Barre Marie - Fitness Equipment Klarfit - Free user manual and instructions
Find the device manual for free Barre Marie Klarfit in PDF.

User questions about Barre Marie Klarfit
0 question about this device. Answer the ones you know or ask your own.
Ask a new question about this device
Download the instructions for your Fitness Equipment in PDF format for free! Find your manual Barre Marie - Klarfit and take your electronic device back in hand. On this page are published all the documents necessary for the use of your device. Barre Marie by Klarfit.
USER MANUAL Barre Marie Klarfit
- Read these operating instructions carefully and make sure that you fully understand the instructions for assembly.
- Carefully inspect the packaging and make sure all parts are complete.
- Never use the bar if parts are missing.
- Before each use, make sure that all screws and bolts are properly tightened and that nothing is protruding in the training area.
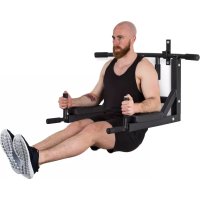
- This bar has been designed so that it tilts when too much force from the side is used, as this will help you to improve your balance and technique.
- Do not use the bar for gymnastics or other exercises where the full load and weight is on the bar.
- In particular, other fitness programs that are more strenuous and require pushing, pulling, or full weight bearing cannot be withstood by a freestanding ballet bar.
- There is an iron bar (D) designed to balance this bar.
- Do not step, stand or sit on the iron bar (D) as this may cause personal injury and / or property damage.
- Consult your doctor before starting a training or fitness program. This is especially important if you are over 35 years old, have never exercised, are pregnant, or have a disease or back injury.
Children should always be supervised by an adult while exercising.
Returns for the following reasons are not accepted:
- Components that have been damaged during use or assembly because they have not been utilized in accordance with the manufacturer's instructions.
- Storage in improper places and no use of original parts for assembly.
- Dirt deposits, scratches, peeled powder coating, etc. after normal use or during assembly.
- Any damage incurred during the delivery process or when the package is opened after purchase.
- Damage caused by natural disasters such as floods, earthquakes or other acts of God.
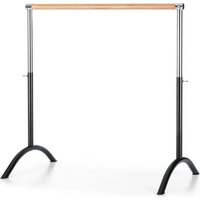
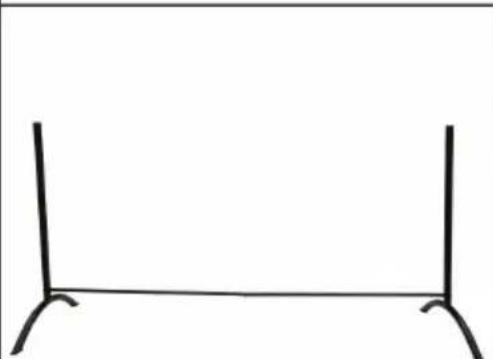
DEVICE OVERVIEW
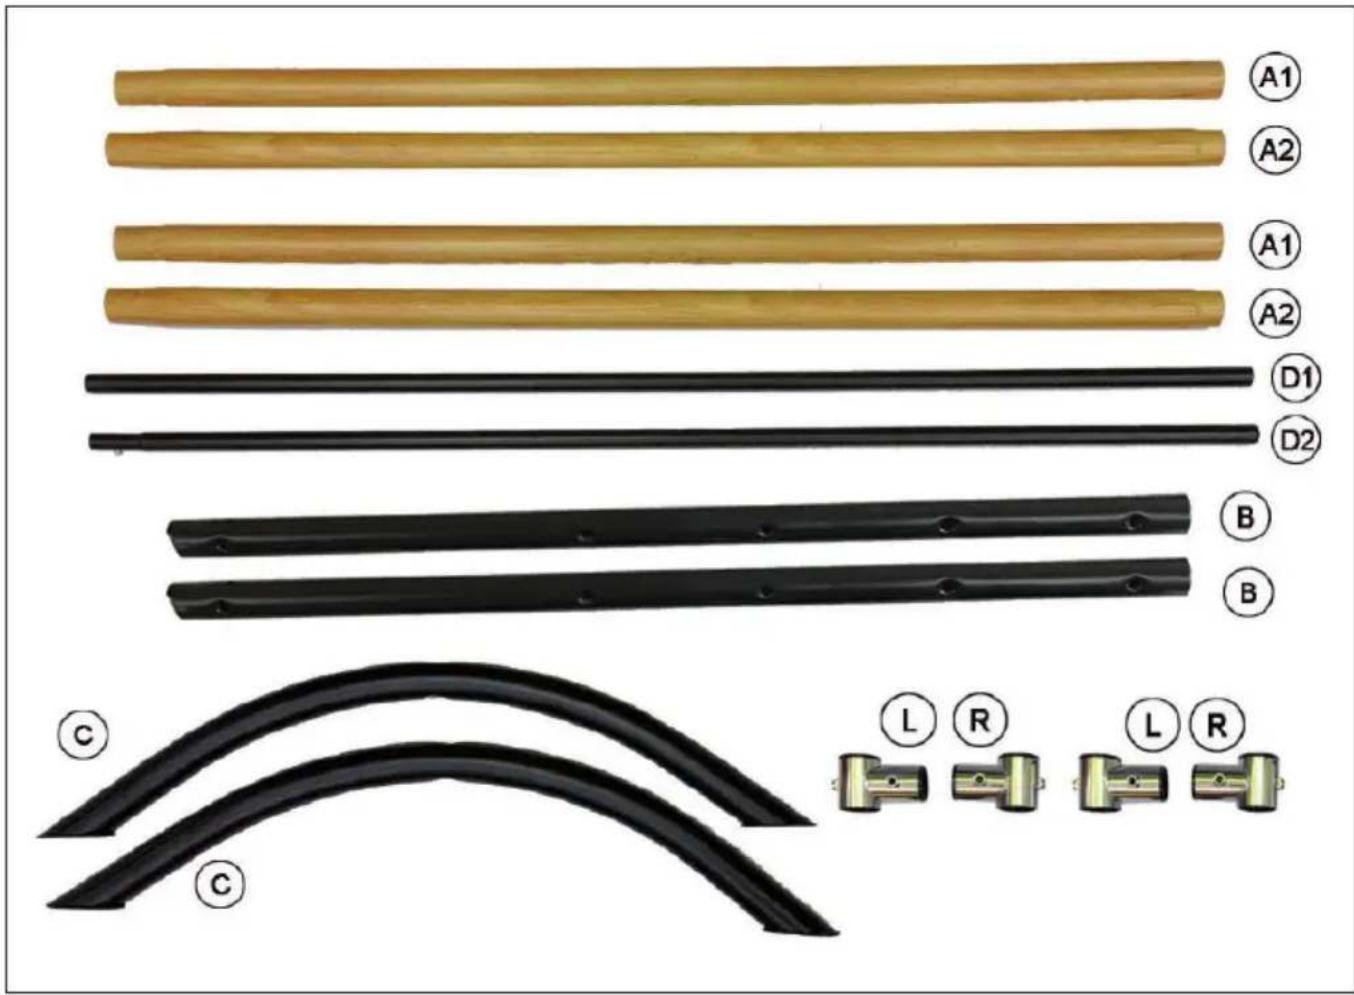
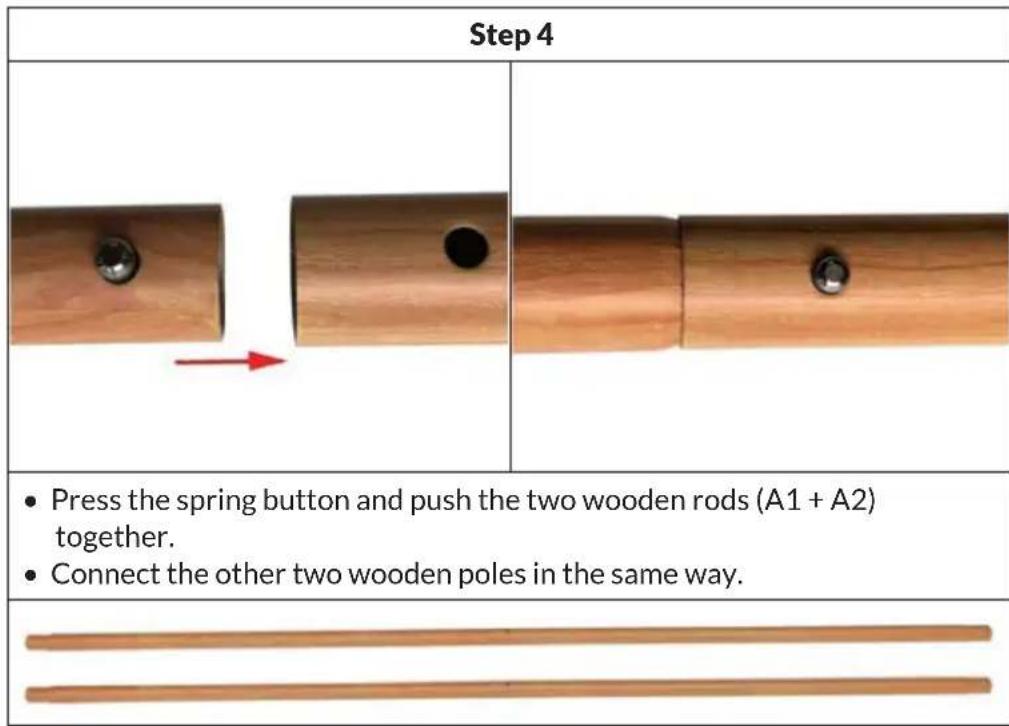
A1 Wooden bar (110 cm)
A2 Wooden bar (110 cm)
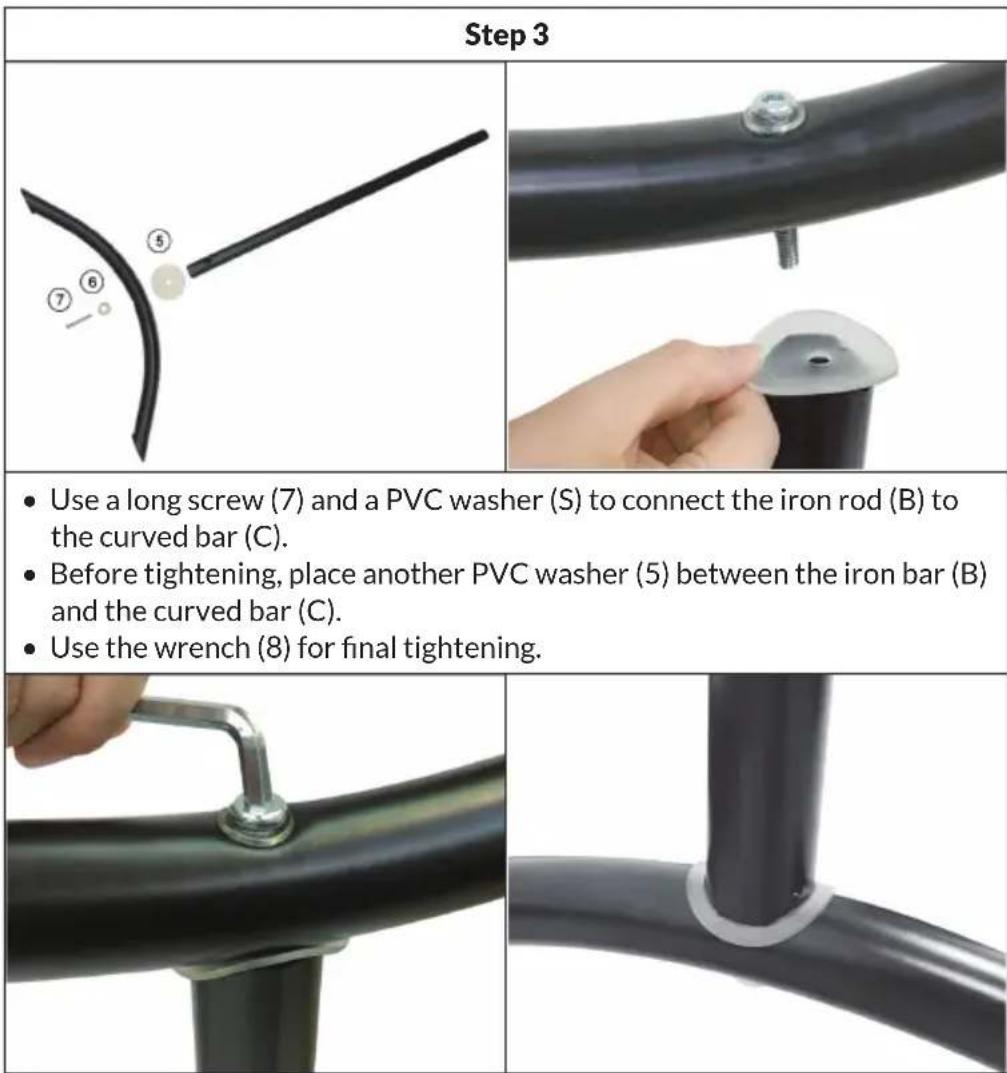
B Iron bar (98cm)
C Curved bar
D1 Iron bar
D2 Iron bar
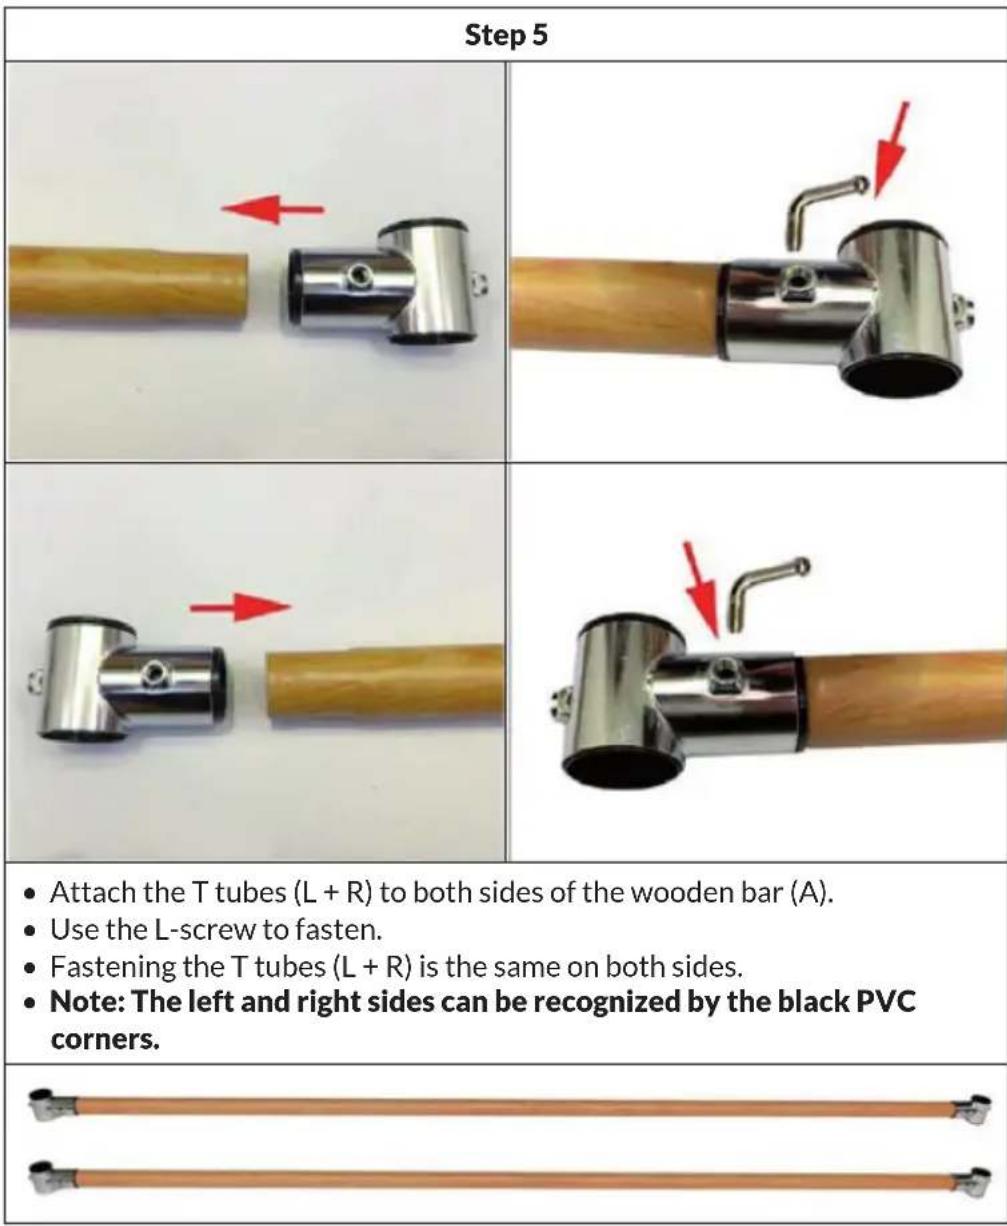
L T-Tube (left)
R T-Tube(right)
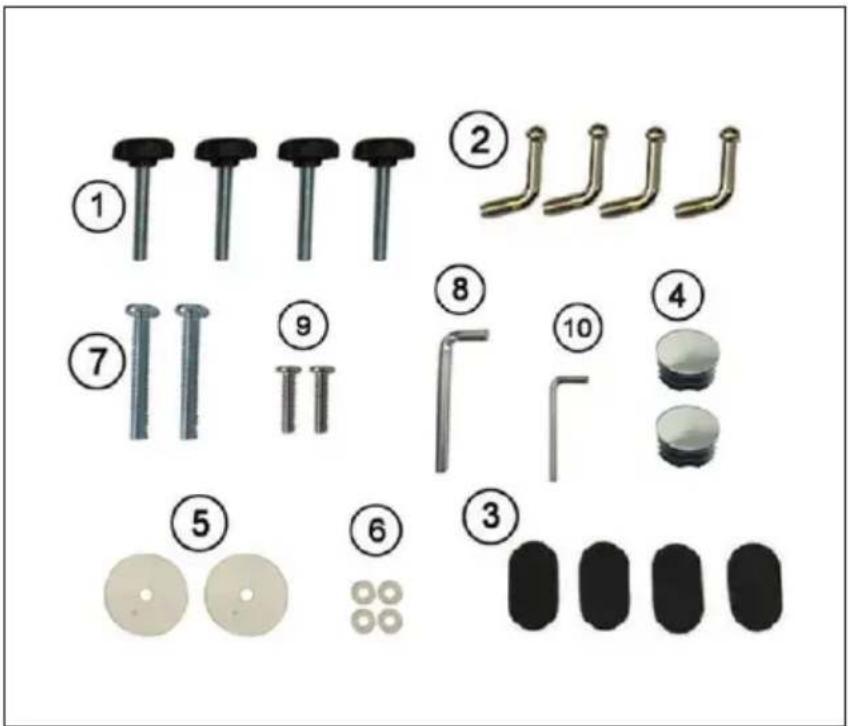
Hardware parts
1 Plastic head long screw
2 L-screw
3 Anti-slip pad
4 End cap
5 PVC washer (L)
6 PVC washer (S)
7 Long screw (L)
8 Wrench (Big)
9 Short screw
10 Wrench (S)
ASSEMBLY

CAUTION
Risk of injury! This device is long and heavy and should therefore be assembled by at least two or three people together.
Step 1
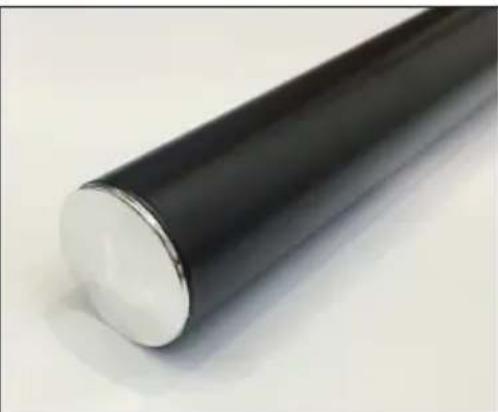
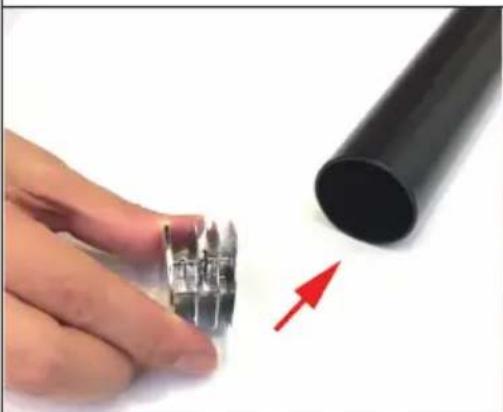
Put the end cap (4) on both sides of the iron bar (A).
Step 2
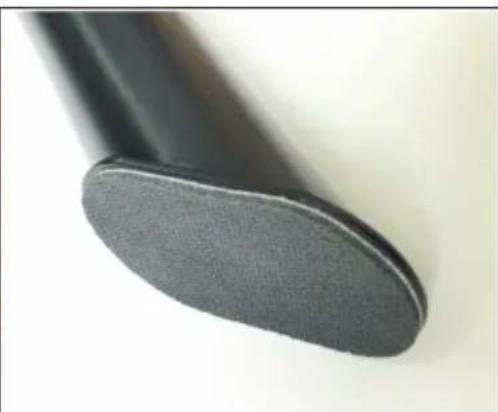
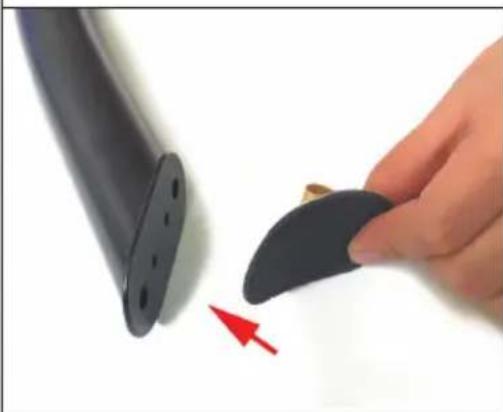
Glue the anti-slip pads (3) on each curved bar (C)
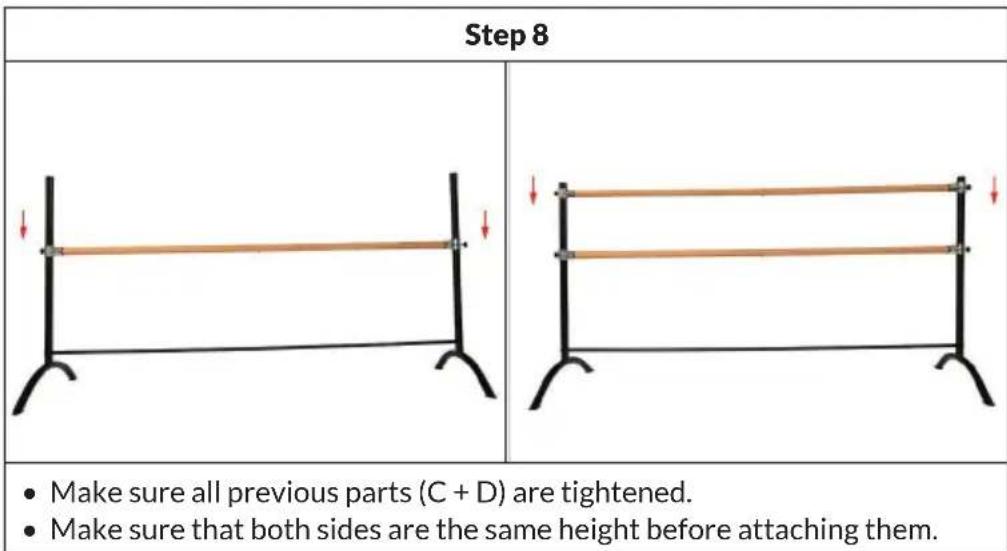
Step 8
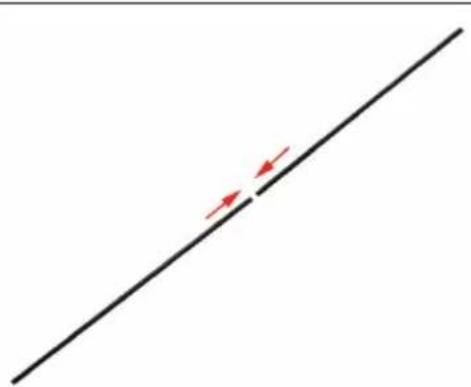
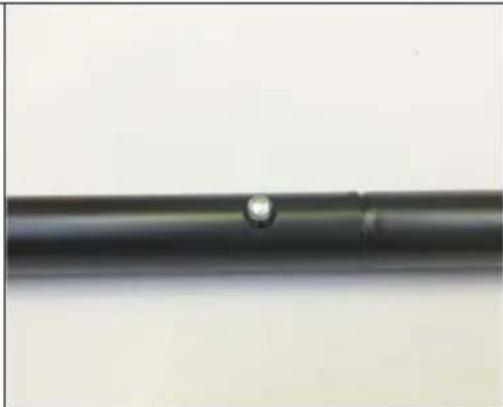
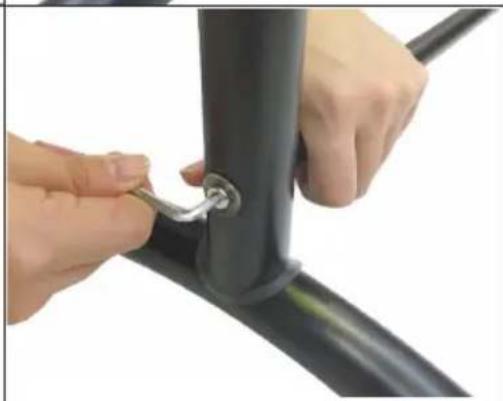
- Assemble the iron bars (D1 + D2). One iron bar (D1) has a hole and the other iron bar (D2) has a clamp.
- Assemble the two iron bars (D1 + D2) and make sure that the clamp is in the correct position and cannot be easily pulled out.
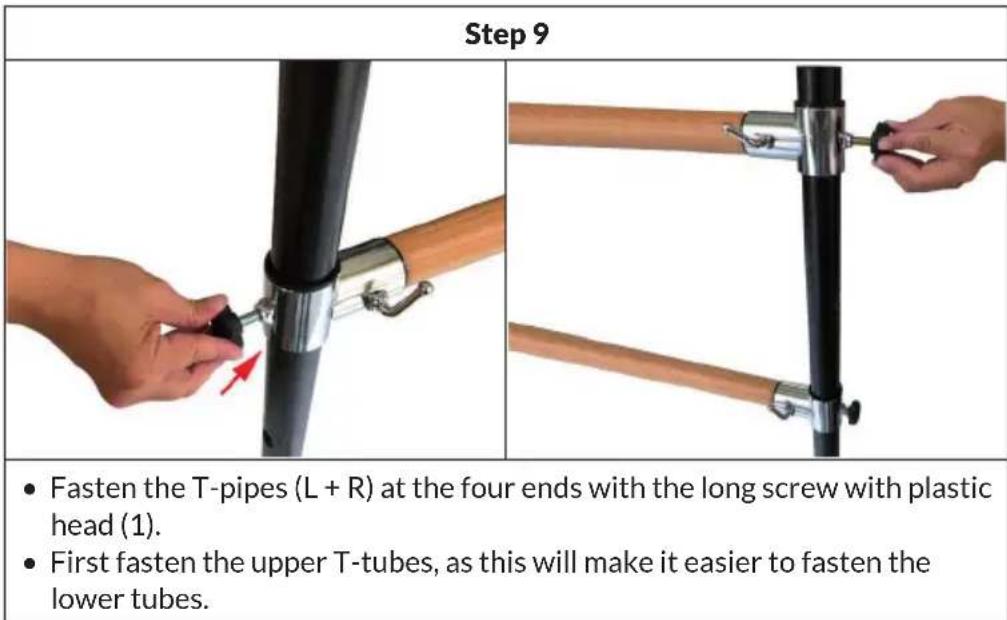
Step 9
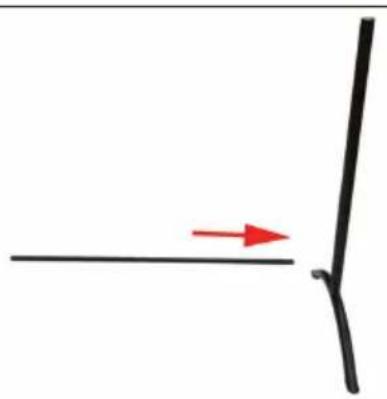
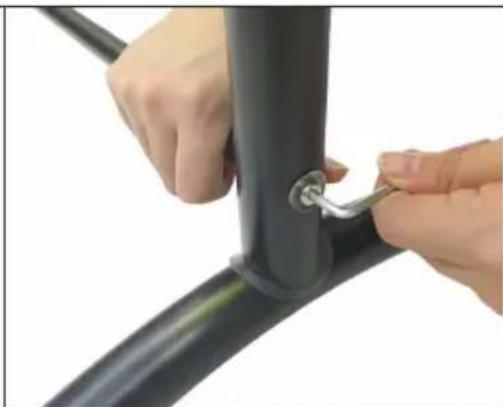
- Put the iron bar (D) together with the iron bar (B) on which the curved bar (C) is already attached.
- Use a long screw (9) and a PVC washer (10) to fix the iron bar (B) and use the wrench (10) to tighten.
NOTE: The big hole is for inserting the rod and the small hole is for fixing the screw.

Berlin Brands Group UK Limited
PO Box 42
272 Kensington High Street
London, W8 6ND
United Kingdom