
WTV 601 - Washing machine MIELE - Free user manual and instructions
Find the device manual for free WTV 601 MIELE in PDF.
| Product type | Front-loading washing machine |
| Brand | Miele |
| Model | WTV 601 |
| Washing capacity | 7 kg |
| Maximum spin speed | 1600 rpm |
| Number of programs | 15 programs (cotton, synthetics, delicates, wool, etc.) |
| Dimensions (H x W x D) | 85 cm x 60 cm x 65 cm |
| Net weight | 90 kg |
| Power supply | 230 V, 50 Hz, 10 A |
| Energy class | A+++ (old classification) or A (new) |
| Water consumption per cycle | 55 L |
| Noise level (wash/spin) | 46 dB / 73 dB |
| Safety system | Child lock, overflow protection, foam detection |
| Maintenance and cleaning | Regular cleaning of drain filter, detergent drawer, and door seal |
| Special functions | Delayed start, prewash, easy iron, rinse hold |
| Stacking compatibility | Can be used with Miele stacking kit for dryer |
| Country of manufacture | Germany |
| Manufacturer warranty | 2 years (parts and labor) |
Frequently Asked Questions - WTV 601 MIELE
User questions about WTV 601 MIELE
0 question about this device. Answer the ones you know or ask your own.
Ask a new question about this device
Download the instructions for your Washing machine in PDF format for free! Find your manual WTV 601 - MIELE and take your electronic device back in hand. On this page are published all the documents necessary for the use of your device. WTV 601 by MIELE.
USER MANUAL WTV 601 MIELE
Onacnoct ot naahe npaNi NOBnKHOCT Ha nepaHra cbc cy-
IepaHnTa HNKOra He Tp6Ba Da ce MOHTnpa Bbpxy cyuINHra. Beue He e rapaHTnpaHa HeIOBvXHocTTa Ha nepaHrTa Cbc cyuINHb KOLoHa. BuHaru n3NoJ3BaIe nepaHrTa KaTo OCHOBa 3a nepaHrTa Cbc cyuINHb KOLoHa.
Pa3mepn nepaJIHЯ cbc cyuINHЯ B KOJOnHa
$$ \begin{array}{l} \mathbf {a} = \text {H a N - M a J K O 2 c m} \ \mathbf {b} = 1 7 2 \mathrm {c m} \ \mathbf {c} = 6 5 \mathrm {c m} \ \end{array} $$
CbctaBn yactn Ha KOMnIeKTa 3a Cbbp3BaHe Ha nepaJIHn I cy- shINH

① PaMka
② YnIbTHHTeHn npbCTeHn
③ BnHTOBe cbcCKpNTa rnaBa 3a 3aKpeNBaHe Ha KOMJIeKTa 3a CBbp3Ba-He
ПодгOTOBКа на КOMплeкТа 3a CBbp3BaHe
IocTabete KOMJIeKta 3a Cbbp3BaHe cdoJHaTa CTpaHa Harope Bbpx Myeka OCHOBA,HaNPmEp OJeNo.
3aIeneTe WeecTe yIbTHnTeHn npbcTeHa Bbpxy OJHaTa cTpHa Ha KOMJIeKTA 3a Cbbp3BaHe.
3aBbptTe KOMnJIeKTa 3a Cbbp3BaHe n Iro NocTaBeTe BbpxY KaNaka Ha nepaHraTa.
Подравнану КOMплекта 3а CBьрЗВанe
I OndpaBHeTe KOMnJIeKTa 3a Cbbp3Ba-He OTnBAO,OTdACHO N OTnpEi, HapaB-Ho c nepaHra.
ФИКСИРаTe ПОДравнЯ KOMПЛЕKT 3a CBbp3BaHe CbC caMOЗаJIeNBaUca ЛЕНТа ВьрXYΚАпаKa
3aKpenBaHe Ha KOMnIeKTa 3a CBbp3BaHe
3a 3aKpeBbHeTo n3NoJ3BaITe npNIOXKeHnTe 6 BnHTa Cbc cKpNTa rnaBa.
3aBnHTeTe 3dpaBO KOMJIeKTa 3a CBbp3BaHe BHNMaTeJHo Ha pbKa Bbp-xy KaNaKa Ha nepaHra. Pn TOBa He npEbPtaTe BNHToBeTe.
IodrotOBka Ha cyuHnHa

3aBbptTeYeTnpTe KpaKa Ha cyuHn-HraTa.
MONTAX Ha cywnHra Ta Bbpy KOMPJIeKTa 3a CBbp3BaHe Ha nepaJIHn CyuINHn
IocTaBHe Ha cyuHnHa Ta Bbpy nepaHnHaTa
3a Ta3n CTbPkCa ca Heo6xoJIMN DBaMa Dywn.
IIOBdHHeTe cyuHnHaTa nHaKNoHeTe JeKO Ha3aI npI NoCTaBAreHo.
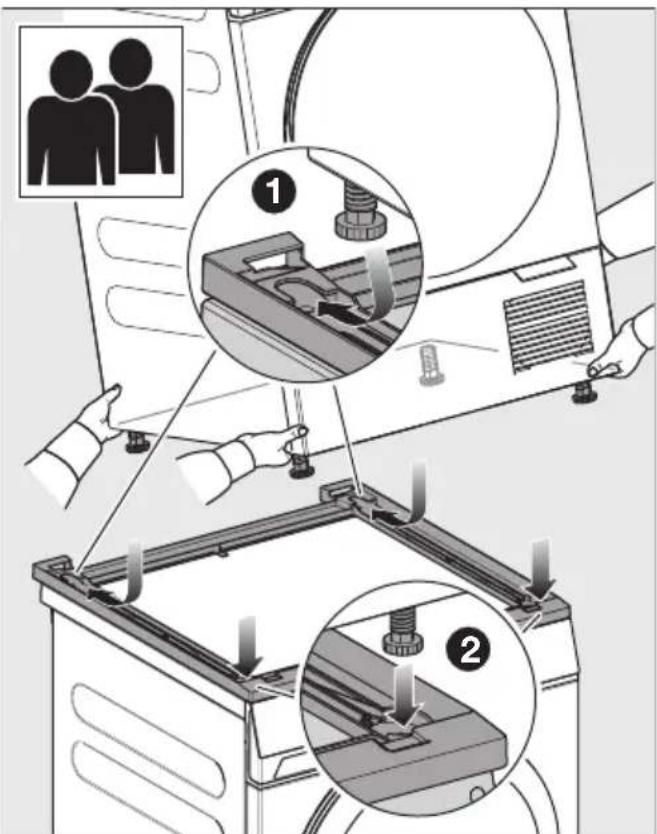
1 Ibpo NoctaBeTe 3aHnTe KpaKa B KOMJIeKta 3a CBp3BaHe n rN n36y-TaIte n3uJIo Ha3aJ.
CneiTOBa nocTaBeTe npeHnTe KpaKa.
KpaKaTa Ha cyuHnHaTcToT cTa6nHOB KOMnKeTa 3a Cbbp3BaHe.
Демонох Ha komплекта 3a CBbp3BaHe Ha nepaJIни cy-ш无聊ня
Korato KOMnIeKtBt 3a Cbbp3BaHe Ha nepaJIHn I cyuINJHc Ce DeMOHTnpa, B KaNaKa Ha nepaJIHrTa OCTaBAT OTBOpN.
Iopadn OTBOpNTe B Kanaka nepaJIHraTa Beue He exepMeTnUHa. IepaJIHra Ta He Tp6Ba Da ce n3NoJ3Ba NOBeue.
Bb3MOxHocTn 3a 3aTBapRHe Ha OTBOpNTe:
- 3aTBOpTe OTBOpTe cbc cnJINKOH.
- Bb3nojTe MOHTaJa Ha HOB KaNaK Ha CneuJnCTn.
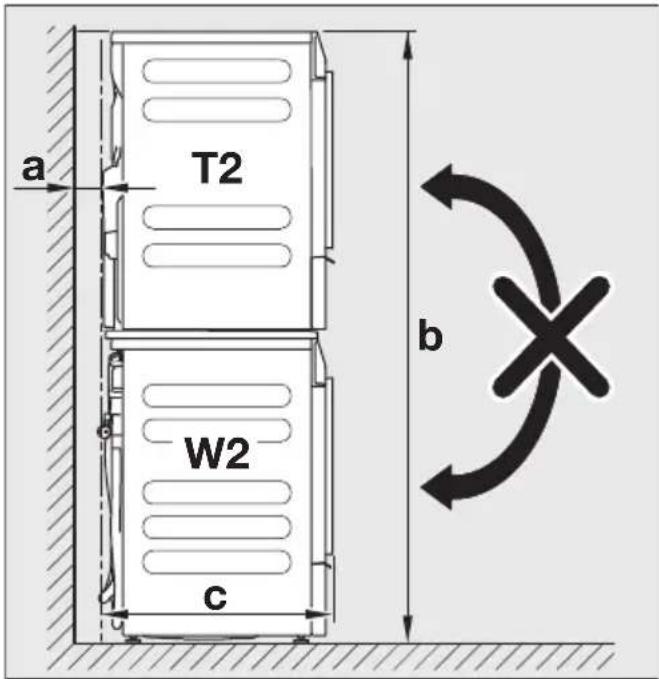
Risk of tipping over due to incorrect washer-dryer stack statics.
The washing machine must never be mounted on the tumble dryer. This will impair the statics of the washer-dryer stack.
Always use the washing machine as the base for the washer-dryer stack.
Washer-dryer stack dimensions
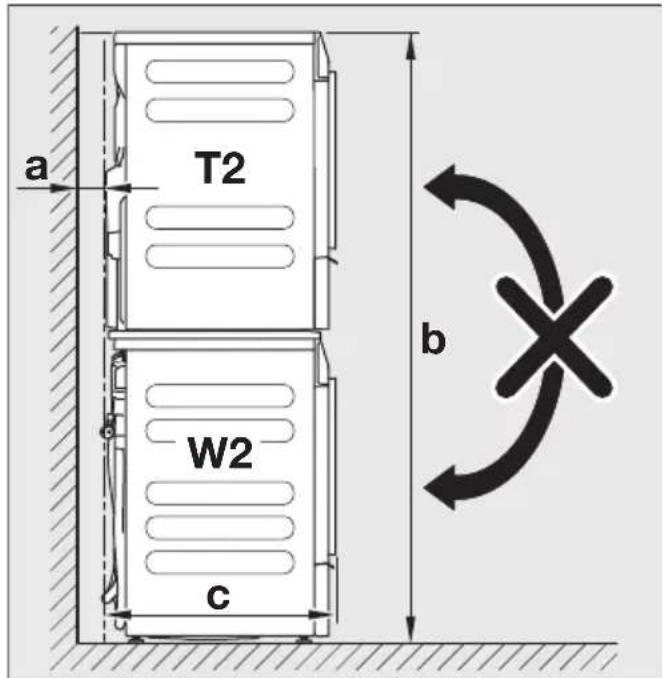
a = at least 2cm
b = 172cm
c = 65 ~cm
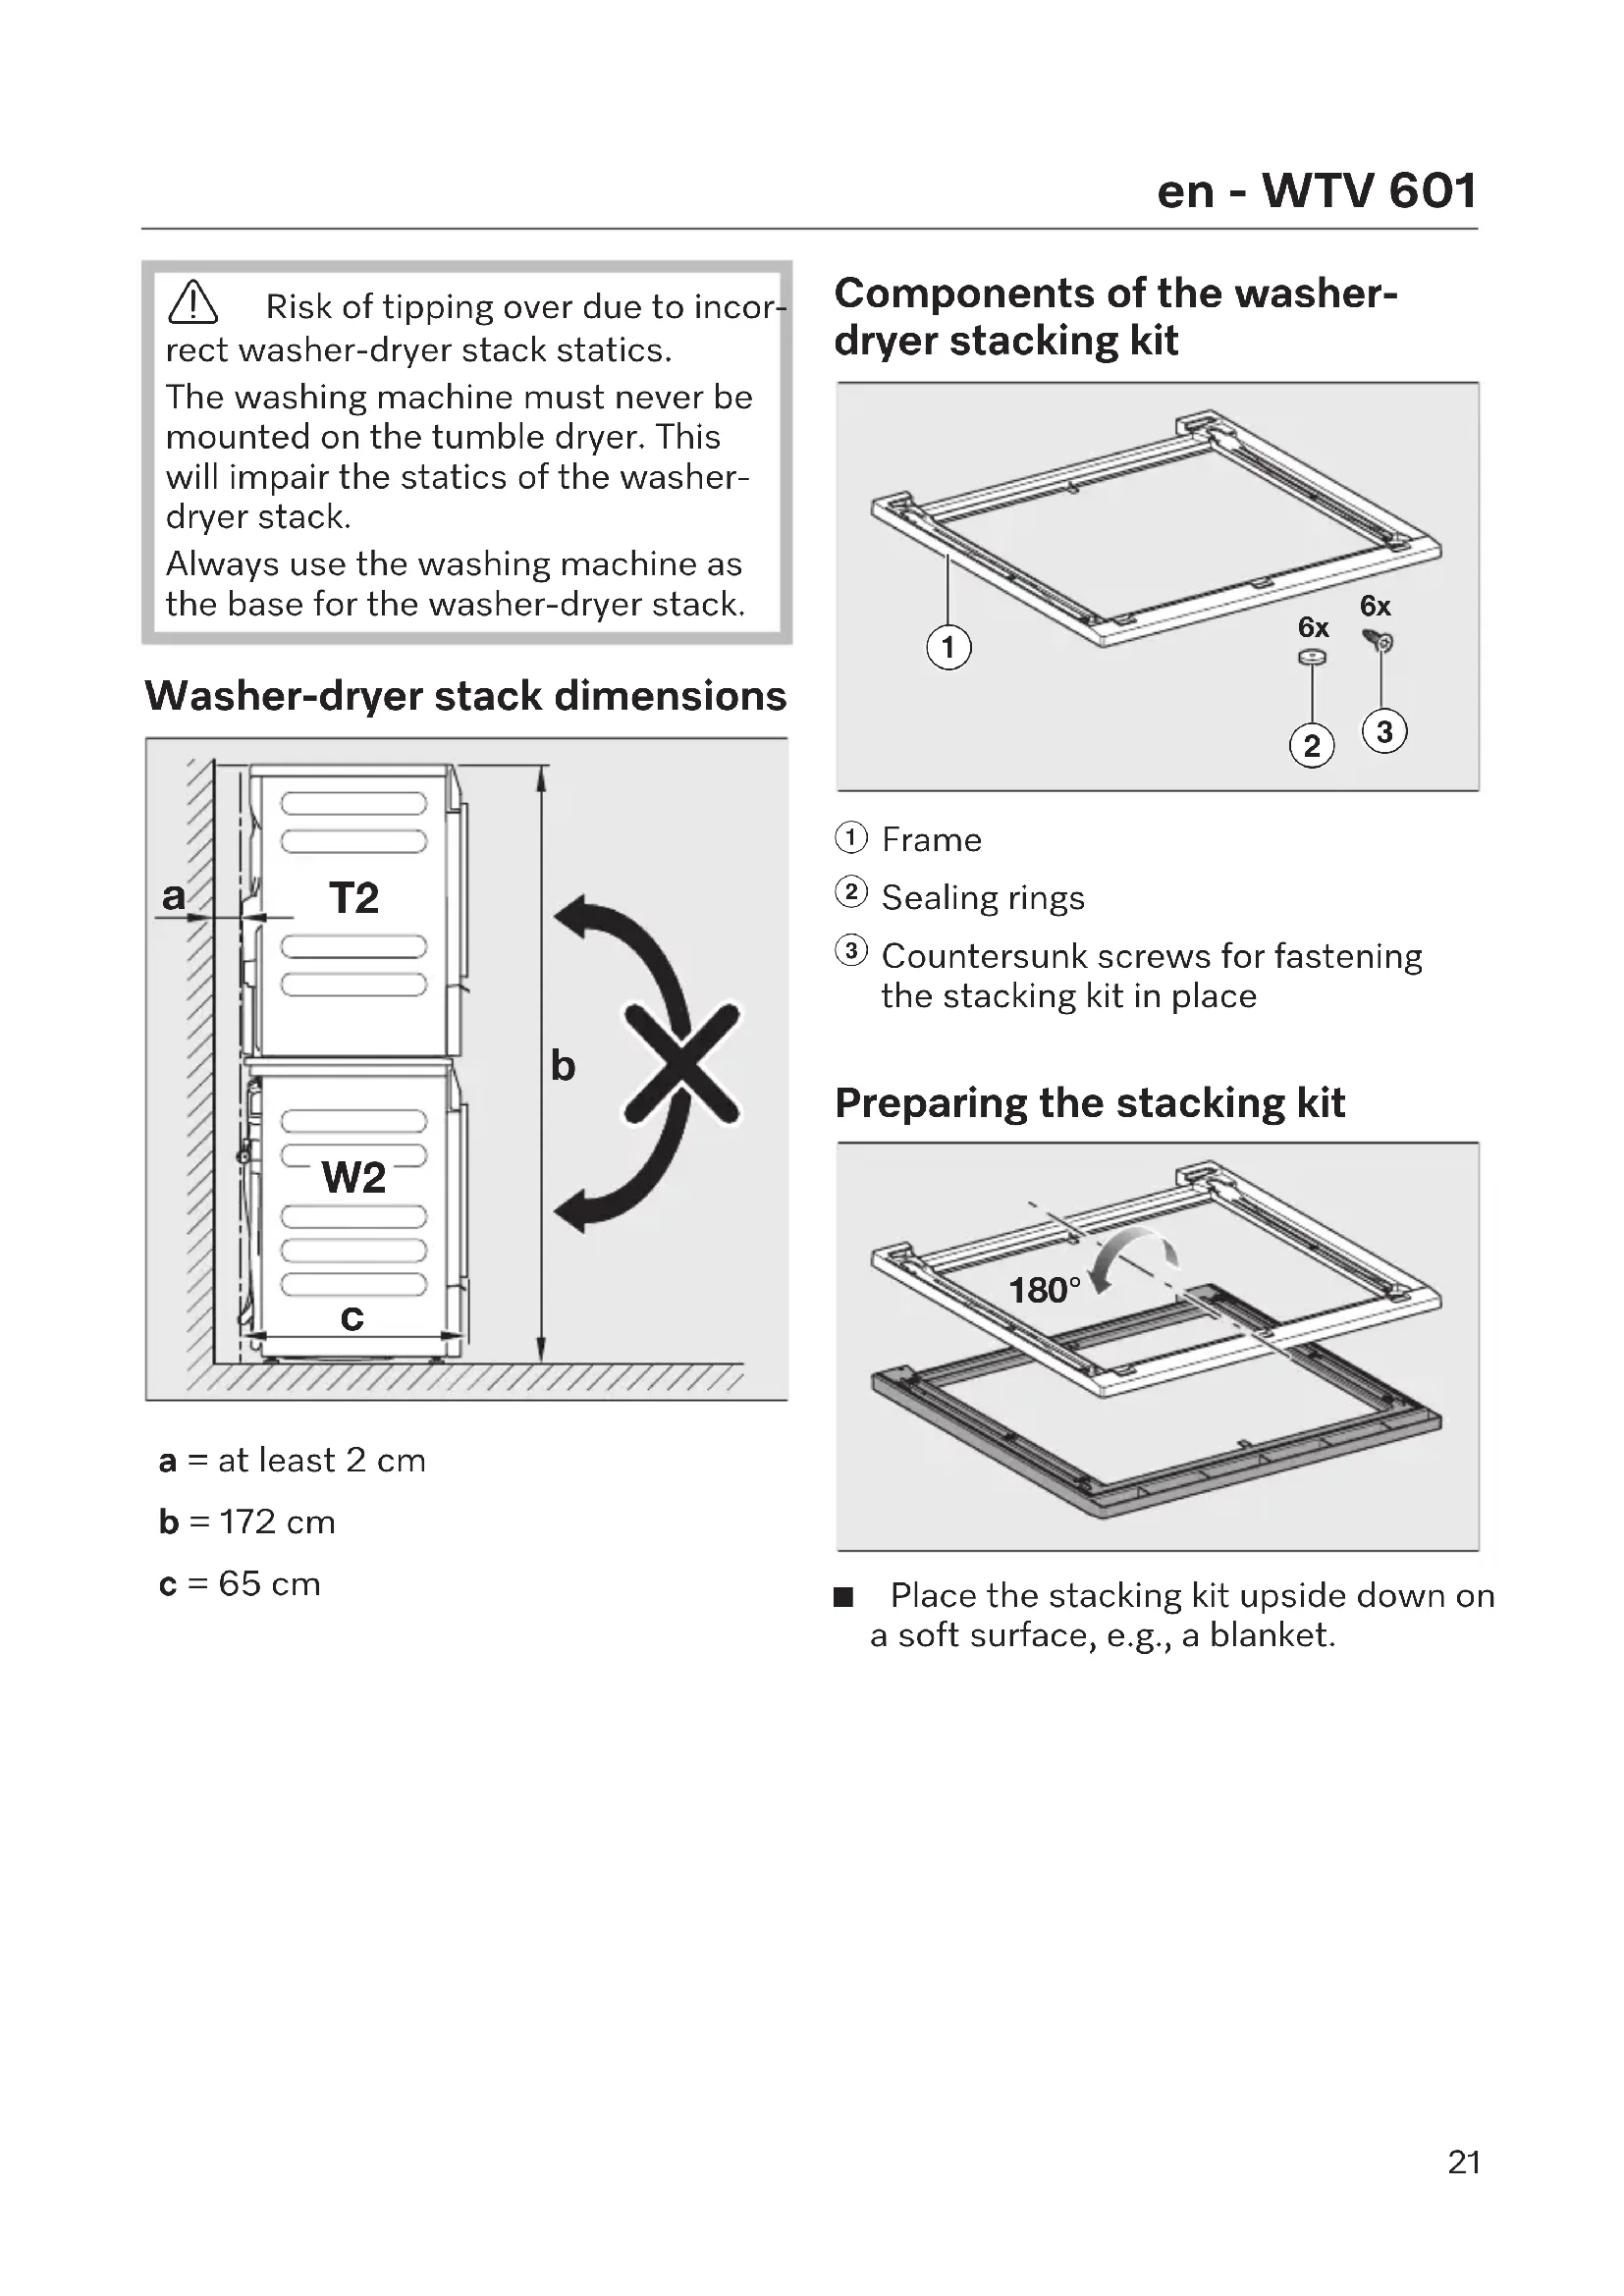
Components of the washer-dryer stacking kit
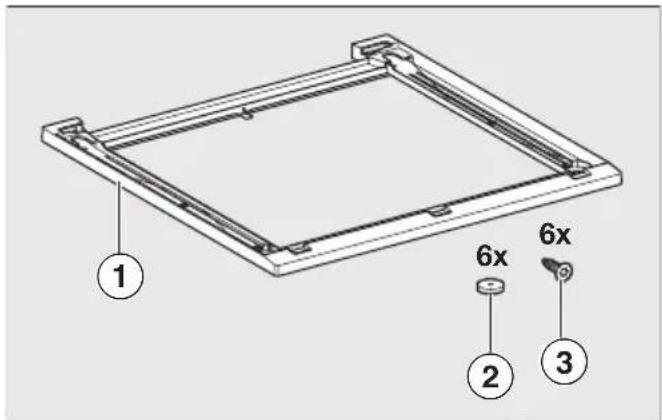
① Frame
② Sealing rings
③ Countersunk screws for fastening the stacking kit in place
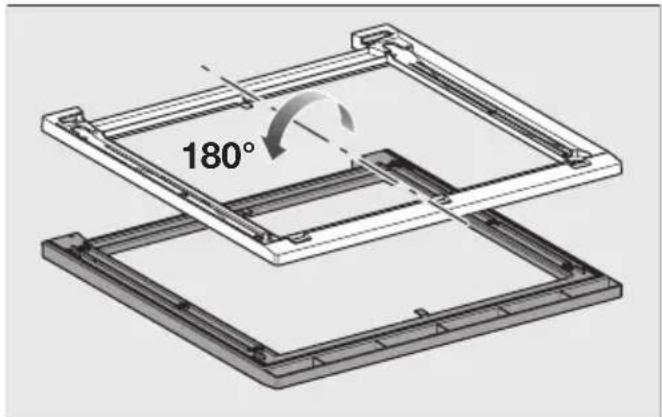
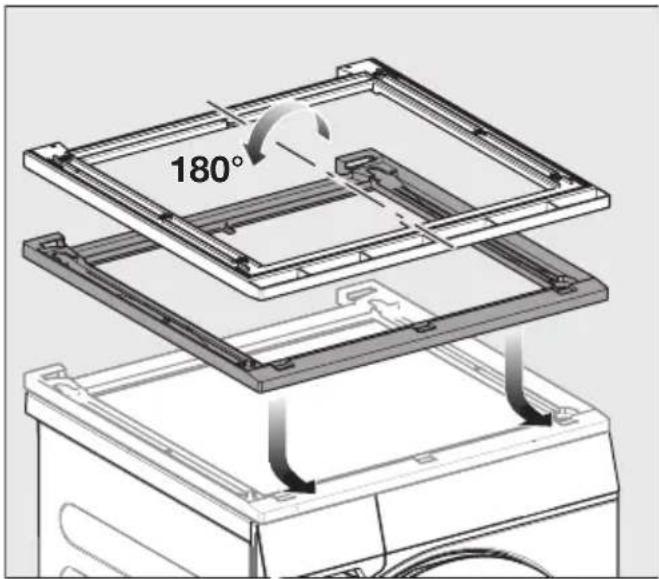
Preparing the stacking kit
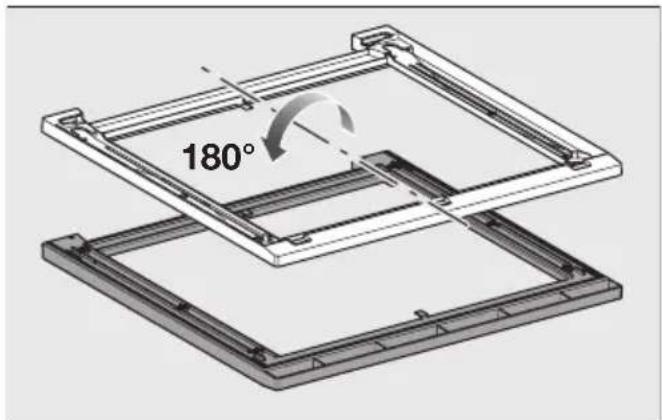
Place the stacking kit upside down on a soft surface, e.g., a blanket.
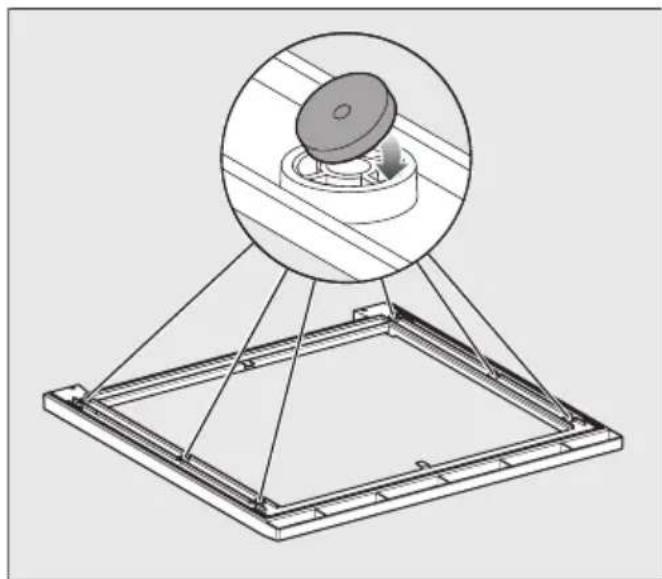
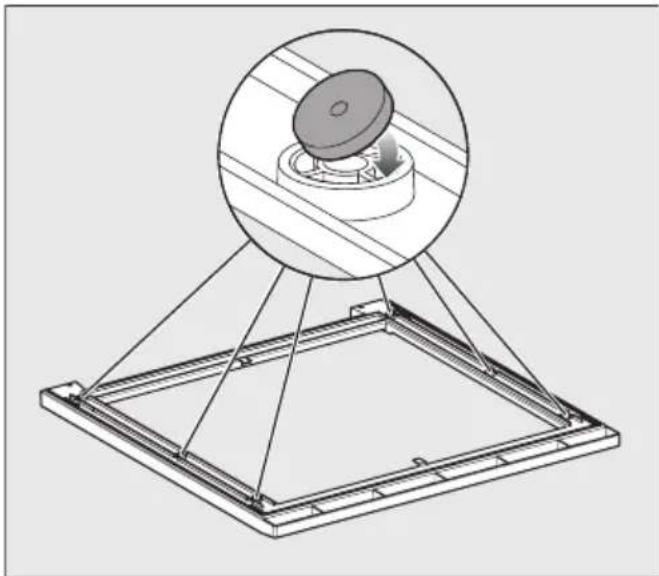
Stick the 6 sealing rings to the underside of the stacking kit.

Turn the stacking kit the right way up and place it on the washing machine lid.
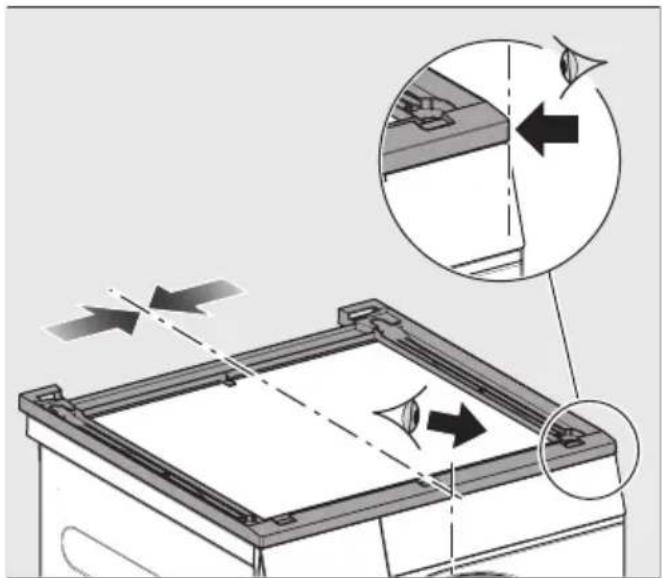
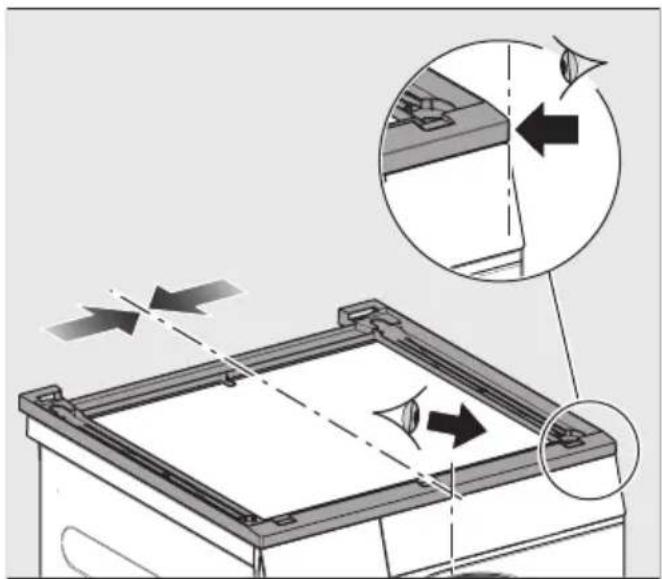
Aligning the stacking kit
Align the stacking kit flush with the washing machine on the left and right and at the front.

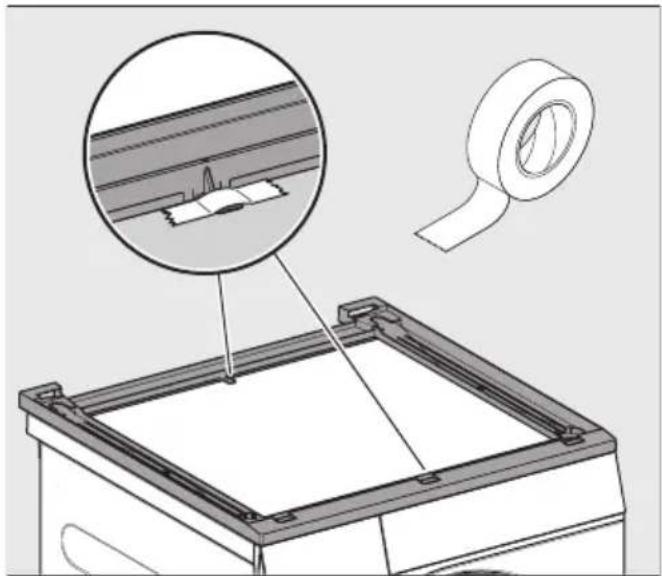
Fix the aligned stacking kit to the lid with adhesive tape.
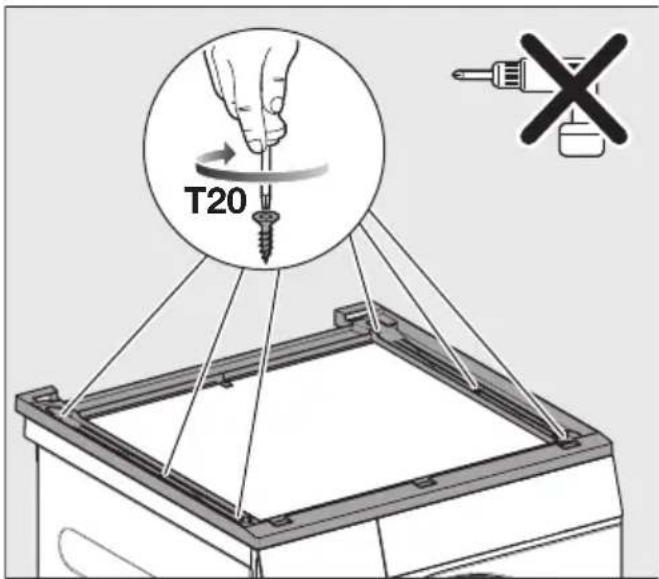
Fastening the stacking kit in place
Use the 6 countersunk screws included with the delivery to fasten the stacking kit in place.
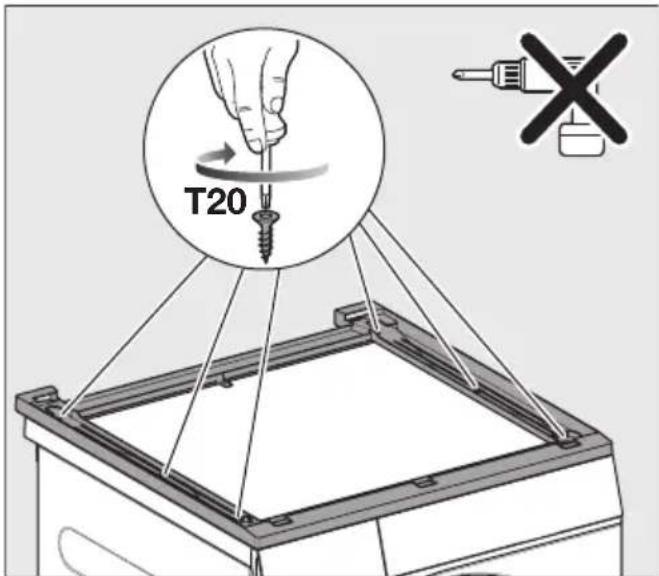
Carefully screw the stacking kit onto the washing machine lid by hand. Do not overtighten the screws.
Preparing the tumble dryer
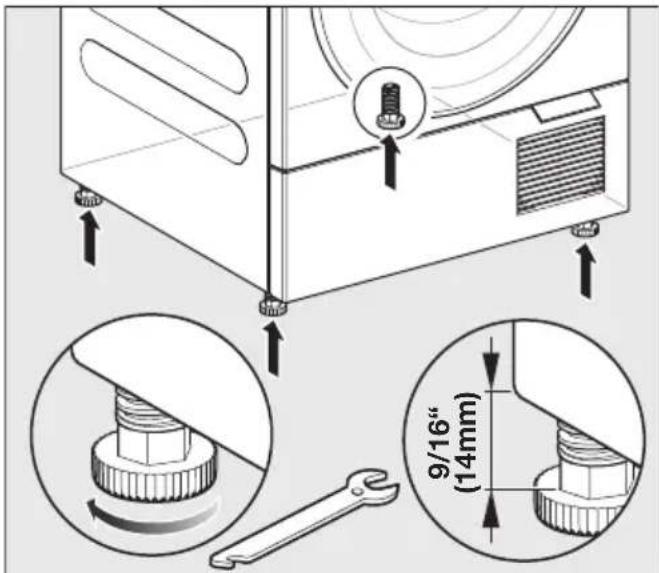
Unscrew the 4 tumble dryer feet.
Mounting the tumble dryer on the washer-dryer stacking kit
Placing the tumble dryer on the washing machine
This step must be carried out by 2 people.
- Lift the tumble dryer and tilt it back slightly for installation.
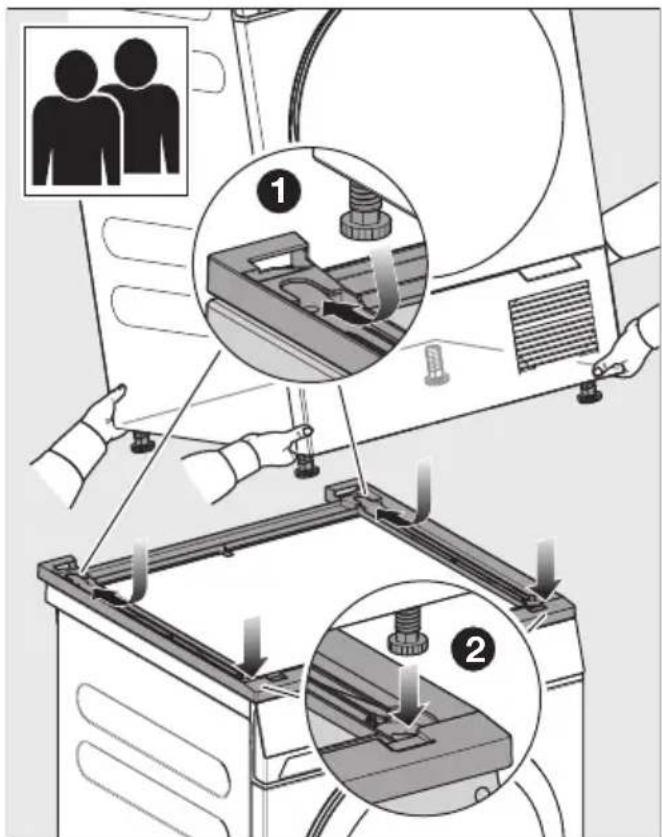
Place the rear feet in the stacking kit first and push them all the way back.
Then set down the front feet.
The tumble dryer feet are positioned securely in the stacking kit.
Removing the washer-dryer stacking kit
When the washer-dryer stacking kit is removed, holes remain in the lid of the washing machine. The holes in the lid mean that the washing machine is no longer leak-proof. The washing machine must not be operated.
Options for sealing the holes:
- Seal the holes with silicone.
- Have a new lid fitted by a professional.
BbIbePHTe 4 HOxKcYuINbHOJ MaHnHbl.
YctaHOBka cyuNbHO MaUNHbI Ha MOHTaXHbI KOMJIeKTДЯ YCTaHOBKn CTnpaJIbHOu NCyuNbHO MaunH B KOJOhHy
YCTaHOBka CyuINbHOB MaUNHbI Ha CTnPaJIbHyIO MaUNHy