MAD85F9BPK - Deep fryer MIDEA - Free user manual and instructions
Find the device manual for free MAD85F9BPK MIDEA in PDF.
User questions about MAD85F9BPK MIDEA
0 question about this device. Answer the ones you know or ask your own.
Ask a new question about this device
Download the instructions for your Deep fryer in PDF format for free! Find your manual MAD85F9BPK - MIDEA and take your electronic device back in hand. On this page are published all the documents necessary for the use of your device. MAD85F9BPK by MIDEA.
USER MANUAL MAD85F9BPK MIDEA
natural_image
Line drawing of a rectangular electronic device with a handle and top panel (no text or symbols)Luftfritteuse
BEDIENUNGSANLEITUNG
MAD85F9BPK
DE
natural_image
Diagram showing a device with a lid and its internal structure, before and after assembly (no text or symbols)Probelauf
natural_image
Line drawing of a kitchen sink with faucet and floor, showing debris on floor (no text or symbols)STÖRBEHEBUNG
natural_image
Symbol of a trash bin crossed with two crossed lines and a solid black rectangle below (no text or labels)natural_image
Recycling symbol with three chasing arrows forming a triangle (no text or labels)DATENSCHUTZHINWEISE
Email: customer_services@midea.com
Midea Electrics Netherlands B.V.
Barbara Strozzilaan 101,
1083 HN Amsterdam,
the Netherlands

natural_image
Line drawing of a rectangular electronic device with a handle and top panel (no text or symbols)Friggitrice ad aria
MANUALE D'USO
MAD85F9BPK
natural_image
Exploded view diagram of a mechanical device showing internal components (no text or labels)

natural_image
Technical line drawing of a mechanical housing or enclosure with internal components (no text or symbols)natural_image
Diagram showing a device with a lid removed from its side, illustrating the process of packaging or cleaning (no text or symbols present)natural_image
Diagram of a kitchen sink with faucet and floor, showing debris on the floor (no text or symbols)natural_image
Symbol of a trash bin crossed with two crossed lines and a solid black rectangle below (no text or labels)natural_image
Recycling symbol with three chasing arrows forming a triangle (no text or labels)Email: customer_services@midea.com
natural_image
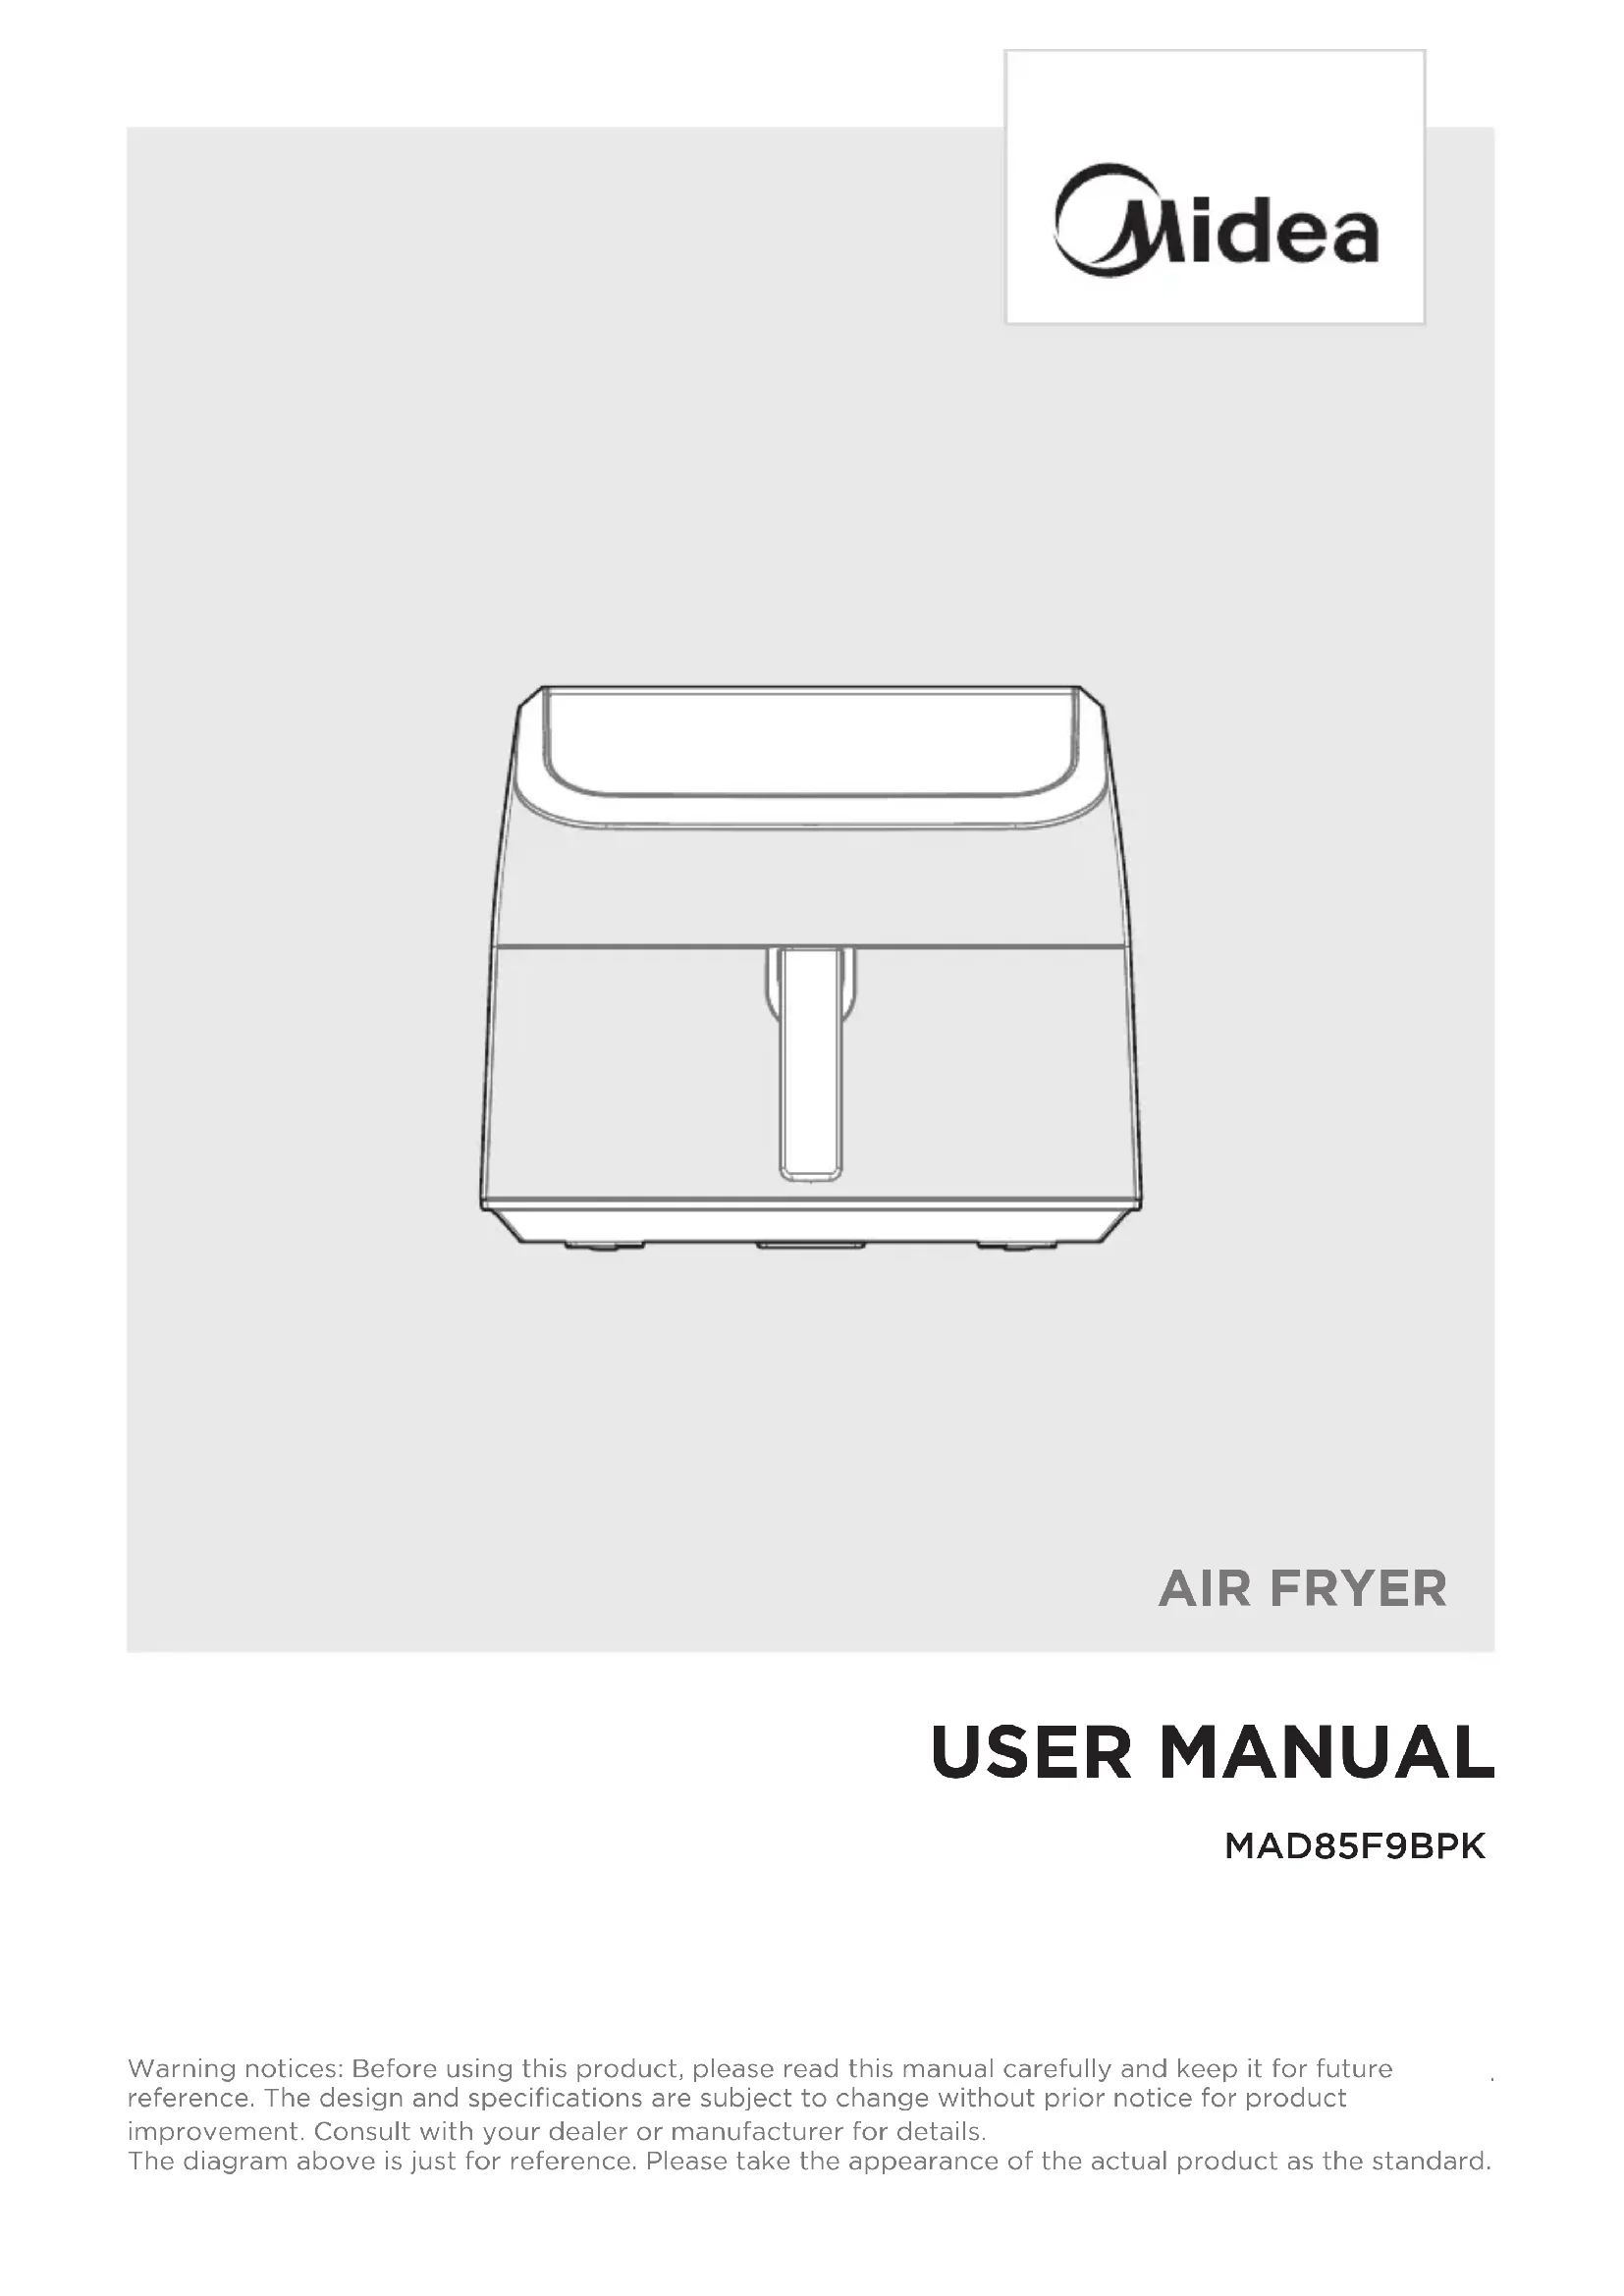
Line drawing of a rectangular electronic device with a handle and top panel (no text or symbols)AIR FRYER
USER MANUAL
MAD85F9BPK
Warning notices: Before using this product, please read this manual carefully and keep it for future reference. The design and specifications are subject to change without prior notice for product improvement. Consult with your dealer or manufacturer for details. The diagram above is just for reference. Please take the appearance of the actual product as the standard.
THANK YOU LETTER
Thank you for choosing Midea! Before using your new Midea product, please read this manual thoroughly to ensure that you know how to operate the features and functions that your new appliance offers in a safe way.
CONTENTS
THANK YOU LETTER 01
SAFETY INSTRUCTIONS 02
SPECIFICATIONS 06
PRODUCT OVERVIEW 07
OPERATION INSTRUCTIONS 08
CLEANING AND MAINTENANCE 16
TROUBLESHOOTING 17
TRADEMARKS, COPYRIGHTS AND LEGAL STATEMENT ^18
DISPOSAL AND RECYCLING 19
DATA PROTECTION NOTICE 20
WARRANTY / SERVICE 21
SAFETY INSTRUCTIONS
Intended Use
The following safety guidelines are intended to prevent unforeseen risks or damage from unsafe or incorrect operation of the appliance. Please check the packaging and appliance on arrival to make sure everything is intact to ensure safe operation. If you find any damage, please contact the retailer or dealer. Please note modifications or alterations to the appliance are not allowed for your safety concern. Unintended use may cause hazards and loss of warranty claims.
Explanation of Symbols
| EN |  | DangerThis symbol indicates that there are dangers to the life and health of persons due to extremely flammable gas. |
 | Warning of electrical voltageThis symbol indicates that there is a danger to life and health of persons due to voltage. | |
 | WarningThe signal word indicates a hazard with a medium level of risk which, if not avoided, may result in death or serious injury. | |
 | CautionThe signal word indicates a hazard with a low degree of risk which, if not avoided, may result in minor or moderate injury. | |
 | AttentionThe signal word indicates important information (e.g. damage to property), but not danger. | |
 | Observe instructionsThis symbol indicates that a service technician should only operate and maintain this appliance in accordance with the operating instructions. |
Read these operating instructions carefully and attentively before using/commissioning the unit and keep them in the immediate vicinity of the installation site or unit for later use!
Safety Instructions
Key Safety Points
Do not touch hot surfaces. Use handle.
Use caution when turning the basket over after cooking, as the hot crisper plate may fall out and create a safety hazard.
Do not cover the air inlet and the air outlet openings while the appliance is operating.
Never touch the inside of the appliance while it is operating.
General Safety
Do not immerse any part of the appliance in water or other liquid.
Warning: Avoid spillage on the connector.
Do not use outdoors.
This appliance is intended to be used in household and similar applications such as:
- Staff kitchen areas in shops, office and other working environments;
- farm houses;
- by clients in hotels, motels and other residential type environments;
- In bed and breakfast type environments.
This appliance can be used by children aged from 8 years and above and persons with reduced physical, sensory or mental capabilities or lack of experience and knowledge if they have been given supervision or instruction concerning use of the appliance in a safe way and understand the hazards involved.
Children shall not play with the appliance.
- Cleaning and user maintenance shall not be made by children unless they are older than 8 and supervised.
- Keep the appliance and its cord out of reach of children aged less than 8 years
- Children should be supervised to ensure that they do not play with the appliance. Keep the appliance and its cord out of reach of children.
- Warning: Misuse may cause potential injury.
- Appliances are not intended to be operated by means of an external timer or separate remote-control system.
- WARNING: If the surface is cracked, switch off the appliance to avoid the possibility of electric shock.
- Always put the ingredients to be fried in the basket, to prevent it from coming into contact with the heating elements.
While Air Frying
- Do not fill the pan with oil as this may cause a fire hazard.
- During hot air frying, hot steam is released through the air outlet openings. Keep your hands and face at a safe distance from the steam and from the air outlet openings.
- Also be careful of hot steam and air when you remove the pan from the appliance.
Immediately unplug the appliance if you see dark smoke coming out of the appliance. Wait for the smoke emission to stop before you remove the pan from the appliance.
- Always use heat-safe containers. Be extremely cautious if using containers that aren’t metal or glass.
- Keep your air fryer away from flammable materials (curtains, tablecloths, etc.). Use on a flat, stable, heat-resistant surface away from heat sources or liquids.
Power & Cord
- Your air fryer should only be used with 220-240V, 50/60Hz electrical systems and a grounded outlet.
- Do not plug into another type of outlet. If the supply cord is damaged, it must be replaced by the manufacturer, its service agent or similarly qualified persons in order to avoid a hazard.
- Do not let the power cord (or any extension cord) hang over the edge of a table or counter, or touch hot surface.
SPECIFICATIONS
| MAD85F9BPKProduct Model | |
| Voltage | 220-240V~ |
| Frequency | 50/60Hz |
| Power | 1900-2200W |
Product information for power consumption and time to reach the applicable low power mode:
standby mode: 0.5 W;
The max time reach the applicable low power mode: 20 minute.
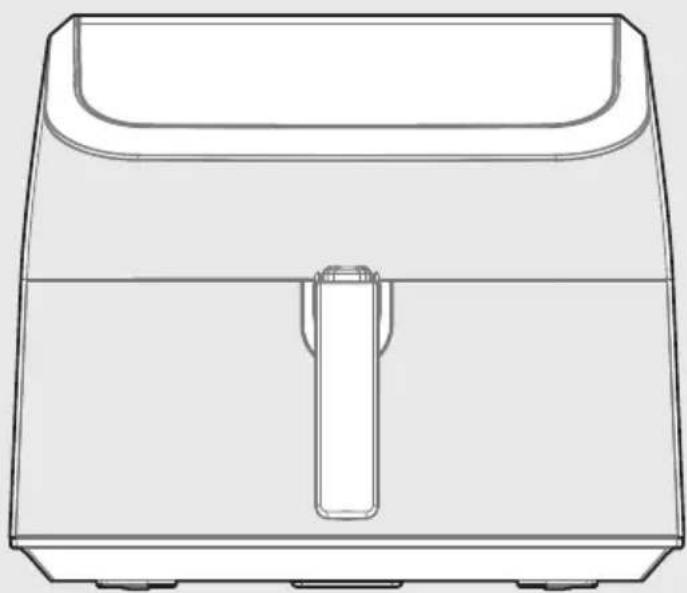
PRODUCT OVERVIEW
Part Name
Before using your new air fryer, make sure that all parts and accessories are included.
Note:
- Do not try to open the top of the air fryer. This is not a lid.
- The basket and crisper plate are made of aluminium metal with nonstick coating.


NOTE
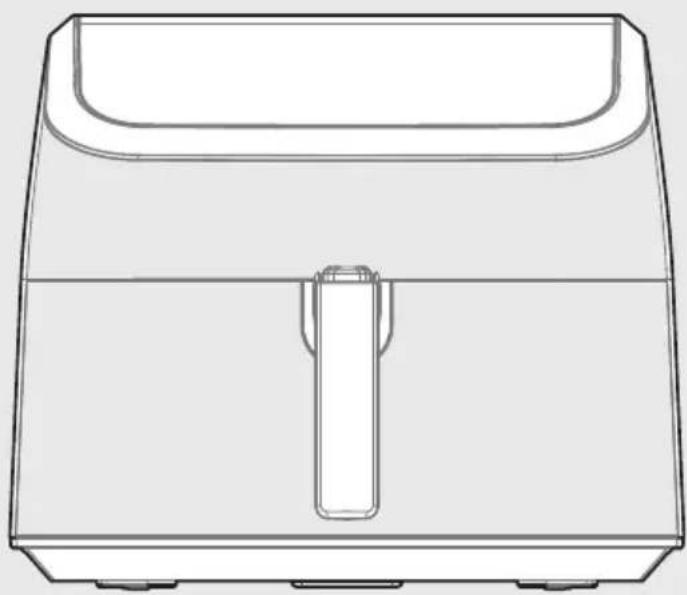
All the pictures in this manual are for explanatory purposes only. Any discrepancy between the real object and the illustration in the drawing shall be subject to the real subject.
OPERATION INSTRUCTIONS
Instructions for Use
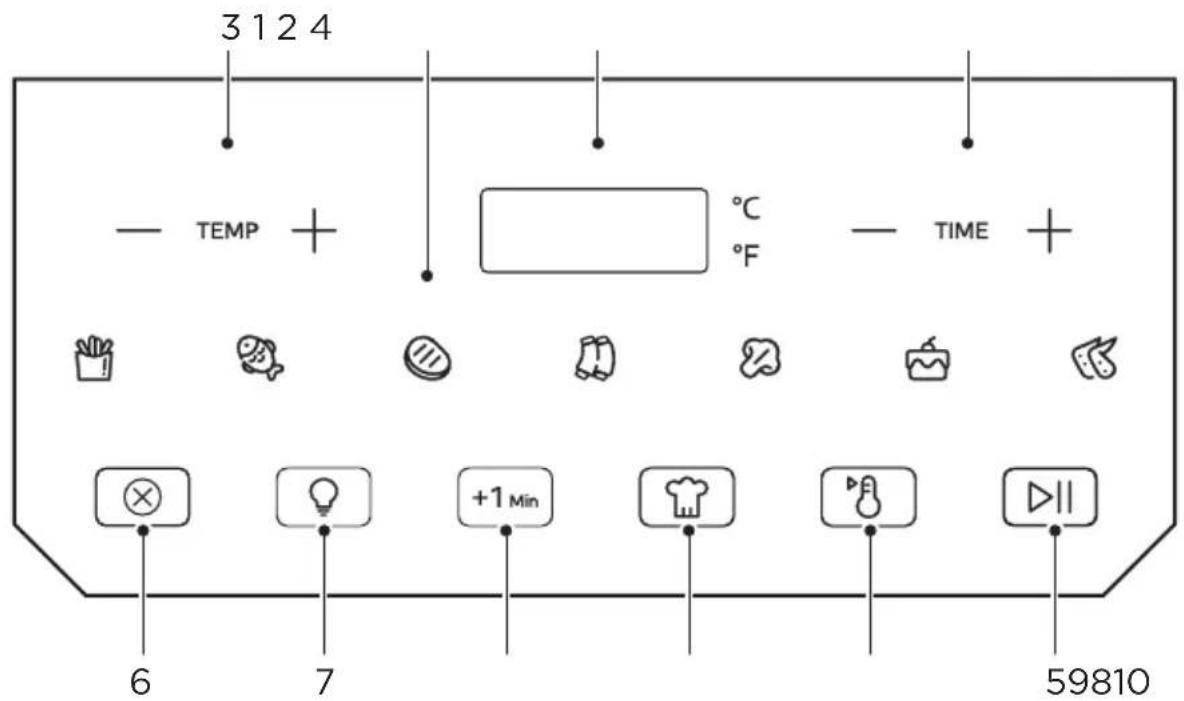
| DescriptionName | ||
| 1 Menu functions | Any of the 7 functions can be used in the air fryer. The temperature and time can be adjusted for each function. | |
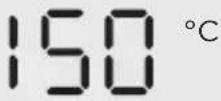
| 2 | Display | The cook time, set temperature, reminder messages, and error messages are shown here. |
| 3 | — TEMP + | Touch — or + to adjust the temperature. |
| 4 | — TIME + | Touch — or + to adjust the time. |
| 5 | Touch ▷II to start or pause cooking. | |
| 6 | Touch ⊗ to cancel cooking. | |
| 7 | Touch to control the inner cavity light. | |
| 8 | Touch to enter DIY mode. | |
| 9 | Touch to activate the keep warm function. | |
| 10 | In the standby state or the end of cooking state, touch +1Min to directly enter the working state of 200°C and 1 minute; In the state of cooking or pause, touch +1Min to increase the current cooking function time by 1 minute. | |
Display Messages
| DescriptionMessage | |
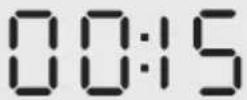 | ·While programming, the display will show the set cook time. While cooking, the display will show the remaining cook time. |
 | ·The display shows the set temperature. |
 | ·Cooking is complete and the Fried barrel tray can be removed. |
 | ·The fried barrel was removed. |
 | ·Reminder the food needs to be flipped over. |
Before First Use
- Remove and discard all packaging from the air fryer, including any temporary stickers and the protective cover fitted over the power plug.
- Place the air fryer on a stable, level, heat resistant surface. Keep away from areas that can be damaged by steam (such as walls or cupboards).
Note:
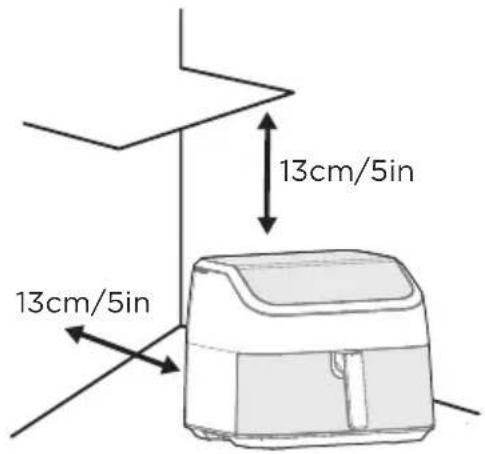
Leave 13 cm/5 inches of space behind and above the air fryer. Leave enough room to remove the fried barrel.
- Wash both the fried barrel and crisper plate thoroughly, using non-abrasive sponge
- Wipe the inside and outside of the air fryer with a slightly moist cloth. Dry with a towel.
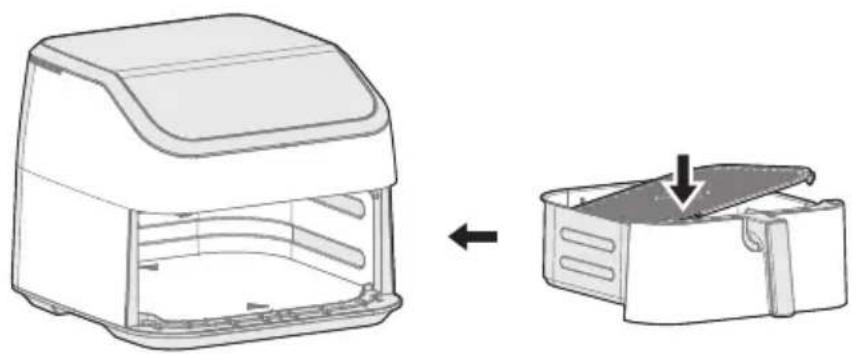
- Place the crisper plate back into the fried barrel. Tilt the crisper plate to insert one side first, then press down on the other side.
- Place the fried barrel inside the air fryer.
natural_image
Diagram showing a device with a lid removed from its side, illustrating the process of packaging or cleaning (no text or symbols present)Test Run
A test run will help you become familiar with your air fryer, make sure it's working correctly, and clean it of possible residues in the process
- Make sure the fried barrel is empty and plug in the air fryer.
- press 🎨 button.
- Press and hold the “ — ” to change the time to 10 minutes.
- Press ▷□□ to begin. When finished, the air fryer will beep.
- Remove the fried barrel. Let the fried barrel cool completely for 10-30 minutes.
Note:
- Use caution when turning the fried barrel over after cooking, as the hot crisper plate may fall out and create a safety hazard
- Do not unscrew the handle from the fried barrel.
Silicone Stoppers
- The crisper plate contains 4 silicone stoppers made of food-safe material These stoppers keep the plate fitted to the bottom of the fried barrel.
- When placing the crisper plate into the fried barrel, tilt the crisper plate to insert one side first, then press down on the other side.
Note:
Forcing the crisper plate into the fried barrel incorrectly may cause damage.
- Make sure children do not play with the silicone stoppers or swallow them.
Operation
Air Frying
Using a function is the easiest way to air fry. Functions are programmed with an ideal time and temperature for cooking certain foods.
- Plug in. When your air fryer at standby-state, add food to the basket
Note:
- Optionally, add the crisper plate into the basket to allow excess oil to drip down to the bottom of the basket.
-
When the frying barrel is not thoroughly pushed in the micro switch is not triggered; the machine is at the power-off state and it won't work. At that time, you need to totally push the frying barrel into the machine.
-
Press the button of the function you want to use. The air fryer will automatically change to the function's default settings;
Note:
- Functions are programmed with an ideal time and temperature for cooking certain foods. The air fryer will default to the Air Fry function if no other function is selected.
- The air fryer has AI memory function, when you adjust the menu parameters, the next cooking will default this parameter. To reset the factory parameters, please press

and

at the same time for 3 seconds.
- Optionally, change the temperature and time. You can do this anytime during cooking
Note:
- You can customise a function's time (1-60 minutes) and temperature (80°-200°C).
-
Press and hold the [-] or [+] buttons to rapidly increase or decrease the time or temperature.
-
Press ▶II to begin air frying.
- The air fryer will beep 3 times when finished.
Note:
- Optionally, press Keep Warm. Press the [-] or [+] buttons to change the time (1-60 minutes).
- Take the basket out of the air fryer, being careful of hot steam. Use tongs or heat-safe utensils to remove the food from the basket.
- Allow to cool before cleaning.

NOTE

- Please carefully take it out.
- Make sure it's flat on the table. (To avoid being scalded by steam or food being topped over the frying barrel, causing oil or hot food to burn the human body.)
- In addition, the auxiliary tools (such as chopsticks) are suggested to be used in the process of taking out food.
Recipe
• These cooking options give your meals all the rich and crispy flavor of deep frying with with little to no oil.
- The default time and temps are a starting point that you can experiment with to get the results you like best.
- The function listed for each food is a recommendation for optimal cooking.
| Menu function | Name | Temperature (°C) | Temperature Range(°C) | Time (min) | Time Range(min) | Recommend |
 | French fries | 190 | 40-200/40-100 | 28 | 1-60/61-720 | 700g |
 | Fish | 190 | 40-200/40-100 | 12 | 1-60/61-720 | 750g |
 | Meat | 200 | 40-200/40-100 | 13 | 1-60/61-720 | 300g |
 | Ribs | 180 | 40-200/40-100 | 26 | 1-60/61-720 | 750g |
 | Vegetable | 170 | 40-200/40-100 | 8 | 1-60/61-720 | 500g |
 | Cake | 170 | 40-200/40-100 | 15 | 1-60/61-720 | 9PCS |
 | Chicken wings | 190 | 40-200/40-100 | 20 | 1-60/61-720 | 800g |
Note:
- Before the product works, please check whether the bakeware is in place to avoid malfunction.
- If you find that the product is malfunctioning, please stop using it and contact our service department immediately.
- Please use the bakeware and fried barrel together in the whole machine, and avoid using them separately.
• After using, unplug the power plug and allow the air fryer to cool completely before moving.
Cooking Tips
Overfilling
- If the fried barrel is overfilled, food will cook unevenly.
Using Oil
- Adding a small amount of oil to your food will make it crispier.
- Oil sprays are excellent for applying small amounts of oil evenly to all food items.
Food Tips
- You can air fry any frozen foods or goods that can be baked in an oven.
- The Frozen function is ideal for small or breaded items, such as nuggets, meatballs, and pot stickers.
- To make cakes, hand pies, or any food with filling or batter, place food in a heat-safe container before placing in the fried barrel.
- Air frying high-fat foods will cause fat to collect underneath the crisper plate. To avoid excess smoke while cooking, pour out fat drippings after cooking.
- Liquid-marinated foods create splatter and excess smoke. Pat these foods dry before air frying.
- The Broil function only uses the top heating element. Using this function when cooking oily food may reduce the amount of smoke produced.
French Fries
- When making fries from raw potatoes, soak uncooked fries in water for 15 minutes to remove starch prior to frying. Pat dry with a towel before adding oil.
EN
More Functions
Pausing
- Press ▷□ to pause cooking. The air fryer will stop heating, and ▷□ will blink until you press ▷□ again to resume cooking.
• After 30 minutes of inactivity, the air fryer will turn off. - This function allows you to pause cooking without removing the fried barrel from the air fryer.
Automatically Resume Cooking
- If you pull out the fried barrel, the air fryer will pause cooking automatically. The display will turn off temporarily as a safety feature.
- When you return the fried barrel, the air fryer will automatically resume cooking based on your previous settings.
Automatic Shutoff
- If the air fryer has no active functions, the air fryer will clear all settings and turn off after 2 minutes of inactivity.
Overheat Protection
- If the air fryer overheats, it will automatically shut down as a safety feature.
- Let the air fryer cool down completely before using it again.
Setting status:
- The selected function indicator start blinking, while other function lights will be on. The setting parameters displayed in the digital tube will be blinking, if doesn't operate within 5s, the machine will go into new set status and continue working.
AI Memory:
- The air fryer has AI memory function, when you adjust the menu parameters, the next cooking will default this parameter. To reset the factory parameters, please press and at the same time for 3 seconds.
CLEANING AND MAINTENANCE
Note:
• Always clean the fried barrel and crisper plate after every use.
- Lining the fried barrel with foil (except the crisper plate) may make cleanup easier.
- Tun off and unplug the air fryer. Allow it to cool completely before cleaning. Pull out the fried barrel for faster cooling.
Note:
- If you need to remove the fried barrel while cooking, do not touch the hot fried barrel to the bottom of the air fryer to avoid melting.
- Wipe the outside of the air fryer with a moist cloth, if necessary.
- The fried barrel and crisper plate are dishwasher-safe. You can also wash the fried barrel and crisper plate with hot, soapy water and a non-abrasive sponge. Soak if necessary.
Note:
- The fried barrel and crisper plate have a nonstick coating. Avoid using metal utensils and abrasive cleaning materials.
-
For stubborn grease:
-
In a small bowl, mix 30 mL of baking soda and 15 mL of water to form a spreadable paste.
- Use a sponge to spread the paste on the basket and crisper plate and scrub. Let the fried barrel and crisper plate sit for 15 minutes before rinsing.
- Wash fried barrel with soap and water
EN
- Clean the inside of the air fryer with a slightly moist, non-abrasive sponge or cloth. Do not immerse in water. If needed, clean the heating coil to remove food debris.
- Dry before using.
Note:
• Make sure the heating coil is completely dry before turning on the air fryer.
natural_image
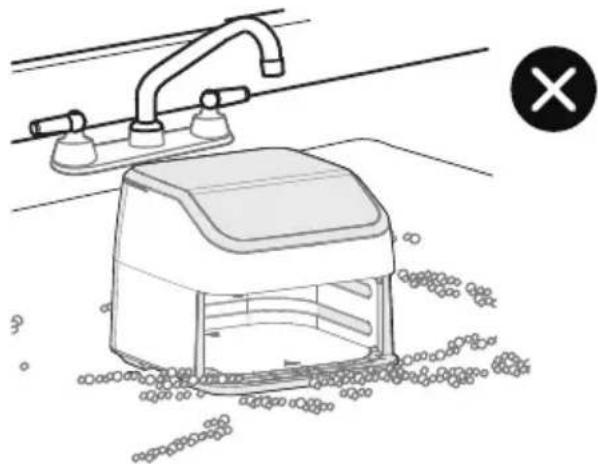
Line drawing of a kitchen sink with faucet and floor, showing no text or symbolsTROUBLESHOOTING
Operation of your appliance can lead to errors and malfunctions. The following tables contain possible causes and notes for resolving an error message or malfunction. It is recommended to read the tables carefully below in order to save your time and money that may cost for calling to the service center.
| Possible Reasons SolutionsProblem | ||
| No power | Improper power cord and outlet connection | Check that the power cord is firmly plugged into outlet. If this cannot solve the problem, please contact the Customer Service Center. |
| Display shows E1,E2,E5,E6 | The unit is not operating properly | Contact the Customer Service Center. |
| Food undercooked | Food not placed in an even layer | For best cooking performance, place food in an even layer with no overlapping. |
| Food not crispy | Crisper plate not used in upper basket | For the best air frying performance, always use the crisper plate in the upper basket. The crisper plate allows air to flow underneath food and produces the best cooking results. |
| Food improperly prepped | For optimal crispiness, spray or brush small amounts of oil onto food before air frying. | |
| Difficult to remove or insert barrel | Too much food within basket | Do not pile food too high or the food will contact the top of the cavity. This can result in difficulty inserting and removing the fried barrel and may cause food to burn. |
| Debris on basket exterior or within upper cavity | Remove all debris from the basket exterior and within the upper cavity. See CLEANING AND MAINTENANCE. | |
TRADEMARKS, COPYRIGHTS AND LEGAL STATEMENT
Midea logo, word marks, trade name, trade dress and all versions there of are valuable assets of Midea Group and/or its affiliates (“Midea”), to which Midea owns trademarks, copyrights and other intellectual property rights, and all goodwill derived from using any part of an Midea trademark. Use of Midea trademark for commercial purposes without the prior written consent of Midea may constitute trademark infringement or unfair competition in violation of relevant laws.
This manual is created by Midea and Midea reserves all copyrights thereof. No entity or individual may use, duplicate, modify, distribute in whole or in part this manual, or bundle or sell with other products without the prior written consent of Midea.
All the described functions and instructions were up to date at the time of printing this manual. However, the actual product may vary due to improved functions and designs.
EN
DISPOSAL AND RECYCLING
Important instructions for environment
Compliance with the WEEE Directive and Disposing of the Waster Product: This product complies with EU WEEE Directive (2012/19/EU). This product bears a classification symbol for waster electrical and electronic equipment (WEEE).
This symbol indicates that this product shall not be disposed with other household wastes at the end of its service life. Used device must be returned to official collection point for recycling of electrical electronic devices. To find these collection systems please contact to your local authorities or retailer where the product was purchased. Each household performs important role in recovering and recycling of old appliance. Appropriate disposal of used appliance helps prevent potential negative consequences for the environment and human health.
natural_image
Symbol of a trash bin crossed with a diagonal line, no text or numbers presentCompliance with RoHS Directive
The product you have purchased complies with EU RoHS Directive (2011/65/EU). It does not contain harmful and prohibited materials specified in the Directive.
EN
Package information
Packaging materials of the product are manufactured from recyclable materials in accordance with our National Environment Regulations. Do not dispose of the packaging materials together with the domestic or other wastes. Take them to the packaging material collection points designated by the local authorities.

natural_image
Recycling symbol with three chasing arrows forming a triangle (no text or labels)DATA PROTECTION NOTICE
For the provision of the services agreed with the customer,
we agree to comply without restriction with all stipulations of applicable data protection law, in line with agreed countries within which services to the customer will be delivered, as well as, where applicable, the EU General Data Protection Regulation (GDPR).
Generally, our data processing is to fulfil our obligation under contract with you and for product safety reasons, to safeguard your rights in connection with warranty and product registration questions. In some cases, but only if appropriate data protection is ensured, personal data might be transferred to recipients located outside of the European Economic Area.
Further information are provided on request. You can contact our Data Protection Officer via MideaDPO@midea.com. To exercise your rights such as right to object your personal date being processed for direct marketing purposes, please contact us via MideaDPO@midea.com. To find further information, please follow the QR Code.
EN
WARRANTY / SERVICE
We congratulate you to your new device and are convinced that you will be satisfied and have your joy with this modern appliance.
If you have any question or concerns, please email us
Email: customer_services@midea.com
In case of a technical fault, enter your exact address, telephone number, sales contract number and Device type (from the type plate of the device).
A precise fault description saves you time and money. For special questions, please contact the customer service center.
Before calling for service:
Please check whether there is an operating error or a cause that has nothing to do with the function of your device.
Please observe the note in the user manual and check whether:
- The power plug is connected
- The power plug may be damaged
- Electricity is available
Warranty terms
This device has been manufactured and tested according to the most modern methods. The seller warrants for faultless material and proper manufacture for a period of 24 months from the date of sale to the end user. The unit is not suitable for commercial use.
EN
The claim under guarantee lapses in the event of intervention by the Buyer or by a third party. Damage caused as a result of improper handling or operation, incorrect installation or storage, improper connection or installation as well as an act [...] of God or other external factors shall not be covered by this warranty.
When claims are submitted, the manufacturer reserves the right to make improvements to defective parts or to replace or exchange the device.
Only if it is not possible to achieve the intended use of the device by repairing or replacing the device, the buyer can demand a reduction of the purchase price or the cancellation of the purchase contract within 6 months from the date of purchase.
Claims for damages, including consequential damages, are excluded unless they are based on intent or gross negligence.
The guarantee claim exists only with submission of the product and the purchase receipt.
Midea Electrics Netherlands B.V.
Barbara Strozzilaan 101,
1083 HN Amsterdam,
the Netherlands
natural_image
Line drawing of a rectangular electronic device with a handle and top panel (no text or symbols)Friteuse à air
MANUEL DE L'UTILISATEUR
MAD85F9BPK
VUE D'ENSEMBLE DU PRODUIT 07
MODE D'EMPLOI 08
NETTOYAGE ET ENTRETIEN 16
DÉPANNAGE 17
MARQUES, DROITS D'AUTEUR ET MENTIONS LEGALES 18
ELIMINATION ET RECYCLAGE 19
AVIS SUR LA PROTECTION DES DONNEES 20
GARANTIE / SERVICE 21
CONSIGNES DE SECURITE
Usage prévu
VUE D'ENSEMBLE DU PRODUIT
natural_image
Diagram showing a device with a lid removed from its side, illustrating the process of packaging or cleaning (no text or symbols present)natural_image
Line drawing of a kitchen sink with faucet and floor, showing surface debris and a cross symbol (no text or labels)DÉPANNAGE
natural_image
Symbol of a trash bin crossed with a diagonal line and a horizontal bar below (no text or labels)natural_image
Recycling symbol with three chasing arrows forming a triangle (no text or labels)AVIS SUR LA PROTECTION DES DONNEES
Email: customer_services@midea.com
Midea Electrics Netherlands B.V.
Barbara Strozzilaan 101,
1083 HN Amsterdam,
the Netherlands
natural_image
Line drawing of a rectangular electronic device with a handle and top panel (no text or symbols)Freidora de aire
natural_image
Diagram showing a device with a lid removed from its side, illustrating the process of packaging or cleaning (no text or symbols present)natural_image
Line drawing of a cleaning or laundry station with a hand架, no text or symbols presentnatural_image
Symbol of a trash bin crossed with two crossed lines and a solid black rectangle below (no text or labels)natural_image
Recycling symbol with three chasing arrows forming a triangle (no text or labels)Email: customer_services@midea.com
Midea Electrics Netherlands B.V.
Barbara Strozzilaan 101,
1083 HN Amsterdam,
the Netherlands

make yourself at home

FR
ÉLÉMENTS D'EMBALLAGE

www.midea.com
© Midea 2022 all rights reserved