
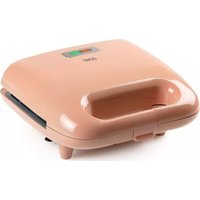
DO9219W - Sandwich maker DOMO - Free user manual and instructions
Find the device manual for free DO9219W DOMO in PDF.
| Product type | Multifunction sandwich and waffle maker |
| Brand | Domo |
| Model | DO9219W |
| Cooking programs | 5 preset programs (Brussels, Belgian, Liège, Breakfast/Healthy, Custom) |
| Browning control | From 1 (light) to 7 (dark) with dial |
| Display | LCD screen |
| Plate type | Non-stick plates |
| Power supply | 220-240 V ~ 50/60 Hz |
| Automatic shut-off | Yes, after 2 hours of inactivity |
| Safety | Safety lock for storage; insulated handles; do not immerse |
| Maintenance and cleaning | Clean with a damp cloth after cooling; do not use abrasive detergents |
| Warranty | 2 years (6 months for accessories and wear parts) |
| Spare parts and repairability | Genuine accessories available online from Domo; repair by a professional if necessary |
| Customer service contact | +32 14 21 71 91 / info@linea2000.be (Mon-Thu 8:30 AM-5 PM, Fri 8:30 AM-4:30 PM) |
| Usage | Indoor only, domestic use |
Frequently Asked Questions - DO9219W DOMO
User questions about DO9219W DOMO
0 question about this device. Answer the ones you know or ask your own.
Ask a new question about this device
Download the instructions for your Sandwich maker in PDF format for free! Find your manual DO9219W - DOMO and take your electronic device back in hand. On this page are published all the documents necessary for the use of your device. DO9219W by DOMO.
USER MANUAL DO9219W DOMO
natural_image
Black and silver DOWO digital kitchen grater with digital display and control buttons (no visible text or symbols)DO9219W
natural_image
Two black-and-white icons: a triangular warning triangle with an exclamation mark and an open book with stacked pages (no text or symbols)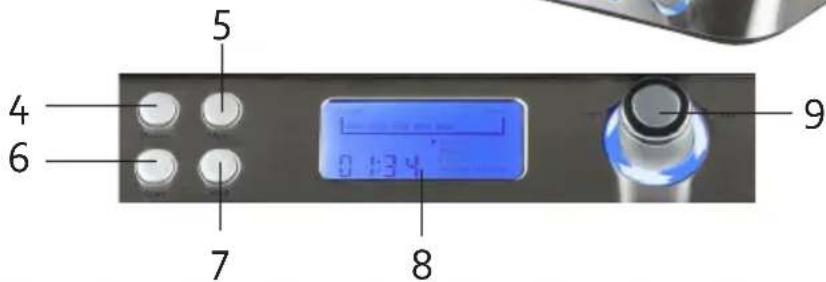
natural_image
Close-up of a black rectangular electronic device with a circular vent and mechanical components (no visible text or symbols)MILIEURICHTLIJNEN
natural_image
Recycling symbol icon with three chasing arrows forming a triangle (no text or labels)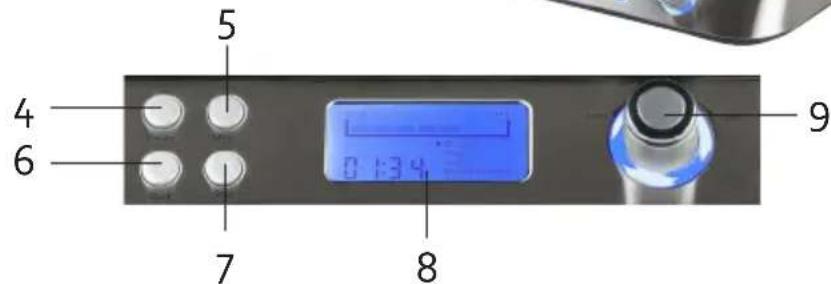
AVANT LA PREMIÈRE UTILISATION
natural_image
Close-up of a black electronic device with a circular top and mounting base (no visible text or symbols)MISE AU REBUT
FR

natural_image
Recycling symbol icon with three chasing arrows forming a triangle (no text or labels)natural_image
Close-up of a black electronic device with a circular vent and metallic connector (no visible text or symbols)ENTSORGEN

natural_image
Recycling symbol icon with three chasing arrows forming a triangle (no text or labels)All of our products are always submitted to a strict quality control before they are sold to you.
Should you nevertheless experience problems with your device, we sincerely regret this. In that case, we kindly request you to contact our customer service.
Our staff will gladly assist you.

+32 14 21 71 91

info@linea2000.be
Monday – Thursday: 8.30 – 12.00 and 13.00 – 17.00
Friday: 8.30 - 12.00 and 13.00 - 16.30
This appliance has a two year warranty period. During this period the manufacturer is responsible for any failures that are the direct result of construction failure. When these failures occur the appliance will be repaired or replaced if necessary. The warranty will not be valid when the damage to the appliance is caused by wrong use, not following the instructions or repairs executed by a third party. The guarantee is issued with the original till receipt. All parts, which are subject to wear, are excluded from the warranty. If your device breaks down within the 2-year warranty period, you can return the device together with your receipt to the shop where you purchased it.
The guarantee on accessories and components that are liable to wear-and-tear is only 6 months.
The guarantee and responsibility of the supplier and manufacturer lapse automatically in the following cases:
- If the instructions in this manual have not been followed.
· In case of incorrect connection, e.g., electrical voltage that is too high.
· In case of incorrect, rough or abnormal use. - In case of insufficient or incorrect maintenance.
· In case of repairs or alterations to the device by the consumer or non-authorised third parties. - If the customer used parts or accessories that are not recommended or provided by the supplier / manufacturer.
SAFETY INSTRUCTIONS
When using electrical appliances, basic safety precautions should always be taken, including the following:
- Read all instructions carefully. Keep this manual for future reference.
- Make sure all packaging materials and promotional stickers have been removed before using the appliance for the first time. Make sure children cannot play with the packaging materials.
· This appliance is intended to be used in household and similar applications such as:
· staff kitchen areas in shops, offices and other working environments;
· farm houses;
- by clients in hotels, motels and other residential type environments;
- bed and breakfast type environments.
· Children should be supervised to ensure that they do not play with the appliance.
- This appliance can be used by children aged from 16 years and above and persons with reduced physical, sensory or mental capabilities or lack of experience and knowledge if they have been given
supervision or instruction concerning use of the appliance in a safe way and understand the hazards involved. Children shall not play with the appliance. Cleaning and user maintenance shall not be made by children unless they are older than 16 and supervised.
- Keep the appliance and its cord out of reach of children younger than 16 years.
• Attention: This appliance cannot be used with an external timer or a separate remote control.
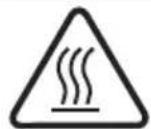
The appliance can become hot during use. Keep the power cord away from hot parts and don't cover the appliance.
· Do not touch any hot surfaces, use the handles.
· Do not put the appliance in water or any other liquid.
· Do not use the appliance near any inflammable materials or hot ovens.
· Make sure that the air can circulate freely around the appliance.
· Have the appliance repaired by a professional if it has been dropped and/or damaged.
- Do not use any sharp objects to remove any remains.
· Never use the appliance when the cord or plug is damaged.
- Do not use the appliance with wet hands.
- Place the appliance on a dry and flat surface.
· Always unplug the appliance when cleaning it. Also let the appliance cool down completely.
- Regularly check the cord for damage. Never let the cord hang over the edge of the table or never let it touch hot surfaces.
- Only use the appliance indoors.
· Only use the appliance for the purpose it was made for.
· This appliance is only suitable for household use.
SAVE THESE INSTRUCTIONS FOR FUTURE REFERENCE
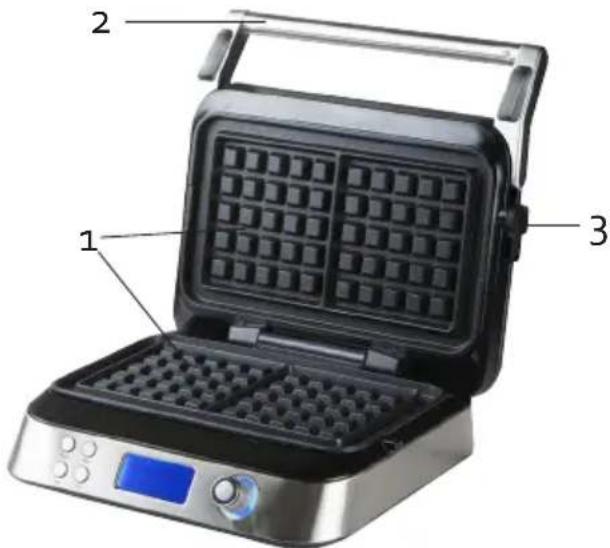
PARTS
- Baking plates
- Handgrip
- Safety lock
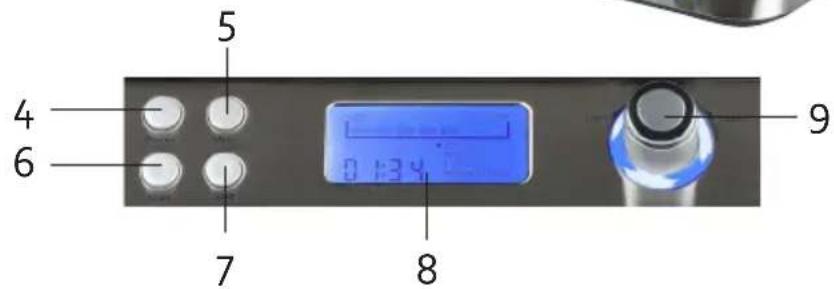
- On/Off button 'POWER'
- Menu dial 'MENU'
- Start button 'START'
- Stop button 'STOP'
- LCD display
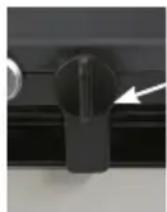
- Rotary knob for degree of browning
BEFORE THE FIRST USE
- Remove all packaging materials and any promotional stickers.
- Wipe the inside and outside of the fryer clean with a soft cloth.
- When using the appliance for the first time there may be a slight smell and light smoke from the cooking plates. This is normal. For hygienic reasons, do not the first wafers made, throw them away.
USE
- Plug the power cord in and press the on/off button. The LCD display illuminates. The display shows the selected settings.
- Press the menu button to set the desired program. All these programs (except 'Custom') have their preset baking time and temperature that make it perfectly possible to bake that type of waffle.
· Brussels
· Belgian
· Liège
· Breakfast/Healthy
- Custom
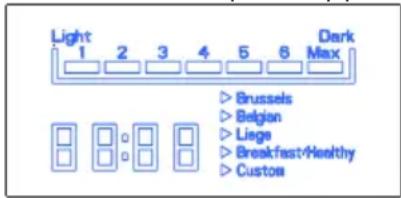
- Turn the degree of browning dial to select the desired baking method. This goes from 1 to a maximum of 7. The higher the degree of browning is set, the browner your waffle is baked. Note: depending on the selected degree of browning, the timer automatically adjusts itself.
- The appliance heats up automatically. The browning bar will blink on and off to indicate that the appliance is warming up. The appliance is at temperature when this bar remains illuminated. There's also a beep.
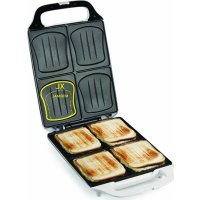
- Pour the waffle dough into the baking plates. Do this evenly so that the dough spreads well over the baking plates.
-
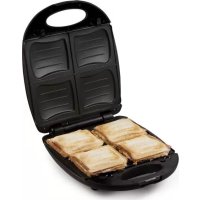
Close the lid and press start. The timer counts down and beeps when the program ends.
-
Of course, you can always remove the waffle from the device before the program is finished. In that case, press the stop button. The device then returns to the start time of the selected program, ready to restart.
- You can also let the waffle cook a little longer by leaving it in the appliance. The waffle iron always remains at temperature regardless of the timer setting.
Attention: never close the safety lock while the appliance is cooking. This lock is only for easy storage of the appliance.
- Carefully remove the waffles from the waffle iron with a wooden or heat-resistant plastic spatula. Never use metal objects, as these may damage the non-stick coating of the appliance.
- The appliance automatically prepares itself to cook the next waffle. So the timer is also reset to restart again.
- Afterwards, turn the appliance off by pressing the power button again. Allow the appliance to cool down before cleaning.

CUSTOM PROGRAM
In addition to the automatic preset programs, the waffle iron also has a 'Custom' program. There is no baking time preset here. Only the temperature is set. This makes it possible to bake an infinite number of different types of waffles in this device.
- Plug the power cord in and press the on/off button. The LCD display illuminates. Use the menu button to select the 'Custom' program.
- As with the other programs, determine the desired degree of browning yourself.
- The device heats itself up automatically and gives a beep when it is ready to use.
- Pour the waffle dough into the baking plates. Do this evenly so that the dough spreads well over the baking plates.
- Press start. The timer starts counting from oo:oo.
- Press stop when you have reached the desired cooking time. The device then switches back to 00:00.
- Remove the waffles from the waffle iron. Here, too, the waffle iron always remains at the right temperature. This allows you to immediately pour the dough into the waffle iron again. Press start again to start baking. Press stop again when you have reached the desired cooking time. You repeat this cycle over and over again.
- Afterwards, switch off the waffle iron and pull out the plug. Allow it to cool down before cleaning.
Note: If the appliance is turned on for more than 2 hours, it will automatically turn itself off. This is for your own safety if you forget to turn it off.
CLEANING AND MAINTENANCE
- Clean the appliance after each use. Unplug the electric lead and wait until the appliance has cooled sufficiently. It is easier to clean your waffle-maker if it's a bit warm.
- Clean the outside and the baking sheets with a damp clean cloth. Dry the appliance off well. Never use aggressive or abrasive cleaning agents.
· Never submerge the appliance, the electric cord or the plug into water or another liquid.
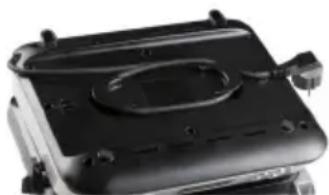
- When not in use, store the appliance on a flat dry surface. Close the safety lock to store the appliance in an upright position. Simply wrap the cord around the cord storage bar.
natural_image
Close-up of a black rectangular electronic device with a circular vent and mounting bracket (no visible text or symbols)ENVIRONMENTAL GUIDELINES

This symbol on the product or on its packaging indicates that this product may not be treated as household waste. Instead it must be brought to the applicable collection point for recycling of electrical and electronic equipment. By ensuring this product is disposed of correctly, you will help prevent potential negative consequences for the environment and human health, which could otherwise be caused by inappropriate waste handling of this product. For more detailed information about recycling of this product, please contact your local city office, your household waste disposal service or the shop where you purchased the product.
natural_image
Recycling symbol icon with three chasing arrows forming a triangle (no text or labels)The packaging is recyclable. Please treat the packaging ecologically.
GARANTIA
natural_image
Close-up of a black rectangular electronic device with a circular top and mounting base (no visible text or symbols)natural_image
Recycling symbol icon with three chasing arrows forming a triangle (no text or labels)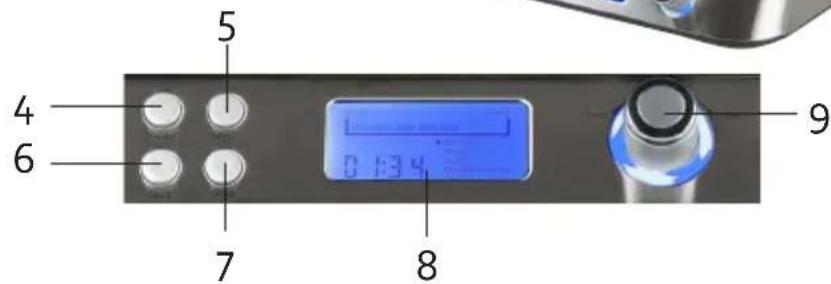
PRIMA DELL'USO
natural_image
Close-up of a black rectangular electronic device with a circular vent and mounting bracket (no visible text or symbols)MISURE AMBIENTALI

natural_image
Recycling symbol icon with three chasing arrows forming a triangle (no text or labels)natural_image
Close-up of a black rectangular electronic device with a circular vent and mounting base (no visible text or symbols)OHLED NA ŽÍVOTNÍ PROSTŘEDÍ

natural_image
Recycling symbol icon with three chasing arrows forming a triangle (no text or labels)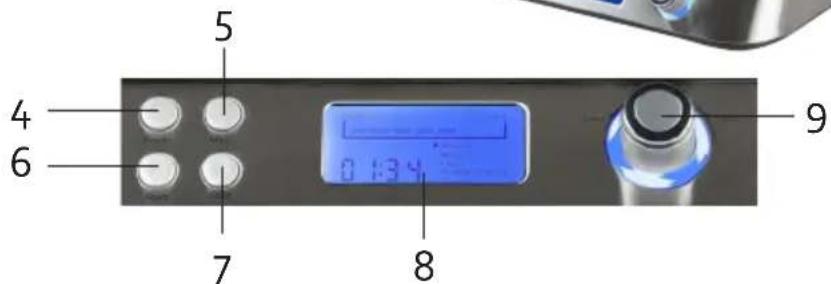
PRED PRVÝM POUŽITÍM
natural_image
Close-up of a black rectangular electronic device with a circular vent and mounting bracket (no visible text or symbols)OHL'AD NA ŽIVOTNÉ PROSTREDIE

natural_image
Recycling symbol icon with three chasing arrows forming a triangle (no text or labels)
- MILIEURICHTLIJNEN
- AVANT LA PREMIÈRE UTILISATION
- MISE AU REBUT
- ENTSORGEN
- SAFETY INSTRUCTIONS
- PARTS
- BEFORE THE FIRST USE
- USE
- CUSTOM PROGRAM
- CLEANING AND MAINTENANCE
- ENVIRONMENTAL GUIDELINES
- GARANTIA
- PRIMA DELL'USO
- MISURE AMBIENTALI
- OHLED NA ŽÍVOTNÍ PROSTŘEDÍ
- PRED PRVÝM POUŽITÍM
- OHL'AD NA ŽIVOTNÉ PROSTREDIE
Brand : DOMO
Model : DO9219W
Category : Sandwich maker