
HBB 3734 - Tumble dryer CLATRONIC - Free user manual and instructions
Find the device manual for free HBB 3734 CLATRONIC in PDF.
| Brand | Clatronic |
| Model | HBB 3734 |
| Product type | Hot air dryer with inflatable cover |
| Power supply | 220-240 V~, 50/60 Hz |
| Power consumption | 1200 W |
| Protection class | II |
| Net weight | Approx. 3 kg |
| Dimensions (approx.) | 50 x 30 x 30 cm |
| Timer | 30 to 180 minutes + continuous operation |
| Safety switch | Automatic shutdown if tilted > 45° |
| Package contents | Support tubes, screws, hanger, gasket, fan guard, balloon body (shirts and trousers), motor unit |
| Main functions | Drying and ironing clothes (shirts, trousers) |
| Care and cleaning | Clean the exterior with a damp cloth, do not immerse; accessories can be rinsed with hot water |
| Safety | Hot surface (caution burns), do not cover the appliance, use on a heat-resistant surface |
| Spare parts and repairability | Contact an authorized service center; do not repair yourself |
| General information | For machine-spun garments; do not use for dripping wet laundry |
Frequently Asked Questions - HBB 3734 CLATRONIC
User questions about HBB 3734 CLATRONIC
0 question about this device. Answer the ones you know or ask your own.
Ask a new question about this device
Download the instructions for your Tumble dryer in PDF format for free! Find your manual HBB 3734 - CLATRONIC and take your electronic device back in hand. On this page are published all the documents necessary for the use of your device. HBB 3734 by CLATRONIC.
USER MANUAL HBB 3734 CLATRONIC
natural_image
Pink long-sleeve button-up women's blouse with black buttons, displayed on a white stand (no text or symbols visible)Overview of the Components ...... Page 3
Instruction Manual......Page 30
Technical Data......Page 33
natural_image
Diagram of a mechanical component with curved arms and a central circular housing (no text or symbols)natural_image
Diagram of a mechanical or electrical component with labeled parts L and R, showing internal structure without any text or symbols.a Tête de support
b Bras de support
natural_image
Diagram of a mechanical component with curved arms and a central circular feature labeled L and R (no text or symbols beyond labels)natural_image
Diagram of a mechanical or electrical component with two curved arms and a central circular component labeled L and R, showing directional arrows (no text or symbols beyond labels)natural_image
Diagram of a mechanical or electrical component with labeled parts L and R, showing internal structure without any readable text or symbols.Thank you for choosing our product. We hope you will enjoy using the appliance.
Symbols in these Instruction Manual
Important information for your safety is specially marked. It is essential to comply with these instructions in order to avoid accidents and prevent damage to the appliance:

WARNING:
This warns you of dangers to your health and indicates possible injury risks.

CAUTION:
This refers to possible hazards to the appliance or other objects.

NOTE:
This highlights tips and information.
General Notes
Read the operating instructions carefully before putting the appliance into operation and keep the instructions including the warranty, the receipt and, if possible, the box with the internal packing. If you give this appliance to other people, please also pass on the operating instructions.
- The appliance is designed exclusively for private use and for the envisaged purpose. This appliance is not fit for commercial use.
- Do not use it outdoors. Keep it away from sources of heat, direct sunlight, humidity (never dip it into any liquid) and sharp edges. Do not use the appliance with wet hands. If the appliance is humid or wet, unplug it immediately.
- When cleaning or putting it away, switch off the appliance and always pull out the plug from the socket (pull the plug itself, not the lead) if the appliance is not being used and remove the attached accessories.
- Do not operate the appliance without supervision. Always switch off the appliance when leaving the house. Remove the plug from the socket.
- The appliance and the mains lead have to be checked regularly for signs of damage. If damage is found the appliance must not be used.
- Use only original spare parts.
- In order to ensure your children's safety, please keep all packaging (plastic bags, boxes, polystyrene etc.) out of their reach.

WARNING:
Do not allow small children to play with the foil.
There is a danger of suffocation!
Special Safety Information for this Appliance
You will find the following symbol with warning character on the product:
WARNING:
To avoid overheating, the appliance must not be covered. Keep the ventilation slots free.

WARNING: Hot surface!
The motor unit and the bars become hot during operation. Therefore, do not touch them during or shortly after use.

CAUTION:
This appliance is intended only for drying textiles washed in water.
- This appliance can be used by children aged from 8 years and above and persons with reduced physical, sensory or mental ca-
pabilities or lack of experience and knowledge if they have been given supervision or instruction concerning use of the appliance in a safe way and understand the hazards involved.
• Children shall not play with the appliance.
- Cleaning and user maintenance shall not be made by children without supervision.
- Do not repair the appliance on your own. Always contact an authorized technician. If the supply cord is damaged, it must be replaced by the manufacturer, its service agent or similarly qualified persons in order to avoid a hazard.

CAUTION:
This appliance is not intended to be immersed in water during cleaning. Please observe the instructions that we have included for you in the chapter “Cleaning”.
Intended Use
This appliance is used for drying and ironing garments (e.g. shirts). You may use all garments which are suitable for ironing. Always follow the laundry tags which are found in the garments!
Only use this appliance as instructed in this user manual. Do not use this appliance commercially.
No other use is intended and can cause damage or personal injuries.
The manufacturer does not assume any liability for damages resulting from improper use.
Unpacking the Appliance
- Take out all the parts carefully out of the packing.
- Remove all packaging material such as plastic films, filler material, cable ties and cardboard.
- Check the delivery scope for completeness.
- If there are missing parts or obvious damage, do not use the appliance. Return it to your retailer immediately.
Overview of the Components / Scope of Delivery
1 Long poles
2 Connectors
3 Hanger
a Hanger head
b Hanger arms
4 Joint
5 Short pole
6 Fan guard
7 Ventilation
8 Mounting device for the balloon body
9 On/off switch/timer
10 Motor unit
No Illustration
Balloon body for shirts
Balloon body for trousers
Notes for Use
- The appliance is intended for garments which are spin-dried by a washing machine. Allow the garment to drain in case you wash it by hand or if you haven't spin-dried it. The appliance is not suitable for dripping wet clothes.

NOTE:
For best results, use ironing moist clothes.
- The drying time depends on the material of the garment.
- The balloon body can be enlarged by opening the zippers.
- If necessary, the placket, cuffs and the collar need to be ironed once more. For trousers, it may be necessary to iron the waistband, the hem and the area around the zipper.
- Conventional clothespins may be used for fixing the garments to the balloon body. When using extra long garments, clothespins are of advantage in order to ensure the best possible drying at the projecting edge.
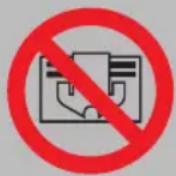
On / Off Switch
The functions of the on / off switch are the following:
ON:Appliance in continuous operation
OFF: Switch off the appliance
30 - 180: Timer operation in minutes
Safety Switch
Your appliance is equipped with a safety switch. This cuts off the power supply as soon as the appliance is tilted by 45°. The safety switch can prevent dangerous situations caused by overheating.
Electrical Connection
Check whether the mains voltage that you want to use, corresponds with that of the appliance. You will find the information about it on the rating plate.
Assembly
Preparation
- Mount the hanger by inserting the hanger arms into the head of the hanger. Watch out for the markings left (L) and right (R) (see image).

natural_image
Diagram of a mechanical component with labeled parts L and R, showing internal structure without any text or symbols.- Use the provided screws to attach the hanger arms at the bottom of the hanger.
- Place the motor unit on a flat, non-slip and heat-resistant surface.
- Insert the short pole into the appliance in such a way that the marking points show downwards.
- Slide the fan cover onto the pole until it reaches the marking.
- Attach the joint onto the short pole with the joint and both its openings pointing upwards.
- Insert the two longer poles into the openings of the joint.
Mounting the Rack for Shirts
- Mount the hanger on the poles. Use the two outer openings for this.
- Loosen the two connectors on the two poles and pull the poles to the desired height. Tighten the connectors again.
- For shirts, put the balloon body over the hanger and pull it over the rack. Use the elastic band to secure the balloon body to the mounting device (8).
The appliance is now ready to use.
Mounting the Rack for Trousers
- Loosen the two connectors on the two poles and pull the poles to the desired height. Tighten the connectors again.
- For trousers, put the balloon body over the poles. Each trouser leg of the balloon body must hang over one pole. Use the elastic band to secure the balloon body to the mounting device (8).
- Pull the two poles apart.
The appliance is now ready to use.
Operation
- Set the on / off switch to the OFF position.
- Pull the garment (e.g. shirt) over the balloon body. Note the following when doing so:
- The collar must be placed above the balloon body's collar part.
- All buttons of the garment need to be buttoned.
-
The garment must lie flat on the balloon body.
-
Insert the mains plug into a correctly installed safety socket.
-
Turn the appliance on by using the on / off switch. There are two ways for operating the appliance:
1) Set the on / off switch to ON.
2) Set a time with the on / off switch.
i NOTE:
The indicator lamp lights up when the appliance is in operation.
- Switch the appliance off by setting the on / off switch to OFF.
- Disconnect the mains plug from the socket.
- Allow the garment to cool down before removing it from the balloon body.
Cleaning

WARNING:
- Pull the mains plug out of the mains socket before you clean the appliance and allow the appliance to cool down.
- Do not immerse the appliance in water! Doing so may result in an electric shock or fire.

CAUTION:
- Do not use any wire brush or other abrasive objects.
- Do not use abrasive or aggressive cleaners.
Housing
Only use a slightly damp cloth to clean the outside of the appliance.
Balloon Body
You may wipe the balloon body with a damp cloth.
Accessories
The accessories can be cleaned by rinsing with warm water. Allow the accessories to dry before reassembling the appliance.
Troubleshooting
| ProblemPossible Cause Solution | ||
| The appliance does not function. | The appliance has no power supply. Test the socket with another appliance. | |
| The appliance is faulty. Contact our service centre or a specialist. | ||
| The garment takes too long to dry. | The garment is very thick. Repeat the procedure. | |
| The garment was not dry enough. Allow it to drain first. | ||
| The zippers are not fully closed. Close the zippers. | ||
| The appliance stops during operation. | The inlet or outlet openings are covered. Be sure that the inlet or outlet openings are unobstructed. | |
| The timer is expired. | Set the timer again. | |
| Your appliance is equipped with a safety switch. It will block the motor when overloaded. | Disconnect the mains plug from the socket. | |
| Allow the appliance to cool down before restarting it. | ||
Technical Data
Model: HBB 3734
Power supply: 220-240V\~, 50/60Hz
Power consumption: 1200 W
Protection class: II
Net weight: .... approx. 3 kg
The right to make technical and design modifications in the course of continuous product development remains reserved.
This appliance has been tested according to all relevant current CE guidelines, such as electromagnetic compatibility and low voltage directives, and has been constructed in accordance with the latest safety regulations.
Disposal
Meaning of the "Dustbin" Symbol

Protect our environment: do not dispose of electrical equipment in the domestic waste.
Please return any electrical equipment that you will no longer use to the collection points provided for their disposal.
This helps avoid the potential effects of incorrect disposal on the environment and human health.
This will contribute to the recycling and other forms of re-utilisation of electrical and electronic equipment.
Information concerning where the equipment can be disposed of can be obtained from your local authority.
Instrukcja obsługi
natural_image
Diagram of a mechanical component with labeled parts L and R, showing internal structure without any text or symbols.CTC Clatronic Sp. z o.o
Ul. Brzeska 1
45-960 Opole
Usuwanie
natural_image
Diagram of a mechanical component with curved ends and a central circular feature labeled L and R (no text or symbols beyond labels)natural_image
Diagram of a mechanical component with curved arms and a central circular feature labeled L and R (no text or symbols beyond labels)natural_image
Diagram of a mechanical component with two curved arms and a central circular housing, showing directional arrows (no text or symbols)غرض الاستخدام


- Symbols in these Instruction Manual
- WARNING:
- CAUTION:
- NOTE:
- General Notes
- Special Safety Information for this Appliance
- WARNING: Hot surface!
- Intended Use
- Unpacking the Appliance
- Overview of the Components / Scope of Delivery
- No Illustration
- Notes for Use
- On / Off Switch
- Safety Switch
- Electrical Connection
- Assembly
- Preparation
- Mounting the Rack for Shirts
- Mounting the Rack for Trousers
- Operation
- i NOTE:
- Cleaning
- Housing
- Balloon Body
- Accessories
- Technical Data
- Disposal
- Meaning of the "Dustbin" Symbol
- Instrukcja obsługi
- Usuwanie
- غرض الاستخدام
Brand : CLATRONIC
Model : HBB 3734
Category : Tumble dryer