
Aquatronic 1600 - Kitchen scales SALTER - Free user manual and instructions
Find the device manual for free Aquatronic 1600 SALTER in PDF.

| Product type | Digital kitchen scale with LCD display and wall bracket |
| Brand | Salter |
| Model | Aquatronic 1600 |
| Maximum capacity | 5 kg (estimated) |
| Precision | 1 g or 0.1 oz (estimated) |
| Units of measurement | Grams (g), ounces (oz), milliliters (ml), fluid ounces (fl.oz) |
| Power source | 3 AAA batteries (1.5 V) |
| Main functions | Weighing solids and liquids, zero/tare function, clock mode, wall hanging |
| Dimensions (approx.) | 20 x 15 x 2 cm (estimated) |
| Weight (approx.) | 200 g (estimated) |
| Material | Plastic |
| Care and cleaning | Clean with a damp cloth; do not immerse in water; avoid chemicals and abrasives |
| Safety | Remove used batteries promptly; do not mix new and old batteries; do not overload; keep away from heat sources |
| Spare parts and repairability | Wall bracket included; standard AAA batteries easily replaceable |
| General information | Scale designed for domestic use; backlit display? (not specified) |
| Warranty | Not specified |
Frequently Asked Questions - Aquatronic 1600 SALTER
User questions about Aquatronic 1600 SALTER
0 question about this device. Answer the ones you know or ask your own.
Ask a new question about this device
Download the instructions for your Kitchen scales in PDF format for free! Find your manual Aquatronic 1600 - SALTER and take your electronic device back in hand. On this page are published all the documents necessary for the use of your device. Aquatronic 1600 by SALTER.
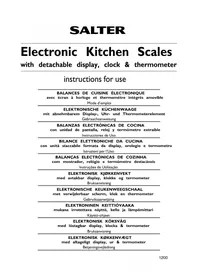
USER MANUAL Aquatronic 1600 SALTER
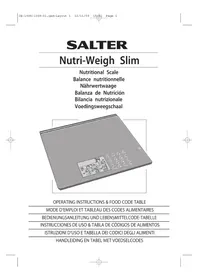
Aquatronic™ Rail Scale with Clock
Instructions for use

| BALANCE ACCROCHABLE AQUATRONIC AVEC HORLOGE INTÉGRée - Instructions d'emploi |
| „AQUATRONIC“-WAAGE MIT UHR, FÜR RELINGLEISTEN - Gebrauchsanleitung |
| BALANZA DE RIEL CON RELOJ AQUATRONIC - Instrucciones de uso |
| BILANCIA AGGANCIANBILE CON OROLOGIO - Istruzioni per l'uso |
| BALANÇA AQUATRONIC COM RELÓGIO PARA PENDURAR EM PRATELEIRA - Instruções de utilizesçao |
| AQUATRONIC HENGEVEKT MED KLOKKE - Bruksanvising |
| OPHANGBARE WEEGSCHAAL EN KLOK VAN AQUATRONIC - Gebruiksaanwijzing |
| AQUATRONIC-KELLOVAKA - Käytöohjeet |
| AQUATRONIC UPPHÄNGNINGSVÄG MED KLOCKA - Bruksanvising |
| AQUATRONIC VÆGHÆNGT VÆGT MED UR - Brugsanvising |
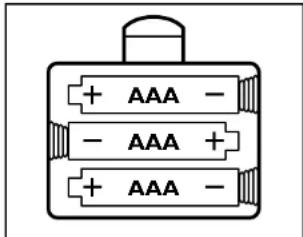
INSERT 3 AAA BATTERIES
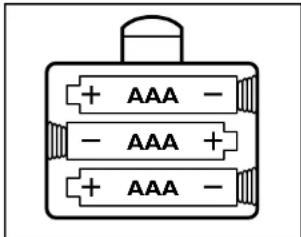
Ensure +/- terminals are the correct way round.
TO PRE-SET METRIC OR IMPERIAL UNITS
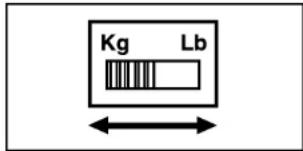
Every time the scale is switched on it will always initially show either metric (g) or imperial (lb/oz) units, according to the position of the slide switch on the underside of the scale. Set this switch to the units you generally prefer to use.
FITTING THE HANGING BRACKET TO THE WALL
This scale has a hanging hook which allows it to be hung on most standard utensil hanging rails.
Alternatively, it can be hung from its' own hanging bracket, which can be fixed to most walls.
When the scale is placed in a hanging position, the display automatically switches to a clock.
CAUTION: DO NOT hang the scale over a direct heat source, such as a cooker hob. If possible, site at least 1m (3ft) distant from electrical products (such as a microwave oven) that may emit electrical interference, which could disrupt the products display. If in doubt, test the product in position, before drilling the wall to fix the bracket.
To fix the hanging bracket to a wall:
- Observing the above caution please, choose a position for the bracket that allows plenty of room for the scale to hang unobstructed and enables you to remove and replace the scale easily.
- With the bracket held in position against the wall, mark the position of the round hole.
- Select a suitable wall plug and drill a hole of the correct size and depth to suit.
- Fit the wall plug, and then screw the bracket to the wall, loosely. Holding the bracket horizontal, mark the 2nd hole position. Move the bracket to one side and drill the second hole.
- Fit the wall plug and then screw the bracket firmly to the wall, ensuring it remains level.
NOTE: The wall plugs supplied with this product are suitable for on solid walls and require a 5mm diameter hole. For hollow or other wall types – use a suitable alternative fixing.
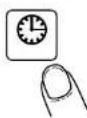
TO SET THE CLOCK
I. To set the clock, place the scale on a flat surface.
If it is not already showing a clock display, press the 'clock' button on the display screen.
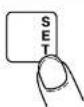
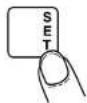
- To enter the clock setting mode, press and hold the SET button on the display screen 2 seconds.
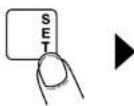

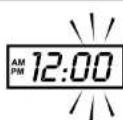
- The hour digits will flash.

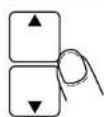
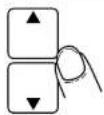
- Use the UP and DOWN buttons on the screen to set the correct hour.

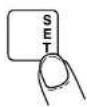
- To confirm the hour setting: Press SET.
- Now the minute digits will flash.
- Use the UP and DOWN buttons on the screen to set the correct minutes.
- To confirm the minute setting: Press SET.
- Now the symbol for 12 hour clock will flash.
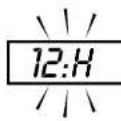
- To change to 24 hour clock: Use the UP or DOWN on screen button.
- To confirm the setting: Press SET.
USING THE SCALE
TO SWITCH TO SCALE MODE
If the scale is hanging:
Moving the scale to a horizontal position will prompt the display to automatically switch to scale mode.
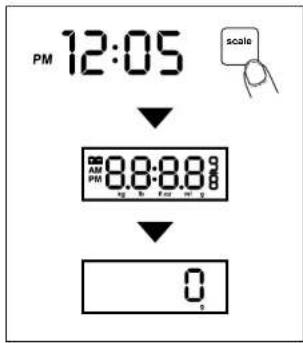
If the scale is already horizontal, but in clock mode:
Press the scale button. '8888' will appear on the display.Wait until the display shows zero before weighing.(see diagram)
To use this scale with a bowl you can either place the bowl on the platform before switching to scale mode, or (if already in scale mode) place the bowl on the platform then press the zero button and wait for a zero display.
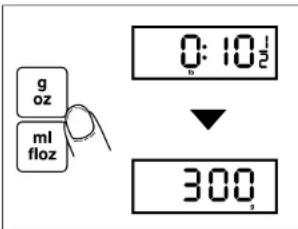
USING THE AQUATRONIC ^TM FEATURE TO MEASURE SOLID AND LIQUID INGREDIENTS
- When first switched on, the scale will display solid measures (g/oz).
- To convert between grams (g) and ounces (oz): press g-oz.
- To measure liquids: press ml-floz.
- To convert between millilitres (ml) and fluid ounces (fl oz): press ml-flox again.
To switch back to solids: press g-oz.
More about liquid measures:
The aquatronic is programmed to measure all water based liquids. In practical terms this covers almost every liquid used in domestic cookery including wine, milk, cream etc.
The exception is oil, which is not water based and would therefore not give such an accurate measure. (The error would be approx. +10% .
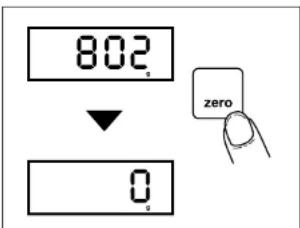
ADD & WEIGH
To weigh several different ingredients into one bowl:
Press the zero button to reset the display between each ingredient.
MANUAL SWITCH OFFAUTO SWITCH
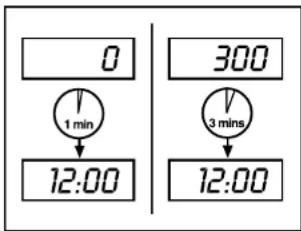
Automatic switch off occurs if the display shows 0 for 1 minute or shows the same weight reading for 3 mins.
Once the scale has switched off, the display will automatically return to clock mode.
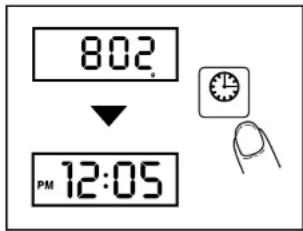
To maximise battery life:
after using the scale, press the clock button to return to clock mode.
ADVICE & CARE
Clean the scale with a slightly damp cloth.
DO NOT immerse the scale in water or use chemical / abrasive cleaning agents.
All plastic parts should be cleaned immediately after contact with fats, spices, vinegar and strongly flavoured / coloured foods. Avoid contact with acids such as citrus fruits.

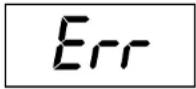
LOW BATTERY WARNING
OVERLOAD WARNING
Always remove 'low' batteries promptly.
Replace with 3 new AAA size batteries.
Never mix old and
new batteries or different battery types.
Total load applied exceeds max. capacity of scale.
Remove excess load.
MINUS INDICATOR
Indicates a negative weight reading.
Pressing zero will restore the display to zero.
INSERER 3 PILES AAA
PREREGLER LES MÉTURES METRIQUES OU IMPERIALES
VERANDEREN NAAR WEEGSCHAAL EUNCTIE

- Aquatronic™ Rail Scale with Clock
- FITTING THE HANGING BRACKET TO THE WALL
- To fix the hanging bracket to a wall:
- TO SET THE CLOCK
- USING THE SCALE
- TO SWITCH TO SCALE MODE
- If the scale is hanging:
- USING THE AQUATRONIC TM FEATURE TO MEASURE SOLID AND LIQUID INGREDIENTS
- More about liquid measures:
- ADD & WEIGH
- To weigh several different ingredients into one bowl:
- MANUAL SWITCH OFFAUTO SWITCH
- ADVICE & CARE
- INSERER 3 PILES AAA
- PREREGLER LES MÉTURES METRIQUES OU IMPERIALES
- VERANDEREN NAAR WEEGSCHAAL EUNCTIE
Brand : SALTER
Model : Aquatronic 1600
Category : Kitchen scales