GSBS 14620 XWF - Fridge GRUNDIG - Free user manual and instructions
Find the device manual for free GSBS 14620 XWF GRUNDIG in PDF.
User questions about GSBS 14620 XWF GRUNDIG
0 question about this device. Answer the ones you know or ask your own.
Ask a new question about this device
Download the instructions for your Fridge in PDF format for free! Find your manual GSBS 14620 XWF - GRUNDIG and take your electronic device back in hand. On this page are published all the documents necessary for the use of your device. GSBS 14620 XWF by GRUNDIG.
USER MANUAL GSBS 14620 XWF GRUNDIG
1. Important instructions for
safety and environment 3
1.1.2 For products with a water
1.3 Children's safety .................7
1.4 Compliance with WEEE
Directive and Disposing of the Waste Product: ............................8
1.5 Compliance with RoHS
3.1 Right place for installation ...11
3.2 Attaching the plastic wedges 11
3.3 Adjusting the stands .............11
3.4 Power connection .................12
3.5 Water connection .................12
3.6 Connecting water hose to the
product ........................................13
3.7 Connecting to water mains ..13
3.9.1.Fixing external filter on the
4.1 What to do for energy
5. Operating the product 21
5.3 Connecting the Product to
5.6 Activating water filter change
warning .......................................31
5.6 Using the water fountain .....32
5.8 Filling the fountain
water tank ...................................32
5.9 Cleaning the water tank .......33
5.10 Taking ice / water ...............34
5.11 Drip tray .............................35
5.12 Zero degree compartment .35
5.18 Icematic and ice
5.20 Freezing fresh food .............39
5.21 Deep freezer details ...........39
5.22 Placing the food ..................40
6. Maintenance and cleaning 42
6.1 Avoiding bad odours..........42
6.2 Protecting the plastic
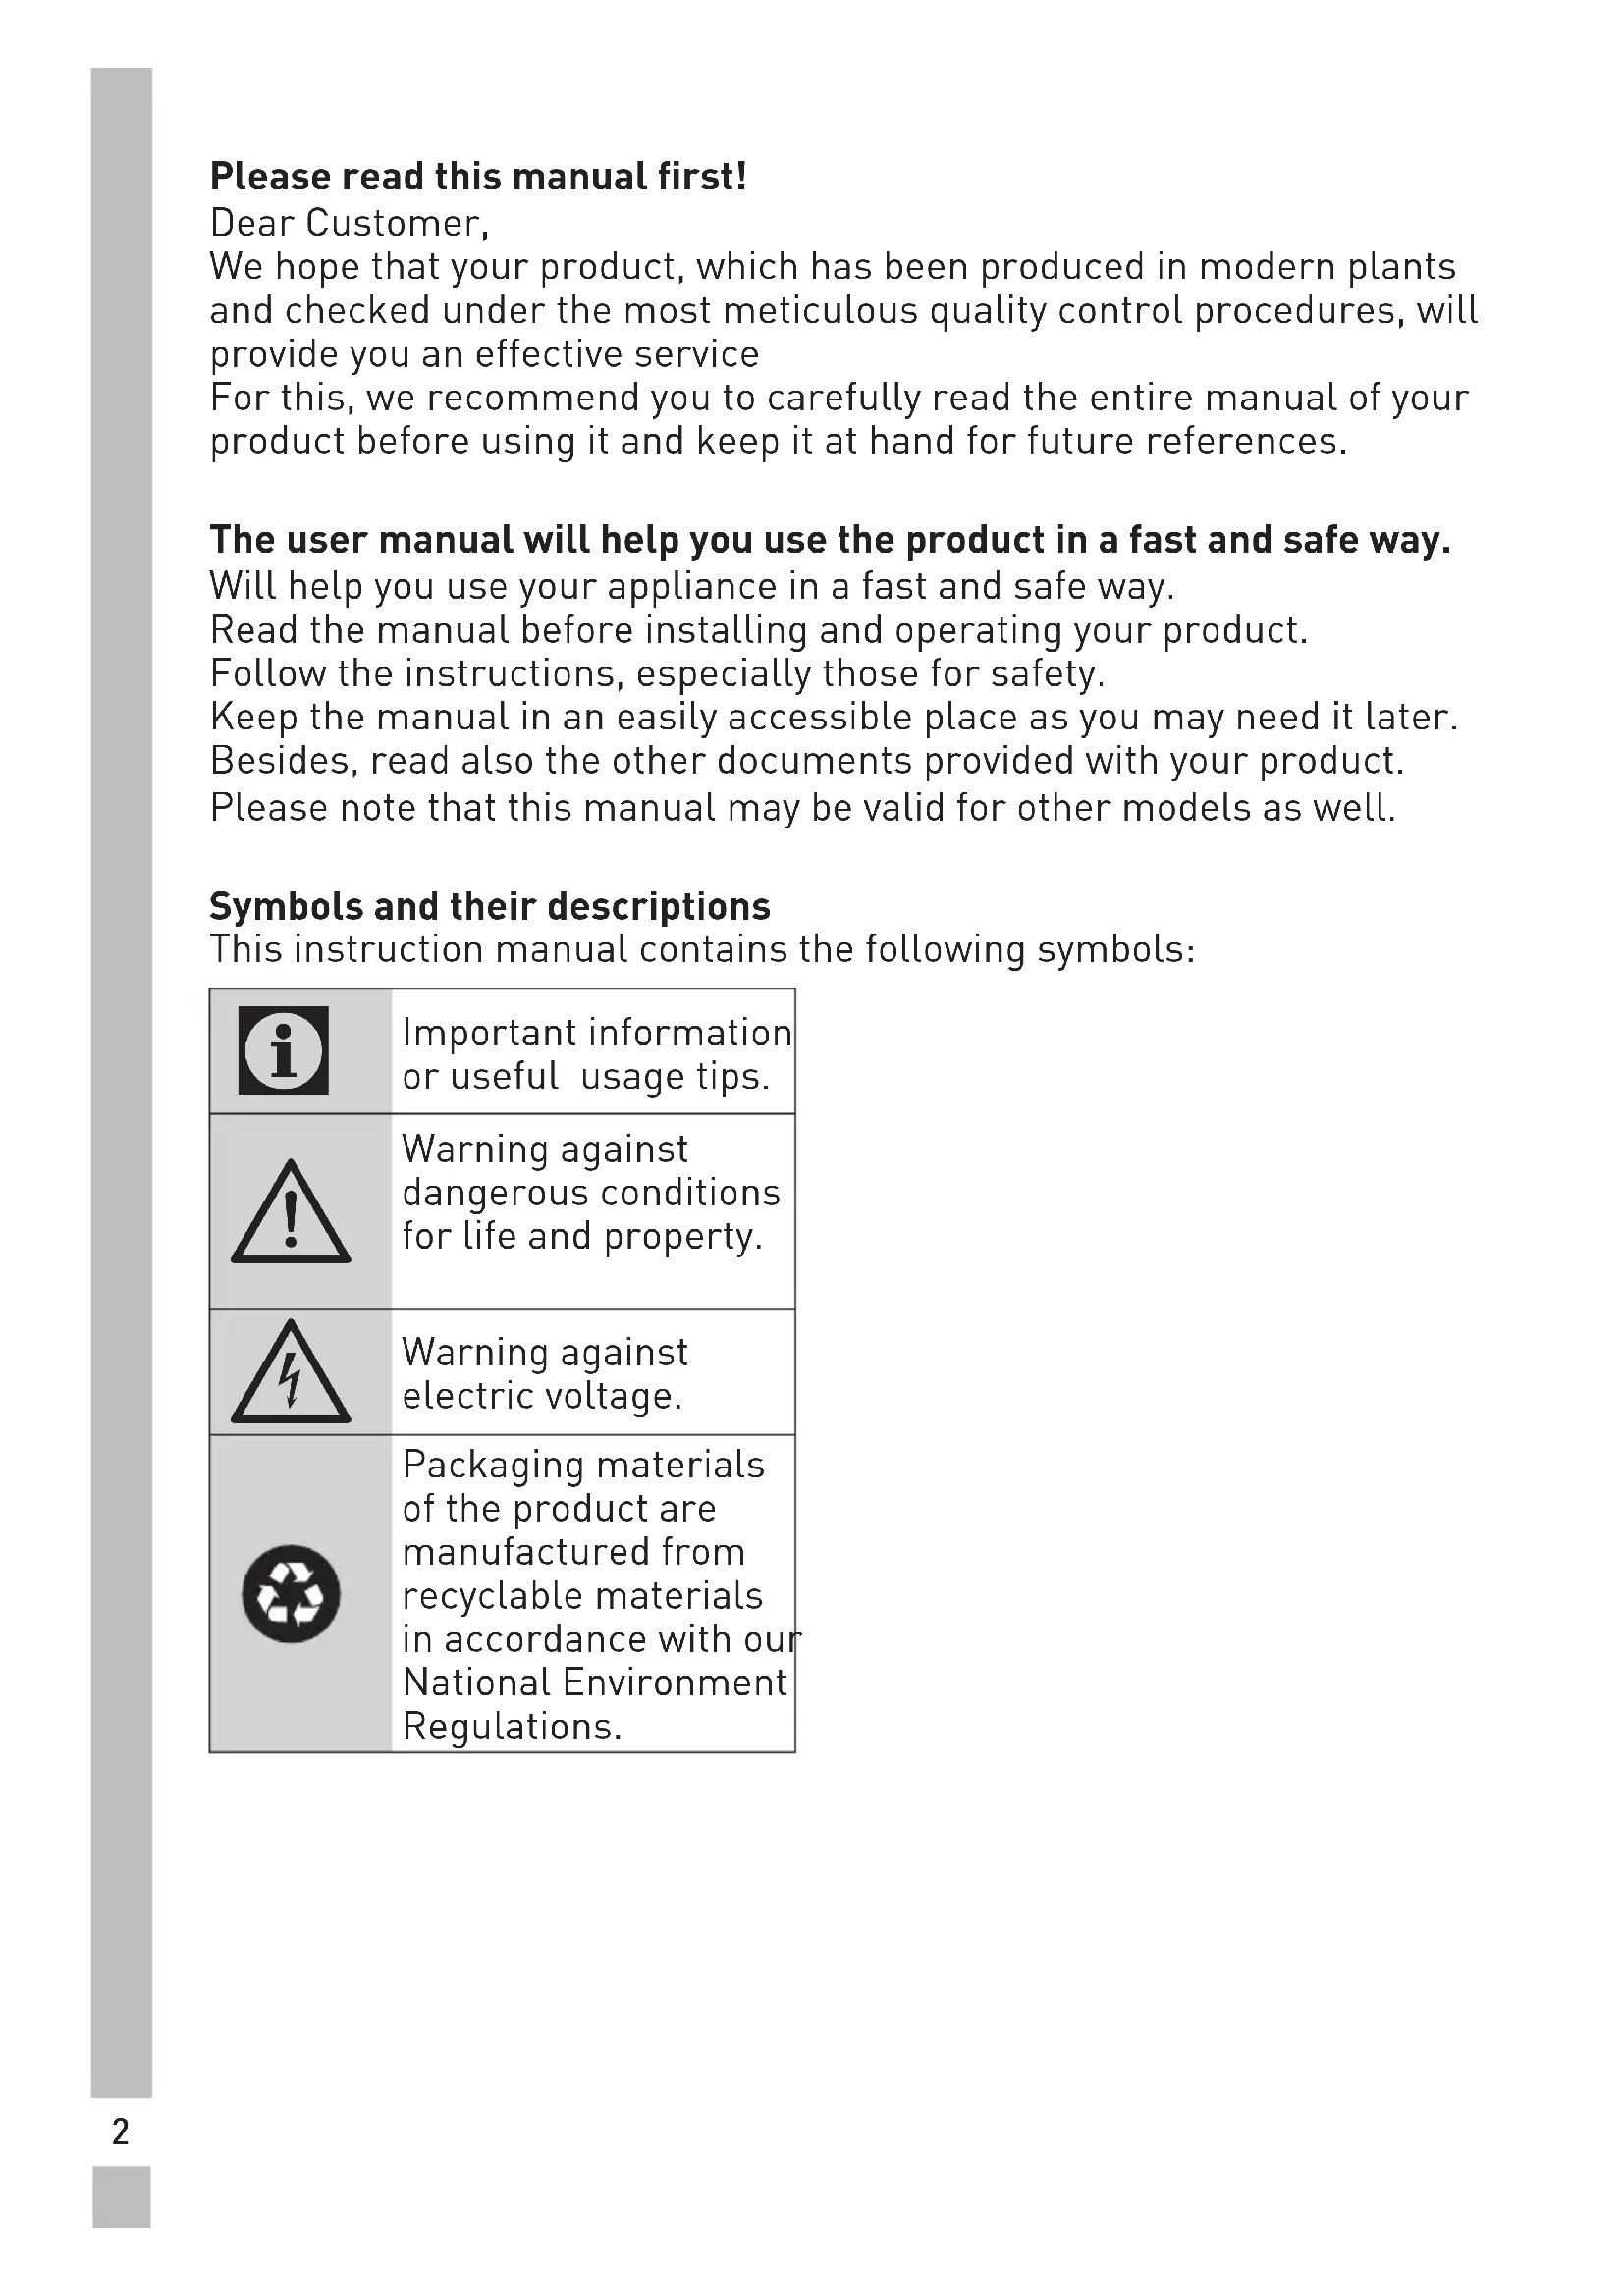
Please read this manual first! Dear Customer, We hope that your product, which has been produced in modern plants and checked under the most meticulous quality control procedures, will provide you an effective service For this, we recommend you to carefully read the entire manual of your product before using it and keep it at hand for future references. The user manual will help you use the product in a fast and safe way. Will help you use your appliance in a fast and safe way. Read the manual before installing and operating your product. Follow the instructions, especially those for safety. Keep the manual in an easily accessible place as you may need it later. Besides, read also the other documents provided with your product. Please note that this manual may be valid for other models as well. Symbols and their descriptions This instruction manual contains the following symbols:
Warning against dangerous conditions for life and property.
Warning against electric voltage. Packaging materials of the product are manufactured from recyclable materials in accordance with our National Environment Regulations.3
1. Important instructions for safety and
environment This section contains safety instructions that will help protect from risk of personal injury or property damage. Failure to follow these instructions shall void any warranty.
- This product can be used by children at and above 8 years old and by persons whose physical, sensory or mental capabilities were not fully developed or who lack experience and knowledge provided that they are supervised or trained on the safe usage of the product and the risks it brings out. Children must not play with the product. Cleaning and maintenance works should not be performed by children unless they are supervised by someone.
- Unplug the product if a failure occurs while it is in use.
- If the product has a failure, it should not be operated unless it is repaired by the Authorised Service Agent. There is the risk of electric shock!
- Connect the product to a grounded outlet protected by a fuse complying with the values in the rating plate. Have the grounding installation made by a qualified electrician. Our company shall not be liable for any damages that will arise when the product is used without grounding in accordance with the local regulations.
- Unplug the product when not in use.
- Never wash the product by spreading or pouring water onto it! There is the risk of electric shock!
- Never touch the plug with wet hands! Never unplug by pulling on the cable, always pull out by grabbing the plug.
- It is recommended to clean the tip of the plug regularly with a dry cloth.
- Do not plug the refrigerator if the wall outlet is loose.4
- Never connect your refrigerator to electricity-saving systems. Such systems are harmful for the product.
- Unplug the product during installation, maintenance, cleaning and repairing procedures.
- Always have the installation and repairing procedures carried out by the Authorised Service Agent. Manufacturer shall not be held liable for damages that may arise from procedures carried out by unauthorised persons.
- Do not eat cone ice cream and ice cubes immediately after you take them out of the freezer compartment! This may cause frostbite in your mouth!
- Do not touch frozen food by hand! They may stick to your hand!
- Do not put bottled and canned liquid beverages in the freezer compartment. They may burst!
- Never use steam and steam assisted cleaning materials to clean or defrost the refrigerator. Steam will cause short circuit or electric shock since it would get into contact with the electrical parts in the refrigerator!
- The product shall never be used while the compartment which is located at the top or back of your product and in which electronic boards are available (electronic board box cover) (1) is open.
- Do not use mechanical devices or other methods to accelerate the defrosting process, other than those recommended by the manufacturer.
- Never use the parts on your refrigerator such as the door and drawer as a means of support or step. This will cause the product to tip over or parts of it get damaged.
- Do not damage the cooling circuit, where the refrigerant is circulating, with drilling or cutting tools. The refrigerant that might blow out when the gas channels of the evaporator, pipe extensions or surface coatings are punctured may cause skin irritations and eye injuries.
- Do not cover or block the ventilation holes on the refrigerator with any material.
- Place the beverage with higher proofs tightly closed and vertically.
- Do not use gaseous sprays near the product since there is the risk of fire or explosion!
- Flammable items or products that contain flammable gases (e.g. spray) as well as the explosive materials should never be kept in the appliance.
- Do not place containers filled with liquid on top of the product. Spilling water on an electrical component may cause electric shocks or risk of fire.
- Do not store products (vaccines, heat-sensitive medicines, scientific materials and etc.) that require a precise temperature control in the refrigerator.6
- If you will not operate the product for a long period of time, unplug and unload the food in it.
- If the product is equipped with blue light, do not look at the blue light with optical tools.
- Exposing the product to rain, snow, sun and wind is dangerous with respect to electrical safety.
- In products with mechanical control (thermostat), wait for minimum 5 minutes to plug in the product again after unplugging it.
- Do not overload the product. It may fall when the door is opened, and cause injury or damage. Similar problems may occur in case of putting things on top of the product.
- 8's door is equipped with a handle, do not pull by the handle when changing the place of the product. Handle may get loose.
- Pay attention not to have your hand or any part of your body get caught by the moving parts inside the product.
- If the product is equipped with a cooling system containing R600a gas, pay attention not to damage the cooling system and piping during usage and transportation. This gas is flammable. If the cooling system is damaged, keep the product away from potential sources that can cause the system catch a fire and ventilate the room in which the unit is placed immediately.
If the product is equipped with a cooling system containing R134a gas, ignore this warning.
You can learn the gas used in production of your product on the rating plate located on the left inner part of it.
WARNING: Never dispose the product in fire.7
1.1.2 For products with a water dispenser
- Pressure for cold water inlet shall be maximum 120 psi (8 bar). If your water pressure exceeds 80 psi (5.5 bar), use a pressure limiting valve in your mains system. If you do not know how to check your water pressure, ask for the help of a professional plumber.
- If there is risk of water hammer effect in your installation, always use a water hammer prevention equipment in your installation. Consult Professional plumbers is you are not sure that there is no water hammer effect in your installation.
- Do not install on the hot water inlet. Take precautions against of the risk of freezing of the hoses. Water temperature operating interval shall be 33°F (0.6°C) minimum and 100°F (38°C) maximum.
- Use only potable water.
- This product has been designed for domestic use. It is not suitable for commercial use and it must not be used out of its intended use.
- Product must be used only for storing food.
- The manufacturer waives any responsibility arisen from incorrect usage or transportation.
- The service life of your product is 10 years. During this period, original spare parts will be available to operate the appliance properly.
1.3 Children's safety
- Packaging materials are dangerous for the children. Keep packaging materials in a safe place away from reach of the children.
- Electrical products are dangerous for the children. Keep children away from the product when it is in use.
- If the product's door is equipped with a lock, keep the keys away from reach of children.8
1.4 Compliance with WEEE Directive and
Disposing of the Waste Product: This product complies with EU WEEE Directive (2012/19/EU). This product bears a classification symbol for waste electrical and electronic equipment (WEEE).This product has been manufactured with high quality parts and materials which can be reused and are suitable for recycling. Do not dispose of the waste product with normal domestic and other wastes at the end of its service life. Take it to the collection center for the recycling of electrical and electronic equipment. Please consult your local authorities to learn about these collection centers.
1.5 Compliance with RoHS Directive:
The product you have purchased complies with EU RoHS Directive (2011/65/EU). It does not contain harmful and prohibited materials specified in the Directive.
1.6 Package information
Packaging materials of the product are manufactured from recyclable materials in accordance with our National Environment Regulations. Do not dispose of the packaging materials together with the domestic or other wastes. Take them to the packaging material collection points designated by the local authorities.9
Figures in this user manual are schematic and may not match the product exactly. If the subject parts are not included in the product you have purchased, then those parts are valid for other models.
1. Freezer compartment
2. Cooler compartment
4. Butter-cheese compartment
6. Cooler compartment door
7. Minibar accessory
11. Zero degree compartment
14. Frozen food storing compart-
15. Freezer compartment door
Figures in this user manual are schematic and may not match the product exactly. If the subject parts are not included in the product you have purchased, then those parts are valid for other models.
3.1 Right place for installation
Contact the Authorized Service for the product's installation. To ready the product for installation, see the information in the user guide and make sure the electric and water utilities are as required. If not, call an electrician and plumber to arrange the utilities as necessary.
manufacturer assumes no responsibility for any damage caused by the work carried out by unauthorized persons.
power cable must be unplugged during installation. Failure to do so may result in death or serious injuries!
span is too narrow for the product to pass, remove the door and turn the product sideways; if this does not work, contact the authorized service.
plastic wedges Use the plastic wedges in the provided with the product to provide sufficient space for air circulation between the product and the wall.
1. To attach the wedges, remove
the screws on the product and use the screws provided with the wedges.
2. Attach 2 plastic wedges on the
ventilation cover shown as j in the figure.
3.3 Adjusting the stands
If the product is not in balanced position, adjust the front adjustable stands by rotating right or left.12
- Connect the refrigerator to an earthed socket with 220- 240V/50 Hz voltage. The plug must comprise a 10-16A fuse.
- Do not use multi-group plug with or without extension cable between the wall socket and the refrigerator.
3.5 Water connection
product and the water pump (if available) during connection. The product’s water mains, filter and carboy connections must be rendered by authorizer service. The product can be connected to a carboy or directly to the water mains, depending on the model. To establish the connection, the water hose must first be connected to the product. Check to see the following parts are supplied with your product’s model:
3.4 Power connection
use extension or multi sockets in power connection.
power cable must be replaced by Authorized Service.
When placing two coolers in adjacent position, leave at least 4 cm distance between the two units.
- Our firm will not assume responsibility for any damages due to usage without earthing and power connection in compliance with national regulations.
- The power cable plug must be easily accessible after installation.
1. Connector (1 piece): Used to
attach the water hose to the rear of the product.
2. Hose clip (3 pieces): Used to fix
the water hose on the wall.
3. Water hose (1 piece, 5 meter
diameter 1/4 inches): Used for the water connection.
4. Faucet adapter (1 piece):
Comprises a porous filter, used for connection to the cold water mains.
5. Water filter (1 piece *Optional):
Used to connect the mains water to the product. Water filter is not required if carboy connection is available.
3.6 Connecting water hose
to the product To connect the water hose to the product, follow the instructions below.
1. Remove the connector on the
hose nozzle adaptor in the back of the product and run the hose through the connector.
2. Push the water hose down
tightly and connect to the hose nozzle adaptor.
4. Connect the other end of the
hose to the water mains (See
Section 3.7) or, to use carboy,
to the water pump (See Section 3.8).
3.7 Connecting to water mains
(Optional) To use the product by connecting to the cold water mains, a standard 1/2” valve connector must be installed to the cold water mains in your home. If the connector is not available or if you are unsure, consult a qualified plumber.
3. Tighten the connector manually
to fix on the hose nozzle adaptor. You may also tighten the connector using a pipe wrench or pliers.14
1. Detach the connector (1) from
2. Connect the faucet adaptor to
the water mains valve.
4. Attach the connector into the
faucet adaptor and tighten by hand / tool.
5. To avoid damaging, shifting
or accidentally disconnecting the hose, use the clips provided to fix the water hose appropriately.
WARNING: After turning
the faucet on, make sure there is no water leak on either end of the water hose. In case of leakage, turn the valve off and tighten all connections using a pipe wrench or pliers. 3.8. For products using water carboy (Optional) To use a carboy for the product’s water connection, the water pump recommended by the authorized service must be used.
3. Attach the connector around
1. Connect one end of the water
hose provided with the pump to the product (see 3.6) and follow the instructions below.
2. Connect the other end of the
water hose to the water pump by pushing the hose into the pump’s hose inlet.
3. Place and fasten the pump
hose inside the carboy.
4. Once the connection is
established, plug in and start the water pump.
Please wait 2-3 minutes after starting the pump to achieve the desired efficiency.
See also the pump’s user guide for water connection.
When using carboy, water filter is not required.
(Optional) The product may have internal or external filter, depending on the model. To attach the water filter, follow the instructions below.
3.9.1.Fixing external filter
on the wall (Optional)
WARNING: Do not fix the
filter on the product. Check to see the following parts are supplied with your product’s model:
1. Connector (1 piece): Used to
attach the water hose to the rear of the product.
2. Faucet adapter (1 piece): Used
for connection to the cold water mains.
3. Porous filter (1 piece)
4. Hose clip (3 pieces): Used to fix
the water hose on the wall.
5. Filter connecting apparatus (2
pieces): Used to fix the filter on the wall.
6. Water filter (1 piece): Used
to connect the product to the water mains. Water filter is not necessary when using carboy connection.
1. Connect the faucet adaptor to
the water mains valve.
2. Determine the location to
fix the external filter. Fix the filter’s connecting apparatus (5) on the wall.
3. Attach the filter in upright
position on the filter connecting apparatus, as indicated on the label. (6)
4. Attach the water hose
extending from the top of the filter to the product’s water connection adaptor, (see 3.6.) After the connection is established, it should look like the figure below.17
The internal filter provided with the product is not installed upon delivery; please follow the instructions below to install the filter. Water line: Carboy line:
1. “Ice Off” indicator must be
active while installing the filter. Switch the ON-OFF indicator using the “Ice” button on the screen.
2. Remove the vegetable bin (a) to
access the water filter.18
3. Remove the water filter by-
pass cover by pulling.
A few drops of water may flow out after removing the cover; this is normal.
4. Place the water filter cover into
the mechanism and push to lock in place.
5. Push the “Ice” button on the
screen again to cancel the “Ice Off” mode.
The water filter will clear certain foreign particles in the water. It will not clear the microorganisms in the water.
See section 5.2 for activating the filter replacing period.19
Connecting the product to electric energy saving systems is risky as it may cause damage on the product.
- Do not keep the refrigerator doors open for long periods.
- Do not place hot food or beverages into the refrigerator.
- Do not overfill the refrigerator; blocking the internal air flow will reduce cooling capacity.
- The energy consumption value specified for the refrigerator was measured with the freezer compartment’s upper shelf removed, other shelves and the lowest drawers in place and under maximum load. The top glass shelf can be used, depending on the shape and size of food to be frozen.
- Depending on the product’s features; defrosting frozen foods in the cooler compartment will ensure energy saving and preserve food quality.
- The baskets/drawers that are provided with the chill compartment must always be in use for low energy consumption and for better storage conditions.
- Food contact with the temperature sensor in the freezer compartment may increase energy consumption of the appliance. Thus any contact with the sensor(s) must be avoided.
- Make sure the foods are not in contact with the cooler compartment temperature sensor described below.
Before using your refrigerator, make sure the necessary preparations are made in line with the instructions in “Safety and environment instructions” and “Installation” sections.
- Keep the product running with no food inside for 6 and do not open the door, unless absolutely necessary.
A sound will be heard when the compressor is engaged. It is normal to hear sound even when the compressor is inactive, due to the compressed liquids and gasses in the cooling system.20
It is normal for the front edges of the refrigerator to be warm. These areas are designed to warm up in order to prevent condensation.
In some models, the instrument panel automatically turns off 5 minutes after the door has closed. It will be reactivated when the door has opened or pressed on any key.21
5. Operating the product
Indicator panels may vary depending on the model of your product. Audial and visual functions of the indicator panel will assist in using the refrigerator.
1. Cooler compartment indicator
5. Temperature adjustment but-
6. Compartment selection but-
7. Cooler compartment indicator
Figures in this user manual are schematic and may not match the product exactly. If the subject parts are not included in the product you have purchased, then those parts are valid for other models.22
1. Cooler compartment indicator
The cooler compartment light will turn on when adjusting the cooler compartment temperature.
2. Error status indicator
This sensor will activate if the refrigerator is not cooling adequately or in case of sensor fault. When this indicator is active, the freezer compartment temperature indicator will display "E" and the cooler compartment temperature indicator will display "1, 2, 3..." etc. numbers. The numbers on the indicator serve to inform the service personnel about the fault.
3. Temperature indicator
Indicates the temperature of the freezer and cooler compartments. 4.Vacation function button To activate this function, press and hold the Vacation button for 3 seconds. When the Vacation function is active, the cooler compartment temperature indicator displays the inscription "- -" and no cooling process will be active in the cooling compartment. This function is not suitable to keep food in the cooler compartment. Other compartments will remain cooled with the respective temperature set for each compartment. Push the Vacation button ( ) again to cancel this function.
5. Temperature adjustment button
Respective compartment's temperature varies in -24°C..... -18°C and 8°C...1°C ranges.
6. Compartment selection button
Use the refrigerator compartment selection button to toggle between the cooler and freezer compartments.
7. Cooler compartment indicator
The freezer compartment light will turn on when adjusting the cooler compartment temperature.
8. Economy mode indicator
Indicates the refrigerator is running on energy-saving mode. This indicator will be active when the temperature in the freezer compartment is set to -18°C. 9.Vacation function indicator Indicates the vacation function is active.
2. High temperature / fault alert
5. Cooler compartment tempe-
9. Freezer compartment tempe-
Figures in this user manual are schematic and may not match the product exactly. If the subject parts are not included in the product you have purchased, then those parts are valid for other models.24
This sign will light up when the freezer compartment is set to -18°C', the most economical setting. ( ) Economic use indicator will turn off when rapid cooling or rapid freezing function is selected.
2. High temperature / fault alert
This indicator ( ) will light up in case of temperature faults or fault alerts. If you see this indicator is lit up, please see the "recommended solutions for problems" section in this guide.
When the rapid cooling function is turned on, the rapid cool indicator will light up ( ) and the cooler compartment temperature indicator will display the value
1. Push the Rapid cool button
again to cancel this function. The Rapid cool indicator will turn off and return to normal setting. The rapid cooling function will be automatically cancelled after 1 hour, unless cancelled by the user. Too cool a large amount of fresh food, press the rapid cool button before placing the food in the cooler compartment.
4. Vacation function
To activate the Vacation function, , press the quick fridge button (number 3)for 3 seconds; this will activate the vacation mode indicator ( ). When the Vacation function is active, the cooler compartment temperature indicator displays the inscription "- -" and no cooling process will be active in the cooling compartment. This function is not suitable to keep food in the cooler compartment. Other compartments will remain cooled with the respective temperature set for each compartment. Push the vacation function button again to cancel this function.
5. Cooler compartment tempera-
ture setting After pressing the button number (5), the cooler compartment temperature can be set to 8,7,6,5,4,3,2 and 1 respectively.( )
6. Energy saving (display off)
Pressing this button ( ) will light up the energy-saving sign ( ) and the Energy-saving function will activate. Activating the energy- saving function will turn off all other signs on the display. When the energy-saving function is active, pressing any button or opening the door will deactivate the energy-saving function and the display signals will return to normal. Pressing this button ( ) again will turn off the energy- saving sign and deactivate the energy-saving function.
Press the display off button (number 6), simultaneously for 3 seconds. The keypad lock sign will light up and the keypad lock will be activated; the buttons will be inactive when the Keypad lock is activated. Press the Display off button again simultaneously for 3 seconds. The keypad lock sign will turn off and the keypad lock mode will be disengaged.25
Press the Display off button to prevent changingthe refrigerator’s tempeture settings.
To activate the eco-fuzzy function, press and hold the eco-fuzzy button for 1 second. When this function is active, the freezer will switch to the economic mode after at least 6 hours and the economic use indicator will light up. To deactivate the ( ) eco-fuzzy function, press and hold the eco- fuzzy function button for 3 seconds. The indicator will light up after 6 hours when the eco-fuzzy function is active.
9. Freezer compartment
temperature setting The temperature in the freezer compartment is adjustable. Pressing the button number (9) will enable the freezer compartment temperature to be set at -18,-19, -20, -21, -22, -23 and -24.
For rapid freezing, press the button number (10); this will activate the rapid freezing indicator ( ). When the rapid freezing function is turned on, the rapid freeze indicator will light up and the freezer compartment temperature indicator will display the value -27. Press the Rapid freeze button ( ) again to cancel this function. The Rapid freeze indicator will turn off and return to normal setting. The rapid freezing function will be automatically cancelled after 24 hours, unless cancelled by the user. To freeze a large amount of fresh food, press the rapid freeze button before placing the food in the freezer compartment.26
1. Freezer compartment
4. Cooler compartment
7. Keypad lock / filter replacing
8. Water, fragmented ice, ice
9. Ice making on/off
Figures in this user manual are schematic and may not match the product exactly. If the subject parts are not included in the product you have purchased, then those parts are valid for other models.27
1. Freezer compartment
4. Cooler compartment
7. Keypad lock / filter replacing
8. Water, fragmented ice, ice
9. Ice making on/off
1. Freezer compartment
temperature setting Pressing the button ( ) number (1) will enable the freezer compartment temperature to be set at -18,-19,-20,-21 ,-22,-23,-24,-
Indicates the refrigerator is running on energy-saving mode. This indicator will be active when the freezer compartment temperature is set at -18 or the energy-saving cooling is engaged by eco-extra function. ( )
This sensor will activate if the refrigerator is not cooling adequately or in case of sensor fault. ( ) When this indicator is activated, the freezer compartment temperature indicator will display "E" and the cooler compartment temperature indicator will display "1, 2, 3..." etc. numbers. The numbers on the indicator serve to inform the service personnel about the fault.
4. Cooler compartment
temperature setting After pressing the button ( ) number (4), the cooler compartment temperature can be set to 8,7,6,5,4,3,2.. respectively.
For rapid cooling , press the button number (5); this will activate the rapid cooling indicator ( ). Press this button again to deactivate this function. Use this function when placing fresh foods into the cooler compartment or to rapidly cool the food items. When this function is activated, the refrigerator will be engaged for 1 hour.
6. Vacation function
When the Vacation function ( ) is active, the cooler compartment temperature indicator displays the inscription "- -" and no cooling process will be active in the cooling compartment. This function is not suitable to keep food in the cooler compartment. Other compartments will remain cooled with the respective temperature set for each compartment. Press the vacation function button again to cancel this function. ( )
7. Keypad lock / Keypad lock / filter
replacing alert cancellation Press keypad lock button ( ) to activate the keypad lock. You may also use this function to prevent changing the refrigerator's temperature settings. The refrigerator's filter must be replaced every 6 months. If you follow the instructions in the
section 5.2, the refrigerator
will automatically calculate the remaining period and the filter replacing alert indicator ( ) will light up when filter expires. Press and hold the button ( ) for 3 seconds to turn off the filter alert light.28
8. Water, fragmented ice, ice
cubes selection Navigate the water ( ), ice cube ( ) and fragmented ice ( ) selections using the button number 8. The active indicator will remain lit.
9. Ice making on/off
Press the button ( ) number (9) to cancel ( ) or activate ( ) ice-making.
Press the auto eco button ( ), number (11), for 3 seconds to activate this function. If the door remains closed for a long time when this function is activated, the cooler section will switch to economic mode. Press the button again to deactivate this function. The indicator will light up after 6 hours when the auto eco function is active. ( )
Press the button ( ) number (12) for rapid freezing. Press the button again to deactivate the function. 5.2HomeWhiz User Instructions HomeWhiz is a feature that enables your product to be controlled by smart devices (tablet/phone/tv etc.) over your wireless network. HomeWhiz helps you in selecting the temperature changes of cooling and freezing compartments, the type of ice you want to get, quick cooling, quick freezing, activating vacation and economy modes. Besides controlling your product, you can observe the present condition of the product from any part of your house, and you get a warning over the connecting device in case of any errors on the product. If you wish, you can receive these error states with email as well.
For the HomeWhiz function to be usable, the application must be installed on your smart device and the refrigerator must be connected to your home network. When your refrigerator is not connected to the home network, your product operates like a machine without HomeWhiz function.29
Your product shall run with a connection to the wireless network in your house. The controls made on the application shall be provided over this network, so the wireless signal strength where the machine is located should be adequate.
5.3 Connecting the Product
to Your Home Network and Mobile Device You have to download the application required to use the HomeWhiz function from the application store of your smart device with the name HomeWhiz. You shall be directed on the mobile application regarding the steps for connecting your product to the home network. Initial Setup:
1. After powering up your
refrigerator, the following screen shall be displayed.
2. Pressing the button numbered
1 for a duration of 3 seconds starts the initial identification of the product to the home network.
3. After pressing the button
number 1 for 3 seconds, a 4 digit password is displayed on the product screen.
4. Open the network settings
menu of your smart device and select the Refrigerator AP network. Refrigerator AP network asks for an 8 digit password. The 4 digit password is entered by repeating it twice. (For example: If the shown password is 5216, you should enter 52165216.)
If you have used your smart device with another HomeWhiz product previously, click on the forget the network you are using option.
5. When establishing connection,
the connection symbol shall30 flash as the led over the button numbered 1. When the connection is established, the led over the button numbered 1 shall be constantly on.
6. After connection, you can open
the application and perform the setup as per the application’s instructions.
If you want to use the email feature, you can activate it by entering your email address during application setup. You can deactivate or reactivate the email feature any time you want from the settings menu of your application. Example mail subject: You have a message from your refrigerator. Example mail content: Door open
To be able to use the email feature, your internet service provider must allow access to port number 587. When you have a problem regarding the email feature, contact your internet service provider to ensure the suitability of the related port.
5.4 Homewhiz Turn On/Off
After your refrigerator connects to the home network for the first time, the HomeWhiz feature can be turned on and off by short pressing button number 1, without the need to enter the password again. HomeWhiz state can be controlled through the on/off area right above the button numbered 1.
If connection cannot be established, repeat the initial setup settings over the product.
If you believe you experience any control or connection problem, please perform the steps below. Observe whether the problem persists after the operation. If the problem persists, perform the next operation.
1. Close and reopen the product
2. Turn HomeWhiz off and on over
the product. Reconnect over the application.
3. Repeat the initial setup over the
5.6 Activating water filter
change warning (For products connected to the mains water line and equipped with filter) Water filter change warning is activated as follows:
1. Within 60 seconds after
switching on the refrigerator, press and hold the Display and Vacation buttons for 3 seconds.
2. Then enter 1-4-5-3 as
password. Selecting the Confirming the entered password password numbers
Enter 1-4-5-3 as follows: Press FF set button for once. Press FRZ set button for once. Press FF set button for 4 times. Press FRZ set button for once. Press FF set button for 5 times. Press FRZ set button for once. Press FF set button for 3 times. Press FRZ set button for once. If the password is entered correctly, buzzer will sound shortly and Filter Change Warning indicator will turn on. Automatic filter usage time calculation is not enabled ex factory. It must be enabled in products equipped with a filter. The refrigerator will give filter change warning with 6-month intervals automatically. If the same procedure is repeated when the automatic filter usage time calculation is enabled, then the function will be canceled.32
5.6 Using the water fountain
(for certain models)
The first few glasses of water taken from the fountain will normally be warm.
If the water fountain is not used for a long time, dispose of the first few glasses of water to get clean water. You must wait approximately 12 hours to get cold water after first operating. Use the display to select the water option, then pull the trigger to get water. Remove the glass shortly after pulling the trigger.
5.8 Filling the fountain
water tank Open the water tank’s lid, as shown in the figure. Fill in pure and clean drinking water. Close the lid.33
5.9 Cleaning the water tank
Remove the water filling reservoir inside the door shelf. Detach by holding both sides of the door shelf. Hold both sides of the water tank and remove at 45° angle. Remove and clean the water tank lid.
Do not fill the water tank with fruit juice, fizzy beverages, alcoholic beverages or any other liquids incompatible for use in the water fountain. Using such liquids will cause malfunction and irreparable damage in the water fountain. Using the fountain in this way is not within the scope of warranty. Such certain chemicals and additives in the beverages / liquids may cause material damage to the water tank.
The water tank and water fountain components cannot be washed with dishwashers.34
5.10 Taking ice / water
(Optional) To take water ( ) / ice cube ( ) / fragmented ice ( ), use the display to select the respective option. Take water/ice by pushing the trigger on the water fountain forward. When switching between ice cube ( ) / fragmented ice ( ) options, the previous ice type may be discharged a few more times.
- You must wait approximately 12 hours before taking ice from the ice / water fountain for the first time. The fountain may not discharge ice if there is insufficient ice in the ice box.
- The 30 pieces of ice cubes (3-4 Litres) taken after first operating should not be used.
- In case of power blackout or temporary malfunction, the ice may partly melt and re-freeze. This will cause the ice pieces to merge with each other. In case of extended power blackouts or malfunction, the ice may melt and leak out. If you experience this problem, remove the ice in the ice box and clean the box.
product’s water system should be connected to cold water line only. Do not connect to hot water line.
- The product may not discharge water during first operation. This is caused by the air in the system. The air in the system must be discharged. To do this, push the water fountain trigger for 1-2 minutes until the fountain discharges water. The initial water flow may be irregular. The water will flow normally once the air in the system is discharged.
- The water may be cloudy during first use of the filter; do not consume the first 10 glasses of water.
- You must wait approximately 12 hours to get cold water after first installation.
- The product’s water system is designed for clean water only. Do not use any other beverages.
- It is recommended to disconnect the water supply if the product will not be used for long periods during vacation etc.35
- If the water fountain is not used for a long time, the first 1-2 glasses of water received may be warm.
(optional) The water dripping from the water fountain accumulates on the drip tray; no water drainage is available. Pull the drip tray out or push on the edges to remove the tray. You may then discharge the water inside the drip tray.
5.12 Zero degree compartment
(Optional) Use this compartment to keep delicatessen at lower temperatures or meat products for immediate consumption. Do not place fruits and vegetables in this compartment. You can expand the product's internal volume by removing any of the zero degree compartments. To remove the compartment, simply pull forth, lift up and pull out.
The refrigerator's vegetable bin is designed to keep vegetables fresh by preserving humidity. For this purpose, the overall cold air circulation is intensified in the vegetable bin. Keep fruits and vegetables in this compartment. Keep the green-leaved vegetables and fruits separately to prolong their life.
(Optional) The product's vegetable bins comprise blue light. The vegetables in the bin will continue photosynthesize under the blue light's wavelength effect and remain live and fresh.36
(Optional) The ionizer system in the cooler compartment's air duct serves to ionize the air. The negative ion emissions will eliminate bacteria and other molecules causing odour in the air.
(Optional) The refrigerator's minibar door shelf can be accessed without opening the door. This will allow you to easily take frequently consumed food and beverages from the refrigerator. To open the minibar cover, push with your hand and pull towards yourself.
WARNING: Do not sit,
hang or place heavy objects on the minibar cover. This may damage the product or cause you to be injured. To close this compartment, simply push forward from the upper section of the cover.
(optional) The odour filter in the cooler compartment's air duct will prevent undesirable odour formation.
5.18 Icematic and ice
storage box (Optional) Fill the icematic with water and put in place. The ice will be ready after approximately two hours. Do not remove the icematic to take the ice. Turn the buttons on the ice cham- bers right-hand side by 90°; the ice will fall to the ice storage box be- low. You may then remove the ice storage box and serve the ice.
The ice storage box is intended for storing ice only. Do not fill with water. Doing so will cause it to break.37
(Optional) Ice maker is located on the upper section of the freezer cover. Hold the handles on the sides of the ice stock reservoir and move up to remove. Remove the ice-maker decorative lid by moving up. OPERATION To remove the ice reservoir Hold the ice stock reservoir from the handles, then move up and pull the ice stock reservoir. (Figure 1) To reinstall the ice reservoir Hold the ice stock reservoir from the handles, move up with an angle to fit the sides of the reservoir to their slot and make sure that the ice selector pin is mounted properly. (Figure 2) Push downwards firmly, until there is no space left between the reservoir and the door plastic. (Figure 2)
If you have difficulty in refitting the reservoir, turn the rotary gear 90° and reinstall it as shown in the figure3. Any sound you hear when the ice drops into the reservoir is a part of normal operation. When the ice dispenser does not work properly If you do not remove ice cubes for a long time, they will cause formation of ice chunks. In this case, please remove the ice stock reservoir in accordance with the instructions given above, seperate the ice chunks, discard the inseparable ice and put the ice cubes back into the ice stock reservoir. (Figure 4)
When ice does not come out, check for any ice stuck in the canal and remove it. Regularly check the ice canal to clear the obstacles as shown in the figure 5.
When using your refrigerator for the first time or when not using it for an extended period of time Ice cubes may be small due to air in the pipe after connection, any air will be purged during normal use. Discard the ice produced for approximately one day since the water pipe may contain the contaminants. Caution! Do not insert the hand or any other object into the ice canal and blade since it may damage the parts or hurt the hand. Do not let the children hang on the ice dispenser or the ice maker since it may cause an injury To prevent dropping the ice stock reservoir use both hands when removing it. If you close the door hard, it may cause water spilling over the ice stock reservoir. Do not dismount the ice stock reservoir unless it is necessary.39
5.20 Freezing fresh food
- To preserve food quality, the food items placed in the freezer compartment must be frozen as quickly as possible, use the rapid freezing for this.
- Freezing the food items when fresh will extend the storage time in the freezer compartment.
- Pack the food items in air-tight packs and seal tightly.
- Make sure the food items are packed before putting in the freezer. Use freezer holders, tinfoil and damp-proof paper, plastic bag or similar packaging materials instead of traditional packaging paper.
- Mark each food pack by writing the date on the package before freezing. This will allow you to determine the freshness of each pack every time the freezer is opened. Keep the earlier food items in the front to ensure they are used first.
- Frozen food items must be used immediately after defrosting and should not be frozen again.
- Do not free large quantities of food at once.
5.21 Deep freezer details
As per the IEC 62552 standards, the freezer must have the capacity to freeze 4,5 kg of food items at -18°C or lower temperatures in 24 hours for each 100 litres of freezer compartment volume. Food items can only be preserved for extended periods at or below temperature of -18°C . You can keep the foods fresh for months (in deep freezer at or below temperatures of 18°C ). The food items to be frozen must not contact the already-frozen food inside to avoid partial defrosting. Boil the vegetables and filter the water to extend the frozen storage time. Place the food in air-tight packages after filtering and place in the freezer. Bananas, tomatoes, lettuce, celery, boiled eggs, potatoes and similar food items should not be frozen. Freezing these food items will simply reduce the nutritional value and food quality, as well as possible spoiling which is harmful to health.40 Freezer Compartment Setting Cooler Compartment Setting Descriptions -18°C 4°C This is the default, recommended setting. -20,-22 veya -24°C 4°C These settings are recommended for ambient temperatures exceeding 30°C. Rapid Freeze 4°C Use this to freeze food items in a short time, the product will reset to previous settings when the process is completed. -18°C or colder 2°C Use these settings if you believe the cooler compartment is not cold enough due to ambient temperature or frequently opening the door.
5.22 Placing the food
Freezer compartment shelves Various frozen goods including meat, fish, ice cream, vegetables etc. Cooler compartment shelves Food items inside pots, capped plate and capped cases, eggs (in capped case) Cooler compartment door shelves Small and packed food or beverages Vegetable bin Fruits and vegetables Fresh food compartment Delicatessen (breakfast food, meat products to be consumed in short notice)41
(Optional) An audible alert will be heard if the product's door remains open for 1 minute. The audible alert will stop when the door is closed or any button on the display (if available) is pressed.
Interior light uses a LED type lamp. Contact the authorized service for any problems with this lamp. The lamp(s) used in this appliance is not suitable for household room illumination. The intended purpose of this lamp is to assist the user to place foodstuffs in the refrigerator/ freezer in a safe and comfortable way.42
and cleaning Service life of the product extends and frequently faced problems decrease if cleaned at regular intervals.
product before cleaning it.
- Never use gasoline, benzene or similar substances for cleaning purposes.
- Never use any sharp and abrasive tools, soap, household cleaners, detergent and wax polish for cleaning.
- Dissolve one teaspoon of carbonate in half litre of water. Soak a cloth with the solution and wrung it thoroughly. Wipe the interior of the refrigerator with this cloth and the dry thoroughly.
- Make sure that no water enters the lamp housing and other electrical items.
- If you will not use the refrigerator for a long period of time, unplug it, remove all food inside, clean it and leave the door ajar.
- Check regularly that the door gaskets are clean. If not, clean them.
- To remove door and body shelves, remove all of its contents.
- Remove the door shelves by pulling them up. After cleaning, slide them from top to bottom to install.
- Never use cleaning agents or water that contain chlorine to clean the outer surfaces and chromium coated parts of the product. Chlorine causes corrosion on such metal surfaces
6.1 Avoiding bad odours
Materials that may cause odour are not used in the production of our refrigerators. However, due to inappropriate food preserving conditions and not cleaning the inner surface of the refrigerator as required can bring forth the problem of odour. Pay attention to following to avoid this problem:
- Keeping the refrigerator clean is important. Food residuals, stains, etc. can cause odour. Therefore, clean the refrigerator with carbonate dissolved in water every 15 days. Never use detergents or soap.
- Keep the food in closed containers. Microorganisms spreading out from uncovered containers can cause unpleasant odours.
- Never keep the food that have expired best before dates and spoiled in the refrigerator.
plastic surfaces Do not put liquid oils or oil- cooked meals in your refrigerator in unsealed containers as they damage the plastic surfaces of the refrigerator. If oil is spilled or smeared onto the plastic surfaces, clean and rinse the relevant part of the surface at once with warm water.43
Please review this list before calling the service. It will save your time and money. This list includes frequent complaints that are not arising from defective workmanship or material usage. Some of the features described here may not exist in your product. The refrigerator does not operate.
- The plug is not inserted into the socket correctly. >>> Insert the plug into the socket securely.
- The fuse of the socket which your refrigerator is connected to or the main fuse have blown out. >>> Check the fuse. Condensation on the side wall of the fridge compartment (MULTIZONE, COOL CONTROL and FLEXI ZONE).
- Ambient is very cold. >>> Do not install the refrigerator in places where the temperature falls below 10 °C.
- Door has been opened frequently. >>> Do not open and close the door of refrigerator frequently.
- Ambient is very humid. >>> Do not install your refrigerator into highly humid places.
- Food containing liquid is stored in open containers. >>> Store food with liquid content in closed containers.
- Door of the refrigerator is left ajar. >>> Do not leave the doors of your refrigerator open for a long time.
- Thermostat is set to a very cold level. >>> Set the thermostat to a suitable level. Compressor is not running
- Protective thermic of the compressor will blow out during sudden power failures or plug-out plug-ins as the refrigerant pressure in the cooling system of the refrigerator has not been balanced yet. The refrigerator will start running approximately after 6 minutes. Please call the Authorised Service Agent if the refrigerator does not start at the end of this period.
- The fridge is in defrost cycle. >>> This is normal for a full- automatically defrosting refrigerator. Defrosting cycle occurs periodically.
- The refrigerator is not plugged into the socket. >>> Make sure that the plug is fit into the socket.
- Temperature settings are not made correctly. >>> Select the suitable temperature value.
- There is a power outage. >>> Refrigerator returns to normal operation when the power restores.44 The operation noise increases when the refrigerator is running.
- The operating performance of the refrigerator may change due to the changes in the ambient temperature. It is normal and not a fault. The refrigerator is running frequently or for a long time.
- New product may be wider than the previous one. Larger refrigerators operate for a longer period of time.
- The room temperature may be high. >>> It is normal that the product operates for longer periods in hot ambient.
- The refrigerator might be plugged in recently or might be loaded with food. >>> When the refrigerator is plugged in or loaded with food recently, it will take longer for it to attain the set temperature. This is normal.
- Large amounts of hot food might be put in the refrigerator recently. >>> Do not put hot food into the refrigerator.
- Doors might be opened frequently or left ajar for a long time. >>> The warm air that has entered into the refrigerator causes the refrigerator to run for longer periods. Do not open the doors frequently.
- Freezer or fridge compartment door might be left ajar. >>> Check if the doors are closed completely.
- The refrigerator is adjusted to a very low temperature. >>> Adjust the refrigerator temperature to a warmer degree and wait until the temperature is achieved.
- Door seal of the fridge or freezer may be soiled, worn out, broken or not properly seated. >>> Clean or replace the seal. Damaged/broken seal causes the refrigerator to run for a longer period of time in order to maintain the current temperature. Freezer temperature is very low while the fridge temperature is sufficient.
- The freezer temperature is adjusted to a very low value. >>> Adjust the freezer temperature to a warmer degree and check. Fridge temperature is very low while the freezer temperature is sufficient.
- The fridge temperature is adjusted to a very low value. >>> Adjust the fridge temperature to a warmer degree and check. Food kept in the fridge compartment drawers is frozen.
- The fridge temperature is adjusted to a very high value. >>> Adjust the fridge temperature to a lower value and check.45
Temperature in the fridge or freezer is very high.
- The fridge temperature is adjusted to a very high value. >>> Fridge compartment temperature setting has an effect on the temperature of the freezer. Change the temperatures of the fridge or freezer and wait until the relevant compartments attain a sufficient temperature.
- Doors are opened frequently or left ajar for a long time. >>> Do not open the doors frequently.
- Door is ajar. >>> Close the door completely.
- The refrigerator is plugged in or loaded with food recently. >>> This is normal. When the refrigerator is plugged in or loaded with food recently, it will take longer for it to attain the set temperature.
- Large amounts of hot food might be put in the refrigerator recently. >>> Do not put hot food into the refrigerator. Vibrations or noise.
- The floor is not level or stable. >>> If the refrigerator rocks when moved slowly, balance it by adjusting its feet. Also make sure that the floor is strong enough to carry the refrigerator, and level.
- The items put onto the refrigerator may cause noise. >>> Remove the items on top of the refrigerator. There are noises coming from the refrigerator like liquid flowing, spraying, etc.
- Liquid and gas flows occur in accordance with the operating principles of your refrigerator. >>>It is normal and not a fault. Whistle comes from the refrigerator.
- Fans are used in order to cool the refrigerator. It is normal and not a fault. Condensation on the inner walls of refrigerator.
- Hot and humid weather increases icing and condensation. It is normal and not a fault.
- Doors are opened frequently or left ajar for a long time. >>> Do not open the doors frequently. Close them if they are open.
- Door is ajar. >>> Close the door completely. Humidity occurs on the outside of the refrigerator or between the doors.
- There might be humidity in the air; this is quite normal in humid weather. >>> When the humidity is less, condensation will disappear.
- If moisture forms in the area between the two refrigerator doors, disable the “Energy Saving” mode.46 Bad odour inside the refrigerator.
- No regular cleaning is performed. >>> Clean the inside of the refrigerator regularly with a sponge, lukewarm water or carbonate dissolved in water.
- Some containers or package materials may cause the smell. >>> Use a different container or different brand packaging material.
- Food is put into the refrigerator in uncovered containers. >>> Keep the food in closed containers. Microorganisms spreading out from uncovered containers can cause unpleasant odours.
- Remove the foods that have expired best before dates and spoiled from the refrigerator. The door is not closing.
- Food packages are preventing the door from closing. >>> Replace the packages that are obstructing the door.
- The refrigerator is not completely even on the floor. >>> Adjust the feet to balance the refrigerator.
- The floor is not level or strong. >>> Also make sure that the floor is level and strong enough to carry the refrigerator. Crispers are stuck.
- The food is touching the ceiling of the drawer. >>> Rearrange food in the drawer.
WARNING: If you cannot eliminate the problem although you
follow the instructions in this section, consult your dealer or the Authorised Service Agent. Never try to repair a non-functional product yourself.1
5. For at undgå at beskadige,
For energy efficiency, it is recommmended to remove top shelf and load food on the shelf below.Net volume of your appliance is declared without top two flaps and the top shelf in place.Place two ice pack ( if provided ) directly on the top of frozen food to be stored on top shelf.
A sound will be heard when the compressor is engaged. It is normal to hear sound even when the compressor is inactive, due to the compressed liquids and gasses in the cooling system.
It is normal for the front edges of the refrigerator to be warm. These areas are designed to warm up in order to prevent condensation.