
X09281MDX - Refrigerator AEG - Free user manual and instructions
Find the device manual for free X09281MDX AEG in PDF.



| Product Type | Extractor Hood |
| Brand | AEG |
| Model | X09281MDX |
| Power Supply | 220-240 V, 50/60 Hz |
| Number of Speeds | 4 (including 2 timed) |
| Lighting | LED (long life, energy-efficient) |
| Grease Filter | Washable (dishwasher safe) |
| Charcoal Filter | Non-washable, replace every 4 months |
| Hob²hood Function | Yes, wireless connection with hob |
| Breeze Function | Yes, ambient ventilation at low speed |
| Control | Touch control with display and saturation indicators |
| Minimum Installation Distance | 50 cm (electric) / 65 cm (gas or mixed) |
| Maintenance | Monthly cleaning, regular charcoal filter replacement |
| Safety | Temperature alarm, automatic shutdown of high speeds |
| Repairability | Original spare parts available, AEG after-sales service |
Frequently Asked Questions - X09281MDX AEG
User questions about X09281MDX AEG
0 question about this device. Answer the ones you know or ask your own.
Ask a new question about this device
Download the instructions for your Refrigerator in PDF format for free! Find your manual X09281MDX - AEG and take your electronic device back in hand. On this page are published all the documents necessary for the use of your device. X09281MDX by AEG.
USER MANUAL X09281MDX AEG
FOR PERFECT RESULTS
Thank you for choosing this AEG product. We have created it to give you impeccable performance for many years, with innovative technologies that help make life simpler – features you might not find on ordinary appliances. Please spend a few minutes reading to get the very best from it.
Visit our website to:

Get usage advice, brochures, trouble shooter, service information: www.aeg.com

Register your product for better service: www.aeg.com/productregistration

Buy Accessories, Consumables and Original spare parts for your appliance: www.aeg.com/shop
ENVIRONMENT CONCERNS
Recycle the materials with the symbol. Put the packaging in applicable containers to recycle it. Help protect the environment and human health and to recycle waste of electrical and electronic appliances. Do not dispose appliances marked with the symbol with the household waste. Return the product to your local recycling facility or contact your municipal office department for household waste or the shop where you purchased this product.
CUSTOMER CARE AND SERVICE
We recommend the use of original spare parts.
When contacting Service, ensure that you have the following data available.
The information can be found on the rating plate. Model, PNC, Serial Number.

Warning / Caution-Safety information.

General information and tips

Environmental information.
Subject to change without notice.
SAFETY INSTRUCTIONS
Caution! Closely follow the instructions set out in this manual. All responsibility, for any eventual inconveniences, damages or fires caused by not complying with the instructions in this manual, is declined. The extractor hood has been designed exclusively for domestic use.
Caution! Do not connect the appliance to the mains until the installation is fully complete. Before any cleaning or maintenance operation, disconnect hood from the mains by removing the plug or disconnecting the mains electrical supply.
Always wear work gloves during the maintenance, installation and lighting operations. The appliance is not intended for use by children or persons with impaired physical, sensorial or mental faculties, or if lacking in experience or knowledge, unless they are under supervision or have been trained in the use of the appliance by a person responsible for their safety. This appliance is designed to be operated by adults, children should be monitored to ensure that they do not play with the appliance. This appliance is designed to be operated by adults. Children should not be allowed to tamper with the controls or play with the appliance. Never use the hood without effectively mounted grating! The hood must NEVER be used as a support surface unless specifically indicated. The premises where the appliance is stalled must be sufficiently ventilated, when the kitchen hood is used together with other gas combustion devices or other fuels. The ducting system for this appliance must not be connected to any existing ventilation system which is being used for any other purpose such as discharging exhaust fumes from appliances burning gas or other fuels. The flaming of foods beneath the hood itself is severely prohibited. The use of exposed flames is detrimental to the filters and may cause a fire risk, and must therefore be avoided in all circumstances. Any frying must be done with care in order to make sure that the oil does not overheat and ignite.
Caution! Accessible parts of the hood may become hot when used with cooking appliance.
With regards to the technical and safety measures to be adopted for fume discharging it is important to closely follow the regulations provided by the local authorities. The hood must be regularly cleaned on both the inside and outside (AT LEAST ONCE A MONTH).
This must be completed in accordance with the maintenance instructions provided in this manual). Failure to follow the instructions provided in this user guide regarding the cleaning of the hood and filters will lead to the risk of fires. Do not use or leave the hood without the lamp correctly mounted due to the possible risk of electric shocks. We will not accept any responsibility for any faults, damage or fires caused to the appliance as a result of the non-observation of the instructions included in this manual.
Warning! Failure to install the screws or fixing device in accordance with these instructions may result in electrical hazards.
2. USE
The hood serves to aspirate the fumes and vapors resulting from cooking. The attached installation manual indicates the version to be used depending on the model you have, the suction version with
external evacuation or filtering with internal recirculation
3. INSTALLATION
The mains power supply must correspond to the rating indicated on the plate situated inside the hood. If provided with a plug, connect the hood to a socket in compliance with current regulations and positioned in an accessible area, after installation. If it is not fitted with a plug (direct mains connection) or if the plug is not located in an accessible area, after installation, apply a double pole switch in accordance with standards which assures the complete disconnection of the mains under conditions relating to over-current category III in accordance with installation instructions.
Warning! Before re-connecting the hood circuit to the mains supply and checking the efficient function, always check that the mains cable is correctly assembled.
The minimum distance between the supporting surface for the cooking equipment on the hob and the lowest part of the range hood must be not less than 50 cm from electric cookers and 65 cm from gas or mixed cookers. If the instructions for installation for the gas hob specify a greater distance, this must be adhered to.
4. MAINTENANCE
ATTENTION! Before performing any maintenance operation, isolate the hood from the electrical supply by switching off at the connector and removing the connector fuse.
Or if the appliance has been connected through a plug and socket, then the plug must be removed from the socket.
The cooker hood should be cleaned regularly (at least with the same frequency with which you carry out maintenance of the fat filters) internally and externally. Clean using a cloth dampened with neutral liquid detergent. Do not use abrasive products. DO NOT USE ALCOHOL!
Warning! Failure to carry out the basic cleaning recommendations of the cooker hood and replacement of the filters may cause fire risks. Therefore, we recommend observing these instructions.
The manufacturer declines all responsibility for any damage to the motor or any fire damage linked to inappropriate maintenance or failure to observe the above safety recommendations.
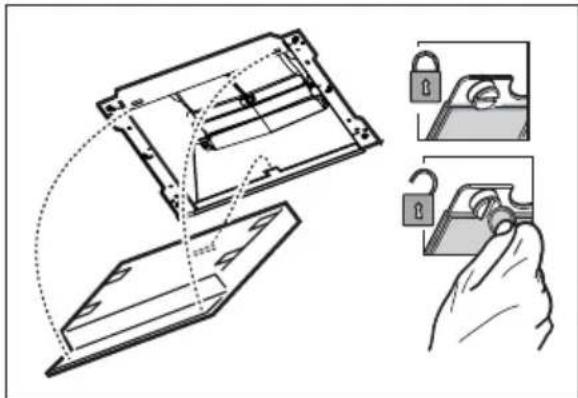
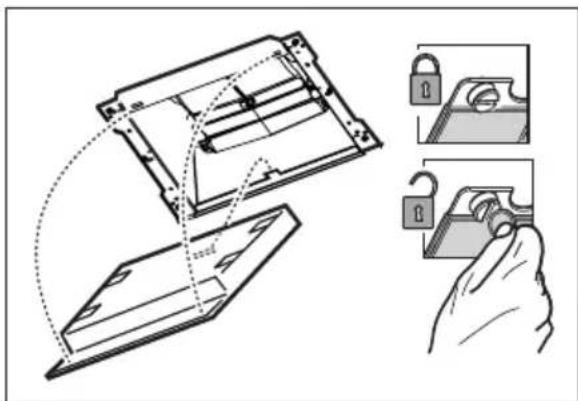
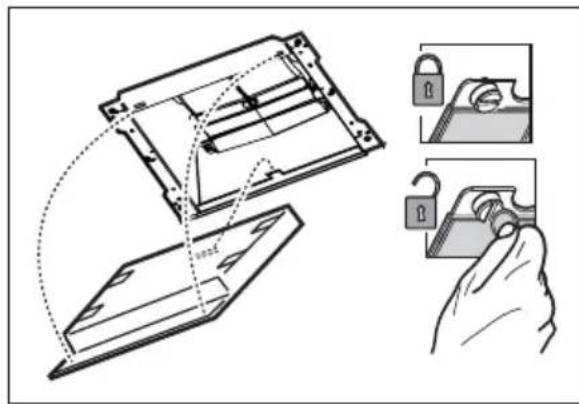
4.1 Grease filter - The grease filter must be cleaned once a month using non aggressive detergents, either by hand or in the dishwasher, which must be set to a low temperature and a short cycle. When washed in a dishwasher, the grease filter may discolour slightly, but this does not affect its filtering capacity.
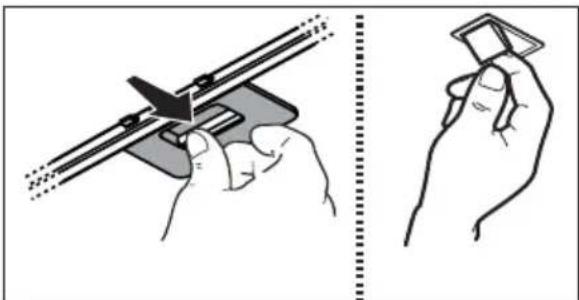
4.2 Non-washable activated charcoal filter - The saturation of the charcoal filter occurs after more or less prolonged use, depending on the type of cooking and the regularity of cleaning of the grease filter. In any case, it is necessary to replace the cartridge at least every four months. The charcoal filter may NOT be washed or regenerated.
5. CONTROLS
The hood is fitted with a control panel with aspiration speed selection control and a light switch to control cooking area lights. Use the high suction speed in cases of concentrated kitchen vapours. It is recommended that the cooker hood suction is switched on for 5 minutes prior to cooking and to leave in operation during cooking and for another 15 minutes approximately after terminating cooking.
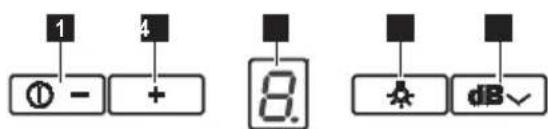
The control switches are located on the unit's front panel:
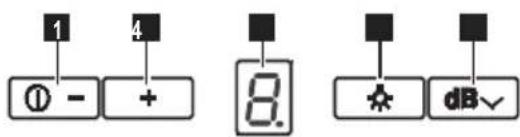
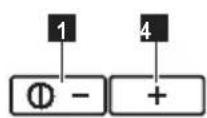
1 Suction speed (power) ON-OFF/ decrease key
2 Suction speed (power) 1 - 2 - 3 - 4 Increase key. Suction speeds (powers) 3 and 4 have a limited duration, respectively 10 and 5 minutes, after which suction speed (power) 2 is activated.
Note: The LED on the display flashes indicating speed timing.
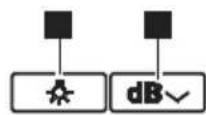
3 Lighting ON/OFF key
4 "Breeze" function key (Environment ventilation)
The hood switches on at low suction speed (power) for about one hour and then switches off.
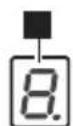
5 Display
Filter saturation indicator
At regular intervals, the hood warns when the filters must be serviced.
Grease filter saturation indicator
The set speed and the letter "F" alternate on the display.
Carbon filter saturation indicator
The set speed and the letter "C" alternate on the display.
Reset of saturation indicator
In order to reset the saturation indicator, switch on the hood then press and hold button 1 for about 3 seconds.
Perform filter maintenance as recommended in this manual.
In the event that both indicators of filter saturation "F" and "C" start flashing, proceed with the reset twice.
The saturation indicator of the charcoal filter is not normally active and if the hood is used in the recirculation mode, it must be activated manually the first time.
Activation of the charcoal filter saturation indicator:
Turn off the hood and simultaneously press buttons 2 and 3 for 3 seconds.
The letters "F" and "C" will flash on the display for 2 seconds, to indicate successful activation of the saturation indicator of the charcoal filter.
Deactivation of the charcoal filter saturation indicator:
Turn off the hood and simultaneously press the buttons 2 and 3 for 3 seconds. Only letter "F" will flash on the display for 2 seconds, to indicate successful deactivation of the saturation indicator of the charcoal filter.
Temperature Alarm
The hood is equipped with a temperature sensor which activates the motor at speed 3 in case the temperature in the display zone is too high.
The alarm condition is indicated by the display with the letter "t" flashing.
This condition remains as such until the temperature falls below the alarm threshold.
This mode can be quit by pressing key "2".
Every 30" the sensor checks the temperature of the display zone.
5.1 Hob²Hood
The hood is equipped with a function for wireless connection with the cooktop for automatic adjustment of the most suitable speed. Refer to the instruction manual of the cooktop to verify the presence and compatibility of this function.
In the case of first connection to the mains or abrupt disconnection from power supply (blackout), wait 1 minute to allow the hood to restore the connection with the cooktop.
6. LIGHTING
The hood is equipped with a lighting system based on LED technology.
The LEDs guarantee an optimum lighting, a duration up to 10 times as long as the traditional lamps and allow to save 90% electrical energy.

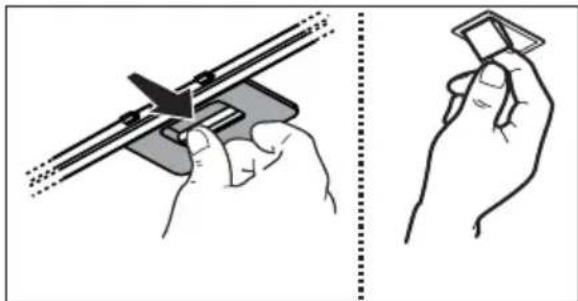
Caution! Do not look directly into the LED light.
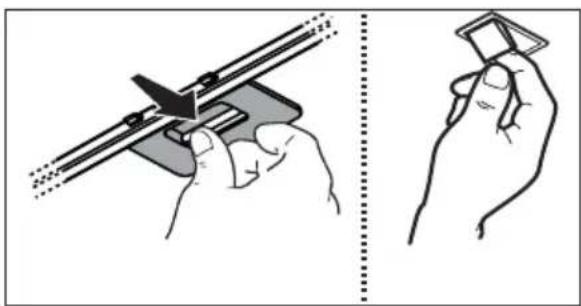
To replace lights, contact authorised spare part center.



www.aeg.com/productregistration

Here you can:

Find recommendations for using the product, operating instructions, troubleshooting, and service information:
www.aeg.com

Register your product for better service: www.aeg.com/productregistration

Purchase accessories, consumables, and original spare parts for your appliance: www.aeg.com/shop
ENVIRONMENT PROTECTION
Materials with the symbol should be recycled. Dispose of the packaging in the appropriate containers for recycling.
1! SAFETY INSTRUCTIONS
Warning! The manufacturer is not responsible for any damage or fire caused by improper use of the appliance due to failure to follow the instructions in this manual. The hood is intended exclusively for domestic use.
Warning! Do not connect the appliance to the electrical supply until installation is fully completed. Before performing any cleaning or maintenance, disconnect the hood from the power supply by removing the plug or switching off the main switch.
Always wear gloves during maintenance, installation, or connection of the lighting. Children or adults should not use the hood if they are physically or mentally incapable, or if they lack the knowledge and experience required for safe and correct operation. Do not leave children unattended to ensure they do not play with the appliance. Do not use the hood if the grille is not correctly installed. It is strictly forbidden to use the hood as a support surface unless specifically stated. Ensure proper ventilation of the room when using the hood in the kitchen simultaneously with other appliances that use gas or other fuels. The extracted air must not be discharged through a duct used for exhausting fumes from appliances burning gas or other fuels.
It is strictly forbidden to cook with an open flame, as the free flame could damage the filters and become a fire hazard; therefore, refrain from doing so in any case. Frying in large quantities of oil must be done under constant supervision, keeping in mind that overheated oil can ignite.
Warning! When used together with other cooking appliances, the exposed parts of the appliance may become very hot.
Regarding technical measures and safety conditions for the discharge
IMPORTANT: The installation must be carried out strictly in accordance with the requirements of local competent authorities. Perform periodic cleaning of the hood both inside and outside (at least once a month, following the conditions specifically provided in the maintenance instructions for this appliance). Failure to follow the instructions for cleaning the hood and replacing the filters may cause a fire. Do not use or leave the hood without correctly installed lamps due to the possible risk of electric shock. We disclaim all liability for malfunctions, damage, or fire of the appliance resulting from failure to follow the instructions provided in this manual.
Warning! The absence of installation of screws and fastening devices in accordance with these instructions may lead to a risk of electrical hazard.
2. USE
The hood is used for suction of smoke and vapors produced during cooking.
The accompanying instructions indicate in which configuration you can use your
model: as an exhaust hood (air discharged outside) or as a recirculation hood (air recirculated internally).
3. INSTALLATION
The voltage must correspond to the voltage indicated on the technical data plate, which is located inside the appliance. If the hood is equipped with a plug, connect the hood to a socket that complies with current regulations and must be accessible in an easily reachable place, which can also be done after installation. If the hood is not equipped with a plug (direct connection to the mains), or if the socket is not located in an accessible place, also after installation, use an approved two-pole switch that ensures complete disconnection from the mains under overvoltage category III conditions, in accordance with installation instructions.
Warning! Before connecting to the power supply, check the electrical system of the hood for proper functioning and make sure that the power cable is correctly installed.
The distance between the lower edge of the hood and the hob surface must be at least 50 cm for electric hobs, and at least 65 cm for gas or combined hobs. If the installation instructions for the gas hob specify a greater distance, take that into account.
4. MAINTENANCE
Warning! Before performing any cleaning or maintenance operation, disconnect the hood from the electrical supply by unplugging it or switching off the main switch of the premises.
The hood must be cleaned frequently both inside and outside (at least with the same frequency as the maintenance of the grease filters). For cleaning, use a special cloth dampened with neutral liquid detergent. Do not use abrasive materials. DO NOT USE ALCOHOL!
Warning! Failure to follow the cleaning instructions for the appliance and filter replacement may lead to a risk of fire. Therefore, we recommend following the instructions provided.
The manufacturer shall not be liable for any damage to the engine or for any fires resulting from improper maintenance or failure to follow the instructions provided.
4.1 Grease filter - The grease filter must be protected from aggressive cleaning agents, both inside and outside the dishwasher. When washing in the dishwasher, some discoloration of the grease filter may occur, but its filtering characteristics remain completely unchanged.
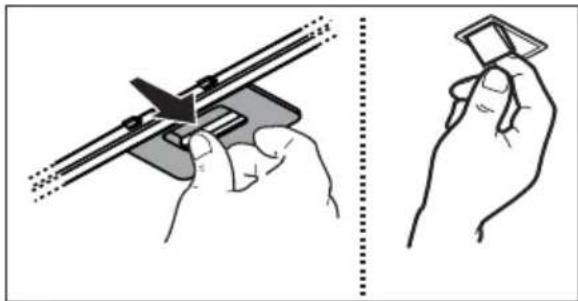
4.2 Charcoal filter
Saturation of the charcoal filter occurs after a more or less long period of use, determined by the type of cooking and the frequency of grease filtering. In any case, replace the cartridge at least every 4 months. The charcoal filter cannot be washed or regenerated.
5. CONTROL PANEL
The hood is equipped with a control panel for adjusting the fan speed and for switching on the light to illuminate the cooking surface.
Use the intensive mode of the hood in case of particularly high concentration of cooking vapors.
We recommend switching on the hood 5 minutes before starting to cook and leaving it on for 15 minutes after the process is finished.
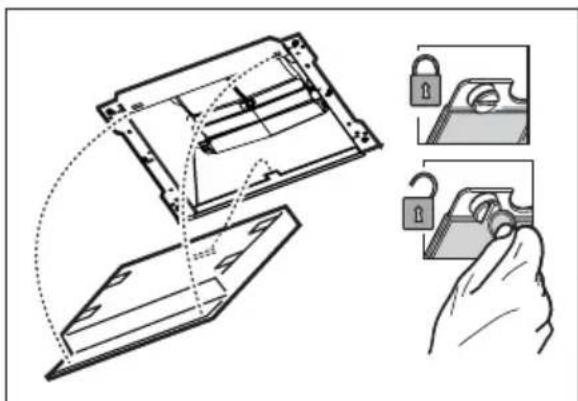
The control buttons are located on the front panel of the unit:
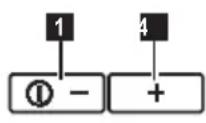

1 Button ON/OFF/decrease speed (power) of suction 2 Button increase speed (power) of suction 1-2-3-4.
Speeds (powers) of suction 3 and 4 have a limited duration, respectively 10 and 5 minutes, after which the speed (power) of suction 2 is activated.
Note. The light on the display indicates the programming of the speed over time.
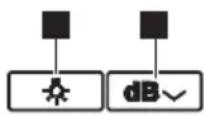
3 Button ON/OFF light 4 Button "Breeze" function (ventilation of the room) The hood turns on at low speed (power) of suction for about one hour, after which it turns off. 5 Display
Filter saturation indicator
At regular working intervals, the hood warns when it is necessary to perform maintenance of the filters.
The display will show the set speed and the letter "F".
Coal filter saturation indicator
The display will show the set speed and the letter "C".
Reset saturation alarm
Register your product for better service: www.aeg.com/productregistration

To ensure safe operation, it is necessary to follow the regulations set by local authorities.
Maintenance must be carried out regularly, both internally and externally (at least once a month). In any case, follow all instructions described in the manual.
Failure to follow the maintenance norms and replacement of filters may pose a fire risk.
Do not use or leave without properly installed lamps due to the risk of electric shock. We are not responsible for any damage or injuries caused by improper use or failure to follow the instructions in this manual.
!Warning! The absence of installed filters and fixing parts in accordance with these instructions may lead to the risk of electric shock.
2. USE
The hood is intended for domestic use to extract fumes and vapors produced during cooking.
In the instructions that follow, you can use the
model - with external evacuation or with internal recirculation.
3. INSTALLATION
The plug must be connected to the electrical mains and must match the specified characteristics and the socket located inside the hood. If the plug is not included in the delivery set, connect the plug to the socket, which complies with the applicable standards and is located in an accessible place, which can be done after installation. If the plug is not included in the delivery set (direct connection to the electrical mains) or the socket is not in an accessible place, also after installation, you should install a reliable two-pole switch that ensures complete disconnection from the mains under conditions of overvoltage category I and in full compliance with the installation rules.
!Warning! Before reconnecting the hood to the electrical mains, check the correct operation, making sure that the mains switch is installed correctly.
The distance between the lower part of the hood and the hob must be at least 50 cm for electric hobs, and 65 cm for gas or combination hobs.
It is necessary to take into account the distances indicated in the installation instructions for the gas hob.
4. MAINTENANCE
!Warning! Before any operation on the system for maintenance, disconnect the hood from the electrical mains, by removing the plug or switching off the main switch.
The hood is designed to clean the air inside the kitchen (also periodically through the filters for recirculation). For cleaning, use a special cloth, moistened with a neutral liquid detergent. Do not use products that contain abrasive materials.
DO NOT USE ALCOHOL!
!Warning! Failure to follow the instructions for cleaning and maintenance may lead to a risk of fire. Therefore, we recommend following the instructions provided.
The manufacturer declines all responsibility for any damage or malfunctions that may arise as a result of incorrect repair or failure to follow the above warnings.
4.1 Grease filters
They must be cleaned once a month with non-abrasive detergents, by hand or in the dishwasher at low temperature and with a short cycle. When washing metal grease filters in the dishwasher, they may lose their shine, but their filtering characteristics do not change.
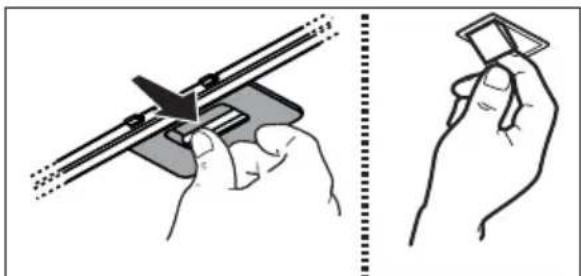
4.2 Charcoal filter, not washable
The service life of the filter element depends on the type of filters and the regularity of cleaning the air filter. In any case, it is necessary to replace the cartridge at least once every six months. This does not require special skills.
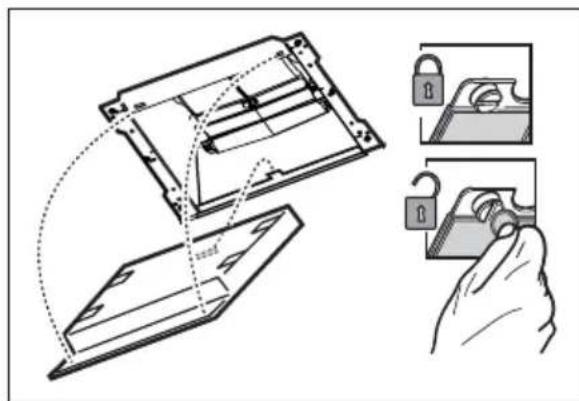
5. CONTROL ELEMENTS
The unit is equipped with a control panel for adjusting the suction power and controlling the light for illuminating the working surface.
Use intensive suction power in case of especially high concentration of dust particles. We recommend turning on the unit 5 minutes before starting to cook and leaving it on for 15 minutes after finishing cooking.
The control panel is located on the front panel of the device:
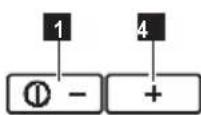
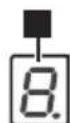
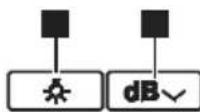
1 Button ON/OFF/Decrease suction power (power)
2 Button Increase suction power (power) 1 -2-3. -4.
The suction power (power) is set to the selected duration of operation, up to 15 minutes respectively, after which the suction power (power) is reduced to 2.
Note: The light indicator on the display will blink, indicating synchronization of the suction power.
3 ON/OFF lighting 4 Functional button "BREEZE" (intermittent ventilation) The unit turns on at low suction power (power) for approximately one hour, after which it turns off. 5 Display
Filter saturation indicator
After certain intervals, the unit warns when it is necessary to perform technical maintenance of the filters.
Water filter saturation indicator
On the display, the number 1 and the letter "F" will alternately appear.
Carbon filter saturation indicator
The device alternately displays the value and the letter "C".
Activating the saturation alarm
To activate the saturation alarm, press and hold button 1 for 3 seconds. The filter maintenance procedure is described in this manual. The saturation alarm indicators "F" and "C" will light up after two activations of the alarm.
The saturation alarm for the pre-filter is not activated by default and can be used in recirculation mode. It must be activated manually the first time.
Press and hold buttons 2 and 3 simultaneously for 3 seconds. The display will show "F" and "C" for 2 seconds, indicating that the saturation alarm for the pre-filter has been activated.
Deactivating the saturation alarm for the pre-filter:
Press and hold buttons 2 and 3 simultaneously for 3 seconds. The display will show "F" for 2 seconds, indicating that the saturation alarm for the pre-filter has been deactivated.
Emergency temperature alarm
The device has a temperature sensor that triggers an alarm when the temperature in the appliance is too high. This condition is indicated on the display by the letter "t" flashing.
The device remains locked until the temperature drops below the activation level of the emergency alarm. To exit this mode, press button "2". Every 30 seconds, the temperature of the surrounding environment is checked.
5.1 Hob²Hood
The device is equipped with a "wireless" connection function for the gas hob surface, for automatic control of the hood based on the hob's activity. Consult the instructions for the gas hob surface to check if this function is available. On first connection to the electrical grid or after an unexpected power outage (blackout), wait 1 minute to allow the device to re-establish connection with the gas hob surface.
6. LIGHTING DEVICE
The device is equipped with an LED lighting system. LEDs provide optimal lighting, last 10 times longer than conventional bulbs, and save 90% energy.
!Caution! Do not look directly at the LED lamp. For lamp replacement, contact an authorized service center for spare parts.
IN THE INTEREST OF YOUR SAFETY
www.aeg.com/productregistration

Register your product for better service: www.aeg.com/productregistration

Buy accessories, consumables and original spare parts for your appliance: www.aeg.com/shop
ENVIRONMENT PROTECTION
Recycle materials with the symbol . Put the packaging in the relevant containers for recycling.
Help protect the environment and human health, as well as to recycle waste from electrical and electronic appliances. Do not dispose of appliances marked with the symbol with the household waste. Return the product to your local recycling facility or contact your municipal office.
CUSTOMER CARE AND SERVICE
We reserve the right to use original spare parts.
When you contact the Service Department, make sure you have the following information available.
The information can be found on the rating plate. Model, PNC (Product Number), Serial Number.

Warning/Important - Important safety information.
General information and tips.
Environmental information.
We reserve the right to make changes without prior notice.
1. IMPORTANT SAFETY INSTRUCTIONS
WARNING! Read the operating instructions carefully before using the appliance. The manufacturer is not responsible for any damage, malfunction, or injury resulting from failure to follow these instructions. The extractor hood is intended for household use only.
WARNING! Do not connect the appliance to the mains until the installation is fully completed. Before any cleaning or maintenance, disconnect the appliance from the mains by removing the plug or switching off the main switch.
For any installation or maintenance work, use the appropriate tools.
The appliance must not be used by persons (including children) with reduced physical, sensory, or mental capabilities, or lack of experience and knowledge, unless they have been given supervision or instruction concerning use of the appliance by a person responsible for their safety. Children should be supervised to ensure that they do not play with the appliance.
Never use the extractor hood if the grille is not correctly installed! The extractor hood must never be used as a work surface, unless specifically indicated. The room must be adequately ventilated when the extractor hood is used simultaneously with other appliances using gas or other fuels. The extracted air must not be discharged through a flue used for exhaust fumes from appliances burning gas or other fuels.
Flambe cooking under the extractor hood is strictly forbidden. Using an open flame is dangerous for the filters and may cause fire; therefore, it must be absolutely avoided.
The hood must be regularly cleaned to prevent the risk of fire.
Warning! Accessible parts may become hot when used with cooking appliances.
Regarding the technical measures and safety measures to be taken for the discharge of fumes, it is necessary
to strictly follow the regulations of the local authorities. The extractor hood must be installed and maintained as described (if used in a room with a fireplace or burner, the instructions for maintenance, as indicated in these instructions, must be followed). Failure to maintain the hood and to clean the filters properly involves the risk of fire. Do not use or leave the hood without correctly installed lamps! Risk of electric shock! The manufacturer accepts no liability for any malfunction, damage, or fire caused to the appliance as a result of failure to follow these instructions.
WARNING! Failure to install the screws or fixing devices in accordance with these instructions may result in electrical hazards.
2. USE
The extractor hood extracts fumes and steam during cooking.
In the package, there is a booklet with instructions specific to the model you have purchased, depending on the model chosen, as the selection is made among the extractor hood versions.
Connection to the electrical mains
3. INSTALLATION
The voltage of the mains must correspond to the voltage indicated on the label with data for the hood, placed on its inner side. If the hood is equipped with a plug for connection to the mains, connect it to a contact corresponding to the current standards, placed in an easily accessible place after installation of the hood. If it is not equipped with a plug (direct connection to the mains), or if the plug is not in an easily accessible place after installation of the hood, use a double-pole switch according to the standards, so as to ensure complete disconnection of the hood from the mains under overvoltage category III, in accordance with the installation rules.
Warning! Before connecting the hood to the mains, check that it functions properly, and check that the cable is installed as it should be.
The minimum distance between the surface on which the cooking vessels are placed and the lower part of the kitchen hood must be not less than 50 cm in the case of electric cookers and not less than 65 cm in the case of gas or combined cookers. If the instructions for the gas cooker specify a greater distance, this must be taken into account.
4. MAINTENANCE
Warning! Before carrying out any cleaning or maintenance operations, disconnect the hood from the electrical mains by removing the plug or switching off the main switch.
The hood must be cleaned regularly (at least as often as you clean the filters), both inside and outside. Use a soft cloth with neutral detergent cleaning agents. Avoid agents that contain abrasive parts. Warning! Never clean with spirits!
Warning! Failure to observe the regulations for cleaning the hood and replacing the filters involves a risk of fire.
Follow the instructions strictly! No responsibility is accepted for any damage to the motor or fire, caused by improper maintenance or failure to observe these instructions.
4.1 Grease filters
Clean monthly with neutral detergents. They can also be washed in a dishwasher at low temperature and short washing cycle. When washing the grease filter in a dishwasher, it may become discolored, but this in no way impairs its filtering capacity.
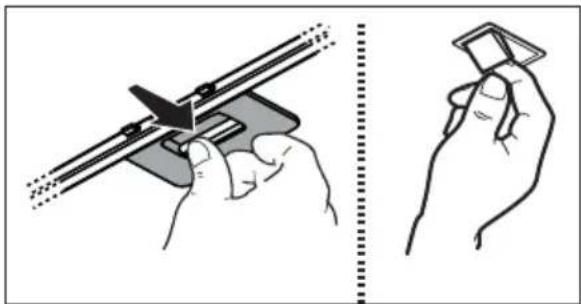
4.2 Activated carbon filter
Replacement
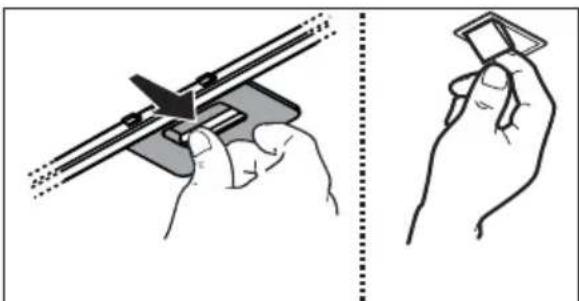
The activated carbon filter becomes saturated after approximately a certain period of use, depending on the type of cooking and how often you clean the filters. In any case, it is necessary to replace the activated carbon filter every four months or when the filter saturation indicator shows that it is necessary. It cannot be washed or reused.
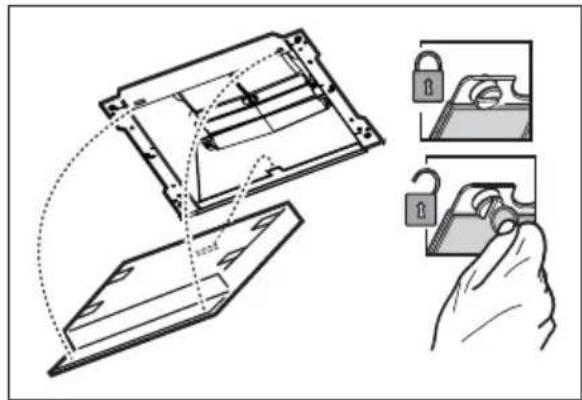
5. CONTROLS
The extractor hood is equipped with a control panel with the possibility to adjust the extraction speed and a timer for the lighting of the goods. If during operation a lot of steam is released, switch to maximum operating mode. It is recommended to switch on the extractor 5 minutes before you start cooking and to leave it running for about 15 minutes after you have finished. The controls are located on the front panel or on the device:
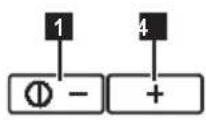

1 Button ON/OFF of the motor
Button ON/OFF/Decrease speed (power) of extraction
2 Button Increase speed (power) of extraction 1-2-3. -4.
Speeds (powers) of extraction 3 and 4 are with limited time, respectively 10 and 5 minutes, after which it is activated
Speed (power) of extraction 2. Note: The light on the screen flashes to show the setting of the speed timer.
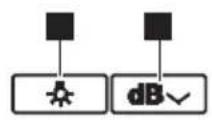
3 Button ON/OFF lighting 4 Button for the "Boost" function (intensive ventilation) The extractor is switched on at the highest extraction speed (power) for about one minute, after which it switches off. 5 Display
Indicator for saturation of the grease filter. During operation, the extractor warns when the grease filter needs maintenance.
Indicator for saturation of the charcoal filter
Reset: On the screen, the set speed and the letter “F” are displayed.
Indicator for saturation of the carbon filter
Reset: On the screen, the set speed and the letter “C” are displayed.
Resetting the saturation indicator
To reset the saturation indicator, switch on the extractor, press button 1 and hold it for about 3 seconds. Perform the filter maintenance as described in the manual. In case the saturation indicators of the filters "F" and "C" start to flash again, repeat the reset operation "reset" twice.
The filter clogging indicator is activated when the aspirator is used in the filter version and the filter needs to be activated.
Activating the filter clogging indicator: Turn off the aspirator, press buttons 2 and 3 simultaneously and hold for 3
seconds. On the display, for 2 seconds the letters "F" and "C" will appear, indicating that the filter clogging indicator is activated.
Deactivating the filter clogging indicator: Turn off the aspirator, press button 2 and hold for 3 seconds. On the display, for 2 seconds only the letter "F" will appear, indicating that the filter clogging indicator is deactivated.
Temperature alarm
The aspirator is equipped with a temperature sensor that activates the motor at 3rd speed, in case the temperature in the display area is too high.
In this case, the display will show the letter "t", which indicates that the temperature has not dropped below the permissible values.
To reset the operating error, press button "2".
Every 30" the sensor reads the temperature in the display area.
5.1 Hob²Hood
The aspirator is equipped with a wireless function for connection to a hob for automatic regulation of the most suitable speed. Refer to the hob instructions to check the availability and compatibility of this function. On first connection to the hob, in case of sudden power failure (blackout), wait 1 minute to give the aspirator the opportunity to re-establish the connection with the hob.
6. LIGHTING
The aspirator is equipped with a lighting system with LEDs.
The LEDs guarantee optimal lighting, up to 10 times more powerful than traditional lamps and allow 90% energy savings.
Warning! Do not look directly at the light of the LEDs!
Before using the appliance, please read the safety instructions carefully.
THANK YOU FOR CHOOSING THIS PRODUCT
Thank you for choosing this AEG product. We have designed it to provide you with impeccable performance for many years, incorporating innovative technologies that make life simpler – features you might not find on ordinary appliances. Please spend a few minutes reading this manual to get the most out of your appliance.
Visit our website for:

Getting usage advice, brochures, trouble shooter, service information: www.aeg.com

Register your product for better service: www.aeg.com/productregistration

Buy Accessories, Consumables and Original spare parts for your appliance: www.aeg.com/shop
ENVIRONMENTAL CONCERNS
Recycle materials with the symbol. Put the packaging in applicable containers to recycle it. Help protect the environment and human health and to recycle waste of electrical and electronic appliances. Do not dispose appliances marked with the symbol with the household waste. Return the product to your local recycling facility or contact your municipal office.
CUSTOMER CARE AND SERVICE
Always use original spare parts. When contacting our Authorised Service Centre, ensure that you have the following data available: Model, PNC, Serial Number.

Warning / Caution - Safety information.

General information and tips

Environmental information
Subject to change without notice.
Before cleaning, the device must be disconnected from the mains and the plug removed from the socket. Do not touch the device with wet hands.
If the device is not working properly, check that it is connected to the mains and that the plug is correctly inserted. If the device still does not work, contact a qualified electrician.
Always unplug the device before cleaning or maintenance! Do not use the device if the power cord or plug is damaged, if it is not working properly, or if it has been dropped or damaged. Do not leave children unattended. If the power cord is damaged, it must be replaced by the manufacturer, its service agent, or similarly qualified persons to avoid a hazard. Do not use the device with wet hands. Do not use the device near water or other liquids. Do not immerse the device in water or other liquids.
The labels marked with "Caution" must be observed. They indicate a risk of injury or damage. Do not use the device if the labels are damaged or missing.
!Caution! When using the device together with other equipment, the protective features of the device may be impaired.
Technical specifications and disposal
Observe the technical safety instructions and the operating conditions specified in the manual! The device must be kept clean and free of dust (see the conditions specified in the manual). Failure to observe the cleaning and maintenance instructions may result in damage. Do not use the device if the power cord is damaged, and do not attempt to repair it yourself. We will not be liable for damage caused by failure to observe the operating conditions specified in the manual.
!Caution! Do not connect the device to a power source other than that specified in these instructions.
2. CLEANING
Before cleaning, unplug the device and remove the filter. To clean the filter, refer to the type of filter indicated in the cleaning instructions, and remove it
from the device or from the filter housing
3. INSTALLATION
If the filter is not cleaned in a timely manner, the ventilation and cooling system may fail. If the filter is not cleaned (it is left dirty), or if the ventilation and cooling system still does not work properly, then the repair must be carried out only by a 3D service center authorized by the manufacturer.
Danger! Before cleaning or servicing the appliance, disconnect it from the power supply by unplugging the power cord from the wall outlet.
The distance from the top of the hob to the bottom of the hood must be at least 50 cm for electric hobs and 65 cm for gas or combined hobs.
If the distance from the gas hob to the hood is greater than specified, it must be reduced.
4. MAINTENANCE AND CARE
Danger! Before cleaning or servicing, unplug the appliance or disconnect it from the power supply to avoid the risk of electric shock.
Clean the hood and the filter regularly (at least once a month). Use a soft cloth dampened with neutral detergent. Do not use abrasive materials.
DO NOT USE FLAMMABLE MATERIALS!
Danger! Failure to clean the filter and the ventilation openings may cause a fire. We do not accept any responsibility for damage caused by improper use.
If the appliance is not working properly, or if it is damaged or has been dropped, do not use it and contact a qualified technician.
4.1 Metal grease filter
The filter should be cleaned regularly with non-aggressive detergents, by hand or in the dishwasher, at low temperature. In the dishwasher, the metal filter may become dull, but its efficiency will not be affected.
4.2 Activated carbon filter
The activated carbon filter can be cleaned at intervals of 3 to 6 months, depending on usage, or more often if the hood is used frequently. In any case, it should be replaced at least every 4 months.
The activated carbon filter cannot be washed and must be replaced when saturated.
5. BACKUP ELEMENTS
The backup elements are designed to ensure the device operates correctly in the event of a power outage. The actual concentration of the solution should be checked periodically, and the filter must be cleaned. When cleaning the filter, do not use a brush with bristles harder than 5 mm, and do not allow more than 15 minutes to pass after rinsing. The backup indicators are located on the front panel:
1 ON/OFF (ON/OFF) button for the backup mode (operation)
2 Backup mode (operation) buttons 1 - 2 - 3. -4. adjustment buttons 3-5 and 4-5 for backup mode (operation) up to 10 and 5
minutes respectively, then 2-11 backup mode (operation) buttons are pressed.
Note: The display indicator shows the current speed setting.
3 ON/OFF (ON/OFF) button 4 "Breeze" (Breeze) (air purification) function button. When the backup mode (operation) is active, it turns on for one hour and then turns off. 5 Display
Filter replacement indicators
After a certain period of time, the filter will need technical maintenance.
Pre-filter replacement indicator
The pre-filter is installed in the device and can be replaced.
HEPA filter replacement indicator The HEPA filter is installed in the device and can be replaced. To reset the indicator, press and hold the reset button for 3 seconds.
To reset the indicator, press and hold the reset button for 3 seconds.
The filter technical maintenance procedure is described in the manual.
When the "F" and "C" indicators are pressed simultaneously, the filter will be reset twice.
To prepare the acid solution, first pour the required amount of water into a clean container, then slowly add the acid while stirring.
Procedure for preparing the acid solution:
Pour water into a container, then add 2 and 3 liters at once, wait 3 seconds, then stir.
After stirring for 2 seconds with the "F" and "C" markers, the acid solution is ready for use.
To stop the acid solution preparation process:
Pour water into a container, then add 2 and 3 liters at once, wait 3 seconds, then stir. After stirring for 2 seconds with the "F" marker, the acid solution preparation process is stopped.
Bath temperature
The temperature of the bath solution should be maintained at 3-5°C above the ambient temperature using a thermostat. The "t" indicator will show the current temperature.
The bath temperature should be checked regularly during operation.
This device must be connected to a power source.
The sensor measures the temperature of the bath solution and displays it.
5.1 Maintenance
The device is equipped with an automatic shut-off function for safe operation. To check the function and its effectiveness, follow the instructions in the manual.
Before cleaning or maintenance, disconnect the device from the power supply (unplug the power cord) and wait at least 1 minute.
6. TROUBLESHOOTING
Kopnyc xapbIK dnoT texhONorncbIHHa Heri3deIgren XapbIK KyyneCimEn Ka6dbIKtaJfAH.
KapbI KIOITapbI OHTaINbI XapbIKTbI, aTeTTeri WAMdApDAn 10 ece apTbIK y3aKTbIKTbI KaMTaMaCbI eTeDi XeHe 90% 3NeKTp 3HeprNcBIn CaKtayra MymKiHdIK 6epei.
60nbIsbI3!KapbIK NIOOBHbIS cjyneCHe TikeNei KapaMasbi3.
Uamdapbl aybictbipy ywiH, ekiJeTTi Kocanbl 6oIweKTepeOpTaIbIFbIH a6apnacbIb3.
3A COBPIEHN PE3YJITATN
Bn 6bnarOapnme wTo ro n36paBe OOB npOn3BOJ ha AEG. rO co3daIOBMe 3a da BN oBe36eIMe DOnrOroDmWeH 6ecnpKeOpEn nepOpMaHC, CO INHOBaTnBHN TexHOJOrn KON rO npabAT JINBOTOT NOEHNOCTaBHe - fYHKUIN WTO MOKe6n Hema Da rN HajTe Kaj ObUnHHTe anapatn. Be MoJIIME, OdBOjTe HeKoIky MInHyTu 3a YInTaHe 3a da rO DoBneTe HajDo6pToO od OOB anapat.
Iocete ja hawata Be6 ctpaHua 3a da:

IobneTe Kopncn COBeTn, 6poUpyn, BOnu 3a peuaBaHe Ha npoBneMn, HOpMaun 3a cepBncnpaHe: www.aeg.com

Pernctpnpate Baunot npo3B0d 3a noobpn ycnyr. www.aeg.com/productregistration

KunybaTe Iodatou, POnOBn N OpiRHaHn DeNoBn 3a BaUnot anapat: www.aeg.com/shop
EKOJIOUKNI PAAHbA
PeuKnnpajTe rMaTePnJaJIne Co Cm6oJIoT . CTabeTe ja am6aJaxaTa BO COOdBETHn KOHTeJHepn 3a da ja peuKnnpaTe.
IomorheTe BO 3aHTnTaHa JxNBTHaTa CpeiHa N OBeKOBOTo 3npaBje N peuKnnapajTe ro OTnAdOT OD eEeKtpnHn EeEeKtpoHcN anapatn. He fprajTe rAnapatnte 03aHueHn co
CMM60JOT BO OTNaIOT OJ DOMaKINHCTBOTO. BpaTeTe ro npOn3BOJOT BO BaWnOT JOKaJIeN KaIauITeT 3a peuKInpAHe nII KONTAKTnpajte ja BaWata ONtHncka KaHcIapJa.
ГРИЖА И YСЛУГА 3A KОПСHИЦN
We recommend using the original spare parts.
When you contact the Service, be sure that you have the spare parts at your disposal.
The version with a filter with a circular air flow
3. INSTALLATION
The main power supply must correspond to the indication shown on the rating plate for the characteristics specified inside the aspirator. If the aspirator is equipped with a plug, connect it to the socket in accordance with the installation instructions and position it in an accessible place after installation. If it is not equipped with a plug (direct connection to the electrical supply) or if the plug is not positioned in an accessible place, after installation, use a bipolar switch in accordance with the standards that require complete disconnection of the electrical supply under conditions of overvoltage category III, in accordance with the installation regulations.
Warning! Before (re)connecting the hood to the electrical supply and checking its functionality, always check that the power cord is correctly installed.
The minimum distance between the hob and the hood for gas and electric cooking appliances must not be less than 50 cm for electric cooking appliances and 65 cm for gas or combined cooking appliances. If the installation instructions for the gas appliances specify a greater distance, you must comply with that.
4. MAINTENANCE
Warning! Before any cleaning or maintenance operation, disconnect the hood from the electrical supply by removing the plug or disconnecting the house mains and switching off.
The hood must be cleaned regularly (at least with the same frequency as the maintenance of the grease filters) both internally and externally. For cleaning, use a cloth dampened with neutral liquid detergent. Do not use products containing abrasives. DO NOT USE
! ALCOHOL! Warning! If the instructions regarding the cleaning of the hood and the replacement of the filters are not followed, there is a risk of fire. It is recommended to follow the recommended instructions.
We disclaim any liability for possible damage to the motor or fire caused by improper maintenance and failure to follow the instructions given.
4.1 GREASE FILTERS
The metal grease filter must be cleaned once a month with neutral detergents, either by hand or in a dishwasher at low temperatures and in a short cycle. Washing the metal grease filter in a dishwasher may cause slight discoloration, but its filtering characteristics do not change.
Attention! Do not look directly into the LED light.
For replacement of parts, contact the regional center for spare parts.
FOR EXCELLENT RESULTS
ENVIRONMENTAL CONCERNS
Recycle materials with the symbol. Place the packaging in the recycling containers if available.
Help protect the environment and human health, and recycle waste from electrical and electronic equipment. Do not dispose of equipment marked with the symbol in household waste. Return the product to a local recycling point or contact your municipal office.
WARNING AND SERVICE FOR CUSTOMERS
We recommend using original spare parts. When contacting Service, make sure you have the following information. The information can be found on the specification plate. Model, PNC, Serial number.

Warning / Safety and care information.
1. SAFETY INSTRUCTIONS
Warning! Strictly follow the instructions in this manual. We disclaim any liability for possible errors, damage, or fire caused by the appliance resulting from failure to follow the instructions in this manual. This appliance is designed exclusively for household use.
Caution! Do not connect the appliance to the power supply until you have completely finished with the installation. Before any maintenance or cleaning, disconnect the appliance from the power supply to avoid any risk of electric shock or to avoid damaging the appliance, or to avoid any risk of injury to persons or property in the kitchen or room.
This appliance can be used by children aged 8 years and above and persons with reduced physical, sensory or mental capabilities or lack of experience and knowledge if they have been given supervision or instruction concerning use of the appliance in a safe way and understand the hazards involved. Children shall not play with the appliance. Cleaning and user maintenance shall not be made by children without supervision. Never use the appliance without correctly mounted filter! The appliance must never be used as a support surface for placing or resting objects unless explicitly stated. The room where the appliance is installed must have good ventilation when the appliance is used together with other appliances that burn gas or other fuels. Exhaust air must not be discharged into a flue used for exhausting fumes from appliances burning gas or other fuels. Strictly avoid cooking food over an open flame under the appliance. Use of uncontrolled flames is harmful to the filter and may cause fire, therefore it should be avoided in any case. During food frying, make sure that the overheated oil does not catch fire.
Warning! Accessible parts may become hot when used with cooking appliances.
When performing any maintenance on the hood, strictly follow the rules of local authorities. The hood must be cleaned frequently, both inside and outside (at least once a month), following the instructions in the maintenance manual for this appliance. Failure to follow the rules for cleaning the hood and replacing the filter increases the risk of fire. Do not use or leave the hood without properly installed filters, as there is a risk of electric shock. We disclaim any liability for possible injuries, damage, or fire caused by the appliance if the instructions in this manual are not followed.
WARNING! If you do not follow these instructions and complete the installation in accordance with these instructions, it may lead to electrical hazards.
2. USE
The hood is intended for use with exhaust or recirculation mode, depending on the preparation. In the instructions, it is specified in which mode you can use your model -
with exhaust to the outside, or with recirculation mode
recirculation
3. INSTALLATION
The mains voltage must correspond to the voltage indicated on the rating plate inside the hood. If there is a plug, connect the hood to a socket that complies with the regulations and is located in an accessible place after installation. If the hood has no plug (direct connection to the mains), install a double-pole switch that ensures complete disconnection from the mains under overvoltage category III conditions, in accordance with installation rules.
WARNING! Before reconnecting the hood to the electrical mains and checking proper operation, make sure that the mains cable is installed correctly.
The minimum distance between the surface supporting the cooking vessels on the hob and the lower part of the hood must not be less than 50 cm for electric hobs and 65 cm for gas or mixed hobs. If the installation instructions for gas hobs specify a greater distance, follow those instructions.
4. MAINTENANCE

WARNING! Before performing any maintenance, disconnect the hood from the power supply by unplugging it or switching off the circuit breaker.
The hood should be cleaned frequently (at least as often as you maintain the grease filter), both inside and outside. For cleaning, use a soft cloth and neutral liquid detergents. Avoid using abrasive products. DO NOT USE ALCOHOL!

WARNING! Failure to follow the rules for cleaning the appliance and replacing the filter increases the risk of fire. Therefore, we recommend following the instructions provided.
We disclaim any liability for possible damage caused to the motor, fire resulting from improper maintenance, or failure to follow the warnings above.
4.1
The filter should be cleaned monthly or after intensive use, manually or in a dishwasher at low temperatures with a short washing cycle. After washing in a dishwasher, the metal filter for grease may lose water (slightly discolored), but its filtering capacity will not change.
4.2
The carbon filter saturation depends on the type of cooking and how often the grease filter is cleaned. In any case, you should replace the cartridge every 4 months.
Do not wash or reuse.
5. COMMANDS
The hood is controlled by the command panel which selects the suction speed and controls the light switch to illuminate the cooking surface. Turn on a higher speed in case of high concentration of steam in the kitchen. We recommend turning on the air suction 5 minutes before you start cooking and leaving the suction on for about 15 minutes after cooking is finished. The commands are located on the front panel of the appliance:

ON/OFF button
decrease speed (suction)

Increase speed (suction) button 1-2-3.-4. Suction speed 3 and 4 have limited operation, approximately 10 to 5 minutes, after which speed 2 is activated. Note: The light on the display indicates the speed time.
3 ON/OFF button lighting 4 "Breeze" function button (room ventilation) The hood turns on at low speed (suction) for about one hour, then turns off. 5 Display
Filter saturation indicator
At regular intervals, the hood reminds you when the filter needs to be cleaned.
Filter saturation indicator for grease
On the display, the speed and the word "F" appear alternately.
Filter clog indicator
On the screen, the lowest displayed speed and the word "L" will appear. Filter clog indicator reset
To reset the clog indicator, turn on the aspirator and press and hold the buttons 1 for about 3 seconds.
Release the buttons described in this chapter.
If the clog indicator for filters "F" and "C" continues to flash, perform the reset operation twice.
The carbon filter clog indicator is usually active, but if the aspirator is used in filter version, it must be manually deactivated first.
Activating the carbon filter clog indicator:
Turn on the aspirator and press buttons 2 and 3 simultaneously for 3 seconds.
On the display, the letters F and C will flash for 2 seconds to indicate that the carbon filter clog indicator has been activated.
Deactivating the carbon filter clog indicator:
Turn on the aspirator and press buttons 2 and 3 simultaneously for 3 seconds.
On the display, only the letter F will flash for 2 seconds to indicate that the carbon filter clog indicator has been deactivated.
Temperature alarm
The kitchen hood is equipped with a temperature sensor that activates the motor at speed 3 if the temperature in the zone around the display is too high.
The alarm state is shown on the display with the word "ALARM" flashing.
The device is designed to operate safely even when the temperature drops below the alarm threshold.
The manufacturer's warranty is issued on the condition that the device is used in accordance with the instructions.
Only a 30°C sensor controls the ambient temperature in the display zone.
5.1 Hood
The aspirator is equipped with a suction function (vacuum) connected to the cooking surface for automatic adjustment of the optimal speed. Refer to the instructions for use of the cooking surface to check compatibility and function.
In case of initial connection to the electrical grid or after a power outage (blackout), wait 1 minute for the aspirator to re-establish connection with the cooking surface.
6. LIGHTING
The aspirator is equipped with a lighting system based on LED technology.
LED guarantees optimal lighting, durability 10 times longer than traditional lamps, and enables energy savings of 90%.
Warning! Do not look directly at the LED light.
For replacement of bulbs, contact the authorized service center for spare parts.
Hob²Hood 1.5
"slw" bll aolg eo haill o1b (wireless)
Therefore, the area of triangle APQ equals the area of triangle AOB plus the area of triangle QPH minus the area of triangle PQR.
6.
4.
www.aeg.com/productregistration

www.aeg.com/shop


- FOR PERFECT RESULTS
- VISIT OUR WEBSITE TO
- ENVIRONMENT CONCERNS
- CUSTOMER CARE AND SERVICE
- SAFETY INSTRUCTIONS
- USE
- INSTALLATION
- MAINTENANCE
- CONTROLS
- FILTER SATURATION INDICATOR
- GREASE FILTER SATURATION INDICATOR
- CARBON FILTER SATURATION INDICATOR
- RESET OF SATURATION INDICATOR
- ACTIVATION OF THE CHARCOAL FILTER SATURATION INDICATOR
- DEACTIVATION OF THE CHARCOAL FILTER SATURATION INDICATOR
- TEMPERATURE ALARM
- HOB²HOOD
- LIGHTING
- ENVIRONMENT PROTECTION
- CHARCOAL FILTER
- CONTROL PANEL
- COAL FILTER SATURATION INDICATOR
- RESET SATURATION ALARM
- DO NOT USE ALCOHOL
- GREASE FILTERS
- CHARCOAL FILTER, NOT WASHABLE
- CONTROL ELEMENTS
- WATER FILTER SATURATION INDICATOR
- ACTIVATING THE SATURATION ALARM
- DEACTIVATING THE SATURATION ALARM FOR THE PRE-FILTER
- EMERGENCY TEMPERATURE ALARM
- LIGHTING DEVICE
- IN THE INTEREST OF YOUR SAFETY
- IMPORTANT SAFETY INSTRUCTIONS
- ACTIVATED CARBON FILTER
- REPLACEMENT
- BUTTON ON/OFF OF THE MOTOR
- BUTTON INCREASE SPEED (POWER) OF EXTRACTION
- INDICATOR FOR SATURATION OF THE CHARCOAL FILTER
- INDICATOR FOR SATURATION OF THE CARBON FILTER
- RESETTING THE SATURATION INDICATOR
- THANK YOU FOR CHOOSING THIS PRODUCT
- ENVIRONMENTAL CONCERNS
- CLEANING
- MAINTENANCE AND CARE
- DO NOT USE FLAMMABLE MATERIALS
- METAL GREASE FILTER
- BACKUP ELEMENTS
- FILTER REPLACEMENT INDICATORS
- PRE-FILTER REPLACEMENT INDICATOR
- HEPA FILTER REPLACEMENT INDICATOR THE HEPA FILTER IS INSTALLED IN THE DEVICE AND CAN BE REPLACED. TO RESET THE INDICATOR, PRESS AND HOLD THE RESET BUTTON FOR 3 SECONDS
- PROCEDURE FOR PREPARING THE ACID SOLUTION
- BATH TEMPERATURE
- TROUBLESHOOTING
- A COBPIEHN PE3YJITATN
- EKOJIOUKNI PAAHBA
- ГРИЖА И YСЛУГА 3A KОПСHИЦN
- FOR EXCELLENT RESULTS
- WARNING AND SERVICE FOR CUSTOMERS
- COMMANDS
- FILTER SATURATION INDICATOR FOR GREASE
- FILTER CLOG INDICATOR
- ACTIVATING THE CARBON FILTER CLOG INDICATOR
- DEACTIVATING THE CARBON FILTER CLOG INDICATOR
- HOOD
- WARNING! DO NOT LOOK DIRECTLY AT THE LED LIGHT
Brand : AEG
Model : X09281MDX
Category : Refrigerator