OCEARTT91S8 - Fridge OCEANIC - Free user manual and instructions
Find the device manual for free OCEARTT91S8 OCEANIC in PDF.

User questions about OCEARTT91S8 OCEANIC
0 question about this device. Answer the ones you know or ask your own.
Ask a new question about this device
Download the instructions for your Fridge in PDF format for free! Find your manual OCEARTT91S8 - OCEANIC and take your electronic device back in hand. On this page are published all the documents necessary for the use of your device. OCEARTT91S8 by OCEANIC.
USER MANUAL OCEARTT91S8 OCEANIC
-
FR (version originale)
-
EN (translated from the original)
https://www.oceanic.eu
Schneider Consumer Services,
IMPORTANT WARNINGS AND SAFETY ADVICE
Read all instructions before using the device. Read this manual carefully before using the device to know exactly what to do and what not to do.
It is very important that this guide be kept with the device for any new consultation. If this device is to be transferred to another person, make sure that the guide follows the device so that the new user can be informed of the operation of the device.
Improper use of the device can be dangerous, especially for children.
In this user guide, the following symbols are used:
| Important information about your personal safety and how to avoid damaging the device | |
| General information and advice | |
| Environmental information | |
| Fire hazard | |
| Risk of electric shock |
SAFETY INSTRUCTION
- This device may be used by children 8 years of age or older, and those with reduced physical, sensory or mental capacity or lack of experience or knowledge, if they are properly supervised. The instructions for the safe use of the device have been given to them and the risks involved have been addressed.
- This device is intended for use in domestic applications.
- This device may be used by children 8 years of age or older, and those with reduced physical, sensory or mental capacity or lack of experience or knowledge, if they are properly supervised.
Children should not play with the device. Cleaning and user maintenance should not be performed by unattended children.
- Children should be supervised to make sure they do not play with the appliance.
- WARNING: Keep ventilation openings clear in the appliance enclosure or in the installation structure.
- CAUTION: Do not use mechanical devices or other means to speed up the deicing process other than those recommended by the manufacturer.
-
WARNING: Do not damage the refrigeration circuit.
-
CAUTION: Do not use electrical appliances inside the food storage compartment unless they are of the type recommended by the manufacturer.
- If the power cable is damaged, it must be replaced by the manufacturer, its after-sales service or similarly qualified persons in order to avoid a hazard.
- Do not store explosive substances such as aerosols containing flammable propellants in this device:
- Before throwing away your appliance, remove the door and leave the shelves in place so that children can not play easily inside.
-
Never allow children to operate or play with the appliance.
-
Never clean parts of the appliance with flammable fluids. Fumes pose a fire hazard or may cause explosions.
-
Do not store or use gasoline or other flammable gases or liquids in or near this appliance. Fumes can cause a fire or explosion.
-
Do not install this unit in a place with extreme weather conditions such as: insufficient ventilation, temperatures below 16^ C or above 38^ C
-
This product complies with current European safety standards for electrical appliances. It has been subjected to extensive testing and meticulous testing to assess its safety and reliability. Before connecting the device, check that the data on the type plate corresponds to that of your installation.
-
Packaging materials are recyclable, do not abandon them in the environment, bring them to a specialized center for recycling.
-
The electrical safety of this appliance is ensured only when it is connected to an electrical installation equipped with a grounding plug in good condition, according to the current standard. If in doubt, have a qualified technician inspect the system thoroughly.
-
The use of this device, like that of any electrical device, implies the observation of certain fundamental rules:
-
Do not touch the appliance with wet or damp hands or feet;
-
Do not pull on the power cable
to disconnect the plug from the socket; • Do not leave the unit exposed to atmospheric agents; • Do not allow the device to be used by children without supervision; • Do not unplug or plug the plug into the wall outlet with wet hands; before carrying out any cleaning or maintenance operation, dis- connect the appliance from the power supply by disconnecting the plug or switching off the main switch of the installation;
-
The socket must remain accessible after installation of the appliance. In case of breakdown or malfunction, switch off the device and do not damage it. The power plug must always remain accessible after installation of the device.
-
WARNING: Do not damage the refrigerant circuit.
Refrigerant causes serious injury if splashed in the eyes. If this happens, go to the hospital immediately.
- WARNING: Ventilation openings in the housing of the unit or in the mounting location must not be obstructed.
- CAUTION: Do not use electrical appliances inside the appliance's food storage compartments.
- CAUTION: Do not use mechanical devices or other means to speed up the defrosting process.
-
This appliance is intended to be used in household and similar applications such as:
-
staff kitchen areas in shops,
offices and other working environments; - farm houses; - by clients in hotels, motels and other residential type environments; - bed and breakfast type environments.
- Only an authorized technician can change the lamp in case of failure.
- WARNING: When positioning the unit, make sure that the power cord is not pinched or damaged.
- WARNING: Do not place mobile sockets or portable power supplies at the rear of the unit.
- Children aged 3 to 8 are allowed to load and unload refrigeration appliances.
- To avoid food contamination, please follow the instructions below: - The prolonged opening of the
door can lead to a significant increase in the temperature in the compartments of the appliance.
-
Regularly clean surfaces that may come into contact with food and accessible drainage systems.
-
Store raw meat and fish in appropriate containers in the refrigerator so that they do not come into contact with each other and do not drip onto other foods.
-
The two-star frozen food compartments are suitable for frozen food storage, ice storage or ice-making and ice-making.
-
The compartments with one, two and three stars are not suitable for freezing fresh foods.
-
If the refrigeration unit remains empty for long periods of time, turn it off, defrost, clean, dry and leave the door open to prevent mold growth in the appliance.
-
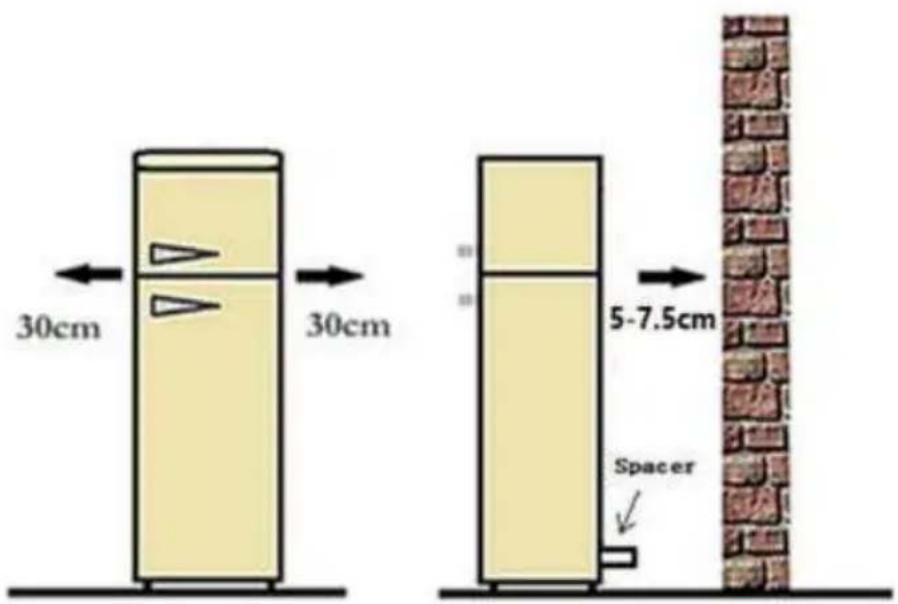
Place the unit against a wall at a distance greater than or equal to 100 mm, and leave at least 300 mm free space on the top of the refrigerator.
-
This refrigeration appliance is not intended for use as a built-in appliance.
- Recommended storage times of frozen food in the freezer compartment. These times vary depending on the type of food. The food that you freeze can be preserved from 1 months (minimum at -18°C).
| Food | Storage time |
| Bacon, casseroles, milk | 1 month |
| Bread, ice cream, sausages, pies, prepared shellfish, oily fish | 2 months |
| Non-oily fish, shellfish, pizza, scones and muffins | 3 months |
| Ham, cakes, biscuits, beef and lamb chops, poultry pieces | 4 months |
| Butter, vegetables (blanched), eggs whole and yolks, cooked crayfish, minced meat (raw), pork (raw) | 6 months |
| Fruit (dry or in syrup), egg whites, beef (raw), whole chicken, lamb (raw), fruit cakes | 12 months |
Never forget:
28.Recommended storage times of frozen food in the freezer
by/’ date, you must freeze them before this date expires.
-
Check that the food was not already frozen. Indeed, frozen food that has thawed completely must not be refrozen. Once be frosted, food should be consumed quickly. Recommended storage times of refrigerator compartment :
-
To prevent food spoilage due to transfer of germs: Store unwrapped animal and vegetable products separate from one another in the drawers. This also applies to different sorts of meat.
- If food has to be stored together due to lack of space:wrap the food.
- Never store fruit and vegetables in a balcony with meat or fish.
| Food | Storage time |
| Butter | 90 days |
| Hard cheese | 110 days |
| Milk | 7 days |
| Sausages, cold cuts | 9 days |
| Meat | 7 days |
Replaceable (LED only) light source by a professional. This product contains two light sources of energy efficiency class G.
Refrigerant
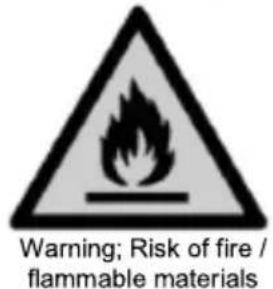
Warning; Risk of fire / flammable materials
WARNING: When positioning the appliance, make sure the power cord is not pinched or damaged.
WARNING: Do not place a portable socket multiple sockets or portable power supplies in the back of the unit. The refrigerant gas in the circuit of this unit is isobutane (R600a), but slightly hazardous flammable gas. During transportation and installation of the device, ensuring not to damage any part of the refrigeration circuit. For installation, handling, cleaning, and disposal of the unit, refer to the following chapters of the User's Guide.
SUMMARY
Important warnings and safety tips -1-
I.Description of the device -16-
II. Technical characteristics -17-
III. Before first use -18-
IV. Installation -19-
V. Instructions to use -24-
VI. Maintenance and cleaning -26-
VII. Trouble Shooting -29-
VIII. Disposal 31-
IX. Warranty -32-
This user guide is available in the following languages:
- FR (original version)
- EN (translated from the original)
Any other translation would be a translation of the original version.
This user guide, any modifications or any new version, is available on our website.
Information on the meaning of the conformity marking
C E
The marking indicates that the product meets the main requirements of the European Directives: 2014/35 / EU (Low Voltage), 2014/30 / EU (Electromagnetic Compatibility), 2011/65 / EU (Restriction of use of certain substances in equipment)
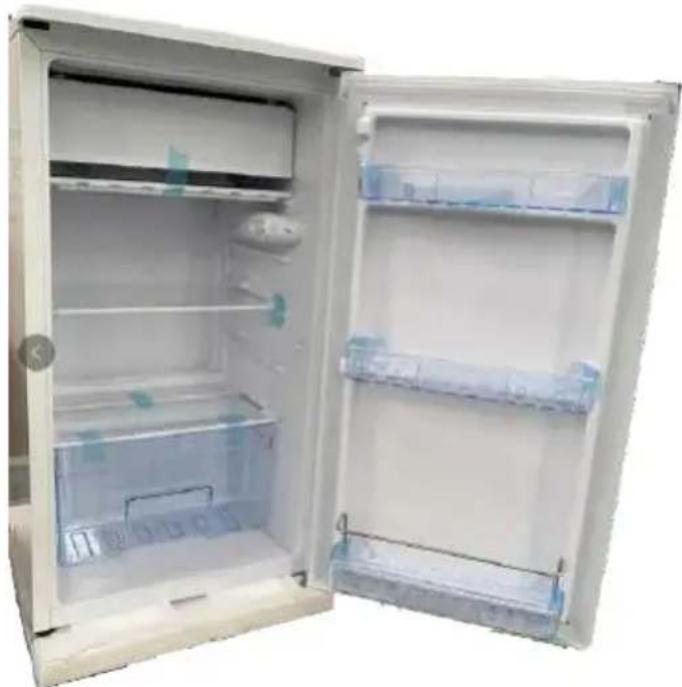
I. DESCRIPTION OF THE DEVICE

- Low temperature compartment
- Thermostat and light
- Shelves (x3)
- Shelf (x2)
- Vegetable bin
- Adjustable feet
II. TECHNICAL CHARACTERISTICS
TECHNICAL DATA :
| Reference | OCEANIC |
| Model | OCEARTT91W8 / OCEARTT91S8 / OCEARTT91B8 |
| Power supply 220-240V~ | |
| Electric power 50Hz | |
| Dimensions WxDxH 445 x 831 x 490 | mm |
| Net weight 22 kg | |
| Installation type Freestanding |
TECHNICAL SHEET RELATING TO THE REGULATION ON ENERGY LABELING: 2019/2016/EU
Product Information sheet according to EU Regulation No. 2019/2016 Energy labelling for Refrigerating appliance can be found be below URL or QR code indicated on Energy label.
OCEARTT91W8 - URL: https://eprel.ec.europa.eu/qr/373146
OCEARTT91W8 - URL: https://eprel.ec.europa.eu/qr/373147
OCEARTT91W8 - URL: https://eprel.ec.europa.eu/qr/37314
a. TRANSPORTATION AND GETTING STARTED
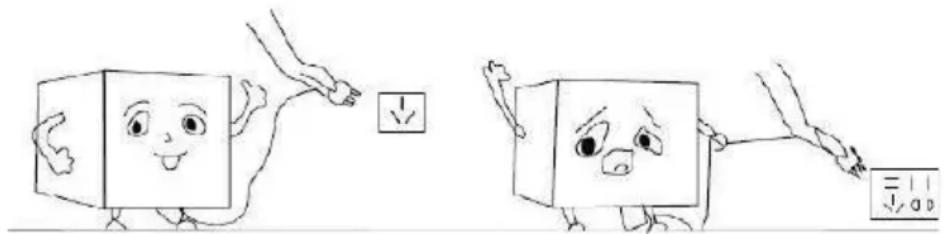
When transporting, take the unit by the base and gently tilt it up to 45^ . Never lift the appliance by the door handle. Do not turn the unit upside down or horizontally. Push the refrigerator on the wheeled legs to move it.
Warning : After transporting the refrigerator, you must wait at least 8 hours before putting it into service.
IMPORTANT : The installation of this device requires the intervention of several people.
b. UNPACKING THE APPLIANCE AND DISPOSING OF THE EMBALLAGI C ELEMENTS
- Remove all packing material around the appliance and the protective elements inside the appliance compartments.
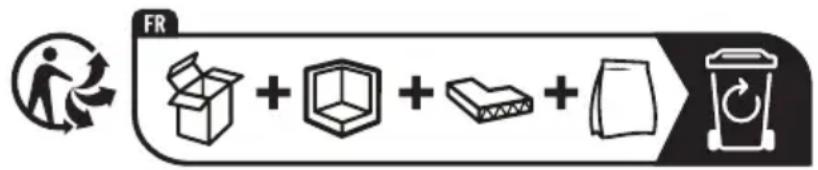
- Carton board and sheets of paper are recyclable. They must be thrown in the collection bins provided for this purpose.
- Materials bearing the symbol are recyclable:
$$
P E < = \text {p o l y e t h y l e n e}; > P P < = \text {p o l y p r o p y l e n e} $$
This means that they can be recycled by depositing them into appropriate collection containers.
- Other packaging elements (adhesive, fasteners, etc.) must be disposed of with household waste.
To know more: www.quefairedemesdechets.fr
c. CLEANING THE DEVICE:
Clean all items in the chest freezer with water and a mild detergent solution. Rinse it thoroughly and dry it with a soft cloth.
Note: The electrical parts of the device can be cleaned only with a dry cloth.
IV. INSTALLATION
- Make sure the unit stays upright during transport. Do not tilt the appliance more than 45 degrees when moving it. Do not exert pressure on the condenser, the door and its handle to avoid deformation or disruption of the operation of the refrigerator.

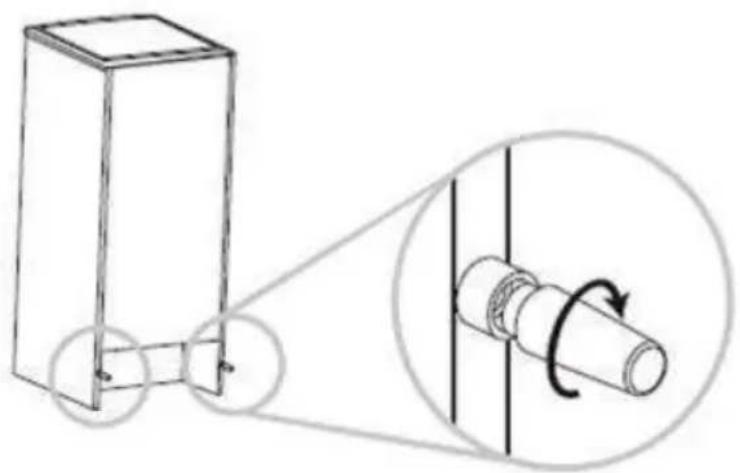
- Make sure there is enough space around the refrigerator for it to work properly. Allow about 10 centimeters of free space at the back and sides of the unit so that air can circulate to cool the compressor. Also leave about thirty centimeters above it. Level the appliance by acting on the adjustable feet.
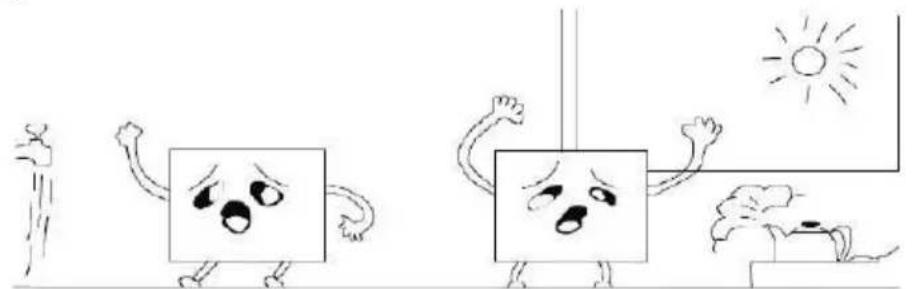
- Place the unit away from direct sunlight and heat sources (stoves, heaters, radiators, etc ...). Direct sunlight can damage the coating and heat sources can increase electricity consumption. Extremely cold ambient temperatures can also cause malfunctions. Avoid putting the device in humid places. If there is too much moisture in the air, there will quickly be frost on the evaporator.
Place the device against a wall with a free distance not exceeding 50-75mm
- When installing your refrigerator, it is important to consider the climate class of the product. To find out which climate class your refrigerator belongs to, please check the nameplate: the refrigeration unit is operating correctly in the ambient temperature range indicated on the table, depending on the climate class.
| Class Sy | mbol | Average ambient temperature °C |
| Extended temperate | SN | from + 10 to + 32 |
| temperate N from + 16 | to + 32 | |
| subtropical | ST from | + 10 to + 38 |
| tropical | T from | + 10 to + 43 |
For refrigerating appliances with climate class :
- extended temperate (SN): 'this refrigerating appliance is intended to be used at ambient temperatures ranging from 10^ to 32^ ;
- temperate (N): 'this refrigerating appliance is intended to be used at ambient temperatures ranging from 16^ C to 32^ C' ;
- subtropical (ST): 'this refrigerating appliance is intended to be used at ambient temperatures ranging from 16^ to 38^' ;
-
tropical (T): 'this refrigerating appliance is intended to be used at ambient temperatures ranging from 16^ C to 43^ C' .
-
Before connecting the unit to the power supply, let it rest for about two hours. This will reduce the risk of malfunction in the cooling system due to handling during transport. Operate your product about 2 to 3 hours before adding food.
CAUTION: To avoid a hazard caused by instability of the unit, it must be installed and secured in accordance with the instructions in the installation instructions.
- Electrical connection
a) Check that the voltage values of the power supply can withstand those indicated on the nameplate placed in the refrigerator. The electrical installation must comply with the requirements of standard NF C 15-100.
If the outlet is not equipped with a grounding plug, or if the plug is not indicated for your network, we advise you to contact a specialized electrician.
Do not use adapters or diverters to prevent overheating and burning.
If the appliance is not equipped with an electrical socket, it must be connected to the mains by means of a switch that will be connected directly to the power supply terminals. This switch must guarantee a unipolar disconnection of the device with contact separation of not less than 3mm .
b) Plug the unit into a properly installed, properly grounded, wall outlet. Never cut or remove (for any reason) the (ground) wire of the power cord.
Any questions regarding power or grounding should be directed to an accredited electrician or a center authorized to work on this type of product.
WARNING: If the grounded plug is used improperly, there may be a risk of electric shock!

Warning! It must be possible to disconnect the device from the mains; the plug must therefore be easily accessible after installation.
WARNING
The socket of the installation must always be provided with a connection to the ground. If the power supply is not connected to ground, you must not connect the device.
WARNING: Do not put water on the refrigerator as it may cause equipment failure or risk of electric shock.
TEMPERATURE INDICATOR

The symbol opposite indicates the location of the coldest zone of your refrigerator: this zone is delimited at the bottom by the window of the vegetable crisper, and at the top by the symbol or the shelf positioned at the same height.
To ensure temperatures in this area, be careful not to change the positioning of this shelf. In refrigerators with forced air (equipped with a fan or No Frost models), the symbol of the coldest zone is not represented because the temperature inside them ishomogeneous.
Installing the temperature indicator
To help you adjust your refrigerator, it is equipped with a temperature indicator that will control the average temperature in the coldest area.
CAUTION: This indicator is intended to work only with your refrigerator, be careful not to use it in another refrigerator (in fact, the coldest area is not the same), or for any other use.
Checking the temperature in the coldest zone
Thanks to the temperature indicator, you can check regularly that the temperature of the coldest zone is correct. Indeed, the temperature inside the refrigerator is a function of several factors such as the ambient temperature of the room, the amount of food stored, the frequency of opening the door. Take these factors into consideration when setting the device.
When the indicator reads "OK", it means that your thermostat is set correctly, and that the indoor temperature is correct.
If the color of the indicator is white, it means that the temperature is too high, it is necessary in this case to increase the setting of the thermostat and to wait 12 hours to carry out a new
visual control of the indicator.
After loading or opening the door, the indicator may turn white after a few moments.

Correct setting

Temperature is too high: set the thermostat
V. INSTRUCTIONS TO USE
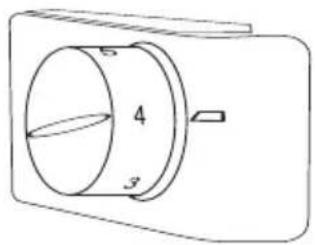
USE OF THE THERMOSTAT:
To regulate the temperature in the refrigerator, turn the thermostat knob. The thermostat can be set to a position from "0" (off) to "7" (the coldest).
For normal use, please select the "4-5" position.
Refrigerator section
Food storage
You will get a better preservation of your food if you place them in the cold zone best suited to their nature.
The coldest area of the refrigerator compartment is located at the bottom of the unit, above the risper.
Coldest zone: 1^ C to 5^ C
This is where fresh food should be stored for safe storage. It is more generally any fresh product whose consumption limit date (DLC) is associated with a storage temperature of less than or equal to +4^ .
CAUTION: Raw (uncooked) food should always be wrapped.
- Chilled precooked foods, such as ready-to-eat foods, meat pies, soft cheeses, etc.
- Pre-cooked meats, eg ham.
- Prepared salads (including mixed green salads, in pieces, pre-washed, prepackaged, rice, potato salad, etc.).
- Desserts, such as fresh cheese, homemade food and leftovers or cream cakes, etc.
Vegetable tray
This is the wettest part of the refrigerator.
Vegetables, fruits, pieces of fresh salad, whole tomatoes, radishes, etc...
WE RECOMMEND THAT ALL PRODUCTS PRESERVED IN THE VEGETABLE BIN BE PACKED IN AN APPROPRIATE PACKAGING.
NOTE :
Always pack raw meat, chicken and fish and store them on the bottom shelf of the refrigerator to avoid bacteria swapping between foods.
Do not store gas or flammable liquid.
Low temperature compartment
- Close food in lidded containers, plastic containers or plastic bags to prevent drying out and mixing odors.
- Store food in small portions.
NOTE:
- Pack foods in servings that fit your needs.
- Portions of fruits and vegetables should not exceed 1kg , meat portions can reach 2.5kg .
- Smaller portions freeze faster and better preserve food quality when defrosting and preparing food.
- It is important to pack foods in airtight bags or containers before freezing to prevent them from becoming tasteless or dehydrated.
- Pack food, expel air, and seal bag or container tightly.
Appropriate packaging:
Plastic bags, stretch film, aluminum foil and freezer trays.
X Inappropriate packaging:
Wrapping paper, greaseproof or cellophane, garbage bags or bags that have already been used.
Suitable sealing devices:
- Elastics, plastic staples, cords, links for freezer bags or similar device.
- Films and plastic bags can be sealed with an iron or specialpress.
ADVICE:
Before placing the package in the low temperature compartment, affix a label bearing the description of the contents and the date of freezing. Do not put too much food in the device. Do not open the door too often, it helps maintain the indoor temperature and save electricity.
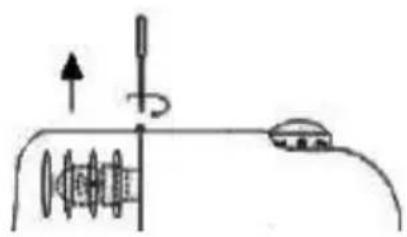
REPLACING THE BULB
In the rear part of the thermostat box is the internal lighting lamp.
- Lamp characteristic: 220-240 V, 10 W. E14
- Disconnect the device from the power supply
- Remove the lamp protection
- Remove the old bulb by unscrewing it anticlockwise
- Screw the new bulb back clockwise
- Replace the lamp protection
- Reconnect the refrigerator to the power supply
VI. MAINTENANCE AND CLEANING
ICING
Defrosting the refrigerator:
Defrosting your refrigerator occurs at every compressor stop. No intervention on your part is necessary.
During operation there is the appearance of drops of condensation or ice on the rear wall. They will be eliminated during deicing described below. The produced water will flow through the drain hole and will be collected in the tank located on the compressor from which it will evaporate.
Defrosting the low temperature compartment:
In order to allow the appliance to function properly, it is necessary to defrost at least once a year or when the ice layer is greater than 10mm .
From time to time you can remove the layer of ice that has formed with a squeegee or other plastic instrument.
NEVER USE A METAL INSTRUMENT OR ELECTRIC APPLIANCE TO DEFROST.
CAUTION :
When defrosting, never use sharp or metallic objects to remove ice from the evaporator surface to avoid damaging the evaporator surface. Reconnect the power again after more than 15 minutes.
Defrosting process:
Excessive ice accumulation will affect the cooling performance of your device. It is therefore recommended to defrost your appliance at least twice a year or whenever ice accumulates.
To defrost the device, choose a time when your device is not too charged. Remove all food and place in another refrigerator or in a cool place. Set the thermostat to the off position (0), unplug the appliance and open the door.
-
• Plug in your device. The internal temperature is controlled by a thermostat. There are 8 parameters. 1 is the warmest setting and 7 is the coldest setting and 0 is disabled.
-
The appliance may not operate at the right temperature if it is particularly hot or if you open the door often.
- Use a sponge or soft cloth to remove water.
Note: For faster defrosting, place hot water containers inside the unit.
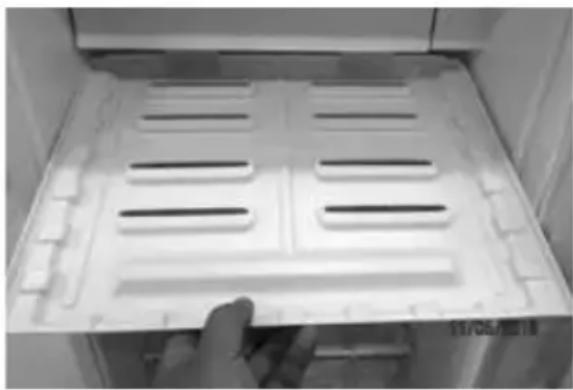
- During defrosting, the water recovery tray should be placed as below.
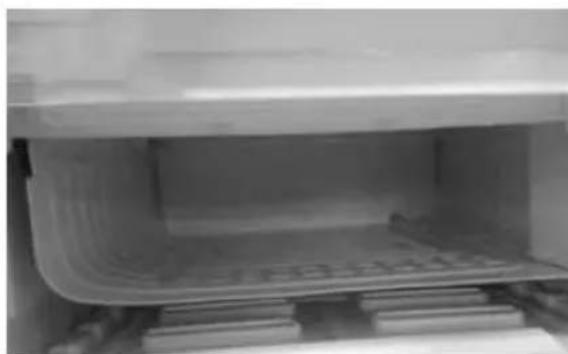
- When the defrost is complete, remove the recovery tray and pour the water into a sink. Clean the tray and put it back in the machine.
Warning! Never use electrical appliances, de-icing sprays, or sharp or sharp objects such as knives or scrapers to remove ice.
- Wait for the appliance to cool down to the desired temperature and replace the food in the appliance.
Wait 15 minutes and then reconnect the device. You can restart the refrigerator by turning the thermostat to the desired setting.
CLEANING
Before cleaning, unplug the appliance:
- Remove the plug from the socket, wait for the appropriate compartment to defrost.
It is advisable to periodically clean the refrigerator.
a) Wash the outside with a cloth soaked in a solution of warm water and liquid soap.
Wash and rinse with clean water, then wipe dry.
b) Wash the inside of the refrigerator and accessories with warm water and baking soda (Add about 2 tablespoons of baking soda to 1 liter of water).
Rinse with clear water, then wipe.
CAUTION: Do not use abrasive cleaners.
CAUTION: Be careful that water does not enter the thermostat box.
CAUTION: If the unit is to remain idle for a long time, it is recommended to disconnect the power and leave the door ajar to prevent the formation of odors and mold.
VII. TROUBLE SHOOTING
| Failures | Possible Cause | Solutions |
| The refrigerator does not work | The device is not connected. | Vérifier que la fiche d'alimentation soit bien insérée dans la prise de courant. |
| The switch is in the off position or "0". | Vérifier que le thermostat ne soit pas en position "0". | |
| The light does not work | The bulb is burned. | Remplacer l'ampoule. |
| The refrigerator is not cold enough | The thermostat temperature is not set correctly. | Check that the refrigerator is not full. |
| The outdoor environment may require a higher setting. | Check that the door closes securely. | |
| The door is opened too often, or the door is not completely closed. | Check that the capacitor is not full of dust. | |
| The door seal is not tight enough. | ||
| There is not enough space between the unit and the walls behind and on the sides. | ||
| The refrigerator makes noise | The rustling can come from the refrigerant flow, which is normal. | Check that there are no objects in contact with the posterior wall. |
| At the end of each cycle, you may hear gurgling noise due to the refrigerant flow in your device. | ||
| The contraction and expansion of the interior walls can cause crackling and crackling. The device is not level. | Check leveling by adjusting the feet on the underside of the unit. | |
| In the lower part of the refrigerator, there is water | There is water in the risper. Check that the hole allowing the exit of the defrosting water is not obstructed. | |
| Condensation formed on the surface of fridge. | This is not a malfunction. Clean the surface | |
CAUTION: Do not damage the refrigerant circuit.
For any other problem occurring on your device: contact the After-Sales Service.
VIII. DISPOSAL
This appliance carries the selective sorting symbol for waste electrical and electronic equipment (WEEE).
This means that this product must be supported by a selective collection system in accordance with the European Directive 2012/19/EU so that it can either be dismantled or recycled, and thus reduce the impact on the environment.
For more information, you can contact your local (town hall) or regional administration.
Electronic products that have not been sorted are potentially dangerous for the environment due to the presence of hazardous substances.
Under no circumstances should you throw this unit on public roads.
When this device reaches the end of its useful life, you must deposit it in a separate collection center for destruction and / or recycling.
IX. WARRANTY
The warranty does not cover the wear parts of the product, nor the problems or damage resulting from:
- superficial deterioration due to normal wear of the product;
- defects or deterioration due to product contact with liquids and corrosion caused by rust or the presence of insects;
- any incident, misuse, misuse, alteration, disassembly or unauthorized repair;
- any unsuitable maintenance operation, use not in accordance with the product instructions or connection to incorrect voltage;
- any use of accessories not supplied or not approved by the manufacturer.

The warranty will be void if the nameplate and/or product serial number are removed.
Product Guarantee & Spare part available
Under the terms of the manufacturer's warranty applicable to the location, the use of Customer Service is free of charge. The mini mum duration of the warranty (manufacturer's warranty for private consumers) in the European Eco nomic Area is 2 years) according to the terms of warranty applicable to the lo cation. The terms of warranty do not affect other rights or claims held by your self under local legislation.
Detailed information about the warranty period and terms of warranty in your country are available from Customer Service, your dealer or our website.
Function-relevant genuine spare parts according to the corresponding Eco design Directive can be obtained from Customer Service for a period of at least 4 years from the date on which your appliance was placed on the market within the European Economic Area.
For more technical specifications on the repair agent and to order replacement parts, please visit: https://www.oceanic.eu
SPARE PARTS AND REPAIR - Refrigeration appliance
Date:10/05/2021
| Reference number OCEART91W8 / OCEARTT91S8 / OCEARTT91B8 | |||
| Model number KS-91R(D) | |||
| Type of refrigeration appliance | TABLE TOP REFRIGERATOR | ||
| Nature of the spare part | Availability period (1) | Availability for professional repairers | Availability to end users |
| Thermostat(s) 7 years | ✓ | ||
| Temperature sensor(s) 7 years | ✓ | ||
| Printed circuit board(s) 7 years | ✓ | ||
| Light source(s) 7 years | ✓ | ||
| Door handle(s) 7 years | ✓ | ✓ | |
| Door hinge(s) 7 years | ✓ | ✓ | |
| Tray(s) 7 years | ✓ | ✓ | |
| Bin(s) 7 years | ✓ | ✓ | |
| Door seal(s) 10 years | ✓ | ✓ | |
(1) from the date on which the last unit of the model was placed on the market.
PROCEDURE FOR ORDERING SPARE PARTS - Professional repairers :
Schneider Consumer Services, email: p.blanc@schneiderconsumer.com
Delivery time: 15 working days from receipt of order.
PROCEDURE FOR ORDERING SPARE PARTS - End user:
Schneider Consumer Services, email: p.blanc@schneiderconsumer.com
Delivery time: 15 working days from receipt of order.
Professional repair services:
In the event of a malfunction during the manufacturer's warranty period: all claims should be made to the professional dealer from whom you purchased your product.
After the expiry of the manufacturer's warranty period, you can use the following repair services:
Schneider Consumer Services,