
FR 6031 H CB - Deep fryer BOMANN - Free user manual and instructions
Find the device manual for free FR 6031 H CB BOMANN in PDF.
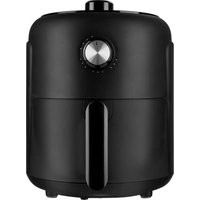
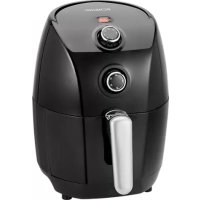
| Product Type | Air Fryer |
| Brand | Bomann |
| Model | FR 6031 H CB |
| Power Supply | 220-240 V~, 50/60 Hz, 1500 W, protection class I |
| Net Weight | Approx. 6.8 kg |
| Number of Automatic Programs | 8 (fries, pizza, bread, pastries, fish, drying, poultry, cakes) |
| Temperature Range | 80 °C to 200 °C (drying: 40 °C to 80 °C) |
| Timer | 1 to 90 minutes (drying: 1 to 24 hours) |
| Rotisserie Function | Yes, with rotisserie rod and fixing clips |
| Included Accessories | Frying basket with lid, extraction tool, 2 fixing clips, rotisserie rod, baking tray/drip pan, 2 sliding racks |
| Interior Light | Yes, button controlled, turns off automatically after 2 minutes |
| Reheat Function | Yes, preset to 115 °C for 6 minutes |
| Pause Mode | Yes, via button or door opening |
| Safety | Door switch (operation only when door closed), automatic stop at end of cycle, hot surface (warning) |
| Cleaning Accessories | Hand wash in warm soapy water, not dishwasher safe |
| Cleaning the Housing | Slightly damp cloth, do not immerse |
| Repairability | Do not repair yourself, contact customer service |
| Storage | In a dry, well-ventilated place, out of reach of children |
Frequently Asked Questions - FR 6031 H CB BOMANN
User questions about FR 6031 H CB BOMANN
0 question about this device. Answer the ones you know or ask your own.
Ask a new question about this device
Download the instructions for your Deep fryer in PDF format for free! Find your manual FR 6031 H CB - BOMANN and take your electronic device back in hand. On this page are published all the documents necessary for the use of your device. FR 6031 H CB by BOMANN.
USER MANUAL FR 6031 H CB BOMANN
- Estos se consideraran valores guía. El tiempo y la temperaturaSEOSEOSEOSEOSEOSEOSEOSEOSEOSEOSEOSEOSEOSEOSEOSEOSEOSEOSEOSEOSEOSEOSEOSEOSEOSEOSEOSEOSEOSEOSEOSEOSEOSEOSEOSEOSEOSEOSEOSEOSEOSEOSEOSEOSEOSEOSEOSEOSEOSEOSEOSEOSEOSEOSEOSEOSEOSEOSEOSEOSEOSEOSEOSEOSEOSEOSEOSEOSEOSEOSEOSEOSEOSEOSEOSEOSEOSEOSEOSEOSEOSEOSEOSEOSEOSEOSEOSEOSEOSEOSEOSEOSEOSEOSEOSEOSEOSEOSEOSEO SEOEYO OMOOEOOOOOOOOOOOOOOOOOOOOOOOOOOOOOOOOOOOOOOOOOOOOOOOOOOOOOOOOOOOOOOOOOOOOOOOOOOOOOOOOOOOOOOOOOOOOOOOOOOOOOOOOOOOOOOOOOOOOOOOOOOOOOOOOOOOOOOOoo
- Sin embargo, podechangiar la temperatura y el tiempo predeterminados de lasmericanas.
- Si deseña selecciónar otro programa tras iniciaar uno, pulse primo el botón
Thank you for choosing our product. We hope you will enjoy using the appliance.
Symbols in these Instruction Manual
Important information for your safety is specially marked. It is essential to comply with these instructions in order to avoid accidents and prevent damage to the appliance:

WARNING:
This warns you of dangers to your health and indicates possible injury risks.

CAUTION:
This refers to possible hazards to the appliance or other objects.

NOTE:
This highlights tips and information.
Contents
Overview of the Components. 3
Control Panel. 4
General Notes 41
Special Safety Precautions for this Appliance. 42
Unpacking the Appliance 43
Scope of Delivery 43
Overview of the Components. 43
Notes for Use 43
Location 43
Connected Wattage 43
Electric Connection 44
Standby (Standby Mode) 44
Switching the Appliance On/Off 44
Before Initial Use 44
Useful Hints for Use 44
Function Buttons 44
Auto Functions 44
Change of Temperature and Time. 45
Turn On the Lighting 45
Warm Up Food 45
Add Rotisserie 45
Preparation 45
Use with the Frying Basket 45
Use with the Rotisserie and the Fixing Clips 45
Use with the Baking Tray and the Slide-in Grids. 45
Using the Appliance 45
Pause Operation 45
End of Operation 46
Cleaning 46
Accessories 46
Housing 46
Storage 46
Troubleshooting 46
Technical Data 47
Disposal 47
Meaning of the "Dustbin" Symbol 47
General Notes
Read the operating instructions carefully before putting the appliance into operation and keep the instructions including the warranty, the receipt and, if possible, the box with the internal packing. If you give this appliance to other people, please also pass on the operating instructions.
- The appliance is designed exclusively for private use and for the envisaged purpose. This appliance is not fit for commercial use.
- Do not use it outdoors. Keep it away from sources of heat, direct sunlight, humidity (never dip it into any liquid) and sharp edges. Do not use the appliance with wet hands. If the appliance is humid or wet, unplug it immediately.
- When cleaning or putting it away, switch off the appliance and always pull out the plug from the socket (pull the plug itself, not the lead) if the appliance is not being used and remove the attached accessories.
- Do not operate the appliance without supervision. If you leave the room you should always turn the appliance off. Remove the plug from the socket.
- The appliance and the mains lead have to be checked regularly for signs of damage. If damage is found the appliance must not be used.
- Use only original spare parts.
- In order to ensure your children's safety, please keep all packaging (plastic bags, boxes, polystyrene etc.) out of their reach.

WARNING:
Do not allow small children to play with the plastic foil.
There is a danger of suffocation!
Special Safety Precautions for this Appliance
You will find the following symbol with warning character on the appliance:
WARNING: Hot surface!
Danger of burns!
During operation and afterwards, the temperature of the accessible surfaces will be very high.
- Therefore, only touch the appliance at the door handle as well as the control panel. If necessary, use oven gloves.
-
During operation, hot steam may escape from the air outlet opening. Keep a sufficient distance.
-
Do not cover the air inlet opening and air outlet opening, in order to ensure sufficient air circulation.
- Keep sufficient distance (15 cm) to highly flammable objects such as furniture, curtains, etc.!
- Due to rising heat and vapours do not place the appliance under wall cupboards.
- Do not operate the appliance with an external timer or separate remote control system.
- Do not tamper with the safety switch.
- This appliance can be used by children aged from 8 years and above and persons with reduced physical, sensory or mental capabilities or lack of experience and knowledge if they have been given supervision or instruction concerning use of the appliance in a safe way and understand the hazards involved.
Children shall not play with the appliance. -
Cleaning and user maintenance shall not be made by children unless they are older 8 years and supervised.
-
Keep the appliance and its cord out of reach of children less than 8 years.
- Do not repair the appliance by yourself. Always contact an authorized technician. If the supply cord is damaged, it must be replaced by the manufacturer, its service agent or similarly qualified persons in order to avoid a hazard.

CAUTION:
This appliance is not intended to be immersed in water during cleaning. Please observe the instructions that we have included for you in the chapter "Cleaning".
Unpacking the Appliance
- Remove the appliance from its packaging.
- Remove all packaging materials like foils, filling materials, cable holders, and carton packaging.
- Check the scope of deliveries for completeness.
- If there are missing parts or obvious damage, do not use the appliance. Return it to your retailer immediately.
Scope of Delivery
1× Hot air fryer
1 × Frying basket with lid
1 × Removal tool
2 × Fixing discs for spits
1× Rotisserie
1 × Baking tray / Grease drip tray
2 × Slide-in grid
Overview of the Components
Picture A, Page 3
1 Air inlet opening
2 Display
3 Air outlet opening
4 Housing
5 Door
6 Door handle
7 Release
8 Guide rail
9 Mount for the rotisserie / frying basket
10 Control panel
11 Frying basket
11a Lid
12 Removal tool
13 Fixing clips
14 Rotisserie
15 Baking tray / Grease drip tray
16 Slide-in grid
Picture B, Page 4: Symbols on the Control Panel
17 Buttons for program selection
18 and buttons for the time setting (
19 button (Switching the appliance on / off)
20 button (Add rotisserie)
21 Button (Warm up food)
22 button (Turn on the lighting)
23 and buttons for the temperature setting (1)
Notes for Use
Location
- Set the appliance onto a non-slip, level, and heat-resistant surface.
- Take care that the appliance and the mains cable never are placed onto hot surfaces or near heat sources (e. g. range, hob).
Connected Wattage
The total power consumption of this appliance can be up to 1500 W. With this connected load a separate supply line protected by a 16 A household circuit breaker is recommended.
CAUTION: Overload!
- If you use extension leads, these should have a cable cross-section of at least 1.5mm^2
- Do not use any multiple sockets, as this appliance is too powerful.
Electric Connection
- Before inserting the power plug into the outlet, check that the mains voltage to be used matches that of the appliance. You can find the required information on the nameplate.
- Connect the appliance to a properly installed earthed socket. You will hear a beep sound and all symbols light up briefly. The button lights red.
Standby (Standby Mode)
NOTE:
The appliance is in standby, if the button lights red.
When faced with the following situations, the appliance will switch into standby:
- When the power plug is inserted.
- If no button is pressed for approx. 60 seconds.
- When the time has elapsed.
- When you press and hold the button for approx. 3 seconds.
You exit the standby mode by pressing the button. All symbols light up and the button flashes red.
Switching the Appliance On/Off
Turn the appliance on and off by using the button.
NOTE:
Operation is only possible when the door is closed.
Before Initial Use
- There is a protective layer on the heating element. To remove this, operate the appliance for about 10 minutes without any contents.
WARNING:
Allow the appliance to cool down before you clean it!
- Disconnect the mains plug from the wall socket.
- Wipe the inside of the appliance and clean the accessories before using the appliance.
Useful Hints for Use
- A safety switch prevents the use of the appliance when the door is not closed. The lighting of the control panel goes out.
- Do not overfill the basket. Always make sure the food has enough space in the basket to get the best results.
- In order to achieve crispy results, you can baste the food with a little oil.
- Do not prepare the appliance for high-fat foods (e.g. sausages).
- All foods can be prepared in the appliance, which are also suitable for the oven.
-
Frozen meals or liquid foods such as soups can be prepared in appropriate containers.
-
Note that the dough expands during baking of cakes, bread or similar. Nothing must come into contact with the heating element.
- Pour water on homemade potato products after cutting at least 30 minutes to reduce the potato starch. Then dry the potato pieces with paper.
- The cooking time depends on several factors: Size, condition, quantity of food and set temperature. For standard values, see "Function Buttons" "Auto functions".
- If you do not preheat the hot air fryer, add 3 minutes to the cooking time.
- Fry steaks / larger quantities of meat in a pan previously before leaving to cook in the hot air fryer. Time and temperature are dependent on the desired degree of doneness.
Function Buttons
NOTE:
- The buttons on the appliance are touch keys. Gently touch the buttons with a finger to execute the function. Whenever a button is pressed, it will be confirmed by a beep sound.
- If you keep the or buttons pressed, fast mode will start.
Auto Functions
Select your desired automatic program on the control panel. The set program can be identified by the flashing of the respective button.
| Button | Mode | Pre-set temperature in °C | Pre-set time in min. |
| French fries | 200 15 | ||
| Pizza 175 25 | |||
| Bread 165 15 | |||
| Meat 180 15 | |||
| Fish | 175 30 | ||
| Drying | 40 120 | ||
| Poultry | 190 30 | ||
| Cakes | 160 30 |
NOTE:
- These shall be considered as guide values. Depending on the size and weight, the time and temperature may be longer and higher or shorter and lower.

NOTE:
- You may, however, change the pre-set temperature and time of the auto functions.
- If you would like to select another program after starting a program, first press the button.
Change of Temperature and Time
The and buttons are available twice each on the appliance.
- Use the or buttons above and below the symbol to set the temperature. (In all programs - except Drying - 80^ to 200^ , Drying: 40^ to 80^ )
- Use the buttons above and below the symbol to set the cooking time. (In all programs - except Drying - 1 to 90 minutes, Drying: 1 to 24 hours)

NOTE:
The display shows alternately the remaining running time and the set temperature.
Turn On the Lighting
Use the button to switch the lighting in the interior of the appliance on and off. After approx. 2 minutes, the lighting switches off automatically. In addition, the lights go on when the door is opened.
Lighting on = button flashes
Lighting off = button lights continuously
Warm Up Food
Use the button to warm up food. The button flashes once you have presses it. The preset temperature is 115^ and the time 6 minutes.
Add Rotisserie
Use the button to switch the rotisserie on and off. You need this one for the rotisserie as well as the frying basket.
Rotisserie on = button flashes
Rotisserie off = button lights continuously
Preparation
Use with the Frying Basket
- Open the door.
- Slide the grease drip tray onto the bottom of the hot air deep fryer.
- Hold the frying basket by the black plastic surfaces. Open the lid of the frying basket by turning it in the direction of The symbol must be exactly above the detent. Remove the lid.
- Fill the basket with the desired food.
-
Close the lid. Place the lid in such a way that the symbol is above the detent. Tighten the lid in the direction of
-
Lift the frying basket with the removal tool onto the guide rails. Hold the release button (7) in the direction of the arrow and slide the basket toward the end of the rail. Unhand the release. The frying basket must snap into place.
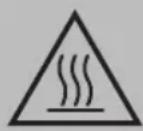
Use with the Rotisserie and the Fixing Clips

NOTE:
Do not select a roast which is too large. The food being grilled must be far enough away from the internal walls and the heating elements and must not touch them.
- Open the door.
- Slide the grease drip tray onto the bottom of the hot air deep fryer.
- Rub edible oil on to the revolving spit and spit forks.
- Poultry has to be dressed before grilling. To do so, tie the wings and the legs closely to the body using kitchen yarn.
- Place the dressed poultry or the piece of roast meat carefully on to the revolving spit. Push the spit forks on to the revolving spit and use them to fix the roast meat in place. Tighten the fixing clips by means of the screws.
- Lift the ready-made rotisserie with the removal tool onto the guide rails. Hold the release button (7) in the direction of the arrow and slide the basket toward the end of the rail. Unhand the release. The rotisserie must snap into place.
Use with the Baking Tray and the Slide-in Grids
- Open the door.
- Slide the baking tray and / or the slide-in grids into the slide rails.
Using the Appliance
- Close the door.
- Press the button to exit standby mode. You will see the preset setting 200^ and 15 minutes.
- Select an automatic program and, if necessary, change the cooking time and the temperature with the 0 buttons.
- If you use the frying basket or the rotisserie, additionally press the button to add the rotisserie.
- Press the button to start the cooking process.
Pause Operation
- Press the button to pause the operation. The button is flashing. Press the button again to resume the operation. The button is continuously lit again.
However, the operation will be interrupted when you open the door. Close the door to resume operation.

NOTE:
The appliance will start from the spot it has been paused.
End of Operation

NOTE:
When the cooking time has elapsed, the fan continues to run to cool down the appliance. OFF flashes in the display. After approx. 20 seconds, 3 beeps will sound and OFF disappears on the display. The appliance is again in standby mode.

WARNING: Danger of burns!
Hot steam can escape!
- Use oven gloves!
- Open the door.
- If you have used the frying basket or the rotisserie spit, remove it with the removal tool. To do this, unlock the frying basket or the rotisserie spit using the unlocking mechanism (7) and remove it. If you have used the baking sheet or the slide-in grids, pull them out.
- Place the accessories only on heat-resistant surface!
- Close the door.
Cleaning

WARNING:
- Always turn the appliance off before cleaning it and remove the mains plug. Wait until the appliance has cooled down.
- Do not immerse the appliance in water! Doing so may result in an electric shock or fire.

CAUTION:
- Do not use any wire brush or other abrasive objects.
- Do not use any acidic or abrasive detergents.
Accessories
The accessories can be cleaned in a warm rinse bath.
Housing
Clean the appliance inside and outside with a slightly moist, not a wet cloth.
Storage
- Clean the appliance as described. Let the accessories dry completely.
We recommend that you store the appliance in its original packaging when it is not to be used for a longer period. - Always store the appliance at a well ventilated and dry place outside the reach of children.
Troubleshooting
If a problem occurs, it is often only a small thing. Before you contact our service, please note the following information:
| Problem Possible Cause | Remedy | |
| The appliance is not working. | The appliance has no power supply. | Check the socket with another appliance. |
| Plug in the mains plug correctly. | ||
| Check the main circuit breaker. | ||
| The door is not closed properly. Close | the door until it audibly snaps into place. | |
| The appliance is defective. Contact our | service or a repair centre. | |
| The lighting in the interior does not light up anymore. | The lighting is defect. | |
| The food is not cooked to the end. | The basket is too full. Reduce the amount | unit of food. Smaller quantities are cooked evenly. |
| The temperature is set too low. Set a higher temperature. | ||
| The cooking time is set too low. Set a longer period of time. | ||
| The food is not crisp. Foods | are used, which is only suitable for a conventional fryer. | Use oven-ready food or sprinkle it with a little oil. |
| Smoke comes out of the appliance. | You are preparing very fatty foods. Fat | splashes inside the appliance may cause the emission of fumes. Provide adequate ventilation. |
| On the baking sheet / fat drip tray are still fat residues from previous use. | Clean the baking sheet / fat drip tray after each use as described in the chapter "Cleaning". | |
Technical Data
Model: FR 6031 H CB
Power supply: 220 - 240 V~, 50 / 60 Hz
Power consumption: 1500 W
Protection class:
Net weight: approx. 6.8kg
The right to make technical and design modifications in the course of continuous product development remains reserved.
This appliance has been tested according to all relevant current CE guidelines, such as electromagnetic compatibility and low voltage directives, and has been constructed in accordance with the latest regulations.
Disposal
Meaning of the "Dustbin" Symbol

Protect our environment: do not dispose of electrical equipment in the domestic waste.
Please return any electrical equipment that you will no longer use to the collection points provided for their disposal.
This helps avoid the potential effects of incorrect disposal on the environment and human health.
This will contribute to the recycling and other forms of re-utilisation of electrical and electronic equipment.
Information concerning where the equipment can be disposed of can be obtained from your local authority.
Instrukcja obslugi
Yka3bIbaeHa BO3MOxHyO ONaCHOCTb IIN3dJIINn IN dpynx OKpyxaIOxN ppeDMTOB.

ПИМЕЧАнЯ:
Jaet COBtI INHOpMaIIO.
CoapedkaHne
O63op deraen npnbopa. 3
Panaelb ynpablenna 4
06uue 3ameuHnra 63
CneuaJIbHbIe yka3aHnno
630nachoctn nna 3toro npnbopa..64
PacnaKOBka ycTpoiCTBa. 65
KOMJIeKT NOCTaBKn 65
O63op detae np6opa. 65
PpmeuHnno nncnoB0BaHnna 65
PacnoonkeHne 65
IopTe6Jnemar MoUHocTb 66
3Jekpnueckoe noKnHoueHne 66
Standby (Dekyphbippekm) 66
BkIouHe/H/BbIKIOueHn np6opa. 66
Ipeed npBbIM nCNoB3OBAHnEM 66
Yka3aHnno 3Kcnpyatau.. 66
He nO3B0JnTe DeTm mIpaTb c NOnIaTnIeHOBOI nIeKo. Onacnoctb yduyba!
CneuNbHbIe yka3aHnNo 6e3oNaChOCTn IJy 3TOrO np6opa
Ha n3delen imeToTc sJeDyUoIne npEynpeKdaUOJIe cIMBOJ:
IcnoB3OBaHne C npOTNBHEM N BbIDBnKhbIM peWETkAMN
- OtkpoTe DBepuy.
- BdBnHbTe npOTnBeH n /nn BBnBnKhBiE peWetkn no HappaBJIHOUIM.
IcnoJb3OBaHne yCTpoNCTBa
- 3aKpOte DBepuy.
-
HaxMnte Ha KhoNky yTo6bI BbInTu n3peXnMa OxuHaHn. IoBNTc npEdbapTeIbHo 3aHaHnHa NaCTpoiKa 200°C n15 MnHyT.
-
Bb6epnte aBtOMaTnueckyI nporpamMy n npn Heo6xO DmocTN N3MeHnTE Bpem IpnrTOBJIeHNr TEmpeTaTyPy C NOMOuBIO KHOJOK
4.ПиИСПОЛБ3OBAHIMЖAPOCHNKOр3INHbI ININBepTeNaTAKKEHaKMNTeHaKHONKITo6bIIO6abNTbBepTeN. - Haxmte Ha KhoNky To6bI hauaTb npoecc npiroTOBnEHn.
Mmnybchbn pexnM
Haxmte KhONky npnoctahOBKn pa6Otbl. Mraet KhoKHaXmTe KhoNky epe pa3, YTo6bl npo- donKnTb pa6Oty. ChBa noCToHH Oropnt KhoNka
- PnOtKpbBaHmN DBePcB1 Oepaun6yDetapeBaHa. 3akpoTe DBepu,TObBo306HOBHTpa6ToY.
IINPIMEYAHNIA:
Papota npnbopa npoJnKITc c MOMeHTa npnoCTaHOBKn.
Koheu pa60tbl

ПРIMЕЧАЙ:
Korda Bpem npirotoBHeHn HCTeHT,BeHTnIaTOp npoDIOJIKT paOToTaB, Yo6bIOCTyIDtB npi6Op. CFFMiraET Ha dncnnee. Pnpimepno uee3 20 cekynd pa3dactcra
3 3bykoBbix CnHana n OHe3NeT c dncnnner. Pnp6op CHOBA nepeKIOUOaETcB peKIM OKnDaHNJ.

PENEYNPEXKDEHNE:Onachoctb oxora!
- Moxket Bixoxndt bopnyn nap!
-
IcnojIb3yIte npxBAtkn!
-
OtkpoTe DBepuy.
- Ecn nCnONb3OBAJacb JapOuHa KOp3HnHa nn
7aMnp BepTeNa, ydaNITe IN C NOMOsbIO 3axBaTA.
TTO OcBO6oJTE XApOCHyO KOp3Hny INI IaMnp
BepTeNa, nCNoJIb3y MExaHn3M pa36IOKIpOBKn (7), n
ydaNITe npHaADNeXHOCTb.
Ecn nCnONb3OBAJcnpOTMbHe HIN BblDnXHbIe peWetKn, INBJIeKInTe INX. - KnaIte npHaJnEeKHOCTn TOnbko Ha JkaponpoHyIO NOBepxHocTB!
- 3akpoTe DBepy.
UncTka

PPEdUnPEXDEHNE:
CoxpaHeNo npabo Ha TexHnueckne I KOHCTpyKuOnHHbIe N3MeHeHnB pamkax npoDOnKaIoUeIcR pa3pa60Kn npOdykTa.
3To H3dJIeNIE PPOJNO BCE Heo6xOaIMbIe n AKTyaJIbHbIe npOBepKn, PpeINcaHNbIe DInpeKTHBOI CE, K npM. Ha 3NeKTPOMaHTHyO COBMeCTHMocTb I COOTBeTCTBne Tpe6oBaHnM K H3KOBOLbTHOH TexHnke, OHO bIIO TaKKe CCKOHTpyuPObAHO INOCTpOeHO C yUeTOM NocPeDnX Tpe6oBaHn IO TEXHnke Be3OnaCHOCTN.
YTNIN3aun
3haueHne cHMBOJa KOp3Ha
3aunTa OkpykaIoUe CpeB1: He Donyckaetc yTnIImaunr 3JIeKtponPi6OpOB BmEcTe C 6blTOBBIMN OTXoAMN.

Yttnn3aun yCTapeBwEe TExHnKn HEnCnpabHBbIX 3NeKTPoPnIbOpOB npOn3BODNTcB RopOdCKNX pNEMhBX NyHKTx.
He donyckaite He npabunbHOn yTuNn3aun OTxOOB.3To HAnocnt BpeD OkpykaUoSe CpeE N Ok3bIbaET HeraTINBHOe BO3dEiCTBne Ha 3DOpOBBe IIOde.
Oka3bIbaIte codeiCTBne nporpaMMe yTNIN3aUNn I dpYmMΦopMaIpepeap60KN 3JNeKTpoHHoN n 3JNeKTpuHeckoTExHKn.
HΦopMaζIIO O ηNHTax yTmIIN3aζIIN 6bITOBOy TEXHKNMOXHO IOnIYHINTB MecTHbIX OpRAHAX BnactN.
jglzjj j0d
"alalgioo"joo
3 a 1y
auijubi Uyieuai
JLJ 1a aai jai jai jai jai jai jai
.
alao1d 1 aowllg aoll l 151 i oj oelu1 (2)
a aae aee aee e ae aee
joo
AaJyNg AaLySuluull
j0alal jSg gill slly adalebi clogalebi ge Jgall
aalablll 1ylo jol yu
a.
:
2b = b
Jgluae 1a 3g aagall jko g jaojao Js
Jibby
jol olo pao 3 lojao cdo161 jS
1b
a aabaaabaaagaaaagaaaagaa
S LWO = S LS WO = S WO + S_ WO
Ld
- lg1261 p
sai. 25uyl gao jay Jaaay aalll 5
a1 = 12,b2 = 35,c_3 = 48
3jaiw. aagill udda 1dylol dauu w yllw
olai jj jlll oal j 7 j j
.000000000000000000000000000000000000000
oo
J 1 J 1 J 1 J 1 J 1 J 1 J 1 J 1 J 1 J 1 J 1 J 1 J 1 J 1 J 1 J 1 J 1 J 1 J 1 J 1 J 1 J 1 J 1 J 1 J 1 J 1 J 1 J 1 J 1 J 1 J 1 J 1 J 1 J 1 J
$$ \text {j} = \delta \text {g a l l} \text {l} $$
$$ \bar {a} \bar {a} \bar {b} \bar {c} \bar {d} \bar {e} \bar {f} \bar {g} \bar {h} \bar {i} \bar {j} \bar {k} \bar {l} = \bar {o} \bar {l} g \bar {s} \bar {d} \bar {b} \bar {c} \bar {d} \bar {e} \bar {f} \bar {g} \bar {h} \bar {i} \bar {j} $$
puuW uio gai
a 111 111 111 111 111 111 111 111 111
aSoll do gol go
So pabll y 100000000000000000000000000000000000000
gill JdJglgssu
Jl jll Jd
a_0b^01
()
.()
jJ11 1
1
Lull Jia dll
a. a. 1234567890
a. a. i. lo g i j. o. 1. g l e sll g b olil j. o. 1. 1. 1. 1. 1. 1. 1. 1. 1. 1. 1. 1. 1. 1. 1.
Jusunlol
ooohoo
jll jil jil jil jil jil jil jil jil jil jil jil jil jil jil jil jil jil jil jil jil jil jil jil jil jil jil jil jil jil jil jil jil jil jil jil jil jil jil jil jil jil jil jil jil jil jil jil jil jil jil jili
S OBC = S COD + S_ BOC
aBaaSg
JgUgUgUgUgUgUgUgUgUgUgUgUgUgUgUgUgUgUgUgUgUgUgUgUgUgUgUgUgUgUgUgUgUgUgUgUgUgUgUgUgUgUgUgUgUgUgUgUgUgUg
13
a 1000000000000000000000000000000000000000
山
aagwll aegy lge oajgall aegy goggll aoe. jolll aggll oiao 3
psuui jjjj
ab = 10
gaa a 15
g j 1
aLalal
jgl qalil a jg jg kail ggl jogui gai j
. dall g jgolj j j j 0
j_4 = 21 22
jlll lai aolil aoaolil
:duydu yj jr j 1 dol j gblg jll
!:
!gjy
. 1.
J 1
(p0w15)afoaLmo gJg 1
!g jwJg
.
·s + 2 =
a0 = 12, b0 = - 4
aaii iiaaii iiaii iiaii iiaii iiaii iiaii iiaii iiaii iiaii iiaii iiaii iiaii iiaii iiaii iiaii iiaii iiaii iiaii iiaii iiaii iiaii iiaii iiaii iiaii iiaii iiaii iiaii iiaii iiaii iiaii iiaii iiaii iiaii iiaii iiaii
.aaabblb
jlll jIbJc puc
Jgglj 151 p dssu b jn no aiaaall gabll lalb y
8
.8 jgabJglia 4 y J5Jgj
y
. 1
4 1
3
3 15 clall baiol jglal jia jia jia jia jia jia jia jia jia jia jia jia jia jia jia jia jia jia jia jia jia jia jia jia jia jia jia jia jia jia jia jia jia jia jia jia jia jia jia jia jia jia jia jia jia jia jia jia jia jia jaijai
J
L
jglplaiuylgaiui j 3 Jolua Jyly
pduwuyi yduj gao
L 1
1011 1010 1010 1010 1010 1010 1010 1010 1010
jL
:
jbs 10g jgs 1000 10000
y
:4
aai g jiaai lal yjy aiaaa o bdo g joil iis
S2 = 1
ab = 10
Cloglogg cialll agall jolil galy
. g jzwl pluizwU jlgzll i
(aIu oIa 1 aIb aua y) ayg jy g aai I aai dai g I yjgl Jy 13. aluuy jayl paa y. sll
jgljgljgljglj
131 (Jgulll Jg 4aai jai aai) Lds
aeejbl tlaolll jgl palaowll jgolll
jJySJI JIJI JIJI JIJI EJI. aJyJI JIJIaie IeI
jglall placw lca gll cai iie
gulio jglu (Lg) g jydlg. yolalg
y. bao aio sgaabol golal plaiu wpuas jgall iis
3 3 3 3 3 3 3 3 3 3 3 3 3 3 3 3 3 3 3 3 3 3 3 3 3 3 3 3 3 3 3 3 3 3 3
4
- 1ole
76.
75
75
75.
75
75.
75
75.
75 1
75
- 74
- 74
- plabll iJusuui
- 73
- 73.
GARANTIEKARTE
warranty card · garantiekaart · carte de garantie · scheda di garanzia · tarjeta de garantia · cartao de garantia · garantikort · karta gwarancyjna · zaru.cnli list · kartica jamstva · carte de garantie · fapaunnoHa KapTa · zaru.cnly list · garancijski list · garanciajegy · rapaHTiHmNfOpMynap · fapaHTnHbTanoH
FR 6031 HCB
24 Monate Garantie gemäß Garantieerklarung - 24 months warranty according to warranty declaration - 24 maanden garantie volgens garantieverklaring - 24 mois de garantie selon la déclaration de garantie - 24 messi de garanzia seconde la dichiarazione di garanzia - 24 meses de garantia de acuero con la déclaracion de garantia - 24 meses de garantia, de accordo a sua déclaration de garantia - 24 manedes garantiet henhold til garantibeteingenslese - 24 misesiace gwarancjna podastawie oswiadczena gwarancjnego - zaruka 24 meseicu podle prohlasenf o zaruce - 24 mesecno jamstvo u skladu s jamstvenom deklaraciujm - 24 luni garantie conform declaratie de garantie - 24 mecaa rapanuca a cbotertcbrne c rapanuohnata deknapaun - 24-measa nza zaruka podla vyhlasenia o zaruke - 24-mesecnagarcija, skladno z garancjsko izjav0- 24 honap garancia a garanciafeletetelekben leirtak szerint - rapanhtra na 24 micui iBIDNOIDHO npo npa raptHTIO - raptHTIO 24 mecaa cornaccho zarneneHHBM raptAHHbIM npAIBNAM -
Kaufdatum, Handlsterpmel, Unterschied - date of purchase, dealer stamp, signature - aankoopdatum, dealerpmel, handtdeckung - date d'achat, tampon du concessionaire, signature - data di acquisto, timbre di riendatore, fornca - fecha de compra, sellio del distribuiator, firra - data de compra, carlimbo do distribuiator, assinatura - kipsopatro, forhandlstemper, signature - data zakupu, pieczec spradewy, podisp - datum zakupeni, ralitico produce, podisp - datum koupivne, rig trogova, podisp - data o achitei, stamplia furnizatoriul, semmatura - Data na nojukiva, neuva na Pogodava, Pogodn - datum nikupu, pecliatna obchodnica/ predajcu, podisp - datum nikupu, rig trogova, podisp - visilaris datumata, kereskedé belyegroje, aliaraks - datrnpobdaniu, nevata npodapau, npocic - Data npodopetemii, ilamran npodapau, Pogodn-
BOMANN®
www.bomann-germany.de
BOMANN
C. Bomann GmbH
Internet: www.bomann-germany.de
Made in P.R.C.


- Symbols in these Instruction Manual
- WARNING:
- CAUTION:
- NOTE:
- Contents
- General Notes
- Special Safety Precautions for this Appliance
- WARNING: Hot surface!
- Danger of burns!
- Unpacking the Appliance
- Scope of Delivery
- Overview of the Components
- Picture A, Page 3
- Picture B, Page 4: Symbols on the Control Panel
- Notes for Use
- Location
- Connected Wattage
- CAUTION: Overload!
- Electric Connection
- Standby (Standby Mode)
- Switching the Appliance On/Off
- Before Initial Use
- Useful Hints for Use
- Function Buttons
- Auto Functions
- Change of Temperature and Time
- Turn On the Lighting
- Warm Up Food
- Add Rotisserie
- Preparation
- Use with the Frying Basket
- Use with the Rotisserie and the Fixing Clips
- Use with the Baking Tray and the Slide-in Grids
- Using the Appliance
- Pause Operation
- End of Operation
- WARNING: Danger of burns!
- Cleaning
- Accessories
- Housing
- Storage
- Troubleshooting
- Technical Data
- Disposal
- Meaning of the "Dustbin" Symbol
- Instrukcja obslugi
- ПИМЕЧАнЯ:
- CoapedkaHne
- CneuNbHbIe yka3aHnNo 6e3oNaChOCTn IJy 3TOrO np6opa
- IcnoB3OBaHne C npOTNBHEM N BbIDBnKhbIM peWETkAMN
- IcnoJb3OBaHne yCTpoNCTBa
- Mmnybchbn pexnM
- IINPIMEYAHNIA:
- Koheu pa60tbl
- ПРIMЕЧАЙ:
- PENEYNPEXKDEHNE:Onachoctb oxora!
- UncTka
- PPEdUnPEXDEHNE:
- YTNIN3aun
- 3haueHne cHMBOJa KOp3Ha
- jglzjj j0d
- a.
- :
- Ld
- oo
- puuW uio gai
- psuui jjjj
- ab = 10
- aLalal
- j_4 = 21 22
- jlll lai aolil aoaolil
- L
- GARANTIEKARTE
- FR 6031 HCB
- BOMANN®
Brand : BOMANN
Model : FR 6031 H CB
Category : Deep fryer