
MPO 2246 CB - Oven BOMANN - Free user manual and instructions
Find the device manual for free MPO 2246 CB BOMANN in PDF.
| Brand | Bomann |
| Model | MPO 2246 CB |
| Product type | Oven |
| Power supply | 220-240 V~, 50/60 Hz |
| Power consumption | 1000 W |
| Net weight | approx. 3.85 kg |
| Heating type | Top, bottom, top and bottom |
| Timer | 0-60 minutes with automatic shut-off and audible signal |
| Included accessories | Pizza tray, grill rack, crumb tray |
| Door material | Glass |
| Cooking functions | Grill, conventional baking |
| Safety | Automatic shut-off, hot surface warning, no child lock |
| Cleaning | Removable trays hand washable, interior cleanable with damp cloth |
| Repairability | Do not repair yourself; contact a qualified technician or after-sales service |
| Power | 1000 W |
| Frequency | 50/60 Hz |
| Voltage | 220-240 V |
Frequently Asked Questions - MPO 2246 CB BOMANN
User questions about MPO 2246 CB BOMANN
0 question about this device. Answer the ones you know or ask your own.
Ask a new question about this device
Download the instructions for your Oven in PDF format for free! Find your manual MPO 2246 CB - BOMANN and take your electronic device back in hand. On this page are published all the documents necessary for the use of your device. MPO 2246 CB by BOMANN.
USER MANUAL MPO 2246 CB BOMANN
Multi Pizza-OfeMPO 2246 CB
Multi-pizzaoven • Four multi pizza • Homo para preparar multiples pizza
Thank you for choosing our product. We hope you will enjoy using the appliance.
Symbols in these Instructions for Use
Important information for your safety is specially marked. It is essential to comply with these instructions in order to avoid accidents and prevent damage to the machine:

WARNING:
This warns you of dangers to your health and indicates possible injury risks.

CAUTION:
This refers to possible hazards to the machine or other objects.

NOTE: This highlights tips and information.
General Notes
Read the operating instructions carefully before putting the appliance into operation and keep the instructions including the warranty, the receipt and, if possible, the box with the internal packing. If you give this device to other people, please also pass on the operating instructions.
- The appliance is designed exclusively for private use and for the envisaged purpose. This appliance is not fit for commercial use.
- Do not use it outdoors. Keep it away from sources of heat, direct sunlight, humidity (never dip it into any liquid) and sharp edges. Do not use the appliance with wet hands. If the appliance is humid or wet, unplug it immediately.
- When cleaning or putting it away, switch off the appliance and always pull out the plug from the socket (pull the plug itself, not the lead) if the appliance is not being used and remove the attached accessories.
- Do not operate the machine without supervision. If you leave the room you should always turn the device off. Remove the plug from the socket.
- The device and the mains lead have to be checked regularly for signs of damage. If damage is found the device must not be used.
- Use only original spare parts.
- In order to ensure your children's safety, please keep all packaging (plastic bags, boxes, polystyrene etc.) out of their reach.

WARNING!
Caution! Do not allow small children to play with the foil as there is a danger of suffocation!
Special safety information for this unit
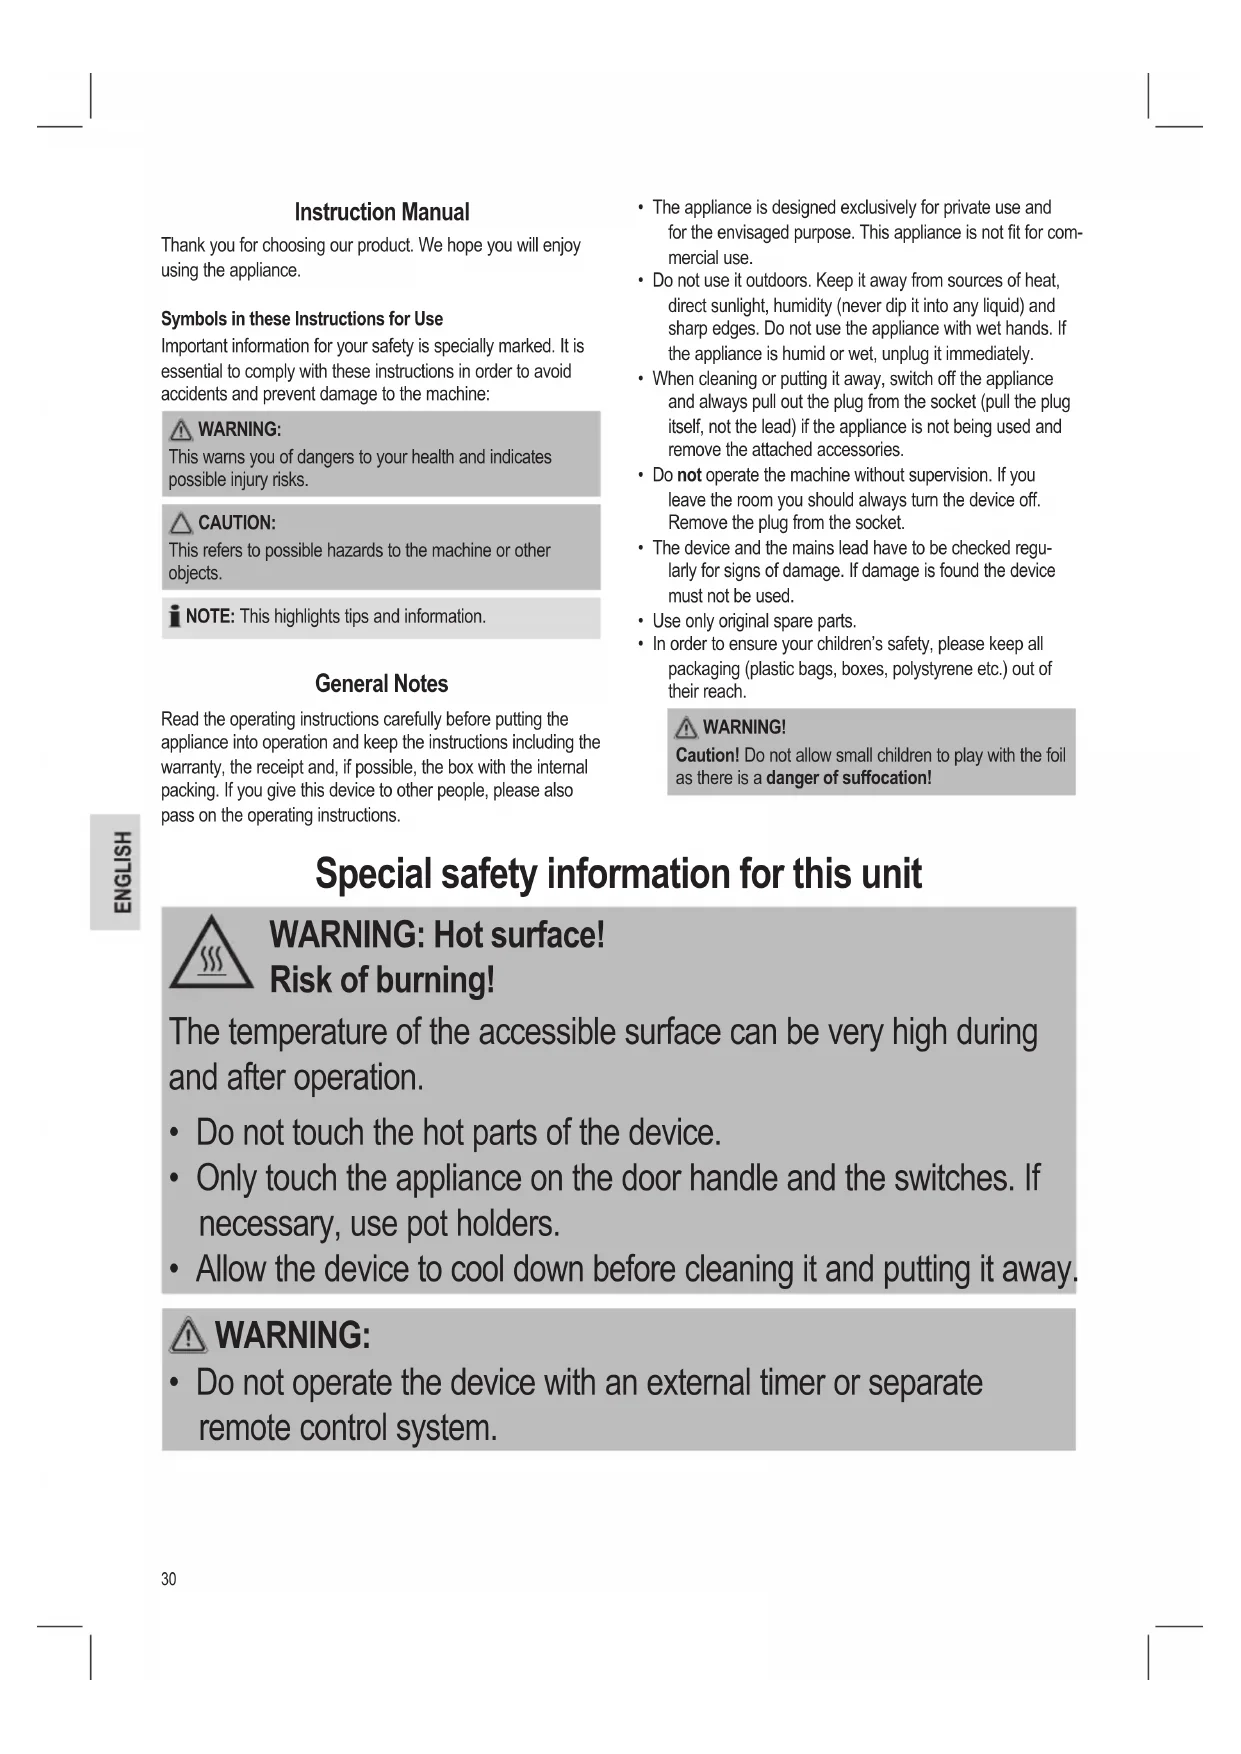
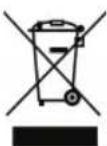
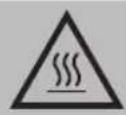
WARNING: Hot surface! Risk of burning!
The temperature of the accessible surface can be very high during and after operation.
- Do not touch the hot parts of the device.
- Only touch the appliance on the door handle and the switches. If necessary, use pot holders.
- Allow the device to cool down before cleaning it and putting it away.

WARNING:
- Do not operate the device with an external timer or separate remote control system.

WARNING:
- Always operate the appliance under supervision. Very dry bread can catch fire inside the appliance!
- Do not try to repair the appliance on your own. Always contact an authorized technician. To avoid the exposure to danger, always have a faulty cable be replaced only by the manufacturer, by our customer service or by a qualified person and with a cable of the same type.
- This appliance can be used by children aged from 8 years and above and persons with reduced physical, sensory or mental capabilities or lack of experience and knowledge if they have been given supervision or instruction concerning use of the appliance in a safe way and understand the hazards involved.
Children shall not play with the appliance. - Cleaning and user maintenance shall not be made by children unless they are older 8 years and supervised.
- Keep the appliance and its cord out of reach of children less than 8 years.

CAUTION:
- Ensure that the power cord does not come into contact with the hot parts of the appliance.
- Do not place the appliance near inflammable items such as curtains or wood.
- Place the appliance on an even, heat-resistant surface.
- Position the appliance with the back of the appliance facing a wall.
- Do not move the appliance when it is in operation.
- Ensure that both operating switches are in the “OFF” position when you are not using the appliance.
Overview of the Components
1 Function switch
2 Timer
3 Crumb tray
4 Door handle
5 Glass door
6 Grill grate
7 Housing
Not shown: Pizza tray
Symbols on the switches
Function switch
Top and bottom heating
Bottom heating
Top heating
Off
Timer
OFF-0 Off
10...60 Minutes
Unpacking the appliance
- Take the appliance out of its packaging.
- Remove all the packaging material such as plastic foil, filling material, cable ties and cardboard packaging.
- Check that all parts are supplied in the box.
- Please check the appliance for any transport damage to prevent hazards.
NOTE:
There may still be dust or production residues on the appliance. We recommend that you clean the appliance as described under "Cleaning".
Instructions for use
Before initial use
There is a protective layer on the heating element. To remove this, operate the appliance for about 10 minutes without any contents. Set the function switch to "Top and bottom heating".
NOTE:
Any smoke or smells produced during this procedure are normal. Please ensure sufficient ventilation.
Electrical connection
- Ensure that both operating switches are in the "OFF" position.
- Check whether the mains voltage that you want to use matches the one of the device. You will find the information about this on the type plate.
- Insert the plug in a duly installed protective contact socket.
Turning on/off
- The operating switches are used to turn the appliance on and off.
- Once you have selected a heating type with the function switch and once you've turned on the timer, the heating process will begin immediately. And vice versa: Once you have set a time and once you have turned on a heating mode, the heating process will begin immediately.
- A beep signals the end of the set time. The appliance shuts off automatically. You may still hear the timer ticking for a few minutes.
- If you'd like to end the heating process before the set time has elapsed, turn the timer anti-clockwise until you hear a beep.
- If you would like to finish working with the appliance, set the function switch to the "OFF" position. Disconnect the mains plug from the socket.
iNOTE:
The timer may also be used at any time without any electrical connection.
General information on use
Always insert the crumb tray beneath the glass door.
- Use the pizza tray for meat or for pizza.
- If you would like to use other dishes, ensure that they are heat-resistant.
- The grill grate is suitable for preparing toast.
- With cooking times of less than 5 minutes, we recommend preheating the oven without food for about 3 minutes.
- When setting the timer to 3 minutes or less, first set it to 10 minutes and then turn it back to 3 minutes.
Using the unit
- Ensure that both operating switches are in the "OFF" position.
- Connect the appliance to a properly installed earthed socket.
- Open the door and place the dish into the oven.
- Close the door.
- Use the function switch to select the desired type of heating.
- Set the desired cooking time with the timer. You can use the following table as a guide.
- Once the oven has been turned off, you may open the door and remove the dish with pot holders.

WARNING: Risk of burning!
- Do not touch the hot parts of the appliance.
-
Only touch the appliance on the door handle and on the switches.
-
Set the function switch to the "OFF" position.
- Disconnect the mains plug from the socket.
- Let the appliance cool down before you clean it!
Recommended toasting times
| Food | Quantity/ Piece | Cooking time | Heating type |
| Sandwich 2 – 3 2 – 3 minutes | Top and bottom heating | ||
| Toast 2 - 3 slices 2 – 3 minutes | Top and bottom heating | ||
| Bacon 4 strips | 5 – 10 minutes per side | Top heating | |
| Ham slices 3 - 4 slices | 7 – 12 minutes per side | Top heating | |
| Hamburger 2 – 3 slices | 8 – 10 minutes per side | Top heating | |
| Pork chops 2 | 12 – 14 minutes per side | Top heating | |
| Fish fillet 1 - 2 slices | 10 – 12 minutes per side | Top heating | |
| Sausages/ Hot Dogs | 3 – 4 | 10 – 12 minutes per side | Top heating |
| Beefsteaks | 2 slices (approx. 2 cm thick) | 12 – 14 minutes per side | Top heating |
| Lamb chops | 2 – 3 | 11 – 14 minutes per side | Top heating |
| Chicken 1 half | 15 – 20 minutes per side | Top heating | |
| Pizza Up to | 350 g | Per recipe instructions | Top and bottom heating |
| Pizza, frozen | approx. 300 g | approx. 15 minutes Also refer to the manufacturer's instructions | Top and bottom heating |
These times only serve as a guide and may vary depending on circumstances.
Cleaning

WARNING:
Always pull out the plug from the mains socket before cleaning and wait until the unit has cooled down.
- Do not immerse the device in water! It could result in an electric shock or fire.

CAUTION:
- Do not use any wire brush or other abrasive objects.
- Do not use any acidic or abrasive detergents.
Pizza tray and crumb tray
- Remove the pizza tray from the inside.
- Pull out the crumb tray from underneath the glass door.
- Clean these parts in hot water by adding some washing-up detergent. Then dry the parts well.
Interior

CAUTION:
Do not use any oven spray! The quartz heater could be damaged in the process.
Keep the interior of the oven clean.
- Splatter and food residues on the oven walls and on the grill grate may be removed with a moist cloth by adding some dishwashing liquid.
- Wipe dry with a dry towel.
Base unit

WARNING:
Please ensure that no water gets inside the appliance!
- Clean the housing after use with a slightly damp cloth.
- Slide the crumb tray back into the guide beneath the glass door.
- Set the pizza tray onto the grill grate in the oven.
Storage
- Clean the appliance as described and let it completely dry.
- We recommend storing the appliance in the original packaging if you do not want to use it for long periods of time.
Always store the appliance out of the reach of children in a well-ventilated and dry place.
Technical Data
Model: MPO 2246 CB
Power supply: 220 - 240 V~, 50/60 Hz
Power consumption: 1000 W
Protection class:
Net weight: approx. 3.85 kg
The right to make technical and design modifications in the course of continuous product development remains reserved.
This device has been tested according to all relevant current CE guidelines, such as electromagnetic compatibility and low voltage directives, and has been constructed in accordance with the latest safety regulations.
Disposal
Meaning of the "Dustbin" Symbol
Protect our environment: do not dispose of electrical equipment in the domestic waste.
Please return any electrical equipment that you will no longer use to the collection points provided for their disposal.
This helps avoid the potential effects of incorrect disposal on the environment and human health.
This will contribute to the recycling and other forms of reutilisation of electrical and electronic equipment.
Information concerning where the equipment can be disposed of can be obtained from your local authority.
Instrukcja obstugi
P03nakyBaHHn npncToPO
- Bmmitb npctpi3 ynaKybaHHa.
- 3HIMITb BeCb nakyBaJbHN MaTePian: nonimePhy nnIBKy, HANOBHIOBaui, 3aTnCKaI dNra KaBeJIIO i KapToHHI Kopo6Kn.
- Ipepeipte, uioctabneho Bci enemeHTM.
4.Дункенн He6e3neKn nepeBipTe,н He 6yNo NOxKOKeH npCtpiNic TpaHcnpOpyBaHHa
IIPNIMITKA.
Ha npictroo moke 6ytn nnil abo Bixdoi Bnpo6nntBa.Mn pekomehnyemno nouictnTnpictpi, jk onicaHO b po3di "HnueHHN".
Ihctpykii 0do BVKOpncTahnH
Ipeep nepuBm BnKOpNCTaHHM
Ha HarpibaIbHomy enemEt i 3axnche nokpnTTa.06 BuaNTn Ioro, yBIMKHTb npoxkni npnaI np6n3HO Ha 10 xBNIH.BCTAHOBITb nepemkaayyHKui y nooXeHHa "HarpibaHra 3Bepxu ta 3H3y".
IIPNIMITKA.
Ljinkom HopmaIbHo, 10 niJc yap po6oTn npnaJy BHNKATIMe JIKNcB DmM YI 3aIaxn. 3a6e3neYTe DOCTaTHO BEHTNIJIIO.
Enektpnne niknouenr
- YneBHITbcra, 0o obuBa nepemikaH 3haxOaTbCra y noJIOXeHHI "OFF".
- IpeekohaiTeC, 10 Hanpyra KINBneHH, Aky PnHaYeTBCB BIKOPNCOTByBaTN, BiNIOBIAe HAnpy3i KINBHeHH npIaNy. Lg IHopmaui BkazhaHa NaCnOpTHI Ta6nHcip npiaNy.
- BCTaBTE BUNIy B HAIJIeXHIM YINHOM BCTaHOBJIeHy po3eTKy 33AXICHM KOHTAKTOM.
BMUKAHH / BMUKAHH
-Перемпаи ВИКОРИСТОВЕТСА,ЦБ BMИΚAТУТВИМИΚA- TNnpINA.
HarpiBaHH NoHaehc HeraHIO nicToro, RaBn BnbpAin Tn HarpibaHra 3a Donomoro npemKaua fynkui Ta yimkhnyu TaMep. Te came BiDyBaetcb, KOIN nepEMKaHi BMKAHOCTCB y 3BOPOTbOMy NopRky Cnpuy BCTAHOBIOETc TaMep, a NotIM BnBpaETcbr TnHarpiBaHH.
Ha npkiHcBCTAHOBHeHO cacy npolya3 ByKOBn CnHAn. PpnaB BmKHeTcB aBTOMaTHHO. MoKnBO, KJIbKa XBnIH NcE 6yTe yTu OkaHH TaMepa.
KIO nOpi6HO 3aBepuHTn npocec HarpBaHHr DO TOrO, K MHe BCTaHOBJIeHN Yac, npOBePTaTe TaIMep IpOTN rOHHNKOBOI cTPIJK, DOKH He NOUYcTe 3BYKOBI CnHAn.
Ku npio 3aBepunntpo60ty npnady, BCTaHOBIT nepeMkau cyHKuiy y noOKeHHN "OFF". BiEeHnTe Hyp biD po3eKn.
IIPIMITKA.
Taimepom MoXHa KopnCTyBaTnca y 6yNb-aykui cac 6e3 nnKIOUeHHa DO mEpexi.
3araJI BiOMOCTI npo BVKOpNCTAHH
3aBxN BCTaHOBnHOte TaIO DnKpnxt nCkIHyDBeP
-ДЯ M'ЯcaЧипіц.Kорис'tу.TацedoДЯпіц.
- Y pa3i BnKOpNCtAHH iHJoro NocCyBnEBHITbcA, 10 BnCTiIKM D0 BnCOKnx TEMpeaTyp.
- PeuItky rPnIb moXHa BnKOpNCToBvBaTn dIra cMaKeHHa ToCTIB.
KUO Yac npiroToyBaHHa MeHue 5 XBUNH,peKoMeHIOBaHO nonepeHNbO nporpiTn npoxHIO nIpynpTAROM np6n3HO 3 XBUNH. - JI KU O NTOPI6HO BCTaHOBITN TaIMep Ha Yac MeHWe 3 XBUNIH, CnepuBCTaHOBiTB Ioro Ha 10 XBUNIH, a NOTIM npOBepHITb Ha3ad Do 3 XBUNIH.
KopncTyBaHHn npuanaom
- YneBHITbc, 06o6nDb a nepeMnkaHi 3haxOJaTbcy y noJIOKeHHI "OFF".
2.Пд ecнайтnpиладdo3a3eMJIeHoi po3eTKI,ВсТановпeHoiHaJIeXHIM YuHOM. - BiDkpniTe DBePcTa Ta BCtAte 6nOo y niH.
- 3akpiTe DBepuTa.
- 3a donomoro npemmkaay a yHKui Bn6epiB noTpiHn Tn HarpiaHH.
- 3a donomoroTo TaMepa BCTaHOBiTb NOTi6Hm Yac npri- roTyBaHHra TabnIIO HIXKHe MOxHa BkOpNCTOByBatn RaJ DOBIDKy.
7.ПICЯВIMKHeHnI Nei MoXHa BiJKnPTu DBePcYa Ta BInHrTn 6JIIO, BIKOPNCOTByOuN pINxONI.

PONEPEDXEHH. Pn3nk oniky!
-
He Topkai Tece rapiyix DeTanei npuna.
TopkaTnca npnaNy moXHa TInbKn 3a pyKy DBepeI npemNkayi. -
BctahOBitb nepemKau cyHKuiy nnoJxehn "OFF".
- BiD'edHaiTe UHyp BiD po3ETKn.
- IpepeuieHnIeM npuaIaMa eOxOioHyTu!
PekomeHDoBaHH Yac CmXeHHA
Yka3bIbaeHa Bo3MOxHyO NaChOCTb IINI INIpyTNX OKpyKaHouNIX pEIMETOB.
IINPIMEYAHN: Daet COBt b HnHΦopMaHIO.
OmbaHOpMaun
IpeiHaanom 3KcNpyatau np6opbA BnHMaTeBHO npOHTaTE npINarAeMyIO INCTpyKUIO NO 3KcNpyatauM N COXpAHNTe ee B HAdexHom MeCTe, BMeCTe C rapaHTnHBIM TaHOHOM, KACCOBbIM YekOM I, NO BO3MOxHOCHTN, KAPTOHHo KOp6KOc C yNAKOBOHbIM MaepnAnOM. Ecn DaTe KOMy-NINO nonOB-3OBaTbCg Pnp6OpM, O63aTeNbHO daITe BnPnDaHy daHHyo INCTpyKUIO NO 3KcNpyatauM.
Пользупесь пиборм толькх acthbIMобра3OMи noHa3haueHIO.Пибор He npedHa3haueHдя кOMMepyeCKORO nCNoIb3OBaHЯ.
He noIb3yIeTcB npI6OpOM NOI OTKpbITbIM He6OM. PpeOxpaHnIe npI6Op OT XApbl, npIaMbx COIIHeuHbIX Lyuei, BnaJXHOCTN (H N B KOem cIyae He nOpyKaIte ero B BoDy) u yapOB o6 octpIe yrJIb. He npIkaCaiTeCb K npI6Op BnaJXbIMn pykAm. Ecn npI6Op yBaJaxHMnCn IIN HAOK, TyT Xe BbIHbTE BuIKy IN3 pO3ETKn.
- Pocne 3KcPnyatauM,MOHTaKe pNHaDNeKHOCTe, YnCTKe NIN NOIOMKe pNbOpa BcERda BbIHMaTe BnIKy n3 po3ETKn (TJHNTe 3a BNJIky,a He 3a Ka6eJIb).
He octabJrTe BkHoueHHbIe 3neKtponp6Opbl6e3 npncMoTpa.BbIXOJa n3 nomueHnB CcerDa BbIKNoaTe np6Op.BbIHbTe wTeKepe n3 po3eTKn.
- Pn6bop n Ka6eBcTeBOro NtTaHnna Heo6xoDmO peryIaRHO o6CneIOBaTb Ha HAnuHne CteIOB NOBpeKdEHH. Pn O6HapUkeHn IOBpeXdEHH NoIb3OBAtbcr np6oPOM 3aIpeuJETcra.
- IcnoJb3yIte ToJIbKO opIMHaJIbHbIe 3aNactM.
- IV3 coo6paXeHn 6e3oNaChocTn DnI DeTeH ne OcTaBJIaYte JExKaTb ynaKOBky (IInactIKOBbIe MeuKIn, KapTOH, NeHONJAcT n T.D.) 6e3 npNCMOTpa.
IPEyIPEXJEHNEI
He no3BOJnIte DeTmIrpaTb C nOIN3TNHeHOBOn nIEKo. Onachocb ydyuBa!
CneuaJIbHbIe Tpe6ObaHn8 6e3OpacHOCTn IJRA 3TOrO np6Opa
I P E D U N P E X D E H N E:
- Пи зациnp6opa He noIb3yTEcB BbiHOChbIM BbIKIO-QuTeJem C yacOBbIM MExaHn3MOM NIN OTdJIbHOJ TeJIeMeXaHn-WeCKoN CnCTeMoN.
- Bcerda cneiTe 3a np6opom BO BpeMЯ ekCnIyaTaUu. Cyxoi xle6 moKet 3arOpetbCra BHyTpN np6opa!
HnB Koem cnyae He pemOHnpuYte np6op camocToIbHo, a obaaTeCb B TaKOM cnyae 3a NOMOUsbK CpeunAInCTy, MeHoueMy COOTBeTcTBUoUsn DOnyck. N3 coo6paXeHn 6e3OpacHOCTN, 3aMeHa CETeBOrO ShHpya Ha paBHO3NaHbI DOnyCKaETcT ToJIbKO Yepe3 3aBOIN3ROTOBNTeJb, Hauy CepBnCHyO MaCTepCKyIO IIN COOTBeTcTBUoUeR KBaINΦnUropOBaHHOrO CneuaJIncTa. - 3TO yCTPOIcTBO MOKET NcNoJIb3OBaTbcra DeTbMn C8 let n JIOMbMn C OrpaHnueHHbIMN cH3nueCKIMN, Ocra3aTeJIbHbIMN n YmCTBeHNbIMN CnOCo6HOCTaMn, a TaKKe JIOdbMn 6e3 OnbIta n 3HaHni,ecn OHn HaxoJdTc rno pncMOrPOM nIN 6bln npOHnCTpykTNpOBaHbI o6 NcNoJIb3OBaHnn yCTPOIcTBa 6e3OpacHbIM O6pa3OM n IOHMaIOT BO3MOXHbIe yrpo3bl.
- DeTЯM He pa3pewaetcI rpaTb C yCTpOiCTBOM.
-ЧИстka и обслужиBaHne He ДОЛЖно ВьЮЛЯТьСЯ DeTьМИ, 3a ИскПючЕнем DeTeN CTapшe 8 Лет И пон HabЛЮДЕнem B3рocЛыIX. - PacnojaraTe neyb n ceTeBOH shHyp BHe DocraemocTn DeTeMnaDwe 8 jeT.
BHIMAHNE:
- Y6eIntecb,ЧTO сиLOBOй Ka6eЛь He copnKacaeTcR C ropaHmNчactamn np6opa.
3anpeaetcpa3MeaTb np6op pydom cJeKo BocnIaMeHembIMN PpeMetAM, TaKIMN KaK StOpbl NIN DepeBraHHbIe DeTaJI.
BHIMAHNE:
- YctaHOBInTe npi6op Ha poBHOJ XapocToIKoN NOBepXHOCTN.
- YctaHOBInTe np6Op 3aDHei CTOPOHOK CTHe.
3anpeaetcnapemeeatb np6op BO Bpemr 3Kcnnyataun.
Korda npnbop He ekcnnyatnpyetcra, ybeintecb, yto oba nepeKnouaTeIra haoTcB noloxeHnn "OFF" (BbIKl.).
0630p KOMNHOHTOB
1ФyHKUHOHaBHyI nepeKluOaTeJb
2 TaHmep
3Подондясбopa кршек
4PyHaDBepeBbI
5CTeKJIaHHaIbepca
6 PeWetka rpnla
7 Kopnyc
He noka3aH: IpoTINBeH bIJI NIIUJIbI
CnMBoJIbHa nepeKNIouaTeJAX
PoiKJIIOUeHHe N K cTeN
- Y6eHntecb, yTo o6a nepeKnOuATEJra HaxoJrTcB noJIOxEHNI "OFF".
2.Поверьт, COOTBeTCTByeT JIN CeTeBOe HAnpЯKeHHe HOMHaJIbHOMy HAnpЯKeHnIO npI6Opa.IHΦopMaцЯ O6 3Tom CoDEpXHTCRA HA TINOBO TaBnUKe.
3.BctabTe cTeByIO BnIKy Bpo3eTKy C HanpjaKeHnEM CETN, OCHAaeeHHyIO 3aUHTbIMKoHTaKTAMN U yCTaHOBJIeHHyIO B COOTBetCTBUN C PpeDINCAHNM.
BkJIOueHHe / BbIKJIOueHHe
- PpeeknHouaTeTNI NCIOJIb3yIOTcI DnB BKNIOHeHn N BblKIOHeHn np6opa.
Cpa3y nocne BbIbopa pexima Haraeba c nomoubno nepeKIOUaTeJIa yHKmN IN BkIOUeHnra TaIMepa,HaHTcR npOcecc Haraeba. N Ho6oPoT: cpa3y nocne ycTaHOBKn TaIMepa IN BkIOUeHnra pexima Haraeba,HaHTcR npOcecc Haraeba.
-ПО OKONHAHIN yCTaHOBJIeHHOrO BpeMeHn pa3daetcR 3ByKOBoI CmHaI. Пибop OCTaHaBJIbAeTcR aBTOMaTHueCKN.В TeueHne HeCKoJIbKIX MmHy T Bbl MoKeTe CnbluAtb TnKaHbe TaMepa. - EcnB Bam HeoXoIMIO pNIOCTaHOBNITb IPOUeCC HArpeBa DO OKOHAnHnY UcTaHOBJIeHHOro BpemeHN, NOBOPaUNBaIte TaMep IpOTnB YacOBO BCTpeIKN, NOKA He pa3dactc CnHn.
- EcIN BbI XOTnTE 3aKOHHTb pa6oTaTb C np6Opom, yCTaHOBInTE nepeKJIIOHATEJIb FyHKmB NIOJoxHeNc "OFF". BbITaUnTE BnIKy n3 pO3eTKn.
I PIMMEUAHNIA:
Taimep MoKHO TaKKe IcIOJIb3OBAtB BJIIO6oe BpeM, He NpOKIIOUaY K 3JIeKTPOcETN.
067aHOpMaOn on nCNoJIb3OBAHNO
BceTgBaCTaBnTe nDIOH dIg c6opApKpOWeK npCTeKNHHyDBepy.
- IcnoIb3yIte npOTnBeHb IJI pNzIbI INI dIg MraCa.
- EcnBbXoTnTe NcNoIb3OBaTb DpyrIyIOncSyIy, y6eIITecb, YTO OHa JkaponpOuHaj.
- PeWetka DnI rPnIy nOxDOnIT dNpIpyroTOBHeHnToCTOB.
ДяпгOTOBJIENI npOyKTOB MeHee,ЧEM 3a 5 MInHyT, Мbl peKOMeHdYem ПрДВapITeMbHO pa3OrpeTb DyXOBky BTeHeHne 3MnHyT.
- Pn yctaHOBKe TaMepa Ha 3 MmHyTbI m MeHee ChaHa npeBeDte TaMep Ha 10 MmHyT, a 3aTeM yctaHOBtE Ha 3 MmHyTbl.
3Kcnnyataun / npraDOK pa60TbI
- Y6eHNTecb, yTO o6a nepeKluOHTeJIy yCTaHOBJIeHbI B noJIOXKeHne "OFF".
- BkHouHte np6opBpo3eKy, HmEoUyO 3aemJHeHne.
- Otkpoite TeBepuy I NOMeCTIte NOIOH B DyXOBky.
- 3akpoTe DBepu.
5.ДЯБьбopaжelaemoroTnHaHarpebaNcnoJb3yIte nepeKIIIOUaTeJIbФyHKUIM. - YctaHOBtE XeNaEMoe Bpecra PnriROToBHeHna TaMMepe.B KaYeCTBe pyKOBoDCTBa MoKeTe BocIONb3OBAtbcTa6JInuei.
7.Cpa3y nocJe BbIKHueHnry DxyOBKn Bbl MoKeTe OTKpbItb DBepUy N BbITaUHTb NocUy C NOMOuBIO pINXBaTOK.

IPENYIPEXHENE:OcteperaTeCb oxorob!
3aippeaaetcnpkacatbcaKropyM qactm DUXOBKN.
- PπkacaiTeCb K pni60py ToIbko 3a pyuKy nHaxmMaTe Ha nepeKnOuateJIn.
8.Y6eNTecb,yTO o6a nepeKluOaTeTn HaxoJrTcB noJIOKeHn "OFF".
9. BbItaunTe BnKy n3 po3eTkn.
10. Праздуем пистугь к очирке пибopa, дайтешу OCTынчы!
PeokmeHyemoe BpemnnoKapnbHn
PpOTHBnB DnI NnCbI nNoDOn dNc6opApKpwEe
- BbTaUHTe npOTnBEHb IJIaIuIcIb IN3HyTpN.
- BbItaunTe nDIOH dIy NiUcbl N3-NOd CTeknIHHOI DBepUbl.
3.ПомоиTe 3TN DeTANB TROPaHb BOe,doBaVB HEMHO MOUSeRo CpeCTBa.3aTeM TuTaTeNbHo IpocuWnte INX.
BHytpenHnaactb

BHIMAHINE:
3aIpeaaetcnaonb3oBaTb IIO60a3o3OBnIpyDyXOBok! B npocce moKET 6bITb NOBpeXeH KBapCebBn HarpeBaTeB.
IopndepkmbaTe BHTpeHHIOuactb DyXOBKnB YnCTOTE.
- 6pb3mNIOCTaTKn NMIuHa CTeHKax DxyOBKn Ha peWetKe MOXHO ydaJIbTb C NOMOUsbBO BnaJHcN TpRkn, Do6abNBKNDKOCTb DnA MbITbY NOCyDbI.
- IpoTepeTb HacyxO noIontHeM.
Ba3OBbIb6IOK

PENEYIPPEXDEHNE:
He donyckaIte nonaDAnHb BOnB npnbop!
- P0 OkOHaHm pa6Otbl npoTpne Kopnyc cnerka BnaXHOI TpIkoI.
BCTaBHTbNoDDHdNc6opApKpoWeknoCtKnHHyIO DBepu. - YCTaHOBITe npOTnBcHb dIy nIuCbI Ha peUeTky dIpyrnil.
XpaHeHne
OuHCTnTe np6Op, kak OINcaHO BbIe N daITe EMy nPoCOxHyTb.
Mby peKOMeHnyem XpaHNTb npn6Op B opnHaJIbHoI yNaKOBKe,ecnBbI He INaHpye erO nCNoJIb3OBAtB dNITeJIbHOe Bpem.
Bcerda xpaHnTe npnbop noaIbWe ot TeTeB XopoOIO npoBeTpnaBaEMOM n cyXOM MeCTe.
TexHnueckne daHHbIe
MoeB: MPO 2246 CB
3Jektponitanahe: 220-240B\~,50/60T
Iotpe6JraMa MoUHocTb: 1000 BaTT
Klacc 3aunTbI:
Bec HETTO: npimepno.3,85K
CoxpaHEno npaBo Ha texHnueckme IN KOHcTpyKIOOHbIe n3-MeHeHnB pamkax npoDOnXaHOUeIcR pa3pa6OToN npOdykTa.
3To n3deneHne npoIIO BCE Heo6xOaMbIe I aKTuaIbHbIe npOBepKn, npEiMaCAnHbIe dIpeKtBoi CE, K npIM. Ha 3NeKTPomarHnTHyIO COBMecTUMOCb I COOTBeTCTBne Tpe6oBaHnM K Hn3KOBoNtHOIN TEXHKe, OHO 6blIO TAKKE cKOHCTpyuPoBaHO IN NOcTPOeHO C yUeTOM NocIeHNX Tpe6oBaHn I IO TexHKe 6e3OnaChOCTn.
山
A
Jalll jn jilai li 1
jll n jie aia Jlai log pala Iy jI s0.1
JIi, g aia Jia aiaa plsiu y jai jao
Jia i Jua
Jai jai jai jai jai
在 Rt ABD 中:
jiee 100
yla aal yaaabay baiy
#
Lalas ggsa Ls jaii 1
Lalus pie auiy iue g jag y
Jg klae Jn
aiee 1
J 1 J 1 J 1 J 1 J 1 J 1 J 1 J 1 J 1 J 1 J 1 J 1 J 1 J 1 J 1 J 1 J 1 J 1 J 1 J 1 J 1 J 1 J 1 J 1 J 1 J 1 J 1 J 1 J 1 J 1 J 1 J 1 J 1 J 1 J
gill 1
1
"OFF"
.2
.3
.4
.5
.6
.7
1.(a)^2b^2 = 3ab : 2ab : 3ab.
aiail jial alj wal 2 -
"OFF" 8
.
9
10
Cllgall 1ie aale o jbi
1
2
3
4
5
6
7
1jaiy 2
i 1
法全法
jaiill s jaiill jaiill jaiic 1
jaiill jaiill jaiic 1
s jaiill jaiill jaiic 1
jaiill jai!
OFF-0 60...10
jieeaiy
1
.2
.3
.4
:abaa
- 12.
p1234567890
gj11 1
Jia aaii 10 10 10
:
1 1
y
Jusll 1
"OFF"
aalai 2

Lai Lai, liai, jai, Jai, Jai, Jai, Jai, Jai, Jai, Jai, Jai, Jai, Jai, Jai, Jai, Jai, Jai, Jai, Jai, Jai, Jai, Jai, Jai, Jai, Jai, Jai, Jai, Jai, Jai, Jai, Jai, Jai, Jai, Jai, Jai, Jai, Jali, jali, jali, jali, jali, jali, jali, jali, jali, jali, jali, jali, jali
jglg jglg aalal alalal
!:
J 1 J 1 1 1 1 1 1 1 1 1 1 1 1 1 1 1 1 1 1 1 1 1 1 1 1 1 1 1 1 1 1 1
:


GARANTIEKARTE
warranty card · garantiekaart · carte de garantie · schedadi garanzia · tarjeta de garantia · cartao de garantia · garantikort · karta gwarancyjna · zarucni list · karta jamstva · carte de garantie · fapaunonha kapta · zarucny list · garancijski list · garanciajegy · rapahtiHnHfOpMynp · fapaHTnHbI TanoH
MPO 2246 CB
24 Monate Garantie gemäß Garantieerklarung - 24 months warranty according to warranty declaration - 24 maanden garantie volgens garantieverklarung - 24 mois de garantie selon la déclaration de garantie - 24 mesi di garanzia seconde la dichiarazione di garanzia - 24 meses de garantie de acordo con la déclaration de garantia - 24 meses de garantia, de acordeo con a déclaration de garantia - 24 ménedes garanti i henhold til garantiabetingensige - 24 misiace gwarancji na podstawie owiadzenia gwarancjnyego - zaruka 24 mésic podle prohläseni o zaruke - 24 mjesecno jamstvo u skladu s jamstvenom déclarajcijom - 24 luni garantie conform déclaratie de garantie - 24 meça rapanuima b cbotbctbme c rapanuohnata deknapaun - 24-meśacna zaruka podla vyhlasenia o zaruke - 24-mesečna garancija, skladno z garancjsko izjavo - 24 hönap garancia a garancifeltelekken leirakt szerint - rapantni ha 24 miča ilDINOIBIOI 30AII npo raptanllo - raptanTNI 24 meca cornaccho 3aBnHbIM raptanHbIM npabnAm - JJJJJJJJJJJJJJJJJJJJJJJJJJ
Kaufdatum, Handlsterpmel, Unterschied - date of purchase, dealer stamp, signature - aankoopdatum, dealsterpmel, handelskening - date d'achat, tampon du concessionaire, signature - data di acquisto, timbo del rivendatore, firma - fecha de compria, sello del distribuidor, firma - data de compra, carimbo do distribuidor, assinatura - kjepsdata, forhandsterpmel, signatur - data zakupu, plecez spredawcy, podisipat datum zakuspenl,razitko producej, podisip - datum kapovine, zig trovica,potipnis - datum achitite, stampila furnizolari, semnata - Data na noxynkta, Tava n ha podanau, Poganc - datum napku, pocietka o chodnika/ predajcu, podisip - datum napku. zig trovica, podisp - vistarla datuma, kereskedo belgyozje. aliaras - datra npindabhan, nechakna podanau, nidink - Data npinobepentren, Zharnn npindaua, Npoknb-
BOMANN®
www.bomann.de
BOMANN®
C. Bomann GmbH
Internet: www.bomann.de
- Symbols in these Instructions for Use
- WARNING:
- CAUTION:
- General Notes
- WARNING!
- Special safety information for this unit
- WARNING: Hot surface! Risk of burning!
- Overview of the Components
- Symbols on the switches
- Function switch
- Unpacking the appliance
- NOTE:
- Instructions for use
- Before initial use
- Electrical connection
- Turning on/off
- iNOTE:
- General information on use
- Using the unit
- WARNING: Risk of burning!
- Cleaning
- Pizza tray and crumb tray
- Interior
- Base unit
- Storage
- Technical Data
- Disposal
- Meaning of the "Dustbin" Symbol
- Instrukcja obstugi
- P03nakyBaHHn npncToPO
- IIPNIMITKA.
- Ihctpykii 0do BVKOpncTahnH
- Ipeep nepuBm BnKOpNCTaHHM
- Enektpnne niknouenr
- BMUKAHH / BMUKAHH
- IIPIMITKA.
- 3araJI BiOMOCTI npo BVKOpNCTAHH
- KopncTyBaHHn npuanaom
- PONEPEDXEHH. Pn3nk oniky!
- PekomeHDoBaHH Yac CmXeHHA
- OmbaHOpMaun
- IPEyIPEXJEHNEI
- CneuaJIbHbIe Tpe6ObaHn8 6e3OpacHOCTn IJRA 3TOrO np6Opa
- I P E D U N P E X D E H N E:
- BHIMAHNE:
- 0630p KOMNHOHTOB
- CnMBoJIbHa nepeKNIouaTeJAX
- PoiKJIIOUeHHe N K cTeN
- BkJIOueHHe / BbIKJIOueHHe
- I PIMMEUAHNIA:
- 067aHOpMaOn on nCNoJIb3OBAHNO
- 3Kcnnyataun / npraDOK pa60TbI
- IPENYIPEXHENE:OcteperaTeCb oxorob!
- PeokmeHyemoe BpemnnoKapnbHn
- PpOTHBnB DnI NnCbI nNoDOn dNc6opApKpwEe
- BHytpenHnaactb
- BHIMAHINE:
- Ba3OBbIb6IOK
- PENEYIPPEXDEHNE:
- XpaHeHne
- TexHnueckne daHHbIe
- #
- aiee 1
- gill 1
- 1.(a)2b^2 = 3ab : 2ab : 3ab.
- Cllgall 1ie aale o jbi
- i 1
- jieeaiy
- :abaa
- p1234567890
- :
- jglg jglg aalal alalal
- GARANTIEKARTE
- MPO 2246 CB
Brand : BOMANN
Model : MPO 2246 CB
Category : Oven