
VS24 - Vacuum packaging machines WOLF - Free user manual and instructions
Find the device manual for free VS24 WOLF in PDF.

| Product Type | Built-in Vacuum Sealer |
| Brand | Wolf |
| Model | VS24 |
| Weight | 34 kg (75 lb) |
| Opening Dimensions (W x D x H) | For 24 in opening: 603 mm (23 3/4 in) wide; for 30 in opening: 765 mm (30 1/8 in) wide |
| Power Supply | 120 V AC, 60 Hz, 10 A, dedicated circuit |
| Plug | Three-prong grounded plug |
| Power Cord Length | 0.9 m (3 ft) |
| Main Functions | Automatic vacuum and sealing, manual mode (varies by model) |
| Vacuum Capacity | Not specified in manual |
| Materials | Stainless steel (exterior) and food-grade plastic (compartment) |
| Installation | Standard or flush; anti-tip bracket required |
| Trim Overlap | Top and bottom: 0 mm; sides: 18 mm (11/16 in) |
| Care and Cleaning | Clean with a damp cloth and mild detergent; do not immerse |
| Safety | Ground fault circuit interrupter (GFCI) not recommended; anti-tip bracket included |
| Parts and Repairability | Certified Wolf service; model and serial numbers on rating plate |
| General Information | Manual available for free download; rating plate on left side of drawer |
Frequently Asked Questions - VS24 WOLF
User questions about VS24 WOLF
0 question about this device. Answer the ones you know or ask your own.
Ask a new question about this device
Download the instructions for your Vacuum packaging machines in PDF format for free! Find your manual VS24 - WOLF and take your electronic device back in hand. On this page are published all the documents necessary for the use of your device. VS24 by WOLF.
USER MANUAL VS24 WOLF
SPECIFICATIONS, INSTALLATION, AND MORE

WOLF
Contents
3 Vacuum Seal Printer
4Specifications
Installation
7 Troubleshooting
Features and specifications are subject to change at any time without notice. Visit wolfappliance.com/specs for the most up-to-date information.
Important Note
To ensure this product is installed and operated as safely and efficiently as possible, take note of the following types of highlighted information throughout this guide:
IMPORTANT NOTE highlights information that is especially important.
CAUTION indicates a situation where minor injury or product damage may occur if instructions are not followed.
WARNING states a hazard that may cause serious injury or death if precautions are not followed.
IMPORTANT NOTE: Throughout this guide, dimensions in parentheses are millimeters unless otherwise specified.
IMPORTANT NOTE: Save these instructions for the local electrical inspector.
SAVE THESE INSTRUCTIONS
Product Information
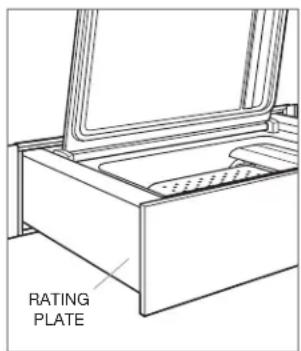
Important product information, including the model and serial number, are listed on the product rating plate. The rating plate is located on the left side of the drawer. The drawer must be open and lid lifted to view the rating plate. Refer to the illustration below.
If service is necessary, contact Wolf Factory Certified Service with the model and serial number. For the name of the nearest Wolf Factory Certified Service or for questions regarding the installation, visit the contact & support section of our website, wolfappliance.com, or call Wolf customer care at 800-222-7820.
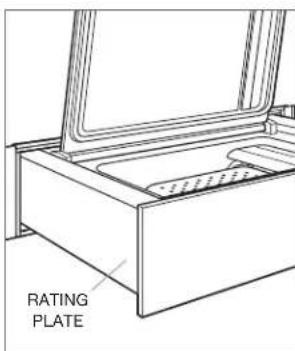
Rating plate location
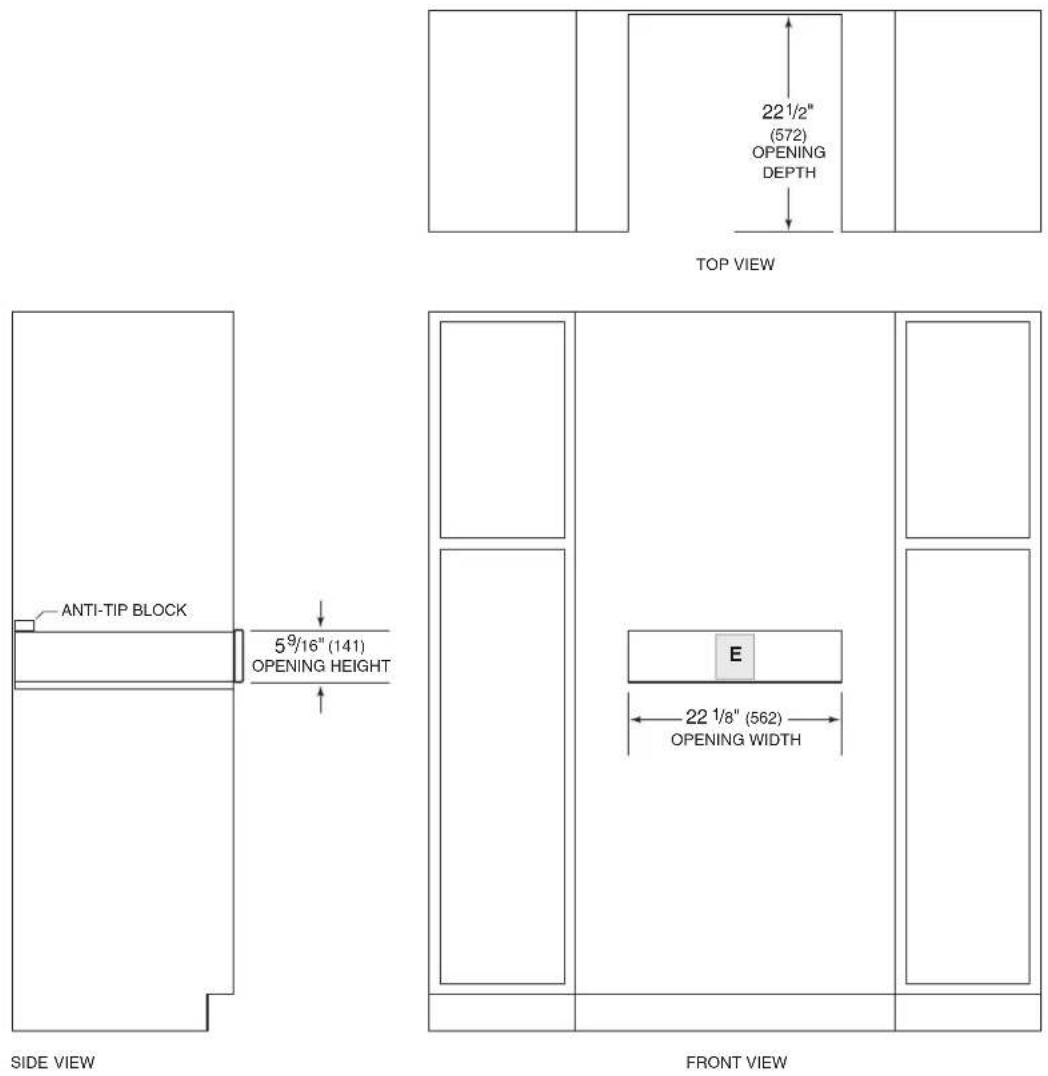
Installation Requirements
The vacuum seal drawer can be installed in a standard or flush inset application. Finish the edges of the opening. They may be visible when the drawer is open.
For standard installations, the face trim overlaps tiles and rails. Refer to the chart below.
For flush inset installations, a minimum 1/8 (3) reveal is required on all sides. To ensure consistent reveals, each corner of the opening must be exactly 90^ .
An anti-tip block must be installed to prevent the vacuum seal drawer from tipping forward when opened.
INSTALLATION REQUIREMENTS
BASE SUPPORT MIN
Vacuum SealDrawer 75 lb (34 kg)
TRIM OVERLAP
Top 0" (0)
Bottom 0^ (0)
Sides
11/16" (18)
Electrical Requirements
Installation must comply with all applicable electrical codes.
Locate the electrical supply as shown in the illustrations on the following pages. A separate circuit, servicing only this appliance is required. A ground fault circuit interrupter (GFCI) is not recommended and may cause interruption of operation.
ELECTRICAL REQUIREMENTS
Electrical Supply grounded, 120 VAC, 60 Hz
Service 10 amp dedicated circuit
Receptacle 3-prong grounding-type
Power Cord 3'
(9 m)
Rating plate location
Vacuum Seal Printer
STANDARD INSTALLATION
Vacuum SealDrawer
FLUSH INSERT INSTALLATION
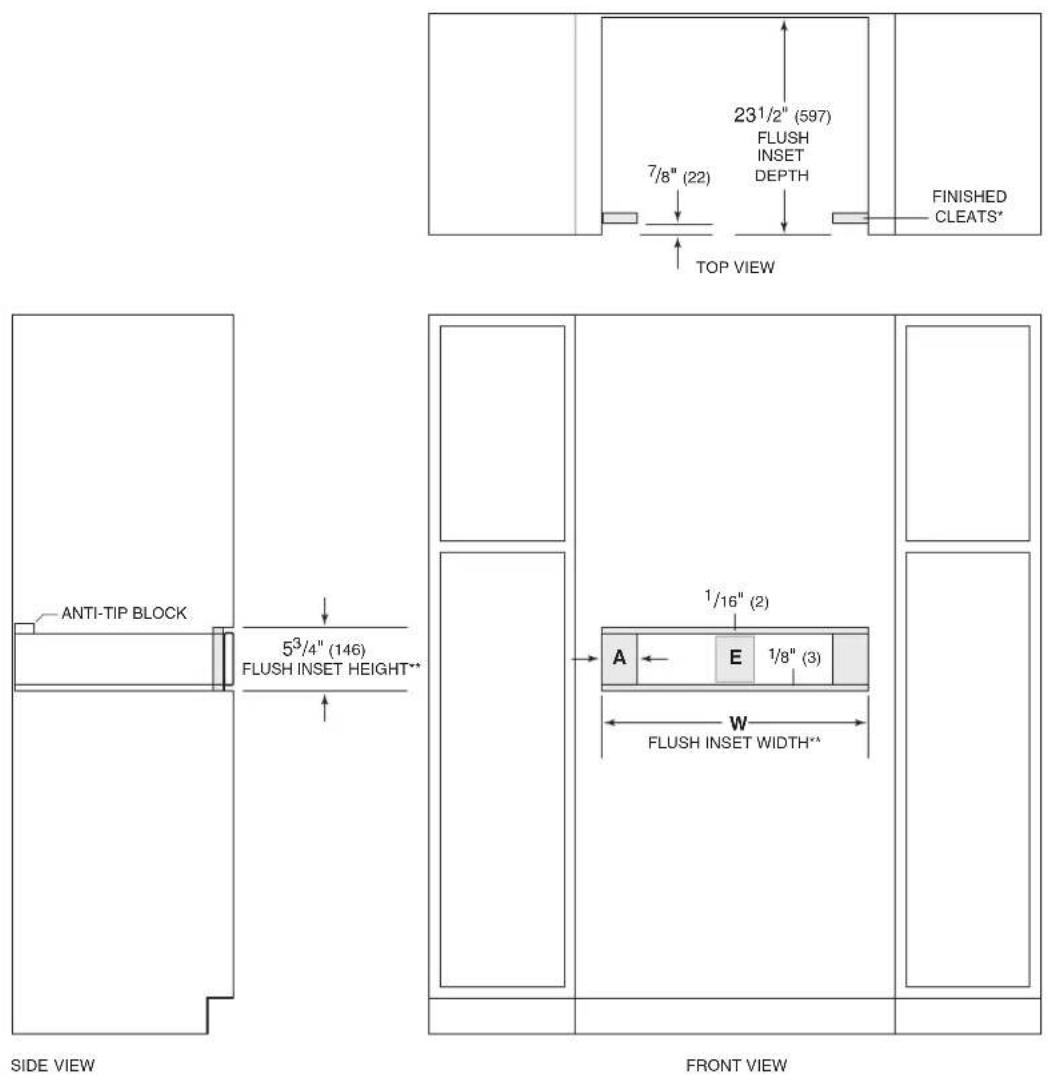
*Will be visible and should be finished to match cabinetry.
** Dimension provides minimum reveals.
| FLUSH INSET WIDTH | W | A |
| 24" Opening 23 | 3/4" (603) | 13/16" (21) |
| 30" Opening 30 | 1/8" (765) 4" (102) |
Preparation
Remove and recycle packing materials. Do not discard the package containing two screws provided for installation.
Install an anti-tip block against the rear cabinet wall. Verify screws are adequately secured and do not penetrate electrical wiring or plumbing.
Installation
1 Turn off power to the electrical outlet.
2 Place the unit on a protected work surface and remove the two shipping screws from the back of the unit. Refer to the illustration below.
3 Place the unit near the opening and plug the power cord into the receptacle.
4 Slide the unit into the opening.
5 Open the drawer to full extension.
6 Drill a pilot holes in each mounting hole location. Refer to the illustration below.
7 Secure the unit with the screws provided.
8 Turn on the electrical supply to the outlet and verify operation.

Shipping screw location
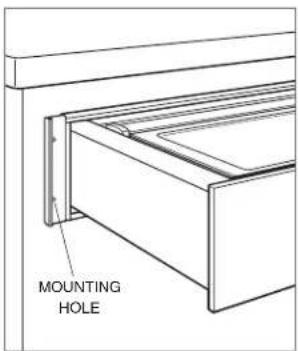
Mounting hole location
Sub-Zero, Sub-Zero & Design, Sub-Zero & Snowflake Design, Dual Refrigeration, The Living Kitchen, Great American Kitchens The Fine Art of Kitchen Design, Wolf, Wolf & Design, Wolf Gourmet, W & Design, red colored knobs, Cove, and Cove & Design are registered trademarks and service marks of Sub-Zero Group, Inc. and its subsidiaries. All other trademarks are property of their respective owners in the United States and other countries.
Contedio
WOLF APPLIANCE, INC. P.O. BOX 44848 MADISON, WI 53744 WOLFAPPLIANCE.COM 800.222.7820