
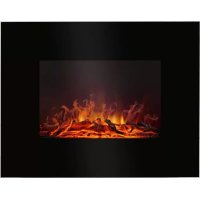
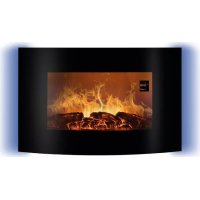
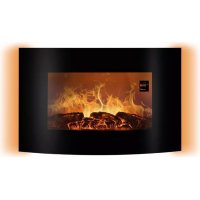
EK 6024 CB - Fireplace BOMANN - Free user manual and instructions
Find the device manual for free EK 6024 CB BOMANN in PDF.

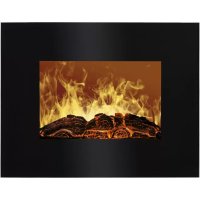
| Product type | Wall-mounted electric fireplace |
| Brand | Bomann |
| Model | EK 6024 CB |
| Net weight | Approx. 13.6 kg |
| Power supply | 220-240 V ~, 50 Hz |
| Power consumption | 1750-2000 W |
| Nominal heat output | 2.0 kW |
| Minimum heat output | 0.9 kW |
| Maximum continuous heat output | 2.0 kW |
| Protection class | I |
| Types of heat emission | Fan-assisted heating |
| Flame effect | LED, adjustable intensity (3 levels) |
| Thermostat | Electronic, adjustable from 15 to 30 °C |
| Weekly programming | Yes, with on and off times per day |
| Open window detection | Yes, automatic heating shut-off |
| Overheat protection | Yes, automatic shut-off |
| Remote control | Yes, with CR2025 batteries included, range ~3 m |
| Cleaning | Soft dry cloth; glass with damp cloth |
| Package contents | Fireplace, remote control, mounting bracket, support, wall plugs and screws |
| Installation | Wall-mounted, recommended height 60 cm from floor, safety distance 1 m from flammable objects |
Frequently Asked Questions - EK 6024 CB BOMANN
User questions about EK 6024 CB BOMANN
0 question about this device. Answer the ones you know or ask your own.
Ask a new question about this device
Download the instructions for your Fireplace in PDF format for free! Find your manual EK 6024 CB - BOMANN and take your electronic device back in hand. On this page are published all the documents necessary for the use of your device. EK 6024 CB by BOMANN.
USER MANUAL EK 6024 CB BOMANN
Thank you for choosing our product. We hope you will enjoy using the appliance.
Symbols in these Instruction Manual
Important information for your safety is specially marked. It is essential to comply with these instructions in order to avoid accidents and prevent damage to the appliance:

WARNING:
This warns you of dangers to your health and indicates possible injury risks.

CAUTION:
This refers to possible hazards to the appliance or other objects.

NOTE: This highlights tips and information.
Contents
Overview of the Components 3
Assembly 4
General Notes. 16
Special Safety Instructions for this Appliance. 17
Handling Batteries 19
Unpacking the Appliance. 19
Scope of Delivery 19
Overview of the Components. 19
Control Panel on the Appliance. 19
Remote Control 19
Display. 19
Assembly Instructions 20
Electrical Connection 20
Power Requirements. 20
Connection 20
Remote Control 20
Inserting/Replacing the Battery. 20
Remote Control Range 20
Operation 21
Switching on the Appliance 21
Basic Setting of the Appliance 21
Close Operation of the Appliance 21
Operate of the Appliance from the Distance 21
Open Window Detection 22
The Timer 22
Display Timer Settings 22
Programming the Timer 22
Activating/Deactivating the Timer 22
End of Operation 22
Overheating Protection 22
Cleaning 23
Maintenance Instructions 23
Troubleshooting 23
Technical Data. 24
Disposal 24
Meaning of the "Dustbin" Symbol. 24
Product Data Sheet. 25
General Notes
Read the operating instructions carefully before putting the appliance into operation and keep the instructions including the warranty, the receipt and, if possible, the box with the internal packing. If you give this appliance to other people, please also pass on the operating instructions.
- The appliance is designed exclusively for private use and for the envisaged purpose. This appliance is not fit for commercial use.
- Do not use it outdoors. Keep it away from sources of heat, direct sunlight, humidity (never dip it into any liquid) and sharp edges. Do not use the appliance with wet hands. If the appliance is humid or wet, unplug it immediately.
- When cleaning or putting it away, switch off the appliance and always pull out the plug from the socket (pull the plug itself, not the lead) if the appliance is not being used and remove the attached accessories.
- Do not operate the appliance without supervision. If you leave the room you should always turn the appliance off. Remove the plug from the socket.
- The appliance and the mains lead have to be checked regularly for signs of damage. If damage is found the appliance must not be used.
- Use only original spare parts.
- In order to ensure your children's safety, please keep all packaging (plastic bags, boxes, polystyrene etc.) out of their reach.

WARNING:
Do not allow small children to play with the foil.
There is a danger of suffocation!
Special Safety Instructions for this Appliance
You will find the following symbol with warning character on the appliance:
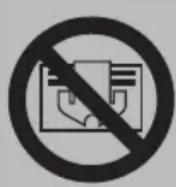
WARNING: Do not Cover!
To prevent overheating of the heating appliance, the heating appliance may not be covered.

WARNING:
Risk of Electrical Shock!
Do not install this heating appliance in close proximity to a bathtub, a shower, or a swimming pool.
Risk of Explosion
The inside of the appliance contains glowing hot components. Do not use the appliance around flammable or explosive liquids or gases!
Risk of Burning
- Some parts of the product can become very hot and cause burns. Avoid contact with the skin.
- You must be particularly careful when children and vulnerable persons are present.
- The escaping air at the top of the appliance reaches temperatures of more than 100^ ! Do not allow children to play unattended in proximity to the appliance.

CAUTION:
Safety Distance
- The heating appliance must not be installed directly below a wall outlet.
- Maintain a 1 m safety distance to readily flammable objects such as furniture, curtains, etc.

CAUTION:
- Mount the appliance in a way that the air can flow freely in and out.
Use
This is an auxiliary heating appliance. Do not leave the appliance unattended for several hours. Do not leave the house while it is in use.
Risk of Overheating
Do not heat any rooms with a volume of less than 4m^3
- Make sure that the power cable is not lying on the appliance.
- Do not insert any objects into the appliance.
- This appliance can be used by children aged from 8 years and above and persons with reduced physical, sensory or mental capabilities or lack of experience and knowledge if they have been given supervision or instruction concerning use of the appliance in a safe way and understand the hazards involved.
Children shall not play with the appliance. - Cleaning and user maintenance shall not be made by children without supervision.
- Children younger than 3 years of age should be kept away from the appliance, unless they are supervised at all times.
- Children from the age of 3 and younger than 8 years of age may only turn the appliance on and off if they are supervised, or have been instructed with regard to the safe use of the appliance, and if they have understood the risks resulting from it, provided that the appliance has been placed and installed in its normal position of use.
- Children from the age of 3 and younger than 8 years of age may not insert the plug into the socket, may not adjust the appliance,
may not clean the appliance and / or may not perform the maintenance by the user.
- Do not repair the appliance by yourself. Always contact an authorized technician. If the supply cord is damaged, it must be replaced by the manufacturer, its service agent or similarly qualified persons in order to avoid a hazard.
Handling Batteries

Insert correctly!

Do not charge!

Do not disassemble!

Danger of explosion! Do not expose batteries to intense heat, such as sunlight, fire or similar.

Do not short circuit!
Batteries should not be disposed in the domestic waste! Dispose empty batteries at a special collection point.

CAUTION:
- Different battery types or new and used batteries must not be used together.
- When not using the remote control for a long period of time, remove the batteries in order to prevent "leakage" of battery acid.
Unpacking the Appliance
- Remove the appliance from its packaging.
- Remove all packaging material such as plastic films, filler material, cable ties and cardboard packaging.
- Check the content for any missing parts.
- In the event that the packaging content should be incomplete or if damages are noticeable, do not operate the appliance. Return it to the dealer immediately.

NOTE:
The glass front is protected by a foil. We recommend not to remove this foil until after the appliance has been installed.
Scope of Delivery
1 Electric fireplace with glass front
1 Remote control
Installation material:
1 Mounting strip
1 Mounting bracket
7 Dowels, 36 mm long
7 Screws, ST4X40mm
2 Threaded screws, ST4X14mm
Overview of the Components
Control Panel on the Appliance
1 On/Off button
2 Button +
3 Button -
4 Button intensity of the flames
5 Button system time
6 Button heating power
7 Power button O/I
Remote Control
8 On/Off button
9 Button +
10 Button heating power
11 Button-
12 Button DAY
13 Button WEEK/TIME
14 Button SET UP
15 Button intensity of the flames
16 Button HOUR
17 Button MIN
Display
A Day
B Signal receiving window
C Temperature in ^ C
D Timer start time (ON)
E Timer turn-off time (OFF)
F Heating power of 900 W ( ) or 1850 W ( )
G Open window detection
H Intensity of the flames (
I Timer active()
J Standby ()
Assembly Instructions
This appliance is intended for permanent attachment to a wall. It should be placed at least 30~cm above the ground. Please refer to the figures on page 4.
Do not switch on the appliance until it has been properly installed!

WARNING:
Make sure beforehand whether there are cables inside the wall which could be damaged!

CAUTION:
- The wall should be a load bearing and heat resistant wall.
- The subsequent work requires manual skills. If necessary, get help from a specialist

NOTE:
- There must be a power outlet nearby, but not above the appliance. The hot air flow is emitted by the fan at the top of the appliance.
- Route the power cord right behind the appliance.
In order to have an optimal view at the fireplace, we recommend installing it onto a height of 60~cm (see Fig. A). - Use a size 8 drill bit to drill holes into the wall.
-
You will also need a medium-sized Phillips screwdriver.
-
Measure the height at which you want to mount the appliance. The recommended dimensions can be found in Fig. B.
- Use 5 screws and dowels to attach the mounting strip horizontally to the wall.
- Attach the mounting bracket with the threaded screws to the appliance (see Fig.C).
- Hang the appliance into the mounting strip on the wall.
- Mark the positions of the 2 boreholes for the mounting bracket.
- Remove the appliance from the wall once again.
- Drill the 2 holes for the mounting bracket. Insert the dowels.
- Hang the appliance into the mounting strip on the wall.
- Use 2 screws to attach the mounting bracket to the wall.
Electrical Connection
Power Requirements
The appliance can consume a total of 2000 W. With this connected load a separate supply line protected by a 16 A household circuit breaker is recommended.

CAUTION: Overload!
- If you use extension leads, these should have a cable cross-section of at least 1.5mm^2
- Do not use any multiple sockets, as this appliance is too powerful.
- Do not connect any other powerful appliances to the same electric circuit.
Connection
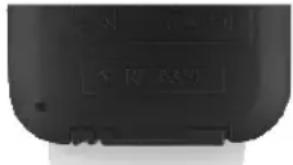
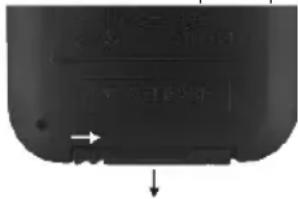
- Make sure that the iron voltage and the line voltage match. The nameplate is located at the bottom of the appliance.
- The mains plug should only be inserted into a correctly installed socket with earthing contact.
Remote Control
Inserting the Battery
A lithium button cell is supplied with the remote control.
- To operate the remote control, remove the plastic strap that protrudes from the battery compartment.
Replacing the Battery
- Press the tab on the remote control battery compartment toward the centre. Now pull out the battery compartment.
- Remove the used battery.
- Insert a new CR2025 3V button cell, observing the correct polarity.
- Slide the battery compartment back into the remote control until the tab snaps into place.
Remote Control Range
- The remote control has a range of approx. 3 meters. If the range decreases you should change the battery.
- Make sure there are no obstacles between the remote control and the sensor of the appliance. It is located in the upper right area of the glass front.
Operation

CAUTION:
Do not switch on the appliance until it has been properly installed!

NOTE:
- The operation can partly be done via the control panel of the appliance.
- To set the timer programming, use the remote control.
Each operating step will be acknowledged by a signal tone.
After switching on the appliance, the display behind the glass front becomes visible. For a better ambience, the display will switch off approx. 30 seconds after each operation. Press any button to reveal the display again.
Switching on the Appliance
Set the power switch to position I. The appliance is in Standby. The symbol lights up in the display.
Basic Setting of the Appliance
After switching on the appliance via the power switch, it will be in the following basic setting:
-Weekday = SUN (Sunday)
-Display of the current room temperature
-Time=00:00
Intensity of the flames = high
-Heating = off
-Timer = off with first operation / check activation in further operation

NOTE:
- Even in the event of a power failure, the appliance is reset to this basic setting.
- For safety reasons, the appliance will always start without heating.
Close Operation of the Appliance

- Switching on the electric built-in fire
You can switch on the appliance on the control panel by briefly pressing the button. The basic setting of the appliance will become visible in the display.

- Setting system time
Press this button to set the current time and day of the week. Use the land buttons to set the weekdays. Press the button again to set the hours. The minutes can be set by pressing the button again.

- Setting the brightness levels
Push this button to set various brightness levels. The stair display H on the display shows the currently set step.

- Setting the heating levels
Push this button to set the heating levels. The symbols F on the display show the currently set heating level.
1 LED = heating level 1 (900 W)
2 LEDs = heating level 2 (1850 W)
No LED = The appliance heating function is switched off.
The fan continues to run for 10 seconds.

NOTE:
The heater and the fan will not be switched on by the appliance until the room temperature is lower than the base temperature for the heater (see basic setting).
Operate of the Appliance from the Distance

- Switching on the electric built-in fire
You can switch on the appliance on the control panel by briefly pressing the button. The basic setting of the appliance will become visible in the display.

- Setting the day
Press this button to start the weekday setting. Use the + and - buttons to set the weekdays.

- Setting hours
After pressing this button, you can set the hours with ^+ and

- Setting minutes
After pressing this button, you can set the minutes with + and -

- Setting the timer
Press this button to enter the weekly timer setting mode and follow the descriptions under "The Timer".

-SETUP
Press this button to switch between the switch-on and switch-off times. The display shows the selection with the symbols D and E. See "The Timer".

- Setting the brightness levels
Push this button to set various brightness levels. The stair display H on the display shows the currently set step.

- Setting the heating levels
Push this button to set the 2 heating levels.
Press once = 900W press twice = 1850W
To set the temperature during heating, press the +or - buttons. The adjustable temperature range is between 15 and 30^ .

NOTE:
Note that the base temperature must be higher than the current room temperature. If the room temperatur falls below the set base temperature, the heating will switch on automatically.
Open Window Detection
If the room temperature suddenly and abruptly drops by approx. 5 - 8^ (e.g. window was opened), the heating mode switches off automatically and the symbol G lights up in the display. Continue the operation by switching the device on again manually.
The Timer
The appliance including heating can be time-controlled via the timer. Prerequisite for the correct operation of the timer is the setting of the current time and day of the week.
Each day of the week includes its own switch-on time, switch-off time and temperature setting.
- A setting can be programmed for any day of the week or for several days.
- Even if the appliance is disconnected from the mains, the timer settings will be preserved.
Display Timer Settings
- Press the WEEK/TIME button.
- Use the button to display the timer settings for the respective days of the week.
- Use the SET UP button to switch between the settings for the start (ON) and turn-off (OFF) times.
- To delete a timer setting, set the time back to 00:00.
Programming the Timer
- Press the WEEK/TIME button to enter the timer mode. The icons for the timer and start time (ON) are flashing.
- Use the SET UP button to choose between start (ON) and turn-off (OFF) times. The display shows the selection.
- Press the DAY button and use the button to select the day of the week on which the timer is to be programmed.
- After pressing the HOUR button, you can set the hours with +and -
- After pressing the MIN button, you can set the minutes with +and -
- As soon as the indicators on the display light up continuously, the settings have been accepted; alternatively, press the WEEK/TIME button previously.
Setting the base temperature for the heating

NOTE:
For technical reasons, the current weekday is displayed again in this menu item.

select the heating level. The starts flashing. Use the +or -but-temperature for the heater.
2. Press the WEEK/TIME button to confirm the selection.
Activating/Deactivating the Timer

IMPORTANT NOTE:
- In the event of a power failure, all timer settings will be preserved. However, the appliance will be reset to the basic settings.
- For safety reasons, the heating will be switched off.

WARNING: Fire hazard!
- Before switching on the timer, check the settings of the current weekday, the current time and the timer settings.
-
Always set the start time in such a way that the appliance is under proper supervision during operation.
-
Program the timer.
- Select the desired heating level.
- To clear the timer settings, check the on and off times for each day of the week and reset all times to 00:00.

NOTE:
If the timer is activated, the symbol will appear in the display.
End of Operation
- Did you activate the timer, or do you only want to temporarily switch the appliance to standby?
- To do this, use the button on the remote control or the on the appliance.
- Do you want to disconnect the appliance from the mains?
- Set the power switch to position O. Disconnect the power supply from the socket.

NOTE:
The appliance will not turn on after disconnecting it from the mains, even if you have activated the timer. The appliance will be reset to the basic settings.
Overheating Protection
The appliance is fitted with an overheating protection, which will automatically turn off the appliance in case of overheating. You will hear a warning signal. For safety reasons, the appliance will not turn itself on again.
In order for the appliance to be operated again, proceed as follows:
- Set the power switch to position O. Disconnect the power supply from the socket. Let the appliance cool
down for approximately 20 minutes before you use it again.
- Check whether the air intake or vent on the heater is blocked. If necessary, clear the blockage.
In the event that the overheating protection turns off the appliance after a brief period, then there is probably a defect.
- Turn the appliance off again and unplug it from the mains.
- Have the appliance checked by the dealer or by our service.
Cleaning

WARNING:
- Before cleaning, always remove the mains plug and wait until the appliance has cooled down.
- Make sure no water enters the openings of the appliance during cleaning. Otherwise this might result in an electric shock or fire.

CAUTION:
- Do not use a wire brush or any abrasive items.
- Do not use any acidic or abrasive detergents.
- Clean the surface of the appliance with a soft dry cloth.
- The glass front may be wiped wet, if necessary. Then dry it with a soft cloth.
Maintenance Instructions
The appliance is equipped with an electronically controlled LED system that projects the flame effect. This system must not be serviced by the user.
Troubleshooting
| Problem Possible Cause Solution | ||
| The appliance does not work. | The appliance is not connected to mains power. | Check the wall outlet with a different appliance. |
| Insert the plug properly in the wall outlet. | ||
| Check the fuse. | ||
| The appliance is defective. Contact our service or a repair centre. | ||
| The heater and the fan are not working. | The room temperature is higher than the base temperature for the heating. | Check the setting for the base temperature. |
| Heating mode switches off abruptly (without timer function). | The open window detection interrupted the heating operation. | If necessary, close the window and switch the device on again. |
| The overheating protection has been activated. | 1. Switch off the appliance by using the power switch.2. Let the appliance cool down for at least 20 minutes before switching it on again. | |
| The appliance is not turning on at the programmed start time. | The appliance has been disconnected from the mains (possibly due to power failure). The appliance has been reset to the basic settings. | Check the settings of the current weekday, the current time and the timer settings. |
| The flame effect does not work. | A component is defective. Contact our service or a repair centre. | |
Technical Data
Model: EK 6024 CB
Power supply: 220-240V\~,50Hz
Power consumption: 1750-2000 W
Protection class:
Net weight: approx. 13.6kg
The right to make technical and design modifications in the course of continuous product development remains reserved.
This appliance has been tested according to all relevant current CE guidelines, such as electromagnetic compatibility and low voltage directives, and has been constructed in accordance with the latest safety regulations.
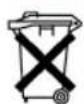
Disposal
Meaning of the "Dustbin" Symbol
Protect our environment: do not dispose of electrical equipment in the domestic waste.
Please return any electrical equipment that you will no longer use to the collection points provided for their disposal.
This helps avoid the potential effects of incorrect disposal on the environment and human health.
This will contribute to the recycling and other forms of re-utilisation of electrical and electronic equipment.
Information concerning where the equipment can be disposed of can be obtained from your local authority.
Product Data Sheet
| Model identifier(s): EK 6024 CB | ||||||
| Item Symbol Value Unit Item | Unit | |||||
| Heat output Type of heat input, for electric storage local space heaters only | ||||||
| Nominal heat output P | nom | 2.0 kW manual heat charge control, with integrated thermostat | N/A | |||
| Minimum heat output (indicative) | Pmin | 0.9 kW manual heat charge control with room and / or outdoor temperature feedback | N/A | |||
| Maximum continuous heat output | Pmax,c | 2.0 kW electronic heat charge control with room and / or outdoor temperature feedback | N/A | |||
| Auxiliary electricity consumption | fan assisted heat output | N/A | ||||
| At nominal heat output (fan motor) | e max | 1.859 kW Type of heat output / room temperature control | ||||
| At minimum heat output (fan motor) | e min | 0.928 kW single stage heat output and no room temperature control | no | |||
| In standby mode el | SB | 0.000 W Two or more manual stages, no room temperature control | no | |||
| with mechanic thermostat room temperature control no | ||||||
| with electronic room temperature control no | ||||||
| electronic room temperature control plus day timer | no | |||||
| electronic room temperature control plus week timer | yes | |||||
| Other control options | ||||||
| room temperature control, with presence detection | no | |||||
| room temperature control, with open window detection | yes | |||||
| with distance control option | no | |||||
| with adaptive start control | no | |||||
| with working time limitation | no | |||||
| with black bulb sensor | no | |||||
| Contact details | C. Bomann GmbH, Heinrich-Horten-Str. 17, 47906 Kempen / Germany | |||||
Mode d'emploi
SUN = domingo, MON = lunes, TUE = martes, WED = miércoles, THU = jueves, FRI = viernes, SAT = sábado

CTC Clatronic Sp. z 0.0
Ul. Brzeska 1
45-960 Opole
Usuwanie
- Symbols in these Instruction Manual
- WARNING:
- CAUTION:
- Contents
- General Notes
- Special Safety Instructions for this Appliance
- WARNING: Do not Cover!
- Risk of Electrical Shock!
- Risk of Explosion
- Risk of Burning
- Safety Distance
- Use
- Risk of Overheating
- Handling Batteries
- Unpacking the Appliance
- NOTE:
- Scope of Delivery
- Overview of the Components
- Control Panel on the Appliance
- Remote Control
- Display
- Assembly Instructions
- Electrical Connection
- Power Requirements
- CAUTION: Overload!
- Connection
- Inserting the Battery
- Replacing the Battery
- Remote Control Range
- Operation
- Switching on the Appliance
- Basic Setting of the Appliance
- Close Operation of the Appliance
- - Switching on the electric built-in fire
- - Setting system time
- - Setting the brightness levels
- - Setting the heating levels
- Operate of the Appliance from the Distance
- - Setting the day
- - Setting hours
- - Setting minutes
- - Setting the timer
- -SETUP
- Open Window Detection
- The Timer
- Display Timer Settings
- Programming the Timer
- Setting the base temperature for the heating
- Activating/Deactivating the Timer
- IMPORTANT NOTE:
- WARNING: Fire hazard!
- End of Operation
- Overheating Protection
- Cleaning
- Maintenance Instructions
- Technical Data
- Disposal
- Meaning of the "Dustbin" Symbol
- Product Data Sheet
- Mode d'emploi
- Usuwanie
Brand : BOMANN
Model : EK 6024 CB
Category : Fireplace