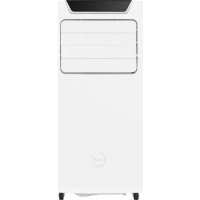
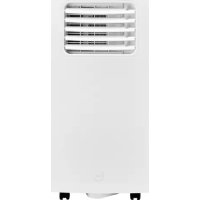
ACS18K01 - Air Conditioning Fuave - Free user manual and instructions
Find the device manual for free ACS18K01 Fuave in PDF.
| Technical specifications | Reversible air conditioning, power of 18000 BTU, energy efficiency A++ |
|---|---|
| Operating modes | Cooling mode, heating mode, dehumidification mode, ventilation mode |
| Indoor unit dimensions | Width: 100 cm, Height: 30 cm, Depth: 22 cm |
| Outdoor unit dimensions | Width: 80 cm, Height: 60 cm, Depth: 30 cm |
| Noise level | Indoor unit: 25 dB(A), Outdoor unit: 50 dB(A) |
| Usage | Ideal for spaces up to 70 m², remote control included |
| Maintenance | Washable filters, maintenance recommended every 6 months |
| Safety | Frost protection, integrated electrical protection |
| General information | 2-year warranty, professional installation recommended |
Frequently Asked Questions - ACS18K01 Fuave
Download the instructions for your Air Conditioning in PDF format for free! Find your manual ACS18K01 - Fuave and take your electronic device back in hand. On this page are published all the documents necessary for the use of your device. ACS18K01 by Fuave.
USER MANUAL ACS18K01 Fuave
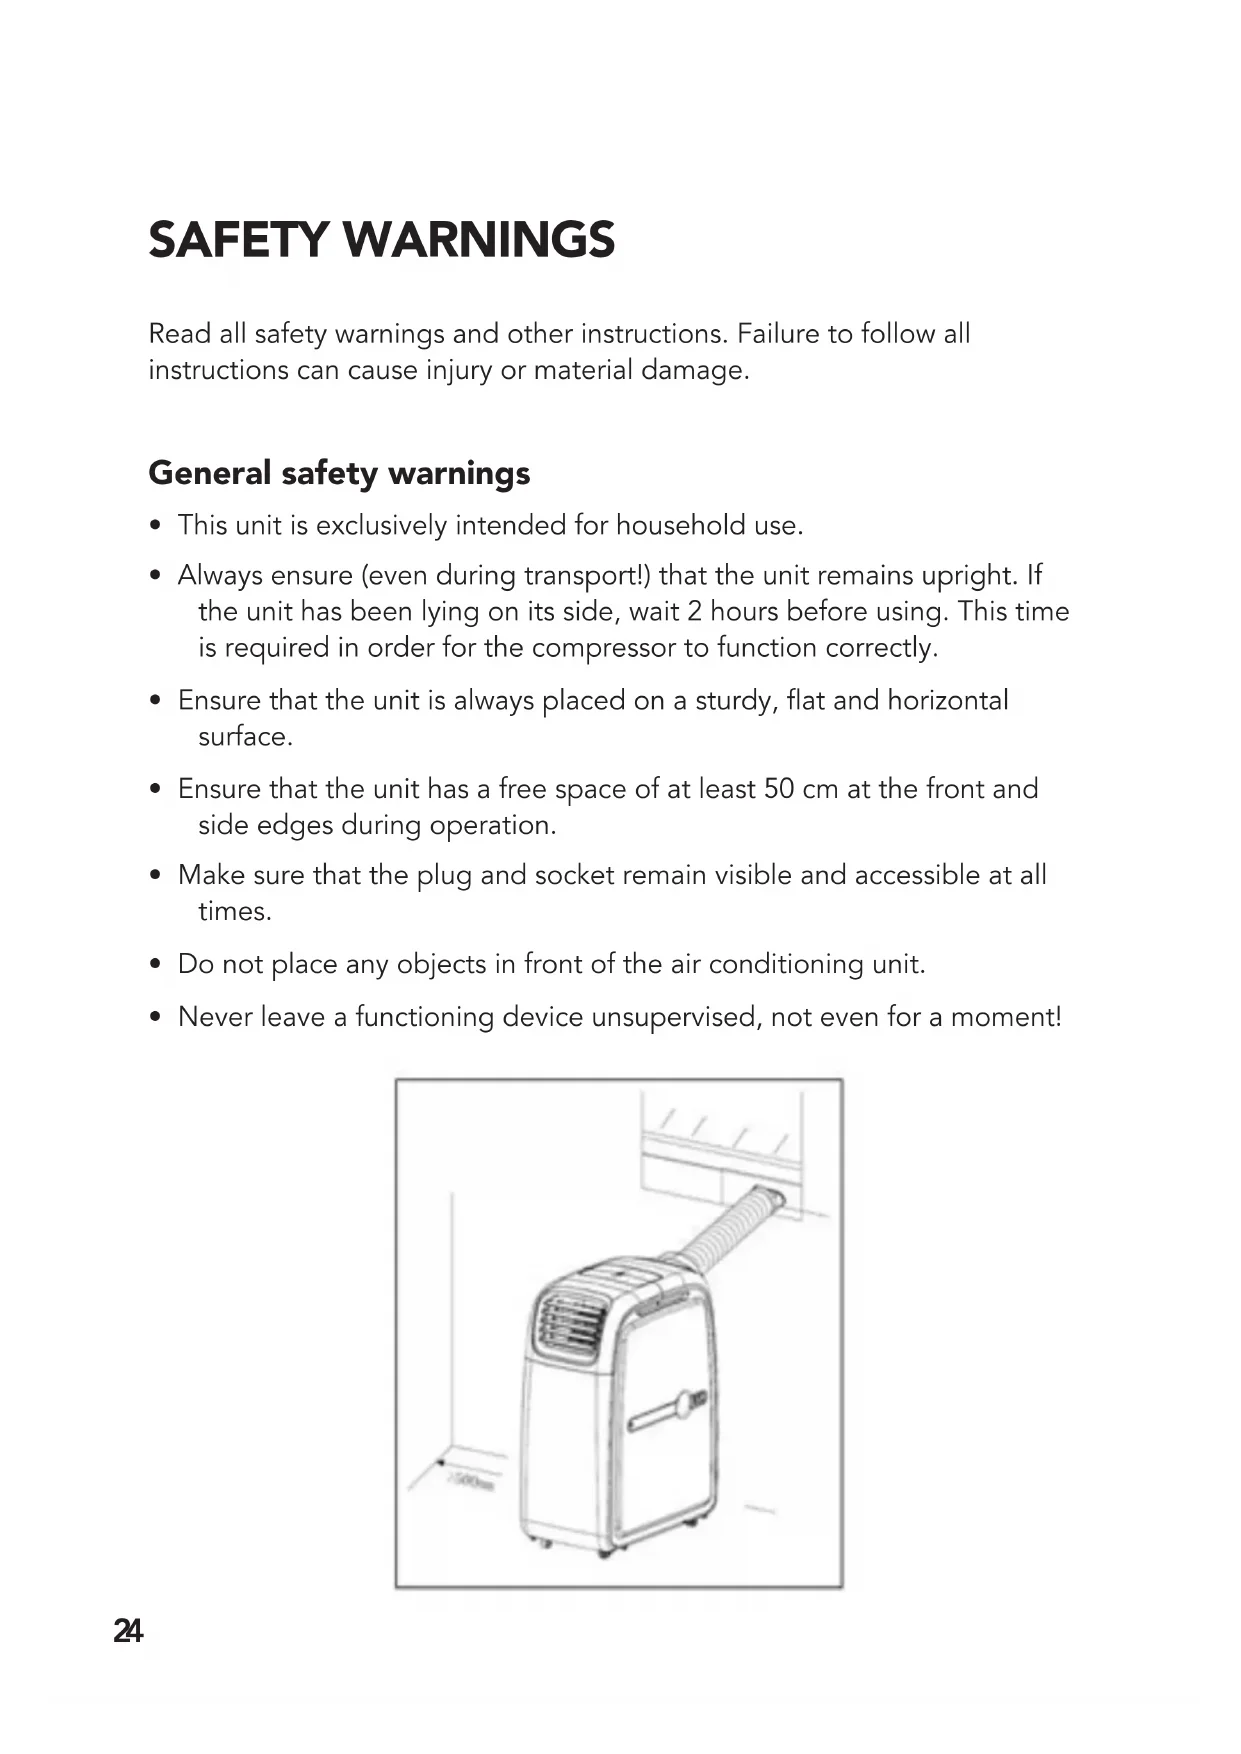
- This unit is exclusively intended for household use.• Always ensure (even during transport!) that the unit remains upright. If the unit has been lying on its side, wait 2 hours before using. This time is required in order for the compressor to function correctly.• Ensure that the unit is always placed on a sturdy, at and horizontal surface.• Ensure that the unit has a free space of at least 50 cm at the front and side edges during operation.• Make sure that the plug and socket remain visible and accessible at all times.• Do not place any objects in front of the air conditioning unit.• Never leave a functioning device unsupervised, not even for a moment!25
- Do not use the air conditioning unit in the vicinity of ammable or explosive substances or fuels. Never use any paint, cleaning sprays, anti-insect sprays or similar near the unit; this could deform the plastic or cause electrical damage.
- Do not use the appliance: - close to a re source; - close to splashing oil; - in direct sunlight; - with splashing water; - in a bathroom or at a swimming pool.
- Never block the grilles for incoming or outgoing air (not even partially). In order to prevent over-heating, never cover the device!
- Never insert ngers or objects such as pens into the device via the grilles.
- Ensure that the ventilator does not become blocked.
- Children, incapacitated persons and pets should be supervised.
- This appliance is not a toy, so children should not play with the appliance. In particular, warn children of these dangers.
- This appliance can be used by children aged from 8 years and above and persons with reduced physical, sensory or mental capabilities or lack of experience and knowledge if they have been given supervision or instruction concerning use of the appliance in a safe way and understand the hazards involved. Children shall not play with the appliance. Cleaning and user maintenance shall not be made by children without supervision. Avoid children coming into contact or playing with the device.
- Cleaning and user maintenance shall not be made by children without supervision.
- Remove the plug from the socket when you hear strange noises, smell a strange smell, when there is smoke.
- Do not turn on the appliance if you have discovered damage to the appliance, cord or plug, if the appliance is malfunctioning, if it has been dropped or if there are signs of any other defect. Return the complete product to the vendor or to a certied electrician for inspection and/or repair. Always ask for original parts.26
- The air conditioning unit is only suitable for indoor use.
- Only use the plug that is installed on the device in the factory and no other form of connector!
- The appliance shall be installed in accordance with national wiring.
- Before use, check that the electrical outlet you want to use is earthed, has no defects, and that the power supply to the electrical outlet corresponds to that on the rating plate of the appliance. Damage caused by a faulty voltage is not covered by the warranty!
- If the appliance is not being used, or if you are cleaning, servicing or moving it, switch it off rst and then unplug the appliance. Always move and / or move the device quietly!
- Even when you start using the appliance: rstly plug in the mains, then the switch to the ON position and only then use the control button!
- Do not use the device in a damp or wet environment, near a bath, shower or swimming pool and do not splash water, oil or any liquid on or in the appliance.
- Avoid using extension cords as much as possible. If this is unavoidable, use a cord with sufcient capacity (at least 3 x 1.5 mm²) and keep it outside the walking route!
- Do not move the appliance by pulling on the electrical cable and take the plug in your hand if you want to take it out of the socket.
- Do not pull on, deform or modify the electrical cable or immerse it in water. Pulling or misuse of the electrical cable will cause damage to the device and cause an electric shock.
- If the electrical cable, plug or the appliance itself is damaged, broken, or malfunctions, do not use it or switch it off immediately and remove the plug from the socket. Device, plug and / or cable must be repaired/ replaced by an electrician or similarly qualied person. Repairs by inexperienced people will invalidate the warranty and can cause dangerous situations!
- The appliance (incl. cord and plug) may only be opened and/or repaired by properly authorised and qualied persons.27 Safety in relation to coolant R290
- This device contains the coolant R290. R290 is a coolant that complies with the relevant European Directives. Never perforate the coolant circuit. R290 is ammable (GWP 3)!
- Never use substances other than those recommended by the manufacturer for the defrosting process.
- This device must be used and stored in a room that does not contain sources of ignition, such as open ames or gas and electrical devices in operation.
- Do not perforate any of the components of the cooling circuit and do not set light to the device.
- If the device is installed, working or stored in an un-ventilated you must take measures to prevent re or explosions caused by leaked coolant. Ensure that there are absolutely no sources of ignition (such as re, heaters, sparking electrical equipment, lit cigarettes, etc.) in the same room!
- The device must be stored in such a way that mechanical defects are prevented.
- Do not install, operate or store the device in a room smaller than 11,3m².
- R290 is odourless, which means that you cannot smell leaks!
- Persons working on the cooling circuit must be in possession of the correct qualications that state the person in question is competent to use coolant in accordance with a special evaluation that is recognised by the sector association.
- The repairs must be executed on the grounds of the recommendations of the manufacturer of the device. Maintenance and repairs that require the assistance of other qualied persons must be executed under supervision of someone who is specialised in the use of ammable coolant.28 Maximum effect gebruik
- Never exceed the recommended area to be cooled.
- Do not place the unit in the vicinity of a heat source or in direct sunlight.
- Close windows and doors and keep curtains or hatches closed during the sunniest hours in the day.
- Modify temperature and ventilation settings once the area has reached the required condition.29
4. Water drain connection
Accessoiries A. Outlet hose B. Connector hose C. Remote control Description30 INSTALLATION The Fuave ACS18K01 is a mobile airconditioner/heater/dehumidier that can be moved from room to room. Install as follows:
- Remove all packaging material, keep it away from children and ensure that the unit remains in an upright position.
- Before use, check that all accessories are present and that there is no damage to the accessories or the unit itself. Do not use a damaged unit; take it back to your supplier!
- Place the unit on a sturdy, at, dry and horizontal base near an electrical socket and a discharge point for hot air, e.g. a window that can be opened slightly. Make sure that the appliance has at least 50 cm at the front and sides free space and take into account all instructions from the safety instructions.31 Dehumidication
- To dehumidify you now connect a water discharge hose to the water tap (see image). You lead this hose to a bucket or drain. The hose cannot go upwards! Remove the sealing cap before you connect the hose. Store the sealing cap carefully, you need it for the cooling function. Cool
- To cool you do not need to connect a water discharge hose.
- Check if the sealing cap of the water discharge connection is in place.
- Attach the air discharge hose before you put the device into use.
- Rotate the air discharge hose in the direction of arrow 1 and you attach it to the device. By rotating in the direction of arrow 2 you again remove the air discharge hose.32
- Rotate the other end of the air discharge hose in the connection piece of the hose.
- You can also hang the outlet hose out of an open window; this method is less efcient however.
- Avoid bends or pinches in the pipe. These will lead to a build-up of damp, waste air which can cause leaks, overheating or lead to the air conditioning unit switching off.
- Warning! Do not use your air conditioner before it is installed according to the instructions described above!
- Warning! Ensure that no water can enter the device!33
- Switch over to heat A (air grille connection) and B (hose connection) (see g.). Heating34
- Reattach the air exhaust hose to the hose connection.
- Attach the other end of the drain hose to the window seal, to direct the air to be discharged.
- You can also hang the drain hose without a window seal from an open window; however, this method is less effective.
- Attach the other end of the drain hose to the opening in the opening window seal, in order to direct the hot air to be discharged.
- Prevent kinks or bends in the drain hose. This causes accumulation of ejected humid air, which may result in leakage, overheating or shutdown of the heater.
- Please note: this device is in the rst place an air conditioner. The appliance can heat when the ambient temperature is not lower than 7°C, otherwise the appliance will freeze internally.
- Warning! The length of the drain pipe is specially adapted to the technology of this device. Therefore do not replace it, and do not extend it with its own hose, as this can negatively affect the functioning of the appliance. The hose can be stretched, but in order to achieve an optimal effect you should keep the length as short as possible.
- Remember your burglary prevention!35
Don’t turn on the air conditioner until after you’ve attached the window seal. This will prevent the air conditioner’s warm exhaust air from circulating around the house. This window seal isn’t suitable for tilt windows.
1. Velcro on window frame
Clean the window and window frame with soap or detergent to clear it of any dust and grease. Cut the velcro 1 to size with scissors and attach it to the window frame around the window.
Next, attach the velcro around the entire window. Note: don’t stick the velcro onto the glass
3. Seal on window frame
Attach the window seal’s narrow side 2 to the velcro on the window frame. Work outwards from the middle and fully attach the narrow side all around.
Slightly open the window and attach the window seal’s broad side 3 to the velcro on the window. Make sure to leave enough room in the corners so the window seal won’t get stuck in the window.
Open the window seal’s zipper by about 50 centimeters.
6. Attach exhaust hose
Stick the air conditioner’s exhaust hose through the hole in the window seal. Close the zipper until the exhaust hose is secured. The window seal is now ready for use. You can turn on the air conditioner.36 Button Function Power On/off switch Mode Function selector: heat cool dehumidify Timer Start and stop at a preset time Speed Set fan speed Temp+ (up) Temperature selection higher Temp- (down) Temperature selection lower Wi (only control panel) The unit is connected to Wi-Fi Image remote control Image control panel WORKING37 Before using the air conditioner, check: - That it has been installed according to safety instructions; - That it is not damaged or broken; - That the electrical socket that you wish to use has the same voltage as is given on the unit’s specication plate (220-240V / 50Hz); - That no other devices are connected to the same socket. If this has all been checked, you can insert the plug into the socket. The control panel en the remote control have basically the same buttons. Insert 2 batteries (AAA-1.5V) in the battery compartment at the back on the remote control.
- Press on Mode until the Cool light shows on the display.
- Set the desired temperature using the Temp+(Up)/Temp-(Down) button.
- The display shows the set temperature. The temperature can be set to between 17 and 30°C.
- Maintain an interval of at least 3 minutes between each on and off.
2. Dehumidifying function
- Press on Mode until the Dry light shows on the display.
- Check that the water outlet is correctly connected (see page 9).
- The display automatically shows 2°C under room temperature.
- The temperature cannot be changed.
- The fan speed is set to low automatically.
- Maintain an interval of at least 3 minutes between each on and off.
- Press on Mode until the Heat light shows on the display.
- Set the desired temperature using the Temp+(Up)/Temp-(Down) button.
- The display shows the set temperature. The temperature can be set to between 17 and 30°C.
- Maintain an interval of at least 3 minutes between each on and off.38
- Automatic start: the air conditioning unit stands standby. Press on Timer and select the desired temperature using Temp+(Up)/Temp-(Down). If the display shows 4, for example, the air conditioning unit will start in 4 hours.
- Automatic stop: the air conditioning unit is on. Press on Timer and select the desired temperature using Temp+(Up)/Temp-(Down). If the display shows 8, for example, the air conditioning unit will switch off in 8 hours.
- The timer can be set to between 1 to 24 hours. Water outlet During the cooling process, the device removes water from the air. This largely evaporates but any excess water is collected in the water reservoir. If the water reservoir in the device is full, the compressor and the motor will stop automatically and the ‘water tank full’ light (W.F.) will come on. In this event, switch the air conditioning unit off and remove the plug from the socket. Empty the water tank by removing the cap from the water drainage point (see picture) and draining the tank into a drain or receptacle. Do not forget to replace the cap again afterwards! You can then switch the air con- ditioning unit back on. When dehumidifying, more water is removed from the air. This is why you must connect a hose to the water drainage hose during dehumidifying and run this to a drain (at a lower point).39 LED display The display shows the congured temperature or the timer settings. If the timer function is used then the display briey shows the new values after which the display returns to the congured temperature. The display also shows the error codes, see further on in this manual. Safety The Fuave ACS18K01 is tted with an overheating safeguard that switches the unit off if it overheats. If this should occur, you must remove the plug from the socket and leave the equipment to cool for at least 30 minutes. Remove the cause of overheating - has the device been (partially) cover- ed? Is it too close to a wall or another obstacle, preventing it sucking in or dispelling sufcient air? You can then use the device normally again but keep an eye on it for the rst 30 minutes to ensure there are no further problems. If the device is showing signs of problems or the overheating recurs, even though there is no obvious assignable cause, ask your supplier or a recognised electrician to check/repair the unit.40 Cleaning and maintenance Note! Before cleaning or carrying out maintenance work on the air conditioning unit, always switch off and remove the plug from the soc- ket! Regular cleaning is vital in order to keep the unit in good working order! Cleaning the housing Use a soft, damp cloth to wipe the housing. Never use aggressive cleaning products, petrol, detergent, chemically-impregnated cloths or other cle- aning solutions. These could damage the housing. Never spray the unit and ensure that water never penetrates the device! Dry the unit with a soft cloth. Cleaning the lter Clean the lter once every two weeks; a unit with a dirty lter will never work properly. The lter can be found behind the air inlet grilles on the side. You can easily open these grilles and remove the lter. Use a vacuum cle- aner or gently beat the lter to remove loose dust and dirt. Rinse the lter with tepid water (not hotter than 40°C) with a mild, neutral cleaning pro- duct. Let the lter dry thoroughly in the shade before replacing in the unit. Take care! Never use the air conditioning unit without the lter!41 Cleaning of radiator Clean the radiator behind the lter carefully with, potentially, the brush of the vacuum cleaner. End of season cleaning If the device is to be stored for a long period, you must take the following measures!
- Open the water drain and completely remove the condensed water. Let the unit run for several hours, so that the air conditioning is dry on the inside.
- Then switch the air conditioning unit off and remove the plug from the socket.
- Clean the lter and reposition them or replace with a new one.
- Unscrew the waste pipe from the device in order to prevent damage.
- Pack the air conditioning unit in its original packaging or in a plastic bag and place in a dry place for storage. Place a heavy object on the unit.
- Do not store the device in a room smaller than 11,3m². Troubleshooting and Error codes Troubleshooting The unit does not start if I press the ON/OFF button
- Is the plug in the socket?
- Is the earth leakage circuit breaker engaged? No power?
- Is the water tank full? Empty it.
- The room temperature is lower than the set temperature; amend the set temperature. The unit doesn’t seem to be very effective
- Measure the outlet temperature; this must be approx. 10° cooler than room temperature.
- Is there direct sunlight? Shut the curtains.
- Are windows or doors open? Shut them.
- Are there too many people in the room? They produce heat!
- Is the space too big?
- Is there an object in the room that is generating (a great deal of) heat? Switch it off or remove it.
- Is the lter dusty or covered in dirt? Clean it.
- Is the air inlet or outlet (hose) blocked? Make sure there is free air ow.42 The unit is making a noise
- Is the surface underneath the machine sturdy and even?
- The ow of coolant in the unit also produces a little noise. This is per- fectly normal. The unit switches itself off
- The overheating safeguard may have switched the unit off. See ‘Safety’. Error code Cause What to do E0 Error temperature sensor Have it replaced. The unit works without tem- perature setting. E2/E4 Water tank is full Switch the unit off and empty it manually. Switch it on again. E3 Error coil sensor The coil sensor is open or is malfunctioning. This has no effect on the normale use of the machine. Error codes