IAN 273647 - Tent CRIVIT - Free user manual and instructions
Find the device manual for free IAN 273647 CRIVIT in PDF.



| Brand | CRIVIT |
| Model | IAN 273647 |
| Category | Camping tent |
| Product type | Family tent for 4 persons |
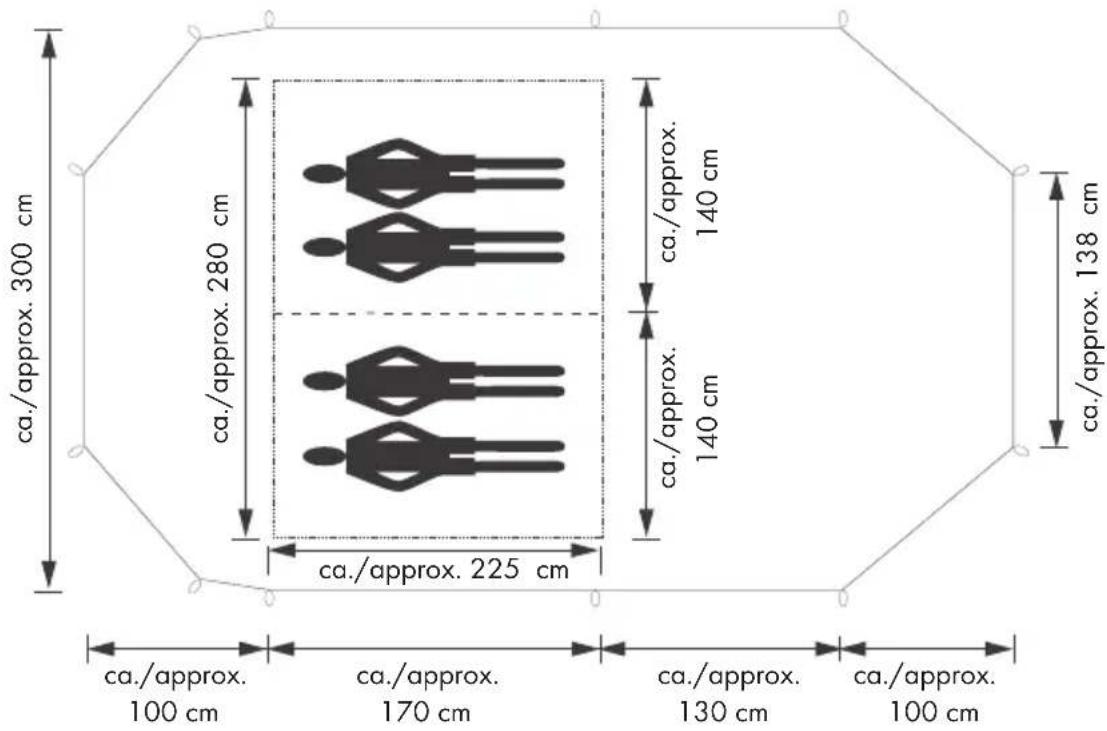
| Exterior dimensions | 500 x 300 x 195 cm (L x W x H) |
| Interior dimensions | 225 x 280 x 185 cm (L x W x H) |
| Maximum height | 185 cm |
| Main material | Polyester (fabric), fiberglass (poles) |
| Number of persons | 4 |
| Poles | 2 main poles (red and other) + 1 support bar, Ø 12.7 mm |
| Assembly type | Poles threading through channels, fixing with pegs and guy lines |
| Features | Double roof, groundsheet, roof window, detachable pockets, awning |
| Safety | Do not use fire inside, follow local fire regulations |
| Care and cleaning | Clean with soft sponge and water, do not machine wash, dry completely before storage |
| Repairability | Repair kit included: self-adhesive patches, spare poles, elastic cords, tensioners, fabric pieces |
| Warranty | 3 years from date of purchase |
| Usage | Leisure camping, temporary and occasional use (ISO 5912, category B, level 1) |
| Included accessories | Outer tent, inner tent, poles, bar, guy ropes, pegs, hooks, groundsheet, tensioners, roof window, detachable pockets, repair kit |
Frequently Asked Questions - IAN 273647 CRIVIT
User questions about IAN 273647 CRIVIT
0 question about this device. Answer the ones you know or ask your own.
Ask a new question about this device
Download the instructions for your Tent in PDF format for free! Find your manual IAN 273647 - CRIVIT and take your electronic device back in hand. On this page are published all the documents necessary for the use of your device. IAN 273647 by CRIVIT.
USER MANUAL IAN 273647 CRIVIT
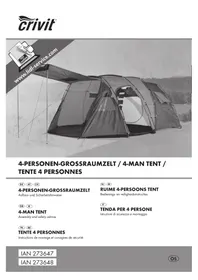
4-PERSONEN-GROSSRAUMZELT / 4-MAN TENT / TENTE 4 PERSONNES
DE AT CH
4-PERSONEN-GROSSRAUMZELT
Assembly and safety advice
FR BE
TENTE 4 PERSONNES
GB/IE Assembly and safety advice Page 9
natural_image
Simple line drawings of a human figure with number 2 and a wooden post (no text or symbols)C
G
natural_image
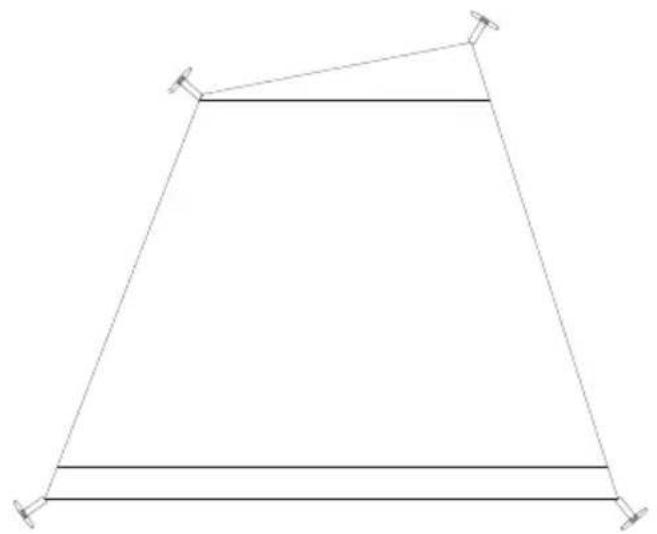
Simple line drawing of a trapezoidal structure with four corner supports (no text or symbols)H
4-PERSONEN-GROSSRAUMZELT
This product is suitable for use as accommodation when travelling and camping. The product is not intended for commercial use.
Cat. B camping tent in accordance with ISO 5912
Performance level 1: for infrequent and short-term use.
● Description of parts
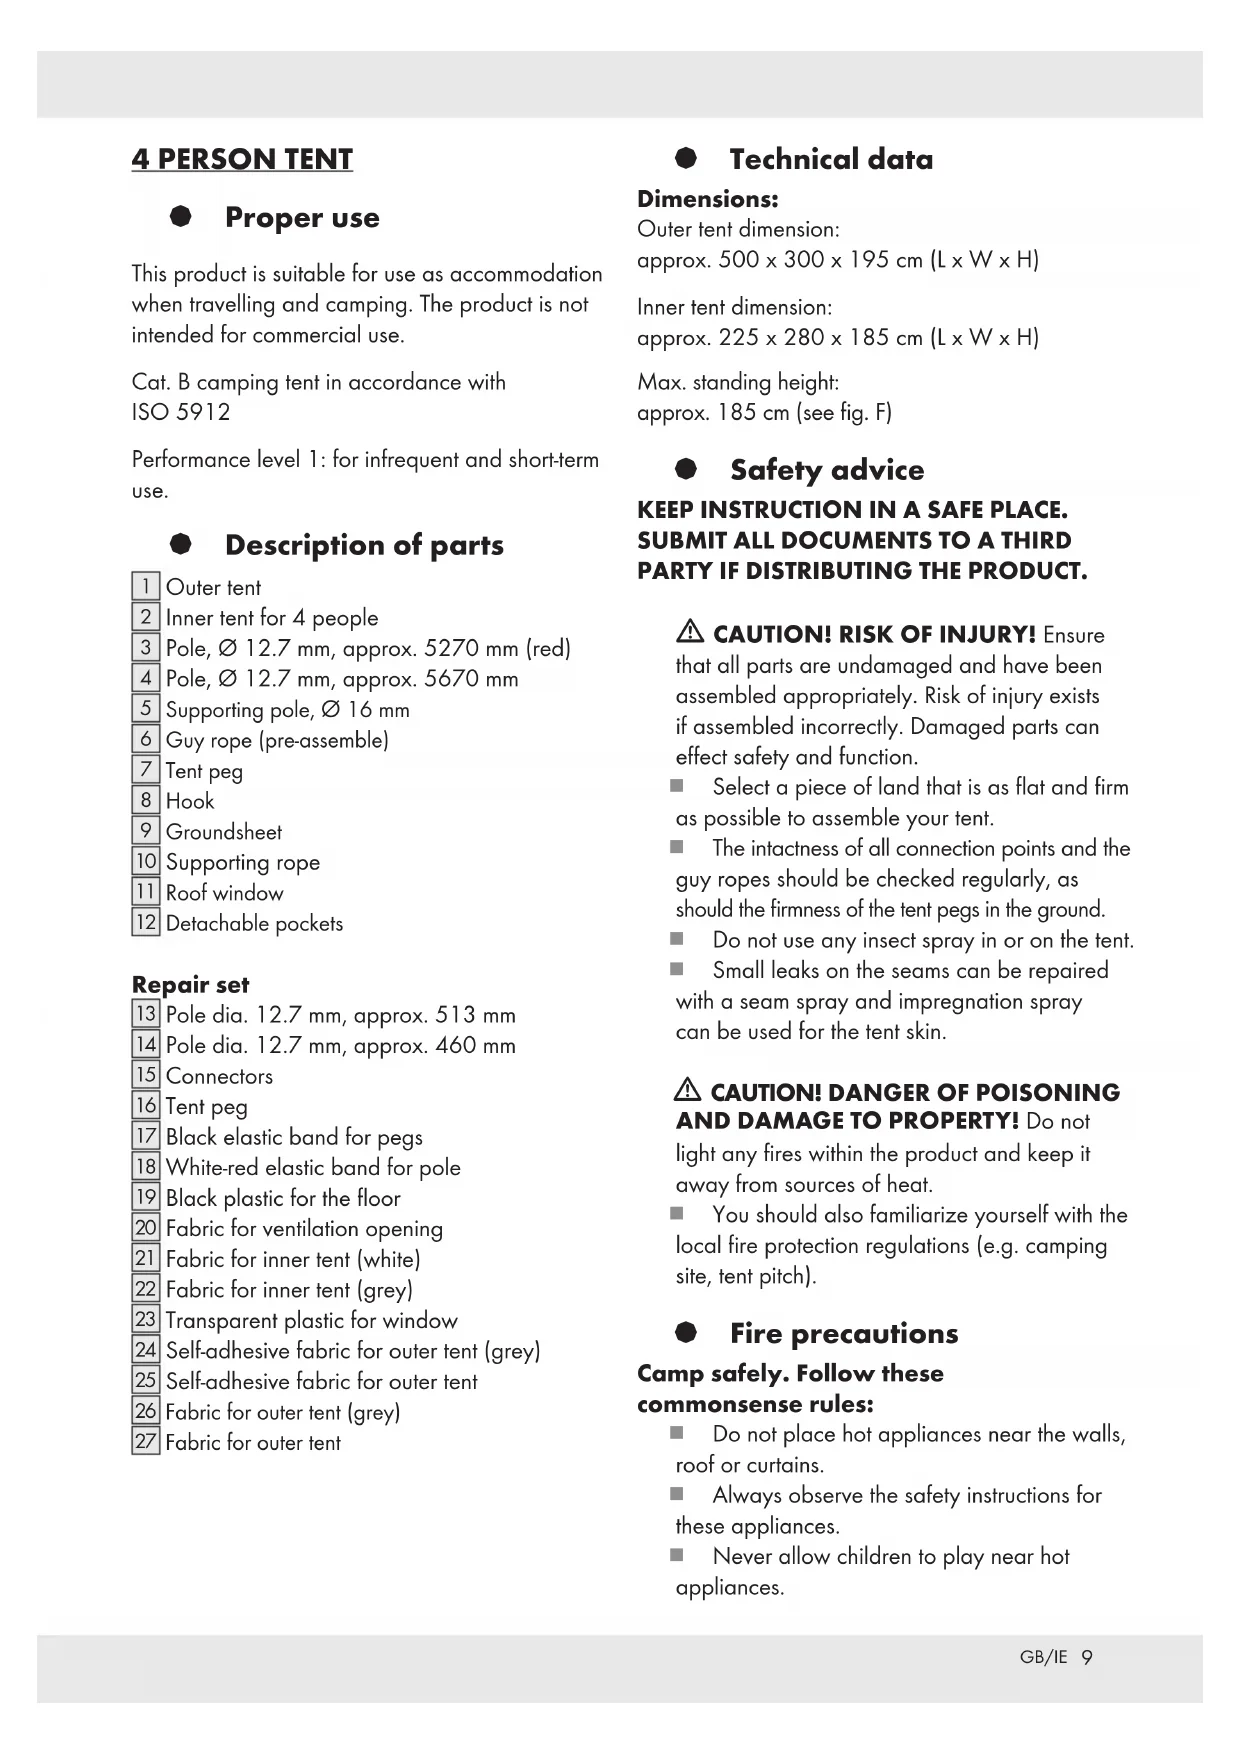
1 Outer tent
2 Inner tent for 4 people
3 Pole, ∅ 12.7 mm, approx. 5270 mm (red)
4 Pole, ∅ 12.7 mm, approx. 5670 mm
5 Supporting pole, ∅ 16 mm
6 Guy rope (pre-assemble)
7 Tent peg
8 Hook
9 Groundsheet
10 Supporting rope
11 Roof window
12 Detachable pockets
Repair set
13 Pole dia. 12.7 mm, approx. 513 mm
14 Pole dia. 12.7 mm, approx. 460 mm
15 Connectors
16 Tent peg
17 Black elastic band for pegs
18 White-red elastic band for pole
19 Black plastic for the floor
20 Fabric for ventilation opening
21 Fabric for inner tent (white)
22 Fabric for inner tent (grey)
23 Transparent plastic for window
24 Self-adhesive fabric for outer tent (grey)
25 Self-adhesive fabric for outer tent
26 Fabric for outer tent (grey)
27 Fabric for outer tent
- Technical data
Dimensions:
Outer tent dimension:
approx. 500 x 300 x 195 cm (L x W x H)
Inner tent dimension:
approx. 225 × 280 × 185 cm (L × W × H)
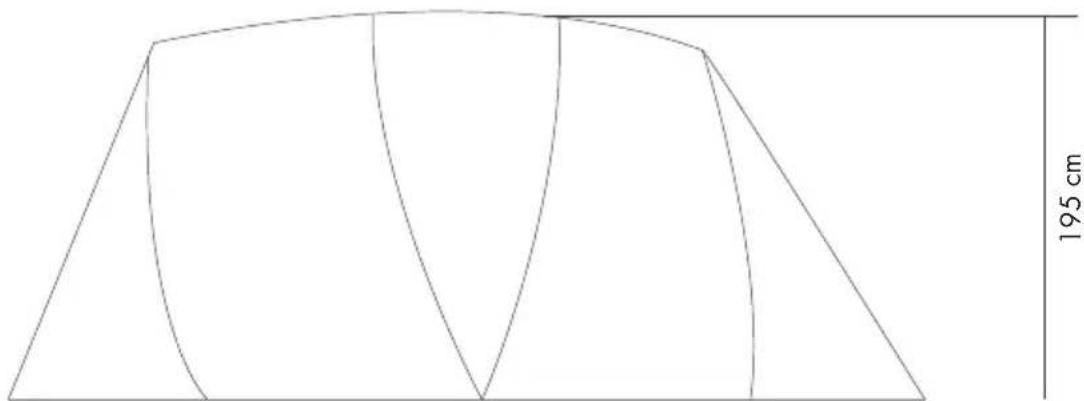
Max. standing height:
approx. 185 cm (see fig. F)
● Safety advice
KEEP INSTRUCTION IN A SAFE PLACE. SUBMIT ALL DOCUMENTS TO A THIRD PARTY IF DISTRIBUTING THE PRODUCT.
⚠️ CAUTION! RISK OF INJURY! Ensure that all parts are undamaged and have been assembled appropriately. Risk of injury exists if assembled incorrectly. Damaged parts can effect safety and function.
- Select a piece of land that is as flat and firm as possible to assemble your tent.
The intactness of all connection points and the guy ropes should be checked regularly, as should the firmness of the tent pegs in the ground. - Do not use any insect spray in or on the tent.
■ Small leaks on the seams can be repaired with a seam spray and impregnation spray can be used for the tent skin.
⚠️ CAUTION! DANGER OF POISONING AND DAMAGE TO PROPERTY! Do not
light any fires within the product and keep it away from sources of heat.
- You should also familiarize yourself with the local fire protection regulations (e.g. camping site, tent pitch).
● Fire precautions
Camp safely. Follow these commonsense rules:
- Do not place hot appliances near the walls, roof or curtains.
■ Always observe the safety instructions for these appliances. -
Never allow children to play near hot appliances.
-
Keep exits clear. Do not block the exit with objects.
■ Make sure you know the fire precaution arrangements on the site.
- Tent assembly
Inside the carrying bag there is a label with a QR-code. If the QR code is scanned you will receive details about how to pitch the product.
Please ensure that the product is only assembled by people with the appropriate skills.
Note: The polyester material of the tent consists of water-repellent material.
It is possible that during the first rainfall the tent will not be completely watertight. However, the threads of the tent will contract when exposed to water so that after a short time the tent will become watertight.
■ Erect the product in accordance with the illustrations A to F.
Illustration A:
- Place the outer tent 1 flat on the ground. The holders for the poles 3 4 must be facing upwards.
- Push the poles marked in different colours carefully through the holders marked with the same colour.
Illustration B:
- Set the tent 1 up and fix the poles to the rings of the floor fastenings.
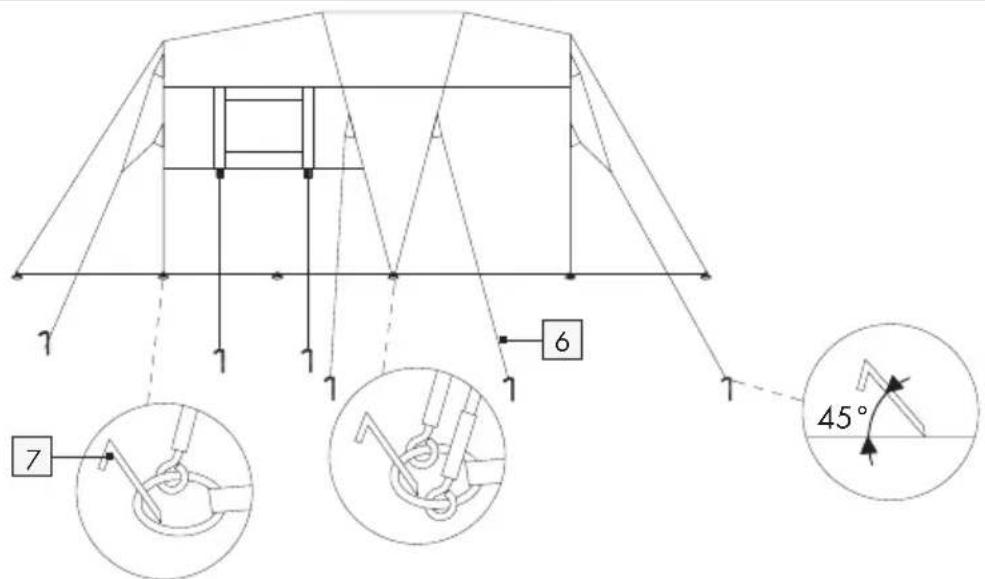
Illustration C:
- Fix one side of the tent in the ground with the tent pegs 7. Then take hold of the other end of the tent and pull it apart in such a way that the tent is taut.
- Secure the outer tent 1 by tensioning the floor fastenings with the tent pegs 7.
- Now secure the outer tent 1 with the guy rope (pre-assemble) 6 and the tent pegs 7.
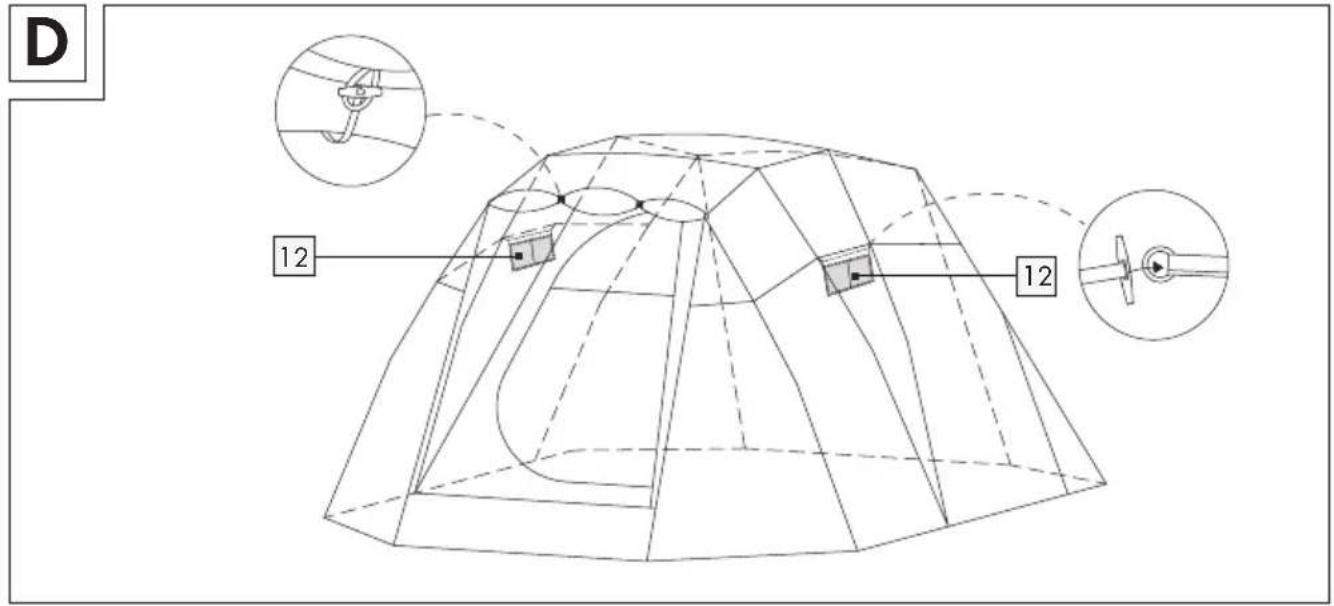
Illustration D:
-
Open the sunroof (entrance), unroll it and attach it with the two fasteners.
-
Hang the detachable pockets 12 in inner tent.
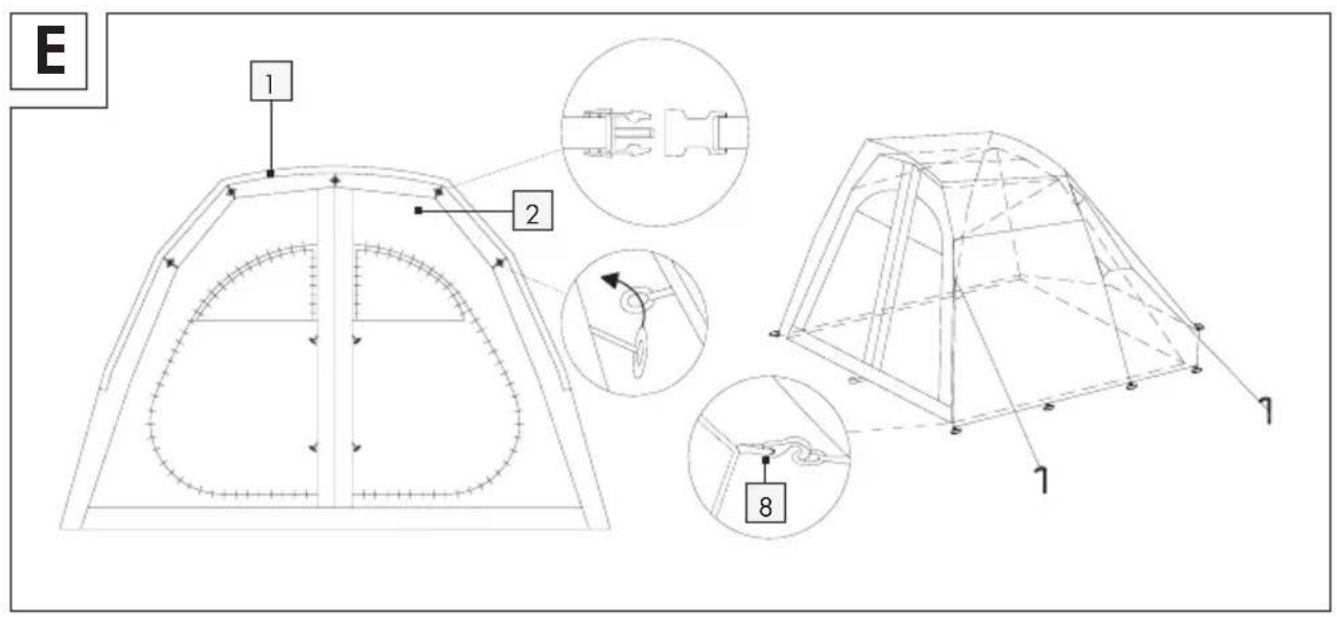
Illustration E:
-
Hang the inner tent 2 and the floor tarpaulin 9 into the toggle and click closures of the outer tent 1 that are designated for that purpose.
-
Use the hooks 8 at the corners of inner tent 2 to connect with the outer tent 1.
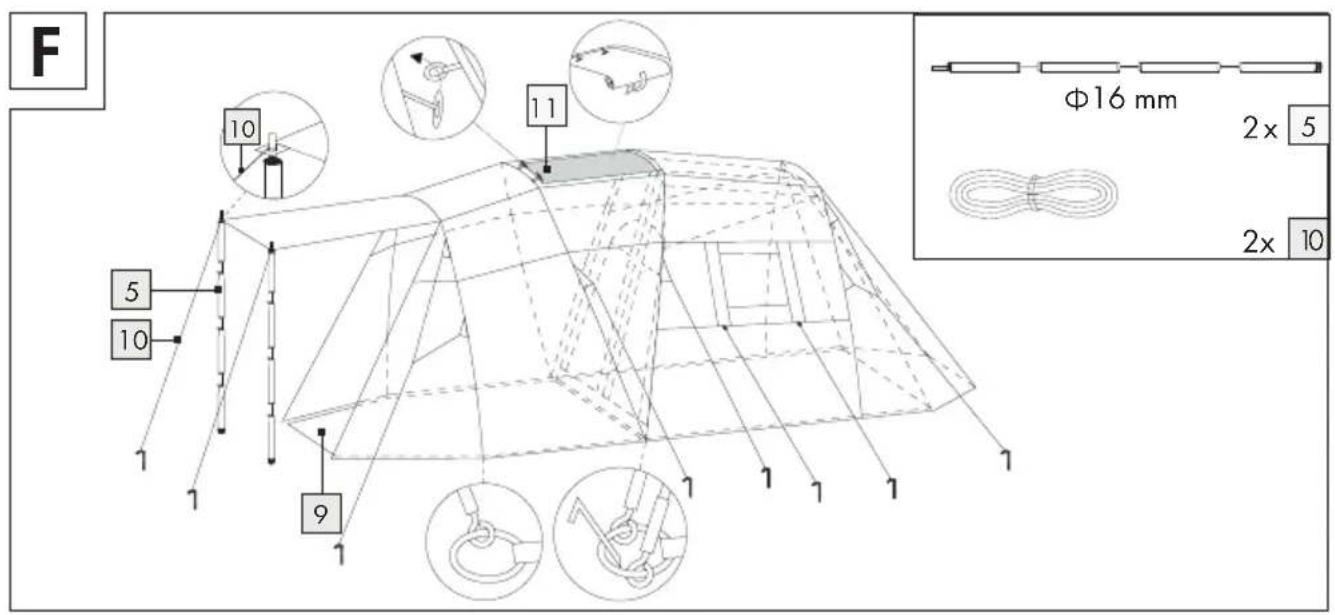
Illustration F:
- Stretch the tent until taut and pull all of the corners and guy ropes 6 until they are tight. Do not over-tighten the guy ropes 6. If the strength of the wind increases the attachment point and seam of the tent might tear. In order to use the entrance as a sunroof, insert the main support poles 5 into one another and attach the pointed end of the main support poles 5 into the holes of the sunroof provided.
- Secure the supporting poles 5 with the supporting ropes 10 and the tent pegs 7.
- Lay out the groundsheet 9 in the tent and engage the hooks of the groundsheet 9 in the rings of the tent attachments.
- The door in the partition of the inner tent 2 can only be opened to one side.
● Taking down the tent
- Clean the tent both inside and outside before you take the tent down. The tent must be dismantled in the reverse order to the manner in which it has been erected.
● Packing the tent together
CAUTION! Please ensure that the tent is completely dry before you pack it together. Otherwise this may result in stains and damage to the fabric.
⚠ CAUTION! The tent pegs and other individual parts must be packed separately in the bags provided. Otherwise the tent pegs 7 might damage the tent.
■ Always fold the outer tent together in such a way that the floor of the tent is facing outwards.
■ Then fold the inner text and roll it together.
Collect all of the parts together carefully before you pack the tent. You should count the parts in order to ensure that none of them have been mislaid or lost.
■ After the tent has been rolled up, pack it carefully into the carrying bag.
- Repair instructions
Damages on the outer tent
- Clean the area which has to be glued and wipe it dry thoroughly.
- Cut the self-adhesive repair panel, 24, 25 according to the size of the hole.
Note: Make sure that the patch is larger than the hole and that it overlaps the edges.
Round off the edges of the repair patch and remove the protective film.
Place the patch over the hole and press down firmly.
■ Use the transparent foil to repair the window.
Glue the edges with a transparent glue from a specialized shop. Depending on the glue that you will use, might this repaired area no longer be water and wind tight.
Damages on floor / inner tent
Holes in the tent floor or inside the tent can be sewn up with the aid of the enclosed piece of material 19-22, 26, 27. Place the fabric in the according colour on the hole and sew it with a sewing machine. We recommend to use a short stitch length to avoid that the fabric tears. Afterwards, treat the seams with a seam sealer from a specialized trade.
Fibreglass pole damaged / replacing elastic band in fibreglass pole
There are 2 fibreglass poles included with different sizes. Please make sure to use the correct pole when replacing.
- Cut the elastic band which is inside the fibreglass pole and pull it out.
Take the new white-red elastic band out of the included repair set.
- Tie a double knot at one end and pull out the other end through the fibreglass poles.
Tip! We recommend to carefully heat up the end with a cigarette lighter to avoid that the ends frays out and that the band slides better through the poles.
Please make sure to be outdoors when doing this and please also pay attention that you don't offend the fire safety regulations of your camping site! - You should also make a double knot here, after you have pulled out the elastic band through the last fibre pole.
Elastic band for pegs missing or damaged
■ Remove the damaged band and replace it by a new one that you will find in the enclosed repair set. Pull the black elastic band 17 through the loop and tie the ends to a knot.
● Cleaning and Care
CAUTION! Never wash the tent in a washing machine. Otherwise the product may lose some of its ability to keep out water.
⚠️ CAUTION! Never use petrol, solvent or other cleaning agents. Otherwise there is a danger of damage to the product.
Condensation can form in all synthetic tents; you should therefore air the tent as frequently as possible in order to counteract this.
■ Remove any dirt from the tent with a soft sponge and clean water.
Please allow all parts to dry thoroughly before you repack the tent. This will prevent the formation of mould, bad odours and discolouration.
If the zipper sticks when being opened or closed, spray it with silicone spray.
The product may lose some of its ability to keep out water with frequent use. Therefore you should spray the tent regularly with a waterproofing agent (available in DIY shops, camping shops etc.).
- Disposal
The packaging is made entirely of recyclable materials, which you may dispose at local recycling facilities.
Contact your local refuse disposal authority for more details of how to dispose of your worn-out product.
Warranty
The device has been manufactured to strict quality guidelines and meticulously examined before delivery. In the event of product defects you have legal rights against the retailer of this product. Your legal rights are not limited in any way by our warranty detailed below.
The warranty for this device is 3 years from the date of purchase. Should this device show any fault in materials or manufacture within three years from the date of purchase, we will repair or replace it - at our choice - free of charge to you.
The warranty period begins on the date of purchase. Please keep the original sales receipt in a safe location. This document is required as your proof of purchase. This warranty becomes void if the device has been damaged or improperly used or maintained.
The warranty applies to faults in material or manufacture. This warranty does not cover product parts subject to normal wear, thus possibly considered consumables (e.g. batteries) or for damage to fragile parts, e.g. switches, rechargeable batteries or glass parts.
TENTE 4 PERSONNES
circa 500 x 300 x 195 cm (L x H x P)
Dimensioni tenda:
circa 225 x 280 x 185 cm (L x H x P)
Altezza massima:



- 4-PERSONEN-GROSSRAUMZELT / 4-MAN TENT / TENTE 4 PERSONNES
- 4-PERSONEN-GROSSRAUMZELT
- TENTE 4 PERSONNES
- ● Description of parts
- Repair set
- - Technical data
- Dimensions:
- ● Safety advice
- KEEP INSTRUCTION IN A SAFE PLACE. SUBMIT ALL DOCUMENTS TO A THIRD PARTY IF DISTRIBUTING THE PRODUCT.
- ⚠️ CAUTION! DANGER OF POISONING AND DAMAGE TO PROPERTY! Do not
- ● Fire precautions
- Camp safely. Follow these commonsense rules:
- - Tent assembly
- Illustration A:
- Illustration B:
- Illustration C:
- Illustration D:
- Illustration E:
- Illustration F:
- ● Taking down the tent
- ● Packing the tent together
- - Repair instructions
- Damages on the outer tent
- Damages on floor / inner tent
- Fibreglass pole damaged / replacing elastic band in fibreglass pole
- Elastic band for pegs missing or damaged
- ● Cleaning and Care
- - Disposal
- Warranty
Brand : CRIVIT
Model : IAN 273647
Category : Tent