
HS1050 - Steamer BLACK & DECKER - Free user manual and instructions
Find the device manual for free HS1050 BLACK & DECKER in PDF.

| Product Type | Steamer |
| Brand | Black & Decker |
| Model | HS1050 |
| Power Supply | 120 V ~, 60 Hz |
| Power | 600 W (estimated) |
| Rice Bowl Capacity | 5 cups (1.25 L) |
| Number of Cooking Baskets | 2 (upper and lower) |
| Timer | 75 minutes with auto shut-off and chime |
| Egg Cooking | Up to 6 eggs with built-in supports |
| Flavor Scenter System | Herb and spice strainer in drip tray |
| Lid | Removable, reversible to serve as a tray |
| Water Level Indicator | MIN/MAX marks on the reservoir |
| Power Indicator Light | Light on during cooking |
| Foldable Cooking Baskets | Yes, for easy storage |
| Basket Material | Heat-resistant food-grade plastic |
| Maintenance: Descaling | Recommended every 3 months with white vinegar |
| Dishwasher Safe | Baskets, rice bowl, lid and drip tray (top rack) |
| Warranty | 2-year limited (USA and Canada) |
| User-Replaceable Parts | Lid, cooking bowls, egg supports, drip tray with strainer, rice bowl |
Frequently Asked Questions - HS1050 BLACK & DECKER
User questions about HS1050 BLACK & DECKER
0 question about this device. Answer the ones you know or ask your own.
Ask a new question about this device
Download the instructions for your Steamer in PDF format for free! Find your manual HS1050 - BLACK & DECKER and take your electronic device back in hand. On this page are published all the documents necessary for the use of your device. HS1050 by BLACK & DECKER.
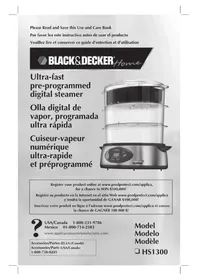
USER MANUAL HS1050 BLACK & DECKER
Accessories/Parts (USA)
1-800-738-0245
For online customer service
and to register your product, go to
www.prodprotect.com/applica
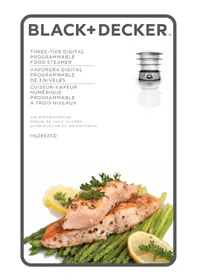
natural_image
Black's Decker portable food heater with shrimp and asparagus, no visible text or symbols on the device itself.Please Read and Save this Use and Care Book.
IMPORTANT SAFEGUARDS
When using electrical appliances, basic safety precautions should always be followed, including the following:
○ Read all instructions.
○ Do not touch hot surfaces. Use handles or knobs.
To protect against a risk of electric shock, do not immerse cord, plug or base unit in water or other liquid.
○ Close supervision is necessary when any appliance is used by or near children.
○ Unplug from outlet when not in use and before cleaning. Allow to cool before putting on or taking off parts or cleaning.
Do not operate any appliance with a damaged cord or plug or after the appliance malfunctions or is dropped or damaged in any manner. Return the appliance to the nearest authorized service facility for examination, repair, or electrical or mechanical adjustment. Or, call the appropriate toll-free number listed on the cover of this manual.
The use of accessory attachments not recommended by the appliance manufacturer may cause injuries.
○ Do not use outdoors.
Do not let cord hang over the edge of table or counter or touch hot surfaces.
Do not place on or near a hot gas or electric burner or in microwave or heated oven.
Extreme caution must be used when moving an appliance containing hot food, water or other hot liquids.
To disconnect, turn any control to OFF (0), then remove plug from wall outlet.
○ Do not use appliance for other than intended use.
○ To reduce the risk of electric shock, cook only in removable container.
This appliance is not intended for use by persons (including children) with reduced physical, sensory or mental capabilities, or lack of experience and knowledge, unless they have been given supervision or instruction concerning use of the appliance by a person responsible for their safety.
Children should be supervised to ensure that they do not play with the appliance.
SAVE THESE INSTRUCTIONS.
This product is for household use only.
POLARIZED PLUG (120V Models Only)
This appliance has a polarized plug (one blade is wider than the other). To reduce the risk of electric shock, this plug is intended to fit into a polarized outlet only one way. If the plug does not fit fully into the outlet, reverse the plug. If it still does not fit, contact a qualified electrician. Do not attempt to modify the plug in any way.
TAMPER-RESISTANT SCREW
Warning: This appliance is equipped with a tamper-resistant screw to prevent removal of the outer cover. To reduce the risk of fire or electric shock, do not attempt to remove the outer cover. There are no user-serviceable parts inside. Repair should be done only by authorized service personnel.
ELECTRICAL CORD
a) A short power-supply cord (or detachable power-supply cord) is to be provided to reduce the risk resulting from becoming entangled in or tripping over a longer cord.
b) Longer detachable power-supply cords or extension cords are available and may be used if care is exercised in their use.
c) If a long detachable power-supply cord or extension cord is used,
1) The marked electrical rating of the detachable power-supply cord or extension cord should be at least as great as the electrical rating of the appliance,
2) If the appliance is of the grounded type, the extension cord should be a grounding-type 3-wire cord, and
3) The longer cord should be arranged so that it will not drape over the countertop or tabletop where it can be pulled on by children or tripped over.
Note: If the power supply cord is damaged, it should be replaced by qualified personnel or in Latin America by an authorized service center.
Product may vary slightly from what is illustrated.

† 1. Lid with handles (Part # HS1050-01)
2. Steam vents
† 3. Upper basket tray with built-in egg holders (Part # HS1050-02)
† 4. Upper steaming basket (Part # HS1050-03)
† 5. Lower basket tray with built-in egg holders (Part # HS1050-04)
† 6. Lower steaming basket (Part # HS1050-05)
† 7. Drip tray with built-in Flavor Scenter® screen (Part # HS1050-07) (not shown)
8. External water-fill inlet
9. Heating element (not shown)
10. Water reservoir (not shown)
11. Water window with Min/Max level markings
12. 75-minute timer
13. Unit base
14. Power indicator light
† 15. 5-cup rice bowl (Part # HS1050-06) (not shown)
16. Cooking chart (behind base; not shown)
Note: † indicates consumer replaceable/removable parts
How to Use
This appliance is for household use only.
GETTING STARTED
- Remove packing materials and any stickers from the unit.
- Please go to www.prodprotect.com/applica to register your warranty.
- Wash all parts as instructed in the CARE AND CLEANING section of this manual.
- Select a location for the unit. Do not place unit directly under cabinets or too close to the wall to allow steam to escape without damaging counter space or cabinets.
FILLING WATER RESERVOIR
- Place the drip tray onto the base of the unit.
Important: To avoid water overflow, the drip tray must be in place before filling the water reservoir. - Pour water into the water-fill inlet up to the Max marking on the water window. Do not overfill.
Important:
• Water should never go below the Min level on the water window.
- Do not add any salt, pepper, seasoning, herbs, beer, wine or any other liquid to the water reservoir.
- During the cooking cycle, check the water window. If water level is low, add cold tap water to the water-fill inlet as needed. This will ensure continuous steaming
3. Place herbs or spices in Flavor Scenter ^® screen.
Note: You can also use the drip tray without adding herbs to the Flavor Scenter® if you prefer.
USING STEAMING BASKETS
You can arrange your steaming baskets according to the amount of food you are cooking.
Caution: Use pot holders when removing the lid or lifting the steaming basket, drip tray or rice bowl. Lift the lid away from your face and body to avoid escaping steam. Cooking with One Steaming Basket
- Place either basket onto the drip tray.
- Place food in the steaming basket. You can also cook up to 6 eggs by inserting an egg into each indentation on built-in egg holders.
- Cover the steaming basket with the lid, making sure it fits securely in place. Follow steps 4-6 on page 6.
Cooking with Two Steaming Baskets
- Fill both baskets with desired foods. Always place more solid foods or foods that take longer to cook in lower basket.
- Place lower basket onto drip tray. Place upper basket on top of lower basket.
- Cover the steaming basket so that the lid handles line up over the basket handles. Make sure the lid tabs fit properly into the steaming basket openings.
- Plug the power cord into wall outlet and set the timer for the desired cooking time, up to 75 minutes. Power indicator light will illuminate. When the time is up, a bell rings, the power indicator light goes out and the unit automatically shuts off.
- When cooking is finished, unplug the unit and remove food immediately to avoid over-cooking.
- Use inverted lid to hold hot steaming basket.
Caution: Use pot holders when removing the lid or lifting the steaming basket, drip tray or rice bowl. Lift the lid away from your face and body to avoid escaping steam.
USING THE RICE BOWL
When cooking in the rice bowl, add rice, herbs, seasonings and water directly into the rice bowl.
- Place the steaming basket onto the drip tray and place the rice bowl with contents into the steaming basket. Cover steaming basket with the lid.
- Plug cord into wall outlet and set the timer to desired cooking time, up to 75 minutes.
- When cooking is finished, unplug the unit and remove the rice bowl immediately to avoid over-cooking.
- Use the inverted lid as a tray for the steam basket.
Caution: Use pot holders when removing the lid or lifting the steaming basket, drip tray or rice bowl. Lift the lid away from your face and body to avoid escaping steam.
Care and Cleaning
This appliance contains no user-serviceable parts. Refer service to qualified service personnel.
Important: Unplug the unit and allow to cool completely before cleaning.
CLEANING
• Steaming Baskets, Rice Bowl, Lid and Drip Tray
Immerse in hot, sudsy water. Rinse and dry thoroughly. These parts can also be washed in the dishwasher, top rack only.
• Water Reservoir
Clean with hot, sudsy water. Use a non-abrasive plastic brush or mesh scouring pad to clean the interior. Rinse thoroughly with clean, warm water. Do not immerse base in water.
Important: Do not use bleach, abrasive pads or cleaners to clean any part of the unit. MAINTAINING YOUR UNIT
Mineral deposits left by hard water can clog your unit and cause steam to stop before food is cooked. Cleaning is recommended every 3 months. The frequency of flushing out deposits is affected by your usage and water hardness.
- Fill water reservoir to the Max level (on the water window) with white vinegar.
Important: Do not use any other chemical or commercial descaler.
- Make sure the drip tray, steaming bakets and lid are in place.
- Plug unit into wall outlet.
- Set timer to 25 minutes.
Important: If vinegar begins to boil over the edge of the base, unplug the unit and turn off the timer. Reduce amount of vinegar.
- Once you hear the bell ring, unplug the unit and let it cool completely.
- Pour out vinegar from water reservoir and rinse reservoir several times with warm, sudsy water.
STORING YOUR UNIT
Nesting basket design makes it easy to store the unit.
- Unplug unit from wall outlet and let it cool completely.
- To store, place one basket inside the other.
NEED HELP?
For service, repair or any questions regarding your appliance, call the appropriate 800 number on the cover of this book. Please DO NOT return the product to the place of purchase. Also, please DO NOT mail product back to manufacturer, nor bring it to a service center. You may also want to consult the website listed on the cover of this manual.
TWO-YEAR LIMITED WARRANTY
(Applies only in the United States and Canada)
What does it cover?
- Any defect in material or workmanship provided; however, Applica's liability will not exceed the purchase price of product.
For how long?
- Two years from the date of original purchase with proof of such purchase.
What will we do to help you?
- Provide you with a reasonably similar replacement product that is either new or factory refurbished.
How do you get service?
- Save your receipt as proof of date of sale.
- Visit the online service website at www.prodprotect.com/applica, or call toll-free 1-800-231-9786, for general warranty service.
- If you need parts or accessories, please call 1-800-738-0245.
What does your warranty not cover?
• Damage from commercial use
- Damage from misuse, abuse or neglect
- Products that have been modified in any way
- Products used or serviced outside the country of purchase
• Glass parts and other accessory items that are packed with the unit
- Shipping and handling costs associated with the replacement of the unit
- Consequential or incidental damages (Please note, however, that some states do not allow the exclusion or limitation of consequential or incidental damages, so this limitation may not apply to you.)
How does state law relate to this warranty?
- This warranty gives you specific legal rights. You may also have other rights that vary from state to state or province to province.
BLACK&DECKER is a registered trademark of The Black & Decker Corporation, Towson, Maryland, USA
Made and Printed in People's Republic of China
San Jose, Costa Rica
Tel.: [506] 257-5716 / 223-0136
Ecuador
Col. Centro, Cuauhtemoc,
México, D.F.
Tel. 01 800 714 2503
Nicaragua
ServiTotal
City Market Nivel Plaza Local 153
Diagonal Hotel Melia.
Caracas.
Tel. (582) 324-0969
www.applicaservice.com
servicio@applicamail.com
Applica Consumer Products, Inc.

- Please Read and Save this Use and Care Book.
- IMPORTANT SAFEGUARDS
- SAVE THESE INSTRUCTIONS.
- POLARIZED PLUG (120V Models Only)
- TAMPER-RESISTANT SCREW
- ELECTRICAL CORD
- How to Use
- GETTING STARTED
- FILLING WATER RESERVOIR
- Important:
- USING STEAMING BASKETS
- Cooking with Two Steaming Baskets
- USING THE RICE BOWL
- Care and Cleaning
- CLEANING
- • Steaming Baskets, Rice Bowl, Lid and Drip Tray
- • Water Reservoir
- Important: Do not use bleach, abrasive pads or cleaners to clean any part of the unit. MAINTAINING YOUR UNIT
- Important: Do not use any other chemical or commercial descaler.
- Important: If vinegar begins to boil over the edge of the base, unplug the unit and turn off the timer. Reduce amount of vinegar.
- STORING YOUR UNIT
- NEED HELP?
- TWO-YEAR LIMITED WARRANTY
- (Applies only in the United States and Canada)
- What does it cover?
- For how long?
- What will we do to help you?
- How do you get service?
- What does your warranty not cover?
- How does state law relate to this warranty?
- Ecuador
- Nicaragua
Brand : BLACK & DECKER
Model : HS1050
Category : Steamer