
10032191 - Freezer Klarstein - Free user manual and instructions
Find the device manual for free 10032191 Klarstein in PDF.

| Product type | Freezer |
| Brand | Klarstein |
| Model | 10032191 |
| Power supply | 220-240 V ~ 50-60 Hz |
| Temperature adjustment | Rotary button with MIN, MAX, OFF positions |
| Defrosting | Manual, recommended at 5-10 mm of frost |
| Installation | Freestanding, rear clearance min. 15 cm |
| Safety instructions | Do not use mechanical devices to defrost, do not damage the refrigerant circuit |
| Cleaning | With cloth and warm water, do not use steam cleaner |
| Recycling | Compliant with directive 2012/19/EU |
| Adjustable feet | Yes, to compensate for uneven floors |
| Use | Domestic and similar (office kitchens, hotels, etc.) |
| Commissioning | Let it rest for 2 hours before plugging in, then cool for 2-3 hours empty |
Frequently Asked Questions - 10032191 Klarstein
User questions about 10032191 Klarstein
0 question about this device. Answer the ones you know or ask your own.
Ask a new question about this device
Download the instructions for your Freezer in PDF format for free! Find your manual 10032191 - Klarstein and take your electronic device back in hand. On this page are published all the documents necessary for the use of your device. 10032191 by Klarstein.
USER MANUAL 10032191 Klarstein
Congratulations on purchasing this equipment. Please read this manual carefully and take care of the following hints to avoid damages. Any failure caused by ignoring the mentioned items and cautions mentioned in the instruction manual are not covered by our warranty and any liability.
CONTENT
Technical Data 8
Declaration of Conformity 8
Safety Instructions 9
Getting Started 9
Operation 10
Care and Cleaning 11
Troubleshooting 11
Hints on Disposal 12
TECHNICAL DATA
| Item number 10032191 | |
| Power supply 220-240 V ~ 50-60 Hz |
DECLARATION OF CONFORMITY

Producer:
Chal-Tec GmbH, Wallstraße 16, 10179 Berlin, Germany.
This product is conform to the following European
Directives:
2014/30/EU (EMC)
2014/35/EU (LVD)
2011/65/EU (RoHS)
643/2009/EC (ErP)
1060/2010/EU (ErP)
SAFETY INSTRUCTIONS
- Keep ventilation openings, in the appliance enclosure or in the built-in structure, clear of obstruction.
- Do not use mechanical devices or other means to accelerate the defrosting process.
- Do not damage the refrigerant circuit.
- Do not use electrical appliances inside the food storage compartments of the appliance, unless they are of the type recommended by the manufacturer.
- The appliance has to be unplugged after use and before carrying out user maintenance on the appliance.
- This appliance is not intended for use by persons (including children) with reduced physical, sensory or mental capabilities, or lack of experience and knowledge, unless they have been given supervision or instruction concerning use of the appliance by a person responsible for their safety.
Children should be supervised to ensure that they do not play with the appliance. - If the supply cord is damaged, it must be replaced by the manufacturer, its service agent or similarly qualified persons in order to avoid a hazard.
- Do not store explosive substances in this appliance.
- The appliance is not designed for commercial use. It is intended for use in domestic households and in similar working and residential environments, such as staff kitchen areas, farm houses, hotels, motels and bed and breakfast type environments.
- Disconnect the power supply before replacing the lamp.
- Packaging material could be dangerous for children! For disposing of package and the appliance please go to a recycling centre. Cut off the power supply cable and make the door closing device unusable.
GETTING STARTED
Before first Use
- Remove the exterior and interior packing.
- Before connecting the freezer to the power source, let it stand upright for approximately 2 hours. This will reduce the possibility of a malfunction in the cooling system from handling during transportation.
- Clean the interior surface with lukewarm water using a soft cloth.
Installation
- This appliance is designed to be free standing only.
- Place your freezer on a floor that is strong enough to support the freezer.
- Allow 15 cm of space between the back and sides of the freezer.
- Locate the freezer away from direct sunlight and sources of heat (stove, heater, etc.) Avoid locating the freezer in moist areas.
- After plugging the appliance into a wall outlet, allow the unit to cool down for 2 3 hours before placing food in the freezer compartment.
OPERATION
Temperature Control
- Your freezer has one control for regulating the temperature. The temperature control is located on the lower right hand corner.
The range of the temperature control is from position MIN, MAX and OFF - To turn the freezer off, turn the temperature control to "OFF". Turning the temperature control to "OFF" position stops the cooling cycle but does not shut off the power to the freezer.
Note: If the unit is unplugged, lost power, or turned off; you must wait 3 to 5 minutes before restarting the unit. If you attempt to restart before this time delay, the freezer will not start.
Defrosting Your Freezer
For the most efficient operation and minimum energy consumption, defrost the freezer when the frost on the freezer walls is excessive or 5 to 10mm thick.
- Remove the frozen food from the freezer and place it in a cooler to protect the food.
- Turn the thermostat knob to "OFF".
- Unplug the freezer. The Power Supply light should be off (green light out).
During defrosting, the ice melts into the cabinet. - Remove the drain plug on the inside floor of the freezer by pulling straight out.
- Place a shallow pan outside drain outlet. The defrost water will drain out.
- Check the pan occasionally so the water does not overflow.
- Clean the interior of the freezer.
- Replace the plug on the inside floor.
- Reset the thermostat to desired setting.
- Allow the cabinet to cool for one hour.
- Return food to the freezer.
Note: Defrosting usually takes a few hours. Leaving the door open will help speed the process. Also, pouring warm water (not boiling) on the ice/frost will help speed melting.
CARE AND CLEANING
- Never clean the appliance with a steam cleaner. Moisture could accumulate in electrical components, danger of electrical shock!
- Hot vapors can lead to the damage of plastic parts. The appliance must be dry before it is placed back into service.
- Ethereal oils and organic solvents can attack plastic parts, e.g. lemon juice or the juice form orange peel, butyric acid, cleanser that contain acetic acid. Do not allow such substances to come into contact the appliance parts.
- Do not use any abrasive cleaners.
- Clean the appliance and the interior accessories with a cloth and lukewarm water. After cleaning wipe with fresh water and rub dry.
After everything is dry place appliance back into service.
TROUBLESHOOTING
| Problem Possible | Cause Suggested Solution | |
| Appliance does not work | Mains plug is not plugged in or is loose | Insert mains plug. |
| Fuse has blown or is defective Check fuse, replace if necessary. | ||
| Socket is defective Mains malfunctions are to be corrected by an electrician. | ||
| Appliance cools too much | Temperature is set too cold. Turn the temperature to a warmer setting. | |
| The food is too warm. | Temperature is not properly adjusted. | Please look in the initial Temperature Setting section. |
| Door was open for an extended period. | Open the door only as long as necessary. | |
| A large quantity of warm food was placed in the appliance within the last 24 hours. | Turn the temperature regulation to a colder setting temporarily. | |
| The appliance is near a heat source. | Please look in the installation location section. | |
| Unusual noises Appliance is not level. Re-adjust the feet. | ||
| The appliance is touching the wall or other objects. | Move the appliance slightly. | |
| A component, e.g. a pipe, on the rear of the appliance is touching another part of the appliance or the wall. | If necessary, carefully bend the component out of the way. | |
HINTS ON DISPOSAL
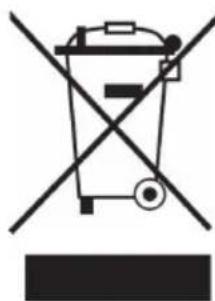
According to the European waste regulation 2012/19/EU this symbol on the product or on its packaging indicates that this product may not be treated as household waste. Instead it should be taken to the appropriate collection point for the recycling of electrical and electronic equipment. By ensuring this product is disposed of correctly, you will help prevent potential negative consequences for the environment and human health, which could otherwise be caused by inappropriate waste handling of this product. For more detailed information about recycling of this product, please contact your local council or your household waste disposal service.
Estimado cliente:

Brand : Klarstein
Model : 10032191
Category : Freezer