
CHW3070 - Water dispenser Campomatic - Free user manual and instructions
Find the device manual for free CHW3070 Campomatic in PDF.
| Brand | Campomatic |
| Model | CHW3070 |
| Product Type | Vertical water dispenser (cold and hot) |
| Power Supply | 220-240 V ~ 50 Hz |
| Total Power | 620 W |
| Heating Power | 530 W |
| Cooling Power | 0.7 A |
| Climate Class | ST |
| Refrigerant | R134a / 32 g |
| Bottle Capacity | Up to 20 L (5 gallons) |
| Tank Material | Stainless steel |
| WaterGuard System | Yes |
| Indicator lights | Power (yellow), hot water (red), cold water (green) |
| Taps | Blue (cold water), Red (hot water) |
| Switches | Rear, red (hot water), green (cold water) |
| Temperature adjustment | Yes |
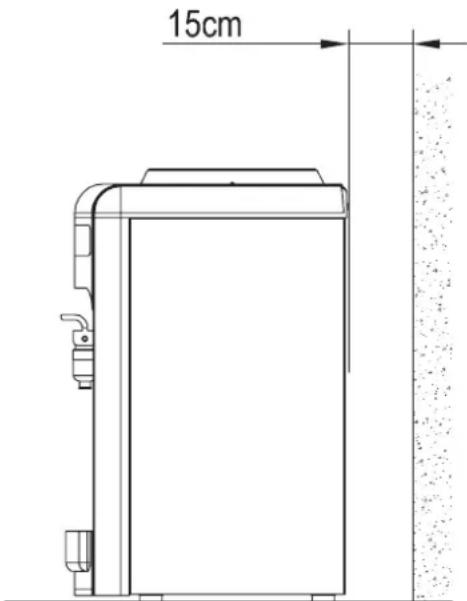
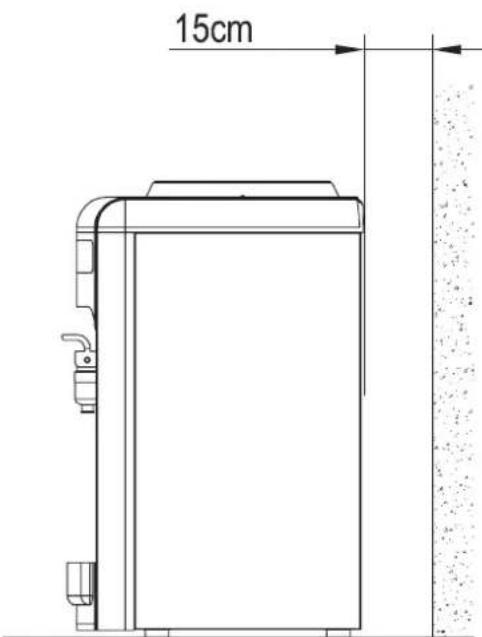
| Minimum distance from wall | 15 cm |
| Recommended cleaning | Every 2-3 months with 2% citric acid |
| Electrical protection | Fuse, ground wire, electrical leak protector |
| Use | Indoor only |
| Installation surface | Hard, flat and level |
| Allowed liquids | Water only |
| Safety | Do not immerse, unplug before cleaning, keep children away |
Frequently Asked Questions - CHW3070 Campomatic
User questions about CHW3070 Campomatic
0 question about this device. Answer the ones you know or ask your own.
Ask a new question about this device
Download the instructions for your Water dispenser in PDF format for free! Find your manual CHW3070 - Campomatic and take your electronic device back in hand. On this page are published all the documents necessary for the use of your device. CHW3070 by Campomatic.
USER MANUAL CHW3070 Campomatic
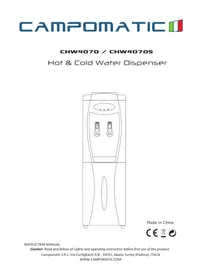
Hot & Cold Water Dispenser
Made in China

INSTRUCTION MANUAL
Caution: Read and follow all safety and operating instruction before first use of this product.
Campomatic S.R.L. Via Configliachi 5/B . 35031, Abano Terme (Padova), ITALIA
WWW.CAMPOMATIC.COM
Table of Content
English 3
French 8
18
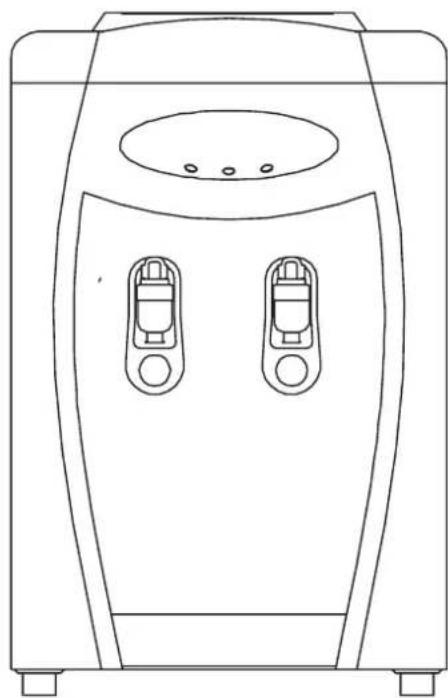
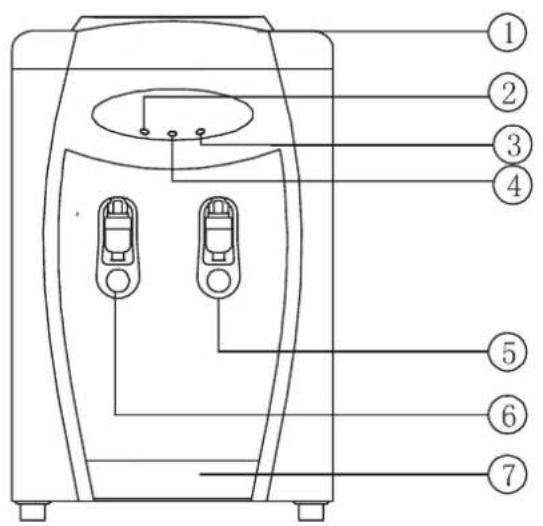
1- PARTS NAME
I. Water guard
2. Heating lamp (Red)
3. Cooling lamp (Green)
4. Power lamp (yellow)
S. Cold tap (Blue)
6. Hot tap (Red)
7. Drip tray
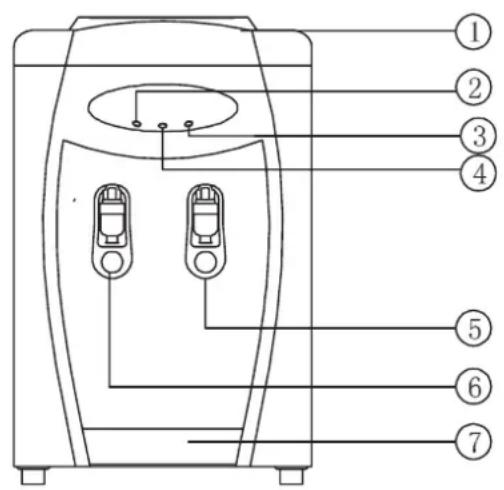
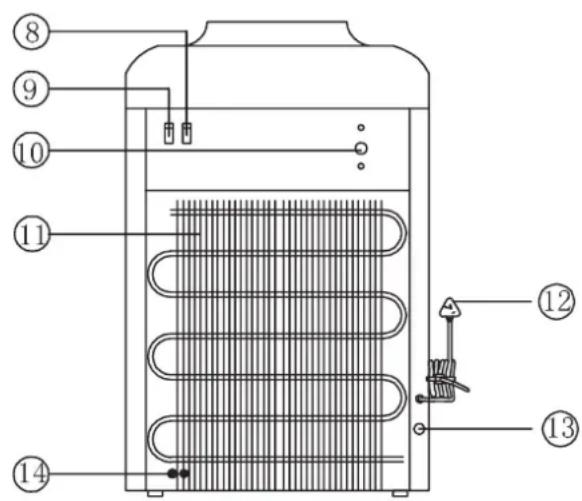
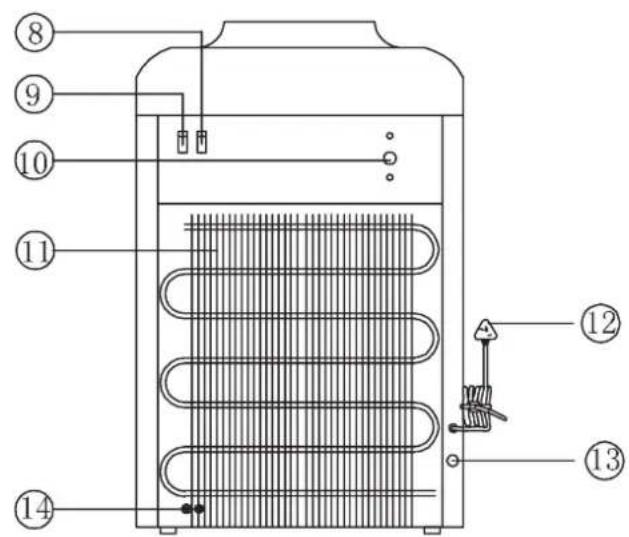
8. Heating switch (red)
9. Cooling switch (green)
10. Water Temperature Controller
11. Radiator (Condenser)
12. Power cord set
13. Drain stopple
14. Earth wire
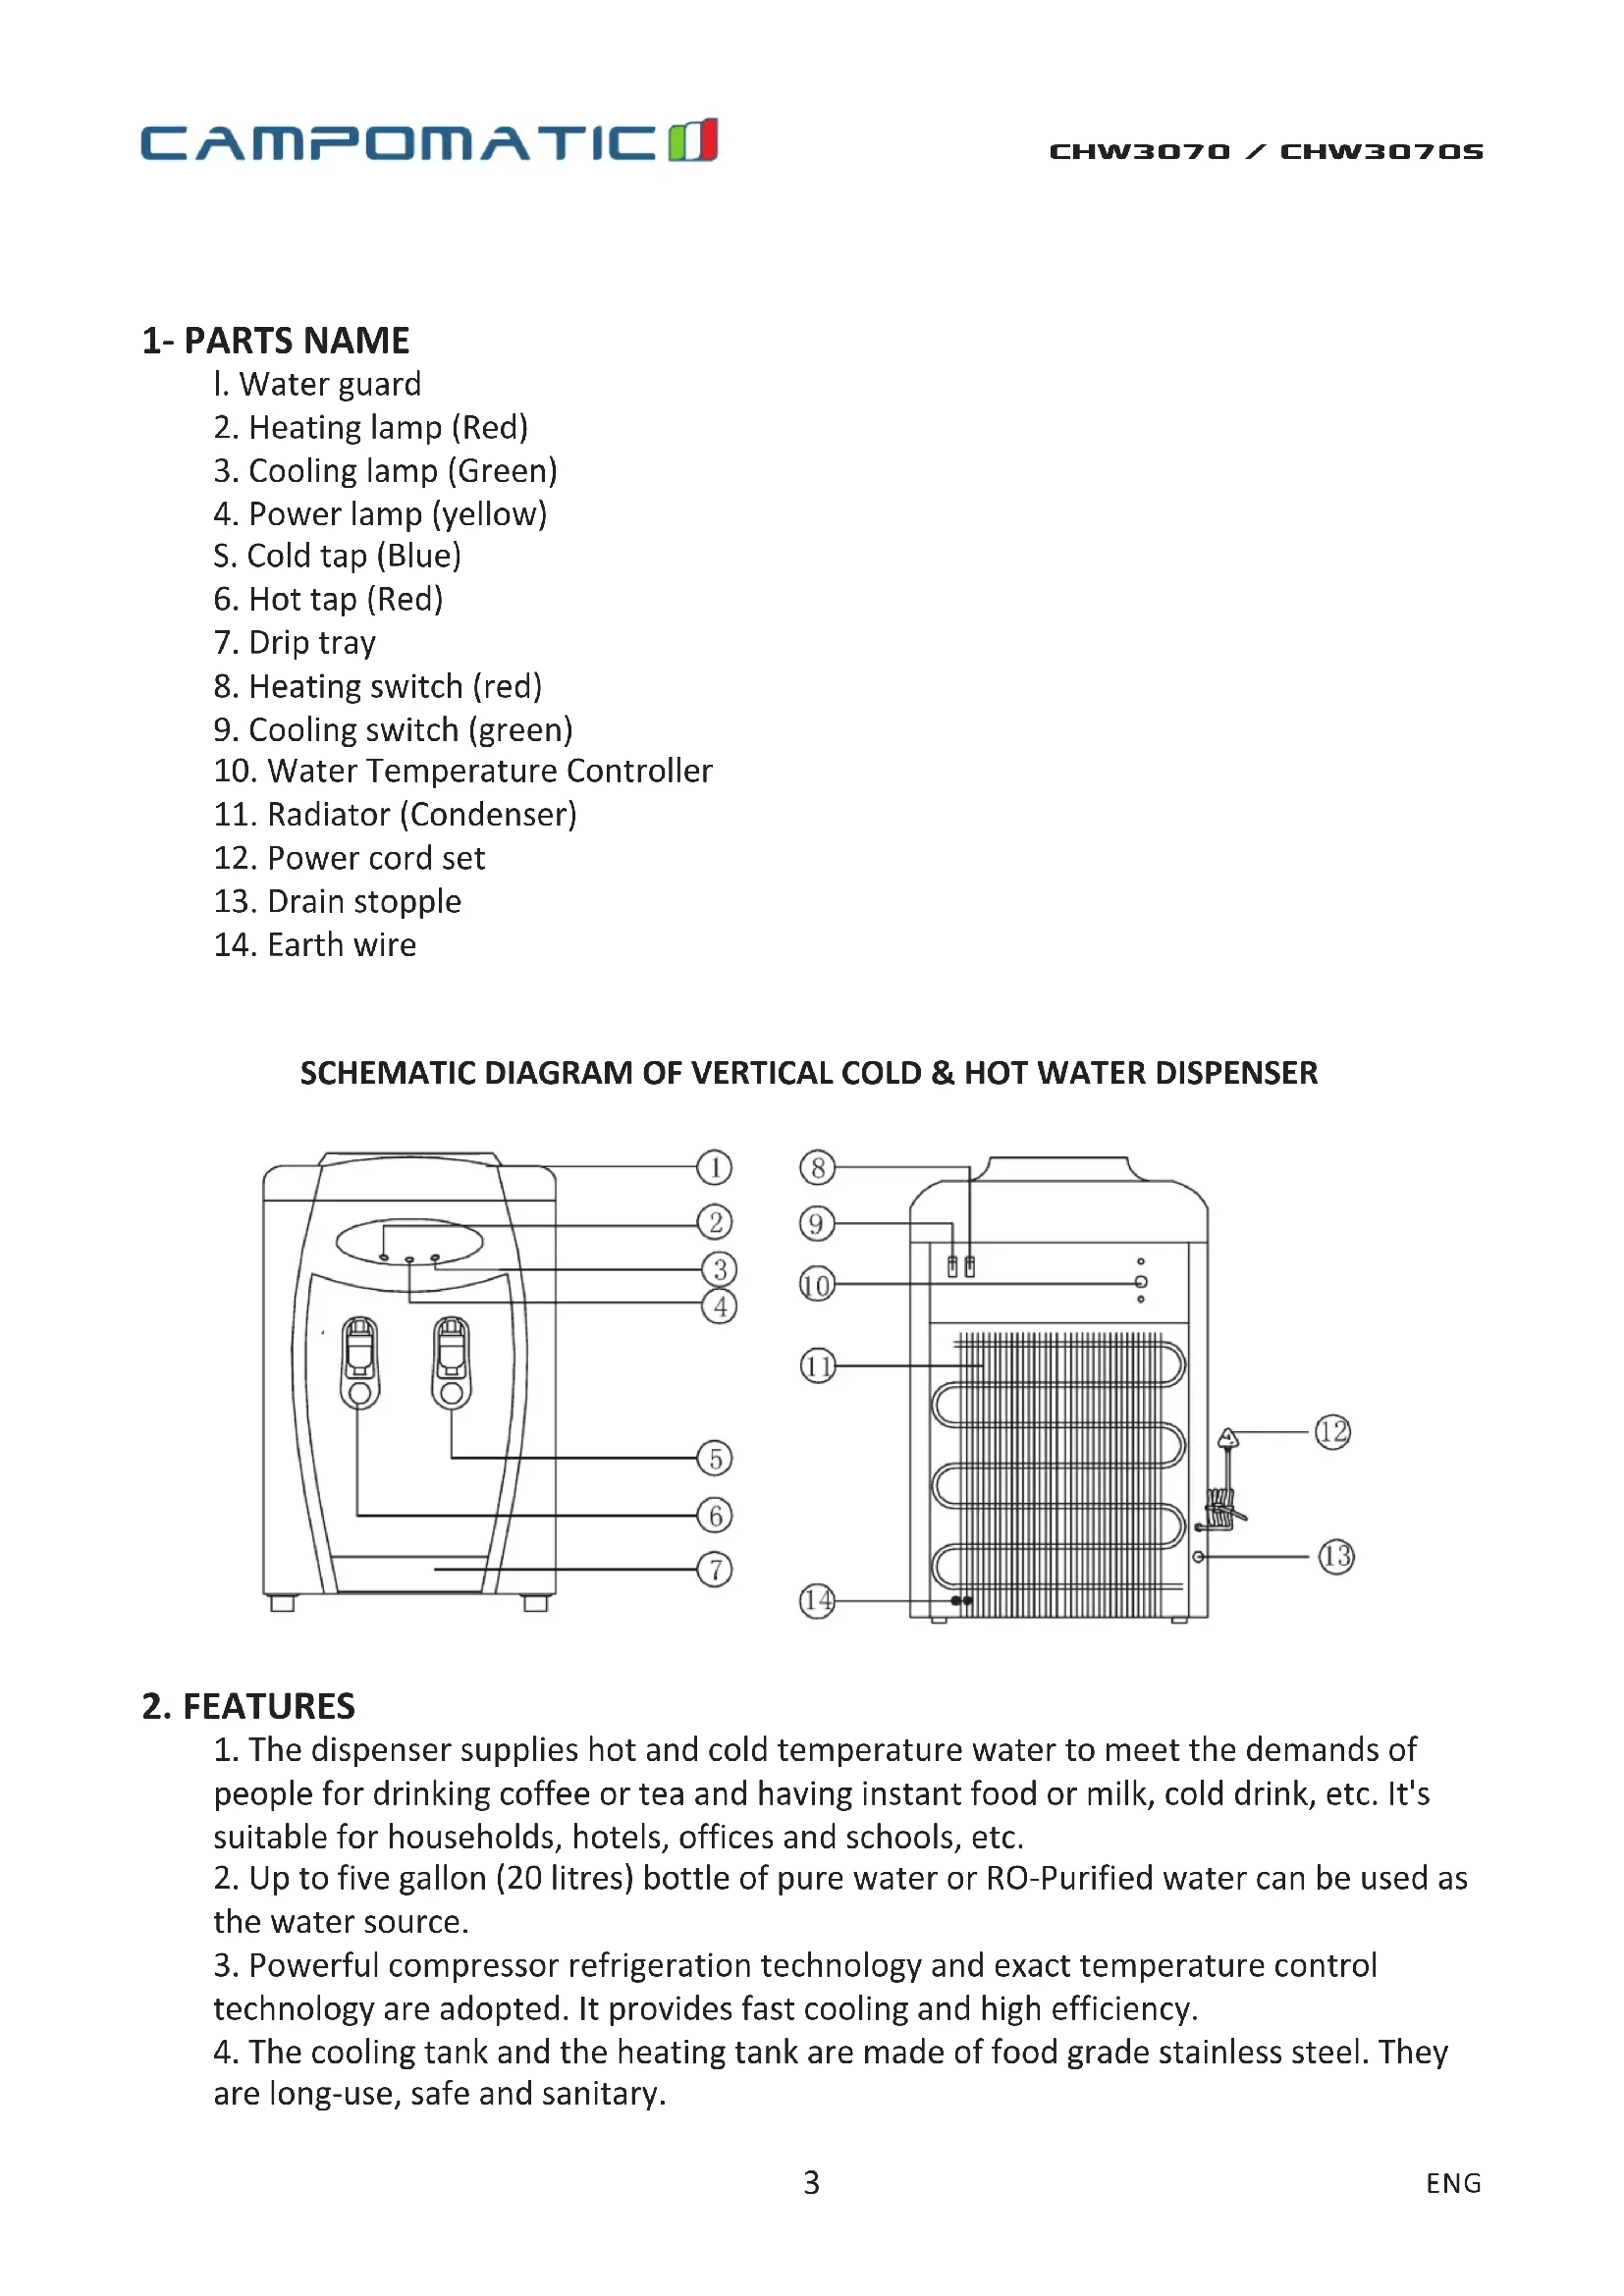
SCHEMATIC DIAGRAM OF VERTICAL COLD & HOT WATER DISPENSER
2. FEATURES
- The dispenser supplies hot and cold temperature water to meet the demands of people for drinking coffee or tea and having instant food or milk, cold drink, etc. It's suitable for households, hotels, offices and schools, etc.
- Up to five gallon (20 litres) bottle of pure water or RO-Purified water can be used as the water source.
- Powerful compressor refrigeration technology and exact temperature control technology are adopted. It provides fast cooling and high efficiency.
- The cooling tank and the heating tank are made of food grade stainless steel. They are long-use, safe and sanitary.
3. INSTALLATION
- In case it was transported or stored horizontally, place the dispenser in an upright position for at least 4 hours before plugging it into the socket.
- Remove the tamper seal label from the cap of the bottle. Do not remove the cap.
- Gently insert the bottle vertically into the water guard and press the taps until the water flows out from the RED (hot) tap.
- Insert the power plug into a properly grounded socket, then turn on the switches (DON'T TURN ON THE SWITCHES AT THE SAME TIME) to start the machine, the heating lamp and the cooling lamp light up. It will stop or start working automatically when the water temperature reaches the factory temperature settings.
- If you do not want to dispense hot water, turn off the hot water switch on the back of the unit (Red color)
- If you do not want to dispense cold water, turn off the cold water switch on the back of the unit (Green color)
4. WARNING
- Replace bottle as soon as you notice it is empty. Unplug unit if bottle and tanks are empty.
- This unit dispenses water at temperatures that can cause severe burns. Avoid direct contact with hot water.
- Keep children away from unit while dispensing.
- Never allow children to dispense hot water without proper and direct supervision.
- Prior to use, this dispenser must be properly assembled and installed in accordance with this manual.
- This dispenser is intended for water use only. Do NOT use other liquids.
- For indoor use only. Keep water dispenser in a dry place away from direct sunlight.
- Install and use only on a hard, flat and levelled surface.
- Do NOT place dispenser into an enclosed space or cabinet. Always maintain its distance more than 15cm from the wall. There should be a distance of 15cm on the left and right side.
- Make sure the adoption of the earth wire with Three Pin-hole Socket and the Electric Leakage Protector is available to avoid any electric shock.
- Do not use an extension cord with your water dispenser.
- Always grasp plug and pull straight out from outlet. Never unplug by pulling on power cord.
- Do NOT use dispenser if the cord or plug is damaged.
- To protect against electric shock, do NOT immerse
cord, plug, or any other part of cooler in water or other liquids.
- Ensure dispenser is unplugged prior to cleaning.
- Do not move it roughly. Do not incline it over 45^
- Never allow children to use the dispenser without proper and direct supervision. Unplug unit to prevent unsupervised use by children.
- In order to avoid a hazard due to inadvertent resetting of the thermal cutout, this appliance must not be supplied through an external switching device, such as a timer, or connected to a circuit that is regularly switched on and off by the utility.
- Maintenance and repair must be carried out by specialized technicians. It is extremely dangerous to any person to fix the device or to dismantle it for repairing purposes other than a qualified technician.
- Do not let the power plug dangling over the edge in the reach of children.
5. CARE & CLEANING
Note: Do NOT use abrasive materials or chemical cleaners.
- Clean cabinet surfaces with a soft cloth and warm soapy water. Dry it with a cloth
- Brush off dust from the radiator (12) located at back of dispenser to improve efficiency.
6. CLEANING COLD TANK
Recommended to be done every 2 to 3 months depending on the water type
- Best to do prior to loading a fresh bottle
- Turn off both switches on back
- Unplug power cord
- Remove water bottle
- Place at least a 10 Litre bucket under the drain of the dispenser (found on the back side)
- Remove drain cap and silicon plug. Cold water will flow into the bucket. This will be followed several seconds later by hot water at temperatures that can cause severe burns. Avoid direct contact with hot water.
- Place drain cap and silicon plug in a safe location so they are not lost.
- Keep children away while draining the dispenser
- Remove remaining water from the reservoirs by dispensing from both taps
- Replace silicon plug and drain cap
- Remove water guard (1) assembly by turning it counter clockwise.
-
Clean water guard assembly with a soft cloth using a cleaning mixture with 2% cooking citric acid and 5 litres of clean water and then rinse the water guard and place it on a clean cloth.
-
Pour remaining cleaning mixture into the tank
- Dispense all cleaning mixture through the both taps
- Wipe inside of reservoir and area around both taps with a soft cloth
- Rinse system twice by dispensing 5 litres of tap water through both taps
- Make sure all water has been dispensed.
- Replace water guard assembly
- Repeat INSTALLATION procedure as mentioned previously
7. TROUBLESHOOTING
Dispenser does not operate.
- Make sure the power cord is properly connected to a working outlet.
Water is leaking.
- Bottle may have a leak. Remove bottle and replace with new bottle.
No water is coming from the taps.
- Make sure the bottle is not empty. If so replace it.
- Make sure to push the water controls in fully.
Cold water is not cold.
- Make sure the switch is on and the plug is in the socket.
- Check the fuse and replace if necessary.
- It takes up to one hour after setup to dispense cold water.
- Make sure the back of the dispenser is at least 15cm from a wall
Hot water is not hot.
- Make sure the switch is on and the plug is in the socket.
- It takes 15-20 minutes after setup to dispense hot water.
- Check the fuse and replace if necessary.
Dispenser is noisy.
- Make sure dispenser is positioned on a level surface with proper distance from walls or enclosure cabinet.
Water tastes bad.
- Drain water from reservoirs and replace bottle with a fresh one.
- Clean dispenser as per Care & Cleaning instructions.
Electrical Leakage.
- Make sure the earth wire and the leakage protector are available
8. TECHNICAL PARAMETERS
Power supply: 220-240V~50Hz
Total Power: 620W
Heating power: 530W
Cooling capability(L/h): 2
Electricity leakage protection : I
Refrigerating current: 0.7A
Climate: ST
Refrigerant code/Quantity: R134a/32g
9. CORRECT DISPOSAL OF THIS PRODUCT
This marking indicates that this product should not be disposed with other household wastes throughout the EU. To prevent possible harm to the environment or human health from uncontrolled waste disposal, recycle it responsibly to promote the sustainable reuse of material resources. To return your used device, please use the return and collection systems or contact the retailer where the product was purchased. They can take this product for environmental safe recycling.
1. NOM DES PIECES
9. ÉLIMINATION CORRECTE DU PRODUIT
m = 311 ;
aLc1c1gJzWlg aJySll aol aaal no
JLLsLgjjglgJgJgJgJcLw gJgJgJ
()jg1j0afoafofofofofofofofofofofofofofofofofofofofofofofofofofofofofofofofofofofofofofofofofofofofofofofofofofofo
4
.
J 1
.
.
L 1
.1
.0000000000000000000000000000000000000000
.
L 10 aol o Lai 18
gJgJgJgJgJgJgJgJgJgJgJgJgJgJgJgJgJgJgJgJgJgJgJgJgJgJgJgJgJgJgJgJgJgJgJgJgJgJgJgJgJgJgJgJgJgJgJgJgJgJg
aLgJl aJI JI gag g no sLig gao yoo o o o o o o o o o o o o o o o o o o o
aJgS aos a
15cm
.11
jLalaa 8. fJgSJI jIgJl Jauai JauaI Laoi Laoi .1
LgJ11wJ JxJxJgJ1
- 1
1
sJgWgJLLjL
aikii jie slygSll ic olal ggo Jaa glc yol.10
20 z( 1,2) .
wL 1
1
JLIO JIJIgJcJySbSbSbJbIooLlEgOgOeB
LgIgIgIgIgIgIgIgIgIgIgIgIgIgIgIgIgIgIgIgIgIgIgIgIgIgIgIgIgIg
1.1.10
olalggo glo sLowi.1
《WaterGuard》0L11
$$ (j o - 1) j s i m i n j w g o. $$
$$ (j _ {i} \cdot i) \quad j _ {j} \cdot j _ {i} \cdot j _ {i} \cdot j _ {i} \cdot j _ {i} \cdot j _ {i} \cdot j _ {i} \cdot j _ {i} \cdot j _ {i} $$
$$ (j _ {i} \cdot i) j _ {i} \cdot i = 1, j _ {i} \cdot i = 2, $$
$$ (s l o _ {j j}) _ {2} \cup_ {1} \cup_ {1} s l l a = 0. $$
$$ (s l _ {1} a) \rightarrow s l _ {1} l l s l l a. a. i. > 1 $$
$$ S _ {\Delta U} E = 0 \frac {3}{2} \sim 0. 7 $$
$$ (j a - 1) j x \cdot w i l l _ {j j} \wedge $$
$$ (j _ {1} - 3) j _ {2}, j _ {3}; j _ {4}, j _ {5}, j _ {6}, j _ {7}, j _ {8}, j _ {9}. a $$
$$ \Delta L _ {1} \sim \Delta_ {1} \rightarrow \Delta_ {2}, \Delta L _ {2} \sim 1. $$
$$ (\dot {0} \dot {1} 5 1 1) \in [ 0, \dot {1} 1 1. 1 1 $$
$$ \leqslant \left| L _ {1} \right| = 1. 5 $$
$$ \therefore \omega = 1 0 ^ {\circ} $$
$$ \therefore \lim _ {w \rightarrow 0} \frac {\left| w - 1 \right|}{w ^ {2}} $$
g aai LwJg d Jd 10
Jilat.
JgLJI gaggl Jy jI JgJg
$$ \therefore \sum_ {i = 1} ^ {n} a _ {i} = 0 $$
L 10000000000000000000000000000000000000000000
$$ \dot {a} _ {\cdot} \dot {J} L c \dot {a} _ {\cdot} \dot {J} L \dot {s} \dot {g} $$

= S_ log_aL
CHW3070 / CHW3070S
aLl g oJol olalg jgo
all


LadeJI wS
Jgll 110111111111111111111
Campomatic S.R.L. Via Configliachi 5/B . 35031, Abano Terme (Padova), ITALIA
WWW.CAMPOMATIC.COM


- Hot & Cold Water Dispenser
- Table of Content
- 1- PARTS NAME
- SCHEMATIC DIAGRAM OF VERTICAL COLD & HOT WATER DISPENSER
- FEATURES
- INSTALLATION
- WARNING
- CARE & CLEANING
- CLEANING COLD TANK
- TROUBLESHOOTING
- TECHNICAL PARAMETERS
- CORRECT DISPOSAL OF THIS PRODUCT
- NOM DES PIECES
- ÉLIMINATION CORRECTE DU PRODUIT
- = S_ log_aL
Brand : Campomatic
Model : CHW3070
Category : Water dispenser