
CHD4070B - Water dispenser Campomatic - Free user manual and instructions
Find the device manual for free CHD4070B Campomatic in PDF.
| Product Type | Vertical Water Dispenser |
| Brand | Campomatic |
| Model | CHD4070B |
| Power Supply | 220-240 V ~ 50 Hz |
| Total Power | 620 W |
| Heating Power | 530 W |
| Cooling Power | 0.7 A |
| Refrigerant | R134a |
| Refrigerant Quantity | 42 g |
| Climate Class | ST (subtropical) |
| Electrical Protection | Class I |
| Maximum Bottle Capacity | 20 L (5 gallons) |
| Tank Material | Stainless Steel |
| WaterGuard System | Yes, for bottle insertion |
| Functions | Hot and cold water, with indicator lights |
| Automatic Function Shutdown | Yes, by pressing the heating and cooling buttons for 3 seconds |
| Recommended Cleaning | Every 2 to 3 months |
| Recommended Cleaning Product | 2% citric acid solution |
| Usage | Indoors only, on a flat, hard surface |
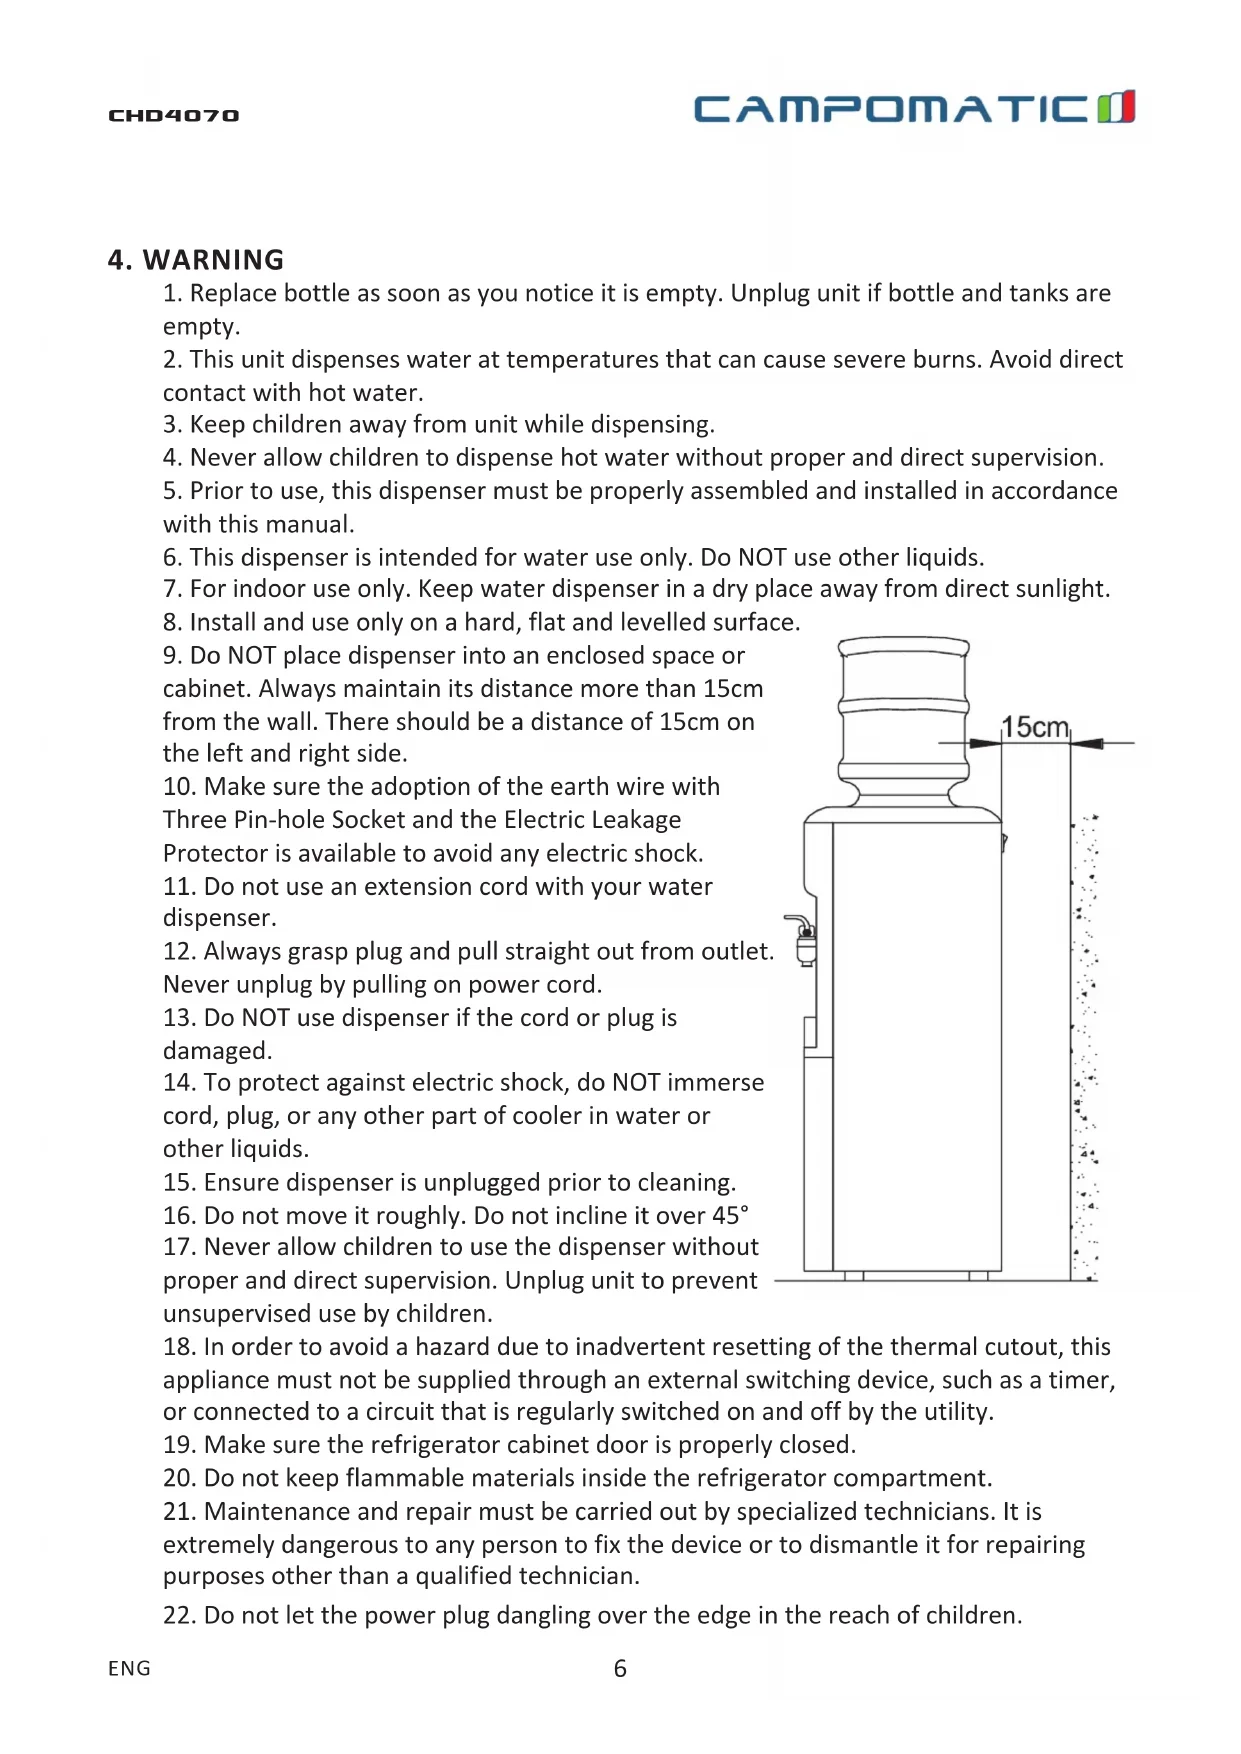
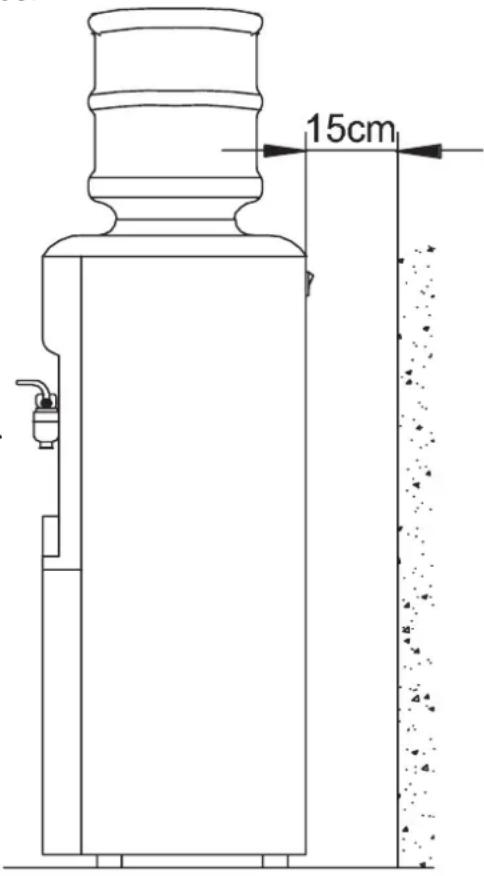
| Minimum Distance from Walls | 15 cm on each side and at the back |
| Repairs | By a qualified technician only |
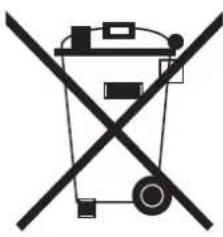
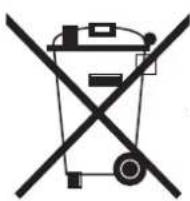
| Disposal | Do not dispose of with household waste, recycle via collection points |
Frequently Asked Questions - CHD4070B Campomatic
User questions about CHD4070B Campomatic
0 question about this device. Answer the ones you know or ask your own.
Ask a new question about this device
Download the instructions for your Water dispenser in PDF format for free! Find your manual CHD4070B - Campomatic and take your electronic device back in hand. On this page are published all the documents necessary for the use of your device. CHD4070B by Campomatic.
USER MANUAL CHD4070B Campomatic
CHD4070 / CHD4070S CHD4070B / CHD4070R
Hot & Cold Water Dispenser
Made in China
INSTRUCTION MANUAL
Caution: Read and follow all safety and operating instruction before first use of this product.
Campomatic S.R.L. Via Configliachi 5/B . 35031, Abano Terme (Padova), ITALIA
WWW.CAMPOMATIC.COM
TABLE OF CONTENT
English 3
French 10
15
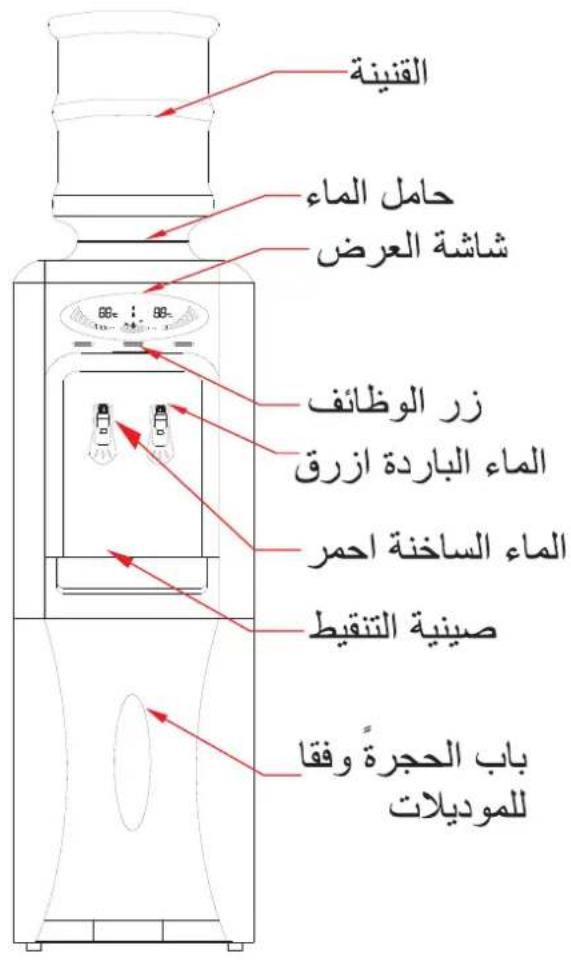
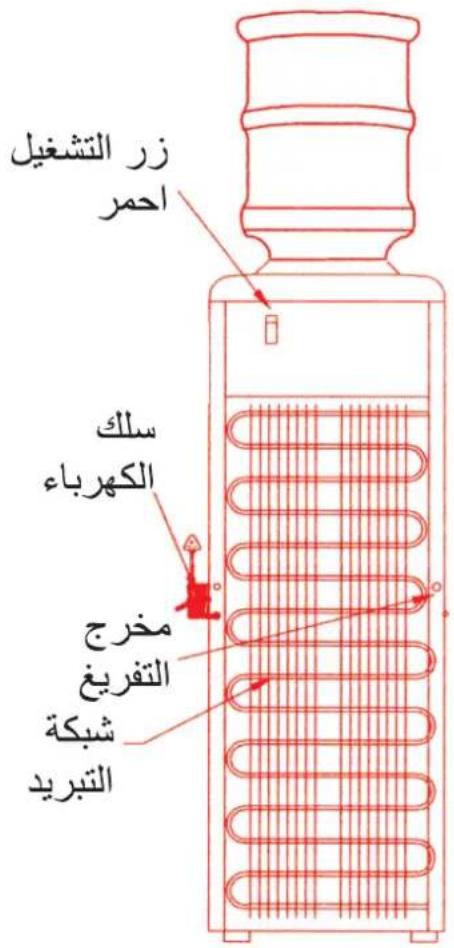
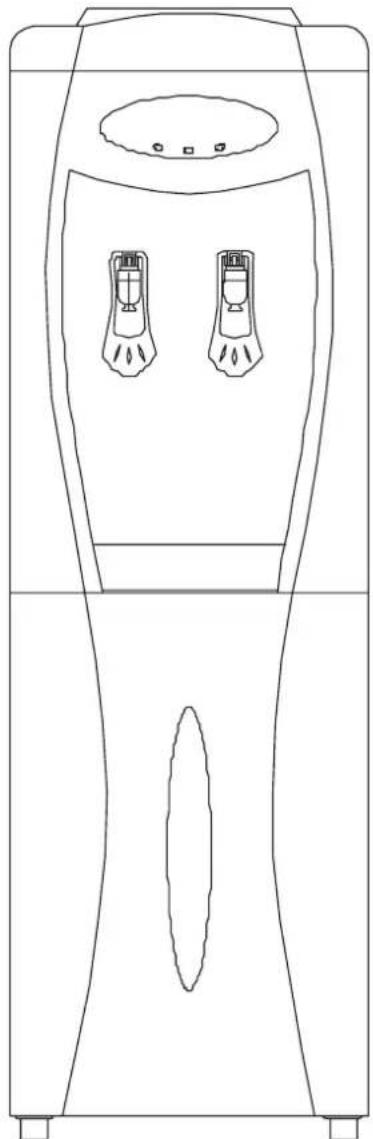
1. PART LIST

2. FEATURES
- The dispenser supplies hot and cold temperature water to meet the demands of people for drinking coffee or tea and having instant food or milk, cold drink, etc. It's suitable for households, hotels, offices and schools, etc.
-
Up to five gallon (20 litres) bottle of pure water or RO-Purified water can be used as the water source.
-
Powerful compressor refrigeration technology and exact temperature control technology are adopted. It provides fast cooling and high efficiency.
- The cooling tank and the heating tank are made of food grade stainless steel. They are long-use, safe and sanitary.
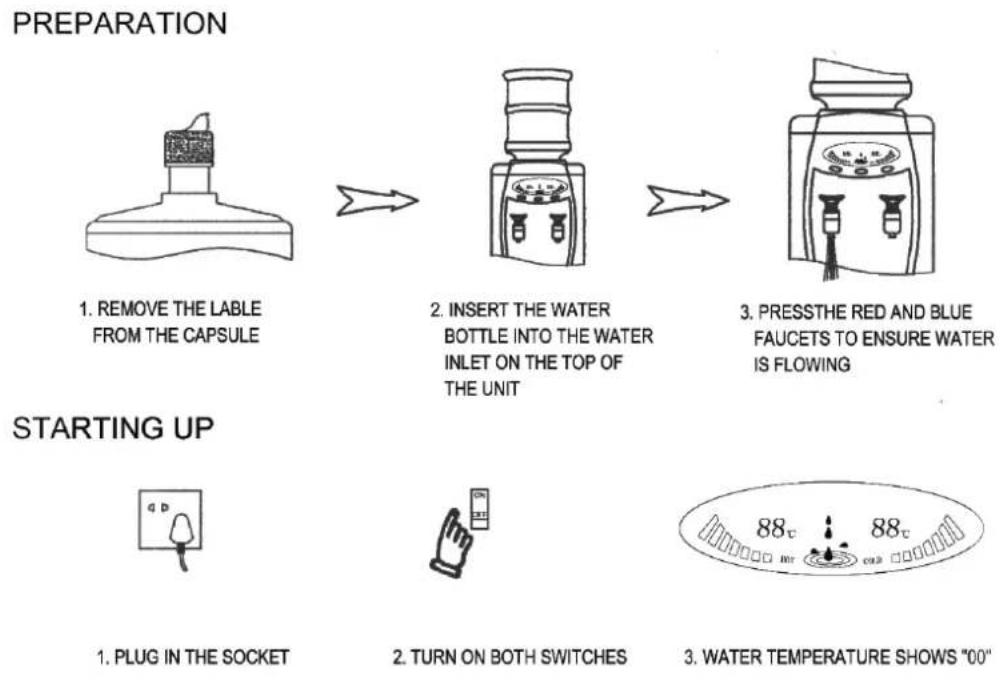
3. INSTALLATION
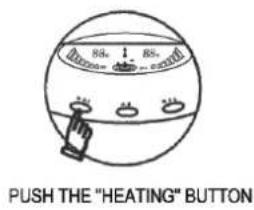
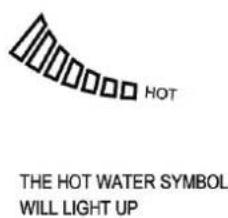
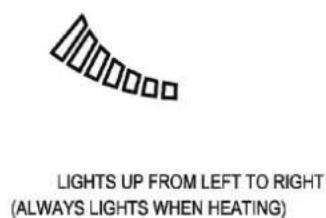
HEATING
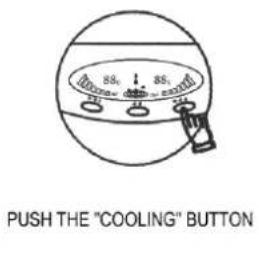
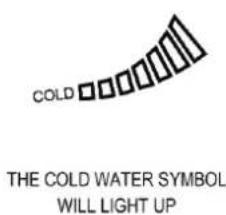
COOLING

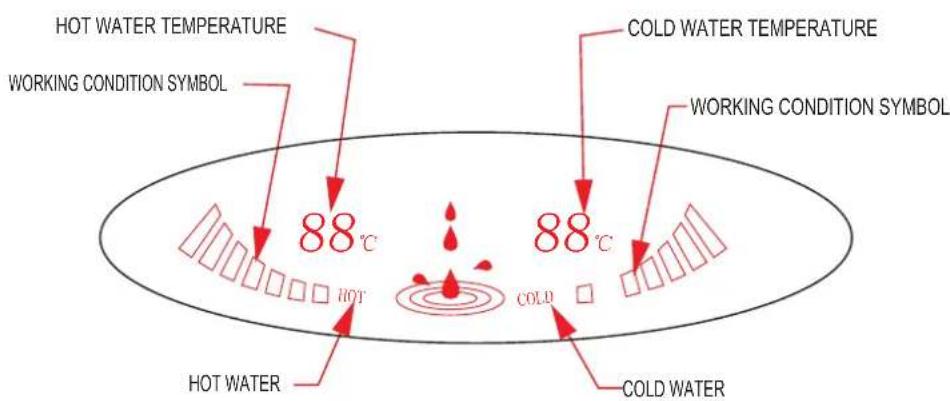
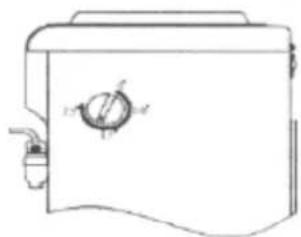
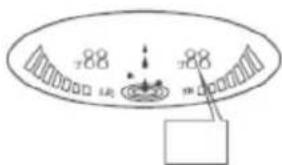
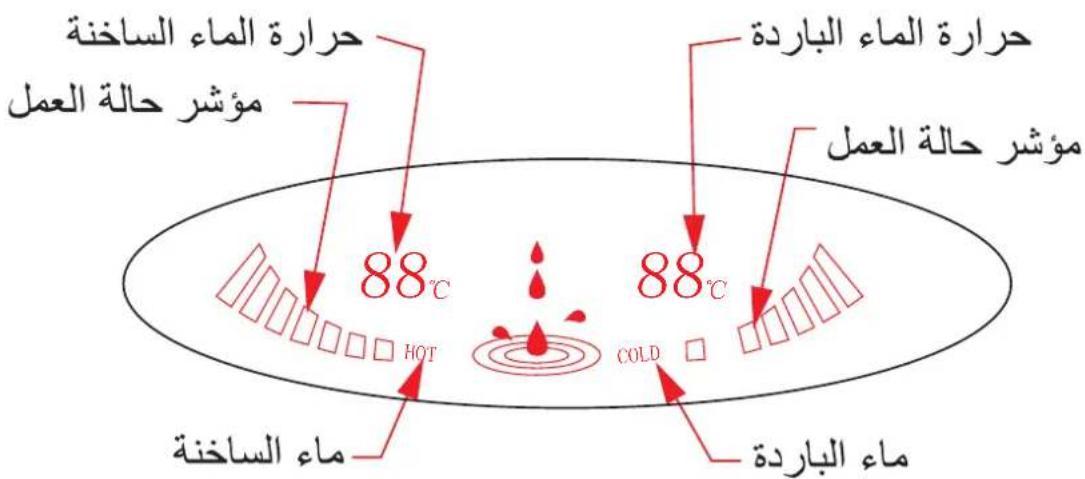
SETTING THE PREFERRED WATER TEMPERATURES
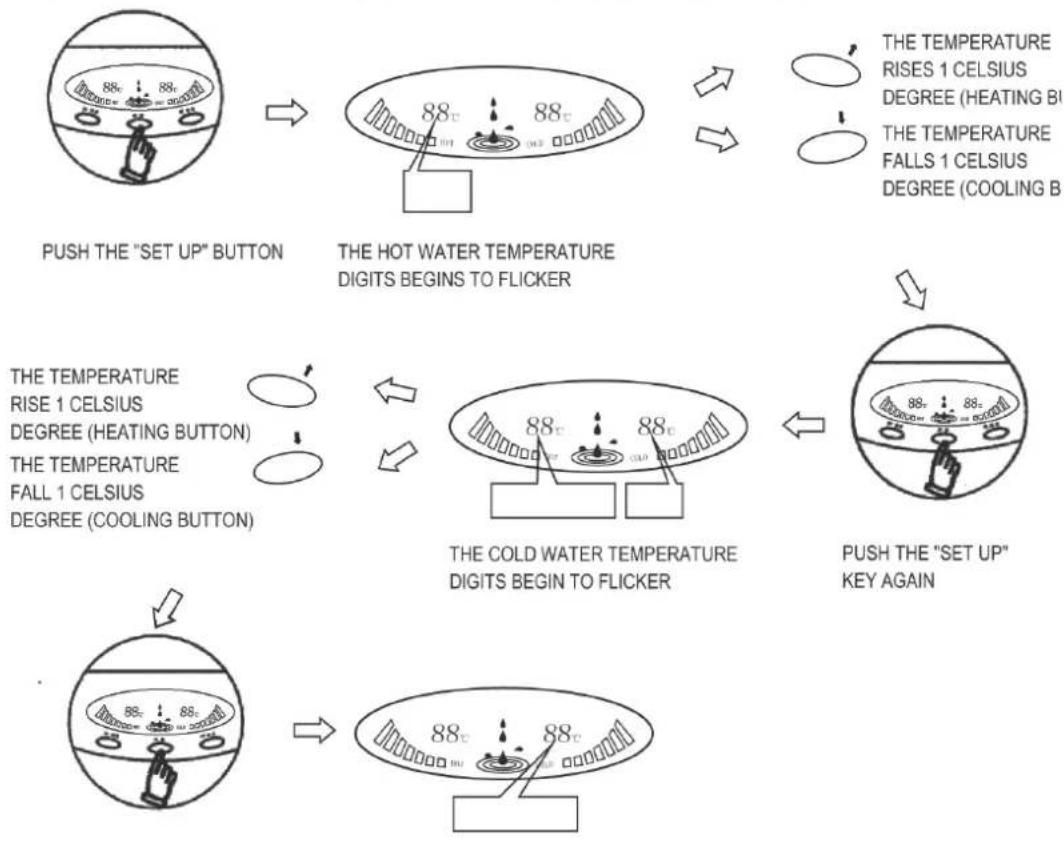
PUSH THE "SET UP" BUTTON AGAIN
AFTER ADJUSTMENT, THE HOT & COLD WATER TEMPERATURE SYMBOL WILL SHOW THE CORRECT WATER TEMPERATURE.
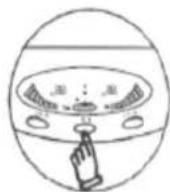
IF YOU WANT SHUT OFF THE HEATING AND COOLING FUNCTION, PUSH THE "HEATING" AND "COOLING" BUTTON IN TURN ABOUT THREE SECONDS, THE SYSTEM WILL CLOSE AUTOMATICALLY.
4. WARNING
- Replace bottle as soon as you notice it is empty. Unplug unit if bottle and tanks are empty.
- This unit dispenses water at temperatures that can cause severe burns. Avoid direct contact with hot water.
- Keep children away from unit while dispensing.
- Never allow children to dispense hot water without proper and direct supervision.
- Prior to use, this dispenser must be properly assembled and installed in accordance with this manual.
- This dispenser is intended for water use only. Do NOT use other liquids.
- For indoor use only. Keep water dispenser in a dry place away from direct sunlight.
- Install and use only on a hard, flat and levelled surface.
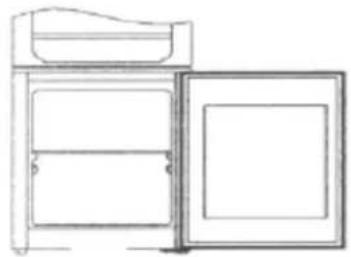
- Do NOT place dispenser into an enclosed space or cabinet. Always maintain its distance more than 15cm from the wall. There should be a distance of 15cm on the left and right side.
- Make sure the adoption of the earth wire with Three Pin-hole Socket and the Electric Leakage Protector is available to avoid any electric shock.
- Do not use an extension cord with your water dispenser.
- Always grasp plug and pull straight out from outlet. Never unplug by pulling on power cord.
- Do NOT use dispenser if the cord or plug is damaged.
- To protect against electric shock, do NOT immerse cord, plug, or any other part of cooler in water or other liquids.
- Ensure dispenser is unplugged prior to cleaning.
- Do not move it roughly. Do not incline it over 45^
- Never allow children to use the dispenser without proper and direct supervision. Unplug unit to prevent unsupervised use by children.
- In order to avoid a hazard due to inadvertent resetting of the thermal cutout, this appliance must not be supplied through an external switching device, such as a timer, or connected to a circuit that is regularly switched on and off by the utility.
- Make sure the refrigerator cabinet door is properly closed.
- Do not keep flammable materials inside the refrigerator compartment.
- Maintenance and repair must be carried out by specialized technicians. It is extremely dangerous to any person to fix the device or to dismantle it for repairing purposes other than a qualified technician.
- Do not let the power plug dangling over the edge in the reach of children.
5. CARE & CLEANING
Note: Do NOT use abrasive materials or chemical cleaners.
- Clean cabinet surfaces with a soft cloth and warm soapy water. Dry it with a cloth
- Brush off dust from the radiator (12) located at back of dispenser to improve efficiency.
CLEANING COLD TANK
Recommended to be done every 2 to 3 months depending on the water type
- Best to do prior to loading a fresh bottle
- Turn off both switches on back
- Unplug power cord
- Remove water bottle
- Place at least a 10 Litre bucket under the drain of the dispenser (found on the back side)
- Remove drain cap and silicon plug. Cold water will flow into the bucket. This will be followed several seconds later by hot water at temperatures that can cause severe burns. Avoid direct contact with hot water.
- Place drain cap and silicon plug in a safe location so they are not lost.
- Keep children away while draining the dispenser
- Remove remaining water from the reservoirs by dispensing from both taps
- Replace silicon plug and drain cap
- Remove water guard (1) assembly by turning it counter clockwise.
- Clean water guard assembly with a soft cloth using a cleaning mixture with 2% cooking citric acid and 5 litres of clean water and then rinse the water guard and place it on a clean cloth.
- Pour remaining cleaning mixture into the tank
- Dispense all cleaning mixture through the both taps
- Wipe inside of reservoir and area around both taps with a soft cloth
- Rinse system twice by dispensing 5 litres of tap water through both taps
- Make sure all water has been dispensed.
- Replace water guard assembly
- Repeat INSTALLATION procedure as mentioned previously
6. TROUBLESHOOTING
Dispenser does not operate.
- Make sure the power cord is properly connected to a working outlet.
Water is leaking.
- Bottle may have a leak. Remove bottle and replace with new bottle.
No water is coming from the taps.
- Make sure the bottle is not empty. If so replace it.
- Make sure to push the water controls in fully.
Cold water is not cold.
- Make sure the switch is on and the plug is in the socket.
- Check the fuse and replace if necessary.
- It takes up to one hour after setup to dispense cold water.
- Make sure the back of the dispenser is at least 15cm from a wall
Hot water is not hot.
- Make sure the switch is on and the plug is in the socket.
- It takes 15-20 minutes after setup to dispense hot water.
- Check the fuse and replace if necessary.
Dispenser is noisy.
- Make sure dispenser is positioned on a level surface with proper distance from walls or enclosure cabinet.
Water tastes bad.
- Drain water from reservoirs and replace bottle with a fresh one.
- Clean dispenser as per Care & Cleaning instructions.
Electrical Leakage.
- Make sure the earth wire and the leakage protector are available
Refrigerator Compartment is not cooling.
- Make sure the refrigerator compartment door is properly closed
7. CORRECT DISPOSAL OF THIS PRODUCT


This marking indicates that this product should not be disposed with other household wastes throughout the EU. To prevent possible harm to the environment or human health from uncontrolled waste disposal, recycle it responsibly to promote the sustainable reuse of material resources. To return your used device, please use the return and collection systems or contact the retailer where the product was purchased. They can take this product for environmental safe recycling.
9. ÉLIMINATION CORRECTE DU PRODUIT

aog aagai jwogjol oal
aikiiJg aLlei cLaie jog olI gjg aikj
jLg≤11
aJyRgSJI 1JUJJ bIe g o Lw ygl
215 0
1 1
1
1 1 1 1 1 1 1 1 1 1 1 1 1 1 1 1 1 1 1 1 1 1 1 1 1 1 1 1 1 1 1 1 1 1 1 1 1 1 1
.11111111

:aaai1laolg1.9
220-240V\~50Hz: _b 1Jg
620W: aJLQx1 aSbJI
530W:
1:SL,8≤11 2000
0.7A:
R134a/42g: /
a. = ( x1,y1) , = ( x2,y2)
. 15.5 cIaIio g I ab wI5 Ig o po ssiwi X : abo
. 1
.
1
pssuill sU1 g j 15 aabii cai.1
.aaieae 5yj Jaaabjj Joo
a. a11 2g 1 g 1 1
SLgSJIJooJyLJI EJI.4
sll aiee j1.2
(a.131 a41 08g)jgl 2
J 1
JLJI JIJI 1
Lagai jol oJ 10o g oog LwJ oJwog aill slln Jnol .V
.
1 1
LogilsoJf JcJHgJbCgJgS1JdJscI.1
.(1)《Waterguard》L
J 1
aaii aiee ieae eae eae aeae
1
12
aocli aei juii i 10
1
ALSuIgJcJU>1.1V
a11 1
Laa Lw 8g5ii Ii Sjll iSjI jss .19
1gJSLiI 4
JouyoljEjgo
J 5
y
.0a>g:lg:wgl aiaai jil .gao iaiaJg<la
y 8
.1gJz-1w, aCjLc cJLS 1! .aCjLc cWJ aii j0 o sLi -
-
-
-
-
-
-
-
-
-
-
-
-
-
-
-
-
-
-
-
-
-
- 1.
-
-
-
-
-
-
-
-
-
-
-
-
-
-
-
-
-
-
-
-
124LJ LJI 1
1y4Jg00gAaJI gDj j 1n
aL31 c31 1gJui wU aui jui 5i i ool aai j no gao
111 111 111 111 111 111 111 111 111 111
10 8 Lg 8 8
LisLwJnLwJ L1
1
P( 5,0) .Q( -34,34)
( 12 + 13 - 19) = 119
1111111111
gill giiil iic jilali y gill
:
j
a
S OBC = S COD + S_ BOC
a
S OBC = S BOC + S_ BOC

a a a a a a a a a a a a a a a a a a a a a a a a a a
gllg h jiljol Jai Lioic Jia
()jg 1
()jg1j0afoafofofofofofofofofofofofofofofofofofofofofofofofofofofofofofofofofofofofofofofofofofofofofofofofofofofofofofofo
4.1.2
.
L 1
.
yogwio jgJ LwI sU 2.2
1 1
JilgW a e 2. hao sU g o puiu w u yauo gll iio .1
.8JwU uWuWuWuWuWuWuWuWuWuWuWuWuWuWuWuWuWuWuWuWuWuWuWuWuWuWuWuWuWuWuWuWuWuWuWuWuWuWuWuWuWuWuWuWuWuWuWuWuWuWuWwU
.
L 10 aol aol ool
1g 10 aLwoc
Lg aJg gJg Jg Jg Jg Jg Jg Jg Jg Jg Jg Jg Jg Jg Jg Jg Jg Jg Jg Jg Jg Jg Jg Jg Jg Jg Jg Jg Jg Jg Jg Jg Jg Jg Jg Jg Jg Jg Jg Jg Jg Jg Jg Jg Jg Jg Jg Jg Jg Jg Jg Jg
.45 4000
.011 2020s1011w pssu8.11
JgJl Jll Jj 100 gJgJc Jd alaa 8. gJgJc jglal Jal JlaJ Lol .1
- 1
12
Aii j 10
2020 202044g 2g 453217
gagaiiaiLwJg oJoljI gJgJgJ.1

= 5^7 · _7^2
CHD4070 / CHD4070S
CHD4070B / CHD4070R
aLl g oJol olalg jgo
allgoo


cladeijl ciS
Jgll 110111111111111111111
Campomatic S.R.L. Via Configliachi 5/B . 35031, Abano Terme (Padova), ITALIA
WWW.CAMPOMATIC.COM

- CHD4070 / CHD4070S CHD4070B / CHD4070R
- TABLE OF CONTENT
- PART LIST
- FEATURES
- INSTALLATION
- HEATING
- COOLING
- WARNING
- CARE & CLEANING
- CLEANING COLD TANK
- TROUBLESHOOTING
- Dispenser does not operate.
- Water is leaking.
- No water is coming from the taps.
- Cold water is not cold.
- Hot water is not hot.
- Dispenser is noisy.
- Water tastes bad.
- Electrical Leakage.
- Refrigerator Compartment is not cooling.
- CORRECT DISPOSAL OF THIS PRODUCT
- ÉLIMINATION CORRECTE DU PRODUIT
- = 57 · _72
Brand : Campomatic
Model : CHD4070B
Category : Water dispenser