
AMW 7121 IX - Microwave WHIRLPOOL - Free user manual and instructions
Find the device manual for free AMW 7121 IX WHIRLPOOL in PDF.
| Product type | Built-in microwave oven |
| Brand | Whirlpool |
| Model | AMW 7121 IX |
| Dimensions (W x H x D) | 595 x 455 x 560 mm |
| Weight | 35 kg |
| Power supply | 230 V ~ 50 Hz |
| Microwave power | 900 W |
| Capacity | 42 L |
| Main functions | Microwave, Grill, Hot air, Combined grill, Quick defrost, Automatic cooking, Crisp function, Automatic steam cooking |
| Cavity material | Stainless steel |
| Safety | Child safety lock, automatic shut-off, microwave protection |
| Maintenance and cleaning | Clean with a soft damp cloth; do not use abrasive products |
| Repairability | Repair by qualified technician only; disassembly of panels prohibited |
| Included accessories | Turntable, grill, user manual |
| Energy efficiency class | A+ (estimated) |
Frequently Asked Questions - AMW 7121 IX WHIRLPOOL
User questions about AMW 7121 IX WHIRLPOOL
0 question about this device. Answer the ones you know or ask your own.
Ask a new question about this device
Download the instructions for your Microwave in PDF format for free! Find your manual AMW 7121 IX - WHIRLPOOL and take your electronic device back in hand. On this page are published all the documents necessary for the use of your device. AMW 7121 IX by WHIRLPOOL.
USER MANUAL AMW 7121 IX WHIRLPOOL


| S_schweiz | Wichtig!Der anschluss für dieses gerät muss mit 230v, 16 a erfolgen. falls das gerät nicht über einen trennbaren anschluss verfügt (z.b. stecker), muss sichergestellt werden, dass eine trennvorrichtung (z.b. steckdose, sicherung) mit mindestens 3mm kontaktabstand vorgeschaltet wird.Der anschluss muss durch einen qualifizierten elektroinstallateur durchgeführt werden. |
| S_suisse | Importante!Questo apparecchio deve essere allacciato a 230 v, 16 a. se l'allacciamento non è staccabile (p.es. una spina) deve esserci un dispositivo di separazione (p.es. un interruttore automatico) con una distanza di almeno 3 mm fra i contatti. L'allacciamento deve essere realizzato da un installatore elettricista qualificato. |
| S_vizzera | Important!Cet appareil doit être branché sur 230 v, 16 a. s'il ne dispose pas d'un raccordement dissociable (prise, par ex.), un dispositif de disjonction (prise, fusible, par ex.), à au moins 3 mm d'écart, doit être prévu. Le raccordement doit être effectué par un installateur électricien qualifié. |
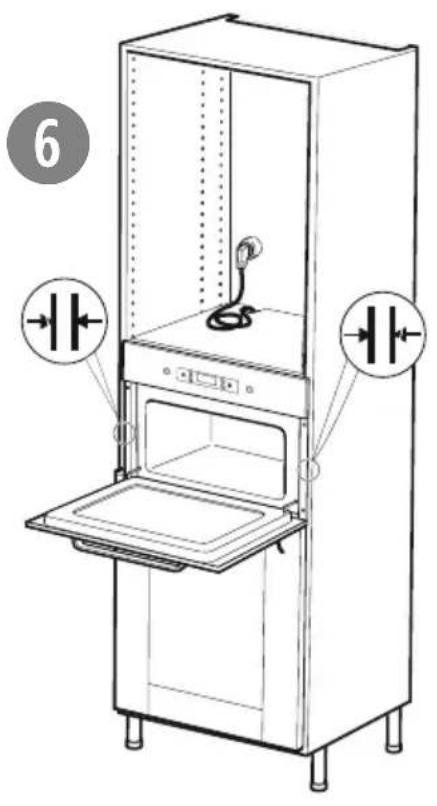
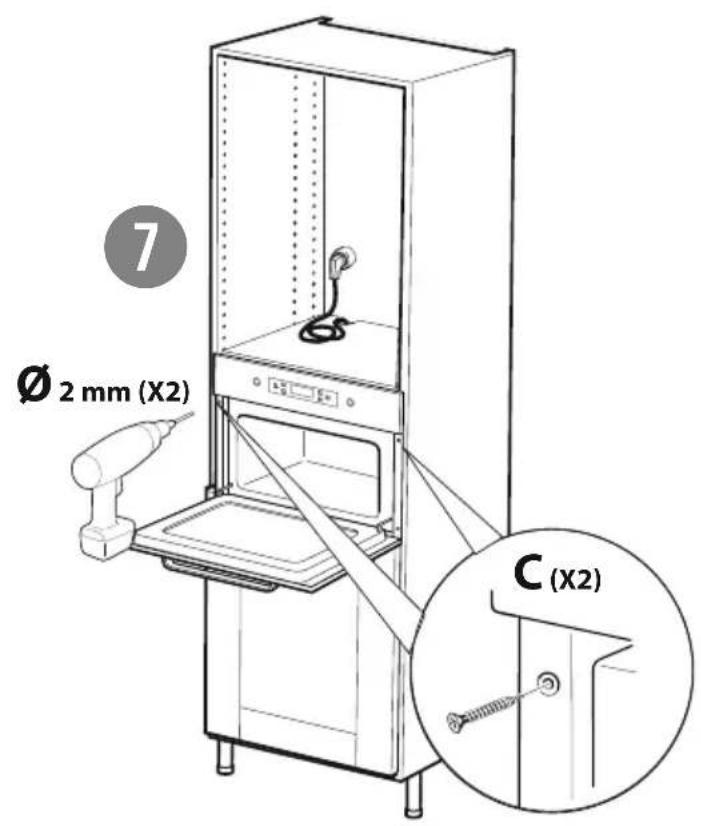

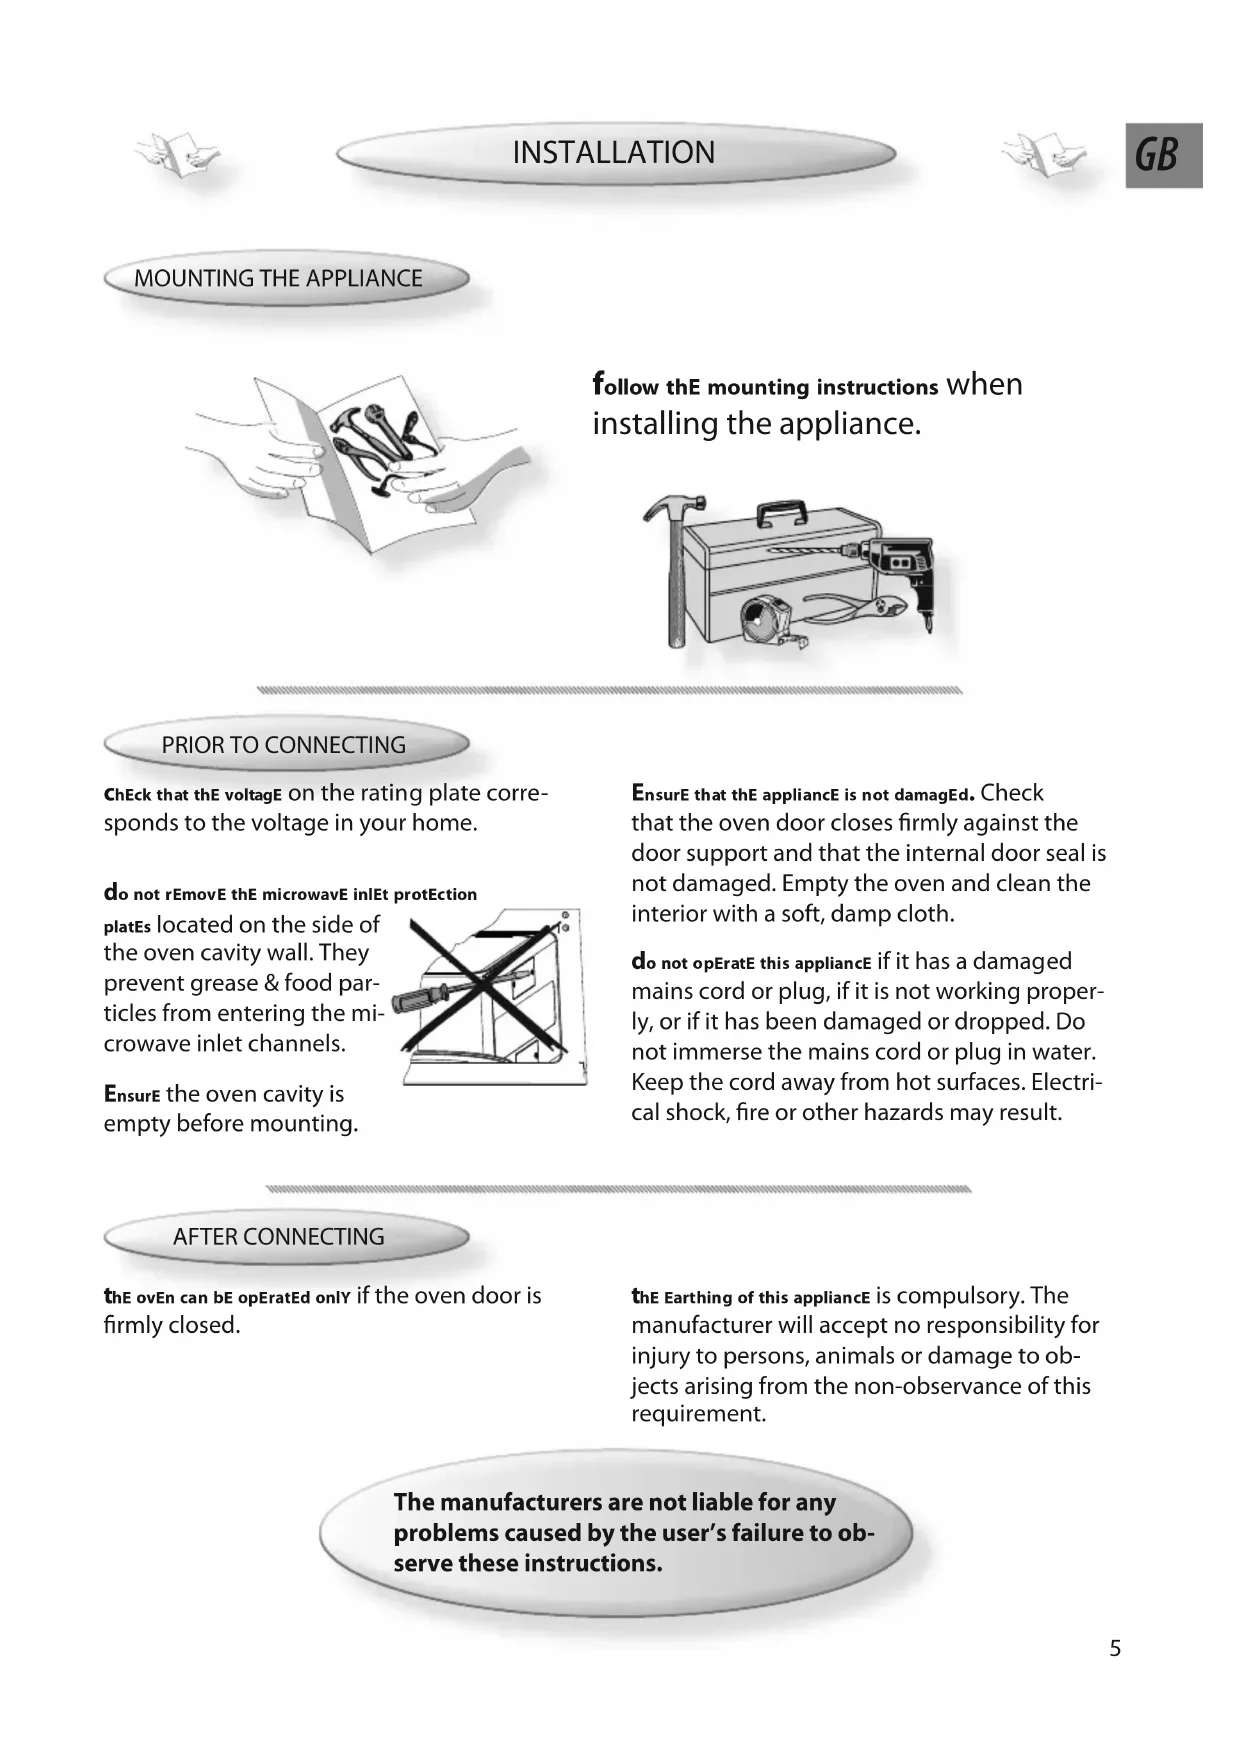
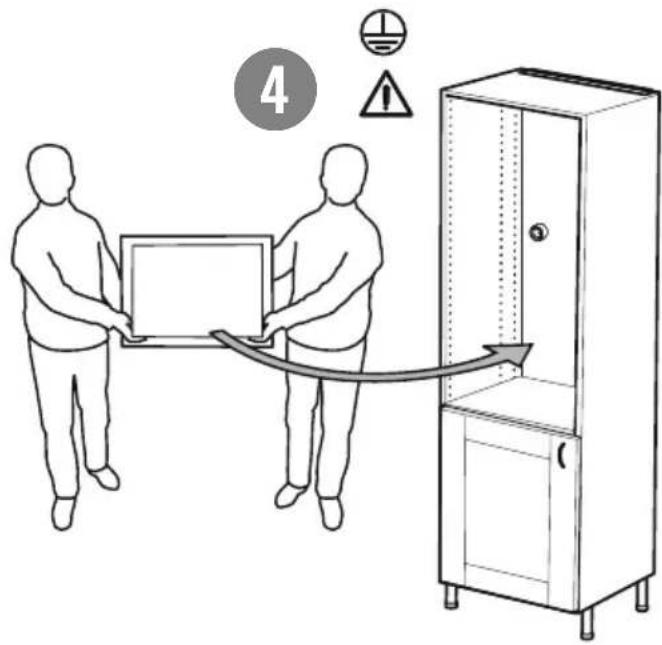
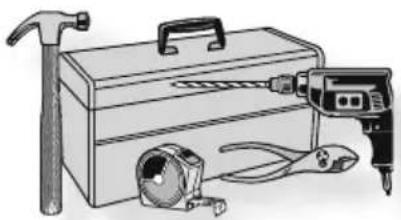
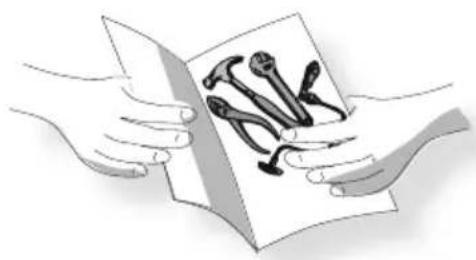
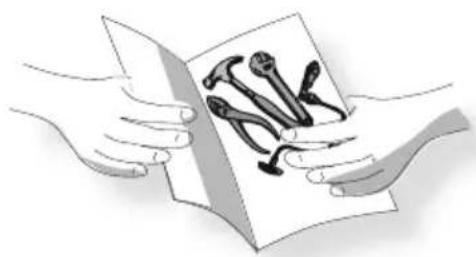
MOUNTING THE APPLIANCE

natural_image
Illustration of two hands holding a folded paper with black tools inside (no text or symbols)follow the mounting instructions when installing the appliance.
natural_image
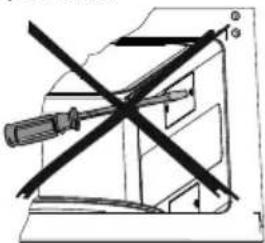
Illustration of a toolbox with tools and a hammer, no text or symbols presentPRIOR TO CONNECTING
ChEck that the voltage on the rating plate corresponds to the voltage in your home.
do not rEmovE thE microwaveE inlEt protEction
platEs located on the side of the oven cavity wall. They prevent grease & food particles from entering the microwave inlet channels.
Ensure the oven cavity is empty before mounting.
EnsurE that the applianceE is not damaged. Check that the oven door closes firmly against the door support and that the internal door seal is not damaged. Empty the oven and clean the interior with a soft, damp cloth.
do not opEratE this appliance if it has a damaged mains cord or plug, if it is not working properly, or if it has been damaged or dropped. Do not immerse the mains cord or plug in water. Keep the cord away from hot surfaces. Electrical shock, fire or other hazards may result.
AFTER CONNECTING
the ovEn can be opEratEd only if the oven door is firmly closed.
the Earthing of this appliance is compulsory. The manufacturer will accept no responsibility for injury to persons, animals or damage to objects arising from the non-observance of this requirement.
The manufacturers are not liable for any problems caused by the user's failure to observe these instructions.
do not hEat, or usE flammable matErials in or
near the oven. Fumes can create a fire hazard or explosion.
do not usE Your microwave oven for drying tex-
tiles, paper, spices, herbs, wood, flowers, fruit or other combustible materials. Fire could result.
If matErial insidE / outsidE thE ovEn should ignite
or smoke is obsErvEd, keep oven door closed and turn the oven off. Disconnect the power cord or shut off power at the fuse or circuit breaker panel.
do not ovEr-cook food. Fire could result.
do not IEavE thE ovEn unattEndEd, especially
when using paper, plastic or other combustible materials in the cooking process. Paper can char or burn and some plastics can melt if used when heating foods.
do not use corrosive chemicals or vapors in this appliance. This type of oven is specifically designed to heat or cook food. It is not designed for industrial or laboratory use.
Service Only TO be carried OuT by a
Trained Service Technician. It is hazardous for anyone other than a trained person to carry out any service or repair operation, which involves the removal of any cover, which gives protection against exposure to microwave energy.
do not remOve any cOver.
natural_image
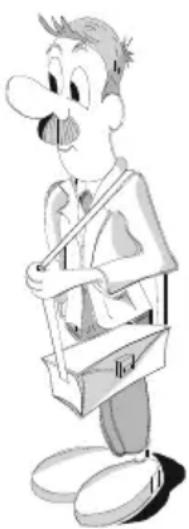
Cartoon character holding a bag, no text or symbols visibleOnly allow children to use the appliance under adult supervision and after adequate instructions have been given, so that the child is able to use the appliance in a safe way and understands the hazards of improper use.
This appliance is not intended for use by persons (including children) with reduced physical, sensory or mental capabilities, unless used under the supervision of a person responsible for their safety.
Warning
AccesSible parTS may becOme hOT during use, young children should be kept away
do not use your microwave oven for heating anything in airtight sealed containers. The pressure increases and may cause damage when opening or may explore

The dOOr Seals and The dOOr Seal areas must be regularly inspected for damage. If these areas are damaged the appliance should not be operated until it has been repaired by a trained service technician.
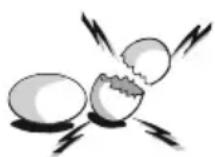
EGGS
do not use Your microwave oven for cooking or reheating whole eggs with or without shell since they may explode even after microwave heating has ended.
This appliance is deSigned for dOmeSTic uSe Only!
The appliance SHOULD nOT be OperatEd without food in the oven when using microwaves. Operation in this manner is likely to damage the appliance.
If You practiceE opErating the oven, put a glass of water inside. The water will absorb the microwave energy and the oven will not be damaged.
do not use the cavity for any storage purposes.
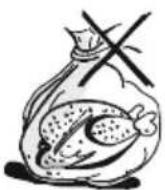
RemOve wire TwiST-TieS from paper or plastic bags before placing bag in the oven.
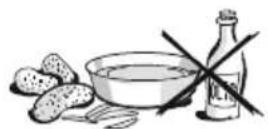
DEEP-FRYING
do not usE Your microwave oven for deep-frying, because the oil temperature cannot be controlled.
UsE hot pads or ovEn mitts to prevent burns, when touching containers, oven parts, and pan after cooking.
LIQUIDS
E.g. bEvEragEs or watEr. Overheating the liquid
beyond boiling point can occur without evidence of bubbling.
This could result in a sudden boil over of the hot liquid.
To prevent this possibility the following steps should be taken:
- Avoid using straight-sided containers with narrow necks.
- Stir the liquid before placing the container in the oven and let the teaspoon remain in the container.
- After heating, allow standing for a short time, stirring again before carefully removing the container from the oven.
CAREFUL
alwaYs rEfEr to a microwave cookbook for details. Especially, if cooking or reheating food that contains alcohol.
After heating baby food or liquids in a
baby bottle or in a baby food jar, always stir and check the temperature before serving.
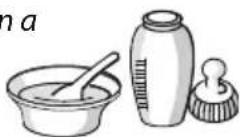
This will ensure that the heat is evenly distributed and the risk of scalding or burns can be avoided.
Ensure the Lid and the Teat is removed before heating!
thErE are a number of accessories available on the market. Before you buy, ensure they are suitable for microwave use.
a more detailEd and ExtEnsivE instructions for Use can be downloaded from
www.whirlpool.eu
this Quick Start Guide is designed to cover a range of different models. The number of buttons and functions may therefore differ from the specific model you have purchased.
the principle of opEration is:
\~ Choose function
\~: Adjust setting
\~: Press the start button
PLEASE NOTE!
APPEARANCE
the actual appEarance of the control panel may look different than the panels shown in this guide depending on the model you have purchased.
Example panels
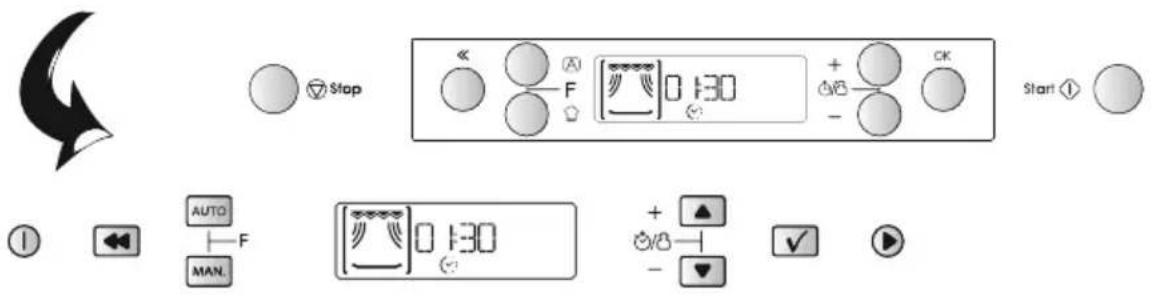
CLOCK
When the appliance is first plugged in, or after a power failure, the Clock will flash and needs to be reset.
1 PrEss theE +/- buttons to set the hours.
2 prEss the ok button. (The two right hand digits (minutes) flicker).
3 PrEss the +/- buttons to set the minutes.
4 PrEss the OK button again to confirm the change.
the Clock is sEt and in opEration.
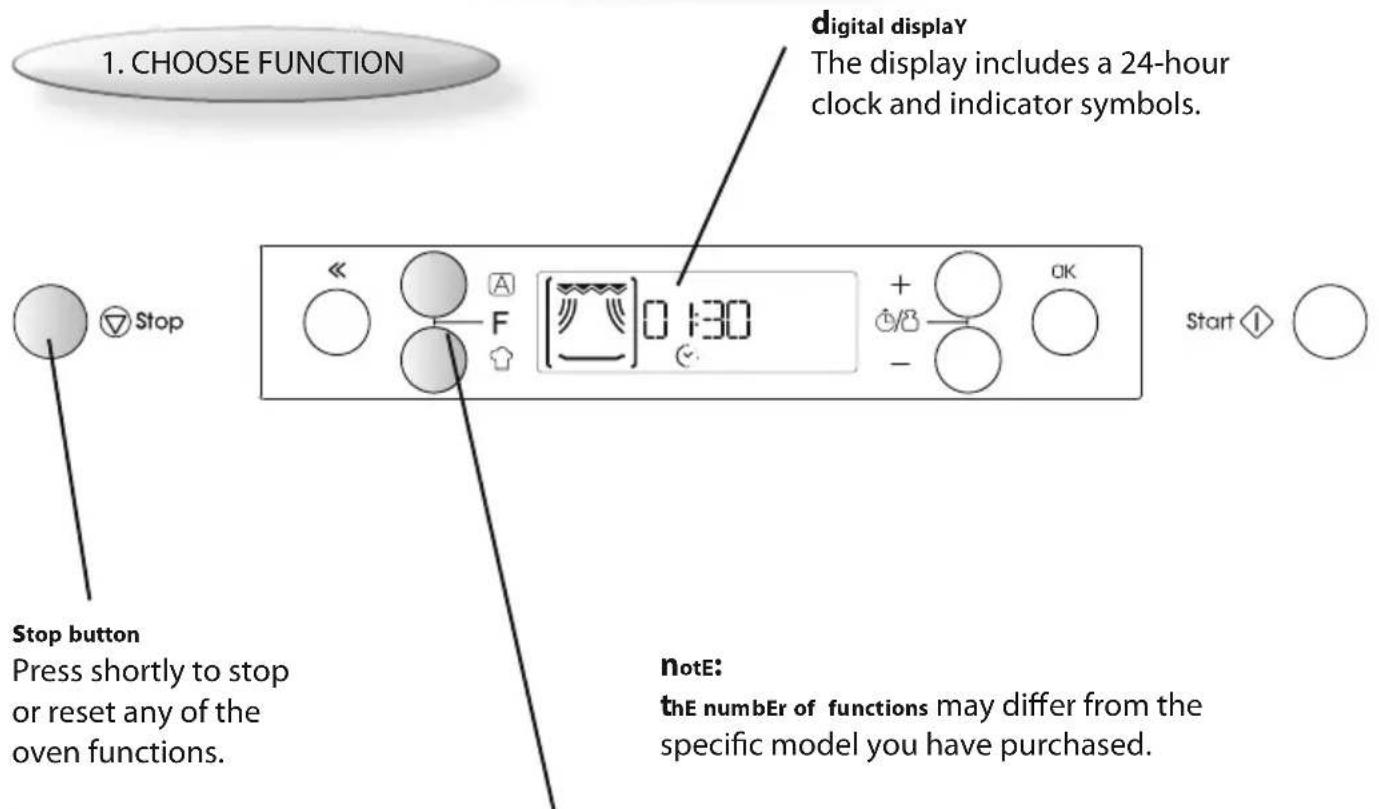
| the function buttons lets you choose between various functions. | |
| FUNCTION DESCRIPTION | |
| Standby 24 hour Clock, | Kitchen timer & ECO |
| Microwave Cooking & Reheating with microwaves only | |
| Crisp Crisping dough based foods such as Pizza & Pie | |
| Grill Browning with Grill only | |
| Grill Combi Cooking with Grill and microwaves | |
| Forced Air Baking with hot air | |
| Forced Air Combi Roasting with hot air + microwaves | |
| Quick Heat Preheating the empty oven before using Forced Air | |
| Jet Defrost Defrosting quickly | |
| Auto Reheat Automatic Reheating | |
| Auto Steam Automatic Steam cooking | |
| Auto Crisp | Automatic Crisp cooking |
| Auto Cook | Automatic Cooking |
| Auto Melt | Automatic Melting |
| Auto Soften | Automatic Softening |
| Setting | Change various settings |
2. ADJUST SETTING
3. START
JEt Start button
Use to start the cooking process or invoke the Jet Start function.
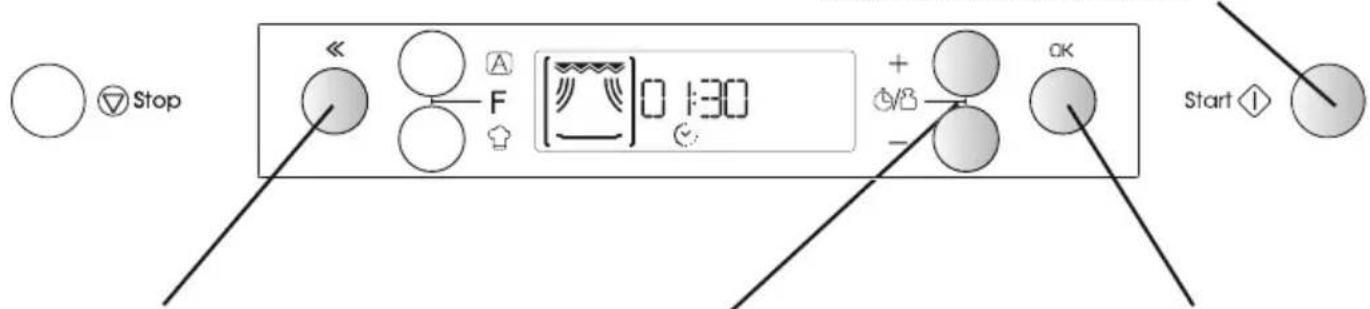
the << button lets you return to a previous part of the setting sequence in order to alter that setting before starting the cooking procedure.
The OK button lets you confirm your selection and automatically forwards you to the next setting that needs to be accomplished before starting the cooking procedure.
| the +/- buttons lets you adjust various settings. | |
| FUNCTION PRESS TO SET | |
| Standby Kitchen timer | |
| Microwave Microwave power & Cooking time | |
| Crisp Cooking time | |
| Grill Cooking time | |
| Grill Combi Microwave power & Cooking time | |
| Forced Air Temperature & Cooking time | |
| Forced Air Combi Temperature, Microwave power & Cooking time | |
| Quick Heat Temperature | |
| Jet Defrost Food class & Weight | |
| Auto Reheat Food class, Weight & Doneness | |
| Auto Steam Food class, Weight & Doneness | |
| Auto Crisp | Food class, Weight & Doneness |
| Auto Cook | Food class, Weight & Doneness |
| Auto Melt | Food class, Weight & Doneness |
| Auto Soften | Food class, Weight & Doneness |
| Setting | Clock, Sound, ECO & Brightness |
the packing box may be fully recycled as confirmed by the recycling symbol. Follow local disposal regulations. Keep potentially hazardous packaging (plastic bags, polystyrene etc.) out of the reach of children.
natural_image
Recycling symbol with three chasing arrows forming a triangle (no text or labels)this applianceE is marked according to the European directive 2002/96/EC on Waste Electrical and Electronic Equipment (WEEE). By ensuring this product is disposed of correctly, you will help prevent potential negative consequences for the environment and human health, which could otherwise be caused by inappropriate waste handling of this product.
the Symbol on the product, or on the docu-
ments accompanying the product, indicates that this appliance may not be treated as household waste. Instead it shall be handed over to the applicable collection point for the recycling of electrical and electronic equipment.
disposal must be carried out in accordance with local environmental regulations for waste disposal.
for more dEtailEd information about treatment, recovery and recycling of this product, please contact your local city office, your household waste disposal service or the shop where you purchased the product.
bEforE scrapping, cut off the mains cord so that the appliance cannot be connected to the mains.
FR

INSTALLATION

INSTALLATION DE L'APPAREIL

natural_image
Illustration of two hands holding a folded paper with several pliers inside (no text or symbols)natural_image
Illustration of a toolbox with a hammer, a drill bit, and a tool (no text or symbols)AVANT DE BRANCHER L'APPAREIL
natural_image
Pure technical diagram showing a crossed tool and mechanical component without any text, numbers, or symbols.natural_image
Cartoon character holding a bag, no text or symbols visiblenatural_image
Recycling symbol composed of three chasing arrows forming a triangle (no text or labels)natural_image
Illustration of two hands holding a folded paper with black tools inside (no text or symbols)natural_image
Illustration of a toolbox with tools including a hammer, drill bit, and power tool (no text or symbols)VOR DEM ANSCHLIESSEN
natural_image
Pure mechanical diagram showing a tool intersecting a bracket with no text or symbolsnatural_image
Cartoon illustration of a man in a suit holding a briefcase (no text or symbols)wecke.
ReparaTuren am Gerät dür-
natural_image
Recycling symbol composed of three chasing arrows forming a triangle (no text or labels)DE
natural_image
Illustration of two hands holding a sheet of black-and-white photo of multiple hand tools (no text or symbols visible)natural_image
Illustration of a toolbox with a hammer, a drill bit, and a power tool (no text or symbols)PRIMA DI COLLEGARE L'APPARECCHIO
natural_image
Cartoon character holding a briefcase, no visible text or symbolsnatural_image
Recycling symbol with three chasing arrows forming a triangle (no text or labels)HET APPARAAT MONTEREN
natural_image
Illustration of two hands holding a folded paper with several small tools emerging from them (no text or symbols visible)natural_image
Illustration of a toolbox with a hammer, a drill bit, and a power tool (no text or symbols)NL
VOORDAT U DE OVEN AANSLUIT
natural_image
Technical diagram showing a tool crossed with a screwdriver inside a mechanical housing (no text or symbols)natural_image
Cartoon illustration of a man holding a bag with open mouth, no text or symbols presentdE klok is ingEstEld En in wErking.
natural_image
Recycling symbol composed of three chasing arrows forming a triangle (no text or labels)
NL
MONTAJE DEL APARATO

natural_image
Illustration of two hands holding a folded paper with black tools inside (no text or symbols)natural_image
Illustration of a toolbox with a hammer, a power tool, and a pair of pliers (no text or symbols)natural_image
Pure mechanical diagram showing a tool intersecting a bracket with no text or symbolsnatural_image
Cartoon character holding a briefcase, no text or symbols visiblenatural_image
Recycling symbol with three chasing arrows forming a triangle (no text or labels)natural_image
Illustration of two hands holding a folded paper with multiple pliers (no text or symbols)natural_image
Illustration of a toolbox with a hammer, a drill bit, and a power tool (no text or symbols)ANTES DE LIGAR
natural_image
Technical line drawing of a mechanical component with intersecting diagonal lines and a screwdriver (no text or symbols)CErtifiQuE-sE de que a cavidade do forno está vazia antes de proceder à montagem.


botão Stop
natural_image
Recycling symbol with three chasing arrows forming a triangle (no text or labels)natural_image
Illustration of two hands holding a folded paper with a diagram of five pliers inside (no text or symbols)natural_image
Illustration of a toolbox with a hammer, a drill bit, and a power tool (no text or symbols)INNAN MIKROVÅGSUGNEN ANSLUTS
SE
natural_image
Pure mechanical diagram showing a tool crossed with a screwdriver, without any text, numbers, or symbols.natural_image
Cartoon character holding a briefcase, no text or symbols presentStart

Stoppknapp
natural_image
Recycling symbol with three arrows forming a triangle (no text or labels)INSTALLATION AF APPARATET
natural_image
Illustration of two hands holding a folded paper with black tools inside (no text or symbols)natural_image
Illustration of a toolbox with a hammer, a drill bit, and a tool (no text or symbols present)F∅R TILSLUTNING
natural_image
Diagram of a mechanical device with a screwdriver crossed out, showing no text or symbolsnatural_image
Cartoon character holding a bag, no visible text or symbolsnatural_image
Recycling symbol with three chasing arrows forming a triangle (no text or labels)natural_image
Illustration of two hands holding a sheet of tools, one open and one closed (no text or symbols visible)natural_image
Illustration of a toolbox with a hammer, a drill bit, and a power tool (no text or symbols)F∅R TILKOPLING
natural_image
Pure technical diagram showing a tool crossed out by two diagonal lines, no text or symbols presentnatural_image
Cartoon character wearing a vest and glasses, holding a bag (no text or symbols visible)

mErk:
med << kan du gå tilbake til en tidligere innstilling for å endre den før du starter tilberedningen.
natural_image
Illustration of two hands holding a folded paper with black tools emerging from it (no text or symbols visible)natural_image
Illustration of a toolbox with a hammer, a drill bit, and a power tool (no text or symbols)ENNEN VERKKOVIRTAKYTKENTÄÄ
natural_image
Diagram of a mechanical device with a screwdriver crossed out, showing no text or symbolsnatural_image
Cartoon character holding a bag, no text or symbols visiblenatural_image
Recycling symbol composed of three chasing arrows forming a triangle (no text or labels)
A KÉSZÜLÉK BESZERELÉSE
natural_image
Illustration of two hands holding a sheet of black tools, no text or symbols presentnatural_image
Illustration of a toolbox with a hammer, a drill bit, and a power tool (no text or symbols)A HÁLÓZATRA CSATLAKOZTATÁS ELÖTT
natural_image
Pure mechanical diagram showing a tool intersecting a bracket with no text or symbolsnatural_image
Cartoon character holding a bag, no text or symbols visibleStart

Stop gomb
natural_image
Recycling symbol composed of three chasing arrows forming a triangle (no text or labels)natural_image
Illustration of two hands holding a folded paper with black tools inside (no text or symbols)natural_image
Illustration of a toolbox with a hammer, a drill bit, and a power tool (no text or symbols)PŘED PŘIPOJENÍM
natural_image
Technical diagram showing a tool crossed with a screwdriver inside a mechanical component (no text or symbols)natural_image
Cartoon character holding a bag, no text or symbols visiblenatural_image
Recycling symbol with three chasing arrows forming a triangle (no text or labels)natural_image
Illustration of two hands holding a folded paper with black metal tools (no text or symbols visible)natural_image
Illustration of a toolbox with a hammer, drill bit, and power tool (no text or symbols)PRZED PODŁĄCZENIEM
natural_image
Pure mechanical diagram showing intersecting diagonal lines and a tool, without any text, numbers, or symbols.Start

PrzYcisk „Stop”
natural_image
Recycling symbol with three chasing arrows forming a triangle (no text or labels)natural_image
Illustration of two hands holding a folded paper with black pliers inside (no text or symbols)natural_image
Illustration of a toolbox with a hammer, a drill bit, and a power tool (no text or symbols)ПЕРЕД ПОДКЛЮЧЕНИЕМ
natural_image
Diagram of a mechanical device with a diagonal black crossbar and screwdriver, no text or symbols presentnatural_image
Cartoon character wearing a sash and holding a bag (no text or symbols visible)natural_image
Recycling symbol composed of three chasing arrows forming a triangle (no text or labels)natural_image
Pure electrical circuit lines without any symbols
RU
MONTÁŽ SPOTREBIČA

natural_image
Illustration of two hands holding a sheet of black-and-white photo of multiple pliers (no text or symbols)natural_image
Illustration of a toolbox with a hammer, a drill bit, and a power tool (no text or symbols)PRED PRIPOJENÍM
natural_image
Technical line drawing of a mechanical assembly with intersecting diagonal lines and a screwdriver (no text or symbols)natural_image
Cartoon character holding a briefcase, no text or symbols visibleStart

tlačidlo Stop
natural_image
Recycling symbol composed of three chasing arrows forming a triangle (no text or labels)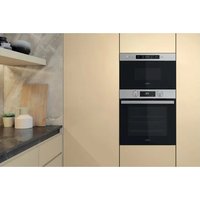

- MOUNTING THE APPLIANCE
- PRIOR TO CONNECTING
- AFTER CONNECTING
- PLEASE NOTE!
- APPEARANCE
- CLOCK
- ADJUST SETTING
- START
- JEt Start button
- FR
- INSTALLATION
- INSTALLATION DE L'APPAREIL
- AVANT DE BRANCHER L'APPAREIL
- VOR DEM ANSCHLIESSEN
- ReparaTuren am Gerät dür-
- PRIMA DI COLLEGARE L'APPARECCHIO
- HET APPARAAT MONTEREN
- VOORDAT U DE OVEN AANSLUIT
- MONTAJE DEL APARATO
- ANTES DE LIGAR
- botão Stop
- INNAN MIKROVÅGSUGNEN ANSLUTS
- SE
- Stoppknapp
- INSTALLATION AF APPARATET
- F∅R TILSLUTNING
- F∅R TILKOPLING
- mErk:
- ENNEN VERKKOVIRTAKYTKENTÄÄ
- A KÉSZÜLÉK BESZERELÉSE
- A HÁLÓZATRA CSATLAKOZTATÁS ELÖTT
- Stop gomb
- PŘED PŘIPOJENÍM
- PRZED PODŁĄCZENIEM
- PrzYcisk „Stop”
- ПЕРЕД ПОДКЛЮЧЕНИЕМ
- MONTÁŽ SPOTREBIČA
- PRED PRIPOJENÍM
- tlačidlo Stop
Brand : WHIRLPOOL
Model : AMW 7121 IX
Category : Microwave