
Bread Boss MB4132 - Beard trimmer REMINGTON - Free user manual and instructions
Find the device manual for free Bread Boss MB4132 REMINGTON in PDF.

| Product type | Beard trimmer |
| Brand | Remington |
| Model | Bread Boss MB4132 |
| Power supply | Rechargeable with included mains adapter |
| Charging time | 4 hours |
| Runtime | 50 minutes |
| Main functions | Cutting, thinning, tapering, neck trimming, beard/mustache shaping |
| Blades | Blades washable under running water |
| Adjustable cutting guide | Adjusting wheel with length indicator, groove attachment |
| Cutting length without guide | 1 mm (perpendicular 0.4 mm) |
| Maintenance and cleaning | Blades washable under running water, body not washable, brushing after use |
| Safety | Do not use with damaged cord, do not immerse in water, keep out of reach of children, do not leave plugged in unattended |
| Spare parts | Replacement adapter available via customer service |
| Included accessories | Adapter, cleaning brush (not shown) |
| Wired use | Possible, but reduces battery life |
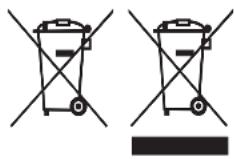
| Recycling | Removable battery, electrical products to be recycled at an official center |
Frequently Asked Questions - Bread Boss MB4132 REMINGTON
User questions about Bread Boss MB4132 REMINGTON
0 question about this device. Answer the ones you know or ask your own.
Ask a new question about this device
Download the instructions for your Beard trimmer in PDF format for free! Find your manual Bread Boss MB4132 - REMINGTON and take your electronic device back in hand. On this page are published all the documents necessary for the use of your device. Bread Boss MB4132 by REMINGTON.
USER MANUAL Bread Boss MB4132 REMINGTON
Thank you for buying your new Remington® product. Please read these instructions carefully and keep them safe. Remove all packaging before use.

IMPORTANT SAFEGUARDS
- This appliance can be used by children aged from 8 years and above and persons with reduced physical, sensory or mental capabilities or lack of experience and knowledge if they have been supervised/instructed and understand the hazards involved. Children shall not play with the appliance. Cleaning and user maintenance shall not be done by children unless they are older than 8 and supervised. Keep the appliance and cable out of reach of children under 8 years.
- Always check the appliance before you use it. Do not use the appliance if it is damaged, as this may cause injury.
- The adaptor contains a transformer. Do not cut off the adaptor to replace it with another plug, as this causes a hazardous situation.

Suitable for cleaning under an open water tap.
- The body of this appliance is not washable or water resistant. Do not put the appliance in liquid.
- WARNING: Detach the shaver from the charging adapter before cleaning it in water.
- Do not use the product with a damaged cord. A replacement can be obtained via our International Service Centres.
- This product should only be used with the charging adaptor supplied.
- Always replace a damaged adaptor with one of the original type.
- Do not use the appliance if it is damaged or malfunctions.
- This appliance should never be left unattended when plugged into a power outlet, except when charging.
- Keep the power plug and cord away from heated surfaces.
- Do not plug or unplug the appliance with wet hands.
- Do not twist or kink the cable, or wrap it round the appliance.
- This appliance is not intended for commercial or salon use.
PARTS
- On/Off switch
- Zoom wheel
- Length position indicator
-
Charge indicator
-
Trimmer assembly
- Adjustable comb
- Adaptor (not shown)
- Cleaning brush (not shown)
CHARGING YOUR APPLIANCE
Before using your trimmer for the first time, charge for 4 hours.
- Ensure the product is switched off.
- Connect the charging adaptor to the product and then to the mains.
- The charging indicator will illuminate.
| Charge Level Indicator | |
| Charging LED will show | |
| Fully Charged LED will turn off |
- Your trimmer cannot be overcharged. However, if it is not going to be used for an extended period of time (2-3 months), unplug it from the mains and store.
- To preserve the life of your batteries, let them run out every 6 months then recharge for 4 hours.
- On a full charge, your beard trimmer will run for up to 50 minutes of cordless usage.
CORDED
- Connect the appliance to the mains and turn on.
We recommend you let the product charge for a few minutes before using corded.
CAUTION: Extended mains only use will result in the reduction of the battery life.
INSTRUCTIONS FOR USE
FITTING THE ADJUSTABLE COMB
- Hold the trimmer in one hand with your thumb firmly on the zoom wheel to keep it from turning. Ensure the length position indicator is at 1.5.
- Slide the comb down the grooves until it clicks into place.
The comb can only be attached one way.
TO THIN AND TAPER THE BEARD/MOUSTACHE
- Fit the adjustable comb.
- Use the zoom wheel to set the comb to the desired length setting.
- The setting will appear on the length position indicator. If you are trimming for the first time start with the maximum trimming length setting.
-
Turn the unit on.
-
Place the flat top of the trimmer comb against the skin.
- Slowly slide through the hair. Repeat from different directions as necessary.
- If hair builds up in the trimmer comb during the trimming process, switch the unit off, pull the comb and brush the hair off.
Note: Use the beard trimmer without the adjustable comb for trimming hair close to the skin. This will trim hair to 1mm, holding the blades perpendicular to the skin will trim hair to 0.4mm.
TRIMMING THE NAPE OF YOUR NECK
Note: you will need a hand mirror for this operation if performing it alone.
- Remove the adjustable comb.
- Use your fingers to lift the hair at the base of your head up off the neck. Your index finger should be covering the roots of the hairs you are lifting to prevent accidental removal by the beard trimmer.
- Using your other hand, hold the trimmer to the base of your neck with the cutting unit facing up and move the trimmer up the length of the neck until it touches your finger covering the hair roots at the base of your head.
- Be sure to move the unit slowly when performing this operation and to keep the roots at the base of your head out of the way of the trimmer.
TO DEFINE THE BEARD/MOUSTACHE LINE
- Hold the trimmer with the trimmer blade facing you.
- Start with the edge of beard/moustache line and gently lower the trimmer blade onto your skin.
- Use motions towards the edge of the beard/moustache line to trim to desired locations in facial area and away from beard in neck area.
BLADE RELEASE
- Ensure the trimmer is switched off.
- Remove the adjustable comb.
- Remove the blades by pushing your thumb upwards under the blades and move the blade set away from the trimmer body.
- To reattach the blades, align the back of the blades with the back housing at the top of the trimmer and push down until the blade set clicks into place.
TIPS FOR BEST RESULTS
- Beard, moustache and sideburn hairs should be dry.
- Avoid using lotions before use.
- Comb your hair in the direction that it grows.

CARING FOR YOUR TRIMMER
- To ensure long lasting performance of the trimmer, clean the blades and unit regularly.
- Ensure the appliance is switched off and unplugged from the mains.
- Do not use harsh or abrasive cleaners on the unit or blades.
- This product has washable blades. Ensure the blades are detached from the trimmer before washing the blades.
- Wash the blades under a running tap to remove any hair clippings.
After rinsing under a tap ensure the blades are dry. - Do not rinse while the product is connected to the mains.
- Please note the main body of the trimmer is not washable and should be kept away from water.
- After each use, it is recommended to clean hair from the blades either by rinsing the blades or using a cleaning brush.
BATTERY REMOVAL
The appliance must be disconnected from the supply mains when removing the battery.
- Turn the trimmer on and discharge all remaining power.
- Remove the comb.
- Detach the blade cartridge.
- Remove the blade clip using a screwdriver.
- Pry the two halves of the housing apart from one another to expose the inside.
- Unscrew the two screws located toward the head end of motor bracket assembly and one screw at the mid point of the bracket assembly.
- Take out the bracket assembly from the housing.
- Disconnect the battery from the circuit board.
- Used batteries must be removed from the appliance and disposed of at an appropriate official recycling/collection point.
RECYCLING
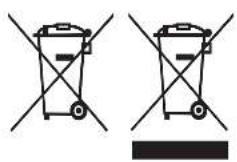
To avoid environmental and health problems due to hazardous substances, appliances and rechargeable and non-rechargeable batteries marked with one of these symbols must not be disposed of with unsorted municipal waste. Always dispose of electrical and electronic products and, where applicable, rechargeable and non-rechargeable batteries, at an appropriate official recycling/ collection point.
UW APPARAAT VERZORGEN
NAGRA GODA RÄD FÖR BÄSTA RESULTAT
RADY, JAK OSIAGNAC NAJLEPSZY WYNIK
- On/Off switch
- Trimmer assembly
- Zoom wheel
- Adjustable comb
- Length position indicator
- Adaptor (not shown)
- Charge indicator
- Cleaning brush (not shown)
A KÉSZÜLEK FELTÖLTEXE
AZÁLLITHATOFESU FELHELYEZÉSE
Pn n3BneueHnn 6aTapeu yCTpoiCTBO CneJeT OTKJIIOUHTb OT 3NeKTPOCeTN.
- Y6eIntecb, yTO TpIMMep nonHOCTbIO pa3pJxKeH.
- Chmnte hacaKy-rpe6eHb.
- Chmnte 6nok je3Bni.
- Chmunte 3axnM ne3Bn C nOMOu bIO OTBeptKn.
- Pa3beHnHTe DBe NOOBnHbI Kopnyca, yTo6bl OTKpbItb BHyTpEHnE y3nbl.
-
ChIMITE 2 BnHTa, pacnoJIOXeHHbIe By3JIe KPOHSTeHa MOTopa B 6JIxKe K rOJOBKe, n 1 BnHT B ceHTpe y3Ja KPOHSTeHa.
7.ИЗВЕКΙTEузел кронштун ha n3 KОрпуca. -
OToeHNHe 6aTapeo OT neuathO nlaTbi.
- Исторынные батарей НебхODимо ИЗВLEчь ИЗ пибopa и утúnлзирobа ТВ COOTВETCTBYЮшем Oфиц�аловом РунКтпегеработк/N/c6opa.
ПОВТOPHA ПЕPEPAБOTKA
Bo n36eXaHne BO3dEiCTBnB BpeDhBix BeIeCTB Ha OKpykaIOUyO cpeNy n 3OpOBBe np60bpI N 6bTapeN Ondop3OBOro IIN MHOropa3OBOrO nCpOJIb3OBAHn, NOMEeHHbIe ONDHM I3 3TNX CmMBOLOB, Heo6xOIMo yTNIIN3npOBaTb OTJeNbHOOT HecOPTIpOBaHHbIX 6bITOBbIX OTxODOB. O6raTeJIbHO yTNIIN3npyIte 3JIeKTPnueckne i 3JIeKTPoHHbIe n3DeJIIn, a TaKKe (ecNI 3TO IIpIMeHMo) 6bTapeN Ondop3OBOrO IIN MHOropa3OBOrO nCpOJIb3OBAHn B COOTBETCTByIOUx OfHIuJIbHBIX NYHKTax NOBtOPHO nepepa6OTKn / c6opa OTxODOB.
EN IYI SONUCLAR ICIN IPUCLARI
N3BAJDAHE HA BATEPNA
Korato n3BaJdTe 6aTeepnTa, ypeBb Tp86Ba Da e n3KnUoyen OT 3axpaHbHeTo.
- BkIIOUeTe TpIMepa n ro octaBeTe da pa6oTn do n3uePnBaHe Ha 6aTepeYraTa.
2.ИЗвадеТегpe6eha. - Otdelete kacetata 3a octpneeta.
4.ИЗbaTe XaIkaTа Ha OCTpneTO C NOMOuTa Ha OTBepTKa. - OtdeleTe IBeTe IIOOBHH Ha Kopnyca eHa O T dpyra, 3a da CTnIRHeTe Do BbTpewHaTa qact.
- Pa3BnIte IBaTa BnHTa, pa3NoIoxeHn KbM rIaBHna Kpa'Ha cKo6aTa Ha MOTopa n eINHn BnHT B cpeHaT aYact Ha cKo6aTa.
7.ИЗваде tcko6aTa ot Kopnyca.
8.ИЗкlioуete 6aTepeyraOTпlaTkaTa. - YnOtpe6eHnte 6aTeepn Tp86Ba Da ce n3BaT OT ypea N da CE npedaaT Ha npabUNHOTo MxCTO 3a peuKInpaHe/cb6puHa.
PEUKNJIIPAHE
3a da ce n36erHaT ekOJorHn H 3dpabHn npoBemn nopadn haIuYe Ha onaChi cy6ctaHn, ypeDnte, akymylaTopHnte n
HeakymylaTopHnTe 6aTepu, 06o3HaueHn C eHN OT Te3N CmBOnn, He Tp6Ba Da ce n3XbPnT 3aeHNO C HecOpTnpaHn O6uHcN OtnpaBcu.
BnHa r n 3xBbPnIe eKeTpueckn n eKeTpoHn npOdykTu, KbTeTo e npINOJXMO, aKymlaTopHn H HeakymlaTopHn 6aTePN, Ha IOxOJaIO OfNuaJIHO MrcTO 3a peuKnIpaHe/cb6IpaHe.
a + b = 3
山
yI 1
.
.1
.0
3
4
Jolal
AE
y 1
5
.6
1
J 1
J 1
aaii i 1i
/1y00 1
.


Model No. MB4130
Remington® is a Registered Trade Mark of Spectrum Brands, Inc.,
or one of its subsidiaries
VARTA Consumer Batteries GmbH & Co. KGaA, Alfred-Krupp-Str. 9, 73479 Ellwangen, Germany
www.remington-europe.com