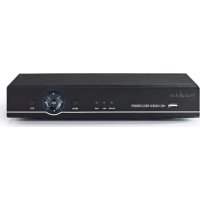
AHDR208CBK - Voice recorder NEDIS - Free user manual and instructions
Find the device manual for free AHDR208CBK NEDIS in PDF.



| Product Type | Digital Video Recorder (DVR) |
| Brand | Nedis |
| Model | AHDR208CBK |
| Supported Signal | AHD, IPC, CVBS, TVI, CVI (5 in 1) |
| Video Coding | H.264 |
| Recording Resolution | Automatic adjustment, up to 1080p |
| Number of Channels | 4 or 8 channels 1080p |
| Power Supply | 12 VDC |
| Power Consumption | < 15 W (without hard drive) |
| Dimensions | 255 x 215 x 45 mm |
| Weight | < 1.5 kg (without hard drive) |
| Interfaces | USB (2x), RS485, SATA (max 8 GB), VGA, HDMI, CVBS, BNC (4x/8x), RCA input, RCA output |
| Network | Ethernet, P2P Cloud, N_EYE Pro app |
| Mobile App | iOS and Android |
| Recording Modes | Automatic, Manual, Scheduled, Motion Detection, Alarm |
| Playback | 4 channels 1080p, instant playback, event search |
| Backup | USB or network |
| Operating Conditions | -10 to 55 °C, 10-90% humidity |
| Security Functions | User password protection |
| Maintenance and Cleaning | Clean with a soft dry cloth. Do not use chemicals. |
| Spare Parts and Repairability | Replaceable SATA hard drive. Power adapter included. |
Frequently Asked Questions - AHDR208CBK NEDIS
User questions about AHDR208CBK NEDIS
0 question about this device. Answer the ones you know or ask your own.
Ask a new question about this device
Download the instructions for your Voice recorder in PDF format for free! Find your manual AHDR208CBK - NEDIS and take your electronic device back in hand. On this page are published all the documents necessary for the use of your device. AHDR208CBK by NEDIS.
USER MANUAL AHDR208CBK NEDIS
| Sensor | Main Board Sensor Industrial Embedded Microprocessor |
| Operating System Embedded Linux operating system | |
| System | Signal Support AHD, IPC, CVBS, TVI, CVI (5 in 1) |
| Video Coding H.264 | |
| Video Format 4CH / 8CH 1080p | |
| Video Frame PAL: 1 - 25 FPS / NTSC: 1 - 30 FPS | |
| Double Stream Support | |
| Interface USB Port (2x), RS485, SATA HDD (max 8 GB), VGA, HDMI, CVBS, BNC (4x / 8x), RCA input, RCA output | |
| Recording Manage | Recording Mode Automatic / Manual / Scheduled / Motion Detection / Alarm Recording |
| Recording Resolution Self-adaption | |
| Playback 4CH 1080p | |
| Playback Mode Instant / Search / Event | |
| Backup Mode USB / Network | |
| Network | Protocol Support TCP/IP, UDP, PPPoE, DHCP, DDNS, NTP etc. |
| P2P Cloud N_EYE Pro APP / www.yunis.com | |
| Supported access Mobile App (iOS / Android), UTC control, 3G, WIFI | |
| Power | Power 12 VDC |
| Power Consumption < 15W (no HDD) | |
| Others | Operating conditions -10 - 55 °C / 10 - 90% humidity |
| Phyiscal 255 x 215 x 45 mm / < 1,5 KG (no HDD) |
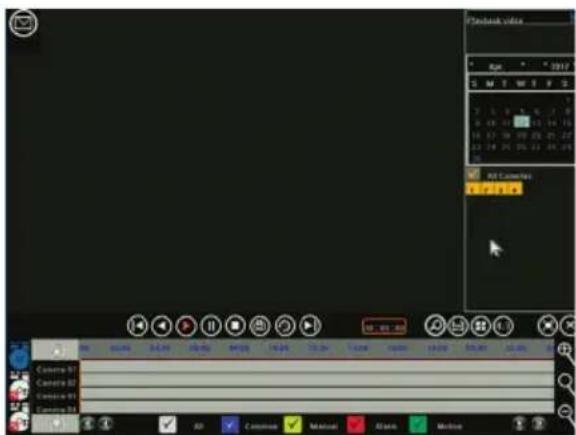
Figure "A"
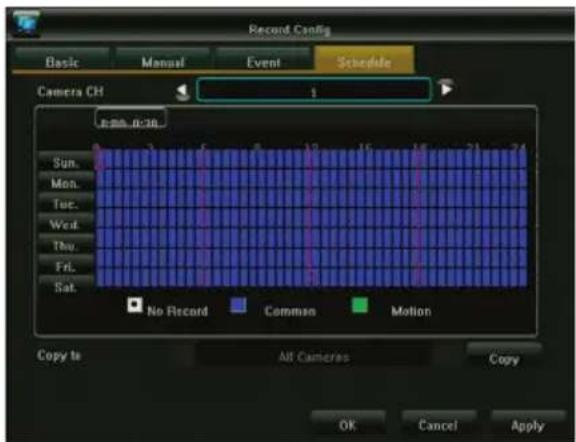
Figure "B"
Figure "C"
1. Connect
- Connect the cameras to the recorder with the coaxial cables using BNC connector
- Use the power splitter to power the cameras
- Connect the DVR to a TV or monitor using the preferred connector
- Connect the mouse using USB
- Connect the recorder to the internet using an Ethernet cable (if desired)
- Finally power up the recorder with the included power adapter.
2.Start Up
Press the start button and make sure the TV/monitor is set to the right input source. It will enter the real-time monitoring screen as shown in figure "A".
3. Navigation
Right-click anywhere to access the "Right-click menu".
At first attempt login is required, default username is admin, default password is 123456
Use the left mouse button to navigate through the menu, right click in the menu to go back.
4.Shutdown
- Right-click anywhere to access the "Right-click menu", choose "Shut down system" and "Close", or
- Long press the startup button at the front panel (not recommended as it may damage the hard disk)
5. Recovery
At sudden system power off, the recording video will be stored automatically and after reboot, the recorder will automatically resume to the status before power off.
6. Recording
In the Record Config menu you can set each camera's recording schedule. By selecting the preferred recording mode and clicking individual timeslots or dragging to set a larger timeframe or to cover multiple days at once.
White means that no recording will be done in this timeslot, blue means constant recording is done and green means that recording will only happen after motion is being detected.
After a schedule is finished, it can easily be copied to one or more cameras. See figure "B"
7. Motion detection
In right-click menu - main menu - system settings - output mode the motion detection can be enabled and different settings can be set:
- 3 different sensitivity settings
- exact action(s) to take: Record one or more channels, take snapshot, send Email or show triggered camera fullscreen.
- Area setting (motion mask): if set only motion in the highlighted areas trigger the set action(s).
8. Playback
When watching back earlier recordings, you get the interface like figure "C".
The 4 grey timelines at the bottom represent the 4 different channels. Differently coloured areas indicate different types of recording (scheduled, manual, alarm or triggered by motion detection).
Drag the timeline left or right to scroll in time, use the mouse's scroll-wheel to zoom the timeline.
Double click on a specific time to play back the recording starting from the selected time.
9. Mobile Application
To access the DVR on your smartphone make sure the DVR is connected to the router and the network is configured correctly. Download and open the App "N_EYE PRO", login or register your account or use local login if you only need access from within the local network. Add device using the plus sign and select Network Device. Scan the QR-tag shown at the DVR under P2P Cloud or copy the requested network parameters. The App can automatically detect the number of cameras on this DVR. After saving you will see all cameras added. On the top-right corner specific cameras can be switched on and off. Other options in the App include playback and manual recording on smartphone.
| Image Color | Brightness | ||||
| Contrast | |||||
| Chroma | |||||
| Saturation | |||||
| Video Mode Settings | AHD | ||||
| TVI | |||||
| AUTO | |||||
| CVI | |||||
| Electronic Zoom | Click and drag in bottom right image to zoom in | ||||
| PTZ control | not applicable with our cameras | ||||
| Video Query | Select date and camera, search for made recordings in bottom timeline | ||||
| Play / Pause Play / Pau video | |||||
| Stop Stop the video, a screen close | |||||
| Fast Forward / Rewind / Reorient Forward | / Rewind | ||||
| Slow / Fast Play the video speed of X/2X/4X/8X/16X | |||||
| Screen splitting mode 3Dch 4 cameras simultaneously | |||||
| Backup Backup record on USB hard disk | |||||
| Capture Save still frame he selected channel | |||||
| Full Screen Single-click inter full screen | |||||
| Electronic zoom Use thmbnail on the bottom right corner to select an area to zoom in to | |||||
| ExitPlayback Return to View page | |||||
| Main Menu | Backup | ||||
| Record Configuration | Basic / Manual / Event | Channel default = ch. 1, select which channel to set. | |||
| Stream type video = video only, composite = video and audio | |||||
| Video quality set quality (higher quality = larger files) | |||||
| Resolution automatically defined by the camera | |||||
| Bit rate limit choose preset value or set manually | |||||
| Frame rate choose any value, default is "full frame rate"; | |||||
| Schedule | Channel Select the camera for which to set the recording schedule | ||||
| Select the desired type of recording (No, Common or Motion) | |||||
| Click and drag to set the schedule for the entire week | |||||
| Copy the selected schedule to other cameras if needed. | |||||
| System Setting | Output Mode | Menu Output | Camera Name | Shown on each channel display | |
| Camera Mosaic | Define up to 4 areas which are blocked in recording (security/privacy) | ||||
| Video Loss | Set the required action when signal loss is detected | ||||
| Motion detection | Set sensitivity | ||||
| Set the required action(s) when motiomm is detected: recording one or more channels, showing fullscreen | |||||
| Area setting (motion mask): only movement in the highlighted areas triggers recording | |||||
| Color Settings | Set brightness, contrast, chroma and saturation for each channel individually | ||||
| Output Config | Menu Transparency | Set the transparency of menu item background | |||
| Screen Saver Time | Set the time after which the screen automatically switches off | ||||
| Resolution | Set the resolution sent over VGA and HDMI output | ||||
| Main Menu | System Setting | System Configure | Device Name | |
| Auto logout | ||||
| Video Standard | ||||
| Language | ||||
| System Time | ||||
| Date Format | ||||
| Time Format | ||||
| Time Zone | ||||
| Summer Time (daylight saving time) | ||||
| User Management | Add user | |||
| Delete User | ||||
| Edit User | ||||
| User Autorization | ||||
| Version Info | ||||
| System Update | ||||
| Hard Disk Management | Disk Type | Shows the code of the product model | ||
| Disk Capacity | Shows the total capacity of the hard disk | |||
| Free Space | Shows the remaining capacity of the hard disk | |||
| Status | Current working status of the hard disk | |||
| Initialize the hard disk | Start the disk format operation (needed before first use) | |||
| Network Parameters | Basic | Network card type you can choose different network card based on your needs | ||
| Obtain IP address automatically | ||||
| Update | can re-obtain a DHCP lease | |||
| IP address | ||||
| Subnet mask | ||||
| Gateway | ||||
| MAC address | Shows physical address of the current network interface | |||
| WLAN mode | Only applicable after new network card is installed | |||
| Advanced Config | Set DDNS Parameters | |||
| E-mail Settings | ||||
| PPPOE | ||||
| Port Setting | ||||
| Alarm Management | Alarm Input | Channel | ||
| Alarm status | ||||
| Alarm time | ||||
| Linkage mode | ||||
| Copy to other channels | ||||
| Alarm Output | Channel | |||
| Output Alarm Delay | ||||
| Alarm Time | ||||
| Copy to other channels | ||||
| Exception Configuration | ||||
| System Info | Stream Statistics | |||
| Log Info | ||||
| Export Configuration | ||||
| Import Configuration | ||||
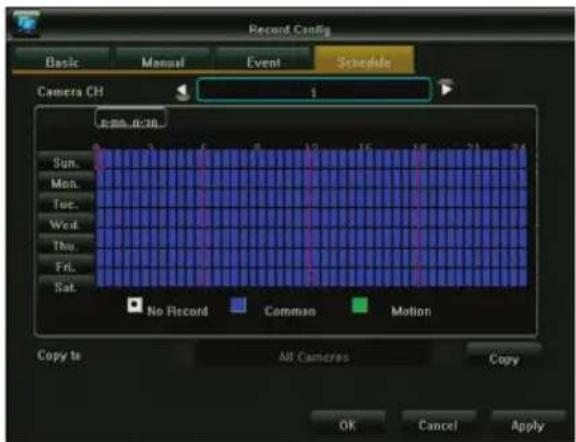
Figure "B"
Figure "C"
1. Connexion
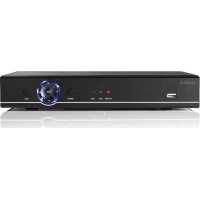
Brand : NEDIS
Model : AHDR208CBK
Category : Voice recorder