BHHV520BFP - Handheld vacuum BLACK & DECKER - Free user manual and instructions
Find the device manual for free BHHV520BFP BLACK & DECKER in PDF.
Download the instructions for your Handheld vacuum in PDF format for free! Find your manual BHHV520BFP - BLACK & DECKER and take your electronic device back in hand. On this page are published all the documents necessary for the use of your device. BHHV520BFP by BLACK & DECKER.
USER MANUAL BHHV520BFP BLACK & DECKER
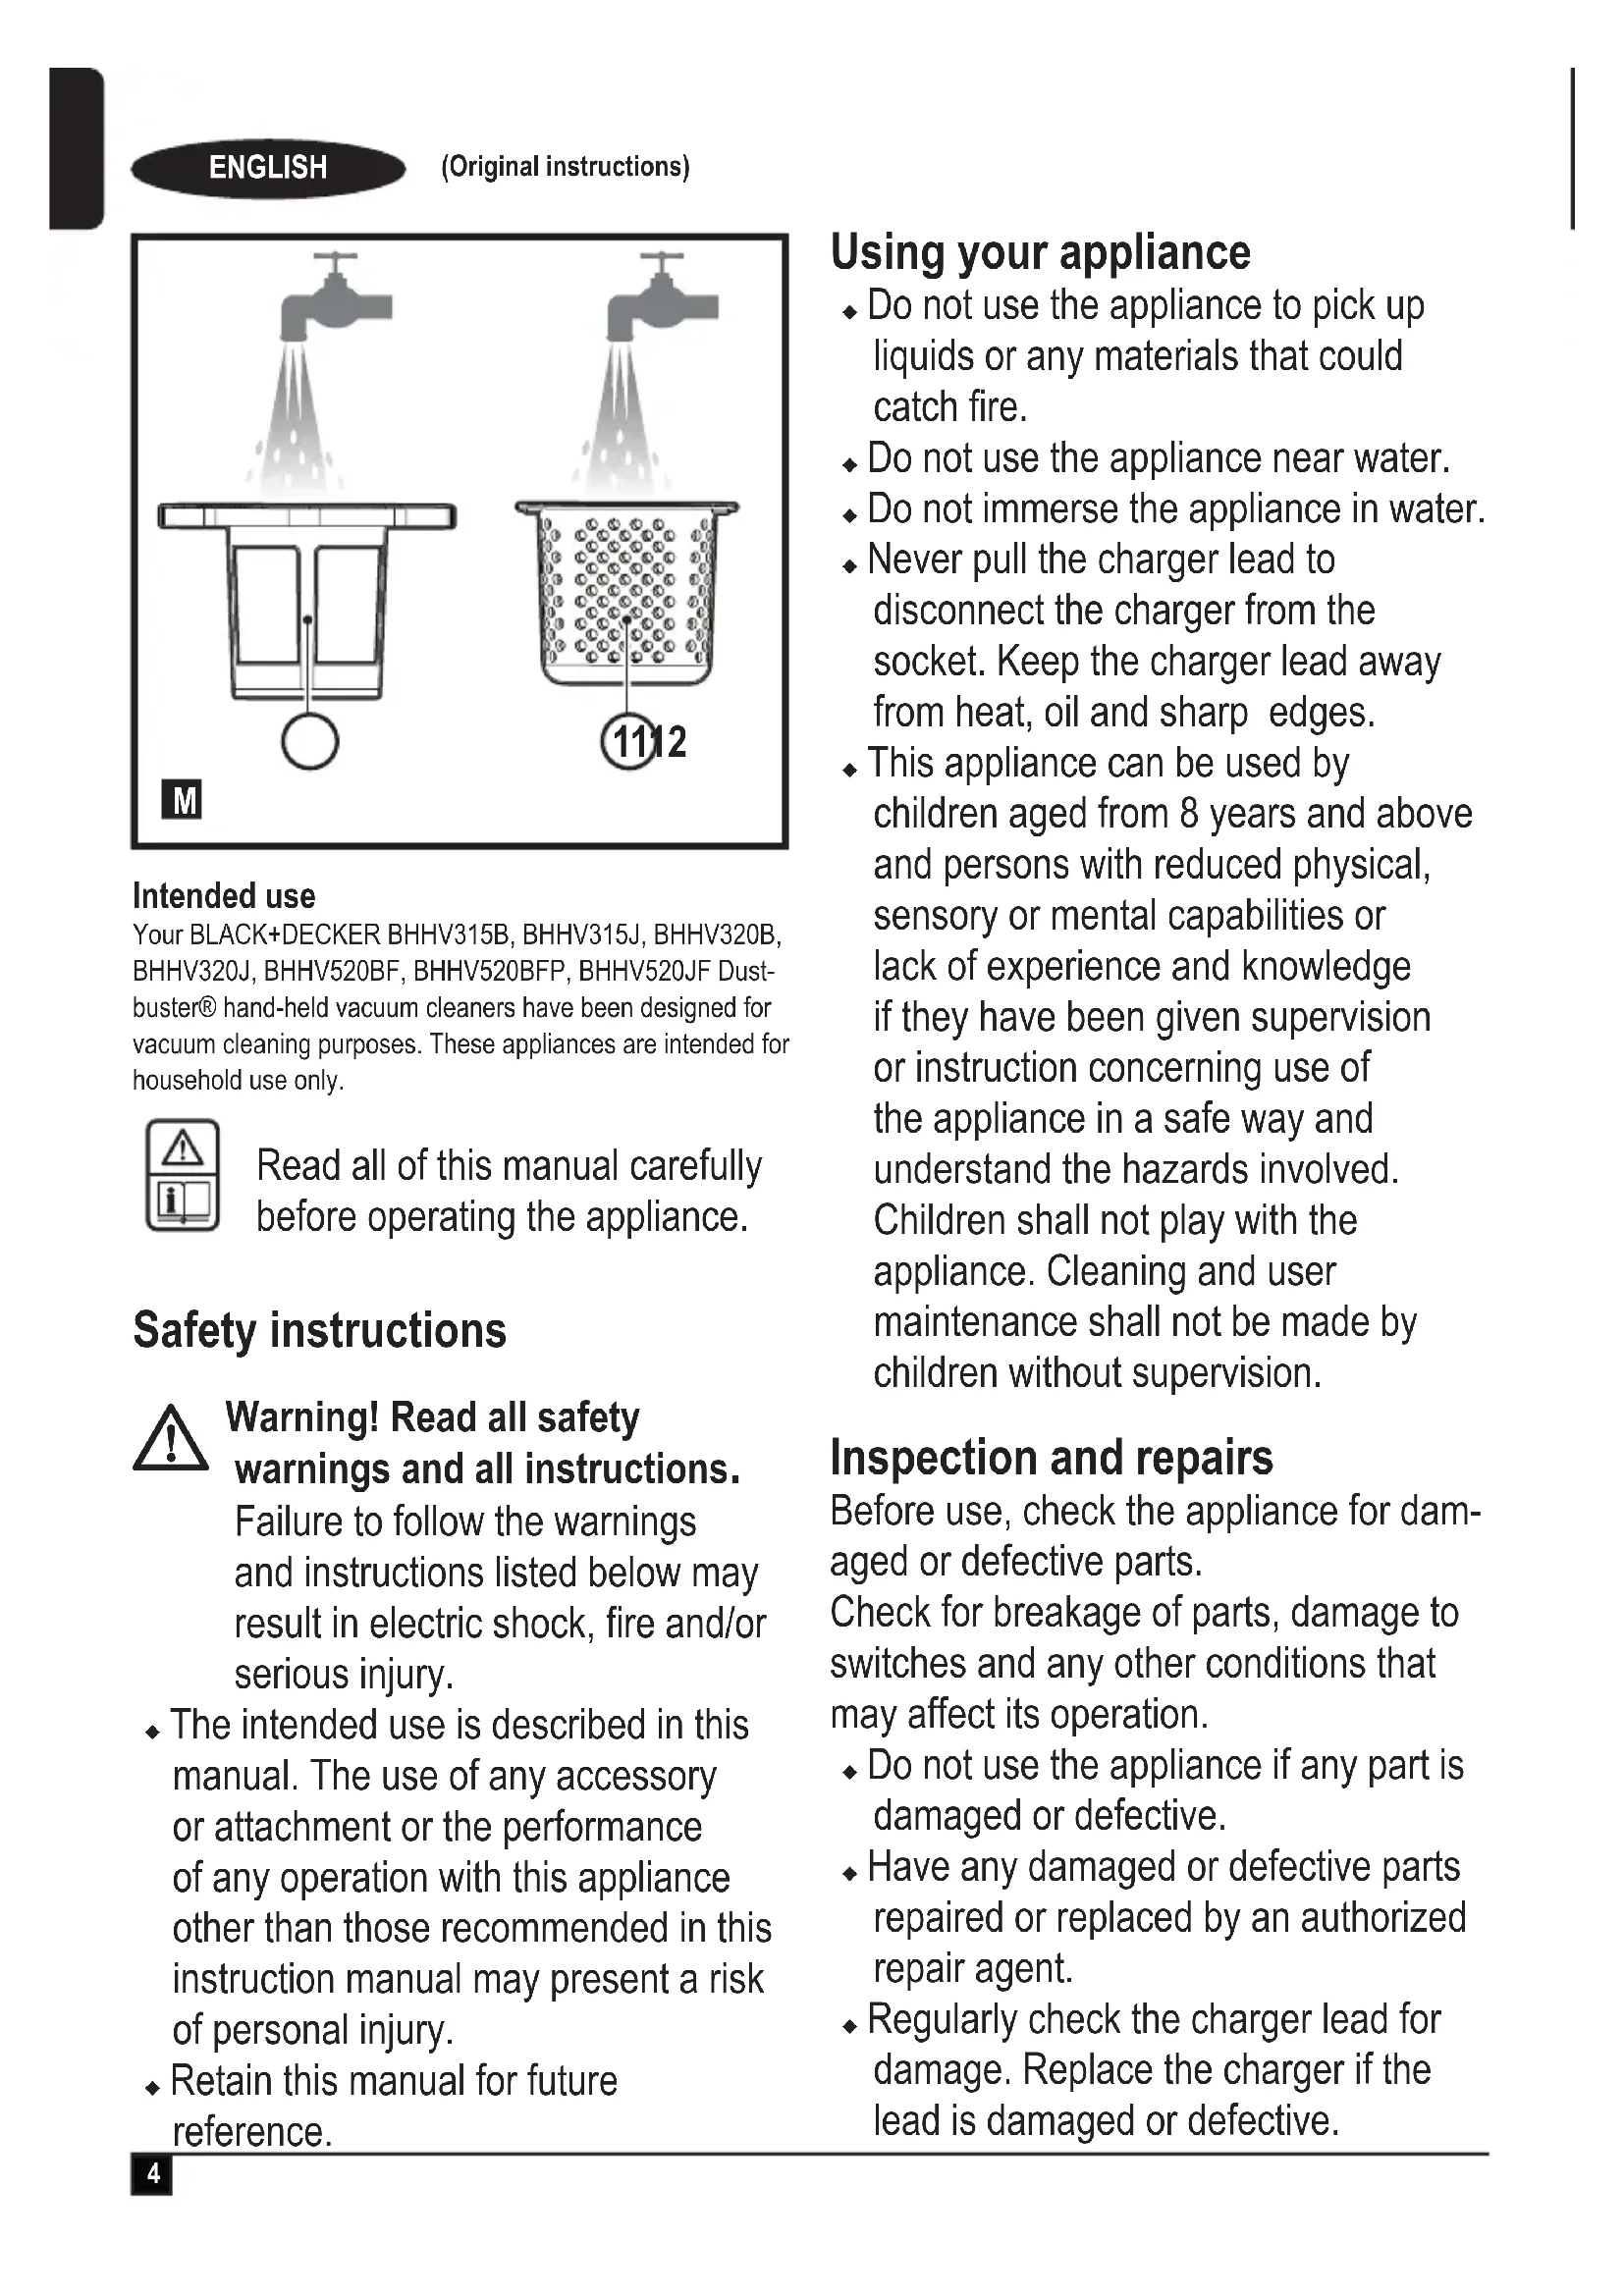
6e4 ENGLISH(Original instructions) Intended use Your BLACK+DECKER BHHV315B, BHHV315J, BHHV320B,BHHV320J, BHHV520BF, BHHV520BFP, BHHV520JF Dust-buster® hand-held vacuum cleaners have been designed for vacuum cleaning purposes. These appliances are intended for household use only. Read all of this manual carefully before operating the appliance. Safety instructions
Warning! Read all safety warnings and all instructions. Failure to follow the warnings and instructions listed below may result in electric shock, re and/or serious injury. u The intended use is described in this manual. The use of any accessory or attachment or the performance of any operation with this appliance other than those recommended in this instruction manual may present a risk of personal injury. u Retain this manual for future reference. Using your appliance u Do not use the appliance to pick up liquids or any materials that could catch re. u Do not use the appliance near water.u Do not immerse the appliance in water.u Never pull the charger lead to disconnect the charger from the socket. Keep the charger lead away from heat, oil and sharp edges. u This appliance can be used by children aged from 8 years and above and persons with reduced physical, sensory or mental capabilities or lack of experience and knowledge if they have been given supervision or instruction concerning use of the appliance in a safe way and understand the hazards involved. Children shall not play with the appliance. Cleaning and user maintenance shall not be made by children without supervision. Inspection and repairs Before use, check the appliance for dam- aged or defective parts. Check for breakage of parts, damage to switches and any other conditions that may affect its operation. u Do not use the appliance if any part is damaged or defective. u Have any damaged or defective parts repaired or replaced by an authorized repair agent. u Regularly check the charger lead for damage. Replace the charger if the lead is damaged or defective.
ENGLISH(Original instructions)u Never attempt to remove or replace any parts other than those specied in this manual. Additional safety instructions After use u Unplug the charger before cleaning the charger or charging base. u When not in use, the appliance should be stored in a dry place. u Children should not have access to stored appliances. Residual risks Additional residual risks may arise when using the tool which may not be included in the enclosed safety warnings. These risks can arise from misuse, prolonged use etc. Even with the application of the relevant safety regulations and the implementa- tion of safety devices, certain residual risks can not be avoided. These include: u Injuries caused by touching any rotating/moving parts. u Injuries caused when changing any parts, blades or accessories. u Injuries caused by prolonged use of a tool. When using any tool for prolonged periods ensure you take regular breaks. u Impairment of hearing.u Health hazards caused by breathing dust developed when using your tool (example:- working with wood, especially oak, beech and MDF.) Chargers Your charger has been designed for a specic voltage. Always check that the mains voltage corresponds to the voltage on the rating plate. Warning! Never attempt to replace the charger unit with a regular mains plug. u Use your BLACK+DECKER charger only to charge the battery in the appliance with which it was supplied. Other batteries could burst, causing personal injury and damage. u Never attempt to charge non- rechargeable batteries. u If the supply cord is damaged, it must be replaced by the manufacturer or an authorised BLACK+DECKER Service Centre in order to avoid a hazard. u Do not expose the charger to water.u Do not open the charger.u Do not probe the charger.u The appliance/battery must be placed in a well ventilated area when charging. Electrical safety Symbols on the charger Read all of this manual carefully before using the appliance.
This tool is double insulated; therefore no earth wire is required. Always check that the power sup- ply corresponds to the voltage on the rating plate.6 ENGLISH (Original instructions)
The charger is intended for indoor use only. Labels on appliance The following symbols appear on this appliance along with the date code. Read all of this manual carefully before using the appliance
S010Q 14 / SSC140040
BHHV315J/B BHHV320J/B Only use with charger S010Q 14 / SSC140040BHHV520JF/BF/BFP Only use with charger S010Q 23 / SSC230040 Features This tool includes some or all of the following features. 1. On/off power switch 2. Power indicator 3. Dust chamber 4. Vacuum tube 5. Extendable crevice tool 6. Pet head attachment 7. Charging station 8. Wall charger Use Fitting the charging station (Fig. A) u Fit the charging station (7) to a suitable bench area (preferably near a power outlet) using the screws provided.u The unit can then be stored, when not in use, or during the charging procedure. Charging port (Fig. B, C) u Place the charger (8) into the charging port (8a) on the handle of the unit as shown in gure B. u Place the charging plug into a power outlet and switch on as shown in gure C. Using the pull out crevice tool (Fig. D) u Extend the crevice tool (5) as shown in gure D, until it clicks in place. Attaching the pet head (Fig. E, F) Warning! The unit needs to be switched off when the pet head is attached or detached.Warning! Do not use directly on pets.u Slide the vacuum tube opening into the opening of the motorized pet head (6), ensuring that the connectors (6c) engage with the recesses (6d). An audible click will be heard. Removing the pet head u Pull the motorized pet head release tabs (6a) outward to release them from the recesses (6b).u Pull the main unit from the pet head.Warning! The unit needs to be switched off when the pet head is attached or detached. Removing and clearing the beater bars (Fig. G) u To remove the beater bar from the pet head Depress the release button as shown in gure G.u The beater bar can now be removed.u The end pieces are also removable allowing you to clear the brushes from any hair or other debris that may have accumulated.u Wash the beater bar with warm soapy water as shown in gure G. Switching on and off (Fig. H) u Push the On/off power switch (1) to turn on the unit. u Push the On/off power (1) switch once again to engage the power boost.u Push the On/off power (1) switch to turn the unit off. Power indicator (Fig. I) u The power indicator (2) indicates the battery life available (2a) and when the lter needs cleaning (2b). Cleaning the lters (Fig. J, K, L) u Press the dust chamber release button (9) to release the dust chamber access door (10) as shown in gure J.u Empty the dust bowl (3) by lightly shaking over a suitable container as shown in gure K. u Lift the pre filter (11) out of the dust chamber (3) using the tab provided as shown in gure K. u Lift the filter (12) out of the dust chamber (3) using the tab provided as shown in gure L.u Wash the lters with warm soapy water as shown in gure u Allow the lters to dry naturally, using heat may cause the lters to distort. u Ret the lter (12) into the pre-lter (11) and then reinsert into the dust chamber (3). Never place the lters into the dust chamber backwards. u Close the dust chamber access door (10).Warning! Before performing any maintenance or cleaning on the appliance, unplug the appliance.From time to time wipe the appliance with a damp cloth. Do not use any abrasive or solvent-based cleaner. Do not immerse the appliance in water.
S010Q 23 / SSC2300407
(Übersetzung der ursprünglichen Anweisungen)DEUTSCHENGLISH(Original instructions) Maintenance Your BLACK+DECKER cordless appliance has been designed to operate over a long period of time with a minimum of main-tenance. Continuous satisfactory operation depends upon proper tool care and regular cleaning.Warning! Before performing any maintenance on cordless appliances:u Run the battery down completely if it is integral and then switch off.u Unplug the charger before cleaning it. Your charger does not require any maintenance apart from regular cleaning.u Regularly clean the ventilation slots in your appliance/charger using a soft brush or dry cloth.u Regularly clean the motor housing using a damp cloth. Do not use any abrasive or solvent-based cleaner. Replacing the lters The lters should be replaced every 6 to 9 months and when-ever worn or damaged. Replacement lters are available from your BLACK+DECKER dealer.u Remove the old lters as described above.u Fit the new lters as described above. Protecting the environment
Separate collection. Products and batteries marked with this symbol must not be disposed of with normal household waste.Products and batteries contain materials that can be recov-ered or recycled reducing the demand for raw materials.Please recycle electrical products and batteries according to local provisions. Further information is available atwww.2helpU.comTechnical Data BHHV315B BHHV315J BHHV320BVoltage 12V 12V 12VAmp hours 1.5Ah 1.5Ah 2.0AhWatt hours 16Wh 16Wh 24WhWeight (g) 1075 1080 1080 BHHV320J BHHV520JF BHHV520BF BHHV520BFP Voltage 12V 18V 18V 18V Amp hours 2.0Ah 2.0Ah 2.0Ah 2.0Ah Watt hours 24Wh 36Wh 36Wh 36Wh Weight (g) 1085 1220 1195 1220 Guarantee Black & Decker is condent of the quality of its products and offers consumers a 24 month guarantee from the dateof purchase. This guarantee is in addition to and in no way prejudices your statutory rights. The guarantee is valid within the territories of the Member States of the European Union and the European Free Trade Area.To claim on the guarantee, the claim must be in accordance with Black & Decker Terms and Conditions and you will need to submit proof of purchase to the seller or an authorised re-pair agent. Terms and conditions of the Black & Decker 2 year guarantee and the location of your nearest authorised repair agent can be obtained on the Internet at www.2helpU.com, orby contacting your local Black & Decker ofce at the address indicated in this manual.Please visit our website www.blackanddecker.co.uk to registeryour new Black & Decker product and receive updates on new products and special offers.(Übersetzung der ursprünglichen Anweisungen)DEUTSCH Verwendungszweck Ihre BLACK+DECKER BHHV315B, BHHV315J, BHHV320B, BHHV320J, BHHV520BF, BHHV520BFP, BHHV520JF Dustbuster® Handstaubsauger wurden zum Aufsaugen von Schmutz entwickelt. Diese Geräte sind nicht für den gewerblichen Einsatz vorgesehen. Lesen Sie diese Anleitung voll- ständig und aufmerksam durch, bevor Sie das Gerät verwenden. Sicherheitshinweise