B9481N3 - Oven NEFF - Free user manual and instructions
Find the device manual for free B9481N3 NEFF in PDF.
| Brand | NEFF |
| Model | B9481N3 |
| Category | Built-in electric oven |
| Cooking modes | Top/bottom heat, Large area grill, Small area grill, Circo-roast grill, Pizza position, Circo-roast, Top/bottom heat and fan, Bottom heat and fan |
| Temperature range | 50 to 250 °C |
| Grill position | Adjustable power (grill position) |
| Power supply | 240 V, 50/60 Hz |
| Oven light | Bulb 25 W, socket E14, heat-resistant up to 300 °C |
| Electronic clock | Timer, automatic shut-off, delayed programming |
| Accessories included | Baking/roasting grid, Enamel baking tray |
| Cleaning | Self-cleaning catalytic panels, smooth enamel, removable racks and door |
| Safety | Monitoring required, child safety (adult supervision), automatic shut-off, precautions for self-cleaning |
| Customer service | FR 01 40 10 42 10, CH 0848 840 040, B 070 222 143 |
| Energy compliance | Class determined according to EN50304 (circo-roast) |
Frequently Asked Questions - B9481N3 NEFF
User questions about B9481N3 NEFF
0 question about this device. Answer the ones you know or ask your own.
Ask a new question about this device
Download the instructions for your Oven in PDF format for free! Find your manual B9481N3 - NEFF and take your electronic device back in hand. On this page are published all the documents necessary for the use of your device. B9481N3 by NEFF.
USER MANUAL B9481N3 NEFF
natural_image
Close-up of a stainless steel oven with control knobs and indicator lights (no readable text or symbols)[en] Instruction manual ....3
[fr] Notice d'utilisation .....14
[it] Istruzioni per l'uso .....25
[es] Instrucciones de uso .....36
[el] Οδηγίες χρήσεως .....47
Built-in oven B9481N3
Four encastrable B9481N3
Important safety information....4
Causes of damage 5
Your new appliance....6
Function selector....6
Temperature selector 6
The electronic clock 6
Accessories 7
Before using the oven for the first time....7
Setting the clock 7
Baking out the oven 7
Cleaning the accessories....7
How to operate your oven....7
Type of heating and temperature 7
How to operate your electronic clock....8
Changing the settings....8
Cancelling settings 8
Setting the acoustic signal....8
Setting the electronic clock....8
Setting the timer....8
Setting the automatic timer....8
Care and cleaning 9
Cleaning agents 9
Catalytic cooking compartment panels....9
Removing the ceiling panel 9
Removing and fitting the appliance door.... 10
Cleaning the hook-in racks 10
Troubleshooting ....10
Replacing the oven light bulb.... 11
After-sales service 11
E number and FD number 11
Energy and environment tips....11
Saving energy.... 11
Environmentally-friendly disposal.... 11
Acrylamide in foodstuffs 12
Tips for using your appliance ....12
Baking....12
Roasting and grilling 13
Additional information on products, accessories, replacement parts and services can be found at
www.neff-international.com and in the online shop
www.neff-eshop.com
⚠️ Important safety information
Read these instructions carefully. Only then will you be able to operate your appliance safely and correctly. Retain the instruction manual and installation instructions for future use or for subsequent owners.
This appliance is only intended to be fully fitted in a kitchen. Observe the special installation instructions.
Check the appliance for damage after unpacking it. Do not connect the appliance if it has been damaged in transport.
Only a licensed professional may connect appliances without plugs. Damage caused by incorrect connection is not covered under warranty.
This appliance is intended for domestic use only. The appliance must only be used for the preparation of food and drink. The appliance must be supervised during operation. Only use this appliance indoors.
This appliance may be used by children over the age of 8 years old and by persons with reduced physical, sensory or mental capabilities or by persons with a lack of experience or knowledge if they are supervised or are instructed by a person responsible for their safety how to use the appliance safely and have understood the associated hazards.
Children must not play with, on, or around the appliance. Children must not clean the appliance or carry out general maintenance unless they are at least 8 years old and are being supervised.
Keep children below the age of 8 years old at a safe distance from the appliance and power cable.
Always slide accessories into the cooking compartment correctly. See "Description of accessories in the instruction manual.
Risk of fire!
■ Combustible items stored in the cooking compartment may catch fire. Never store combustible items in the cooking compartment. Never open the appliance door if there is smoke inside. Switch off the appliance and unplug it from the mains or switch off the circuit breaker in the fuse box.
A draught is created when the appliance door is opened. Greaseproof paper may come into contact with the heating element and catch fire. Do not place greaseproof paper loosely over accessories during preheating. Always weight down the greaseproof paper with a dish or a baking tin. Only cover the surface required with greaseproof paper. Greaseproof paper must not protrude over the accessories.
Risk of burns!
■ The appliance becomes very hot. Never touch the interior surfaces of the cooking compartment or the heating elements. Always allow the appliance to cool down. Keep children at a safe distance.
■ Accessories and ovenware become very hot. Always use oven gloves to remove accessories or ovenware from the cooking compartment.
■ Alcoholic vapours may catch fire in the hot cooking compartment. Never prepare food containing large quantities of drinks with a high alcohol content. Only use small quantities of drinks with a high alcohol content. Open the appliance door with care.
Risk of scalding!
■ The accessible parts become hot during operation. Never touch the hot parts. Keep children at a safe distance.
- When you open the appliance door, hot steam may escape. Open the appliance door with care. Keep children at a safe distance.
■ Water in a hot cooking compartment may create hot steam. Never pour water into the hot cooking compartment.
Risk of injury!
Scratched glass in the appliance door may develop into a crack. Do not use a glass scraper, sharp or abrasive cleaning aids or detergents.
Risk of electric shock!
- Incorrect repairs are dangerous. Repairs may only be carried out by one of our trained after-sales engineers. If the appliance is faulty, unplug the mains plug or switch off the fuse in the fuse box. Contact the after-sales service.
■ The cable insulation on electrical appliances may melt when touching hot parts of the appliance. Never bring electrical appliance cables into contact with hot parts of the appliance. - Do not use any high-pressure cleaners or steam cleaners, which can result in an electric shock.
- When replacing the cooking compartment bulb, the bulb socket contacts are live. Before replacing the bulb, unplug the appliance from the mains or switch off the circuit breaker in the fuse box.
A defective appliance may cause electric shock. Never switch on a defective appliance. Unplug the appliance from the mains or switch off the circuit breaker in the fuse box. Contact the after-sales service.
Risk of fire!
- Loose food residues, grease and meat juices may catch fire during the Self-cleaning cycle. Remove coarse dirt from the cooking compartment and from the accessories before every Self-cleaning cycle.
■ The appliance will become very hot on the outside during the Self-cleaning cycle. Never hang combustible objects, e.g. tea towels, on the door handle. Do not place anything against the front of the oven. Keep children at a safe distance.
Risk of burns!
■ The cooking compartment will become very hot during the Self-cleaning cycle. Never open the appliance door or move the locking latch by hand. Allow the appliance to cool down. Keep children at a safe distance.
The appliance will become very hot on the outside during the Self-cleaning cycle. Never touch the appliance door. Allow the appliance to cool down. Keep children at a safe distance.
Risk of serious damage to health!
The appliance will become very hot during the Self-cleaning cycle. The non-stick coating on baking trays and tins is destroyed and noxious gases are released. Never let non-stick baking trays and tins go through the Self-cleaning cycle. Only enamelled accessories may be cleaned at the same time.
Causes of damage
Caution!
■ Accessories, foil, greaseproof paper or ovenware on the cooking compartment floor: do not place accessories on the cooking compartment floor. Do not cover the cooking compartment floor with any sort of foil or greaseproof paper. Do not place ovenware on the cooking compartment floor if a temperature of over 50 °C has been set. This will cause heat to accumulate. The baking and roasting times will no longer be correct and the enamel will be damaged.
■ Water in a hot cooking compartment: do not pour water into the cooking compartment when it is hot. This will cause steam. The temperature change can cause damage to the enamel.
■ Moist food: do not store moist food in the cooking compartment when it is closed for prolonged periods This will damage the enamel.
- Fruit juice: when baking particularly juicy fruit pies, do not pack the baking tray too generously. Fruit juice dripping from the baking tray leaves stains that cannot be removed. If possible, use the deeper universal pan.
■ Cooling with the appliance door open: only allow the cooking compartment to cool when it is closed. Even if the appliance door is only open a little, front panels of adjacent units could be damaged over time.
■ Very dirty door seal: If the door seal is very dirty, the appliance door will no longer close properly when the appliance is in use. The fronts of adjacent units could be damaged. Always keep the door seal clean.
■ Appliance door as a seat, shelf or worktop: Do not sit on the appliance door, or place or hang anything on it. Do not place any cookware or accessories on the appliance door.
- Inserting accessories: depending on the appliance model, accessories can scratch the door panel when closing the appliance door. Always insert the accessories into the cooking compartment as far as they will go.
- Carrying the appliance: do not carry or hold the appliance by the door handle. The door handle cannot support the weight of the appliance and could break.
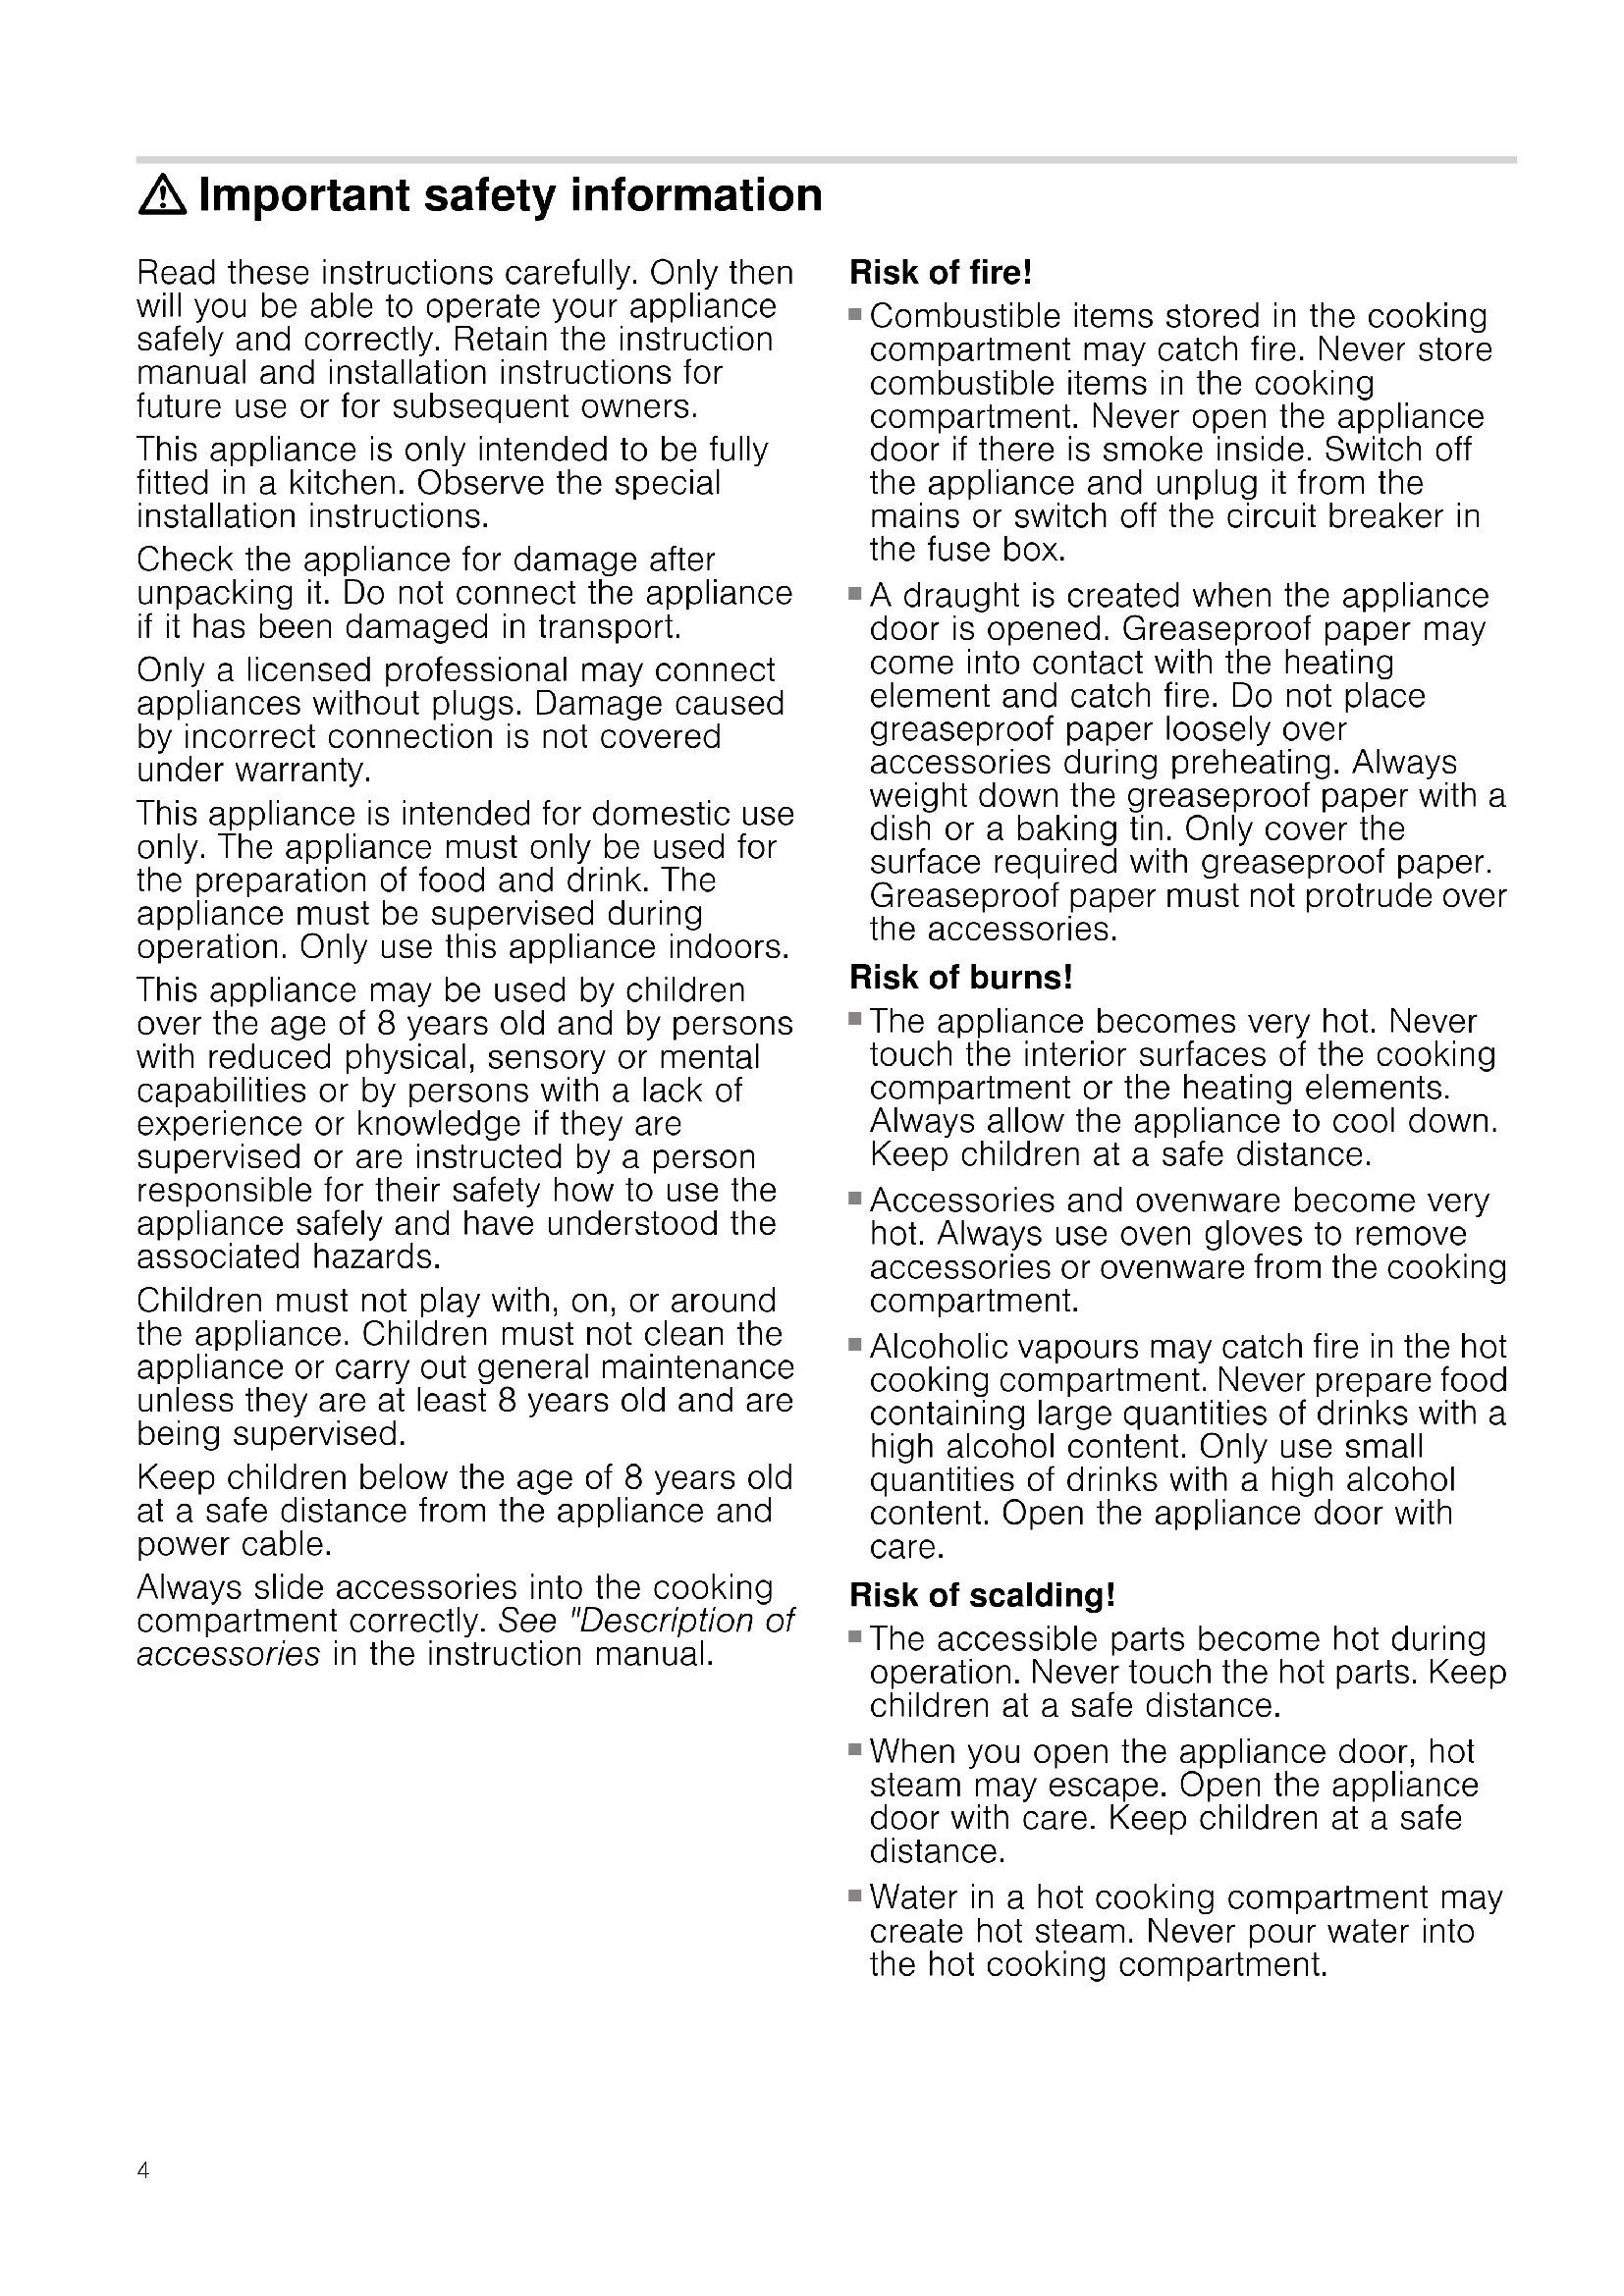
Your new appliance
Get to know your appliance. You will find information on the control panel, the oven, types of heating and accessories.
Explanation
| 1 Function selector |
| 2 Temperature selector |
| 3 Indicator light |
| 4 Display panel and control buttons |
Function selector
Use the function selector to set the type of heating.
Setting Use
| o | Off position The oven switches off. |
| Top/bottom heat For cakes, bakes and lean joints.The heat is emitted evenly from above and below. | |
| Grill, large area For grilling steaks, sausages, toast and pieces of fish. The whole area below the grill heating element becomes hot. | |
| Grill, small area For grilling small amounts of steaks, sausages, toast and pieces of fish.The centre part of the grill heating element becomes hot. | |
| Circulated air grillingJoints of meat, poultry and whole fish. The grill heating element and the fan switch on and off alternately.The fan causes the hot air to circulate around the dish. | |
| Circotherm intensiveFor the quick preparation of frozen products without preheating,e.g. pizza, chips or strudel. The bottom heating element and the ring heating element in the back panel heat up. | |
| Hot air* For cakes and pastries on one or two levels. The fan distributes the heat of the ring heating element in the rear wall evenly throughout the cooking compartment. |
* Type of heating used to determine the energy efficiency class in accordance with EN50304.
| Setting Use | ||
| Top/bottom heat and Hot air | For cakes and pastries on one or two levels. The fan distributes heat from the heating elements evenly in the cooking compartment. | |
| Bottom heat and Hot air | For cakes with moist topping. The fan distributes heat from the bottom heating element evenly in the cooking compartment. | |
* Type of heating used to determine the energy efficiency class in accordance with EN50304.
When you set the type of heating, the oven light in the cooking compartment switches on.
Temperature selector
The temperature selector is used to set the temperature or grill setting.
Setting Meaning
| ● | Off position The oven does not heat up. | |
| 50-250 | Temperature range | The temperature in the cooking compartment in °C. |
| Grill setting The grill setting for the grill. | ||
The indicator light is lit when the oven is heating up. It goes out during heating pauses.
The electronic clock
You can use the electronic clock to control your oven. You can therefore preselect, for example, the time at which the oven is to switch on or at which time the automatic timer is to end the baking or cooking process. The electronic clock can also be used as a timer.

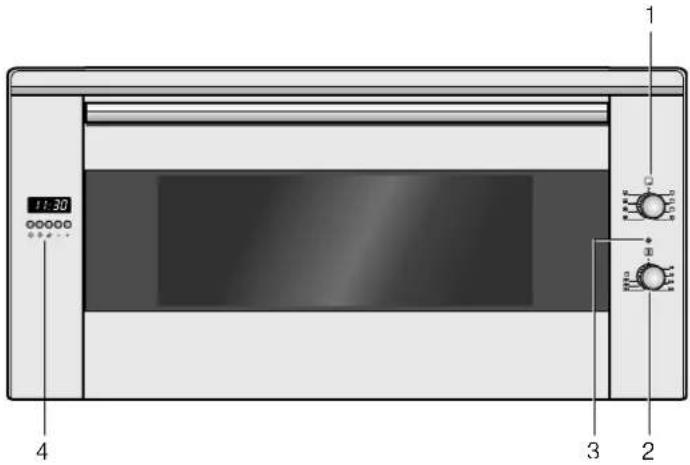
Function buttons
Select the desired function by pressing the appropriate button. Use the + and - buttons to set the cooking time and or clock time. You can read the values that you have set in the display panel.
Symbol Meaning Use
| Timer Setting the duration | ||
| →| | End of operating time | Setting the time for automatic switch-off |
| |→| | Operating time duration | Setting the time until automatic switch-off |
| - | Minus | Reducing the duration or time |
| + | Plus | Increasing the duration or time |
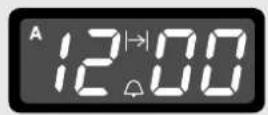
Accessories
The accessories can be inserted into the cooking compartment at 4 different levels. Always insert them as far as they will go so that the accessories do not touch the door panel. Ensure that the accessories have always been inserted into the cooking compartment correctly.
You can pull out the accessories two thirds of the way without them tipping. This allows dishes to be removed easily.
The accessories may become deformed when they become hot. As soon as they have cooled down, the deformation disappears with no effect on the function.
You can buy accessories from the after-sales service, from specialist retailers or online.
Accessories Description
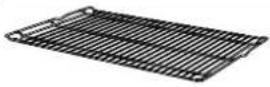
Baking and roasting shelf
For ovenware, cake tins, joints, grilled items, frozen meals.
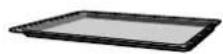
Enamelled baking tray
For moist cakes, pastries, frozen meals and large roasts. Can also be used as a drip tray to collect run-off fat.
Before using the oven for the first time
In this section, you can find out what you must do before using your appliance to prepare food for the first time. Read the Safety information section beforehand.
Remove the appliance packaging and dispose of it appropriately.
Setting the clock
- Press the and function buttons simultaneously.
- Use the + and - function buttons to set the current time.
After a few seconds, the time is saved.
Baking out the oven
Precleaning the oven
- Remove the accessories and the hook-in racks from the cooking compartment.
- Completely remove any leftover packaging, e.g. small pieces of polystyrene, from the cooking compartment.
- Some parts are covered with a protective film. Remove this scratch protection film.
- Clean the outside of the appliance with a soft, damp cloth.
- Clean the cooking compartment with hot soapy water.
Heating up the oven
To remove the new cooker smell, heat up the oven when it is empty and closed.
- Turn the function selector to the Top/bottom heating operating mode.
- Turn the temperature selector to the maximum temperature.
- Switch the oven off after 40 minutes.
Recleaning the oven
- Clean the cooking compartment with hot soapy water.
- Refit the hook-in racks.
Cleaning the accessories
Before using the accessories, clean them thoroughly using a cloth and warm soapy water.
How to operate your oven
You have the option of adjusting your oven to a range of different settings. You can control the oven using the electronic clock.
Type of heating and temperature
- Use the function selector to set the type of heating.
- Use the temperature selector to set the temperature or grill setting.
The oven begins to heat up.
Switching off the oven
Turn the function selector to the off position.
Changing the settings
The type of heating and temperature or grill setting can be changed at any time using their respective selectors.
How to operate your electronic clock
You can operate the electronic clock with one hand. After pressing the appropriate function button, set the time or cooking time with the + and - buttons. The value which is set is adopted.
You can also change or cancel your settings during operation and thereby cancel the process.
Changing the settings
- Press the appropriate function button.
The corresponding symbol lights up
- Change your settings with the + and - buttons.
Cancelling settings
- Press the appropriate function button.
The corresponding symbol lights up
-
Press the - button until 0.00 is shown in the display panel.
-
If the automatic timer was in operation, switch off the oven.
Setting the acoustic signal
You can choose between three sounds provided no programme is running.
Press the - button several times until the desired sound is reached.
The sound is adopted.
Setting the electronic clock
After the appliance has been connected to the mains for the first time or after a power cut, three zeros are shown in the display.
Setting the clock
You can only set the clock when no other function is in operation.
-
Press the and function buttons simultaneously.
-
Use the + and - function buttons to set the current time.
Setting the timer
The timer is a reverse counting timer which produces an audible signal once the duration set has elapsed. The timer has no influence on the functions of the oven.
Setting the duration
-
Press the 🔒 button.
-
Use the + and - function buttons to set the duration.
The △ symbol is shown in the display.
- To show the remaining duration in the display, press the 🔒 button.
An audible signal sounds once the time has elapsed.
Setting the automatic timer
The electronic clock can be used to switch the oven on or off automatically.
Automatic switch-off
Setting the operating time duration
-
Turn the function selector to the desired operating mode.
-
Turn the temperature selector to the desired temperature. The oven switches on.
-
Press the function button.
-
Use the + and - buttons to set the operating time duration. The oven starts and the A symbol and the current clock time appear in the display panel.
The operating time duration has elapsed
A signal sounds and the A symbol flashes with the current clock time in the display panel.
The oven switches off.
To end the signal early, press the and buttons.
Automatic switch-on and switch-off
Baking or roasting starts for the set duration at a later time which you chose.
Setting the operating time duration
-
Turn the function selector to the desired operating mode.
-
Turn the temperature selector to the desired temperature.
The oven switches on.
-
Press the function button.
-
Use the + and - buttons to set the operating time duration. The oven starts and the A symbol and the current clock time appear in the display panel.
Setting the end of operating time
-
Press the I button. The total of the current clock time and the operation duration is shown in the display panel.
-
Press and hold the button and use the + and - buttons to change the end of the operating time.
The oven switches off and starts later automatically. The A symbol and the current clock time appear in the display panel.
The operating time duration has elapsed
A signal sounds and the A symbol flashes with the current clock time in the display panel.
The oven switches off.
To end the signal early, press the and buttons.
Care and cleaning
With good care and cleaning, your oven will remain clean and fully-functioning for a long time to come. Here we will explain how to maintain and clean your oven correctly.
Notes
■ Slight differences in the colours on the front of the oven are caused by the use of different materials, such as glass, plastic and metal.
■ Shadows on the door panel which look like streaks, are caused by reflections made by the oven light.
Enamel is baked on at very high temperatures. This can cause some slight colour variations. This is normal and does not affect their function. The edges of thin trays cannot be completely enamelled. As a result, these edges can be rough. This will not impair the anti-corrosion protection.

Risk of electric shock!
Do not use any high-pressure cleaners or steam cleaners, which can result in an electric shock.

Risk of burns!
The appliance becomes very hot. Never touch the interior surfaces of the cooking compartment or the heating elements. Always allow the appliance to cool down. Keep children at a safe distance.
Cleaning agents
Damage to the various different surfaces caused by using the wrong cleaning agent can be avoided by observing the following instructions.
Do not use
■ harsh or abrasive cleaning agents
■ cleaning agents with high concentrations of alcohol
■ hard scouring pads and sponges
■ high-pressure cleaners or steam cleaners.
Wash new sponge cloths thoroughly before use.
Area Cleaning agents
| Appliance exterior Hot soapy water: | |
| Clean with a dish cloth and dry with a soft cloth. Do not use glass cleaners or glass scrapers. | |
| Stainless steel Hot soapy water: | |
| Clean with a dish cloth and dry with a soft cloth. Remove flecks of limescale, grease, starch and albumin (e.g. egg white) immediately. Corrosion can form under such residues. | |
| Special stainless steel cleaning products suitable for hot surfaces are available from our after-sales service or from specialist retailers. Apply a very thin layer of the cleaning product with a soft cloth. | |
| Aluminium and plastic | Glass cleaner: |
| Clean with a soft cloth. | |
Area Cleaning agents
| Enamel surfaces(smooth surfaces) | To facilitate cleaning, you can switch on the interior lighting and detach the appliance door if necessary. Apply commercially available washing-up liquid or a vinegar solution with a soft, damp cloth or chamois; dry with a soft cloth. Loosen baked-on food residues with a damp cloth and detergent.We recommend using oven cleaning gel if the oven is very dirty. This can be applied to the affected area. Leave the cooking compartment open after cleaning to allow it to dry. |
| Self-cleaning surfaces(rough surfaces) | Please see the notes in section:Self-cleaning surfaces |
| Door panels Glass cleaner:Clean with a soft cloth. Do not use a glass scraper. | |
| Glass cover for the oven light bulb | Hot soapy water:Clean with a dish cloth. |
| SealDo not remove. | Hot soapy water:Clean with a dish cloth. Do not scour. |
| Shelves Hot soapy water:Soak and clean with a dish cloth or brush. | |
| Accessories Hot soapy water:Soak and clean with a dish cloth or brush. | |
Catalytic cooking compartment panels
The catalytic cooking compartment panels are coated with self-cleaning enamel.
The surfaces clean themselves while the oven is in operation. Larger splashes will only be removed after the oven has been used several times.
Self-cleaning surfaces
The side walls are covered with catalytic panelling. Never clean these surfaces with oven cleaner. Slight discolouration of the enamel does not affect automatic self-cleaning.
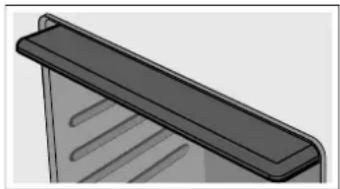
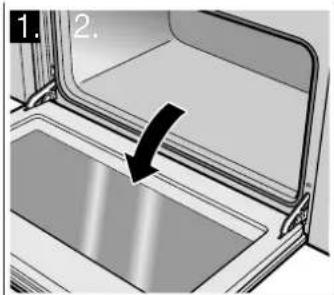
Removing the ceiling panel
For ease of cleaning, you can remove the ceiling panel.
natural_image
3D rendering of a black rectangular object with horizontal lines, possibly a shelf or panel (no text or symbols visible)Removing and fitting the appliance door
You can remove the appliance door to clean it more thoroughly.
Removing the appliance door
Risk of injury!
Whenever the hinges are not locked, they snap shut with great force. Make sure that, when unhooking the oven door, the locking levers are folded up completely.
- Open the oven door completely.
- Fold up the left and right locking levers. Make sure that, when the locking levers are folded up, you do not close the oven door. The hinges may become bent which may cause damage to the enamel.
natural_image
Diagram of a door opening with a black arrow pointing to the interior panel (no text or symbols)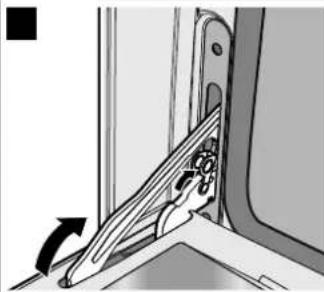
natural_image
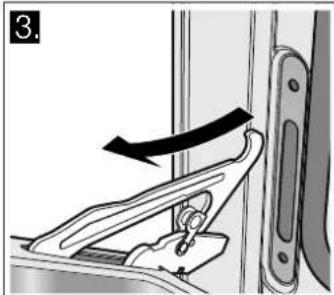
Mechanical assembly diagram showing a lever mechanism with an arrow indicating motion (no text or symbols present)- Open the oven door at an angle. Hold it on the right and left with both hands. Close it just a little further and pull it out.
natural_image
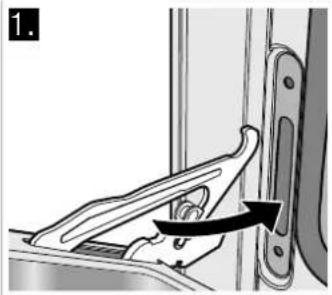
Mechanical assembly diagram showing a lever mechanism with an arrow indicating motion (no text or symbols present)Fitting the appliance door
- When hooking in the oven door, ensure that the notch on the bottom of the hinge locks into the slot.
- Fold down both locking levers on the left and right again and close the oven door.
natural_image
Mechanical assembly diagram showing a lever mechanism with an arrow indicating motion (no text or symbols present)
natural_image
Mechanical assembly diagram showing a hand operating a tool with a magnified inset (no text or symbols)Risk of injury!
Do not reach into the hinge if the oven door falls out unintentionally or a hinge snaps closed. Call the after-sales service.
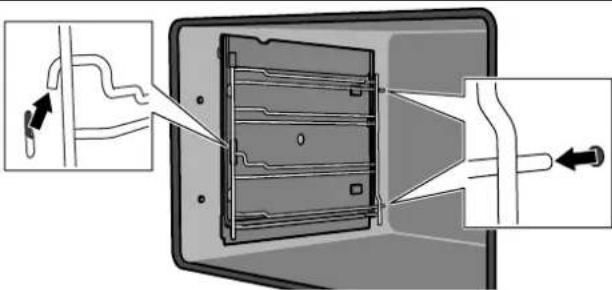
Cleaning the hook-in racks
You can remove the hook-in racks for easier cleaning.
The hook-in racks in each case are fixed to the side walls of the cooking compartment at three points.
Removing the hook-in racks
- Lift the front hook out of the hole.
- Pull the hook-in rack forwards out of the rear holes.
Cleaning the hook-in racks
Clean the hook-in racks with washing-up liquid and a sponge or brush.
Inserting the hook-in rack
- Insert the hook-in rack into the holes in the back wall.
- Hook the front hook into the hole.
Troubleshooting
Malfunctions often have simple explanations. Please read the following notes before calling the after-sales service.
Problem Possible cause Notes/remedy
| The appliance does not work. | Circuit breaker faulty. | Look in the fuse box and check that the circuit breaker for the cooker is in working order. |
| Power cut Check whether the kitchen light works. | ||
| The oven cannot be switched off. | The electronics are faulty. | Switch off the circuit breaker. Contact the after-sales service. |
| The clock display flashes. | Power cut Reset the clock. | |
| The oven does not heat up. | Circuit breaker faulty. | Check the circuit breaker and replace if necessary. |
Problem Possible cause Notes/remedy
| The function selector has not been set. | Set the function selector. | |
| The door glass is broken. | Switch off the appliance.Contact the after-sales service. | |
| Fruit juice or albumen stains on enamelled surfaces. | Moist cake or meat juices. | Harmless change in the enamel, cannot be removed. |
Risk of electric shock!
Incorrect repairs are dangerous. Repairs may only be carried out by one of our trained after-sales engineers.
Incorrect repairs may result in significant risk to the user.
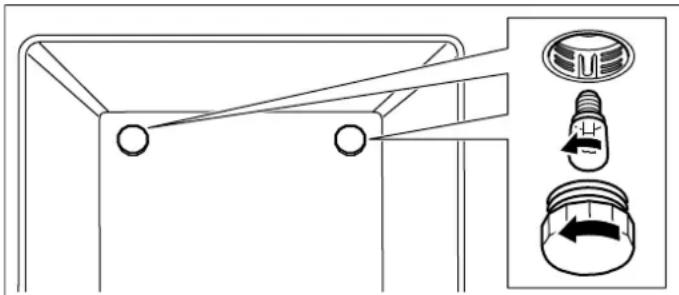
Replacing the oven light bulb
If the bulb in the oven light fails, it must be replaced.
Replacement heat-resistant bulbs can be obtained from the after-sales service or from specialist retailers. Please supply your appliance's E number and FD number. Do not use any other type of bulb.
- Switch off the appliance at the circuit breaker or pull out the mains plug.
- Open the appliance door.
- Lay a tea towel in the cold cooking compartment to prevent damage.
- Unscrew the glass cover from the defective oven light bulb inside the cooking compartment by turning it anti-clockwise.
natural_image
Pure technical diagram of a mechanical component with no text, numbers, or symbols- Replace the oven light bulb with one of the same type.
Voltage: 240 V;
Power: 25 W;
Thread: E14;
Temperature resistance: 300 °C
- Screw the glass cover of the oven light bulb back on.
- Remove the tea towel and switch the circuit breaker back on or plug in the mains plug.
Press the function button for the oven lighting until it locks into place in order to check whether the oven lighting is working properly.
After-sales service
Our after-sales service is there for you if your appliance needs to be repaired. We will always find the right solution in order to avoid unnecessary visits from a service technician.
E number and FD number
When calling us, please give the product number (E no.) and the production number (FD no.) so that we can provide you with the correct advice. The rating plate containing these numbers is found on the side of the oven door. To save time, you can make a note of the number of your appliance and the telephone number of the after-sales service in the space below, should it be required.
E no.
FD no.
After-sales service
Please note that there will be a fee for a visit by a service technician in the event of a malfunction, even during the warranty period.
Please find the contact data of all countries in the enclosed customer service list.
To book an engineer visit and product advice
GB 0844 8928989
Calls from a BT landline will be charged at up to 3 pence per minute. A call set-up fee of up to 6 pence may apply.
IE 01450 2655
0.03 € per minute at peak. Off peak 0.0088 € per minute.
Rely on the professionalism of the manufacturer. You can therefore be sure that the repair is carried out by trained service technicians who carry original spare parts for your appliances.
Energy and environment tips
Here you can find tips on how to save energy when baking and roasting and how to dispose of your appliance properly.
Saving energy
■ Only preheat the oven when it is specified in the recipe that you should do so.
■ Use dark, black lacquered or enamelled baking tins. They absorb the heat particularly well.
- Open the oven door as infrequently as possible while you are cooking, baking or roasting.
It is best to bake several cakes one after the other. The oven is still warm. This reduces the baking time for the second cake. You can also place two loaf tins next to each other.
For longer cooking times, you can switch the oven off 10 minutes before the end of the cooking time and use the residual heat to finish cooking.
Environmentally-friendly disposal
Dispose of packaging in an environmentally-friendly manner.
This appliance is labelled in accordance with European Directive 2012/19/EU concerning used electrical and electronic appliances (waste electrical and electronic equipment - WEEE). The guideline determines the framework for the return and recycling of used appliances as applicable throughout the EU.
Acrylamide in foodstuffs
Acrylamide is mainly produced in grain and potato products prepared at high temperatures, such as potato crisps, chips, toast, bread rolls, bread or fine baked goods (biscuits, gingerbread, cookies).
Tips for keeping acrylamide to a minimum when preparing food
| General | ■ Keep cooking times to a minimum.■ Cook meals until they are golden brown, but not too dark.■ Large, thick pieces of food contain less acrylamide. |
| Baking With Top/bottom heating max. 200 °C.With 3D hot air or hot air max.180 °C. | |
| Biscuits With Top/bottom heating max. 190 °C.With 3D hot air or hot air max. 170 °CEgg or egg yolk reduces the production of acrylamide. | |
| Oven chips Spread out a single layer evenly on the baking tray. Cook at least 400 g at once on a baking tray so that the chips do not dry out. | |
Tips for using your appliance
Here you will find a selection of tips on ovenware and preparation methods.
Notes
■ Use the accessories provided. Additional accessories may be obtained as special accessories from specialist retailers or from the after-sales service.
Before using the oven, remove any unnecessary accessories and ovenware from the cooking compartment.
■ Always use an oven cloth or oven gloves when taking accessories or cookware out of the cooking compartment.
Baking
Baking tins
■ Use light-coloured baking tins and trays wherever possible.
■ Always place the baking tins on the middle of the baking and roasting wire rack.
Baking tips
| How to establish whether sponge cake is baked through. | Approx. 10 minutes before the end of the baking time stated in the recipe, insert a cocktail stick into the cake at its deepest point. If no cake mixture sticks to the wood, the cake is ready. |
| The cake collapses. Use less fluid next time or set the oven temperature 10 degrees lower. Note the stirring times indicated in the recipe. | |
| The cake has risen high in the middle and less around the edges. | Do not grease the sides of the springform cake tin. After baking, carefully loosen the cake using a knife. |
| The cake is too dark on the top. Place it lower in the oven, select a lower temperature and bake the cake for a little longer. | |
| The cake is too dry. When it is done, make small holes in the cake using a cocktail stick. Then drizzle fruit juice or an alcoholic drink over it. Next time, set the temperature 10 degrees higher and reduce the baking time. | |
| The bread or cake (e.g. cheesecake) looks good but is sticky on the inside (soggy with wet streaks). | Next time, use less liquid and bake at a lower temperature for slightly longer. For cakes with a moist topping, bake the base first. Sprinkle it with almonds or bread crumbs and then place the topping on top. Take care to follow recipes and baking times. |
| The pastries are not evenly browned. | Select a slightly lower temperature to ensure that the cake is baked more evenly. Excess greaseproof paper can affect the air circulation. Always cut the greaseproof paper to suit the size of the baking tray. |
| The bottom of a fruit flan is too light. Place the cake one level lower the next time. | |
| The fruit juice overflows. Next time, use the deeper universal pan, if you have one. | |
| Small baked items made out of yeast dough stick to one another during baking. | There should be a gap of approx. 2 cm around each item. This gives enough space for the baked items to expand and turn brown on all sides. |
| Condensation forms when you bake moist cakes. | Baking may create water vapour, which escapes above the door. The steam may settle and form water droplets on the control panel or on the fronts of adjacent units. This is a natural process. |
Roasting and grilling
Ovenware
You may use any heat-resistant ovenware. Always place the ovenware in the middle of the wire rack. The enamelled baking tray is also suitable for large roasts.
Roasting tips
■ A a lower temperature produces more even browning.
■ Depending on the size of the joint, add 2 or 3 tablespoons of liquid to lean meat and 8 to 10 tablespoons of liquid to pot roasts.
■ When cooking duck or goose, pierce the skin on the underside of the wings to allow the fat to run out.
■ Poultry will turn out particularly crispy and brown if you baste it towards the end of the roasting time with butter, salted water or orange juice.
■ Turn pieces of meat halfway through the cooking time.
- When the roast is ready, turn off the oven and allow it to rest for an additional 10 minutes. This will allow the meat juices to distribute themselves better inside the roast.
- When roasting large pieces of meat, you may find that the amount of steam and condensation on the oven door is more than usual. This is a normal occurrence which has no effect on the oven's performance. Once roasting is complete, dry the oven door and window with a cloth.
If you are roasting on the wire rack, insert the enamelled baking tray into shelf position 1 to collect the drips of fat.
Grilling tips
If possible, grill items should be of equal thickness. They should be at least 2 to 3cm thick. This ensures that they brown evenly while also remaining succulent.
Place the food to be grilled in the centre of the wire rack. Pour a little water into the enamelled baking tray and insert this into the shelf position underneath the grill to collect the drips of fat. Never place it on the cooking compartment floor.
- Drizzle some oil over the food to be grilled before you place it on the wire rack under the grill.
If the food to be grilled is thin, turn it over halfway through grilling; if it is thick, turn it over several times during grilling. Use tongs when turning the food to avoid piercing it and, in the case of meat, to keep the meat juices inside the meat.
■ Dark meats such as lamb and beef brown better and more quickly than light meats such as pork and veal.
Roasting tips
| How can you tell when the roast is ready? | Use a meat thermometer (available from specialist retailers) or carry out a "spoon test". Press down on the roast with a spoon. If it feels firm, it is ready. If the spoon can be pressed in, it needs to be cooked for a little longer. |
| The roast is too dark and the crackling is burnt in places. | Check the shelf position and temperature. |
| The roast looks good but the juices are burnt. | Next time, use a smaller roasting dish and add more liquid. |
| The roast looks good, but the juices are too clear and watery. | Next time, use a larger roasting dish and add less liquid. |
fr
Table des matières
Position Signification
natural_image
Illustration of a black rectangular object with horizontal lines, possibly a shelf or panel (no text or symbols visible)natural_image
Diagram of a door opening with a black arrow pointing to a surface, labeled '1.' and '2.' (no text or symbols on the diagram itself)
natural_image
Diagram of a mechanical clamp or bracket assembly with an arrow indicating direction (no text or symbols present)natural_image
Mechanical assembly diagram showing a lever mechanism with an arrow indicating motion (no text or symbols present)natural_image
Mechanical assembly diagram showing a lever mechanism with an arrow indicating motion (no text or symbols present)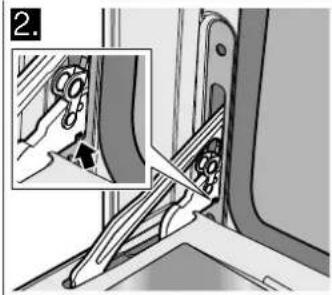
natural_image
Mechanical assembly diagram showing a hand turning a tool into a bracket (no text or symbols visible)Risque de blessure!
Nettoyage des grilles supports
Tasti funzione
natural_image
Illustration of a black rectangular object with horizontal lines, possibly a shelf or panel (no text or symbols visible)natural_image
Diagram of a door opening with a black arrow pointing to the interior panel (no text or symbols)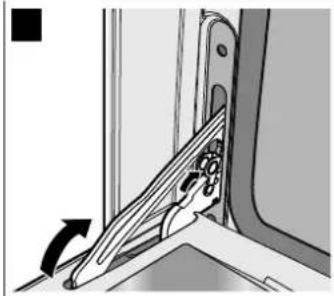
natural_image
Mechanical assembly diagram showing a lever mechanism with an arrow indicating motion (no text or symbols present)natural_image
Mechanical assembly diagram showing a lever mechanism with an arrow indicating motion (no text or symbols present)natural_image
Mechanical assembly diagram showing a lever mechanism with an arrow indicating motion (no text or symbols present)
natural_image
Mechanical assembly diagram showing a hand operating a tool with a magnified inset highlighting the component (no text or symbols present)natural_image
Pure mechanical diagram showing lever and knob components without any text or symbolsnatural_image
3D rendering of a mechanical component with ribbed texture (no text or symbols)natural_image
Diagram of a refrigerator interior showing a door, glass pan, and lid with an arrow pointing to the lid (no text or symbols present)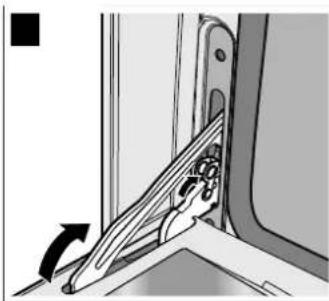
natural_image
Mechanical assembly diagram showing a lever mechanism with an arrow indicating motion (no text or symbols present)natural_image
Mechanical assembly diagram showing a lever mechanism with an arrow indicating motion (no text or symbols present)natural_image
Mechanical assembly diagram showing a lever mechanism with an arrow indicating motion (no text or symbols present)
natural_image
Mechanical assembly diagram showing a hand turning a tool into a bracket (no text or symbols visible)natural_image
Pure mechanical diagram showing a lever mechanism with three labeled parts (no text or symbols)www.neff-international.com kai oto online-shop:
www.neff-eshop.com
Πλήκτρα λειτουργιών
natural_image
3D rendering of a mechanical component with layered structure (no text or symbols)natural_image
Diagram of a door frame with an arrow pointing to a lid panel (no text or symbols)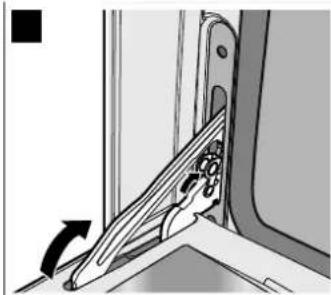
natural_image
Mechanical assembly diagram showing a lever mechanism with an arrow indicating motion (no text or symbols present)natural_image
Mechanical assembly diagram showing a lever mechanism with an arrow indicating motion (no text or symbols present)natural_image
Mechanical assembly diagram showing a lever mechanism with an arrow indicating motion (no text or symbols present)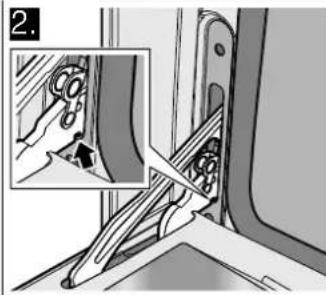
natural_image
Mechanical assembly diagram showing a hand operating a tool with a magnified inset highlighting the component (no text or symbols present)natural_image
Technical line drawing of a mechanical component with three labeled parts (no text or symbols present)بعد أن ي Currently Limited Luxury, choosing it. I’ve decided to make 10 decafterly doing all the French
| نصائح لتقيل الأクリلاميد إلى الحد الأدنى عند تحضير الطعام | |
| ▪ قلّل أوقات الطهي إلى الحد الأدنى.▪ قم بطهي الوجبات حتى يصبح لوynesها بني ذهperi وليس قاتما للغابة.▪ القPGع الكبيرة من الطعام تحتوي على أكريلاميد أقل.▪ | نقط عامة |
| ▪ باستخدم وضع التсхخين العلوي/السفلي بحد أقصى 200°م.▪ باستخدم الهواء الساخن ثلاثى الأبعاد أو الهواء الساخن على درجة حرارة 180°م بحد أقصى. | إعداد المخبو Zusات |
| ▪ باستخدم وضع التсхخين العلوي/السفلي بحد أقصى 190°م.▪ باستخدم الهواء الساخن ثلاثى الأبعاد أو الهواء الساخن على درجة حرارة 170°م بحد أقصى.▪ البيض أو صفار البيض يقال من إنتاج مادة الأクリلاميد. | ب.بستويت |
| ▪ قم بتوzigع طبقة واحدة منها بالتساوي على لوح الخbéizers. قم بieżداد 400 جم على الأقل على كل لوح، وذلك حتى لا تجف. بطاطسIlIlIlIlIlIlIlIlIlIlIlIlIlIlIlIlIlIlIlIlIlIlIlIlIlIlIlIlIlIlIlIlIlIlIlIlIlIlIlIlIlIlIlIlIlIlIlIlIlIlIlIlIlIlIlIlIlIlIlIlIlIlIlIlIlIlIlIlIlIlIlIlIlIlIlIlIlIlIlIlIlIlIlIlIlIlIlIlIlIlIlIlIlIlIlIlIlIlIlIlIIlIlIlIlIlIlIlIlIlIlIlIlIlIlIlIlIlIlIlIlIlIlIlIlIlIlIlIlIlIlIlIlIlIlIlIlIlIlIlIlIlIlIlIlIlIlIlIlIlIlIlIlIlIlIlIlIlIlIlIlIlIlIlIlIlIlIlIlIlIlIlIlIlIlIlIlIlIlIlIlIlIlIlIlIlIlIlIlIlIlIlIlIlIlIlIlIlIlIlIIIlIlIlIlIlIlIlIlIlIlIlIlIlIlIlIlIlIlIlIlIlIlIlIlIlIlIlIlIlIlIlIlIlIlIlIlIlIlIlIlIlIlIlIlIlIlIlIlIlIlIlIlIlIlIlIlIlIlIlIlIlIlIlIlIlIlIlIlIlIlIlIlIlIlIlIlIlIlIlIlIlIlIlIlIlIlIlIlIlIlIlIlIlIlIlIlIlIlIlilIlIlIlIlIlIlIlIlIlIlIlIlIlIlIlIlIlIlIlIlIlIlIlIlIlIlIlIlIlIlIlIlIlIlIlIlIlIlIlIlIlIlIlIlIlIlIlIlIlIlIlIlIlIlIlIlIlIlIlIlIlIlIlIlIlIlIlIlIlIlIlIlIlIlIlIlIlIlIlIlIlIlIlIlIlIlIlIlIlIlIlIlIlIlIlIlIlIlIlllIlIlIlIlIlIlIlIlIlIlIlIlIlIlIlIlIlIlIlIlIlIlIlIlIlIlIlIlIlIlIlIlIlIlIlIlIlIlIlIlIlIlIlIlIlIlIlIlIlIlIlIlIlIlIlIlIlIlIlIlIlIlIlIlIlIlIlIlIlIlIlIlIlIlIlIlIlIlIlIlIlIlIlIlIlIlIlIlIlIlIlIlIlIlIlIlIlIlIlILIlIlIlIlIlIlIlIlIlIlIlIlIlIlIlIlIlIlIlIlIlIlIlIlIlIlIlIlIlIlIlIlIlIlIlIlIlIlIlIlIlIlIlIlIlIlIlIlIlIlIlIlIlIlIlIlIlIlIlIlIlIlIlIlIlIlIlIlIlIlIlIlIlIlIlIlIlIlIlIlIlIlIlIlIlIlIlIlIlIlIlIlIlIlIlIlIlIlIl | بطاطسIlIlIlIlIlIlIlIlIlIlIlIlIlIlIlIlIlIlIlIlIlIlIlIlIlIlIlIlIlIlIlIlIlIlIlIlIlIlIlIlIlIlIlIlIlIlIlIlIlIlIlIlIlIlIlIlIlIlIlIlIlIlIlIlIlIlIlIlIlIlIlIlIlIlIlIlIlIlIlIlIlIlIlIlIlIlIlIlIlIlIlIlIlIlIlIlIIlIlIIlIlIlIlIlIlIlIlIlIlIlIlIlIlIlIlIlIlIlIlIlIlIlIlIlIlIlIlIlIlIlIlIlIlIlIlIlIlIlIlIlIlIlIlIlIlIlIlIlIlIlIlIlIlIlIlIlIlIlIlIlIlIlIlIlIlIlIlIlIlIlIlIlIlIlIlIlIlIlIlIlIlIlIlIlIlIlIlIlIlIlIlIlIlIlIlIIlIlIIIIIIIIIIIIIIIIIIIIIIIIIIIIIIIIIIIIIIIIIIIIIIIIIIIIIIIIIIIIIIIIIIIIIIIIIIIIIIIIIIIIIIIIIIIIIIIIIIIIIIIIIIIIIIIIIIIIIIIIIIIIIIIIIIIIIIIIIIIIIIIIIIIIIIIIIIIIIIIIIIIIIIIIIIIIIIIIIIIIIIIIIIIIIIIIIIIIIIIIIII |
natural_image
Pure technical diagram of a mechanical component with no text, numbers, or symbolsnatural_image
Mechanical assembly diagram showing a lever mechanism with an arrow indicating motion (no text or symbols present)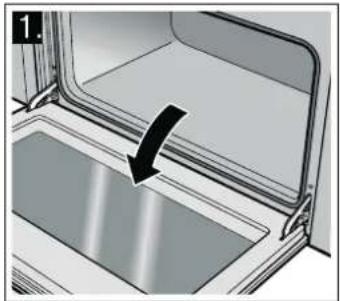
natural_image
Interior view of a refrigerator with a black arrow pointing to the lid area (no text or symbols visible)natural_image
Mechanical assembly diagram showing a lever mechanism with an arrow indicating motion (no text or symbols present)تركيب باب الجهاز
natural_image
Mechanical assembly diagram showing a hand operating a tool with a magnified inset (no text or symbols)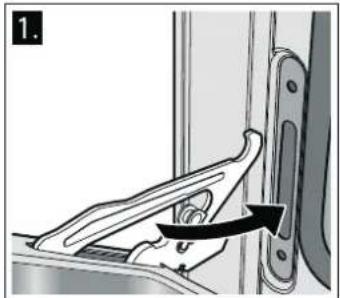
natural_image
Mechanical assembly diagram showing a lever mechanism with an arrow indicating motion (no text or symbols present)خطر الإصابة!
natural_image
3D rendering of a black rectangular object with horizontal lines, resembling a shelf or panel (no text or symbols visible)natural_image
Close-up of a stainless steel oven with control knobs and indicator lights (no readable text or symbols)[ar] دليل الاستعمال