
TSU9200 - Universal remote PHILIPS - Free user manual and instructions
Find the device manual for free TSU9200 PHILIPS in PDF.

| Product Type | Touchscreen Universal Remote Control |
| Brand | Philips |
| Model | TSU9200 |
| Display | 2-inch color TFT screen, QCIF resolution (176×220 pixels), 65536 colors |
| Interface | USB 2.0 port, infrared (IR), 2.4 GHz RF link |
| Infrared range | Up to 12 meters (operation), 45° angle at 5 meters |
| IR learning | Distance 100-150 mm, frequency 17 kHz - 1 MHz |
| Memory | 4 MB Flash |
| Power supply | Built-in rechargeable battery, 5 V DC / 2 A power adapter, docking station |
| Battery life | Approximately 3-4 hours full charge |
| Dimensions (remote) | 242 × 51 × 27 mm |
| Dimensions (docking station) | 249 × 61 × 24 mm |
| Operating temperature | 5 °C to 45 °C |
| Storage temperature | -25 °C to 70 °C |
| Compatible operating systems | Windows XP, Windows Vista |
| Minimum PC configuration | Pentium III 500 MHz, 256 MB RAM, 250 MB free disk space |
| Box contents | Remote control, docking station, power adapter, USB cable, software CD, guides |
| Main features | Universal control, programmable activities, code learning, built-in database, RF link with optional extenders |
| Care and cleaning | Wipe with a soft dry cloth. Do not use abrasive products. |
| Safety | Use only the supplied adapter. Do not expose to water or excessive heat. |
Frequently Asked Questions - TSU9200 PHILIPS
User questions about TSU9200 PHILIPS
0 question about this device. Answer the ones you know or ask your own.
Ask a new question about this device
Download the instructions for your Universal remote in PDF format for free! Find your manual TSU9200 - PHILIPS and take your electronic device back in hand. On this page are published all the documents necessary for the use of your device. TSU9200 by PHILIPS.
USER MANUAL TSU9200 PHILIPS
Installing and configuring
All rights are reserved. Reproduction in whole or in part is prohibited without prior consent of the copyright owner.
Royal Philips Electronics is not liable for omissions or for technical or editorial errors in this manual or for damages directly or indirectly resulting from the use of the Pronto Remote Control.
The information in this Starter's Guide may be subject to change without prior notice.
All brand or product names are trademarks or registered trademarks of their respective companies or organizations.
Concept and realisation of the Guide:
3 Preparing for Configuration 8
3.1 Inserting the Battery 8
3.2 Charging the Remote Control 8
3.3 Preparing Your PC 9
4 Configuring the Pronto Remote Control 9
4.1 Using Pronto Dashboard 9
4.2 Using the Wizard to Configure the Remote Control 9
5 Doing More with the Configuration 12
5.1 Starting from an Existing Configuration 12
5.2 Managing My Database 12
5.3 Advanced Editing 13
6 Using the Service Menu 14
7 Support 15
7.1 Troubleshooting 15
7.2 FAQ Information and Latest Updates 16
8 Specifications 17
1 – Before You Start
Based on a long experience and successful business in the custom installation market, the Pronto line of touch-screen Remote Controls has been extended with the TSU9200, a hard button based LCD remote. Like its bigger brothers, it is designed by custom installers and built by Philips. It includes all technology and features that are needed to operate any home theater in an easy and straightforward way.
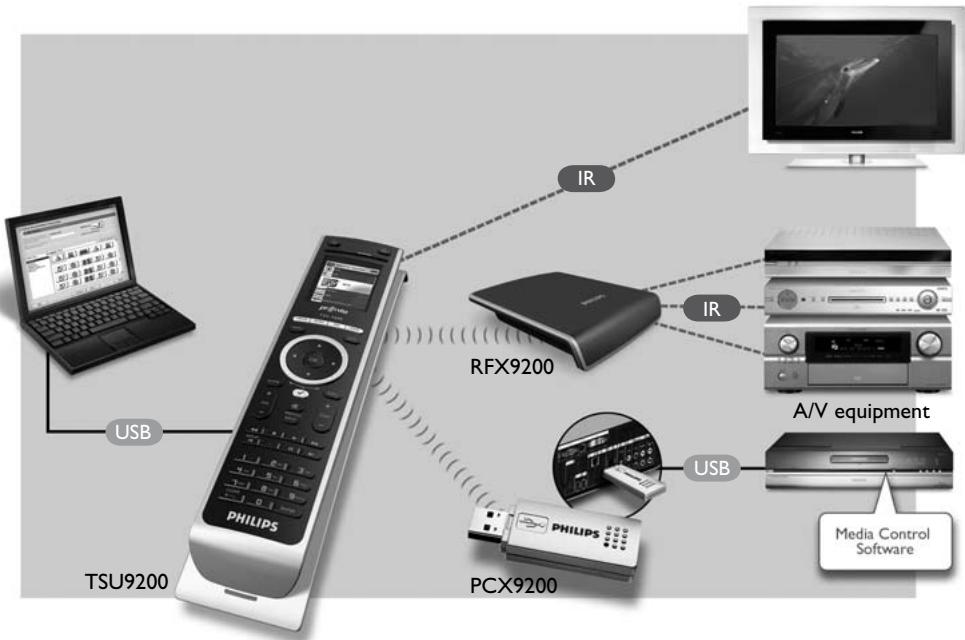
The system is based on a very reliable 2.4 GHz digital RF link and can work wirelessly with the RFX9200 Extender as well as with the PCX9200 PC extender. It ships with a wizard based Configuration Program with which you can create personalized configurations for your clients in minutes, including icon based channel selection using the extensive built-in icon database.

The Pronto System
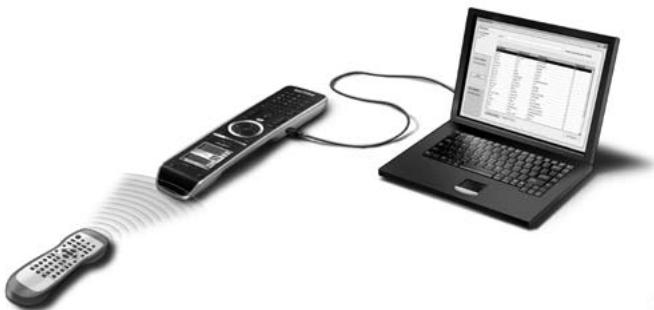
The Pronto System contains a variety of equipment that is connected and configured to interact with each other. The scheme below shows a possible connection with several A/V devices.
To set up a Pronto System and configure the Remote Control as the central unit of the system, you need different components. The scheme below indicates the different components, their significance in the configuration of the Pronto system and their mutual connection.
More information is available:
- In the Configuration Program's Online Help:
- On how to set up the Remote Control.
- On how to incorporate Extenders in the setup.
- In the Starter's Guides for the PCX9200 and RFX9200 Extenders:
- On how to configure and install an Extender in the Pronto System.

Note
The PCX9200 and the RFX9200 Extenders are optional accessories.
2 Unpacking the Pronto Remote Control
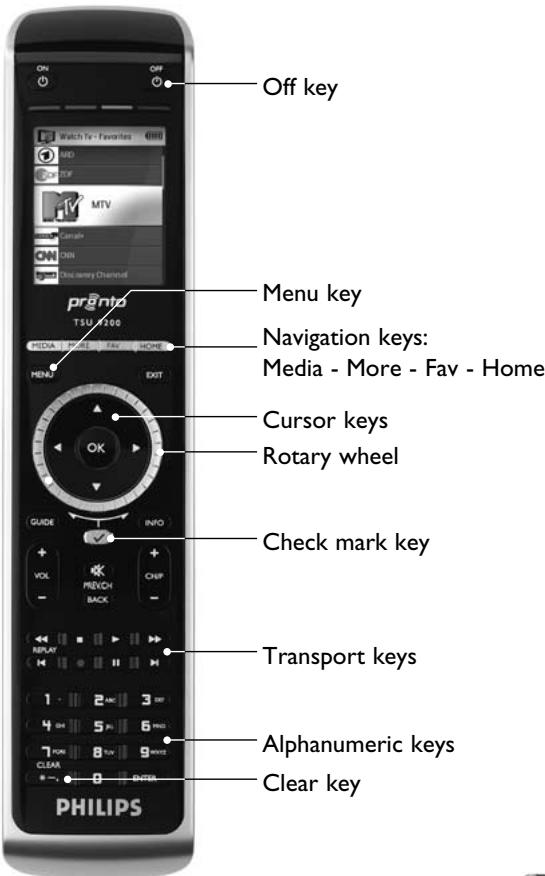
Remote Control
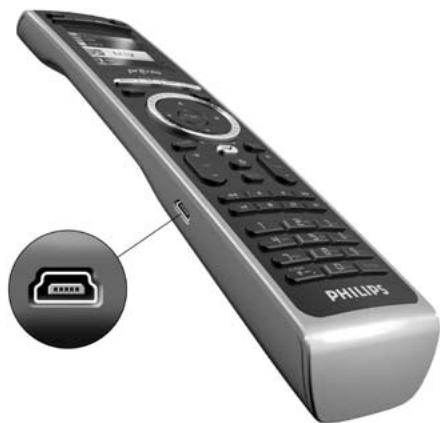
USB connector
Use this connector to download the configuration from the PC to the Remote Control.
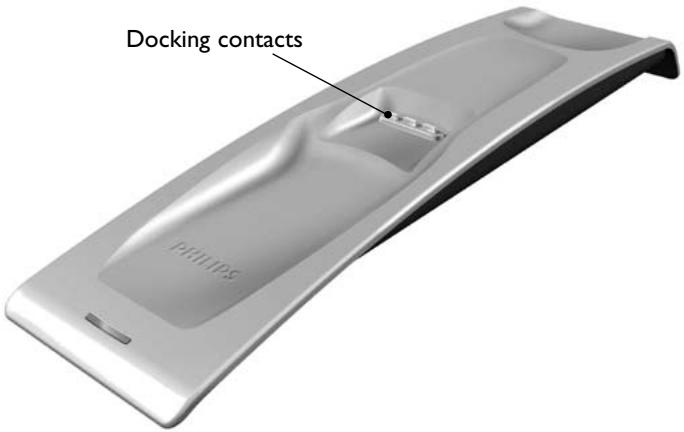
Docking Station
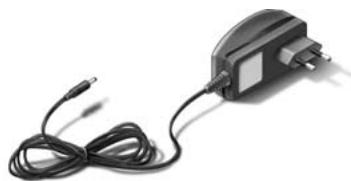
Power Adapter
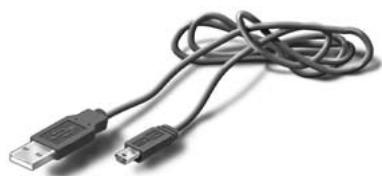
USB Cable
CD with the configuration software
3 Preparing for Configuration
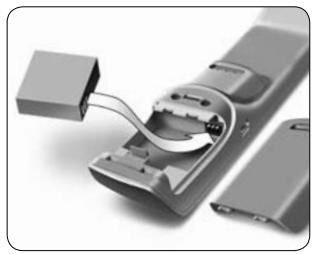
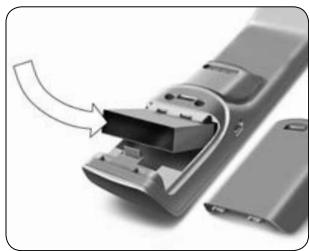
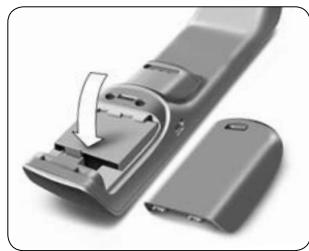
3.1 Inserting the Battery
To insert the battery:
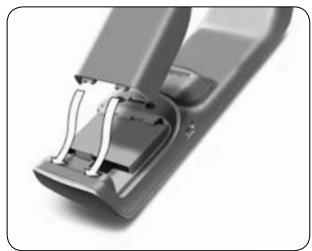
1 Place the battery in the battery compartment, making sure to match the contacts of the battery to the contacts of the Remote Control.
2 Click the battery into place.
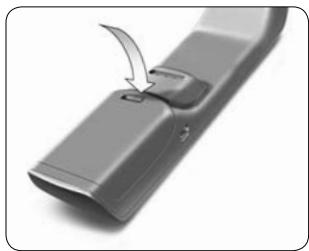
3 Position the cover and press firmly until you hear a click.
3.2 Charging the Control Panel
It is advised to charge the Remote Control to its maximum before you start configuring it. This can take 3 to 4 hours.
Note
The Remote Control always functions when it is placed in the docking station.
Place the Remote Control in the docking station.
A red Charging LED on the front of the docking station lights up while the Remote Control is charging. When the Charging LED fades out, the Remote Control is fully charged.
3.3 Preparing Your PC
In the box you find an installation CD for the Configuration Program.
To install the Configuration Program:
Insert the CD in the PC and follow the instructions on the screen.

Notes
It is advised to check for updates for the Configuration Program. See www.pronto.philips.com in the Downloads section (PC Software).
You can install the Configuration Program next to other Philips Pronto editors on the same operating system. Your files are automatically placed in a separate directory.
To uninstall the Configuration Program, use the Windows uninstall feature.
(Start > Control Panel > Add/Remove Programs)

Note
It is recommended to back up MyDatabase and the configurations regularly.
4 Configuring the Pronto Remote Control
4.1 Using Pronto Dashboard
Pronto Dashboard is the starting point for managing configurations for a wide variety of Pronto Remote Controls. It presents the tasks you can perform depending on the installed programs:
- New Project Wizard.
- Manage MyDatabase. See Managing MyDatabase on page 12.
- Classic ProntoEdit to configure other products of the Pronto line.
4.2 Using the Wizard to Configure the Remote Control
The Configuration Program is a wizard for configuring the TSU9200. It is very easy to use and it creates a valid configuration in just a few steps.
To start the wizard:
Select the New Project wizard in Pronto Dashboard. -or-
Start the wizard from the Windows Start Menu.
Creating a Configuration
The wizard will guide you through the following five steps:
Step 1: Define the project details.
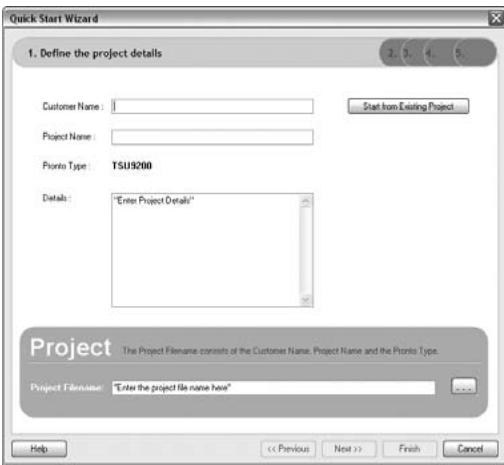
- The project details will be automatically stored on your PC.
Step 2: Identify the components in the project.
- The contents of a project are based on your client's A/V equipment. Every piece of equipment is a component and must be added to the project.
Tip
Enter the component in the Search field to check for matching patterns of devices, brands and model numbers.

Step 3: Define the activities in the project.
Note
An activity is a sequence of commands you can configure. For example, you can program the TSU9200 to activate the TV, DVD and surround system when Watch DVD is selected. So by selecting an activity, it executes all these steps with just one press.
- Select an icon and a name for the activity in the wizard.
- Link the components.
- Create the activity command sequence.
Step 4: Add favorites to activities.
- Depending on the activity, you can program favorites. These can be TV or radio channels.
Step 5: Link extenders to components.
- Extenders are optional accessories. Please refer to the documentation of the Extender for setting it up.
By following these 5 steps, you create a basic configuration. To create an advanced configuration, see Doing More with the Configuration on page 12.
Downloading the Configuration to the Remote Control
As a last step in the wizard, the configuration needs to be downloaded to the Remote Control.
To download the Configuration to the Remote Control:
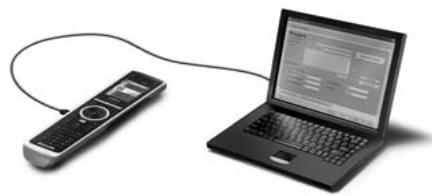
1 Connect the Remote Control to the PC with the USB cable.
The Remote Control goes into test/download mode. In this mode the Remote Control cannot be used, it can only be controlled by the PC editor.
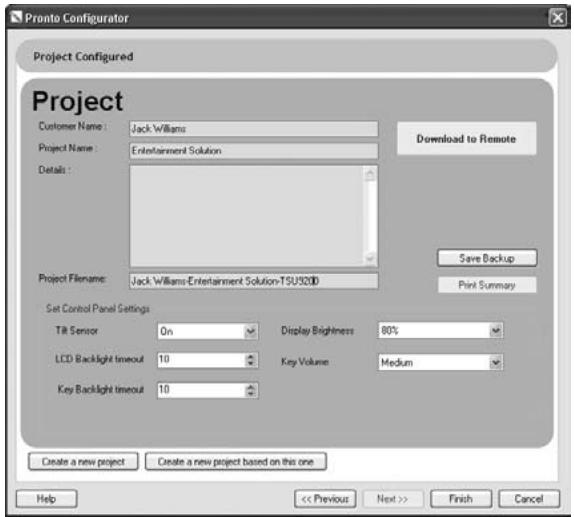
2 Click Download to Remote to start downloading.
The editor will not allow further modifications until the download is complete. This normally takes 15-30 seconds.
3 Follow further instructions on the PC screen.
Note
Click Print Summary to print a list of the configured components and the way they are connected to the RF extenders.
Warnings
Do not pull the USB cable out of the PC when you are downloading the configuration.
Messages regarding the download appear in the Configuration Program.
5 Doing More with the Configuration
5.1 Starting from an Existing Configuration
To start editing an existing configuration:
Launch the dashboard.
-or- Start the dashboard from the Windows Start Menu.
2 Select New Project Wizard.
3 Select This is a project that resembles one I already did.
The Configuration Program opens.
You will notice that a lot of data is filled in. You have the option to edit favorites and extenders and to reassign the codes, delays and more functions from one component to another.
5.2 Managing MyDatabase
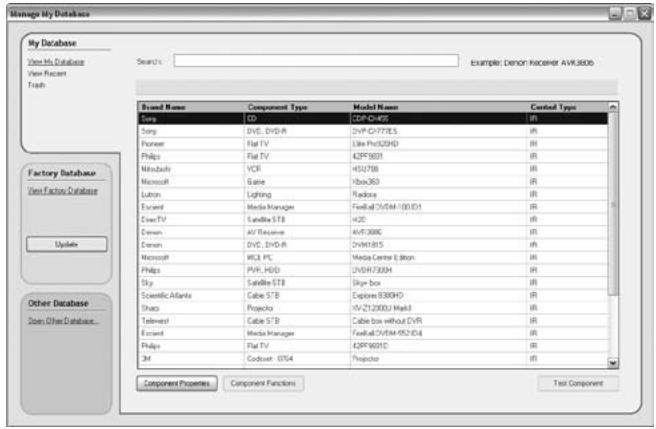
MyDatabase is a personal database that contains all the components you need for your various projects. You can compile MyDatabase with the components from the Factory Database and shared databases, or you can add new components yourself. In MyDatabase, you can customize and fine-tune the components and add them to your project.
To open MyDatabase:
Select Manage MyDatabase on the dashboard.
-or-
Click MyDatabase in step 2 of the wizard. See Creating a Configuration on page 10.
The MyDatabase management application opens (on top of the wizard).
To add codes to MyDatabase:
In the Factory Database, search the device, based on its model number and add it to MyDatabase via the button Add To My Database.
-or-
Learn the codes from the original Remote Control of the A/V component in MyDatabase.
1 Connect the Remote Control to the PC with the USB cable.
2 Place the original remote 10-15 cm (4 to 6 inches) from the Remote Control in line with its learning eye. Check if both batteries are sufficiently charged.
3 Press and hold the key of the original remote for at least 1 second.

Tip
With the Remote Control connected to the PC, you can test newly added codes via the Manage MyDatabase application. Press Test IR. The code will be sent to the A/V equipment.
5.3 Advanced Editing
To create an Advanced Configuration, click Advanced in the activity screen (step 3 of the wizard). There you can add, delete and modify 'more functions' and reassign hard buttons to different functions or macros. Please refer to the Configuration Program's Online Help for more details.
6 Using the Service Menu
To go to the Service Menu:
Press MENU and simultaneously for 3 seconds.
You enter the service menu where you can choose between several options.
Note
All buttons are now disabled except for the rotary wheel and .
Use the rotary wheel to navigate and to make a selection.
About Remote Control
This option displays information about the installed software and the Configuration.
Select Back to return to the service main menu.
Link PCs
This option allows you to link media activities to the PC.
1 Select Link PCs.
The list of media activities is displayed.
2 Select a media activity.
3 Press to confirm.
The list of PCs is displayed. This list contains:
All PCs in range
- All PCs that are already linked to media activities
4 Select the PC you want to link to the media activity.
5 Press to confirm.
Note
- A media activity can be linked to only one PC.
- A PC can be linked to many media activities.
- Once a new configuration is downloaded, the media activities in the new configuration have to be linked again.
Select Back to return to the service main menu.
Range check Extenders
This option displays the list of extenders defined in the configuration and checks whether or not they are in range:
Note
- The status (in or out of range) of all extenders will be updated in real time.
- If no extender is defined in the configuration, the Range check Extenders option will not be presented in the service main menu.
Select Back to return to the service main menu.
Device settings
This option lets you adjust the following settings:
- Display brightness
- LCD backlight timeout
Key backlight timeout
Key volume - Tilt sensor
1 Select the setting you want to change.
2 Select an option to change the settings.
Press to confirm your choice.
3 Select Back to return to the device settings menu.
4 Select Back to return to the service main menu.
7 Support
7.1 Troubleshooting
The A/V equipment does not respond to commands from the Remote Control
- Make sure that you have defined the correct codes for your A/V equipment.
- Make sure that your extenders have been set up correctly.
- Check the range between the extenders and the Remote Control in the service menu. For more information, check the Starter's Guides for the PCX9200 and RFX9200 Extenders and the Configuration Program's Online Help.
The Macros do not work
- Make sure that your A/V equipment responds to commands.
- Insert sufficient delays in the macros to allow the equipment to start up properly.
- Verify that the button has not been reprogrammed. Ensure that the Action List contains the appropriate commands for the A/V equipment.
For more information refer to the Configuration Program's Online Help.
The PC does not recognize the Remote Control
- Unplug the Remote Control and try again a few seconds later.
- Reboot the PC.
If this does not work, contact Philips Support.
Pronto will not learn codes
- Make sure the Remote Control and the original Remote Control are positioned correctly.
- Do not learn codes under bright fluorescent light or sunlight, as intensive light sources affect the ability to learn codes successfully.
- Make sure the batteries of the Remote Control and the original remote are sufficiently charged.
- Press and hold the key on the original remote for more than 1 second.
The Remote Control behaves erratically
Normally, resetting the Remote Control is not necessary. However, if the screen freezes or if you notice unusual behavior, you can perform a reset to get it running again.
You reset the Remote Control by pressing and simultaneously.
7.2 FAQ Information and Latest Updates
You can find more information on www.pronto.philips.com.
Navigate to the Support section for more FAQ Information.
Navigate to the Downloads section for the following updates:
- TSU9200 Remote Control Firmware.
Download this on the Remote Control to upgrade to new features, when the Remote Control does not start up or when the screen stays black after resetting. - RFX9200 Extender Firmware.
- Configuration Program Software.
8 Specifications
Display
2.0" TFT color display
- QCIF (176 x 220 pixels) resolution portrait LCD
- 65,536 colors
Interface
- USB 2.0 port connector
Infrared (IR)
- Operating distance = max 12 m (36 ft)
- Learning distance = 100 - 150 mm (3,9 - 5,9 inch) at 0-40 degrees
- Operating angle = 45^ at max 5m (15 ft)
- Operating/ learning frequency range = 17 kHz - 1 MH carrier freq
Wireless System
Digital RF link at 2.4 GHz
Memory
- 4 MB Flash
Power Management
- Power on by tilting, turning the rotary wheel or pressing the navigation keys
Power off automatically by time out - Battery status indication
Dimensions Remote Control
242× 51× 27mm (9,5× 2× 1,1 inch)
Dimensions Docking Station
249× 61× 24mm (9,8× 2,4× 0,9 inch)
Operating Temperature
5^ - 45^ (41^ - 113^)
Storage Temperature
- 25^ - 70^ (-13°F - 158°F)
Battery
Lithium ion battery, 1000 mAh
Power Adapter
100 V-240 VAC / 50-60 Hz Power adapter (5 VDC/2 A output)
Accessories
USB cable
Power adapter
- Docking station
- CD-ROM with the Configuration Program, Starter's Guides for the Remote Control, Acrobat Reader
- 2 Starter's Guides, Installing and Configuring and Using the Remote Control
Warranty certificate
Configuration Program
- Supported operating systems:
- Windows XP
Windows Vista
- Minimum requirements:
- 500 MHz Intel Pentium III workstation or equivalent
256 MB physical memory
250 MB of free disk space
- Recommended requirements:
1.2 GHz Intel Pentium IV workstation or equivalent
- 512 MB physical memory
- 500 MB of free disk space
IR code database information
- Designed with UEI Technology
- Licensed under U.S. Patent 5,689,353
Portions © UEI 1999
Contendo
2 Selezione New Project Wizard.
3 Selezione This is a project that resembles one I already did.
About Remote Control
3 Sélectionnez This is a project that resembles one I already did.
About Remote Control
Lithium-ion, 1000 mAh