USER MANUAL BAR2 KH8V2 IN BAUKNECHT
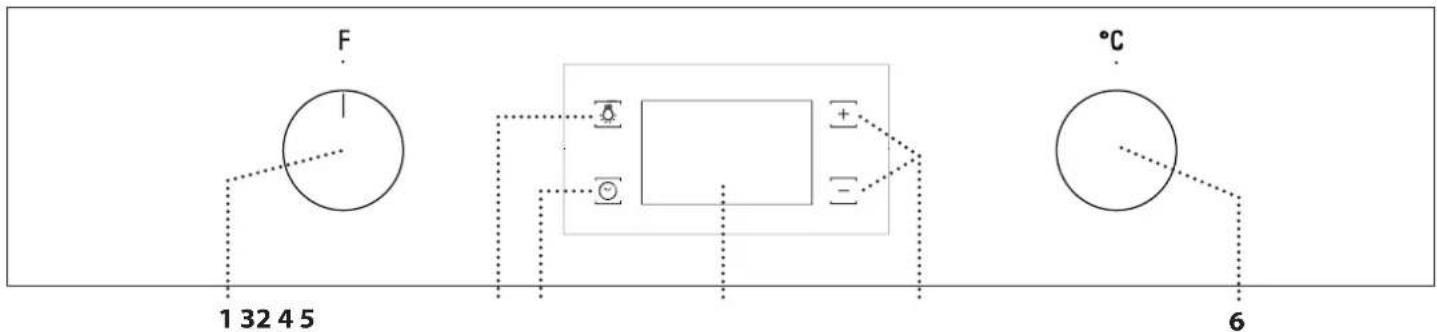
For accessing the cooking time settings, delayed start and timer. For displaying the time when the oven is off.
4. DISPLAY
For changing the cooking time settings.
6
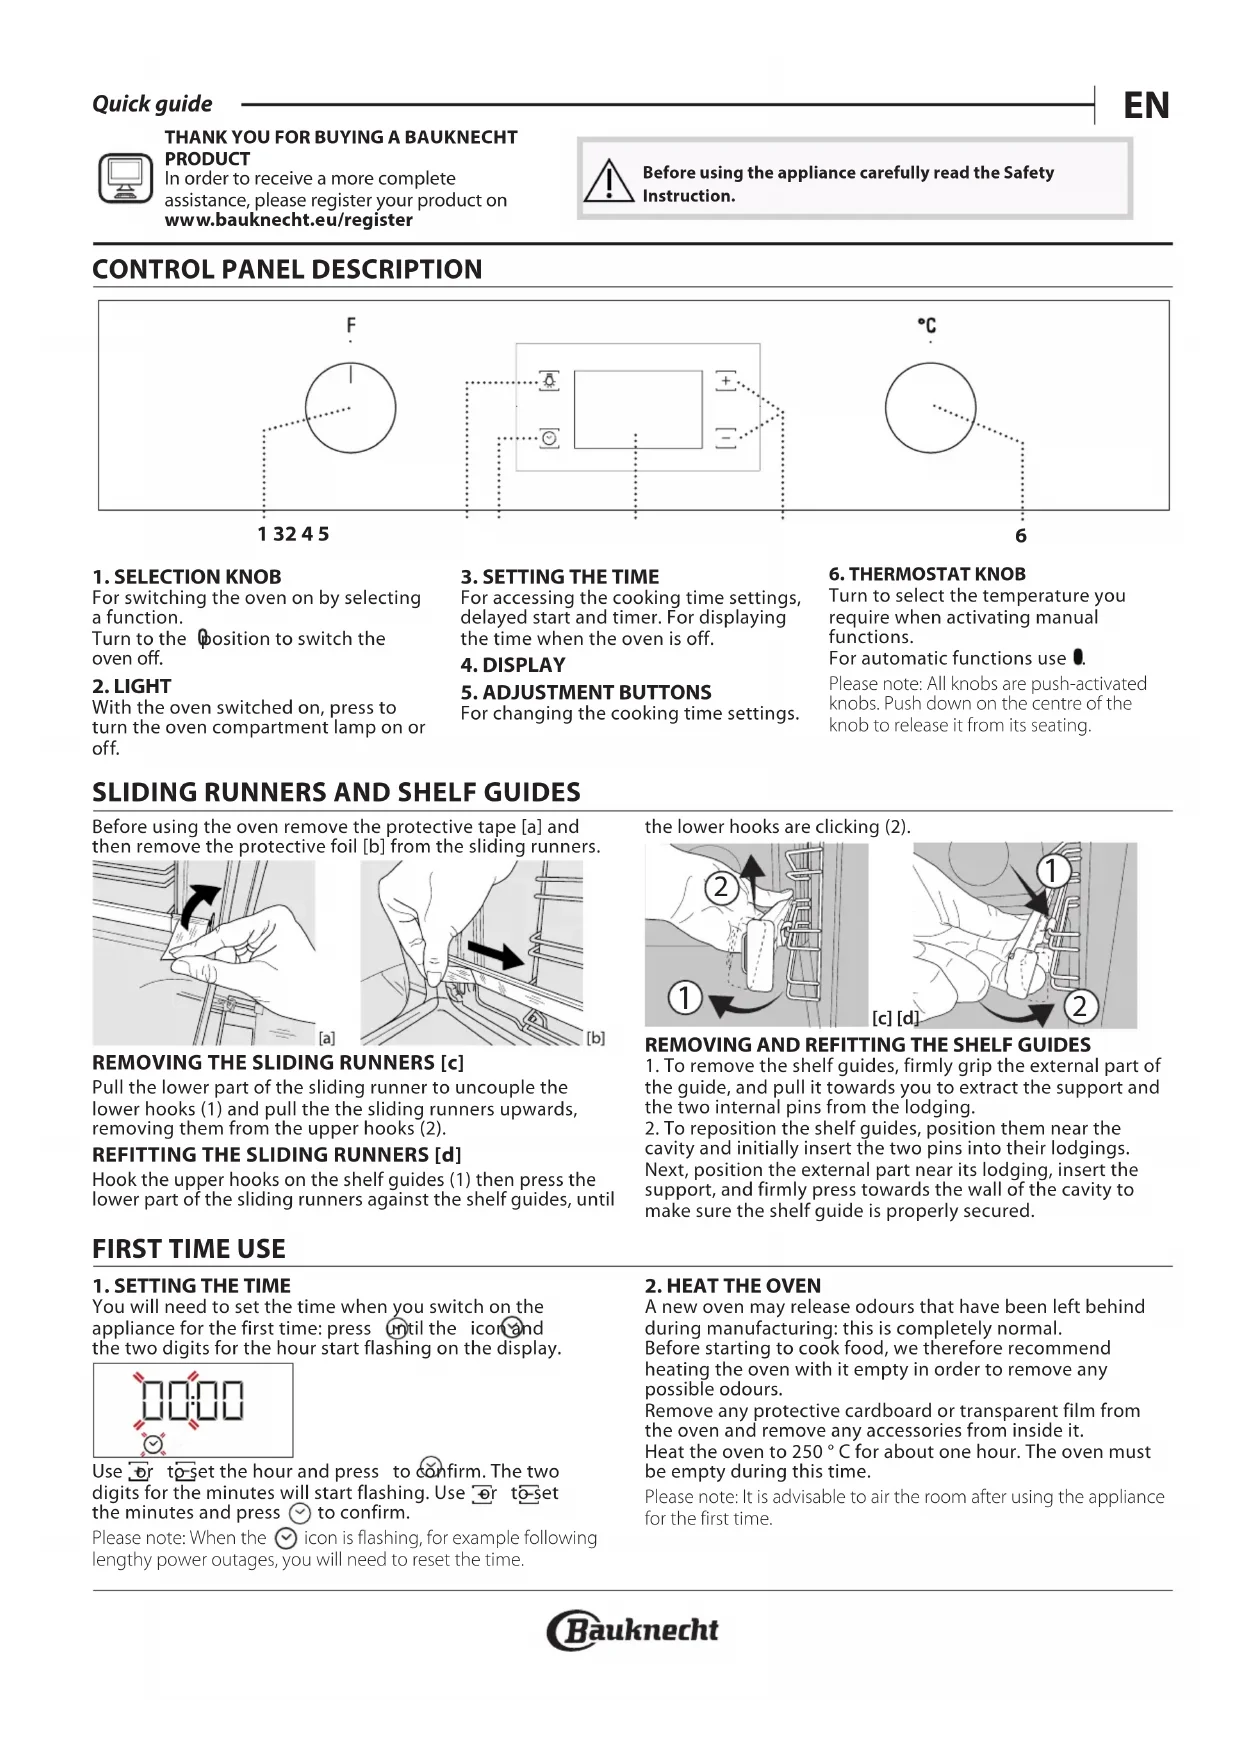
6. THERMOSTAT KNOB
Turn to select the temperature you require when activating manual functions.
For automatic functions use 0.
Please note: All knobs are push-activated knobs. Push down on the centre of the knob to release it from its seating.
1. SELECTION KNOB
For switching the oven on by selecting a function.
Turn to the position to switch the oven off.
2.LIGHT
With the oven switched on, press to turn the oven compartment lamp on or off.
SLIDING RUNNERS AND SHELF GUIDES
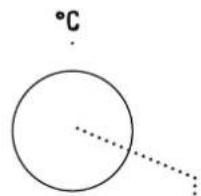
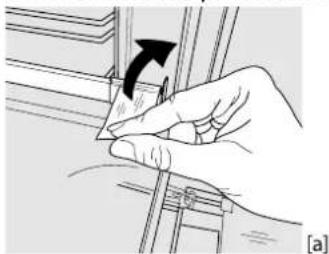
Before using the oven remove the protective tape [a] and then remove the protective foil [b] from the sliding runners.
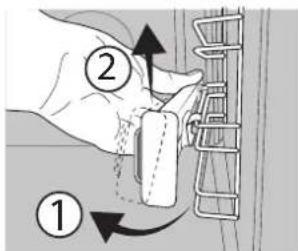
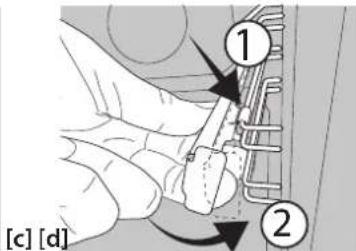
REMOVING THE SLIDING RUNNERS [c]
Pull the lower part of the sliding runner to uncouple the lower hooks (1) and pull the the sliding runners upwards, removing them from the upper hooks (2).
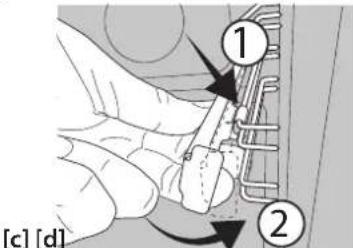
REFITTING THE SLIDING RUNNERS [d]
Hook the upper hooks on the shelf guides (1) then press the lower part of the sliding runners against the shelf guides, until
FIRST TIME USE
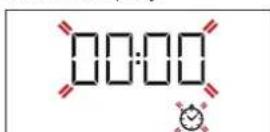
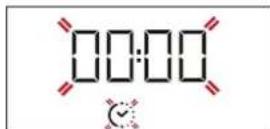
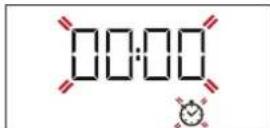
1. SETTING THE TIME
You will need to set the time when you switch on the appliance for the first time: press until the icon and the two digits for the hour start flashing on the display.
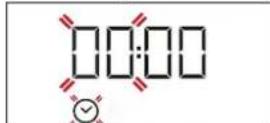
Use to set the hour and press to confirm. The two digits for the minutes will start flashing. Use or to set the minutes and press to confirm.
Please note: When the icon is flashing, for example following lengthy power outages, you will need to reset the time.
the lower hooks are clicking (2).
REMOVING AND REFITTING THE SHELF GUIDES
-
To remove the shelf guides, firmly grip the external part of the guide, and pull it towards you to extract the support and the two internal pins from the lodging.
-
To reposition the shelf guides, position them near the cavity and initially insert the two pins into their lodgings. Next, position the external part near its lodging, insert the support, and firmly press towards the wall of the cavity to make sure the shelf guide is properly secured.
2. HEAT THE OVEN
A new oven may release odours that have been left behind during manufacturing: this is completely normal. Before starting to cook food, we therefore recommend heating the oven with it empty in order to remove any possible odours.
Remove any protective cardboard or transparent film from the oven and remove any accessories from inside it. Heat the oven to 250^ for about one hour. The oven must be empty during this time.
Please note: It is advisable to air the room after using the appliance for the first time.
FUNCTIONS & DAILY USE

CONVENTIONAL
For cooking any kind of dish on one shelf only.
FORCED AIR
For cooking different foods that require the same cooking temperature on several shelves (maximum three) at the same time. This function can be used to cook different foods without odours being transferred from one food to another.

MAXI COOKING
For cooking large joints of meat (above 2.5kg
We recommend turning the meat over during cooking to ensure that both sides brown evenly. We also recommend basting the joint every so often to prevent it from drying out excessively.

PIZZA
For baking different types and sizes of pizza and bread.
It is a good idea to swap the position of the baking plates halfway through cooking.

GRILL
For grilling steaks, kebabs and sausages, cooking
vegetables au gratin or toasting bread. When grilling meat, we recommend using a drip tray to collect the cooking juices: Position the tray on any of the levels below the wire shelf and add 200ml of drinking water.

TURBO GRILL
For roasting large joints of meat (legs, roast beef,
chicken). We recommend using a drip tray to collect the cooking juices: position the pan on any of the levels below the wire shelf and add 200ml of drinking water.
1. SELECT A FUNCTION
To select a function, turn the selection knob to the symbol for the function you require: the display will light up and an audible signal will sound.
2. ACTIVATE A FUNCTION
MANUAL
To start the function you have selected, turn the thermostat knob to set the temperature you require.
Please note: During cooking you can change the function by turning the selection knob or adjust the temperature by turning the thermostat knob.
The function will not start if the thermostat knob is on. You can set the cooking time, cooking end time (only if you set a cooking time) and a timer.
AUTOMATIC
To start the automatic function you have selected ("Bread" or "Dessert"), keep the thermostat knob at the position for automatic functions (0).
To finish cooking, turn the selection knob to position 0.
Please note: You can set the cooking end time and timer.
RISING
To start the "Rising" function, turn the thermostat knob to the relevant symbol; if the oven is set to a different temperature, the function will not start.

RISING
For helping sweet or savoury dough to rise effectively.
To maintain the quality of proving, do not activate the function if the oven is still hot following a cooking cycle.

ECO FORCED AIR
For cooking roasts and stuffed roasting joints on a shelf. Food is prevented from drying out excessively gentle, intermittent air circulation. When this ECO MODEON is in use, the light will remain switched off during long but can be switched on again by pressing

BREAD AUTO
This function automatically selects the ideal literature and baking time for bread. For best results, finally follow the recipe. Activate the function when there is cold.

PASTRY AUTO
This function automatically selects the ideal temperature and baking time for cakes. Activate the function when the oven is cold.

DIAMOND CLEAN
The action of the steam released during this special low-temperature cleaning cycle allows dirt and food residues to be removed with ease. Pour 200ml of drinking water on the bottom of the oven and only activate the function when the oven is cold.
Please note: You can set the cooking time, cooking end time (only if you set a cooking time) and a timer.
3. PREHEATING AND RESIDUAL HEAT
Once the function starts, an audible signal and a flashing icon on the display indicate that the preheating phase has been activated.
At the end of this phase, an audible signal and the fixed icon on the display will indicate that the oven has reached the set temperature: at this point, place the food inside and proceed with cooking.
Please note: Placing the food in the oven before preheating has finished may have an adverse effect on the final cooking result.
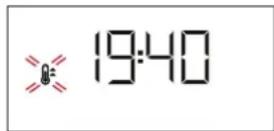
After cooking and with the function deactivated, the icon may continue to remain visible on the display even after the cooling fan has switched off to indicate that there is residual heat in the compartment.
Please note: The time after which the icon switches off varies because it depends on a series of factors such as ambient temperature and function used. In any case, the product should be considered to be off when the pointer on the selection knob is at "0".
4.PROGRAMMING COOKING
You will need to select a function before you can start programming cooking.
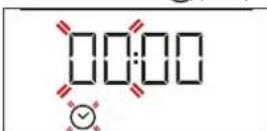
DURATION
Keep pressing until the and "00:00" start flashing on the display.
Use to set the cooking time you require, then press to confirm.
Activate the function by turning the thermostat knob to the temperature you require: an audible signal will sound and the display will indicate that cooking is complete.
Notes: To cancel the cooking time you have set, keep pressing until the icon starts flashing on the display, then use to reset the cooking time to "00:00".
This cooking time includes a preheating phase.
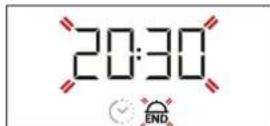
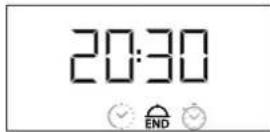
PROGRAMMING THE END COOKING TIME/DELAYED START
After a cooking time has been set, starting the function can be delayed by programming its end time: press until the icon and the current time start flashing on the display.

Use or to set the time you want cooking to end and press to confirm.
Activate the function by turning the thermostat knob to the temperature you require: the function will remain paused until it starts automatically after the period of time that has been calculated in order for cooking to finish at the time you have set.

Please note: To cancel the setting, switch the oven off by turning the selection knob to position 0^ .
Please note: Delay to start functionality is not available for Grill and Turbo Grill functions.
END OF COOKING
An audible signal will sound and the display will indicate that the function has finished.
Turn the selection knob to select a different function or to position "0" to switch the oven off.
Please note: If the timer is active, the display will show "END" alternately with the remaining time.
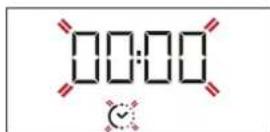
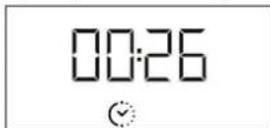
5. SETTING THE TIMER
This option does not interrupt or program cooking but allows you to use the display as a timer, either during while a function is active or when the oven is off.
Keep pressing until the ton and "00:00" start flashing on the display.
Use or to set the time you require and press to confirm.
An audible signal will sound once the timer has finished counting down the selected time.
Notes: To cancel the timer, keep pressing until the icon starts flashing, then use to reset the time to "00:00".
6. DIAMOND CLEAN FUNCTION
To activate the "Diamond Clean" cleaning function, pour 200 ml of drinking water into the bottom of the oven, then turn the selection knob and the thermostat knob to the icon.
Please note: The position of the icon does not correspond to the temperature reached during the cleaning cycle.
The function will activate automatically: the display shows the time remaining to the end, alternating with "DC".


Please note: It is only possible to programme the end time of this function. The duration is automatically set to 35 minutes.
COOKING TABLE
| RECIPE FUNCTION PREHEAT | | TEMPERATURE (°C) | DURATION (MIN) | LEVEL AND ACCESSORIES |
| Leavened cakes | - | Yes 170 30 - 50 | | 2 |
| - | Yes 160 30 - 50 | | 2 |
| - | Yes 160 40 - 60 | | 4 1 |
| Biscuits/tartlets | - | Yes 160 25 - 35 | | 3 |
| - | Yes 160 25 - 35 | | 3 |
| - | Yes 150 35 - 45 | | 4 2 |
| Pizza / Focaccia | - | Yes 190 - 250 | 15 - 50 | 1/2 |
| - | Yes 190 - 250 | 20 - 50 | 4 2 |
| Lasagne / baked pasta / cannelloni / flans | | Yes 190 - 200 45 - 65 | | 2 |
| Lamb / veal / beef /pork 1 kg Yes 190 - 200 80 - 10 | | | | 3 |
| Chicken/rabbit/duck 1 kg Yes 200 - 230 50 - 100 | | | | 2 |
| Baked fish/en papillote 0,5 kg (fillets, whole) | | Yes 170 - 190 30 - 45 | | 2 |
| Toasted bread 5' 250 2 - 6 | | | | 5 |
| Roast potatoes | | Yes 200 - 210 | 35 - 55 ** | 3 |
| ACCESSIONS | ......
Wire shelf | Baking dish or baking tray on the wire shelf | Drip tray/baking tray on the wire shelf | Drip tray | Drip tray with 200 ml of water | Baking tray |
** Turn food two-thirds of the way through cooking (if necessary).
The level is indicated on the wall of the cooking compartment.
The time indicated does not include the preheating phase: we recommend placing the food in the oven and setting the cooking time only after the required temperature has been reached.
Download the complete Use and Care Guide from docs.bauknecht.eu for the table of tested recipes, compiled for the certification authorities in accordance with the standard IEC 60350-1.
TROUBLESHOOTING
| Problem | Possible cause | Solution |
| The oven does not work | Power cut
Disconnection from the mains | Check for the presence of mains electrical power and whether the oven is connected to the electricity supply.
Turn off the oven and restart it to see if the fault persists |
| The display shows the letter “F” followed by a number | Software problem | Contact you nearest After-sales Service Centre and state the letter or number that follows the letter “F” |

Download the complete Use and Care Guide from docs.bauknecht.eu for more informations about your product

Policies, standard documentation and additional product information can be found by:
Visiting our website docs.bauknecht.eu
Using QR Code
- Alternatively, contact our After-sales Service (See phone number in the warranty booklet). When contacting our After-sales Service, please state the codes provided on your product's identification plate.

DESCRIPTION DU PANNEAU DE COMMANDE
1. BOUTON DE SELECTION
6. FUNC TIE Diamond Clean
CHARTE TENECKONNUECKNX HANPABJIAOUIXX [c]
TNotAHnTe 3a HnXHIOU qACTb TeLECKONuuecko HnPaBnIOe, TTo6bl OTOeDNHTb HNXHne KpOuKN (1), n NotAHnTe TeLECKONuueckne HnPaBnIOuNE BBePx, CHmMa INC BepxHnx KpOuKOB (2).
YCTAHOBKA TELECKONIUECKNX HANPABJIIOUX [d]
3aueHnTe BepxHnE KpOuKn 3a depKaTeNn NOk (1), 3aTeM npKMMTE HxHIOU YaCTb TeNECKONNuCeCKnx HaNPaBIAIOUX K
IEPBOE IcIOJIb3OBAHNE
1. YCTAHOBKA BPEMEHN
Pn NepBOM BkHoueHH npbOpa Heo6xOJMo yCTAHOBNTb Bpem:HaXIMaTe TEx nop, noka Ha dncnnee He HauHyT MIRaTb 3HaQOK DBe CnOpbI YaCOB.
YcTaHOBtE 3HaueHHe BpeMeHN KhoNkAMn HHaXm
DnnoNTBepKdEHHaHHTMIRaTbIBeuΦpblMNHT. UcTaHOBInTe3HaueHHe MHNyT KHONKaMn +N -HaxMMTe NOPTBepKdEHH.
dpeXaTeIaM IIOK TaK, YTO6bI HIXHHe KpOcKn 3aΦNkCnPoBaJIncb CO CbIIMMbIM IeNcKOM (2).

CHRTNE U YCTAHOBKA DEPKATEJEI INPOTUBHEI
- 106bI CHrTb DePkaTeIN NOLOK, KpeNko Bo3Mntecb 3a HApyKHyIO qACTb DePkaTeEN I NOTAHNTe IN HA Ce6B, YTO6bl n3Bnueb ONOpY IN DBA BHTpeHHNX UTHoTa IN3 rHe3d.
- 106bI yCTaHOBnTB DePkaTeIN NOLOK HA MeCTo, PaCNOJOKn IN PAnOM C BbiEMKO IN CHaHaA BCTabBe IN BA UTHoTA B rHe3da.
3Atem paCNoJONKeHte HApyKHyIO qACTb PRAOM C ee rHe3Dm, BCTABBe ONOpY IN HaKmTE B HAnpaBNEHM CTEHKn BbiEMKN, YTO6bI y6eINbCB, YTO DEpKaTeIN NOLOK HAdExKHO 3aKpeNJIeHbI.
IpmeaHHe:ecnMiraet 3HaOc (Aanpimep, noCJe DInTeBHOrO OTKIOUeHnE 3JKeKTPOoHEprn), Heo6xOmo 3aHOBO yCTaHOBNTb Bpema.
2.IPOPTPEB DYXOBKN
HOBa neyMoKet ABLTbCA NCTOCHNOM 3anaXOB, CB83aHHbIX C npoecccom npon3BODCTBa:3TO HopMaIbHOE ABHeHne. Ipeed Naanom npiroTOBNEHn6IIO peKomeHnyETc nporpeTB nyCTOn dYxOBOW kKaDn ydaJIeHn BO3MOXbIX OCTaTOHbIX 3aAnXOB.CHMNTe c dYxOBOrO WkaFa3aUHTIN KAPTOH n npo3paHyIO pIeHKy, u3BNeKtte Bce npuHaNDJExHOctn. IporpeTe dYxOBky npu TemnepaType 250 ^ C B TceHne npimepHO OndHO rca.DyXOBn WkaΦ DonKeH 6blbNyCTbIM.
PpmeaHne; nocne nepBoro nCnOb3OBaHna neu peKomeHnyetcnpoBETpntb NOMEeHNE.
PEXKIMbl I EXEHNHEBHOE NcNoJIb3OBAHNE

KOHBEKLIM
PeximI npiroTOBHeHn IIO6bIX 6IIOJ TOJIbKO Ha ODHOM
ypo

KOHBEKLJIA
Дя OДНOBpeMeHHORO npiroTOBHeHra pa3NHybIX 6JIOp npIN OINHaKOBoT TempeA type npiroTOBHeHra Ha HeCKoIbKHX yPOBHX (MaKcIMyM Tpex) 6e3 CmeuBaHn 3aAnXOB. 3ToT peKIM rapaHTnpyET OTCYCTBne nepeHOca 3anXOB c OdHOrO npOdykTa Ha dpyroI.

MAXI COOKING (BOJbUAR IOPLNIA)
PeximIJI nprirotOBHe 6oJIbuxx KyckOB Mca (6OJIee
2,5Kr).IpeBopauBaIte McO B npocece npiroTOBneHn, TTO6bl OHO OINHaKOBO NOpymAHnIOCb C o6eN CTOPOH. TaKKe peKOMeHnyETcpeYyIaPHO NOniBaTb MRCO XnPOM, TTO6bl npedOTbpaNTb ero nepecbixaHne.

NMLUCA
PeximIyBbIneKaHnNiuCbuXnE6o6yNouHbix
n3dennpa3HOro BnDa n pa3Mepa.BcepeHne npriroTOBHeHH peKOMeHdyETcN PomeHrTb IpOTuBHN MeCTAMN.

TINb
PexKIMI npriROBHeHnHa rpiNe 6NphiTEKCOB,
WauJIbka, KOJIbAcOK, OBOUHbIX 3aNEKaHOK uXJIe6HbIX TOCTOB. Ipn
priROBHeHm MCA Ha rpiNe peKOMeHdyETcN CNOb3ObaTb
NoIOHOJ c6opa coka ot XapeHnY UCTAHOBITE NOIOHOH Ha
JIIOBOI yPOBeHb NOD peWEtKo, HAIINB H Hero 200 MNIITbeBOI BObl.

TYPbO-PTnMb
Pexm dIa kapKn KpynHbIX KcKOB Mca (poc6nΦ,
6apaHbN HOxKn, UbInnIa).PekOMeHdyEra NcNoB3OBaTb NpDoH dIra c6opa CTekaIOUero Coka: noCTabbTe ero Ha IIO6oYPOBeH npOpeTeKo, HANIB B Hero 200 Ml NITbeBOB BObl.
1.BbIbOPPEKIMMA
Дя Вьбopa ржима NOвернite pyчу bьбopa Ha сиMbON Heo6xOДМо rpeжIMa: 3arOpHTcЯ DiuCnIe, n pa3dACTcR 3ByKOBoN CmHaJ.
2.BKJIIOUeyHNEPEXIMMA
PUSHON PEKIM
ДявКIOUOeHnB BbIbpaHHOro peKIMa yCTaHOBnte HxKHyTO TempePaTyP, NOBepHyB pyKy mepMocmama.

1940
PpmeHHe: BO BpeMa PnIroTOBnEHH MoKHO N3MeHHTb peKIM pykou b6opa nn OtperynpoBaTb TemnepaTy pukou mepmocmama.
PeknH He 3anyctntcra,ecn pyuKa TepmoCTaHaXoNTcRa .MoxHO 3aDaTb Bpema PpiroTOBHeHnB, Bpema OKOHuaHn (ToIbKO ecn 3aDaHO Bpema PpiroTOBHeHn) HAcTPOuTb TaIMeP.
ABTOMATNUECKNIPEKIM
ДлгьВКЛIOUЧЕНЯБыбpaHHORO abTomaTчecKOro pexIMa(«XJIe6»
Илгь«Дeceptы»pyka mepMocmamaДOLЖHa HaxODITbCByB
ПОLOJOKeHn ABTomaTчecKOrO pexIMa(
ДлгьЗавршенприroTOBЛeня nobepHHTe pyky bIbopa B
ПОLOJOKeHne 0.
PpIMeuaHHe:MOXHO 3aDaTb BpeMa OKOHuaHn HHaCTpoNTb TaIMep.
TIObEM TECTA
ДяВКИJOUEHЯрЖIMА«ПОДБЕМТECTа» NOBEPHNTe pyky mepmocmama do COOTBeTCTBYUOJIERO CUMBOla; eCIN B DyXOBKe yCTaHOBNeHa dpyra TempepaTypa, peKIM He BKIIIOHTcR.

IObEM TECTA
PexnM nIe 6bIcTporo noDbema npoxkeBoro Tecta. IJIeHna KaueCTBeHHoro Tecta He NCIONb3yIte peXm, eCNIka He OCTbIg NocJe pniroTOBHeHn.

OKO KOHBEKLIA
IДЯ npriROTOBHeHЯ KapKOrO n φapuINpOBaHHoro Mca Ha I yPobHe.ДeLInKaTHA rNpKpyLlUra BO3Dyxa, BKNIOUoJuaCn OT BpeMeHn, ppeIoTbpaUaet nepeCyuINBaHne npOdyKTOB. EEM npriROTOBHeHЯ BpeXmE 3KO NaMna He rOpNT. Ee O BKJIQUHTb HaxkTneM

XJIE6ABTO
3TOT pexim aBtOMaTHueckn Bb6npaET Tempepatyp
nBpem, ndeaIbHO NOxOJaIe dIy BIneueKxNpe6a. IIOCTnxKeHnHaunuUwero pe3yNbTaTcTporo CJeynTe peCenTy . BkIouaIte pexim, KOrda duXOBKa xOJOnHa.

DECEPTbI ABTO
3TOT pejIM aBtOMaTnueckn Bb6npaet Tempeatpy
m, ndealbHO NOxOJaUne IJN BbIeNeKn 6NCBNTOB IN
XhblX. BkIOuaiTe pejIM, KOrDa DyXOBKa XoIoHaH.

DIAMOND CLEAN
Iap, 6oBa3yIoUncsB O BpeM Hn3KOTemPePaTyPhoi
OuICTKn, nO3BONJeIeKO ydaJIb TpR3b N OCTaTKn PNIU.
HaJeTe 200 mN BObl Ha IHO dYXOBKn. PExnM MoXHo BkIOuAtb,
ToIbKO KOrDa dYXOBKa XOnODHa.
PIMMeaHHe:MOxHO 3aDaTb Bpema npiroTOBHeHn, Bpema OKOHuaHn (ToIbKO eCNI 3aHaHO Bpema npiroTOBHeHn) n HAcTPOntb TaMep.
3. ПОТPEB И OCTATOЧОЕ TENJO
PnB BKIOUeHn pexIMpa3daetc 3ByKOBOu CnIHAN, a MraOuHn Ha dncJIee 3HaOH KKa3bIbAet Ha BKnIOUeHne nporpeBa. IIO 3aBePeHn nporpeBa 3ByKOBOu CnIHAN n NOCToHHo ropau Hn DaNCIIe 3HaOH Ka3bIBAOJ, YTO dYxOBka pa3OrpeJacb Do Heo6xoJIMOn TemnepaTypbI: NOB D yXOBky 6IOIO n HaCHIne PnIROTOBHeHne.
PnmeaHne: nomeeHne 6IIOa B DxyXOBn IkaF do 3abepeHn nporpeBa MoKeT yXyDnTb pe3yNbTaT npiroTOBnEHN.
Iocne 3aBepweHnnpiroTOBHeHn npoTOKIOueHHom pexHMe 3Haoyok MoKet OCTaBaTbCBAIDNMBiM Ha DnCNIe DaKe NOCJe TORO, KaK OXIAJDAUOn BENTNIATOP BbIKIOUHJIcR, YTO6bl YKa3aTb, 7TO TeMnepaTypa BdyxOBOM WkAfoE eSe BBICOKa.
PnmuueHHe: Bpem, B TeueHHe KOToPORo 3HaQoK OTKnIOuAeTcra, BapbnpyETcRA, NOTOMy YTO OHO 3aBNCIT OT pRda PaKTOpOB, TaKx KaK TemnepaTypa OKpykaOuSeI Cpebl N cNoJIb3yEmbl peXIM. B IIObOM Cnyae Pnp6op CHTaETC BbIKIOUeHHbIM, KOrJa yKa3aTeIb pyKN BBbopa yCTaHOBEn B nIoJKeHHe «0».
4.ПОГРAMMИPOBAHNE ППIGROTOBJEHNA
IpeepnporpaMPOBaHnem npurotOBHeHn Heo6xOaMo Bb6paTb peXm.
JIINTEIbHOCTb
Haxmata KaHa dncnnee He HaHyT MInraTb 3HaQOK n<00:00>.
YCTaHOBtBe Bpem npnroTOBHeHn KhoNkAMn n HAKMITE 1I NOITBepKDeHn.
Bknoutepekm, NOBepHyb pyky mepmocmama Ha Heo6xOmyIO TemnepaTyPy:Pa3dactc 3BykoBoCnHaN, Hn Daicnnee 6ydeT yka3aHo, YTO npiroTOBneHHe 3aKOHHe.
PnmeaHnIyOTMeHb3aHaHHoJINITeBHOCTNIPnroTOBHeHn HaxMaTePOKA He HaHTET MIRATb 3HaYOK CATEM C NOMOuBc6pocbTe BpeMa DO «00:00».3To BpeMa npiROTOBHeHn BKJIIOUaet Bce6paorpeB.
3AADAHNE BPEMEH NOKOHUAHN/OTJIOXEHHBI CTAPT
Tocne 3aHaHbBpeMeHH npiroTOBHeHb BKIOueHepeKIMAMoXHO OTIOXHTb,3aIporpaMMIpOBAB BpeM OKOHaHNHaKImaTe Toka Ha dncnlee He haHyTMraTb 3HaOcN ENTEkyuee BpeM.
YCTaHOBtE BpEMr OKOHuaHnKHOHkAMu HnHaXMITE 1IINIOITBePKeDeHH.
BknoutepekmnIOBepHybpykymepmocmamaHa Heo6xOmyTOtempeatypy:Pekm6yJeT npnoctaHObnen I npoJOnKeH abTOMaTHueCKN NO nCTeueHN BpemeHN, paCCHTaHHORO C yETOM 3aDaHHORO Bamn BpemeHN.
PpmeaHne:Ira6oPaHaCTpoiKn BbIKIOHTe DyXOBky,NOBepHyB pyKy bbi6opaB NOIOKeHne « 0 »
PpmeaHHe:YHKUNOOTNOXKeHHOroCTapTa HeIOCTynHa dnerpekIMOB rpiNb nTyp60rpiNb.
3ABEPUEHNEIPIIOTOBJEHNA
Pa3daTc 3ByKOBOu CnHn, nHa DnCnnee 6yJeT yka3aHo, TOp a6oTa peKIma 3aBepseHa. NobepHnte pyuky b6bopa, uTO6bl BbIbpaTb dpyToe pexm, nIO nobepHnte ee B nONOKeHne «UTO6bl BbIKIOHTb dYXOBky.
PpmeaHne:ecn TaMep akTbEh,Ha nCnIe 6ydyT noOpepeHo NOBtbc HAnncb ENDNocabueee Bpem.
5. YCTAHOBKA TAIIMEPA
3Ta yHKUHe npepbIbAeT n He 3anyckaet npouecc npnroTOBJIeHn, OHa TOJbKO PO3BOJAEr NCPOJb3OBAbT DCNPIeB KaueCTBe TaMepa, KOrDa BKNIOUeH KAKo-Ni6o peKIM NIN KOrDa dYXOB0u KaΦ BBkIOUeH. HaKIMMaTe MoKa Ha DNcPiee He HauHyT MnRaTb 3HaOH K «00:00»
YCTAHOBITE Heo6xOJUMOE BpemKHOHkAMN HnHaKMITE
B MOMENT OKOHUHINI O6paTHORO OTCuETa npo3ByuHT 3ByKOBOI CnHaJ.
Примочан: Дд OTКЮчЕн.TаIMЕра НЖИМAJTE O, NOKA He NaHHT MIRaTb 3HaYOK C NOMOUIB O CBPOCbTe BpEMJdo «00:00».
6. PEXKUM DIAMOND CLEAN
Дявькюченуpeжma «DiamondClean» HaneTe HaДно duXOBOrO ukaфa 200 mNITbEBoB BOdBi n NOBepHnTe pyky bIbopa n pyky MEPmocmama do 3HaUka
PpIMeuaHHe: BO Bpem OuCTKn IIOJoxHe 3HaUka He COOTBeTCTByeT
Pexim BkIouHTCABTOMaTueCKn:Ha dncnnee noka3bBaetcBpem, octabweecdo KOHca, cmeHauuieecn HndnncbIO DC

PpmeaHne: MoKHO 3aIporpaMMPOBaTb TOnbKO BpEMa OKOHuaHnpeXIMa. PpOIOJIKNTeBHOCTb aBTOMaTnueCKN yCTaHabINBaETcHa 35MHyT.
TABINUa IPNIROTOBHeHbIIO