
Avent SCF302 - Breast pump PHILIPS - Free user manual and instructions
Find the device manual for free Avent SCF302 PHILIPS in PDF.
| Brand | Philips |
| Model | Avent SCF302 |
| Product type | Individual electric breast pump |
| Power supply | Mains (100-240 V, 50-60 Hz) or 4 AA batteries (Duracell Ultra M3, Duracell Plus, Energizer Ultra Plus, Duracell Accu NiMH, Ansmann NiMH) |
| Main functions | Manual and automatic pumping with rhythm memory, integrated manual mode, auto shut-off after 3 minutes of inactivity, LED indicator (green, orange, red) |
| Number of cycles per minute | Up to 60 cycles/min at maximum suction |
| Package contents | Control handle, silicone diaphragm, white valves, funnel, storage bottles (125 ml), base, massage cushion with alveoli, funnel cover, battery unit, earth plug, caps, AVENT extra-soft newborn flow teats (1 hole), rings, teat protectors, sealing discs, manual handle and cover for manual use |
| Materials | BPA-free polyethersulfone (PES), silicone |
| Maintenance and cleaning | Wash in warm soapy water or dishwasher (top rack); sterilize by boiling (10 min) or steam sterilizer; do not immerse the control handle, battery unit or plug |
| Safety | Unplug after use, do not use in bath, check condition of parts before each use, do not share the device, do not use during pregnancy, automatic shut-off in case of problem |
| Operating atmospheric pressure | 700 to 1060 hPa |
| Operating ambient temperature | +10 °C to +40 °C |
| Compatible batteries | Duracell Ultra M3, Duracell Plus, Energizer Ultra Plus, Duracell Accu (NiMH), Ansmann (NiMH) |
| Battery life | Approximately 6 hours; flashing red indicator indicates low batteries |
| Warranty | 24 months |
| Consumer service (France) | Toll-free number: 0800 90 81 54 |
Frequently Asked Questions - Avent SCF302 PHILIPS
User questions about Avent SCF302 PHILIPS
0 question about this device. Answer the ones you know or ask your own.
Ask a new question about this device
Download the instructions for your Breast pump in PDF format for free! Find your manual Avent SCF302 - PHILIPS and take your electronic device back in hand. On this page are published all the documents necessary for the use of your device. Avent SCF302 by PHILIPS.
USER MANUAL Avent SCF302 PHILIPS
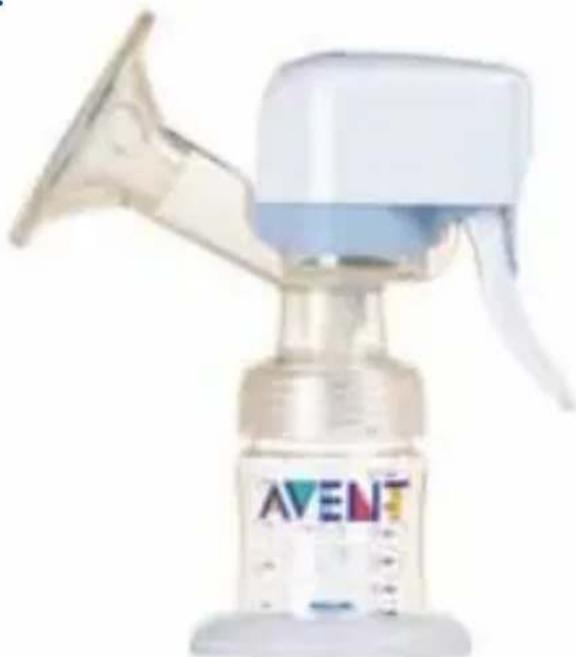
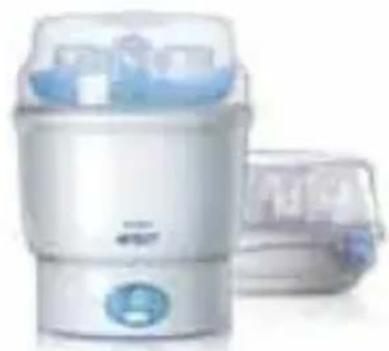
We've taken everything women loved about our classic Manual Breast Pump – the soft petal massager and fingertip sensitive control that make it feel so gentle, natural and comfortable – and we've given it an electronic memory.
The Single Electronic Breast Pump learns from you. Begin by pumping manually, then touch the button and let the breast pump quietly continue your exact pumping rhythm.
If at any time you want to vary the rhythm, touch the button again to revert to manual. The Single Electronic Breast Pump is totally responsive to your needs.
Relax and enjoy the experience because you're always in complete control. And when you're relaxed and comfortable, you express more milk, faster.
The Single Electronic Breast Pump is battery or mains powered for maximum flexibility and portability.
Please take a few minutes to read through the ENTIRE INSTRUCTION LEAFLET before you use your Philips AVENT Single Electronic Breast Pump for the first time. PLEASE SAVE THESE INSTRUCTIONS.
Unless advised otherwise by your health professional it is best to wait until your breastfeeding routine is established before expressing – usually around four weeks.
Breast Pump parts
Pump parts (diagram A1)
a Control handle
Silicone diaphragm and stem
White valve
Pump body
e Milk container (125ml/4oz)
Stand (same as)
8 Let-down Massage Cushion
Funnel cover (same as)
Battery pack
Mains power lead*
Bottle parts (diagram A2)
Dome cap
Extra soft AVENT Teat, Newborn flow (0m + )
Screw ring
Sealing base
Sealing disc
Manual parts (diagram A3)
P Handle
Pump cover
*NEVER STERILISE OR IMMERSE IN WATER
Control Handle* (diagram B)
Power socket
Control button
Control handle
Light
Battery pack* (diagram C)
Power cable
Only the following batteries are compatible with the Single Electronic Breast Pump Battery pack: Duracell Ultra M3, Duracell Plus, Energizer Ultra Plus, Duracell Accu (NiMH), Ansmann (NiMH). For Duracell Acc (NiMH) & Ansmann (NiMH) use/charge in accordance with manufacturers guidelines. Dispose of batteries as per manufacturer's instructions.
Important safeguards
READ ALL INSTRUCTIONS BEFORE USING YOUR PHILIPS AVENT SINGLE ELECTRONIC BREAST PUMP
When using electrical products, especially when children are present, basic safety precautions should always be followed, including the following.
WARNING - To reduce the risk of fire, electrocution or other personal injury:
- The breast pump is intended for repeated use by a single user only.
- Always unplug from the electrical wall socket immediately after use.
- Do not use while bathing.
- Do not place or store the product where it can fall or be pulled into a bath or sink.
- Do not place or drop the control handle, battery pack or mains power lead into water or other liquids.
- Do not reach for a product that has fallen into water. Unplug from the wall socket immediately.
- Do not allow children or pets to play with the control handle, battery pack, mains power lead or accessories as these parts may pose a choking or strangulation danger.
- Before each use inspect the product, including mains power lead, for signs of damage. Never operate this product if it has a damaged lead or plug, if it is not working properly or if it has been dropped, damaged or has been submerged in water.
- Only use attachments recommended by Philips AVENT.
- Do not use outdoors with the mains power lead or where aerosol spray products are being used, or where oxygen is being administered.
- Equipment not suitable for use in the presence of flammable anaesthetic mixture with air, or with oxygen or nitrous oxide.
- Only use the mains power lead and battery pack supplied with the product.
- There are no user serviceable parts inside the breast pump. Do not attempt to open, service or repair the breast pump yourself.
- Keep leads away from heated surfaces.
- This product is a personal care item and should not be shared between mothers.
- Do not attempt to remove the pump body from your breast while under vacuum. Turn the unit off and break the seal between your breast and the pump funnel with your finger, then remove the pump from your breast.
- Do not operate unless control handle is connected to a pump body.
- Never use while pregnant, as pumping can induce labour.
- Never use when sleepy or drowsy.
This appliance is intended for use by responsible persons, keep out of reach of small children and the infirm. - This appliance is not intended for use by persons including children with reduced physical, sensory or mental capabilities, or lack of experience or knowledge, unless they have been given supervision or instruction concerning use of the appliance by a person responsible for their safety.
Children should be supervised to ensure that they do not play with the appliance. - Ensure the unit is not exposed to extreme heat or placed in direct sunlight.
CAUTION - To reduce the risks of injury, device malfunction or failure:
- The product should not be left unattended when plugged into an electrical wall socket.
- Never drop or insert any foreign object into any opening.
- Make sure the voltage of the mains power lead is compatible with the power source.
- Plug the end of the mains power lead into the control handle first, then securely attach the wall plug into the electrical socket.
- Although compliant with applicable EMC directives, this equipment may still be susceptible to excessive emissions and/or may interfere with more sensitive material.
- Wash, rinse and sterilise the appropriate pump parts before each use.
- Never put the control handle, battery pack or lead in water or a steriliser as you can cause permanent damage to the pump.
- Do not continue pumping for more than five minutes at a time if no result is achieved.
- Do not use antibacterial or abrasive cleaners/detergents when cleaning breast pump parts.
- If the pressure generated is uncomfortable or causing pain, turn the unit off, break the seal between the breast and the pump body with your finger and remove the pump from your breast.
How to clean and sterilise your pump (see diagram A)
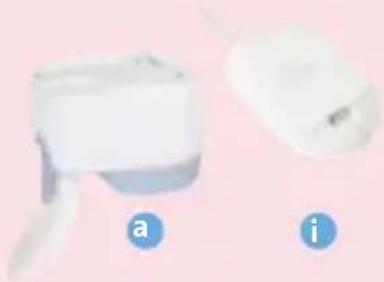
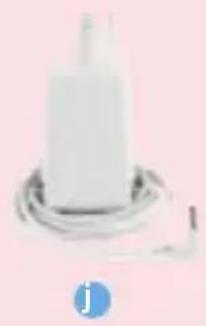
NEVER WASH OR STERILISE…
the control handle (a), battery pack (i) or mains power lead (j).
These components DO NOT come into contact with your breast milk.
You can wipe the control handle clean, using a soft cloth.
Cleaning and sterilising the pump body and breast milk storage components
Before you use your breast pump for the first time and every time before use, you must disassemble, wash and sterilise all the breast pump parts that come into contact with your breast milk.
You can use the dishwasher (top rack only) or hand wash in warm, soapy water and then rinse thoroughly.
Do not use antibacterial or abrasive cleaners/ detergents as they may cause the plastic to crack.
To clean the valve, rub gently between your fingers in warm soapy water - do not insert objects as this may cause damage.
Sterilise these parts in a steam steriliser (digital, electric or microwave), or by boiling in water for 5 minutes.
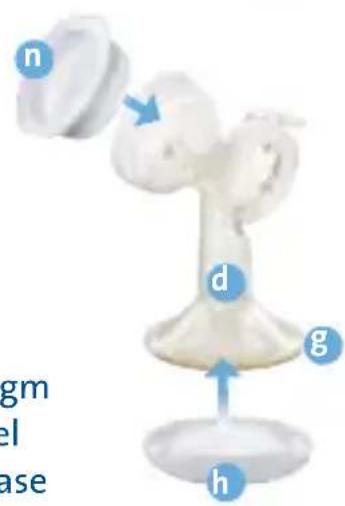
Keeping your pump sterilised and compact for travel
After sterilising all parts, insert the white valve and diaphragm into the pump body. Clip the funnel cover (h) over the funnel and Let-down Massage Cushion (g) and screw the sealing base (n) onto the pump body (d) in place of the milk container.

How to assemble your pump
(see diagram D)
- With clean hands, insert the white valve (c) into the pump body (d) from the bottom making sure that the pointed side of the valve faces downwards.
- Twist the milk container (e) onto the pump body (d) until securely in place.
- To ensure the pump doesn't topple, insert the 125ml/4oz milk container into the stand provided (f).
- Place the silicone diaphragm (b) into the pump body (d), making sure it fits securely around the edge, to create a seal (this is easier if the diaphragm is wet).
- Carefully insert the Let-down Massage Cushion (g) into the pump body (d), making sure it completely covers the edge of the funnel (this is easier if the Let-down Massage Cushion is wet).
- Firmly push the control handle (a) onto the pump body (d) so that it sits securely on top of the silicone diaphragm (b).
- For mains use connect the mains power lead (j) to the control handle (a) and plug into an electrical wall socket.
- For battery use, open the top of the battery pack (i) and insert 4 × AA batteries. Connect the power lead to the control handle (a).
How to use your pump
(see diagram E)
Wash your hands thoroughly and make sure your breasts are clean. Relax in a comfortable chair, leaning slightly forward (use cushions to support your back). Make sure you have a glass of water nearby as expressing can be thirsty work. A photograph of your baby will help too.
To begin pumping
- Switch on at the wall socket if using mains power. To turn the pump on, press and hold the control button for 2 seconds. The light on the top of the control handle will flash ORANGE and then turn to a solid GREEN to indicate that the pump is ready to use. If at any time the light is flashing red, stop and consult the 'Troubleshooting guide'.
- Bring the assembled pump to your breast. Position the cushion firmly onto your breast so as to create a perfect seal (ensure no strand of hair or piece of clothing is trapped). Using the control handle you can find your exact comfort level. As you press down on the handle, you will feel greater suction against your breast. You don't need to squeeze the handle fully, only as far as feels comfortable for you.
- Once comfortable, begin by gently squeezing the handle 5 or 6 times quite quickly, simulating the rapid suckling you usually feel when your baby is first put to the breast. Your milk will soon begin to flow and you can establish a slower, comfortable pumping pattern. Many mothers find that holding down the handle for 2 to 3 seconds at a time imitates the feeling of their baby breastfeeding.
- When you have established a comfortable pumping rhythm with at least 2 squeezes, simply press the control button on the handle, and the Electronic Breast Pump will automatically continue in the same way. The light on the control handle will turn from solid GREEN to a flashing GREEN. Your pattern will now be stored in the pump's memory – even after the pump has been switched off!
To change your pumping rhythm
If at any time you want to change your pumping rhythm, press the control button and the pump will revert to manual pumping. The light will turn back to solid GREEN. You can now pump manually until you are comfortable again. Then press the control button again and the Single Electronic Breast Pump will continue your chosen rhythm.
To stop pumping
When you want to stop pumping, press the control handle and break the seal between the breast and the pump body with your finger. To switch off the pump, press and hold the control button for 2 seconds until the light turns off, then unplug the mains power lead from the wall socket. If you're using the battery pack, disconnect from the control handle. If you forget to turn the pump off, it will switch itself off after 3 minutes to save battery power.
Battery Life
Batteries will last for approximately 6 hours. The light on the control handle will display a slow pulsing flash to warn you when it is time to replace them. There will be enough power for approximately 1 more pumping session, with no drop-off in performance, before the pump switches itself off.
To collect and store your milk
After you have expressed your milk, unscrew the pump body from the milk container (e). If you're using AVENT Breast Milk Containers, insert a sealing disc (o) into the screw ring (m) and twist it onto the milk container. If you're using VIA, unscrew the adaptor and screw a lid onto the cup.
On average you will need to pump for 10 minutes to express 60 - 125ml / 2 - 4oz . However, this is just a guide and varies from woman to woman. If you find that you regularly express more than 125ml / 4oz per session, you can use a 260ml / 9oz AVENT Breast Milk Container or a 240ml / 8oz VIA Cup.
Breast milk can be stored in the fridge or freezer in either sterile breast milk containers (125ml/4oz or 260ml/9oz or 330ml fitted with sealing discs) or in pre-sterilised VIA Cups.


Do not overfill the milk container and be sure to keep it upright, otherwise it may leak.
Expressed milk should be refrigerated immediately.
Only milk collected with a sterile pump should be stored to be fed to your baby.
Expressed breast milk can be stored in the refrigerator for up to 48 hours (not in the door) or in the freezer for up to 3 months.
If you are storing freshly expressed milk in the fridge to add to during the day, only add milk which has been expressed into a sterile container. Milk can only be kept like this for a maximum of 48 hours from first expression, after which it must be used immediately or frozen for future use.
Frozen breast milk can be defrosted overnight in the refrigerator, heated gradually in warm water or heated with a Philips AVENT Bottle and Baby Food Warmer.
NB:
NEVER refreeze breast milk.
DO NOT add fresh breast milk to already frozen milk.
- ALWAYS discard any milk that is left over at the end of a feed.
Never heat milk in a microwave as this may destroy valuable nutrients and antibodies. In addition, the uneven heating may cause hot spots in the liquid which could cause burns to the throat.
Never immerse a frozen milk container or VIA Cup in boiling water as this may cause it to crack/split.
Never put boiling water directly into a VIA Cup, allow to cool for around 20 minutes before filling.
Disassembly
Ensure the power is switched off at the wall socket and disconnect the mains power lead or battery pack from the control handle. Pull the control handle directly upwards away from the diaphragm then unhook it from the stem by moving it towards the funnel.

Hints to help you succeed
Using a breast pump takes practice. You may need to make several attempts before you succeed, but because the Single Electronic Breast Pump is so simple and comfortable to use, you will soon get used to expressing milk.
- Choose a quiet time when you're not rushed and unlikely to be disturbed.
- Having your baby or a photograph of your baby nearby can help encourage your milk to flow.
- Warmth and relaxation can help so you might like to try expressing after a warm bath or shower.
- Placing a warm cloth on your breasts for a few minutes before you start pumping can also encourage your milk flow and soothe painful breasts.
- Try expressing from one breast while your baby is feeding from the other, or continue expressing just after a feed.
- Repositioning the pump on your breast from time to time can help stimulate your milk ducts.
- Some women may prefer to use the pump without the Let-down Massage Cushion. However, it has been shown that, in most cases, the massaging effect of the petals flexing in and out around the areola stimulates the let-down reflex and allows you to express more milk, faster.
- To relieve engorgement, we recommend gentle, slow pumping to relieve the pressure.
Practice with your pump to find the best pumping techniques for you. Don't worry if your milk doesn't flow immediately, relax and continue pumping.
Do not continue pumping for more than 5 minutes at a time if NO result is achieved. Try expressing at another time during the day.
Using your Electronic Pump as a Manual Breast Pump
Your Electronic Breast Pump can also be used as a manual pump. In this case, you simply need to replace the control handle with the manual handle (p) and pump cover (q) provided.
Assembling your Manual Breast Pump (see diagram F)
Ensure you have disassembled, washed and sterilised all the parts.
Follow steps 1-5 as before (see diagram D), then proceed to step 6 and 7 (see diagram F):
- Position the forked end of the handle (p) under the diaphragm stem (b) and push down gently on the handle until you hear it 'click' into place.
- Click the pump cover (q) onto the pump body (d).
How to use your Manual Breast Pump (see diagram G)
- Bring the assembled pump to your breast. Position the Let-down Massage Cushion firmly onto your breast so as to create a perfect seal (ensure no strand of hair or piece of clothing is trapped).
- Once comfortable, gently squeeze the handle 5 or 6 times fairly quickly to initiate let-down. When you see your milk beginning to flow, establish a rhythm of pumping to meet your own comfort level.
Key to Control Handle Symbols
Technical Specifications
- Mains Input Voltage 100 - 240 VAC
- Mains Input Frequency 50 - 60 Hz
Supply voltage fluctuations not exceeding + / - 10% of the nominal voltage - Ambient Temperature range: +10^ to +40^
- Atmospheric Pressure: 700 to 1060hPa
- Equipment rated for continuous operation
Maximum speed at maximum vacuum is 60 cycles per minute
Guarantee
Philips AVENT guarantees that should the Single Electronic Breast Pump become faulty during 24 months from the date of purchase, it will be replaced free of charge during this time. Please return it to the retailer where it was purchased. Please keep your receipt as proof of purchase, together with a note of when and where purchased. For the Guarantee to be valid, please note:
- The Single Electronic Breast Pump must be used according to the instructions in this booklet and connected to a suitable electricity supply or the battery pack provided.
- The claim must not be a result of accident, misuse, dirt, neglect or fair wear and tear.
This Guarantee does not affect your statutory rights.
If the retailer is unable to help, please contact Philips AVENT Customer Services (see back cover for contact details).
Troubleshooting guide
CONCERN SOLUTION
Lack of suction
- Check that all pump parts have been assembled correctly and that the valve is positioned correctly.
- Ensure that the silicone diaphragm and Let-down Massage Cushion are fitted securely to the pump body and a perfect seal is created.
- Make certain that the control handle is firmly in place.
No milk being expressed
- Ensure the pump is correctly assembled and that suction is being created.
- Relax and try again, as expression may improve after practice.
Refer to the 'Hints to help you succeed' section.
Pain in the breast area when expressing
- You may be squeezing too hard. You do not need to use all the suction the pump can generate.
Try squeezing the handle more gently and remember the 2-3 second pumping rhythm. - Consult your health professional/ breastfeeding advisor.
Milk is drawn up the Let-down Massage Cushion
- Remove and re-fit the Let-down Massage Cushion to ensure it is firmly attached and pushed far enough down the centre of the funnel.
Try leaning slightly forward.
Lost or broken parts
- Contact Philips AVENT Customer Services for replacements (see back cover for contact details).
| Cracking or discolouration of pump/bottle parts | ·Avoid contact with antibacterial or abrasive detergents/cleaners as they can damage the plastic. Combinations of detergents, cleaning products, sterilising solution, softened water and temperature fluctuations may, under certain circumstances, cause the plastic to crack. If this occurs, do not use. The pump body and breast milk containers are dishwasher safe but food colourings may discolour them. Follow guidelines in ‘How to clean and sterilise your pump’. |
| Pump not responding | ·Ensure the pump is correctly assembled and switched on with the power indicator illuminated ‘GREEN’. ·Make sure the lead between the electrical wall socket or battery pack and the pump is correctly connected. |
| Pump light flashing RED | ·Pump light flashing RED with delays (3 flashes, delay, 3 flashes etc.): If the pump works properly in Manual Control Mode but does not replicate in Automatic Mode, the handle rhythm may have been too fast for optimal milk expression. The machine is set not to follow. Push the control button to return to Manual Control Mode and use a slower handle rhythm. ·If this does not help and the power light still flashes RED, the pump has detected a vacuum fault. Disconnect the power and check the control handle and diaphragm for obstruction or damage. ·Pump light flashing RED continuously: Low battery warning. Replace the batteries. |
| Difficulties separating the control handle from the pump body | ·The pump must be switched off via the control button in order to separate these parts. If the batteries go flat mid-pumping, you may experience difficulty. Replace the batteries or connect the pump to the mains. Turn the pump on by holding down the control button for 2 seconds – the light will turn GREEN. Now turn it off by holding the button for 2 seconds – the light will go off. You can now disconnect the pump from the power supply and should be able to separate the parts. |
| الإستعمال الحرفية الحرفية الحرفية الحرفية الحرفية الحرفية الحرفية الحرفية الحرفية الحرفية الحرفية الحرفية الحرفية الحرفية الحرفية الحرفية الحرفية الحرفية الحرفية الحرفية الحرفية الحرفية الحرفية الحرفية الحرفية الحرفية الحرفية الحرفية الحرفية الحرفية الحرفية الحرفية الحرفية الحرفية EXTERNE الإستعمال الحرفية الحرفية الحرفية الحرفية EXTERNE | الإستعمال الحرفية الحرفية EXTERNE |
| الإستعمال الحرفية EXTERNE | الإستعمال EXTERNE |
| الإستعمال EXTERNE | الإستعمال EXTERNE |
| الإستعمال EXTERNE | الإستعمال EXTERNE |
| الإستعمال EXTERNE | الإستعمال EXTERNE |
| الإستعمال EXTERNE | الإستعمال EXTERNE |
| الإستعمال EXTERNE | الإستعمال EXTERNE |
| الإستعمال EXTERNE | الإستعمال EXTERNE |
| الإستعمال EXTERNE |
x_5 y_1 = y_2
| الله | الله | |
| plashحيى أيرشام مصطفى جامع الحرفية · مصطفى مصطفى نه;/مصطفى نه/مصطفى نه/مصطفى نه/مصطفى نه/مصطفى نه/مصطفى نه/مصطفى نه/مصطفى نه/مصطفى نه/مصطفى نه/مصطفى نه/مصطفى نه/مصطفى نه/مصطفى نه/مصطفى نه/مreds/مreds/مreds/مreds/مreds/مreds/مreds/مreds/مreds/مreds/مreds/مreds/مreds/مreds/مreds/مreds/مreds/مreds/مreds/مreds/مreds/مreds/مreds/مreds/مreds/مreds/مreds/مreds/مreds/مreds/مreds/مreds/مreds/مreds | الله | |
| الله飛揚الله飛揚الله飛揚الله飛揚الله飛揚الله飛揚الله飛揚الله飛揚الله飛揚الله飛揚الله飛揚الله飛揚الله飛揚الله飛揚الله飛揚الله飛揚الله飛揚الله飛揚الله飛揚الله飛揚الله飛揚الله飛揚الله飛揚الله飛揚الله飛揚الله飛扬/الله飛揚/الله飛揚/الله飛揚/الله飛揚/الله飛揚/الله飛揚/الله飛揚/الله飛揚/الله飛揚/الله飛揚/الله飛揚/الله飛揚/الله飛揚/الله飛揚/الله飛揚/الله飛揚/الله飛揚/الله飛揚/الله飛揚/الله飛揚/الله飛扬/الله飛揚/الله飛揚/الله飛揚/الله飛揚/الله飛揚/الله飛揚/الله飛揚/الله飛揚/الله飛揚/الله飛揚/الله飛揚/الله飛揚/الله飛揚/الله飛揚/الله飛揚/الله飛揚/الله飛揚/الله飛揚/الله飛揚/ (الله飛揚/الله飛揚/الله飛揚/الله飛揚/الله飛揚/الله飛揚/الله飛揚/الله飛揚/الله飛揚/الله飛揚/الله飛揚/الله飛揚/الله飛揚/الله飛揚/الله飛揚/الله飛揚/الله飛揚/الله飛揚/الله飛揚/الله飛揚) | الله | |
| الله飛揚الله飛揚الله飛揚الله飛揚الله飛揚الله飛揚الله飛揚الله飛揚الله飛揚الله飛揚/الله飛揚/الله飛揚/الله飛揚/الله飛揚/الله飛揚/الله飛揚/الله飛揚/الله飛揚/الله飛揚/الله飛揚/الله飛揚/الله飛揚/الله飛揚/الله飛揚/الله飛揚/الله飛揚/الله飛揚/الله飛揚/الله飛揚 | الله | |
| (الله飛揚/الله飛揚/الله飛揚/الله飛揚/الله飛揚/الله飛揚/الله飛揚/الله飛揚/الله飛揚/الله飛揚/الله飛揚/الله飛揚/الله飛揚/الله飛揚/الله飛揚/الله飛揚/الله飛揚/الله飛揚/الله飛揚/الله飛扬) | (الله飛揚/الله飛揚/الله飛揚/الله飛揚/الiale飞/الiale飞/الiale飞/الiale飞/الiale飞/الiale飞/الiale飞/الiale飞/الiale飞/الiale飞/الiale飞/الiale飞/الiale飞/الiale飞/الiale飞/الiale飞/الiale飞/الiale飞/الiale飞/الiale飞/الiale飞/الiale飞/الiale飞/الiale飞/الiale飞/الiale (1) | (1) |

a.aa 1
glll jy 1
j10-0JLJI Jl20
1 1
aagao a2+Jgao a2+1:abaaal 0j
1111111
Jai jie 11 iia o
a a
jolol
154 17 Jx aal y g jy 1000 Jbai jll g ai Philips AVENT u n
yloabxo yjy jy
11 10
0gjll 1bll aegoggl wlia jdaaag
JLg Lw81 g pssxw81 sgs w g 2n j 8 cllno
1
aigaiiagaa 8 jao
Philips AVENT aosy Jlai y jclwll aiai li Lol
(JL
a.sds 1s
g w all oio g. L a y d y aos 10al s w l s ay g jy 181 aia 20
gajll (q) aasall slb (p) gdsjy jao jn jn jn jn jn jn
(Fgillll)
s1j>81g>0aagJwGcLs no s5
Vg1ogbslll lLi D gilll pwrj ybril) aBcL0 1 no ogbsll
F
J (b) jll sL (p) aall o eiaai all b
"
(Gglll pwr sbr) aegll gill aa aol plsswlaa
Lg 1 Lg 1 1 1 1 1 1 1 1 1 1 1 1 1 1 1 1
aI aacn 10000000000000000000000000000000000000000000000000
Clll lcllwlal
y 1 y
y 1
1
J 1
J 2
1
1
ab = 30
81
J 1
L
aaii aiee eae 8
y j 100
aaiy jn 8 yI aI slal y VIA gS g I aagll sIg
Ji 1
11wIaIg IJIaIg aai 0 aIbI Jie iJia! no gssI
g 1
ealloljy

#
Jgssgssssssssssssssssssssssssssssssssssssssssssssssssssssssssssssssssssssssssssssssssssssssssssssssssssssssssssssssssssssssssss
#
J5paoag Jwoc aogai jlc
81J 50
Lgwc (nae gol) 11 b81 allw pssu w Lc
Lgabn jnnnllg Jlall g
g|LjSlllsslll 1golal
1
sall 1o
J 1
1
j 1
gla 0aol lal glaic gocg (aggSg)
即 SLCg 与 LCS
aolo a iog cfo
a a a a a a a a a a a a a a a a a a a a a a a a a
Jiai Phillips AVENT 0gagaaaiaa
jssll 5g jssssg 0g 1 ggl 20 Jiau uul Jauu uu uuuu uuuu uuuu uuuu uuuu uuuu uuuu uuuu uuuu uuuu uuuu uuuu uuuu uuuu uuuu uuuu uuuu uuuu uuuu uuuu uuuu uuuu uuuu uuuu uuuu uuuu uuuu uuuu uuuu uuuu uuuu uuuu uuuu uuu
gao jao jao aai aagcog gssll llll gaoi iia
1
i 1
aegell piae 10
y
a aaaal 1
aall jlll lal 100000000000000000000000000000
y
y
J 1
1
a a a a a a a a a a a a a a a a a a a a a a a a a a a
0slaqiee g 1g j 1j
plool J aLols Laoi
VENT aasagis sJg i
Laoi o
PHILIPS
AVENT
Specifications techniques
TIP BUYGUIAMALI PARCA

GENELUYARI

KULLANIM TALIMATLARINI IZLEYIN
AVRUPASTANDARX
Teknik Özellikler

SINIFII EKIPMAN

ATIK ELEKTRIKLI EKIPMAN ICIN AYRI BIR TOPLAMA YOLUYLA ATIN
Ana Sebeke Giris Gerilimi 100-240 VAC
Ana Sebeke Giris Frekansi 50-60 Hz
Nominal gerilim + / - % 10'unu aşmayan besleme gerilim dalgalanmaları
- Ortam Sicakligi araligi: +10°C - +40°C
- Atmosfer Basinci: 700 - 1060hPa
- Surekli calisma icin siniflandirilmis ekipman
Maksimum emmede maksimum hiz dakikada 60 dongudur
Garanti
For our complete catalogue of mother and babycare products
GB FREE on 0800 289 064
GB ONLY (9am-4.30pm Mon-Fri)
IRL II FREE on 1800 509 021
IRL ONLY (9am-4.30pm Mon-Fri)
AU300 364 474
(Australia National)
NZ300 104 401
AR971)800 AVENT
BPA is Bisphenol-A. This product uses Polyethersulfone (PES), which is BPA-Free and has a natural honey-coloured tint.
(PES) 10000000000000000000000000000000000000000000000000000
www.philips.com/AVENT
Philips AVENT, a business of Philips Electronics UK Ltd. Philips Centre, Guildford Business Park, Guildford, Surrey, GU2 8XH
Trademarks owned by the Philips Group.
© Koninklijke Philips Electronics N.V. All Rights Reserved.
