Curved Glass - Smartwatch DCU - Free user manual and instructions
Find the device manual for free Curved Glass DCU in PDF.
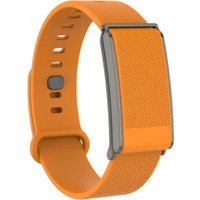
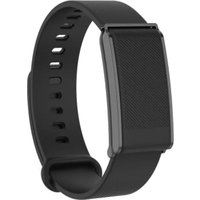
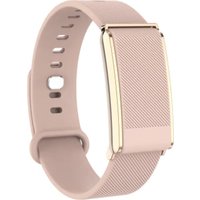
| Technical Features | Curved glass screen, high-definition resolution, Bluetooth connectivity, compatibility with iOS and Android. |
|---|---|
| Usage | Physical activity tracking, smartphone notifications, music control, sleep tracking. |
| Maintenance and Repair | Clean with a soft cloth, avoid harsh chemicals, regular software updates via the app. |
| Safety | Water resistance (IP68 standard), shock protection, screen lock. |
| General Information | Battery life up to 7 days, 2-year warranty, lightweight for optimal comfort. |
Frequently Asked Questions - Curved Glass DCU
User questions about Curved Glass DCU
0 question about this device. Answer the ones you know or ask your own.
Ask a new question about this device
Download the instructions for your Smartwatch in PDF format for free! Find your manual Curved Glass - DCU and take your electronic device back in hand. On this page are published all the documents necessary for the use of your device. Curved Glass by DCU.
USER MANUAL Curved Glass DCU
Smartwatch Curved Glass
iOS - Android
Manual de usuario 3
User manual 17
Manual d'usuari 31
Mode d'emploi 45
ESP
ENG
CAT
FRA
ESP
Thank you very much for purchasing this watch, the DCU team has been working hard to offer you a comfortable, beautiful and functional watch.
If you have any questions that this manual cannot solve, we will be happy to assist you, you can write to info@dcutec.com and in less than 24 hours we will answer you.
We wish you enjoy it!
If you want to know a little more, go to www.dcutec.com or visit our Instagram profile @dcutecnologic. Sometimes we do raffles.
Device maintenance
Remember the following tips to keep your Smartwatch in good condition:
- Clean the watch regularly, especially the inner side, and keep it dry
- Adjust the Smartwatch closure to ensure air circulation.
- Skin care products for the wrist where the watch is worn should not be used excessively
- Please stop using the watch in case of skin allergy or any discomfort.
SCHEMATIC DIAGRAM OF THE SMARTWATCH

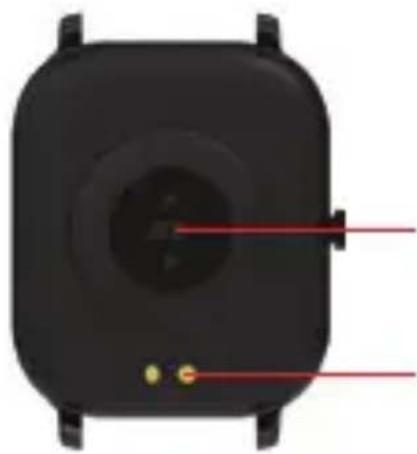
Heart rate sensor
Charging contact
CHARGE YOUR SMARTWATCH
To charge the smartwatch, connect the USB charging cable to the metal charging contacts on the back and connect the other end of the cable to a USB charger 5V 2.4A (max.) or to the USB port of computer
TURN ON
Press and hold the side button for 3 seconds or connect the charging clip on the Smartwatch to turn it on.
ENG
1. Da Fit APP: DOWNLOAD AND CONNECTION
Download the Da Fit APP: the watch can be connected to your smartphone using the Da Fit application. The application can be downloaded by scanning the following QR code or searching for "Da Fit" in the Android Play Store or the iOS APP Store.

Da Fit
2. CONNECTION BETWEEN THE AAPP AND THE SMARTWATCH
- Activate Bluetooth on your Smartphone.
- Start the "Da Fit" application on the phone, complete the personal information and enter the main menu of the APP.
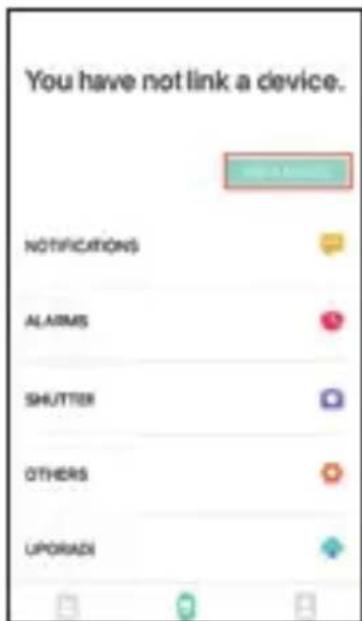
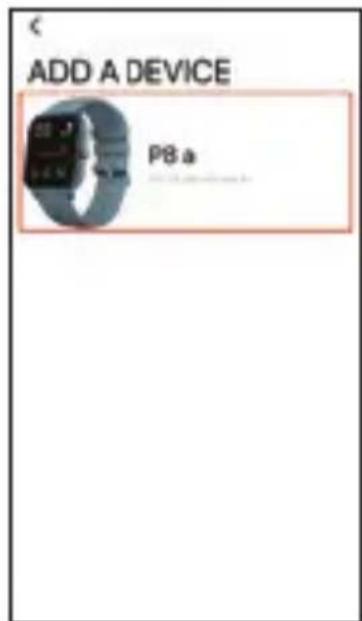
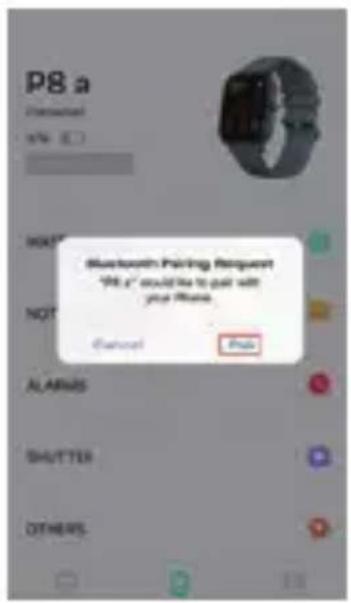
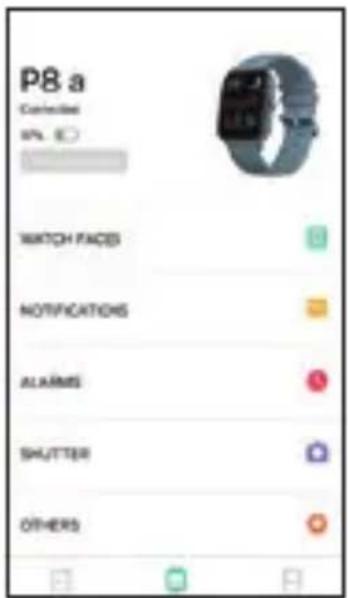
- Click on "connect" in the "Device" menu of the application, look for the Smartwatch to be connected and connect the device. On iOS devices you can complete the link by clicking on "Pair", otherwise, some functions will not be available. The connected Smartwatch will appear in the application as shown in the below picture. On the Smartwatch screen you can see if you are connected or not to the APP by an icon located at the top of the screen of the watch.
To synchronize the data saved on the watch with the application, swipe down in the main APP menu.
ENG
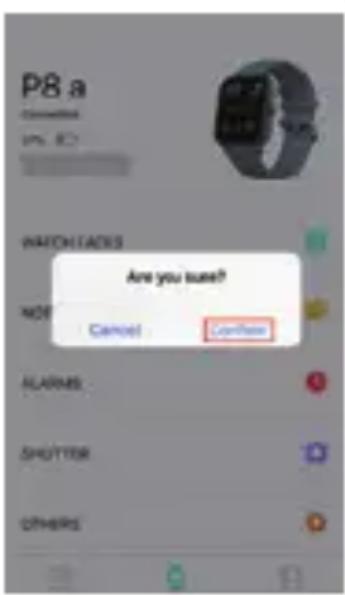
3. UNLINK THE SMARTWATCH AND APP
a. On Android phones: click "delete" on the "Device" screen of the "Da Fit" application.
b. On iOS devices: click "delete" on the "Device" screen of the "Da Fit" application, and then enter the Bluetooth settings of the phone, access the connected Smartwatch and click on "Forget device".
See images below:

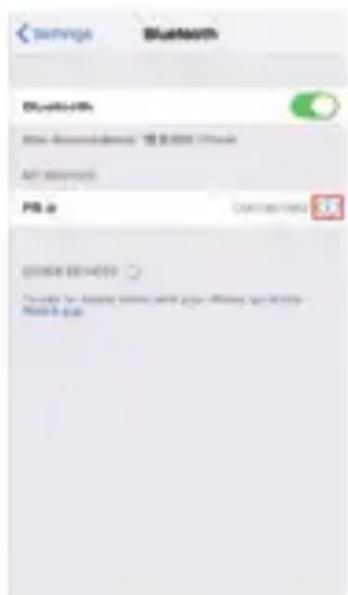

Android Apple
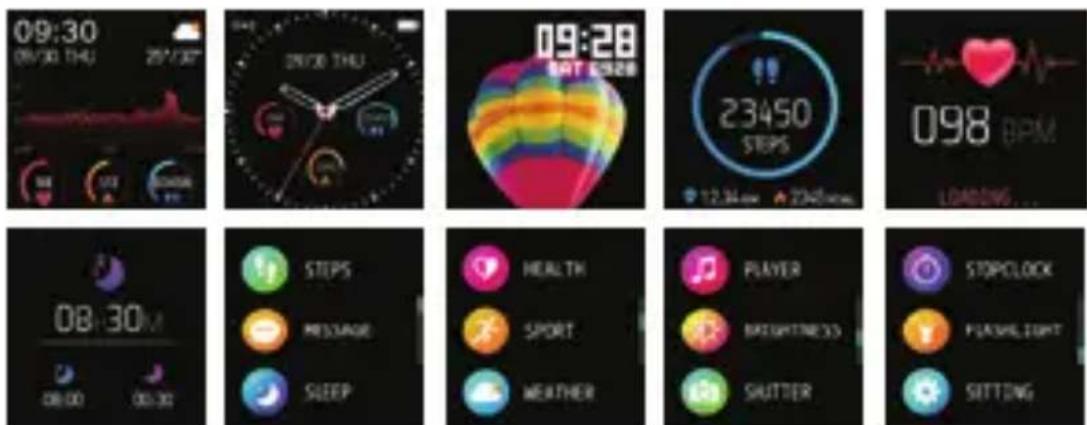
INTRODUCTION TO SMARTWATCH FUNCTIONS
Start: From the main interface of the Smartwatch, time display, swipe from right to left or from top to bottom to access the different functions of the Smartwatch:
Screen display customization
From the main interface press and hold the screen, you will access the menu to select one of the 3 different displays, once selected press once in the centre of the screen to accept the change.
ENG
FUNCTIONS
Message and call notifications
Access to the message notification interface from the main interface by sliding up and clicking on the "Notifications" option, you can view the content of the last messages received, switch between the different messages by sliding from left to right.
Configuration: This function must be configured in the Da Fit APP, enter the APP settings and select the notifications you wish to receive on your watch (WhatsApp, Facebook, Twitter, Instagram, calls, SMS etc.).
Quick access to some functions
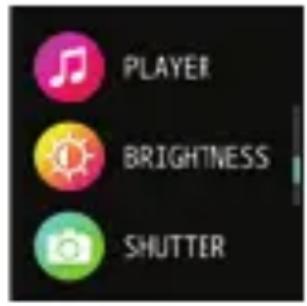
By sliding down from the main interface you can directly access some functions such as flashlight mode, brightness settings, screen lock, Bluetooth connection information, silent mode, power off and reset.
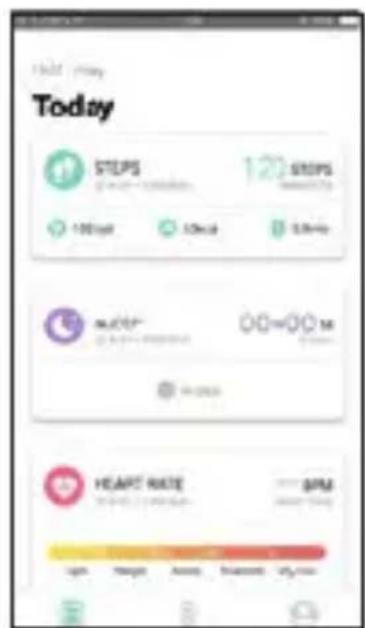
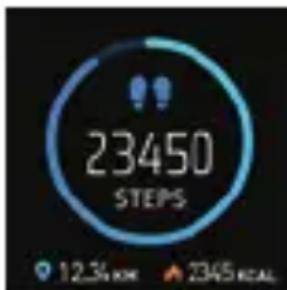
Step counter
The watch can show the total steps, calories and kilometres travelled in 1 day. The data will be reset every day at 0:00.
Instructions for use: From the main interface, slide to the left to directly access the step counter interface and display the data. Or slide upwards and click on the "Steps" option.
Heart rate, blood pressure and blood oxygen
The watch can measure the user's heart rate, blood pressure and blood oxygen through the sensor located on the back.
Instructions for use: From the main interface swipe left to directly access the heart rate measurement interface, the watch will start the measurement automatically. Or, swipe up, click on the "Health" option and select heart rate or blood pressure or blood oxygen to start the measurement.
Sleep mode
The watch will show the total sleep time of the previous night, the deep sleep time and the light sleep time.
Operating instructions: From the main interface swipe left to directly access the sleep mode interface and display the data. Or, swipe up and click on the "Sleep" option.


ENG
Sport mode
Instructions for use: From the main interface swipe up to access the sport selection interface. You can choose between 7 different types: running, walking, cycling, basketball, soccer, badminton and rope. To select one of them, swipe up and down between the different options and click to start the registration of the selected sport.
During the exercise swipe up-down to see the data being recorded, time, heart rate, kilometres, calories, etc. Or click the stop or pause button to pause or stop the exercise.
Data storage: you will be able to see the saved data of the different exercises after connecting with the Da Fit APP.
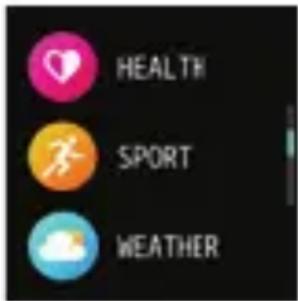
Meteorological Information
(Function available only after pairing the watch with the Da Fit APP from your Smartphone).
View the weather information and forecast by sliding upwards from the main Smartwatch interface and clicking on the "Weather" option.
Operating instructions: Activate/Deactivate: open the "Da Fit" APP and access to: Other settings -> Weather information. In this section select your location (IMPORTANT: if you don't synchronize your watch with the Da Fit application and configure your location, the watch will not be able to display the weather information). Once this is done, access the weather interface of your watch to see the information.
Music control
You can control the music player of your Smartphone from your watch by accessing the "Music Control" interface.
Operating instructions: access the music interface of the watch by sliding up from the main interface and clicking on the "Player" option, move through the different control options (play/pause, next, previous) and select by doing click.
Screen brightness setting
Operating instructions: access the Smartwatch brightness setting interface by sliding upwards from the main interface and clicking on the "Brightness" option. When you have this function on the screen, tap to select the desired brightness level, swipe right to confirm the brightness selection and exit.
Remote control of your Smartphone's camera
After entering at the "Camera App" of your Smartphone, you can take photos using your watch.
Operating instructions: After opening the photo camera of your Smartphone, access to the photo control interface on your watch by sliding up from the main interface and clicking on "camera". The photo control user interface will be displayed. From this interface click on the screen to take a photo.
ENG
Stop-watch
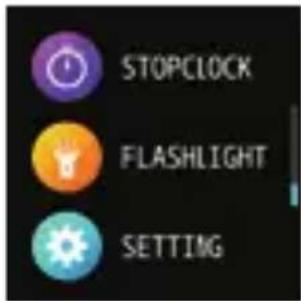
Operating instructions: access to the stopwatch interface by sliding upwards from the main interface and clicking on the "S-watch" option. To start the stopwatch, click on play. During the account you can pause or restart.
Flashlight mode
Operating instructions: access the watch's flashlight interface by sliding upwards from the main interface and clicking on the "Flashlight" option. The screen will light up and work as a flashlight. To turn it off/on press the screen. Swipe right to exit flashlight mode.
Others
From this interface you can configure the display of the main interface, turn off the Smartwatch, reset it or return to the initial factory settings. Operating instructions: access this function by sliding upwards from the main interface and clicking on the "Other" option. Swipe up to select the desired option.
Frequently asked questions (FAQ)
1. Why does my Smartwatch automatically disconnect from Bluetooth when the Android screen turns off?
a. When the Da Fit APP process is deleted, the smart watch will be disconnected from the mobile phone. Don't block the use of the APP in the background.
b. Sets the automatic start of the APP.
c. Use of the background APP without restrictions. The Android mobile phone where the Da Fit APP has been installed can intelligently restrict background operation, you must manually configure the application so that it does not have any restrictions.
2. Why does my smartwatch not receive messages?
a. Confirm that you have activated the notifications from the Da Fit APP on your mobile phone.
b. Confirm that messages can be displayed normally in the notification bar of the mobile phone. Sending messages to the Smartwatch occurs by reading the messages in the notification bar of the mobile phone. The Smartwatch will not receive the message if there is no message in the notification bar of the mobile phone. (You must access the notification settings of your mobile phone to activate notifications from Facebook, Instagram, WeChat, QQ, calls, SMS, WhatsApp, etc.).
ENG
c. Give all the permissions to the APP on the mobile phone --- Go to settings. In the search section write "Notification Permissions" and give all permissions to the Da Fit APP.
3. Why can't you use the watch with very hot water?
Answer: when the water is at high temperature generates a large amount of steam that can easily infiltrate in the smartwatch through the housing space. When the temperature drops, the vapour condenses into drops in liquid phase that will easily short-circuit the internal line of the smart watch and damage the circuit board and the Smartwatch.
Pay attention to the following warnings:
- Low battery: when the battery is low, to protect the battery life, charge it on time.
- Charging: Don't use the Smartwatch during the charging process. The USB can be connected to a PC or a standard 5V charger, 2.4A max. Do not use fast charging chargers.
- Don't charge the watch at temperatures above 50 degrees, this can cause overheating and deformation of the device.
- This device uses a built-in battery. Don't disassemble the battery or drilled, pressures or cuts the watch case.
- When the battery is broken or dripping, avoid contact with eyes and skin. If this occurs, immediately rinse the affected area with water.
WARNING:
This product is not a medical device. The Smartwatch and their applications should not be used for the diagnosis, treatment or prevention of diseases or ailments. To change your exercise and sleep habits, be sure to consult a qualified medical professional to avoid serious damages. Our company reserves the right to modify and improve any of the functions described in this manual without prior notice. At the same time, the company reserves the right to update the contents of the product. All contents are subject to the real product.
WARRANTY
-
The warranty covers quality problems caused by manufacturing, materials or design within the first year of purchase and battery and charger problems within the first 6 months.
-
About the fault caused by the user's personal reasons, we don't offer free warranty, as follows:
1). Disassemble or refit the product.
2). Caused by immodesty drop
3). All artificial damage or misuse (such as: make water into the host, the external force shatter, scratch damage of peripheral components, etc.), all these are beyond the scope of the warranty.
- When ask for free warranty, you must provide a receipt of purchase.
- If you met problems during use, please contact the shop customer service which you bought from.