
70374 - SSD VERBATIM - Free user manual and instructions
Find the device manual for free 70374 VERBATIM in PDF.
| Technical Specifications | Capacity: 1 TB, Interface: SATA III, Read Speed: up to 550 MB/s, Write Speed: up to 500 MB/s, Form Factor: 2.5 inches |
|---|---|
| Usage | Ideal for enhancing the performance of laptops and desktops, storage of games, applications, and media files. |
| Maintenance and Repair | No maintenance required, no moving parts, limited 3-year warranty. |
| Security | Shock and vibration protection, AES 256-bit encryption available. |
| General Information | Compatible with most operating systems, easy installation, lightweight and compact. |
Frequently Asked Questions - 70374 VERBATIM
User questions about 70374 VERBATIM
0 question about this device. Answer the ones you know or ask your own.
Ask a new question about this device
Download the instructions for your SSD in PDF format for free! Find your manual 70374 - VERBATIM and take your electronic device back in hand. On this page are published all the documents necessary for the use of your device. 70374 by VERBATIM.
USER MANUAL 70374 VERBATIM
- Download the PS4™ Software 5
- Back Up User Data 5
- Install the SSD 7
- Restore HDD User Data and Games to the SSD 10
- Repurpose the PS4™ HDD into a Portable HDD 11
Additional Details 25
- Support 25
- Warranty Information 25
- Other 25
Français 26
Introduction 26
1.Precautions 26
2. Contents 26
Installation 27
Thank you for purchasing the Verbatim SSD Upgrade Kit for the PlayStation® 4 (PS4™)! This booklet will guide you through the process of upgrading from an HDD to an SSD. The photos in these instructions will show installation steps using a PS4™ Slim, but the process is similar for all versions of PS4™.
1. Precautions
- Use of a computer connected to the Internet is required.
This process may take a long time depending on the size of user data and game library. - As with all electronics, please ensure you are properly grounded and free of static electricity before starting this process.
- Keep components away from humidity, water, and other liquids.
- Do not alter, modify, or disassemble the HDD or SSD.
- Ensure all connectors are firmly in place after replacing hardware.
- Verbatim is not responsible for lost or missing data or damage to the system resulting from this installation.
2. Contents
1 x 1TB Verbatim 2.5" Internal SATA Solid State Drive (SSD)
1 x 32GB Verbatim USB 3.0 Flash Drive
1xScrewdriver
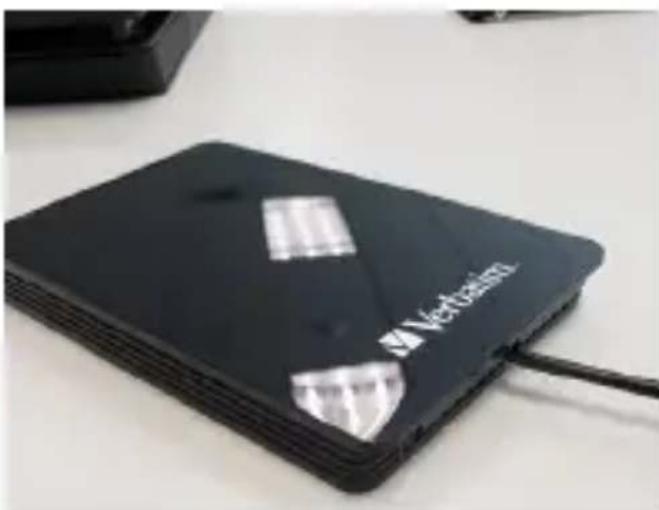
1 x 2.5" Hard Disk Drive (HDD) Enclosure with USB-A Cable
1xHDDFoamBumper
Installation
1. Download the PlayStation® 4 Software
1.1 Plug in the USB flash drive into an available USB port on an Internet-connected computer
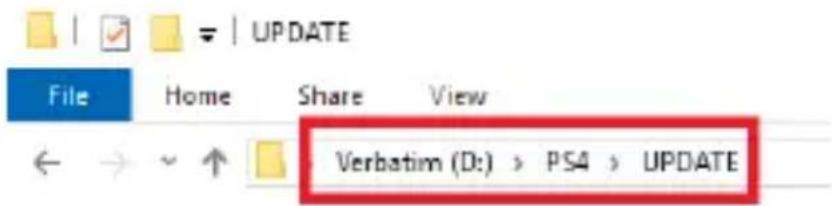
1.2 On the flash drive, create a folder named "PS4" (without quotations). Inside that folder create a folder named "UPDATE" (without quotations).
1.3 On the computer's browser, navigate to: https://www.playstation.com/en-us/support/system-updates/ps4/
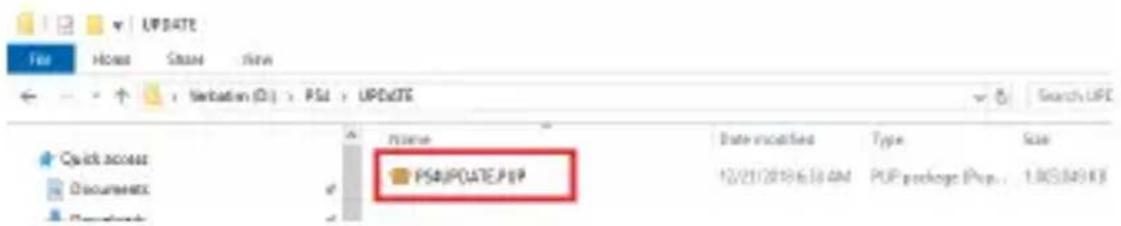
1.4 Download the PS4™ Complete System Software file, and save it in the "UPDATE" folder you created in step 1.2. Save the file with the file name "PS4UPDATE.PUP" (without quotations). Note: make sure to download the complete system software file, not just the update file.
1.5 Safely eject the flash drive from the computer.
2. Back Up User Data
2.1 Plug in the flash drive into an available USB port on the PS4TM.
2.2 Turn on the PS4TM.
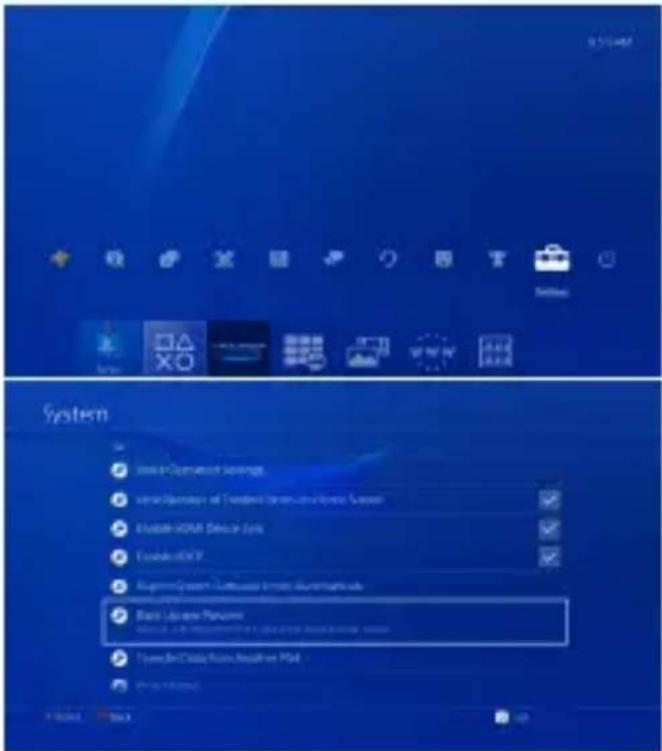
2.3 In the PS4™ menu, navigate to "Settings," then "System," and then "Back up and Restore."
2.4 Select each component of user data that you would like to back up.
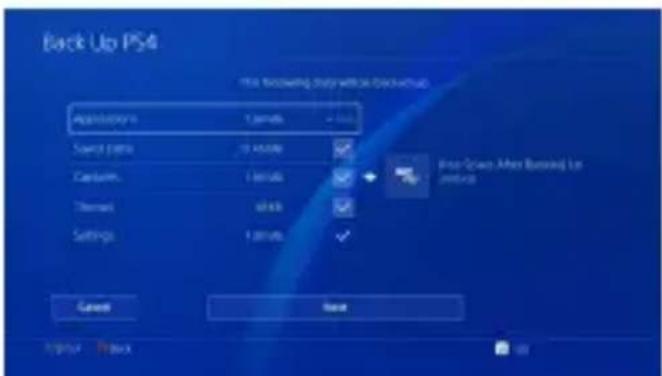
2.5 Click "Next" and then "Back Up PS4TM".
2.6 The PS4™ will now restart and copy all data that was selected for backup in step 2.4. This process can take a while depending on the size of user data.
2.7 Unplug the flash drive from the PS4TM.
2.8 Note: trophies cannot be backed up onto the flash drive. They should be backed up on the PlayStation® Network.
2.8.1 In the PS4™ menu, navigate to "Trophies," push the options button on the controller, and select "Sync with PlayStation® Network" to synchronize trophies to the PlayStation® Network (requires a PlayStation® Network account). For more information, see step 4.13.
2.9 Note: games should not be backed up onto the flash drive. Games will need to be downloaded onto the SSD via the PlayStation® Store or installed via physical disc. For more information, see step 4.13.
3. Install the SSD
3.1 Fully turn off the PS4™ and unplug all cables.
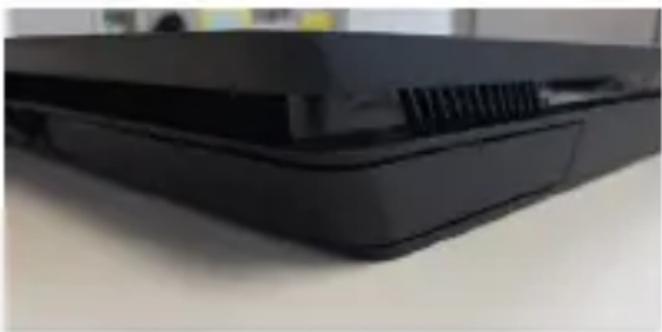
3.2 On a PS4^TM Slim or Pro, remove the plastic angled drive bay cover located on the back right corner of the PS4^TM . For a PS4^TM Classic, remove the upper plastic panel on the top of the PS4^TM .
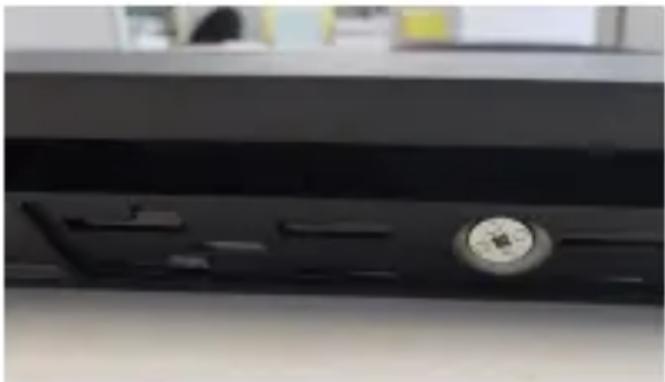
3.3 Remove the single silver screw on the back of the PS4™ using the included screwdriver.
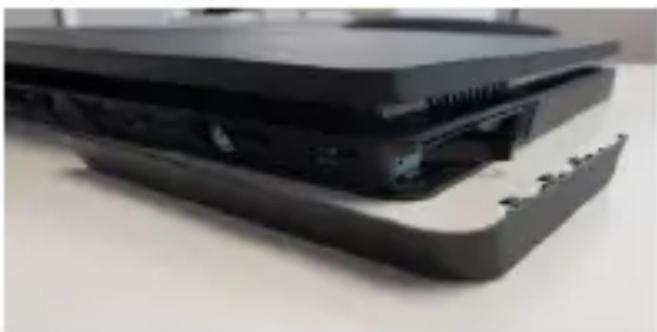
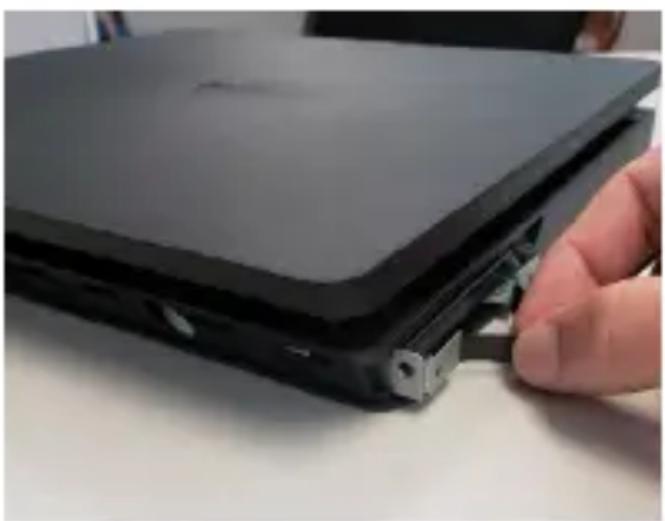
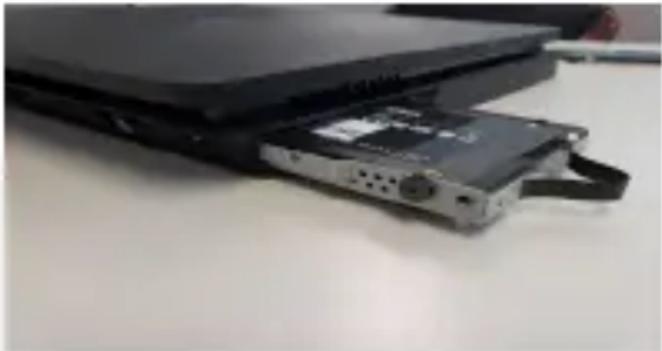
3.4 Using the drive pull tab along the side of the PS4™, gently pull the HDD and drive bracket out of the PS4™ drive bay.
3.5 Take note of the orientation of the HDD inside of the drive bracket as the SSD will need to be installed identically. Remove the four screws that connect the HDD to the drive bracket (two on each side).
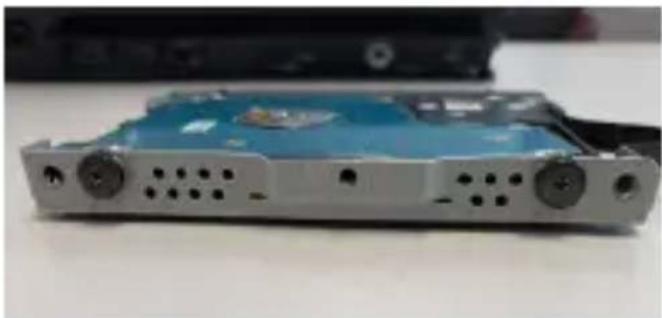
3.6 Remove the HDD from the drive bracket and carefully set aside.
3.7 Place the SSD into the drive bracket using the same orientation as the HDD and screw the four side screws back into place.
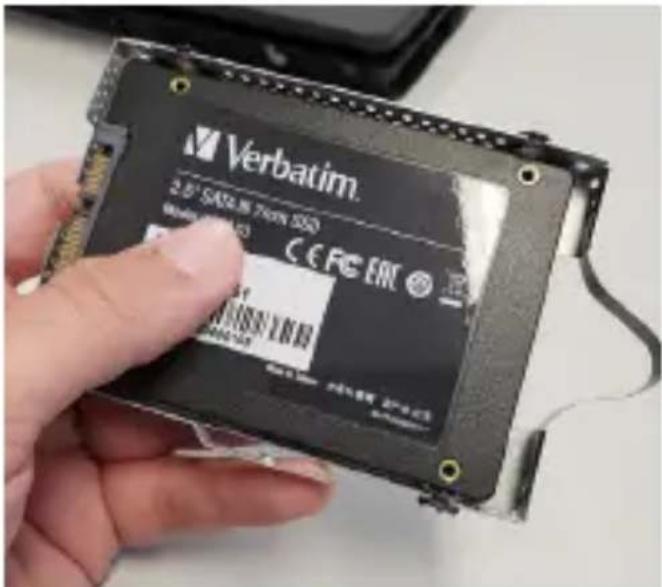
3.8 The gold connectors should be visible and inserted first into the drive bay. Slide the drive bracket with SSD back into the drive bay of the PS4™. Make sure to slide it all the way in to ensure the connectors inside line up.
3.9 Screw the single silver screw into the back of the PS4™ housing.
3.10 Replace the plastic angled drive bay cover or the upper plastic panel in the PS4TM housing.
3.11 Plug the power cable and HDMI cable back into the PS4TM.
4. Restore HDD User Data and Games to the SSD
4.1 Insert the flash drive into an available USB port on the PS4TM.
4.2 Press and hold the power button of the PS4™ for 5-7 seconds. Wait for the PS4™ to start up.
4.3 Connect a controller via USB cable and press the PS button on the controller.
4.4 Choose "Initialize PS4 (Reinstall System Software)" on the menu and follow onscreen instructions.
4.5 Choose "OK" to confirm the flash drive has been inserted. Click "OK" again to initialize.
4.6 The system will restart and install the PS4™ software from the flash drive.
4.7 Once the PS4^TM restarts, follow the onscreen prompts to setup user info, network connection settings, time/date settings, etc. The PS4^TM should act as though this is the first time it has been powered on.
4.8 Once on the home screen of the PS4™, go to "Settings," then "System," and then "Backup and Restore."
4.9 Choose "Restore PS4TM."
4.10 Select the data to restore from the connected flash drive and choose "Restore."
4.11 Follow the prompts and select "Yes" to proceed.
4.12 The PS4™ will go through a series of menus, restoring your data.
4.13 At the PS4™ home menu, login to the PlayStation® Store to download purchased games or, alternatively, install games via physical game discs. This will take time depending on how many games are being installed. Trophies can also be restored from the PlayStation® Network at this point.
Congratulations, the PS4™ is ready to go with user data and games installed onto the SSD!
5. Repurpose the PS4™ HDD into a Portable HDD
5.1 Locate the 2.5" HDD enclosure included in this kit.
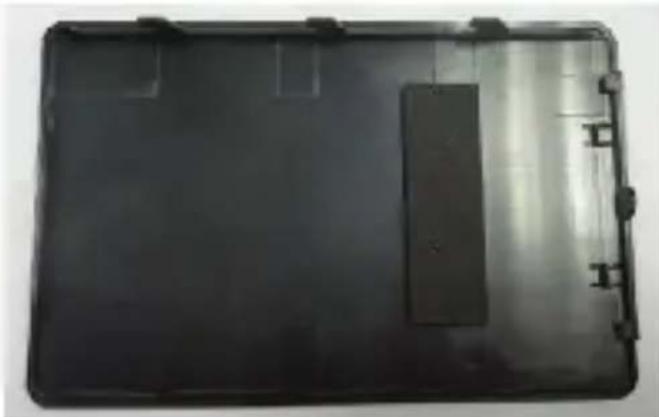
5.2 With the screwdriver, remove the single screw at the base of the 2.5" HDD enclosure.
5.3 Slide the 2.5" enclosure lid off (pull towards the screw).
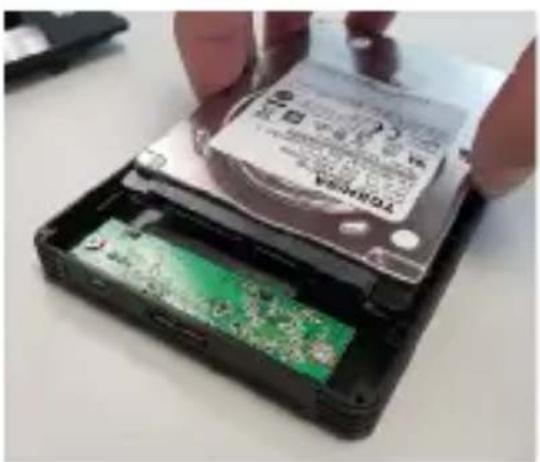
5.4 Remove the sticker from the HDD foam bumper included in this kit. Stick the foam tab sticky side down in the middle of the inside of the enclosure. This will provide padding for the HDD to rest on the inside of the enclosure.
5.5 Take the PS4™ HDD removed in step 2.3.6 and insert it into the SATA connector located inside of the 2.5" HDD enclosure. Be sure that the HDD is snugly inserted and making full contact with the 2.5" HDD enclosure.
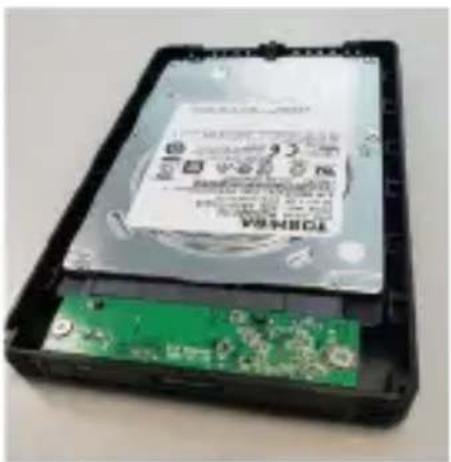
5.6 Replace the 2.5" enclosure lid back into the fittings of the enclosure.

5.7 With the screwdriver, screw in the single screw to the bottom of the 2.5" enclosure.
5.8 Using the included cable, plug the micro USB-B connector into the end of the 2.5" enclosure and the USB-A connector into an available USB port on your computer.
5.9 The next steps will depend on your operating system. Confirm which operating system you intend to use and follow the appropriate instructions.
5.10 Follow these steps for Windows operating systems.
5.10.1 On the computer, search for "command prompt" in the Windows search and launch the Command Prompt program.
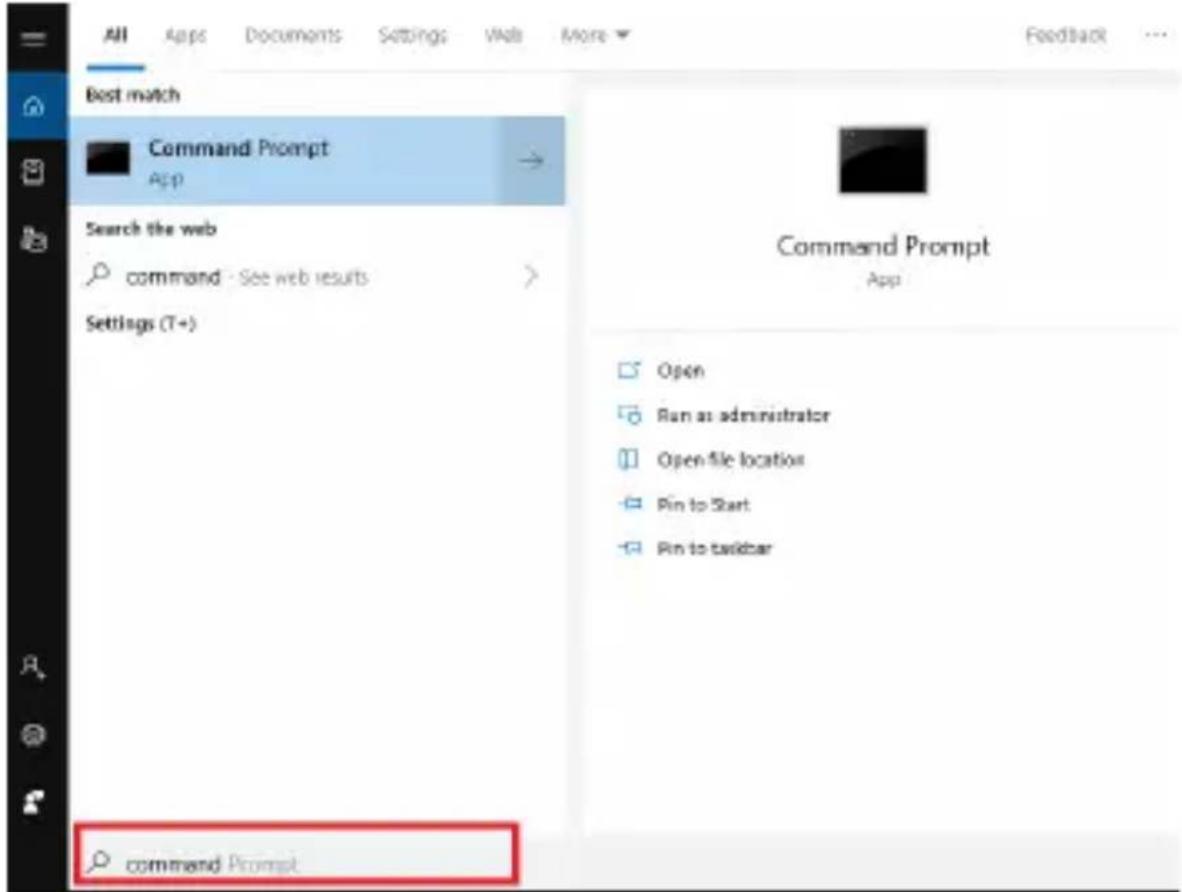
5.10.2 Type "list disk" (without quotations) and hit enter. Record the disk number. Then type "select disk X" (without quotations) where X is the disk number. Make sure to choose the PS4™ HDD and not your operating system HDD. Hit enter. Type "clean" (without quotations). Hit enter. A prompt will notify that the disk has been cleaned and is ready for a fresh formatting. Close the Command Prompt program.

C:\Windows\system32\diskpart.exe
Microsoft DiskPart version 10.0.17763.1
Copyright (C) Microsoft Corporation.
On computer: LT0116
DISKPART> list disk
Disk Status Size Free Dyn Gpt Disk 0 Online 238 GB B Disk 1 Online 931 GB B
DISKPART> select disk 1
Disk 1 is now the selected disk.
DISKPART> clean
DiskPart succeeded in cleaning the disk.
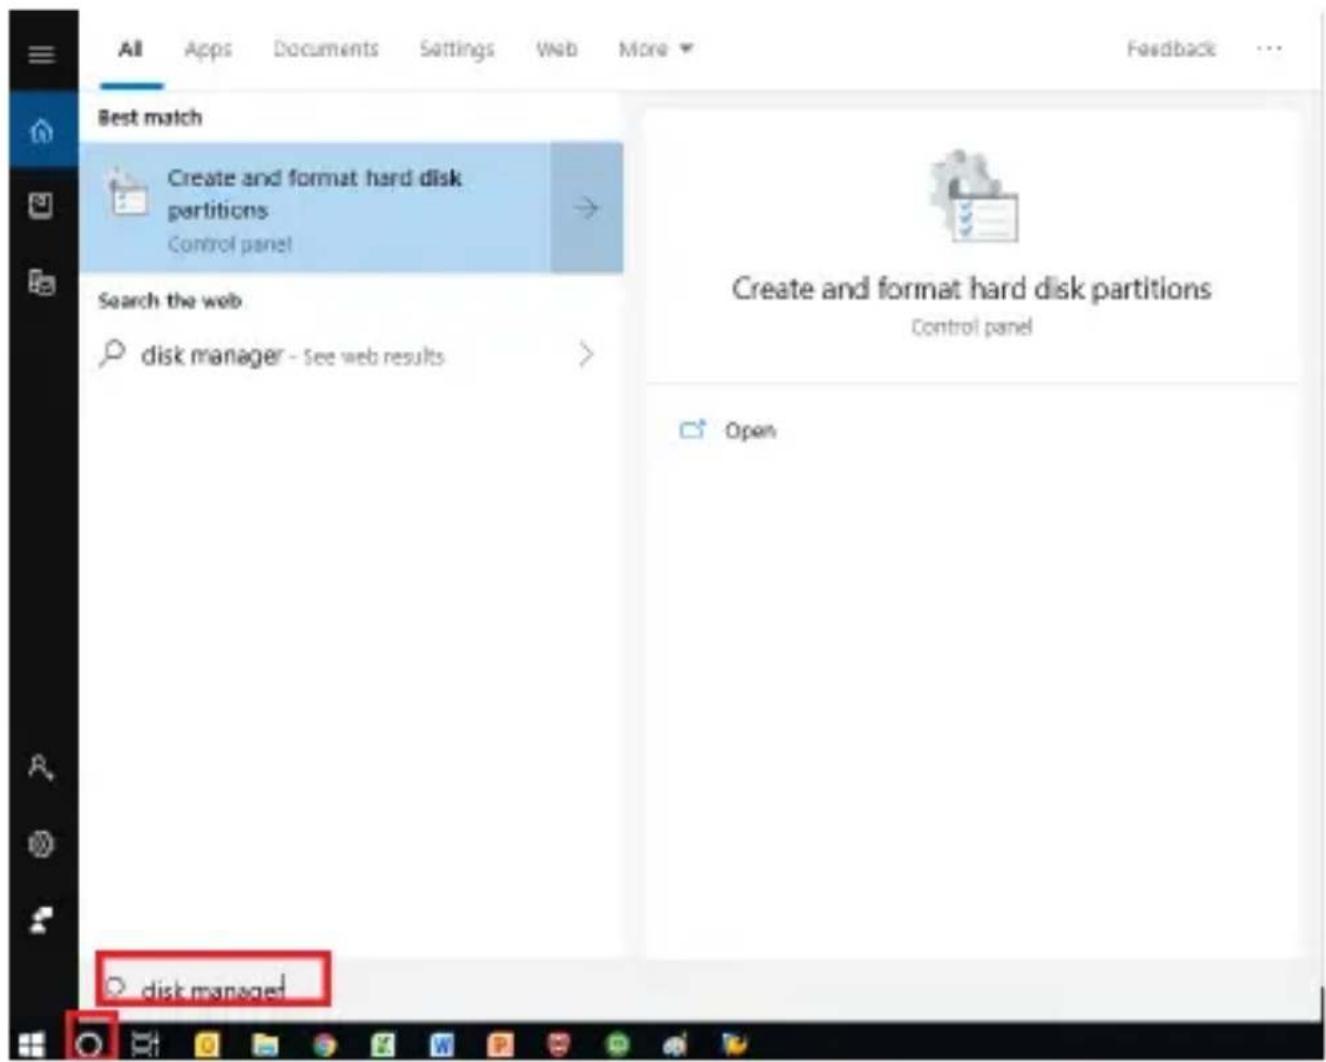
5.10.3 On the computer, search for "Disk Manager."
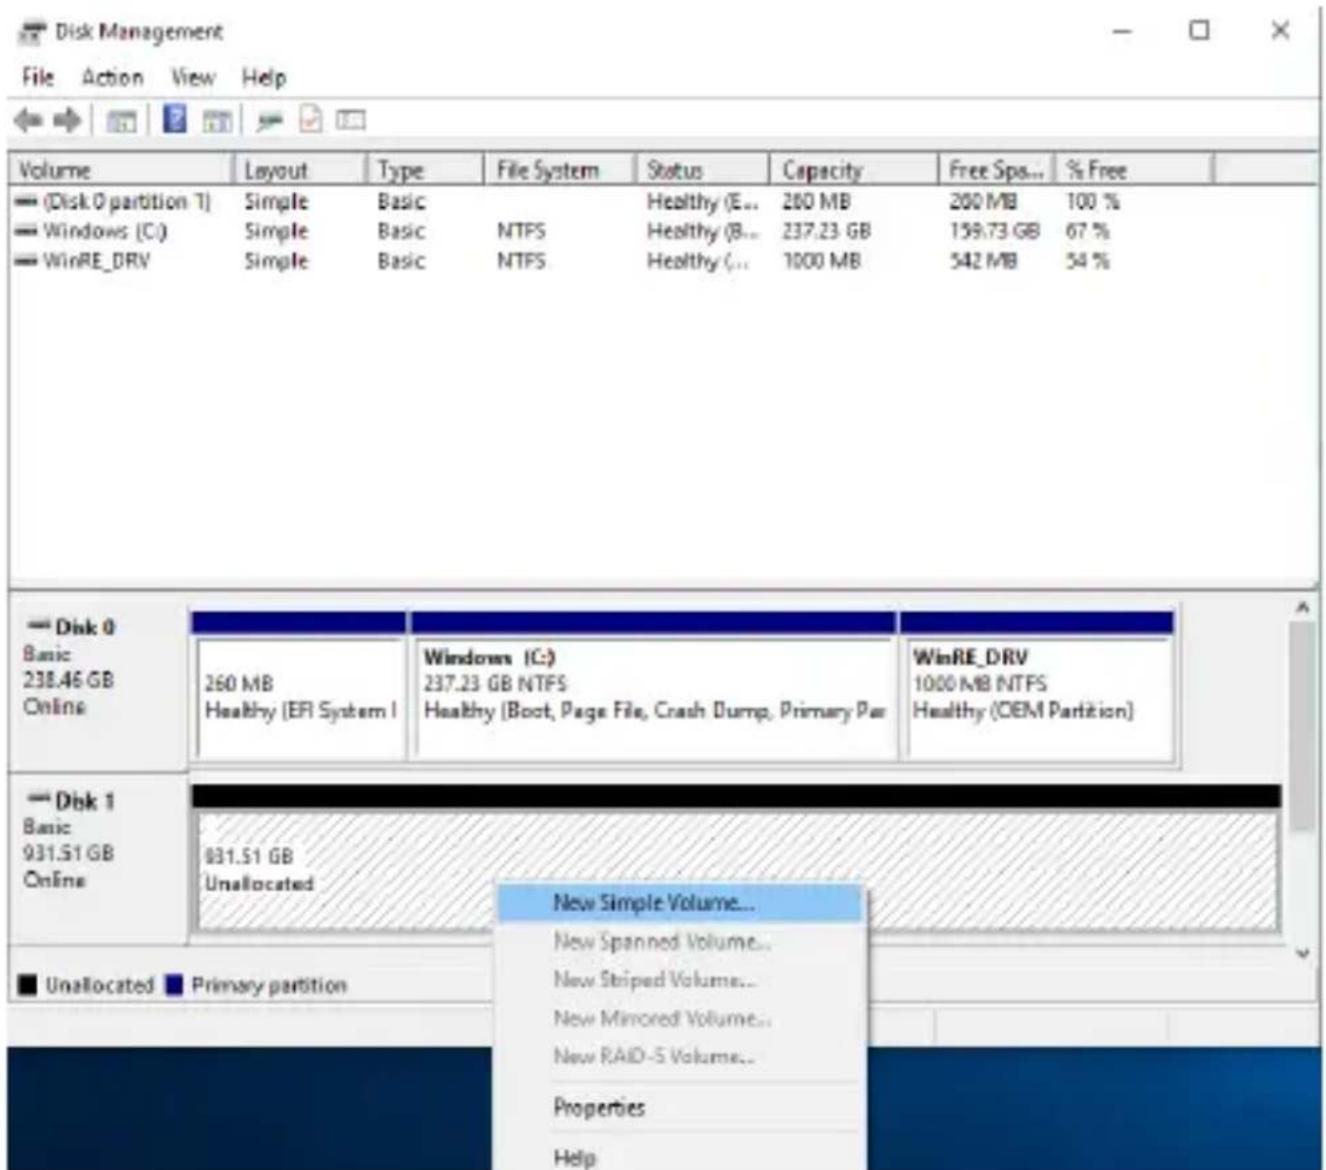
5.10.4 Right click the drive to be formatted and select "New Simple Volume." Note: photo is just an example. Drive letters, capacities, etc. will vary from computer to computer.
5.10.5 Click "Next."
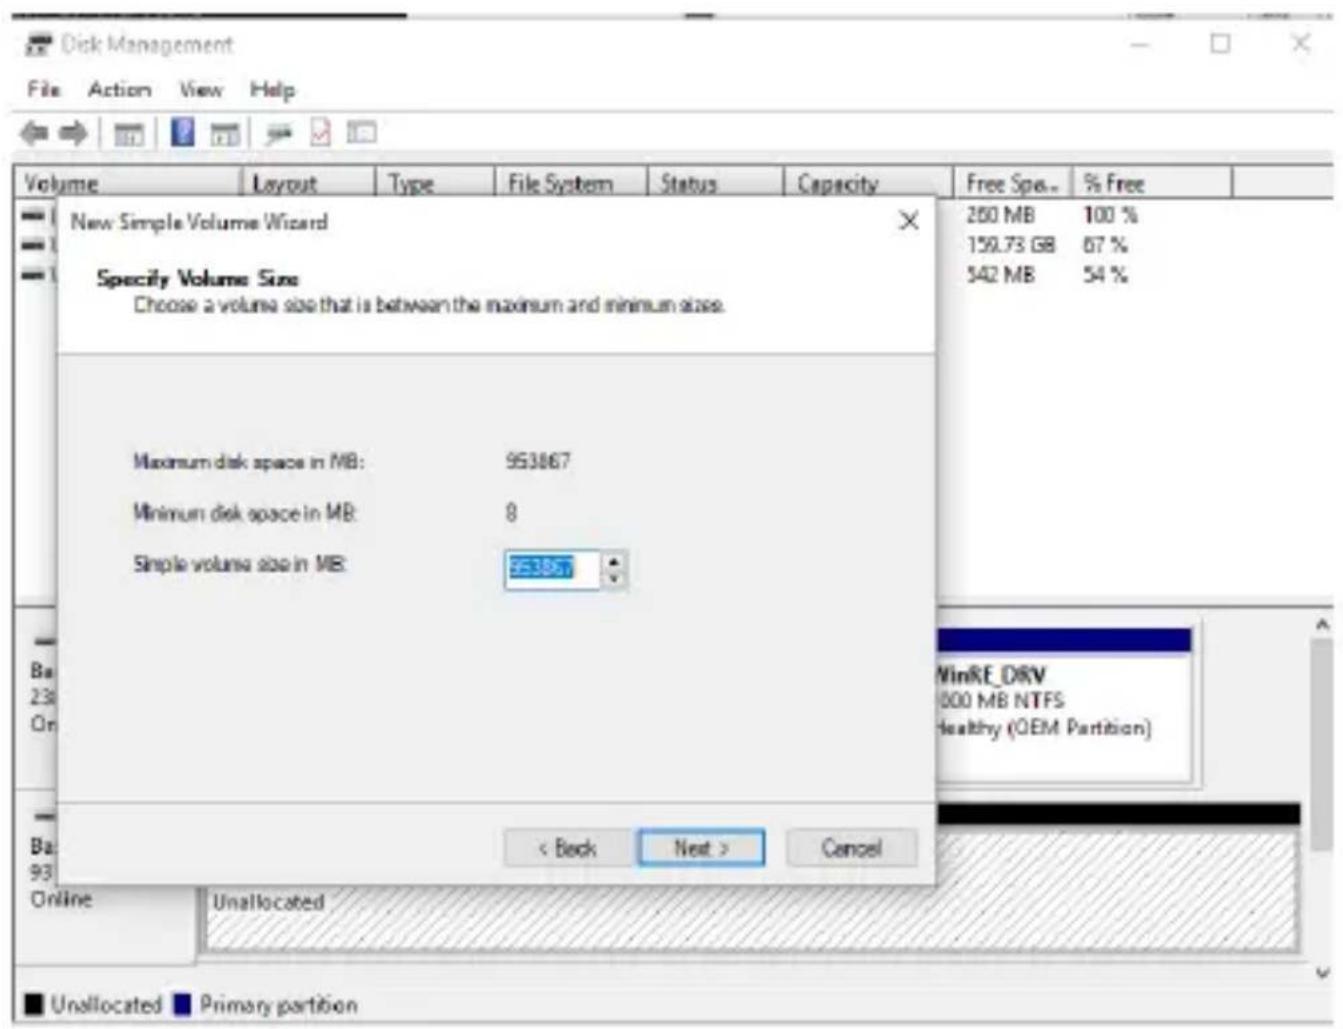
5.10.6 Ensure that the Simple Volume size in MB equals the Maximum disk space in MB.
5.10.7 Click "Next."
5.10.8 Assign a drive letter and click "Next."
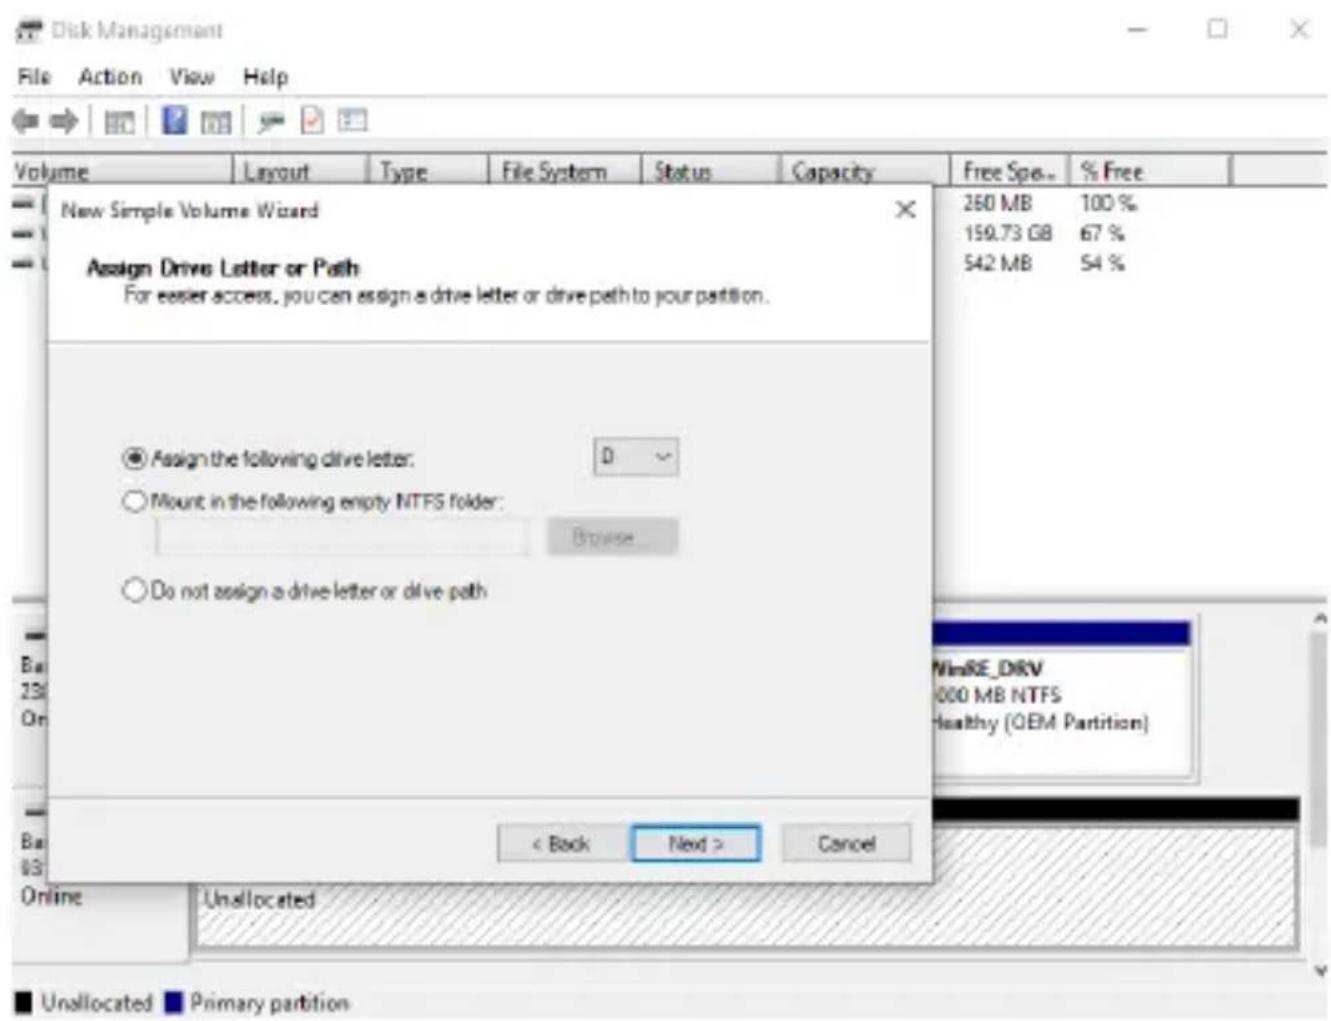
5.10.9 Click "Next."
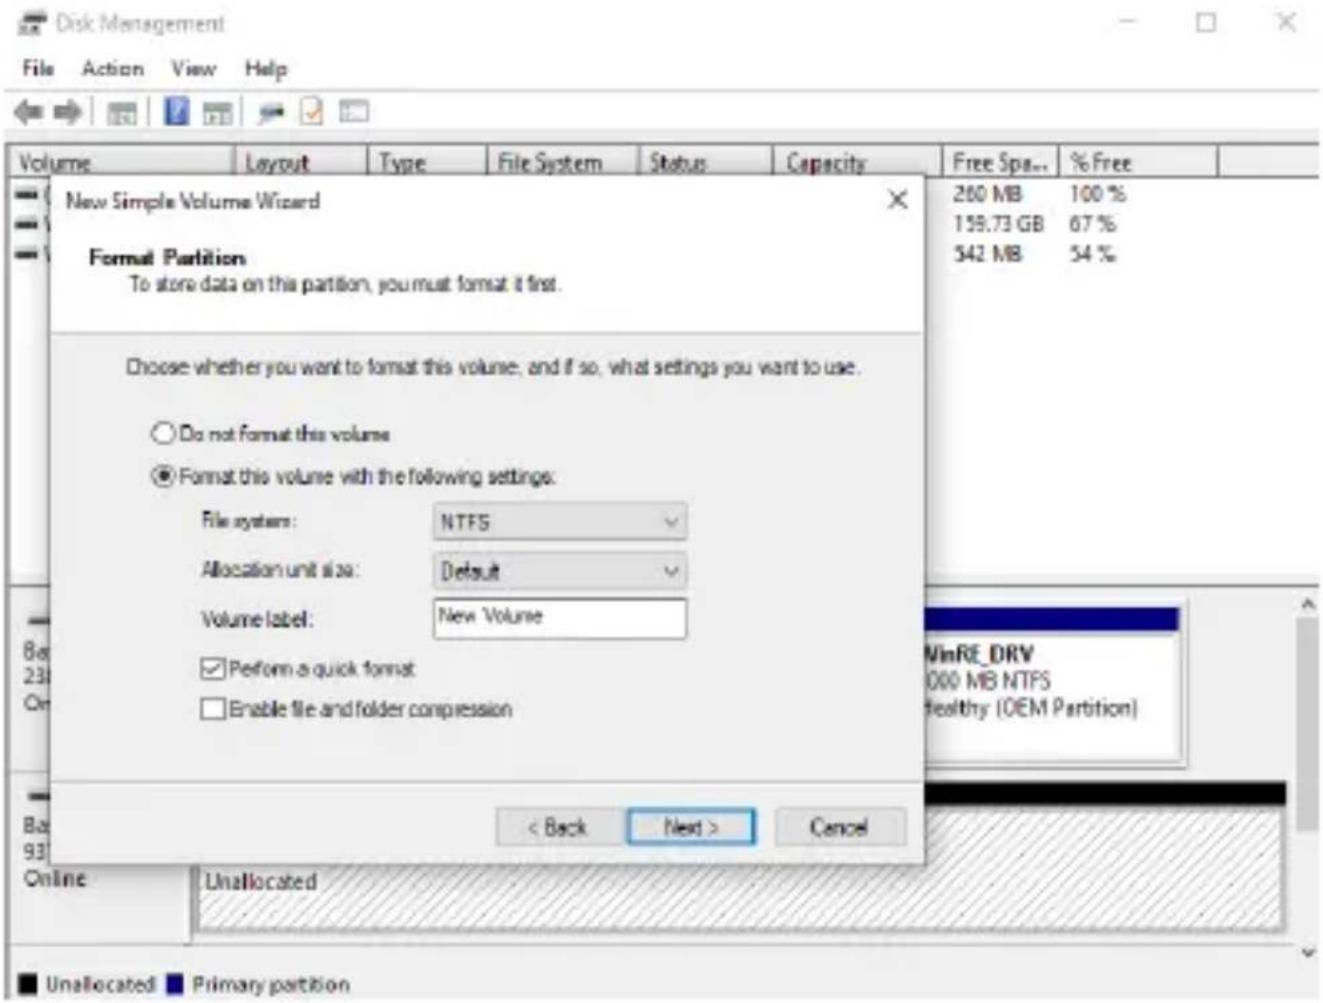
5.10.10 Click "Finish."
5.11 Follow these steps for Mac operating systems.
5.11.1 Launch the disk utility by navigating to "Applications" and then "Utilities."
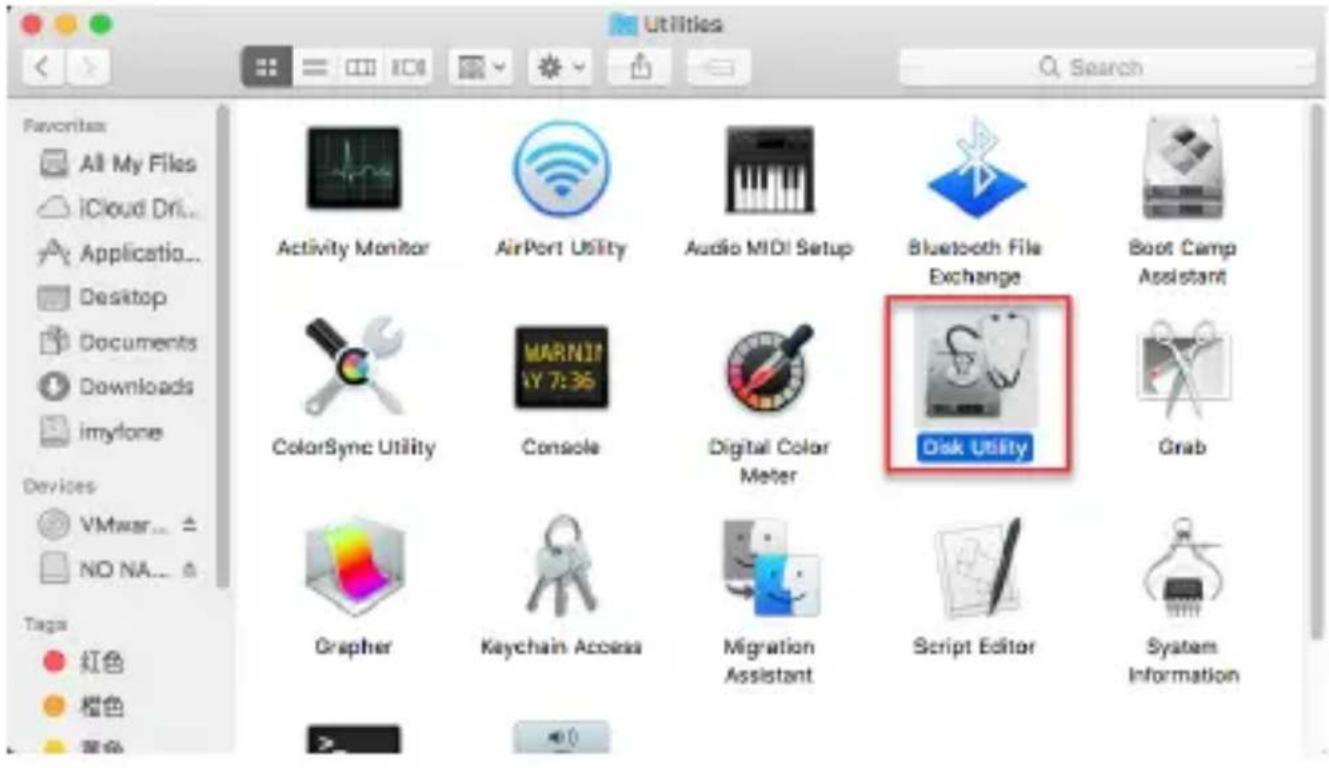
5.11.2 Find the drive name from the list on the left hand side of the "Disk Utility" menu and select it.
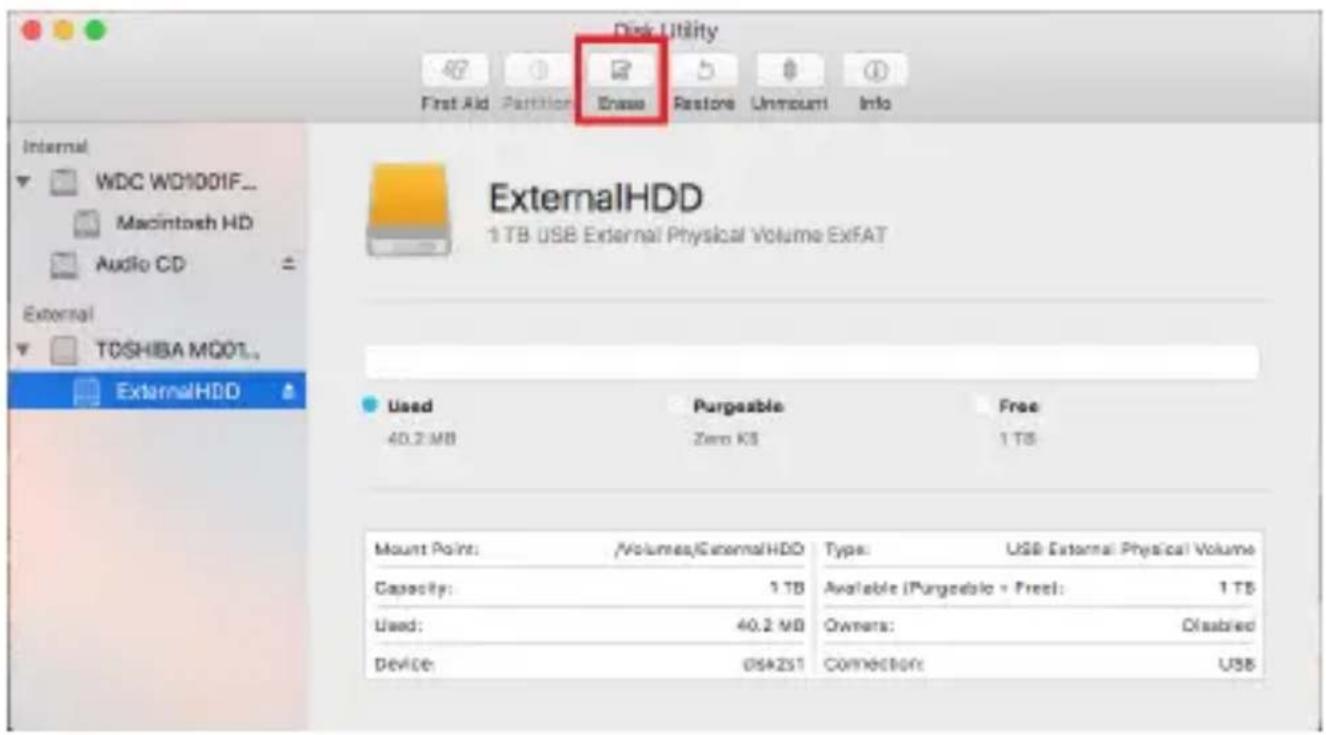
5.11.3 Click on the "Erase" tab at the top of the menu.
5.11.4 To format the drive, click on the drop down menu next to "Volume Format" and select "Mac OS Extended (Journaled).
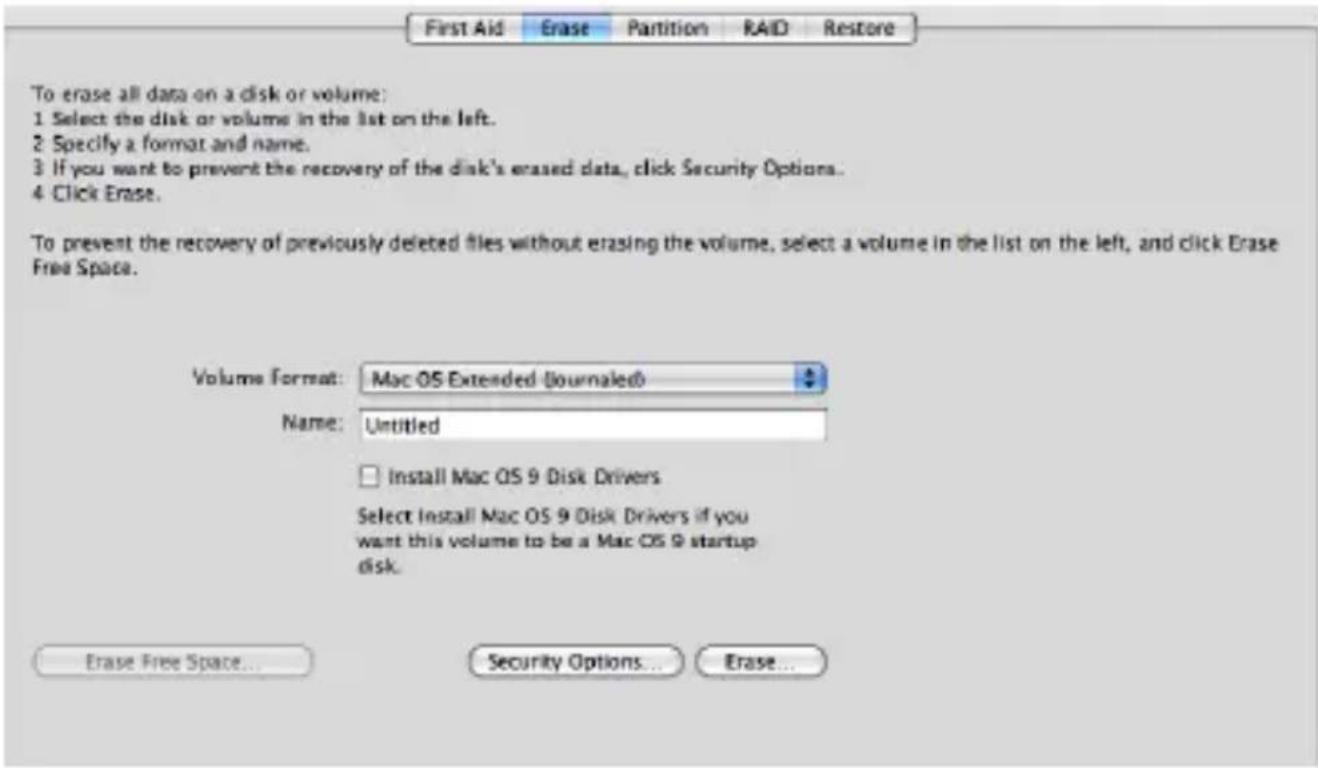
5.11.5 Name the reformatted drive to whatever you like.
5.11.6 Click the "Erase" button and confirm erasure on the popup menu.
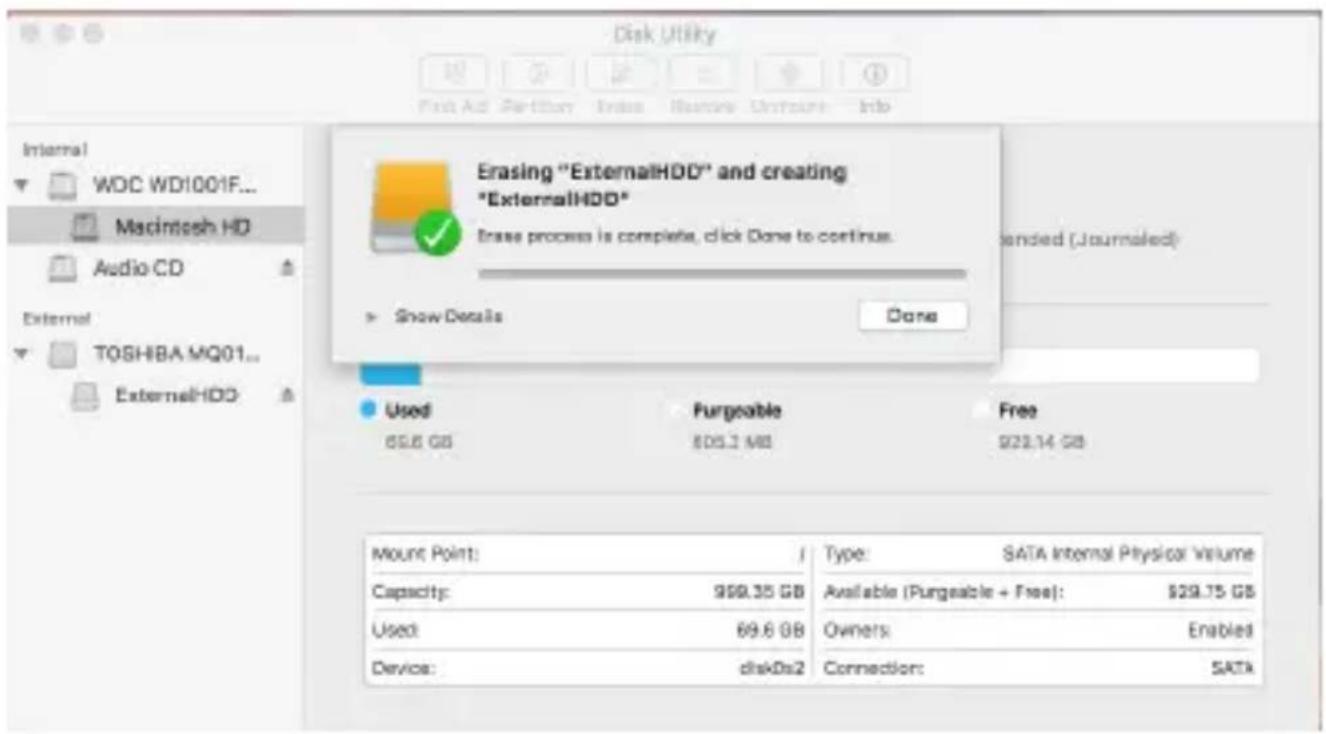
Congratulations, the PS4™ HDD is now formatted as a portable HDD.
Additional Details
-
If you are experiencing difficulty installing or using your Verbatim product, please visit the Technical Support website at www.verbatim.com/support.
-
Product replacement is your sole remedy under this warranty and this warranty does not apply to normal wear or to damage resulting from abnormal use, misuse, abuse, neglect or accident or to any incompatibility or poor performance due to the specific computer software or hardware used.
SPECIAL DAMAGES, HOWEVER CAUSED, FOR BREACH OF WARRANTYES OR OTHERWISE. This warranty gives you specific legal rights and you may also have other rights which vary from state to state or country to country. This warranty information is for Verbatim Americas; for other countries, please visit the websites of the respective countries concerned. Verbatim does not exclude, limit or suspend other rights you may have, including those that may arise from the nonconformity of a sales contract. For a full understanding of your rights you should consult the laws of your country, province or state.
Verbatim warrants this product to be free from defects in material and workmanship for a period of 2 years from the date of original purchase. This warranty excludes batteries. If this product is found to be defective within the warranty period, it will be replaced at no cost to you. You may return it with your original receipt to the place of purchase or contact Verbatim.
- This product is not licensed or endorsed by Sony. PlayStation and Sony trademarks are used only to designate compatibility and are the property of Sony Interactive Entertainment, Inc.
