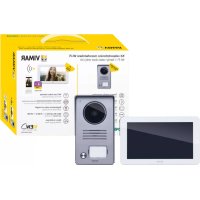
ELVOX K40945 - Video Intercom Vimar - Free user manual and instructions
Find the device manual for free ELVOX K40945 Vimar in PDF.



| Product type | Video intercom with touch screen |
| Brand | Vimar |
| Model | ELVOX K40945 |
| Monitor dimensions (without wall mount) | 188.8 x 113.6 x 14.9 mm |
| Monitor dimensions (with wall mount) | 188.8 x 113.6 x 18.4 mm |
| Street panel dimensions (without rain shield) | 90 x 160 x 20 mm |
| Street panel dimensions (with rain shield) | 94.4 x 162.4 x 34.3 mm |
| Power supply | 24 V DC via power adapter (100-240 V AC, 50/60 Hz) |
| Screen | 7-inch TFT LCD, 1024x600 pixels resolution, capacitive |
| Connectivity | Wi-Fi IEEE 802.11 b/g/n 2.4 GHz |
| Street panel camera | 120° wide angle, 1000 TVL, night vision with white LEDs |
| Panel protection rating | IP44, IK07 |
| Internal memory | 100 images, 10 videos |
| External memory (Micro SD card) | SDHC 8-128 GB, class 4-10, up to 1000 images and 1000 videos |
| Max. number of indoor stations | 3 per family, 2 families max. |
| Max. number of street panels | 2 |
| Main functions | Video call, intercom, door/gate unlocking, manual/automatic recording, Do Not Disturb function, 6 melodies, brightness/color/contrast adjustment, ringtone and conversation volume |
| Mobile app | VIEW Door (Android 5.0+, iOS 9.0+) |
| Operating temperature (panel) | -25°C to +55°C |
| Maintenance and cleaning | Clean with a soft, dry cloth. Do not use abrasive products or solvents. |
| Safety | Installation by qualified personnel. Provide a bipolar switch upstream. Ensure adequate ventilation. |
| Spare parts and repairability | Contact Vimar after-sales service. Repairs must be carried out by authorized personnel. |
| General information | Manual downloadable from faidate.vimar.com. Compliant with RED 2014/53/EU directive. |
Frequently Asked Questions - ELVOX K40945 Vimar
User questions about ELVOX K40945 Vimar
0 question about this device. Answer the ones you know or ask your own.
Ask a new question about this device
Download the instructions for your Video Intercom in PDF format for free! Find your manual ELVOX K40945 - Vimar and take your electronic device back in hand. On this page are published all the documents necessary for the use of your device. ELVOX K40945 by Vimar.
USER MANUAL ELVOX K40945 Vimar
The instructions manual can be downloaded from the website faidate.vimar.com
Specifications techniques :
1 Microphone
2 LED lighting for night-time visibility
3 Camera
4 Speaker
5 Name plate with backlit name card holders
6 Call button
7 Rain-proof frame
8 Speaker volume control
9 Connection terminal block
10 Jumper for configuring entrance panel ID
11 Jumper for configuring NO/NC relay mode:
-
NO = Normally open
-
NC = Normally closed
Note: When the outdoor station is in "speaking mode", i.e. when an "outdoor station-monitor" or "outdoor station-App" audio communication is activated, the push button lights and the lights behind the label holder light up intermittently.
1 Microphone
Multi-plug power supply (for applicable versions)
AC supply voltage: 100 V - 240 V, 0.6
A, 50 Hz / 60 Hz
DC output: 24V, 1A
Dimensions (mm): 43.5 (W) x 80.4(H)
x 38.5 (D)
AU/EU/UK/US plug adapters
Power supply for DIN rail
Technical characteristics
- Power supply: 100 - 240 Vac 50/60Hz
Maximum power consumption 0.8 A - Power dissipation 3.5 W
- Output voltage (+/-) 24 Vdc nominal (SELV - EN60950-1).
Max. current output: 1 A - Operating temperature -5°C +35°C (indoor)
- 3 x 17.5 mm modules, dimensions: 55x91x54 mm
- Symbol for CLASS II
We recommend you install the video entrophy near the router in order to have a strong enough Wi-Fi signal. The received Wi-Fi signal strength is
shown on the Wi-F
We advise against installing the monitor near large metallic objects or near devices which could generate electromagnetic fields.
We recommend you perform an initial device configuration before connecting to the system bus (remember that monitor 40945.M must be configured as the master).
- The first time the video entryphone is turned on, the device will show the device's display language selection screen.
- For the system to function correctly, each device must have its own unique address (ID).
In the case of speech units, configuring the ID is done by configuring jumper 10.
In the case of video entryphones, configuring the ID is done by:
indicating the main video entryphone as the Master;
indicating additional video entryphones as Ext-. tension 1/Extension 2.
Please also note that the video entryphones included in the one-family and two-family kits are preconfigured as Master units, whereas the optional video entryphones are preconfigured as Extension 1.
- Once you have completed the previous steps, you can install and connect the devices to the family bus.
- Once the video entryphone is installed, use the
[GENERAL] icon to configure the CAM1, CAM2, CCTV1 and CCTV2 devices, which can be viewed by means of the [SWITCH] icon

and configure the actuators you wish to LOCK1, LOCK2, GATE1 and GATE2).
Remarques :

Entrance panel installation
- When installing the speech unit, make sure that you set:
o Entrance panel ID by means of jumper 10. The default setting for the entrance panel ID = A0 .If also installing the optional speech unit (i.e. the second speech unit), the second device must be assigned a different ID to that of the first speech unit.Therefore, set ID = A1 by setting the jumper to the second position.
o Relay configuration: select NO or NC mode by means of jumper 11. If you do not wish to use the relay through the terminals (com; NO/ NC).you can set the relay to NO/ NC logic by means of jumper 11.
Note: When installing the entrance panel take care not to seal the bottom part.
Installation of a CCTV camera (optional)
The Vimar 46CAM.136B.8 camera can be connected to the CCTV and GND terminals of the speech unit. Maximum length: 100m with SYV75-3 /RG59 cable
Single-family system connection diagram
- The minimum cable length between two video entryphones is 5m
- Multi-plug power supply: there are two forks, the red one must be connected to the 24V terminal and the black one to the GND terminal of the video entryphone.
- In systems consisting of two speech units, if a call is made from a speech unit while communication is already in progress between the other speech unit and the video entryphone, a busy signal (sequence of beeps) will indicate that the caller needs to wait for the line to become available.
Notas:
Two-family system connection diagram with two panels and up to three monitors per user
MAC: MAC address Wi-Fi
Initial monitor-smartphone configuration
Installation notes:
We recommend you install the monitor near the router in order to have a strong enough Wi-Fi signal
We advise against installing the monitor near large metallic objects or near devices which could generate electromagnetic fields
Once the system has been connected, the devices can be enabled.
Switching on the EVO Wi-Fi monitor may take approximately 40s.
The monitor has a label at the back featuring the following data:
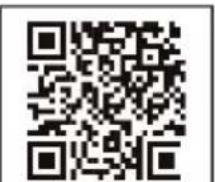
Default Password:XXXXXX
AP name:IDS9457WXXXX
UID:XXXXXXX
MAC:XXXXXXXXX
Device QR code
Default Password: initial password (password to be kept private and confidential)
AP name: device name in AP mode
UID: Unique monitor ID
MAC: MAC Wi-Fi address
Once you have selected your chosen language, the monitor shows the following screen:
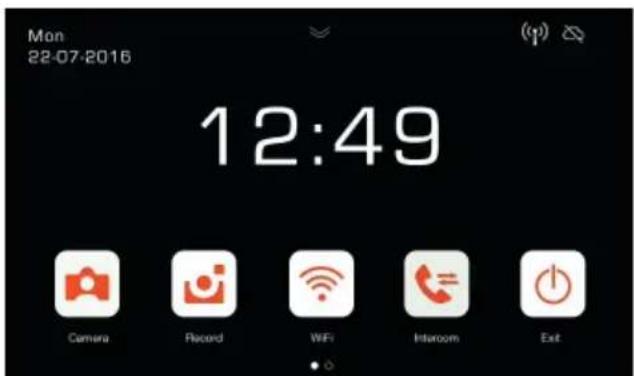
Note that the icons relating to the Wi-Fi signal and to the connection to the cloud indicate there is no communication.
Select the Wi-Fi icon to enter the Wi-Fi and remote operation functions configuration page.
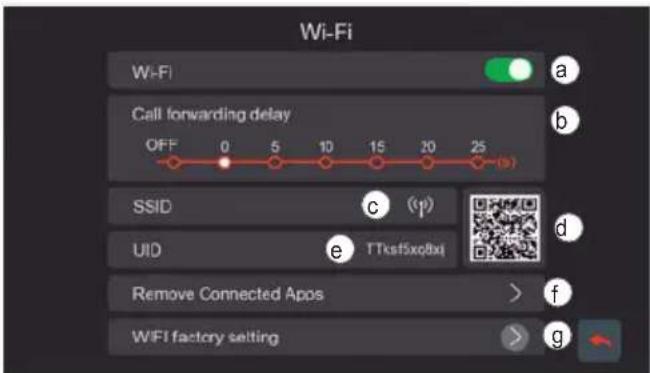
a - Enabling/disabling the Wi-Fi module
b-Forward call setting from outdoor station to App:
- OFF: forwarding disabled
0s - 25s: time you wish to pass between the call from the outdoor station and the call forwarding to your smartphone.
- 0s: the call is forwarded immediately
- 5s, 10s,... the call from the outdoor station is forwarded to the App after 5s, 10s,... respectively
c - Area with an indication of the name of the Wi-Fi network (SSID) and an indication of the Wi-Fi signal strength
d - QR code which unequivocally identifies the Wi-Fi monitor
e - alphanumeric UID which unequivocally identifies the Wi-Fi monitor
f - Function to remove every app-video entrophyone connection.
After using this function, reconfigure the app-video entryphone connection, removing the device previously connected from the VIEW Door app and reconnecting it immediately thereafter using the "Device connected to Network" option, proceeding solely with the initial configuration using the QR code.
g - Function to reset the Wi-Fi configuration.
With this function, the router-video entrophyone connection and all app-video entrophyone connections will be reset. Following the Wi-Fi reset, the video entrophyone will go back to the initial configuration status, in other words it will go into Access Point mode.
Remote operation functions configuration:
The connection of the monitor to the Wi-Fi network can only be configured using the "VIEW Door" App available in the store.
Follow the steps set out below:
1) Make sure the Wi-Fi module (a) is enabled
2) During initial configuration, make sure the video entrophyone is in AP mode, in other words the icon AP appears in (c). If the monitor is not in AP mode, reset the configuration of the Wi-Fi module (g).
3) Enable the App, which displays the monitor-app configuration screen:
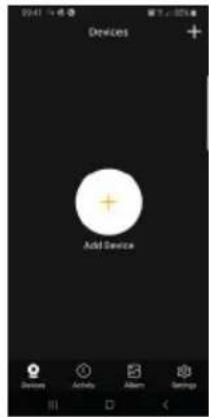
Tap once on "+" to connect the monitor to the App.
4) Select "New Device" if the monitor has not yet been connected to a Wi-Fi network.
If the monitor has already been connected to a Wi-Fi network, then select "Device connected to network" (Device connected to the network)
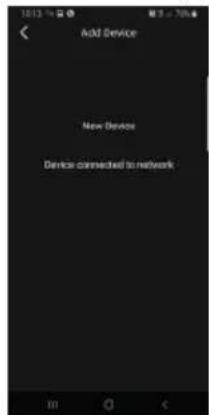
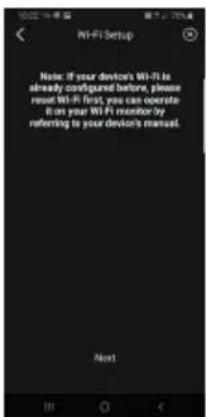
5) Once you have selected "New Device", the App will prompt you to scan the QR code (d) of the monitor you wish to configure. Once the QR code has been scanned, the App will remind you that the monitor needs to be in AP mode, as shown in the figure below:
6) At this stage, the App will start the search for all available Wi-Fi networks.
7) Should the app fail to detect Wi-Fi networks immediately, the following screen will appear:
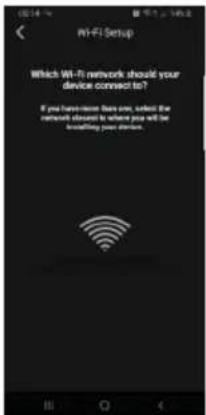
If this is the case, update the scree by swiping down on the smartphone screen.
Continue to update the screen (with a swipe) until the list of available Wi-Fi networks appears, as shown below:
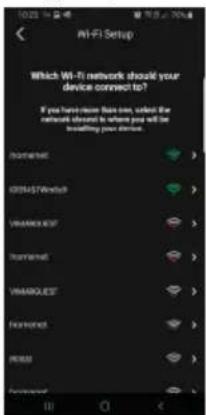
8) The App prompts you to select which network you wish to use.
We recommend you link up to the Wi-Fi network with the strongest signal.
Once you have selected the network, the App will prompt you to enter the password for the chosen Wi-Fi network.
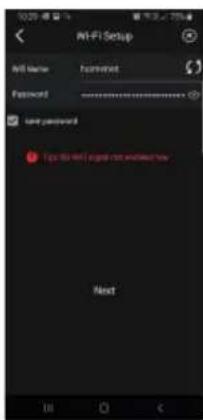
Note that only Wi-Fi networks with a frequency of 2.4GHz should be considered.
Enter the access credentials for the Wi-Fi network and proceed by tapping once on next
9) The App will proceed and connect the smartphone to the monitor, via the cloud
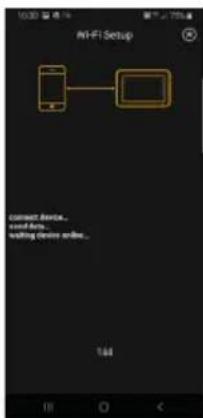
10) Once the connection is complete, the monitor home page will show the following as enabled:
- The Wi-Fi connection (and related signal strength)
- The connection to the Cloud
11) The page relating to the Wi-Fi settings, showing in c) the name of the Wi-Fi network (SSID) and the Wi-Fi signal strength
12) the App will prompt the following screen: you will be able to name the connection you have just configured.
Once you have chosen the name, pro ceed by tapping once on "Save".
K40945 - K40946 - K40955 - K40956
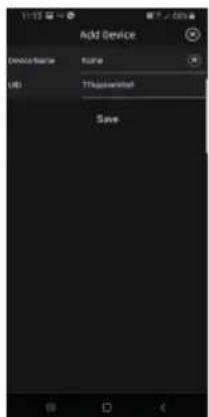
13) After saving, the device shows an initial image
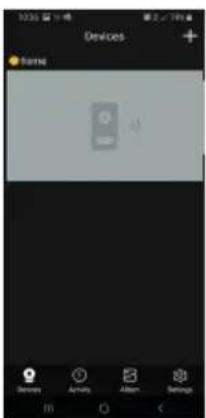
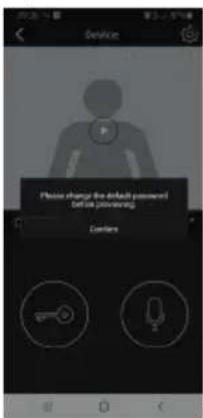
14) Tap once on the image to enable the connection and enter "preview" mode. As soon as the connection has been established, the App prompts you to change the password, switching from the default password to the password customised by the user. For security reasons, the password must comprise a series of numbers of between 4 and 16 digits. Tap once on "Confirm" to proceed
15) Proceed by entering a new password and confirming it. Keep a note of the password you have just set. Should you wish to connect the monitor to another smartphone, you will have to use the same password.
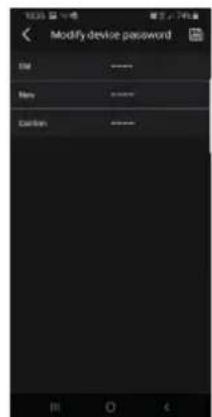
16) Once you have saved the new password, the connection between the App and the monitor proves enabled.
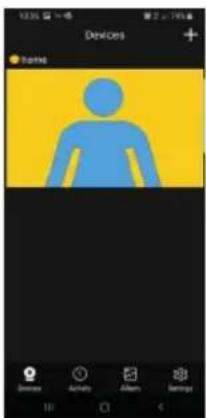
17) In the "Devices" section, you will therefore see the connection to the device referred to as "home" as enabled, as shown below:
18) Note that when you enter the "Settings" section of the App you can define the following functions for all connected devices
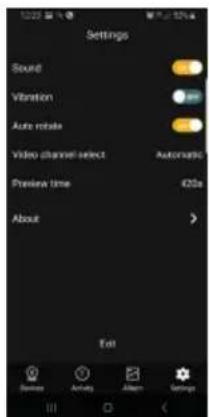
Sound: ringtone enabling
Vibration: vibration enabling
Auto-rotate: image auto-rotate enabling
Video channel select: automatic or manual selection
Preview time: maximum communication duration setting (from 60s to 420s).
Information: information on the App
19) In the "Settings" section relating to the connected monitor, the following functions are available relating to the individual device connected:
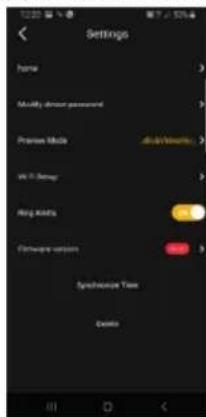
device: name of the device Modify device password: menu to change the password
Preview Mode: video mode selection (high quality mode: 20 f/s;
medium quality mode: 10f/2;
low quality mode: 0.5f/s)
Ring Alerts: call notifications from outdoor station enabling
Firmware version: check firmware installed on the monitor and availability of possible upgrades
Synchronize time zone: function for synchronizing the time zone on which the video entrophy clock is based.
The function informs the video entrophy to use the same time zone used by the smartphone.
Once the time zone has been configured, the date and time of the video entryphone will be updated at:
-
each video entryphone re-starting
-
each update from the cloud (with a weekly frequency).
Delete: delete configured device from the App
Permissions enabled:
To run the app correctly make sure the required permissions are enabled.
For the Android system permission must be given for:
Camera
- Location
- Storage
- Microphone
Phone
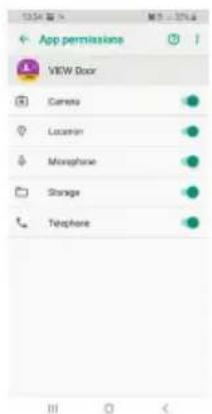
and notifications must be enabled:
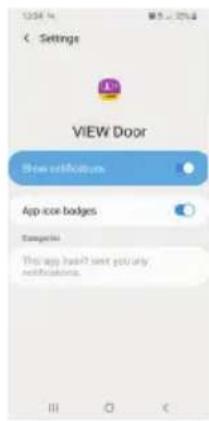
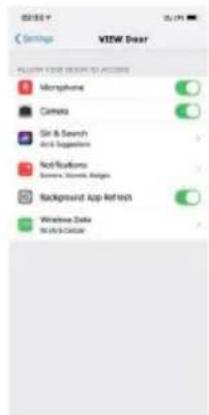
For the iOS system permission must be given for:
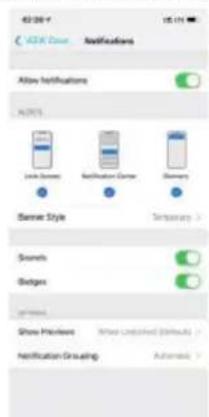
And notifications must be enabled:
Video entryphone-smarhtphone connection for a video entryphone already connected to the Wi-Fi network
If the monitor proves to have already been connected to a smartphone and you wish to connect it to another smartphone, proceed as follows:
1) Tap once on the "+" sign of the App:
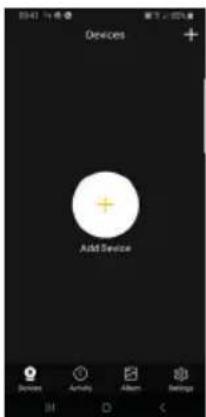
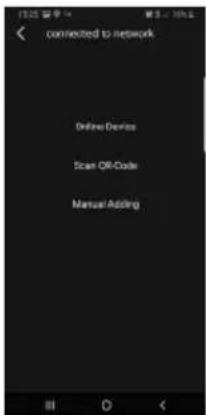
2) Select "Device connected to network". The following screen appears:
3) If the monitor has already been connected, specify which monitor should be connected to the smartphone.
The monitor can be identified using the three options shown in the image above:
Online device: the monitor is already connected to the Wi-Fi network. If you connect the smartphone to the same Wi-Fi network, the monitor to be connected should prove available for selection from a list of devices.
- Scan the QR code: to identify unequivocally the monitor to connect to, simply scan the QR code of the monitor
- Manual configuration: manual entry of the monitor UID.
In any case, the connection will only be confirmed once you have entered the password already defined during the initial video entrophyone-app configuration, as specified in the previous paragraph entitled "Initial video entrophyone-smartphone configuration"
"VIEW Door" app
The app basically consists of four sections:

Devices: lists the devices connected to the app
Activity: lists the notifications received
Album: shows the videos and photos related to the communications.

Settings: configuration of the main app functions.
In detail:
Devices
Each device connected to the app is marked by a name and an image relating to the last communication.
Note that the Outdoor station - App communication can be interrupted on the monitor display.
Activate the monitor display (if in stand-by) and swipe from left to right on the screen shown below to interrupt the communication immediately:
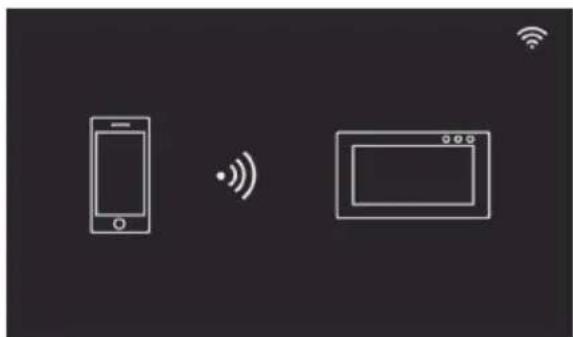
Tap on the image to activate the video consultation mode; the images relating to the activated device appear on the app.
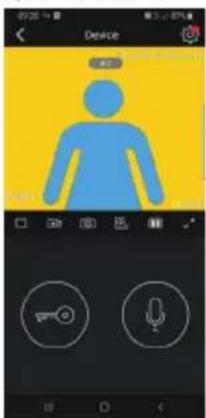
Generally, in preview mode the app will appear as shown in the following image:
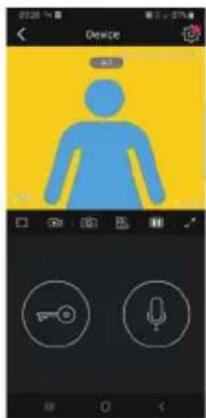
this icon to access the configuration of the spe
cific device connected.
A red dot indicates that a more recent version of the monitor firmware is available.
- Timeout: Indication of the remaining communication time


Video camera: Record video




high quality (20fps);
medium quality (10focs):
medium quality (topps);
ow quality (0.5fps).
The possibility to reduce the image quality may be useful if there is limited data communication bandwidth availability.

Video image rotation

Lock: lock activation (the actuator must be activated in
General section)

Microphone: audio communication activation (when the
audio communication is active, the call button LED and the name card holder LED on the indoor station will flash intermittently).
Activity
A time list is given indicating all the call notifications
Album
Contains the videos and photos recorded during communications
Settings
Used to configure some features of the connected device.
Vibration: activation vibration
- Camera (Camera)
Geolocalisation (Location)
Memoire (Storage) - Micro (Microphone)
-Telephone (Phone)
Rotation image video
Default Password:XXXXXX
AP name:IDS9457WXXXX
UID:XXXXXXX
MAC:XXXXXXXXX
Default Password:XXXXXX
AP name:IDS9457WXXXX
UID:XXXXXXX
MAC:XXXXXXXXX
QR Code do disposicao
Default Password: passwordinic (password a manter reservada)
MAC: MAC address Wi-Fi
In standby mode, touching any part of the display will bring up the screen showing the device's main functions.
Scrolling down on the arrow shown on the main screen accesses the mute and auto record settings.
Scrolling horizontally access the device settings.
Page d'accueil
Notes regarding mute and auto record settings:
Scrolling down on the arrow shown on the main screen accesses the following settings:
- For enabling/disabling "Mute" function (icon).
For enabling/disabling auto record on panel call and selecting the mode ( , icons).
By pressing the [Camera] icon icon on the main screen, the camera will activate and the video entryphone will display the image from the speech unit.
Fonction auto-allumage
Operation: Entrance panel call
When a visitor presses the call button on the entrance panel, an image of the visitor is displayed on the video entrophy screen and communication with the speech unit can be activated/deactivated by pressing the [Communication]
Press the [Intercom] icon on the main screen, select the indoor unit you want to call, then press the [Communi
cation]iconto start the call.
The intercom function is used only to communicate between devices in the same family.
Internruffkfunction
Multimedia - Archiving images and videos
Without an SD card the video entrophyone can record up to 100 images and 10 videos in the internal memory.
Inserting a Micro SD card, the video entryphone can record up to 1000 images and 1000 videos.
When the memory is full, the oldest pictures or videos will be overwritten.
Viewing images and videos
Press the [Photo] icon or [Video] icon on the main screen to review stored images and videos. In the photo and video list, a red dot indicates that images/videos have not yet been displayed.
Notes:
- The micro SD card must be formatted from the video entryphone before use (icon)
- The kit does not include a micro SD card
The instruction manual is downloa dable from the site faidate. vimar.com
In compliance with the provisions of EU Regulation 2016/679 on the subject of personal data protection, Vimar S.p.A. guarantees that the processing using electronic means is carried out while reducing as much as possible the use of personal data and identification data, limiting their use to those cases in which they are strictly necessary to achieve the purposes for which they were collected. Vimar S.p.A. guarantees the implementation and observance of specific safety measures to prevent the loss of data, possible illicit or incorrect uses of the same and unauthorised accesses. The data subject's data will be processed in accordance with the provisions of the product privacy policy which can be consulted from our website www.vimar.com.
It is the responsibility of each data subject to guarantee and verify the ownership and safekeeping of their password and access codes to the web resources. Upon requesting support from the Vimar Service Centre, in order to enable the support activity, each data subject will need to provide the system access password. The provision of the same is considered as consent to the processing. Every
Data subject will be responsible and will have to modify the access password to the system following each intervention provided by the Service Centre
If the products film public venues and not just private property, the 'area under video surveillance' sign envisaged by the privacy regulations and specified on the Italian Data Protection Author - ity website must be displayed visibly.
Confidentialité
Installation should be carried out by qualified personnel in compliance with the current regulations regarding the installation of electrical equipment in the country where the products are installed.
Ensure clearance around the appliance so there is sufficient ventilation.
There must be no dripping or splashes of water on the appliance.
WARNING: To prevent injury, the appli- ance must be secured to the wall as described in the installation instructions.
Above the power supply there must be a bipolar circuit breaker that is easily accessible with a contact gap of at least 3 mm.
Conformity
RED directive
Standards EN 301 489-17, EN 300
- EN 62311, EN 60065, EN
62368-1, EN 60950-1, EN 61000-6-1, EN 61000-6-3.
REACH (EU) Regulation no. 1907/2006 - Art.33. The product may contain traces of lead.
Vimar SpA declares that the radio equipment complies with Directive 2014/53/EU. The full text of the EU declaration of conformity is on the product sheet available at the following Internet address: faidate.vimar.com.

WEEE - Information for users
If the crossed-out bin symbol appears on the equipment or packaging, this means the product must not be included with other general waste at the end of its working life. The user must take the worn product to a sorted waste center, or return it to the retailer when purchasing a new one. Products for disposal can be consigned free of charge (without any new purchase obligation) to retailers with a sales area of at least 400m^2 if they measure less than 25cm . An efficient sorted waste collection for the environmentally friendly disposal of the used device, or its subsequent recycling, helps avoid the potential negative effects on the environment and people's health, and encourages the re-use and/or recycling of the construction materials.
Umuoppwon Tpoaiypaawv
Omyia RED
Ipotua EN 301 489-17, EN 300
328, EN 62311, EN 60065, EN
62368-1, EN 60950-1, EN 61000-6-1, EN 61000-6-3.
Kavovio REACH (EE) ap. 1907/2006 - Ap0po 33. To Tpoiov mopoie va nepiexei Iyv moAusbou.
H Vimar SpA 0nawvei on n ouakeun paioouxvoTntuv oumoppwetai ue tvn oynia 2014/53/EE.To IAnpec kejevo tsn gnos oumpoppwns EE diatietai ototdiov tou pioivtoG otny napakatw diaiktuak dieuovon: faidate.vimar.com.

AHHE - EvnepwoT Twv xpoTow
Tououo diaypauevou kadoa atoppmuwat,otou utapxeyi etanw otuaekun
n atn ouakeuaia tns, utadeikvuei on to Tpioov teo TEOS diapkeias zWCtou TpTEe va uAAleyetai Xwpi -ota ta utaloitna atoppipmuata. ETo TEAC nTs xpongs, oXpOntn TpTeEva aAaei va Tnpadowoe To TpOIOv eEv katalanAo KevTPO diaopoptoinmEvnc uauovn h va to Tnpaoboei otov avtnpooWTO KA tny aoyap evoc vou Tpioovc. SeKAATAHATA TiUAnng mE etipaveia TTuAeeuv Touaxiotov 400 m² mPoPe i va npadoei owpeav, xupic ka UTOxpewn yia ayopa aALWv TpOIOVTW, ta TpOIOVTA yia dIthetaen, mE bIAATAOEIs MkPOTEpc an25 cm. HETAPKNC diaopoptoinmEvn uauoyn, TpOKeIEVou VA EKIVNHe n ETOpEVN BIAIDAKIA avakukawong, ETEEpya- agac kai TEPBAAovTKa Oubatn DBeAEnc nTc uOKEun, OuBbAale OTNV ATIOQUY apvtIKUV ETITIWoe WV ia TO TEPBAAovk NTV uYveia kai TPOOWei TV ENAVXPNAJIOITOnn h/ KAI AVAKUKAN TWU AUKW AVIOA
- Specifications techniques :
- Multi-plug power supply (for applicable versions)
- Power supply for DIN rail
- Technical characteristics
- shown on the Wi-F
- Remarques :
- Entrance panel installation
- Installation of a CCTV camera (optional)
- Notas:
- Initial monitor-smartphone configuration
- Remote operation functions configuration:
- Permissions enabled:
- Video entryphone-smarhtphone connection for a video entryphone already connected to the Wi-Fi network
- "VIEW Door" app
- Devices
- Activity
- Album
- Settings
- Page d'accueil
- Notes regarding mute and auto record settings:
- Fonction auto-allumage
- Operation: Entrance panel call
- Internruffkfunction
- Multimedia - Archiving images and videos
- Viewing images and videos
- Notes:
- Confidentialité
- Conformity
- WEEE - Information for users
- Umuoppwon Tpoaiypaawv
- AHHE - EvnepwoT Twv xpoTow
Brand : Vimar
Model : ELVOX K40945
Category : Video Intercom