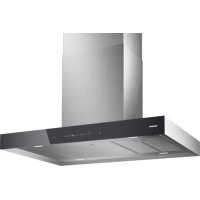
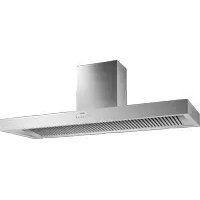
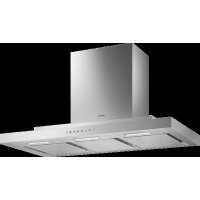
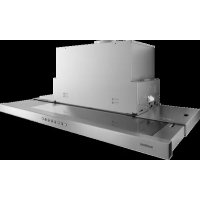
AL400721 - Basket GAGGENAU - Free user manual and instructions
Find the device manual for free AL400721 GAGGENAU in PDF.
| Product Type | Extractable range hood |
| Brand | Gaggenau |
| Model | AL400721 |
| Operating Mode | Extraction or recirculation |
| Ventilation Speeds | 3 speeds + intensive speed |
| Timer function | Yes, 10 minutes |
| Intermittent ventilation | Yes, 5 minutes per hour |
| Lighting | Yes, with brightness adjustment |
| Lighting type | LED (to be confirmed) |
| Grease filter saturation indicator | Yes, after 30 hours of operation |
| Grease filter | Metallic, dishwasher-safe or hand washable |
| Activated carbon filter | Optional for recirculation mode |
| Materials | Stainless steel, lacquered surfaces, aluminum, plastic, glass |
| Power supply | 220-240 V, 50/60 Hz (estimated) |
| Max. compatible gas burner power | 61,000 Btu/hr (18 kW) |
| Included accessories | Recirculated air outlet grille, hose connections |
| Recommended cleaning | Hot water + dish soap, glass cleaner |
| Safety | Automatic shut-off, flame protection |
| Repairability | Authorized Gaggenau after-sales service |
| Product and serial numbers | On the rating plate at the bottom of the appliance |
Frequently Asked Questions - AL400721 GAGGENAU
User questions about AL400721 GAGGENAU
0 question about this device. Answer the ones you know or ask your own.
Ask a new question about this device
Download the instructions for your Basket in PDF format for free! Find your manual AL400721 - GAGGENAU and take your electronic device back in hand. On this page are published all the documents necessary for the use of your device. AL400721 by GAGGENAU.
USER MANUAL AL400721 GAGGENAU
Signal Words for Safety and Best Use 4
IMPORTANT SAFETY INSTRUCTIONS 5
General notes 5
Fire Safety 5
Burn Prevention 6
Child Safety 6
Cleaning Safety 6
Safe use 7
Proper Installation and Maintenance 7
State of California Proposition 65Warnings 7
Causes for damages 8
Protecting the environment 8
Operating modes 8
Air extraction 8
Recirculation 8
Getting to know the appliance 9
Control panel 9
Installation accessories 9
Operating the appliance 10
Extending/retracting the appliance 10
Turn on the fan 10
Intense level 10
Run-on function 11
Interval ventilation 11
Lighting 11
Saturation notification 11
Cleaning and maintenance 12
Removing and installing the metal grease filter 13
Troubleshooting 14
Customer service 15
Additional information on products, accessories, replacement parts and services can be found at www.gaggenau.com and in the online shop www.gaggenau-eshop.com
Signal Words for Safety and Best Use

WARNING
This indicates that death or serious injuries may occur as a result of non-observation of this warning.

CAUTION
This indicates that minor or moderate injuries may occur as a result of non-observation of this warning.
NOTICE: This indicates that damage to the appliance or property may occur as a result of non-compliance with this advisory.
Note: This alerts you to important information and/or tips.

IMPORTANT SAFETY INSTRUCTIONS
READ AND SAVE THESE INSTRUCTIONS
WARNING
When properly cared for, your new appliance has been designed to be safe and reliable. Read all instructions carefully before use. These precautions will reduce the risk of burns, electric shock, fire, and injury to persons. When using kitchen appliances, basic safety precautions must be followed, including those in the following pages.
General notes
Examine the appliance after unpacking it. In the event of transport damage, do not plug it in.
Fire Safety
Always have a working smoke detector near the kitchen.
WARNING
TO REDUCE THE RISK OF A RANGE TOP GREASE FIRE:
a) Never leave surface units unattended at high settings. Boilovers cause smoking and greasy spillovers that may ignite. Heat oils slowly on low or medium settings.
b) Always turn hood ON when cooking at high heat.
c) Clean ventilating fans frequently. Grease should not be allowed to accumulate on fan or filter.
d) Use proper pan size. Always use cookware appropriate for the size of the surface element. Do not flambé under the extractor hood or work with a naked flame. When switched on, the extractor hood draws flames into the filter. There is a risk of fire due to deposits on the grease filter!
CAUTION
For general ventilating use only. Do not use to exhaust hazardous or explosive materials and vapors.
Do not operate any fan with a damaged cord or plug. Discard fan or return to an authorized service facility for examination and/or repair.
In the event that personal clothing or hair catches fire, drop and roll immediately to extinguish flames.
Smother flames from food fires other than grease fires with baking soda. Never use water on cooking fires.
WARNING
TO REDUCE THE RISK OF INJURY TO PERSONS IN THE EVENT OF A RANGE TOP GREASE FIRE, OBSERVE THE FOLLOWING:
SMOTHER FLAMES with a close-fitting lid, cookie sheet, or metal tray, then turn off the burner. BE CAREFUL TO PREVENT BURNS. If the flames do not go out immediately, EVACUATE AND CALL THE FIRE DEPARTMENT.
- NEVER PICK UP A FLAMING PAN - You may be burned.
- DO NOT USE WATER, including wet dishcloths or towels - a violent steam explosion will result.
Use an extinguisher ONLY if:
- You know you have a Class ABC extinguisher, and you already know how to operate it.
The fire is small and contained in the area where it started. - The fire department is being called.
- You can fight the fire with your back to an exit.
Have an appropriate fire extinguisher available, nearby, highly visible and easily accessible near the appliance.
Whenever possible, do not operate the ventilation system during a cooktop fire. However, do not reach through fire to turn it off.
WARNING
Risk of fire
Grease deposits in the grease filter can ignite. Clean the grease filter at least every two months. Never operate the appliance without the grease filter.
WARNING
Risk of fire
Grease deposits in the grease filter can catch fire. Never work with a naked flame near the appliance (e.g. flambéing). Install the unit near a heat-producing appliance for solid fuels (e.g. wood or coal) only if there is a closed, non-detachable cover. There must be no flying sparks.

IMPORTANT SAFETY INSTRUCTIONS
READ AND SAVE THESE INSTRUCTIONS
WARNING
Risk of fire
When gas burners are in operation without any cookware placed on them, they can build up a lot of heat. A ventilation appliance installed above the cooker may become damaged or catch fire. Only operate the gas burners with cookware on them.
WARNING
Risk of fire
During simultaneous use of multiple gas cooktops, a great deal of heat is created. A ventilation device located above it can become damaged or catch fire. Never use two gas cooktops together at maximum heat for longer than 15 minutes. One large burner with over 17,000 Btu/hr (5 kW) (wok) is equal to the wattage of two gas burners.
WARNING
Risk of fire
Operating several gas burners at the same time gives rise to a great deal of heat. The ventilation appliance may become damaged or catch fire. The ventilation appliance must only be combined with gas burners that do not exceed the maximum total output of 61,000 Btu/hr (18 kW). If 41,000 Btu/hr (12 kW) is exceeded, the local regulations concerning room ventilation, room size, and combination with ventilation devices in exhaust and recirculating operation must be heeded.
WARNING
Risk of fire
Hot oil and fat catch fire fast. Never leave hot oil and fat unsupervised. Never extinguish a fire with water. Switch off the cooking position. Suffocate flames carefully with a lid, a fire blanket or similar.
Burn Prevention
WARNING
Risk of burns
The accessible parts get hot during operation. Never touch hot parts. Keep children away.
Child Safety
When children become old enough to use the appliance, it is the legal responsibility of the parents or legal guardians to ensure that they are instructed in safe practices by qualified persons.
Remove all tape and packaging before using the appliance. Destroy the packaging after unpacking the appliance. Never allow children to play with packaging material.
Do not allow anyone to climb, stand, lean, sit, or hang on any part of an appliance, especially a door, warming drawer, or storage drawer. This can damage the appliance, and the unit may tip over, potentially causing severe injury.
Do not allow children to use this appliance unless closely supervised by an adult. Children and pets should not be left alone or unattended in the area where the appliance is in use. They should never be allowed to play in its vicinity, whether or not the appliance is in use.
CAUTION
Items of interest to children should not be stored in an appliance, in cabinets above an appliance or on the backsplash. Children climbing on an appliance to reach items could be seriously injured.
Cleaning Safety
WARNING
Be sure the entire appliance (including the grease filters and light bulbs, if applicable) has cooled and grease has solified before attempting to clean any part of the appliance.
Do not use steam cleaners to clean the appliance.

IMPORTANT SAFETY INSTRUCTIONS
READ AND SAVE THESE INSTRUCTIONS
Safe use
WARNING
Do not repair, replace or remove any part of the appliance unless specifically recommended in the manuals. Improper installation, service or maintenance can cause injury or property damage. Refer to this manual for guidance. All other servicing should be done by a qualified technician.
WARNING
Risk of injury
Items placed on the appliance may fall down. Do not place any objects on the appliance.
Proper Installation and Maintenance
Have the installer show you the location of the circuit breaker or fuse. Mark it for easy reference.
This appliance must be properly installed and grounded by a qualified technician. Connect only to properly grounded outlet. Refer to Installation Instructions for details.
This appliance is intended for normal family household use only. It is not approved for outdoor use. See the Warranty. If you have any questions, contact the manufacturer.
Do not store or use corrosive chemicals, vapors, flammables or nonfood products in or near this appliance. It is specifically designed for use when heating or cooking food. The use of corrosive chemicals in heating or cleaning will damage the appliance and could result in injury.
Do not operate this appliance if it is not working properly, or if it has been damaged. Contact an authorized servicer.
Do not repair or replace any part of the appliance unless specifically recommended in this manual. Refer all servicing to a factory authorized service center.
CAUTION
Grease left on filters can remelt and move into the vent.
Hidden surfaces may have sharp edges. Use caution when reaching behind or under appliance.
WARNING
When the hood is operated in exhaust-air mode simultaneously with a different burner which also makes use of the same chimney (such as gas, oil or coal-fired heaters, continuous-flow heaters, hot-water boilers) care must be taken to ensure that there is an adequate supply of fresh air which will be needed by the burner for combustion.
Safe operation is possible provided that the under pressure in the room where the burner is installed does not exceed 4Pa (0.04 mbar).
This can be achieved if combustion air can flow through non-lockable openings, e.g. in doors, windows and via the air-intake/exhaust-air wall box or by other technical measures, such as reciprocal interlocking, etc.
WARNING
Avoid carbon monoxide poisoning - Provide adequate air intake so combustion gases are not drawn back into the room.
An air-intake/exhaust-air wall box by itself is no guarantee that the limiting value will not be exceeded.
Note: When assessing the overall requirement, the combined ventilation system for the entire household must be taken into consideration. This rule does not apply to the use of cooking appliances, such as cooktops and ovens.
State of California Proposition 65 Warnings
WARNING
This product contains chemicals known to the State of California to cause cancer, birth defects or other reproductive harm.
Causes for damages

CAUTION
Risk of damage due to corrosion. Always turn appliance on when cooking to avoid condensation buildup. Condensation can lead to corrosion damages.
Risk of damage due to ingress of humidity into the electronic circuitry. Never clean operator controls with a wet cloth.
Surface damage due to incorrect cleaning. Clean stainless steel surfaces in the grind direction only. Do not use any stainless steel cleaners for operator controls.
Surface damage due to strong or abrasive cleaning agents. Never use strong and abrasive cleaning agents.
Objects set down on the appliance can damage the appliance and adjacent stove top. Do not set any objects on the moving parts of the appliance.
Protecting the environment
Unpack the appliance and dispose of the packaging in line with environmental requirements.
Operating modes
You can use this appliance in the air extraction or the recirculation mode.
Air extraction

The air sucked in is cleaned by the grease filters and is routed outdoors through a pipe system.
Note: The extracted air must neither be discharged into an operating smoke or waste gas chimney nor into a shaft that serves to ventilate rooms where heat-producing appliances are installed.
The local chimney sweep's consent must be obtained if the exhaust air is to be routed to a smoke or waste gas chimney that is not in operation.
A telescopic wall duct should be used if the exhaust air is routed through the outside wall.
Recirculation
The aspirated air is cleaned by the grease filters and an activated charcoal filter and is returned to the kitchen.
Note: You must install an activated charcoal filter to bind odors in the recirculation mode. Refer to the manual or ask your specialist dealer for details of the various options for operating the appliance in the recirculation mode. You can obtain the necessary accessories from specialist dealers, from our after-sales service or in the online shop.
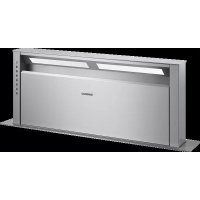
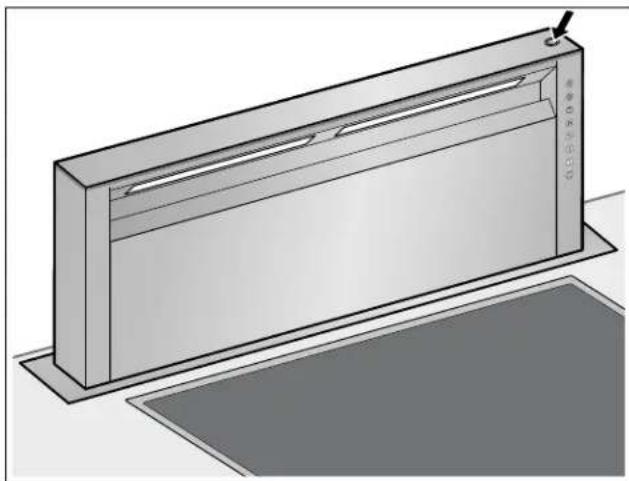
Getting to know the appliance
Here you can get to know your new appliance and get information about accessories.
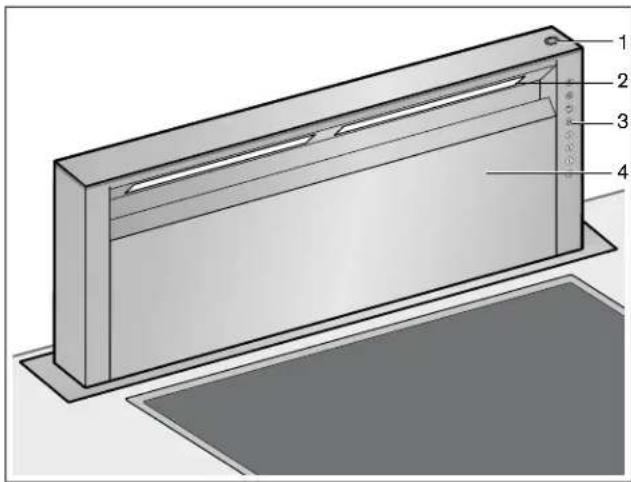
1 Retract/extend the switches
2 Lighting
3 Control panel
4 Filter cover
Control panel
All function buttons are highlighted in green when they are in an active state. The indicator lamp of the "saturation display" blinks.
| Light On/Off |
| Saturation display |
| Run-on function |
| Intensive setting |
| 3 Fan speed 3 |
| 2 Fan speed 2 |
| 1 Fan speed 1 |
| Fan On/Off |
Installation accessories
AA 010 410 Air exhaust grill circulating air 3^9 / 16^9 (90 mm)
AD 754 045 Connecting studs for aluminum flex pipe 2 × NW 5^15 / 16 (150 mm) round
AD 854 043 Connecting studs for flat duct system with air control blades 1 × NW 5^15 / 16 (150 mm) flat
AD 854 045 Connecting studs for flat duct system with air control blades 2 × NW 5^15 / 16 (150 mm) flat
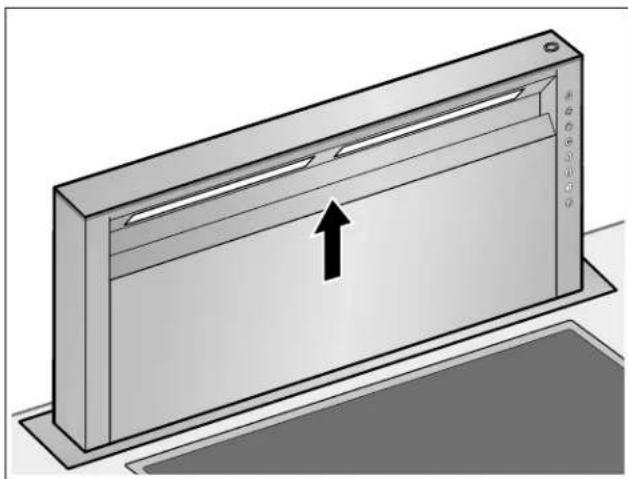
Operating the appliance
This appliance only functions when it is completely extended.
Note: Turn the extractor hood on when you start cooking and switch it off again a few minutes after you have finished cooking. This is the most effective way to eliminate cooking vapor.
Extending/retracting the appliance

WARNING
Risk of injury
Risk of crushing when extending and retracting the appliance. Never reach into the movement area of the appliance when extending or retracting. Keep children at a safe distance.

WARNING
Risk of injury
Cookware set down within the movement area of the appliance can fall over. Hot liquids that pour out can cause injury. Do not set down any cookware within the movement area of the appliance.
Extending the appliance
1 Remove any objects from the area of movement of the appliance.
2 Press the button on the top of the appliance. The appliance extends fully.
Retracting the appliance
The filter cover must be closed completely.
1 Remove any objects from the area of movement of the appliance.
2 Press the button on the top of the appliance. The appliance retracts fully. The light and fan are automatically switched off.
Turn on the fan
Switching on
For extraction there are three ventilator speeds and an Intensive setting available.
1 Press the ① button to switch on the appliance. The fan starts in setting 2.
2 With the buttons 1, 2, 3 or , set the fan speed according to the cooking situation.
Switching off
Use the ① button to switch the appliance off.
Intense level
For especially strong odor or vapor, use the intense level.
1 Press the ① button to switch on the appliance. The fan starts in setting 2.
2 Press the button to switch on the Intensive setting.
Note: If the button was pressed while the fan is running on speed 1, 2 or 3, the electronics automatically switch back to the previously-selected fan speed after 5 minutes.
3 To switch off the Intensive setting earlier, press the ① button or the button for another fan speed.
Setting the duration
You can set the duration after which the Intensive setting switches off automatically.
| Duration Press buttons simultaneously | |
| 3 minutes | >> and 1 |
| 5 minutes | >> and 2 |
| 10 minutes | >> and 3 |
The factory setting is set to 5 minutes.
Run-on function
The run-on function can be set for any fan speed.
1 First press the button for the desired fan speed 1, 2, 3 or and then press the button.
Notes
- The run-on time is ten minutes for all fan speed settings. Once this time has elapsed, ventilation switches off automatically.
If the lighting is switched on, it remains on.
2 To switch off the run-on function earlier, press the ① button.
Interval ventilation
For interval ventilation, the device is switched on automatically for five minutes per hour.
1 Press the ① button to switch on the appliance. The fan starts at level 2. The interval ventilation can be used on level 1, 2 or 3.
2 Press the run-on button twice.
Note: This mode is indicated by alternating lighting up of the button with the corresponding speed.
3 To end interval ventilation, press the ① button.
Lighting
The lighting can be switched on and off independently of the ventilation.
Press the button.
Setting the brightness
Press and hold the button until the desired brightness is reached.
Saturation notification
After 30 hours of operation, the saturation display of the grease filter blinks.
- At the latest now the metal mesh grease filter should be cleaned. For instructions on how to clean the metal mesh grease filter, please see the chapter about Cleaning and maintenance.
While the saturation display is blinking, it can be reset with the button.
Cleaning and maintenance

WARNING
Risk of burns
The appliance grows hot during operation. Let appliance cool down prior to cleaning.

WARNING
Risk of electric shock
Penetrating damp can cause electric shock.
Only clean appliance with a damp cloth. Prior to cleaning, pull the plug or flip the breaker in the fusebox.

WARNING
Risk of electrical shock
Moisture entering the appliance can cause an electrical shock. Don't use a high-pressure cleaner or steam cleaner.

WARNING
Risk of injury
Components inside the appliance may have sharp edges. Wear protective gloves.
Cleaning agents
To prevent various surfaces from becoming damaged due to incorrect cleaning agents, follow the specifications given in the table. Do not use
- cleaning agents that are harsh or scouring,
- cleaning agents with high alcohol content,
- hard scouring pads or sponges,
high-pressure cleaners or steam cleaners.
Thoroughly rinse all new sponges before use.
Observe all instructions and warnings accompanying cleaning agents.
Area Cleaning agents
Stainless steel Warm soapy water:
Clean with a dish rag and dry with a soft towel.
Only clean stainless steel with the grain.
Specific products for stainless steel care are available from customer service or from specialized retailers.
Apply a thin layer of the care product with a soft cloth.
Varnished surfaces Warm soapy water:
Clean with a damp dish rag and dry with a soft towel.
Do not use stainless steel cleaner.
Aluminum and
Glass cleaner:
plastic
Clean with a soft cloth.
Glass Glass cleaner:
Clean with a soft cloth. Do not use a glass scraper.
Controls Warm soapy water:
Clean with a damp dish rag and dry with a soft towel.
Risk of damage to electronics due to permeating damp. Never clean controls with a wet cloth.
Do not use stainless steel cleaner.
Cleaning the metal grease filter

WARNING
Risk of fire
Grease deposits in the grease filter can ignite. Clean the grease filter at least every two months.
Never operate the appliance without the grease filter.
NOTICES
- Do not use any aggressive, acidic or alkaline cleaning agents.
- When cleaning the metal grease filters, also clean the metal grease filter holder in the appliance with a moist cloth.
- You can clean the metal grease filters in a dishwasher or by hand.
In the dishwasher:
Note: Slight discoloration is possible when cleaning the dishwasher. This does not affect the metal grease filter's functioning.
- Do not clean extremely dirty metal grease filters with dishes.
- Loosely position the metal grease filter in the dishwasher. The metal grease filters must not be jammed in.
By hand:
Note: You can use a special grease solvent if soiling is stubborn. You can order it via the online shop.
Soak the metal grease filters in hot soapy solution.
Use a brush for cleaning and then rinse the filters well.
- Allow the metal grease filters to drip dry.
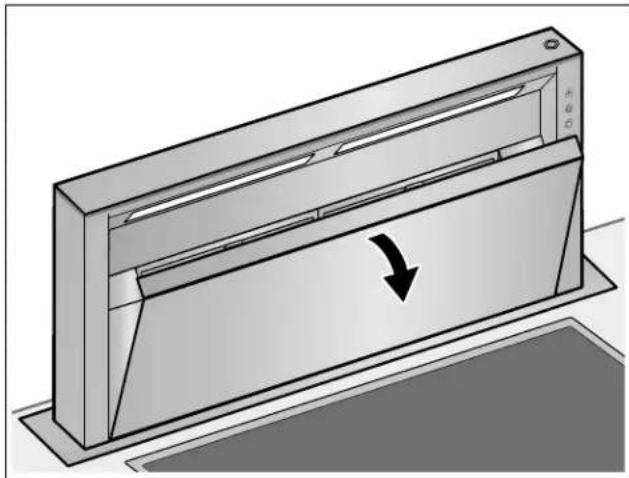
Removing and installing the metal grease filter
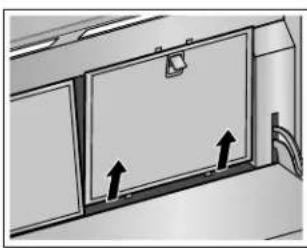
Open the filter cover
1 Grip filter cover in the middle and pull upward.
2 Fold the filter cover forward.
Uninstalling metal grease filter
1 Open the lock and fold the metal mesh grease filter forward.
2 Take metal mesh grease filter out of the holder. Notes
Grease can accumulate in the bottom of the metal mesh grease filter.
- Do not hold metal mesh grease filter at an angle, otherwise grease will drip out.

3 Clean the metal mesh grease filter.
Clean the grease troughs
For better cleaning, it is possible to remove the grease troughs. The grease troughs can be cleaned in the dishwasher.
1 Remove the grease troughs.
2 Clean the grease troughs.
3 Insert the grease troughs again.
Installing metal grease filter
1 Insert metal mesh grease filter.
2 Fold metal mesh grease filter back in and snap the lock in.
3 Reset the saturation display by pressing the button.
The saturation display goes out.
Close the filter cover
Grip filter cover in the middle and fold up.
The filter cover snaps in.
Clean the filter cover
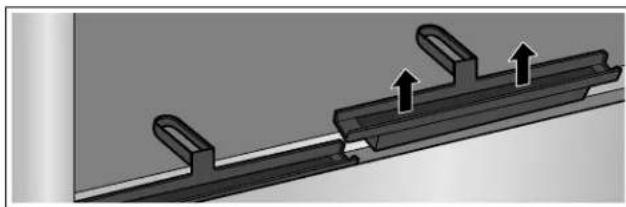
For better cleaning, you can remove the filter cover.
1 Open the filter cover.
2 Grip the filter cover on the side with both hands.
3 Lift up the rear portion to the stop and pull the filter cover forward.

The filter cover can be pulled using the bolts of the holder.
4 Clean the filter cover
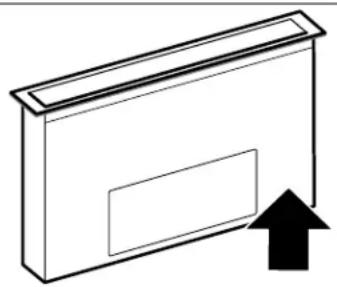
Hook in the filter cover
1 Grip the filter cover on the side with both hands.
2 Push the filter cover onto the bolts of the holder and lift up in the front until it snaps in.
Troubleshooting
You can often easily eliminate problems that may occur on your own. Before calling customer service, take into account the following information.
WARNING
Risk of electric shock Improper repairs are dangerous. Only an after-sales technician trained by us may perform repairs and may replace damaged connecting leads. Remove the mains plug or deactivate the fuse in the fuse box if the appliance is defective. Call after-sales service.
LED lights
Defective LED lights may be replaced by the manufacturer, his customer service or a qualified technician (electrician) only.
Troubleshooting table
| Disruption Possible cause Solution | ||
| Appliance is not working | Plug is not plugged in | Connect the appliance to the mains |
| Power outage Check whether other kitchen appliances are working | ||
| Fuse defective Check in the fuse box whether the fuse for the appliance is in working order | ||
| Appliance does not retract. | Filter cover not closed. | Close filter cover completely. |
| The button illumination does not work. | The control unit is faulty. | Call customer service. |
| The lighting does not work. | The bulbs are faulty. | Call customer service. |
| The ⑨ button flashes. | The filter is soiled. | Clean the filter, see the chapter about Cleaning and maintenance. |
Customer service
If your appliance needs repairs, our customer service is there for you. We work hard to help solve problems quickly and without unnecessary service calls, getting your appliance back up and running correctly in the least amount of time possible.
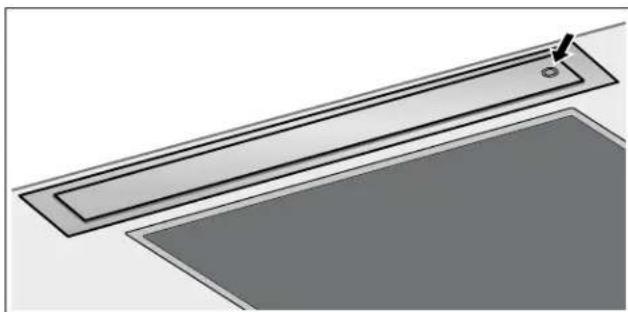
When you call, please indicate the product number (E-Nr.) and serial number (FD-Nr.) so that we can support you in a qualified manner. You will find the type plate with these numbers at the lower front side of the appliance. To access it, open the door of the cupboard in which the appliance is fitted.
To avoid having to search for a long time when you need it, you can enter your appliance data and the customer support telephone number here.
E-Nr. FD-Nr.
Customer Service
Please read the use and care instructions provided with your appliance. Failure to do so may result in an error in using the appliance. This could result in a service call that instead of fixing a mechanical issue is only needed for customer education. Such calls are not covered by the appliance warranty.
Please find the contact data of all countries in the enclosed customer service list.
To book an engineer visit and product advice
USA 8774424436
toll-free
CANADA 800 828 9165
You can rely on the manufacturer's expertise. Rest assured that the repair will be handled by trained service technicians who have the original replacement parts for your appliance.
Table des Matieres
Vitesse intensive 24
1901 Main Street, Suite 600
Irvine, CA 92614
+1.877.442.4436
USA
www.gaggenau-usa.com