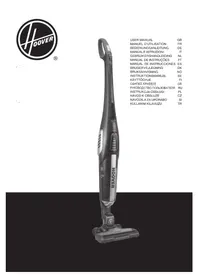
USER MANUAL ATV252LT1 011 HOOVER
* Certain models only


INSTRUCTIONS FOR SAFE USE
This appliance should only be used for domestic cleaning, as described in this user guide. Please ensure that this guide is fully understood before operating the appliance.
Always switch off and remove the charger from the socket before cleaning the appliance or any maintenance task.
This appliance can be used by children aged from 8 years and above and persons with reduced physical, sensory or mental capabilities or lack of experience and knowledge if they have been given supervision or instruction concerning use of the appliance in a safe way and understand the hazards involved. Children shall not play with the appliance. Cleaning and user maintenance shall not be made by children without supervision.
If the power cord is damaged stop using the appliance immediately. To avoid a safety hazard, an authorised Hoover service engineer must replace the power cord.
Keep hands, feet, loose clothing and hair away from rotating brushes.
Use only the original charger supplied with the appliance.
Check that your supply voltage is the same as that stated on the charger.
If the appliance is to be disposed of the batteries must first be removed. The appliance must be disconnected from the supply mains when removing the battery. Dispose of the batteries safely. Run the appliance until it stops because the batteries are fully discharged. Used batteries should be taken to a recycling station and not disposed of with household waste. To remove the batteries, please contact the Hoover Customer Centre or proceed according to the following instructions.
Note: Should you experience any difficulty in dismantling the unit or for more detailed information on treatment, recovery and recycling of this appliance, please contact your local city office or your household waste disposal service.
When charging the appliance, the power switch must be off.
Never charge the batteries in temperatures above 37°C or below 0°C.
It is normal for the charger to become warm to the touch when charging.
Use only attachments, consumables or spares recommended or supplied by Hoover.
Static electricity: some carpets can cause a small build up of static electricity. Any static discharge is not hazardous to health.
Do not use your appliance out of doors or on any wet surface or for wet pick up.
Do not pick up hard or sharp objects, matches, hot ashes, cigarette ends or other similar items. Do not spray with or pick up flammable liquids, cleaning fluids, aerosols or their vapours.
Do not run over the power cord when using your appliance or remove the plug by pulling on the power cord. Do not continue to use your appliance or charger if it appears faulty.
Hoover service: To ensure the continued safe and efficient operation of this appliance we recommend that any servicing or repairs are only carried out by an authorised Hoover service engineer.
Do not use the appliance to clean animals or people.
Do not replace the batteries with non-rechargeable batteries.
The Environment:
This appliance is marked according to the European directive 2011/65/EC on Waste Electrical and Electronic Equipment (WEEE). By ensuring this product is disposed of correctly, you will help prevent potential negative consequences for the environment and human health, which could otherwise be caused by inappropriate waste handling of this product. The symbol on the product indicates that this product may not be treated as household waste. Instead it shall be handed over to the applicable collection point for the recycling of electrical and electronic equipment. Disposal must be carried out in accordance with local environmental regulations for waste disposal. For more detailed information about treatment, recovery and recycling of this
product, please contact your local city office, your household waste disposal service or the shop where you purchased the product.
This product complies with the European Directives 2014/35/EU, 2014/30/EU and 2011/65/EC.
CANDY HOOVER GROUP S.r.l. Via Privata Eden Fumagalli, 20861 Brugherio (MB) Italy
PRODUCT COMPONENTS
A. Ergonomic Handle
B. On/Off Switch
B1. OFF Position B2. FLOOR Position B3. CARPET Position
C. Turbo Button
D. Carry Handle E. LED Display*
E1. LED Charging Indicator*
F. Dust Container
F1. Pre motor filter F2. Shroud F3. Dust Bin
F4. Dust Container Release Button
G. Exhaust Grill H. Main Body
I. Nozzle Release Button J. Flexible Hose K. Agitator Release Flap L. Nozzle Front Lights* M. Front Wheels N. Agitator O. Rear Wheels P. Locking Screw Q. Charger R. Product Holder
PREPARING YOUR CLEANER
- Line up the ergonomic handle to the main body of the cleaner and fix in position with the supplied locking screw. [2]
- Line up the nozzle with the main body and firmly push into the neck until it locks into place. [3]
- Plug charger into the DC socket. For first use, charge your cleaner for 24 hours. [4]
- The charge indicator will flash when charging.
- Fix the Product Holder to your wall using the screw and holder provided [5]. During storage and charging, secure your appliance handle into the product holder.
NOTE: To remove the nozzle, press the nozzle release button and pull it away from the main body.
NOTE: Use only the charger supplied with your cleaner to recharge.
IMPORTANT: When charging the cleaner, the On/Off switch must be in the OFF position.
It is normal for the charger to become warm to the touch when charging.
If the operating times reduce after repeated uses, allow the cleaner to run down until it stops completely, then recharge for 24 hours. Repeat this on a monthly basis to optimize performance.
To minimize self-discharge and maximize battery life, unplug the charger from the product during long periods when the cleaner will not be in regular use.
USING YOUR CLEANER
Turn the cleaner on by sliding the ON/OFF switch forwards to one of the following settings: [6]
- FLOOR: ideal for hard floor surfaces. Normal power without power brush rotation. [B2] CARPET: ideal for carpets and rugs. Normal power with agitator. [B3]
- TURBO: press Turbo button for full power on either floor or carpet mode. [C]
DISPLAY LED*
This cleaner is equipped with a LED display. When the product is on and the display is illuminated, the indicators show the following information.
BATTERY LEVEL INDICATOR*:
- 4 bars = 100% charge
- 3 bars = 75% charge
- 2 bars = 50% charge
- 1 bar = 25% charge
When the batteries are fully discharged, the lower battery level indicator will flash for 20 seconds before the cleaner switches off automatically.
TURBO: When the Turbo mode is activated on the ergonomic handle, the Turbo icon will illuminate in blue*.
CHARGE INDICATOR: When the product is charging, the battery icon will flash every 2 seconds. When fully charged, the icon will stop flashing and remain lit while the charger is plugged in. The icon will switch off when the cleaner is in use.
NOZZLE FRONT LIGHTS*: The nozzle LED lights will be lit only in CARPET setting.
CLEANER MAINTENANCE
Emptying the Dust Container
- Press the dust container release button and pull the dustbin forwards to remove it from the main body of the cleaner. [7]
- Hold the unit over a bin and push the bin empty slider to empty the dust container. [8]
- Return the dust container to the cleaner main body. [9]
Cleaning the Filters
- Press the dust container release button and pull the dust bin forwards to remove it from the main body of the cleaner. [7]
- Pull the filter and shroud assembly from the dust bin using the grips on the filter frame. [10]
- Twist the filter anticlockwise to remove it from the shroud. [10]
- Wash the filter in lukewarm water and leave to dry for 24 hours. Once thoroughly dry, reassemble to the shroud and dustbin. [11]
- If required, wash the dustbin in lukewarm water. Ensure it is fully dry before returning to the main body of the cleaner.
- Return the dust container to the cleaner main body. [9]
NOTE: Do not use hot water or detergents when cleaning the filters. In the unlikely event of the filters becoming damaged, fit a genuine Hoover replacement. Do not try and use the product without a filter fitted.
IMPORTANT: For optimum performance, always keep your filter clean. We recommend that the filter should be washed on a regular basis.
Changing and Cleaning the Agitator
IMPORTANT: Always switch off the cleaner before changing or cleaning the agitator.
- Detach the agitator release flap. It is positioned on the lateral part of the nozzle. [12]
- Hold the agitator release flap and pull down to remove the agitator. [12]
- Replace with new Agitator or clean it. This can only fit in one direction.
- Re-fit in position the agitator release flap.
Battery Replacement
For reasons of safety, the batteries in this cleaner are only replaceable by a Hoover Service engineer. When the batteries fail to maintain charge, please contact the Hoover Customer Service Centre to arrange a replacement.
End of Product Life Battery Disposal
If the cleaner is to be disposed of, the batteries should be removed. Used batteries should be taken to a recycling station and not disposed of with household waste. To remove the batteries, please contact the Hoover Customer Centre and proceed according to the following instructions:
IMPORTANT: Always fully discharge the batteries before removal.
- Run the cleaner until the batteries are completely empty.
- Remove the ergonomic handle and the screws, in the main body to open the cleaner.
- Remove the motor battery housing and disconnect the cables.
- Remove the batteries from the housing.
NOTE: Should you experience any difficulties in dismantling the unit or for more detailed information about treatment, recovery and recycling of this product, please contact your local city office or your household waste disposal service.
TROUBLE SHOOTING
Should you have any problem with your cleaner, follow this simple check list before calling the Hoover Customer Service Centre:
A. Cleaner does not switch on.
Check if the cleaner is charged.
B. Loss of suction or no suction
Empty the dust container and wash the filter.
Remove nozzle and check for any blockages in the ducts and hose.
Check that the dust container has been correctly fitted.
C. Fast Flashing indicator (twice per second)
Incorrect charger connected to product.
Use only charger provided with your cleaner.
D. Batteries cannot be charged.
This may be a result of very long storage periods (over half year).
Contact Hoover customer service to arrange battery replacement.
If the problem persists contact the Hoover customer service centre.
HOOVER SPARES AND CONSUMABLES
Always replace parts with genuine Hoover spares. These are available from your local Hoover dealer or direct from Hoover. When ordering parts always quote your model number.
IMPORTANT: The battery in this cleaner is guaranteed for 6 months from purchase. After 6 months the customer is liable for the cost of a new battery which will be fitted free of charge by an authorised Hoover engineer.
YOUR GUARANTEE
The guarantee conditions for this appliance are as defined by our representative in the country in which it is sold. Details regarding these conditions can be obtained from the dealer from whom the appliance was purchased. The bill of sale or receipt must be produced when making any claim under the terms of this guarantee.
Subject to change without notice.
INSTRUCTIONS DE SECURITE D'UTILISATION
F1. Pre-motor filter
Huls F3. Stofzak
B. On/Off Switch
B1. OFF position B2. FLOOR position B3. CARPET position
C. Turbo Button
B. On/Off Switch
B1. OFF position B2. FLOOR position B3. CARPET position
DISPLAY AND LED*
Contact Hoover customer service if the problem persists.
HOOVER SPARE PARTS AND CONSUMABLES
MAINTENANCE OF THE VACUUM CLEANER
Dust container
- 4 bars = 100% charged
- 3 bars = 75% charged
- 2 bars = 50% charged
- 1 bar = 25% charged
Do not carry the appliance by the power cord. Do not pull the cord to unplug it from the outlet. Do not use the appliance or the charging device if they are damaged.
Hoover service: To ensure continuous, safe, and efficient operation of this household appliance, any repair should be carried out only by a specialist from an authorized Hoover service center.
Do not use the appliance to clean animals or people.
Replacement may only be made with rechargeable batteries.
Environment:
The appliance is marked according to European Directive 2011/65/EC on waste electrical and electronic equipment (WEEE). By following the disposal rules for this electrical appliance, you help prevent potential negative consequences for the environment and human health, which could otherwise result from improper disposal of this device. The symbol on this device indicates that it cannot be disposed of as household waste. It must be taken to an appropriate collection point for electrical and electronic equipment. Disposal must be carried out in accordance with
local environmental regulations for waste disposal. For more detailed
information on disposal, recovery, and recycling of this device, please contact your local city authorities, the household waste disposal service, or the store where the product was purchased.
VACUUM CLEANER COMPONENTS
A. Flexible hose
B. On/Off switch
B1. Non-working position
TECHNICAL MAINTENANCE OF THE VACUUM CLEANER
Emptying the dust container
- Press the release button of the dust container and pull it towards you to remove it from the vacuum cleaner body. [7] 2. Hold the device over a dust bin and press the release slider to empty the dust container. [8]
- Insert the dust container into the main body of the vacuum cleaner. [9]
Cleaning the filters
- Press the release button on the dust container and pull it towards you to remove it from the vacuum cleaner body. [7]
- Remove the filter with the holder assembly from the dust container using the handle on the filter frame. [10] 3. Turn the filter counterclockwise to remove it from the holder. [10]
- Wash the filter in warm water and leave it to dry for 24 hours. After that, thoroughly dry the body and the dust container. [11]
- If necessary, you can wash the dust container in warm water. Make sure it is completely dry before inserting it into the vacuum cleaner body.
- Insert the dust container into the main body of the vacuum cleaner. [9]
NOTE: Do not use hot water or cleaning agents when washing the filter. Damage to the filters is unlikely. If it does occur, replace the damaged filter with a new filter from the manufacturer. It is forbidden to use the vacuum cleaner without a properly installed filter.
ATTENTION! To ensure optimal performance, always keep your filter clean. We recommend cleaning the filter regularly.
Replacing and cleaning the rotating brush
ATTENTION! Before replacing or cleaning the rotating brush, always disconnect the vacuum cleaner from the power supply.
- Release the latch of the rotating brush; it is located on the side of the nozzle. [12]
- While holding the released latch, bend the rotating brush downwards and remove it. [12] 3. Install a new brush or clean the old one. It can only be installed in one position.
- Return the released latch of the rotating brush to its place.
Replacing the battery
For safety reasons, the battery in the vacuum cleaner can only be replaced by a Hoover service engineer. When the battery no longer provides sufficient charge, contact the Hoover customer service for replacement.
End of product life – battery removal
In case of disposal of the vacuum cleaner, the rechargeable batteries must be removed. Used batteries must be handed in at a special collection point and must not be disposed of with normal household waste. To remove the batteries, contact the Hoover customer service or follow the instructions below:
WARNING! Before removing the batteries from the vacuum cleaner, they must be fully discharged.
- Use the vacuum cleaner until the batteries are fully discharged. 2. Remove the ergonomic handles by unscrewing the screws in the main part to open the vacuum cleaner.
- Remove the motor housing and battery compartment, and disconnect the cables.
- Remove the batteries from the housing.
NOTE: If you have any difficulties disassembling the vacuum cleaner, or for more detailed information on recycling or disposal of this product, please contact your local municipal authority or your local waste disposal service.
*Only on specific models
Troubleshooting
If you have any problems with the vacuum cleaner, please perform a simple check before calling the Hoover customer service center.
B. Loss of suction or no suction
Clean the dust container and wash the filter.
Remove the nozzles and check for any blockage in the tube or hose.
Make sure the dust container is correctly installed.
C. The battery charges quickly (2 hours)
An incorrect charging device is connected to the vacuum cleaner.
Use only the charging device supplied with the vacuum cleaner.
D. The battery does not charge
This may be due to prolonged storage (more than half a year).
Contact the Hoover customer service center for battery replacement.
If the problem persists, contact the Hoover customer service center.
SPARE PARTS AND CONSUMABLES FOR HOOVER VACUUM CLEANERS
When replacing parts, use only original spare parts and consumables from Hoover. They can be purchased at your local Hoover dealer or directly from Hoover. When ordering spare parts, be sure to specify the vacuum cleaner model number.
WARNING! The batteries installed in this vacuum cleaner are covered by a warranty of 6 months from the date of purchase. After 6 months, the customer must purchase new batteries, which Hoover service center technicians will install free of charge.
YOUR WARRANTY
The warranty conditions for this household electrical appliance are determined by the representative office in the country where this electrical appliance was purchased. You can obtain more detailed information about these conditions from our dealer. When making claims under these warranty obligations, it is necessary to present the receipt for the purchased goods.
Changes may be made without prior notice.
INSTRUKCJE BEZPIECZNEGUZYTKOWANIA
NAVODILA ZA VARNO UPORABO