
NEC1475 - Microwave Oven PANASONIC - Free user manual and instructions
Find the device manual for free NEC1475 PANASONIC in PDF.
| Product type | Microwave oven |
| Capacity | 20 liters |
| Power | 800 W |
| Functions | Reheating, cooking, defrosting |
| Dimensions (L x D x H) | 45.2 x 34.4 x 25.8 cm |
| Control panel | Manual with buttons |
| Weight | 12 kg |
| Safety | Door locking system |
| Energy consumption | Energy class A |
| Maintenance | Interior cleaning with a damp cloth |
| Included accessories | Turntable, plate support |
Frequently Asked Questions - NEC1475 PANASONIC
User questions about NEC1475 PANASONIC
0 question about this device. Answer the ones you know or ask your own.
Ask a new question about this device
Download the instructions for your Microwave Oven in PDF format for free! Find your manual NEC1475 - PANASONIC and take your electronic device back in hand. On this page are published all the documents necessary for the use of your device. NEC1475 by PANASONIC.
USER MANUAL NEC1475 PANASONIC
Operating Instructions ....Microwave Oven ....For Commercial Use
Please read these instructions completely before operating this oven and keep for future reference.
Types of Container to Use 7
Operating your Oven as a Microwave ....8
Operating your Oven on Convection 9
Operating your Oven on Grill Convection .....10
Operating your Oven on Grill 11
Operating your Oven on Fan Grill ....12
Operating your Oven on Combination .....13 - 16
Setting the Memory Programmes .....17
Using the Memory Programmes .....18
How to Activate Programme Lock ....19
How to Deactivate Programme Lock ....20
Programme List ....20
Keeping your Oven Hot .21
Cooling your Oven quickly ....22
How to change the Beep Tone ....22
How to change Cleaning Interval of the Air Filter .....23
Care of your Oven and Cleaning .....24 - 25
When to Call Service Engineer ....26
Technical Specifications 27
Information on Disposal for users of Waste Electrical & Electronic Equipment .....28
Safety Information
1. Earthing instructions
IMPOTANT: FOR PERSONAL SAFETY, THIS APPLIANCE MUST BE PROPERLY EARTHED. When an outlet is not earthed, it is personal responsibility and obligation of the customer to have it replace with a properly earthed outlet.
VOLTAGE AND POWER WARNING
The voltage used must be the same as specified on the oven. Using a higher voltage than that which is specified is dangerous, and may result in a fire or other type of accident causing damage.
PLACEMENT OF THE OVEN
Locate the oven on a surface which is flat and stable. Do not place the oven in a hot or damp place; e.g. near a gas or electric range. Do not operate the oven when the room temperature is higher than 40^ C(104°F) and/or the humidity is more than 85%. Free air flow around oven is important. There is a possibility of a small amount of interference with weak broadcast signals if the oven is too close to a radio or TV. For safe and efficient operation, the oven must have sufficient air flow to the air vents i.e. 5cm(2 inches) at the side and rear; 20cm(8 inches) at the top. This oven must be positioned so that the plug is accessible.
2. Voltage and Power
The voltage used must be the same as specified on the oven. Using a higher voltage than that which is specified is dangerous, and may result in a fire or other type of accident causing damage.
3. Service
It is dangerous for anyone other than a service technician trained by the manufacturer to perform repair service.
Do not remove the outer casing of the oven.
High voltages are present inside the cabinet. Repairs and adjustments should be done only by qualified service personnel. Contact the manufacturer.
Door Seals
Do not attempt to tamper with or make any adjustments or repairs to door, control panel housing, safety interlock switches or any other part of the oven. Do not remove outer panel from the oven.
The door seals and door seal areas should always be kept clean-use a damp cloth.
4. Operation when empty
The appliance must not be operated by MICROWAVE or COMBINATION WITHOUT FOOD IN THE OVEN. Operation when empty will damage the appliance.
5.Cord
If the supply cord is damaged, it must be replaced by the manufacture or its service agent or a similarly qualified person in order to avoid a hazard.
Do not immerse oven in water. Keep cord away from heated surfaces. Do not let cord hang over the edge of table or work top. The back of the appliance heats up during use. Do not allow the cord to be in contact with the back of the appliance or cabinet surface.
6.Hot Surfaces
Exterior oven surfaces, including air vents on the cabinet and the oven door will get hot during use. (Grill, Convection and Combination) Take care when opening or closing door and when inserting or removing food and accessories.
The oven has heaters situated in the top and back of the oven. After use, the roof, walls and floor will be very hot.
7.Switching off.
In case of electronic failure, oven can only be turned off at outlet.
This product is an equipment that fulfills the European standard for EMC disturbances (EMC = Electromagnetic Compatibility) EN 55011. According to this standard this product is an equipment of group 2, class B and is within required limits. Group 2 means that radio-frequency energy is intentionally generated in the form of electromagnetic radiation for warming and cooking of food. Class B means that this product may be used in normal household areas.
When you first unpack your Oven
1. Examine your Oven
Unpack oven, retain all packing material, and examine the oven for any damage such as dents, broken door latches or cracks in the door. Notify supplier immediately if unit is damaged. N.B DO NOT install if unit is damaged.
2. Door Seals
The appliance should be inspected for damage to the door seals and door seal areas and if these areas are damaged the appliance should not be operated until it has been repaired by a service technician trained by the manufacturer.
3. Guarantee card
Fill out and post the pre-addressed guarantee card.
4. Removal of protective film
A protective film is used to prevent scratching of the outer case during transportation. Peel this film off before installation or use.
Placement of Oven
1. Placement of Oven
Oven must be placed on a flat, stable surface. For proper operation, the oven must have sufficient air flow.
A gap of at least 5 cm (2 inches) must be available at the right and left hand sides and back wall of the oven. A minimum space of 20 cm (8 inches) must be left above the oven and the 2 exhaust vents at the rear.
2.Shelves
Do not place the oven on a shelf directly above or beside a gas or electric hob, cooker or deep fat fryer. The oven may be damaged. It is dangerous to position this oven on a shelf which is so high that food and accessories cannot be safely removed by the user.
3.Stacking
DO NOT attempt to stack these ovens.
Operation
1. Air vents
This oven requires free airflow at the back for maximum cooling efficiency. DO NOT BLOCK THE AIR VENTS.
2.Maximum room temperature
Do not operate the oven when the room temperature is higher than 40^ C ( 104^ F) and/or the humidity is more than 90%. Free airflow around the oven is important.
3. Outdoor use
Do not use outdoors.
4.Storage of accessories
When the oven is not being used, do not store any objects other than oven accessories inside the oven in case it is accidentally turned on. In case of electronic failure, oven can only be turned off at outlet.
Caution
1. Before Use
Before using CONVECTION, COMBINATION, GRILL, GRILL CONVECTION or FAN GRILL function for the first time, operate this oven without food on CONVECTION 250°C for 20 minutes. This will allow the oil that is used for rust protection to be burned off. Remove all accessories from the oven.
2. Smoke/Fire
During cooking with MICROWAVE mode, if smoke is observed, keep the Oven door closed, and switch off or disconnect the oven from the supply. If materials inside the oven should ignite, keep oven door closed, press STOP/RESET pad. Switch off at outlet. If possible, shut off power at the fuse or circuit breaker panel.
3.Interference
There is a possibility of a small amount of interference with weak broadcast signals if the oven is too close to a radio or TV.
4.Heater Operation
When using HIGH, MEDIUM, LOW and SIMMER powers, half the Grill elements and the CONVECTION fan operate to reduce the build up of condensation. Take care NOT TO TOUCH OVEN CEILING.
5.Cleaning
Do not clean this appliance with a water jet. Failure to maintain the oven in a clean condition could lead to deterioration of the oven interior and could adversely affect the life of the appliance and possibly result in a hazardous situation.
Important Information - Read Carefully
1.Heating Times
As MICROWAVE and COMBINATION heating times are much shorter than other cooking methods, it is essential that recommended heating times are not exceeded without first checking the food.
Cooking times given in the charts are approximate. Factors that may affect cooking times are: starting temperature, volume, size and shape of foods and dishes used.
Fire!
If the recommended heating times are exceeded the food will be spoiled and in extreme circumstances could catch fire and possibly damage the interior of the oven. It is critical that the Oven is cleaned regularly and kept free of excess grease. See Care of your Oven and Cleaning.
(See pages 24 - 25.)
2. Small Quantities of Foods
Small quantities of food or foods with low moisture content can burn, dry out or catch on fire if cooked too long.
Fire!
If materials inside the oven should ignite, keep the oven door closed, press STOP/RESET pad. Switch off at outlet, if possible or shut off power at the fuse or circuit breaker panel.
3. Food Components
Foods high in sugar, salt, fats and moisture content heat faster by Microwave because their properties attract microwave energy. Denser foods high in protein and fibre, absorb microwave energy slower which means a longer heating time.
4. Food High in Fat/Sugar
It is important to correctly set the heating time for food with a high fat, alcohol and sugar content. If these foods are heated by microwave for too long they can ignite. NEVER LEAVE UNATTENDED. eg. Doughnuts, syrup sponge puddings, Christmas puddings and mince pies.
5.Eggs
Do not boil eggs in their shell by MICROWAVE. Pressure may build up and the eggs will explode.
6. Piercing Skins
Potatoes, apples, egg yolks, whole vegetables and sausages are examples of food with non-porous skins. These must be pierced using a fork before cooking by MICROWAVE to prevent bursting.
7.Deep fat frying
Do not attempt to deep fat fry in your oven.
8. Checking Internal Temperature
To ensure the complete destruction of food poisoning bacteria such as Lysteria and Salmonella, ensure the internal temperature of the food reaches at least 72°C when reheating. Use a suitable thermometer with probe attachment to check the temperature at the end of the heating time. Heat for a longer time if the correct temperatures are not reached. DO NOT use a domestic meat thermometer - use only correctly calibrated equipment.
9.Liquids
When heating liquids by MICROWAVE, eg. soup, sauces and beverages, overheating the liquid beyond boiling point can occur without evidence of bubbling. This could result in a sudden boil over of the hot liquid. To prevent this possibility, the following steps should be taken:
a. Avoid using straight-sided containers with narrow necks.
b. Do not overheat.
c. Stir the liquid before placing the container in the oven and again halfway through the heating time.
d. After heating, allow to stand in the oven for a short time, stirring again before carefully removing the container.
10.Paper, Plastic
When heating food in plastic or paper containers, check the oven frequently as these types of containers may ignite if overheated. (See page 7.)
Do not use re-cycled paper products, as they may contain impurities which may cause sparks and/or fires when used, unless packaging states they are specifically designed for microwave use.
11.Reheating
It is essential reheated food is served "piping hot" (72°C). Always check before serving and if in doubt return food to oven for further heating.
12. Standing Times
Standing times are essential for foods cooked or reheated by MICROWAVE or COMBINATION. During the stand time, heat will continue to conduct to the centre to cook the food completely. The denser the food, the longer the stand time. Reheated foods also require a standing time.
Important Information - Read Carefully
13.Accessories
Follow specific instructions in this guide for proper use of oven accessories and cookware. Failure to do so could damage the oven.
Take care when removing food and/or accessories from the oven. The Wire Rack Shelf provided DOES NOT have a non-tip lock—take care if you pull it out to remove food.
14. Cooking containers
Before use on MICROWAVE and COMBINATION, always check that containers are suitable.
(See page 7.)
DO NOT MICROWAVE sealed containers as they will explode.
15.Fan motor operation
After using MICROWAVE, CONVECTION, COMBINATION, GRILL, FAN GRILL or GRILL CONVECTION the fan motor always rotates for approx. 5 minutes to cool the electric components. This is normal and you can take out food even though fan motor operates.
16.Baby bottles/jars
Feeding bottles and baby food jars shall be open when heated and the contents are to be stirred or shaken, and the temperature is to be checked before consumption, in order to avoid burns.
17. When children use oven
Only allow children to use the oven without supervision when adequate instructions have been given so that the child is able to use the oven in a safe way and understands the hazards of improper use.
Outline Diagram
Accessories Supplied
(8) Air Filter
PLEASE ENSURE THAT AIR FILTERS ARE INSTALLED BEFORE USING THE OVEN.
Operation without air filters will allow dirt and grease to block air vents causing the oven to overheat.
See page 25 for installation.
(12) Ceramic Insulating Tray
Parts No. A06033230BP
When using metal dishes on COMBINATION, place the Ceramic Insulating Tray between the food container and the Wire Rack Shelf.
The Ceramic Insulating Tray should remain in the oven during preheating on a combination programme.
If placing food directly on the Ceramic
Insulating Tray, ensure it is clean and free of excess grease.
COOL the Ceramic Insulating Tray before cleaning to avoid breakage. Ceramic Insulating
Tray should be placed on base of oven to catch drips when grilling.
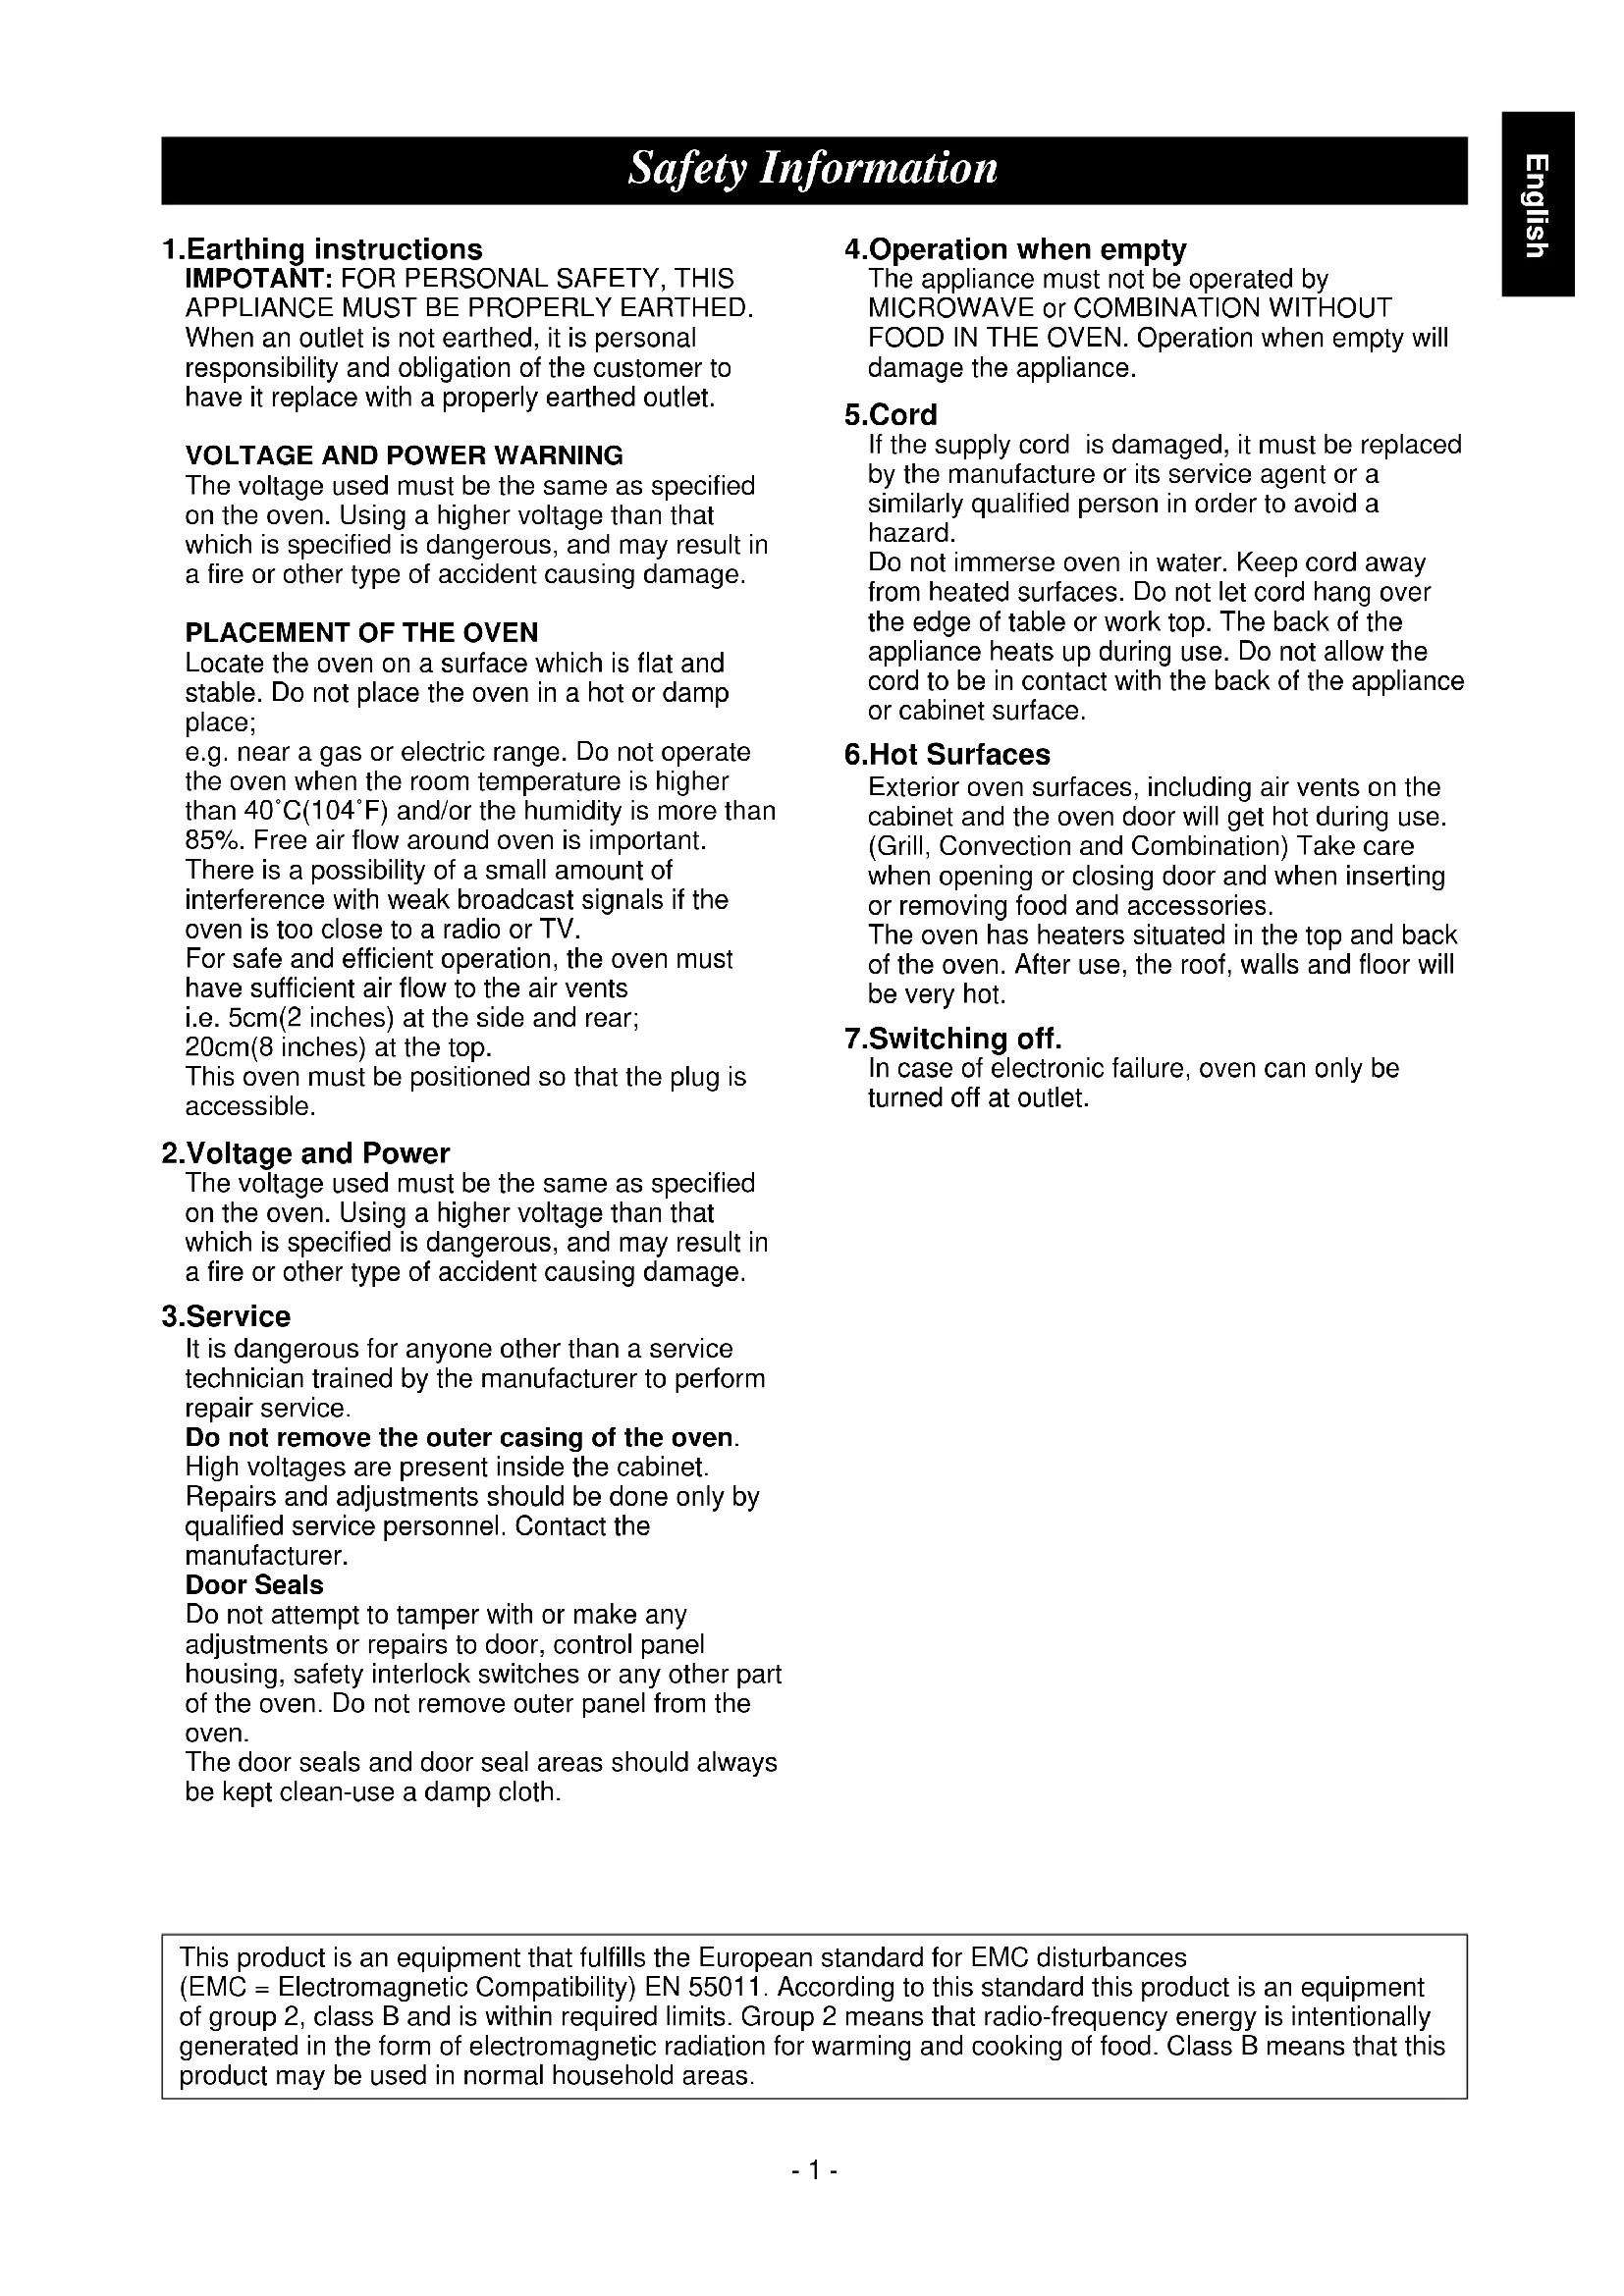
(13) Wire Rack Shelf
Parts No. A06023C50BP
The shelf can be used on CONVECTION, COMBINATION, GRILL CONVECTION, GRILL and FAN GRILL functions.
DO NOT leave shelf in oven on MICROWAVE ONLY function.
DO NOT PLACE METAL CONTAINERS DIRECTLY ON WIRE RACK SHELF when using COMBINATION function.
Use the Ceramic Insulation Tray.
There is NO NON-TIP Safety Lock on Shelf — take care when removing food.
Installing Wire Rack Shelf
Insert direction to the cavity
(14) SD Memory Card
Parts No. RP-SD016BCS0
An SD Memory Card is included with the oven and carries excel files to enable programming via your Personal Computer. Up to 99 of your own cooking programmes can be stores via the SD Memory Card. If the SD Card is lost or develops a fault, please contact Service Engineer.
See “Storing Programme Data on SD Memory Card” for information on using the SD Card and the memory programming software.
Outline Diagram
Your oven Explained
(1) Oven Lamp Cover
(2) Quartz Grill Elements
(3) Convection Fan and Heater
(4) Door handle
(5) Display Window
(6) Control panel
(7) SD Card Cover
(9) Oven Exhaust Vents
(10) Ceramic Base
(11) Shelf Supports (Upper, Lower)
Control Panel
(15) Number Pads
(16) Prog (Programme) pad
(17) Microwave Pad
(18) Grill pad
(19) Fan Grill Pad
(20) Convection Pad
(21) Stop/Reset Pad
Before heating: One press clears the display. During heating: One press stops the heating cycle and two presses clear the display. N.B. See page 19 for operation whilst in Programme Lock.
(22) Prog Lock (Programme Lock) Pad
(23) Preheat Pad
(24) Combination pad
(25) Cooling Pad
(26) Oven Lamp Pad
The Oven Lamp switches off when the door is closed. If you want to check the food, press Lamp Pad, it will then illuminate for 10 seconds. The Oven Lamp turns on whenever the door is opened.
(27) Start Pad Repeat Feature:
You can repeat the same heating programme if you press START Pad within 1 minute of the previous programme finishing. After 1 minutes, if START Pad is not pressed, goes blank if the oven door is closed. After 30 minutes returns to "0" if the oven door is open.
Display Window
The cursor will illuminate to indicate the programme set. Always check the cursor position before you press START Pad.
(28) Microwave
(29) Grill
(30) Fan Grill
(31) Convection
(32) Preheat
(33) Cooling
(34) Microwave Power Level
(35) Cooking Stage Indicator
SD Memory Card
- An SD Memory Card is included in the unit purchased. It allows you to store up to 99 Memory Programmes in the oven.
- Use the card when storing or recalling Memory Programmes.
※You can record the Memory Programme data onto your SD Memory Card using your personal computer. Refer to "Storing Programme Data on SD Memory Card".
How to insert / remove the SD Memory Card
※Before you insert / remove an SD Memory Card, always disconnect the oven from the power supply. Or it is possible, the display window should be blank, otherwise, the data on the SD Memory Card may be damaged.
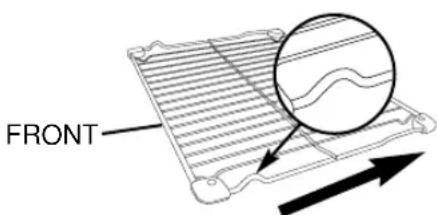
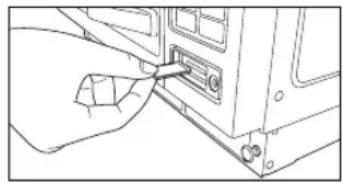
How to remove
- Unscrew the SD Card Cover and remove it.
natural_image
Line drawing of a hand pressing a button on a mechanical component (no text or symbols)- Push the SD Memory Card with your finger to draw it out. Then, remove it.
natural_image
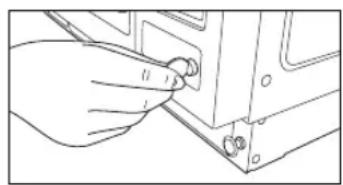
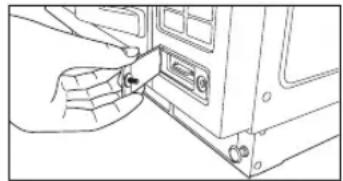
Line drawing of a hand inserting a component into a computer drive (no text or symbols visible)How to insert
- Insert an SD Memory Card with its label facing up as indicated by ▲ mark until it snaps into place.
natural_image
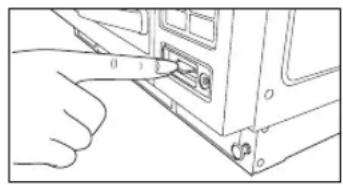
Line drawing of a mechanical component with a handle and mounting bracket (no text or symbols)- Fit the left edge of the SD Card Cover. Screw to close at the right-hand side.
natural_image
Line drawing of a hand inserting a component into a device (no text or symbols visible)Caution:
- Always close the SD Card Cover except when an SD Memory Card is inserted / removed in order to prevent water or dust from entering.
- Insert only an SD Memory Card specified for this oven. Do not use any other type or substitute SD Memory Card.
- Keep the removed SD Memory Card away from static electricity.
- Do not disassemble or modify SD Memory Cards.
- Do not apply a physical shock to SD Memory Cards. Do not bend, drop, or get them wet.
- Do not touch the metal terminals of an SD Memory Card with your hand or metal.
- Do not remove the label. Do not paste another label onto the SD Memory Card.
- Do not leave SD Memory Cards in locations subject to high temperatures or direct sunlight.
- Do not leave SD Memory Cards in locations subject to corrosive gases.
- If the SD Memory Card is lost or becomes faulty, please contact a Service Engineer to obtain a replacement.
Types of container to use
MICROWAVE
1. Glass
DO USE: Heat Resistant glass eg. Pyrex
DO NOT USE:
Delicate glass, lead crystal which may crack or arc.
2.China/Ceramics
DO USE: Glazed china dishes, porcelain and ceramic dishes designed for cooking.
DO NOT USE:
Fine bone china dishes with metal patterns. Jugs with glued handles.
3. Pottery/Earthenware/Stoneware
DO USE: If completely glazed.
DO NOT USE:
If unglazed - these dishes can absorb water which absorbs energy.
This makes the dish hot and increases the heating time.
4.Foil/Metal
DO USE: For reheating only:
Individual portion, open topped foil containers. Take care the containers do not touch WALLS or DOOR of oven. Do not cook in foil containers. Small amounts of Aluminium foil can be used to shield joints of meat during defrosting - take care that foil doesn't touch sides or door.
DO NOT USE:
Metal platters, Wire Rack Shelf, any dish with METAL PATTERN or TRIM. METAL SKEWERS. DO NOT RE-USE FOILCONTAINERS - ARCING may occur as they become DENTED/ DAMAGED. Do not use Le Crueset-style dishes (Cast iron covered by enamel). These can be used on convection or grill.
5.Plastic
DO USE: High temperature plastic like Durable Polysulfon rather than soft flexible dishes. (Remove any metal twist ties.)
DO NOT USE:
Melamine, Polypropilen, Phenol Urea, also do not use plastic food storage bags and containers eg. Margarine, Yoghurt and Mayonnaise tubs.
6.Covering Films
DO USE: Non plasticiser cling film designed for Microwave use. Do not allow film to touch food. To prevent nasty steam burns, pierce film to allow it to escape and remove film from dish carefully.
DO NOT USE:
Film designed only for covering food.
7.Wood/Wicker
DO USE: Wooden skewers designed for food use.
DO NOT USE:
Wicker baskets, wooden bowls (with prolonged use these tend to dry out and may ignite)
8.Paper
DO USE: disposable, polyester coated paper board dishes if designed for microwave.
DO NOT USE:
Paper napkins (these can ignite), wax coated cups, recycled products (unless stated suitable by manufacturer)
COMBINATION
Combination programmes use microwaves and heat (CONVECTION or GRILL) therefore you must choose the container carefully.
DO USE: Metal containers check they do not have jagged metal seams. Ceramics that do not have a metal pattern. Heat proof glass and china.
DO NOT USE:
Enamelled items (that may be gold/metal pattern. Enamelled cast iron eg Le Creuset. Any dish that's not heatproof eg plastics, and cling film.
CONVECTION / GRILL CONVECTION
DO USE: Any container suitable for conventional ovens eg metal, ceramic, earthenwave, enamelled cast iron etc.
DO NOT USE:
Plastic containers, food films, wood/wicker, glass, paper.
GRILL / FAN GRILL
DO USE: Any container suitable for fierce griling eg stainless steel, Le Creuset, Ceramics, Baking Sheets etc.
DO NOT USE:
Plastic containers, fine ceramics, cling film etc.
Operating your Oven as a Microwave
| ACTION | INFORMATION | DISPLAY |
| 1 Open Door.Put in Food.Close Door. | The oven lamp will come on.Oven lamp turns off. |  |
| 2 Select Power Level.Microwave | Press MICROWAVE Pad to select correct power.eg. HIGH—see below. |  |
| 3 Select Time. Press NUMBER Pads to set a heating time.eg. 4 min. 30 secs.Press Pads 4, 3 and 0.Max time you can set:HIGH 15 minsOther 60 mins | Display window will count down time.The cooling fan will be turned on. | 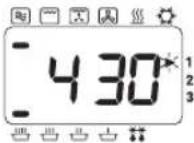 |
| 4 Press START Pad.Start | At end of heating programme, oven beeps3 times, and “0” flashes in window until door is opened.Remove food.Display window will indicate the previous programme. | 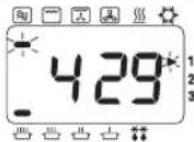 End of Programme End of Programme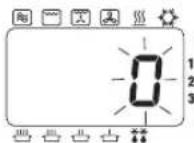 Open Door Open Door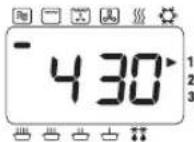 |
ACCESSORIES TO USE
natural_image
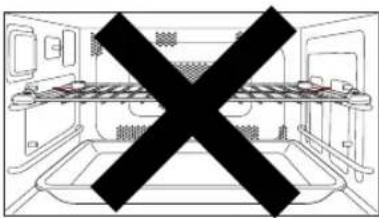
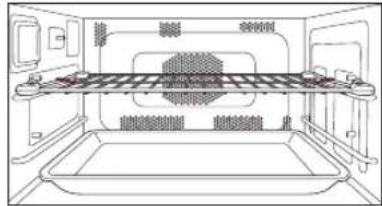
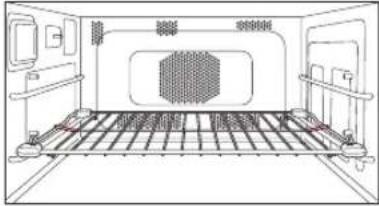
Diagram of a refrigerator interior with a black X symbol indicating no text or symbols on the refrigerator itself (no text or labels present)Do not use the Wire Rack Shelf or Ceramic Insulating Tray when cooking by MICROWAVE.
| PRESS | POWER LEVEL | WATTS | |
| Once | HIGH | 1350 | |
| Twice | MEDIUM | 650 | |
| 3 Times | LOW | 420 | |
| 4 Times | SIMMER | 240 | |
| 5 Times | DEFROST | 180 | |
| 6 Times | — | STAND | 0 |
• Multi-Stage (Sequential) Heating
The oven can be programmed with up to 3 different stages to operate in sequence.
These can be MICROWAVE, GRILL, CONVECTION, FAN GRILL, GRILL CONVECTION or COMBINATION functions. If a required heating time is greater than 15 minutes on HIGH power, use 2 stage programming.
For 2 stage programming:
Follow steps 1-3 then enter the next heating programme, and press START Pad.
For 3 stage programming:
Follow 2 stage programming and enter a 3rd heating programme before pressing START Pad.
- Hot Surfaces
Take great care when removing hot food. Use oven gloves.
- Repeat Feature
See page 5.
Operating your Oven on Convection
| ACTION | INFORMATION | DISPLAY |
| 1 Open Door.Put in Food.Close Door. | The oven lamp will come on.Oven lamp turns off. | 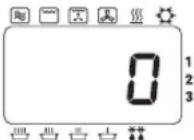 |
| 2 Press CONVECTION Pad.*Convection | Select required oven temperature. eg. 180°CContinue to press CONVECTION Pad until temperature required appears in display window.Temperature counts up in 10°C from 100°C-250°C | 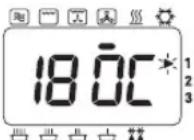 |
| 3 Select Time. | Press NUMBER Pads to set a heating time.eg.18 mins.Press Pads 1,8,0 and 0.Max heating time is:99 mins. 99 secs. | 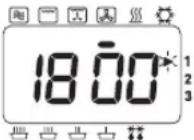 |
| 4 Press START Pad.Start | Display window will count down time.The Convection fan turns on. |  |
| 5 Open Door. | At end of heating programme, oven beeps3 times, and “0” flashes in window until door is opened.Remove food.Display window will indicate the previous programme. | End of Programme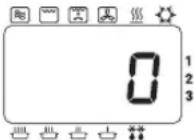 Open Door Open Door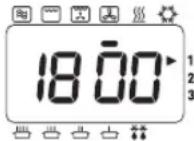 |
ACCESSORIES TO USE
natural_image
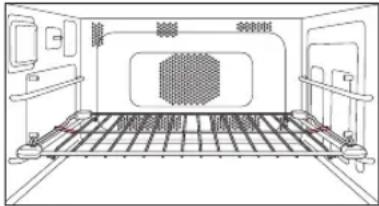
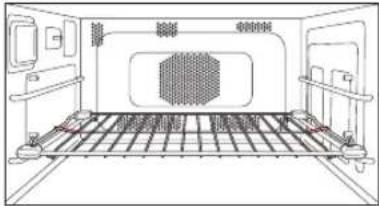
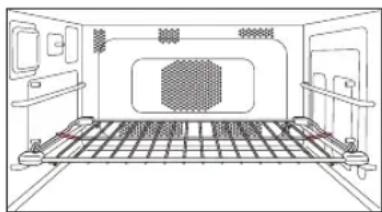
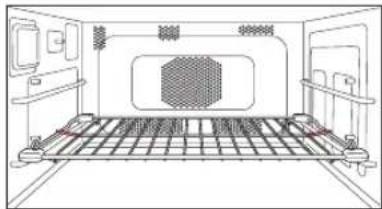
Technical line drawing of a mechanical assembly with grid and mounting brackets (no text or symbols)For best results place the cooking container on Wire Rack Shelf in the LOWER position. Food can be placed directly on the Wire Rack Shelf if it is thoroughly cleaned before use.
Caution:
There is NO NON-TIP Safety Lock on Wire Rack Shelf. Take care when removing food.
* The oven will memorise the last CONVECTION temperature used should you wish to use the same one again.
Press the CONVECTION pad when cooking is complete & the last temperature used will be displayed.
- Hot Surfaces
Take great care when removing hot food. Use oven gloves.
- Multi-Stage (Sequential) Heating
See page 8.
- Recalling Convection Temperature
The temperature selected can be checked for 3 seconds after pressing CONVECTION Pad. Temperature will be displayed briefly in window before returning to remaining heating time. The temperature cannot be altered during a programme.
- Preheat
For best results on Convection the oven should be preheated. (See page 21.)
- Repeat Feature
See page 5.
Operating your Oven on Grill Convection
| ACTION | INFORMATION | DISPLAY |
| 1 Open Door.Put in Food.Close Door. | The oven lamp will come on.Oven lamp turns off. | 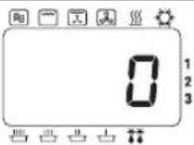 |
| 2 PressGRILL Pad.[IMAGE] | High or low level can be selected, but Grill level is automatically fixed after pressing CONVECTION Pad. |  |
| 3 PressCONVECTIONPad.*[IMAGE] | Select required oven temperature. eg. 180°CContinue to press CONVECTION Pad until temperature required appears in display window.Temperature counts up in 10°C from 100°C-250°C | 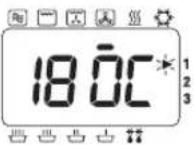 |
| 4 Select Time. | Press NUMBER Pads to set a heating time.eg. 18 mins.Press Pads 1,8,0 and 0.Max heating time is:99 mins. 99 secs. | 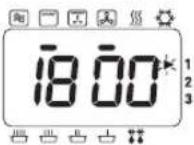 |
| 5 PressSTART Pad.[IMAGE] | Display window will count down time.The Convection fan turns on. | 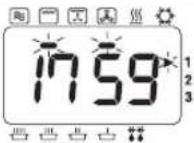 |
| 6 Open Door. | At end of heating programme, oven beeps3 times, and “0” flashes in window until door is opened.Remove food.Display window will indicate the previous programme. | End of Programme Open Door Open Door |
- Hot Surfaces
Take great care when removing hot food. Use oven gloves.
• Multi-Stage (Sequential) Heating
See page 8.
• Recalling Convection Temperature
The temperature selected can be checked for 3 seconds after pressing CONVECTION Pad. Temperature will be displayed briefly in window before returning to remaining heating time. The temperature cannot be altered during a programme. Recalling Grill level is not available.
- Preheat
For best results on Convection the oven should be preheated. (See page 21.)
- Repeat Feature
See page 5.
ACCESSORIES TO USE
natural_image
Technical line drawing of a train or subway station platform with grid layout and control panels (no text or symbols)For best results place the cooking container on Wire Rack Shelf in the LOWER position. Food can be placed directly on the Wire Rack Shelf if it is thoroughly cleaned before use.
Caution:
There is NO NON-TIP Safety Lock on Wire Rack Shelf. Take care when removing food.
* The oven will memorise the last GRILL CONVECTION temperature used should you wish to use the same one again. Press the CONVECTION pad when cooking is complete & the last temperature used will be displayed.
End of Programme
Open Door
Operating your Oven on Grill
| ACTION | INFORMATION | DISPLAY |
| 1 Open Door.Put in Food.Close Door. | The oven lamp will come on.Oven lamp turns off. |  |
| 2 PressGRILL Pad.[IMAGE] | Select required Grill level.eg. HighDisplay Output1 press Hi 1840 W2 presses Lo 1500 W |  |
| 3 Select Time. | Press NUMBER Pads to set a heating time.eg.10 mins.Press Pads 1,0,0 and 0.Max heating time is:60 mins. | 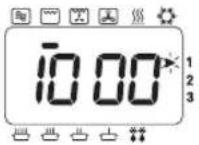 |
| 4 PressSTART Pad.[IMAGE] | Display window will count down time.The convection fan turns on. | 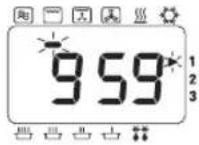 |
| 5 Open Door. | At end of heating programme, oven beeps3 times, and “0” flashes in window until door is opened.Remove food.Display window will indicate the previous programme.(Less than 1 minute.) | End of Programme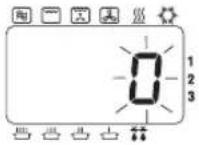 Open Door Open Door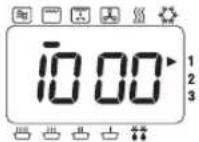 |
ACCESSORIES TO USE
natural_image
Technical line drawing of a vehicle interior with a grid-patterned tray and control panel (no text or symbols)For best results place the food on Wire Rack Shelf in UPPER position.
Ceramic Insulating Tray may be placed on base of oven to catch splashes and drips. Small items of food that might fall between Wire Rack Shelf can be cooked directly on ceramic Insulating Tray on Wire Rack Shelf in UPPER position. Drain frequently to avoid excessive spitting. Deep dishes may be finished under the grill placed on the Wire Rack Shelf in the LOWER position or placed directly on ceramic base.
Caution:
There is NO NON-TIP Safety Lock on Wire Rack Shelf. Take care when removing food.
- Hot Surfaces
Take great care when removing hot food. Use oven gloves.
• Multi-Stage (Sequential) Heating
See page 8.
- Recalling Grill level
The Grill level selected can be checked for 3 seconds after pressing GRILL Pad. The Grill level will be displayed in the window before returning to remaining heating time.
- Preheat
For best results on Convection the oven should be preheated. (See page 21.)
- Repeat Feature
See page 5.
Operating your Oven on Fan Grill
| ACTION | INFORMATION | DISPLAY |
| 1 Open Door.Put in Food.Close Door. | The oven lamp will come on.Oven lamp turns off. | 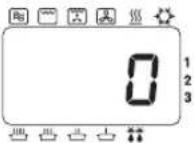 |
| 2 PressFAN GRILLPad.*Fan Grill | Select required Fan Grill temperature. eg. 180°CContinue to press FAN GRILL Pad until temperature required appears in display window.Temperature counts up in 10°C from 100°C-250°C | 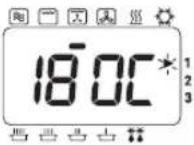 |
| 3 Select Time. | Press NUMBER Pads to set a heating time.eg. 20 mins.Press Pads 2,0,0 and 0.Max heating time is:99 mins. 99 secs. | 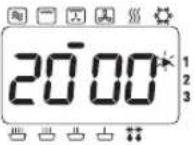 |
| 4 PressSTART Pad.Start | Display window will count down time.The convection fan turns on. | 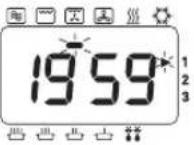 |
| 5 Open Door. | At end of heating programme, oven beeps3 times, and “0” flashes in window until door is opened.Remove food.Display window will indicate the previous programme. | End of Programme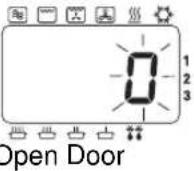 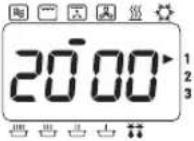 |
ACCESSORIES TO USE
natural_image
Line drawing of a train interior with a grid-patterned platform and railings (no text or symbols)For best results place the cooking container on Wire Rack Shelf in the LOWER position. Food can be placed directly on the Wire Rack Shelf if it is thoroughly cleaned before use.
Caution:
There is NO NON-TIP Safety Lock on Wire Rack Shelf. Take care when removing food.
* The oven will memorise the last FAN GRILL temperature used should you wish to use the same one again. Press the FAN GRILL pad when cooking is complete & the last temperature used will be displayed.
- Hot Surfaces
Take great care when removing hot food. Use oven gloves.
• Multi-Stage (Sequential) Heating
See page 8.
• Recalling Fan Grill Temperature
The temperature selected can be checked for 3 seconds after pressing FAN GRILL Pad. Temperature will be displayed briefly in window before returning to remaining heating time. The temperature cannot be altered during a programme.
- Preheat
For best results on Convection the oven should be preheated. (See page 21.)
- Repeat Feature
See page 5.
Operating your Oven on Combination
Preset Combination
| ACTION | INFORMATION | DISPLAY |
| 1 Open Door.Put in Food.Close Door. | The oven lamp will come on.Oven lamp turns off. | 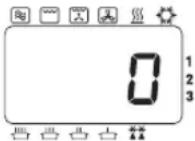 |
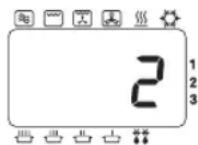
| 2 Press COMBINATION Pad.[IMAGE] | Select Preset COMBINATION Number (1-5).eg. 1—see below. | 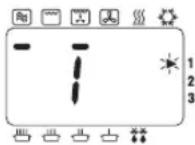 |
| 3 Select Time. | Press NUMBER Pads to set a heating time.eg. 3 mins.Press pad 3,0 and 0.Max heating time is:5 mins. | 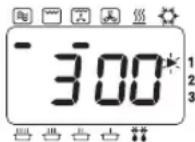 |
| 3 Press START Pad.[IMAGE] | Display window will count down time. | 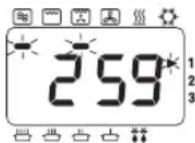 |
| 4 Open Door. | At end of heating programme,oven beeps3 times, and “0” flashes in window until door is opened.Remove food.Display window will indicate the previous programme. | End of Programme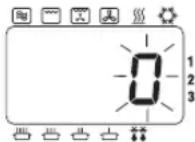 Open Door Open Door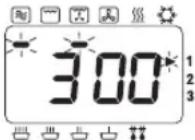 |
ACCESSORIES TO USE
natural_image
Technical line drawing of a mechanical assembly with grid and mounting brackets (no text or symbols)For best results place food on Wire Rack Shelf in the LOWER position. The Ceramic Insulating Tray MUST be used if the cooking container is metal, NEVER place a metal container directly onto the WIRE SHELF when cooking by COMBINATION as arcing may occur and damage the dish/oven.
Caution:
There is NO NON-TIP Safety Lock on Wire Rack Shelf. Take care when removing food.
| PRESS GRIDISPEVEL | ORICROWAVE POWER | GRILL OR CONVECTION SETTING | CONVECTION TEMPERATURE | MAXIMUM HEATING TIME |
| Once | 1* | HIGH | Fan Grill | 250°C |
| Twice | 2 | LOW | Fan Grill | 250°C |
| 3 Times | 3 | DEFROST | Fan Grill | 250°C |
| 4 Times | 4 | LOW | Grill Convection | 250°C |
| 5 Times | 5 | LOW | Grill | Hi |
*Combi 1 may only be used as the first stage of a 2 or 3 stage cooking programme.
Operating your Oven on Combination
- Hot Surfaces
Take great care when removing hot food. Use oven gloves.
• Multi-Stage (Sequential) Heating
See page 8.
- Recalling Preset Combination Number
The Preset Combination Number (1-5) selected can be checked for 3 seconds after pressing COMBINATION Pad.
The Preset Combination Number will be displayed in the window before returning to remaining heating time.
- Preheat
For best results on combination the oven should be preheated.
(See page 21.)
- Repeat Feature
See page 5.
Operating your Oven on Combination
Manual Combination
| ACTION | INFORMATION | DISPLAY |
| 1 Open Door.Put in Food.Close Door. | The oven lamp will come on.Oven lamp turns off. |  |
| 2 Select Power Level.**Microwave | Press MICROWAVE Pad to select correct power.eg. LOW. | 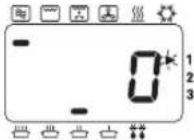 |
| 3 PressGRILL Pad*[IMAGE]orFAN GRILLPad***[IMAGE]orCONVECTION[IMAGE]Pad* ***orGRILL Pad *[IMAGE]+CONVECTIONPad * ***[IMAGE] | MWO + GRILLSelect Grill Level.Display Output1 press Hi 1840 W2 presses Lo 1500 Weg. Hi.ORMWO + FAN GRILLPress Fan Grill Pad until required temperature appears in display.eg. 200°C.ORMWO + CONVECTIONPress Convection Pad until required temperature appears in display.eg. 200°C.ORMWO +GRILL CONVECTIONHi or Lo level can be selected but Grill level is automatically fixed after pressing Convection Pad.+Press Convection Pad until required temperature appears in display.eg. 200°C. | 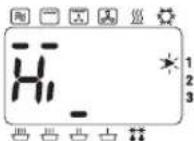 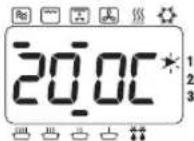 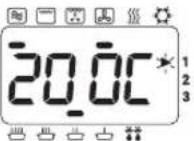 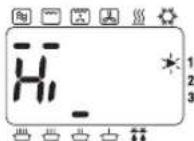 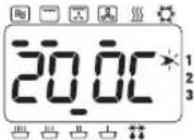 |
| 4 Select Time. | Press Number Pads to set a heating time.eg. MWO + GRILL 18 mins. Press pads 1,8,0 and 0 Max heating time is: 60 mins. | 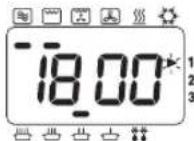 |
(ACTION 5-6 continued on next page.)
ACCESSORIES TO USE
natural_image
Technical line drawing of a mechanical assembly or enclosure with no visible text, numbers, or symbols.For best results place food on Wire Rack Shelf in the LOWER position. The Ceramic Insulating Tray MUST be used if the cooking container is metal, NEVER place a metal container directly onto the WIRE SHELF when cooking by COMBINATION as arcing may occur and damage the dish/oven.
Caution:
There is NO NON-TIP Safety Lock on Wire Rack Shelf. Take care when removing food.
* Combination of Microwave and Grill and Convection is possible.
** Combination settings using HIGH power may only be used as 1 stage of a 2 or 3 stage cooking programme and for a maximum 5 mins heating time.
*** The oven will memorise the last CONVECTION, GRILL CONVECTION, or FAN GRILL temperature used on COMBINATION should you wish to use the same one again.
Press the CONVECTION or FAN GRILL pad when cooking is complete & the last temperature used will be displayed.
Operating your Oven on Combination
| ACTION | INFORMATION | DISPLAY |
5 Press START Pad. | Display window will count down time. | 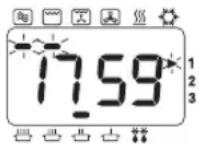 |
| 6 Open Door. | At end of heating programme, oven beeps 3 times, and “0” flashes in window until door is opened.Remove food.Display window will indicate the previous programme. | End of Programme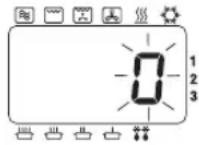 Open Door Open Door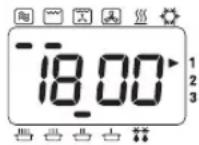 |
- Hot Surfaces
Take great care when removing hot food. Use oven gloves.
• Multi-Stage (Sequential) Heating
See page 8.
- Recalling Grill level (Only Grill Combination)
The GRILL level selected can be checked for 3 seconds after pressing GRILL Pad. The GRILL level will be displayed in the window before returning to remaining heating time.
- Recalling Convection Temperature
The temperature selected can be checked for 3 seconds after pressing CONVECTION Pad. Temperature will be displayed briefly in window before returning to remaining heating time. The temperature cannot be altered during a programme.
• Recalling Fan Grill Temperature
The temperature selected can be checked for 3 seconds after pressing FAN GRILL Pad. Temperature will be displayed briefly in window before returning to remaining heating time. The temperature cannot be altered during a programme.
- Preheat
For best results on combination the oven should be preheated. (See page 21.)
- Repeat Feature
See page 5.
Setting the Memory Programmes
Please ensure that the SD Memory Card is inserted in the Oven.
Your oven has 99 blank memory programmes for your own heating requirement.
All 99 Memory Programmes can be set manually using the Programme Pad on the control panel. However, these programmes can be stored onto the SD Memory Card using your personal computer (see "Storing Programme Data on SD Memory Card").
Any programme information stored directly onto the SD Memory Card will override any manual programmes previously set.
| ACTION | INFORMATION | DISPLAY |
| 1 Open Door. The oven lamp will come on. | 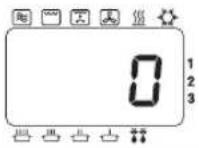 | |
| 2 Press PROG Pad.Keep door open. | Keep pad pressed for 2 seconds until “P” is displayed. | 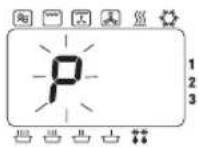 |
| 3 Press Programme Number. | eg. To set Programme 03: SIMMER 20 mins. Press NUMBER Pads 0 and 3.If programme has been previously set, this will appear in the display.If the programme memory is empty then the programme number will appear in the display. | 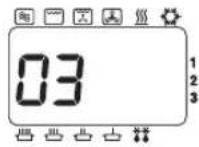 |
| 4 Select Power. eg. Press MICROWAVE Pad 4 times. |  | |
| 5 Select Time. eg. Press NUMBER Pads 2, 0, 0, and 0. | 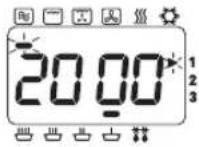 | |
| 6 Press PROG Pad.Prog | After 3 seconds display returns to “0”. | 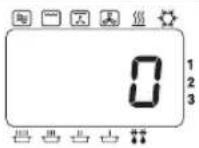 |
- Programme Lock
It is NOT possible to enter a programme when Programme Lock is set. (See page 19.)
• Multi-Stage (Sequential Cooking)
It is possible to programme into the memory a 2 or 3 stage programme using MICROWAVE, CONVECTION, GRILL, FAN GRILL, GRILL CONVECTION or COMBINATION.
- Changing a Memory Programme
To change a programme simply follow steps 1-6 on previous page entering your new programme.
Using the Memory Programmes
Please ensure SD Memory Card is inserted in the oven.
Using the 99 Memory Programmes.
| ACTION | INFORMATION | DISPLAY |
| 1 Open Door.Put in Food.Close Door. | The oven lamp will come on.Oven lamp turns off. | 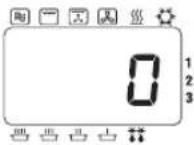 |
| 2 PressNUMBER Pads required. | eg. For programme 03.Press NUMBER Pads 0 and 3. This example is preset Memory Programme:SIMMER power 20 mins. | 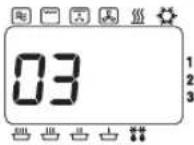 |
| 3 Press START Pad.Start | Display window will count down time. | 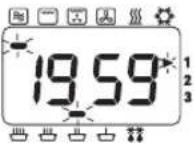 |
- Programme Lock
If programme lock is activated, programme starts immediately therefore there is no need to press START Pad.
How to Activate Programme Lock
One Touch Operating Mode
When Programme Lock is activated, oven operates in “ONE TOUCH” mode, i.e. press required memory programme number and oven immediately starts.
No need to press START Pad.
| ACTION | INFORMATION | DISPLAY |
| 1 Open Door. The oven lamp will come on. |  | |
| 2 Press PROG LOCK Pad. “P” is displayed. | ||
| Prog Lock | KEEP DOOR OPEN. | 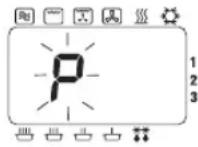 |
| After 2 seconds.... | 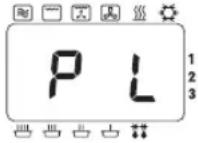 | |
| After 3 seconds..... |  |
- Interrupted Programme
If the door is opened during a programme, the remaining heating time will be cancelled.
- Repeat Feature
Once a manual heating programme has finished, the oven will automatically display the programme again for a repeat programme even if the Programme Lock is activated.
- Setting New Programs
When the Programme Lock is activated it is not possible to enter a Memory Programme or change the Beep tone.
(See page 22.)
- Stop/Reset Pad
During heating, one press stops the heating cycle, the programme is cleared and display returns to "0".
How to Deactivate Programme Lock
| ACTION | INFORMATION | DISPLAY |
| 1 Open Door. The oven light will come on. |  | |
| 2 Press PROG Pad. | Keep key pressed for 2 seconds until “P L” is displayed. | 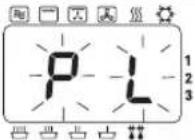 |
| KEEP DOOR OPEN. | ||
| After 2 seconds.... |  | |
| After 3 seconds... |  |
- Two Touch Operating Mode
The oven reverts to 2 TOUCH OPERATION mode when you deactivate Programme Lock. Press required key NUMBER Pads then press START Pad.
- Interrupted Programme
If the door is opened during a programme, once programme lock is deactivated, the remaining heating time will be retained in the display window until the door is closed and START Pad is pressed.
- Repeat Feature
Once a manual heating programme has finished, the oven will automatically display the programme again for a repeat programme with the Programme Lock deactivated.
- Setting New Programs
Once Programme Lock is released, you can enter new heating programs.
Programme List
It is possible to check the programmes that have been entered into the SD Memory Card. With the door open, press START pad and NUMBER pad 1 simultaneously. (The Oven will make an acknowledging beep). After 2 seconds, the display window will show each individual stage of each Memory Programme in the order 01, 02, 03 etc. Finally, it will display the Beep Tone setting and the Programme Lock symbol (P.L), the time interval for cleaning of the Air Filter, before clearing to "0".
Keeping your Oven Hot
To assist in faster heating and browning results, the PREHEAT feature is designed to keep your oven at a background temperature of 190^ C, 220^ C or 240^ C for a hot start before using a GRILL, CONVECTION, FAN GRILL, GRILL CONVECTION or COMBINATION function.
| ACTION | INFORMATION | DISPLAY |
1 Press PREHEAT Pad.* Select a required Preheat temperature when display is blank or "0". | eg. 220°C1 press 190°C2 presses 220°C3 presses 240°C |  |
| 2 Press START Pad. Preheat temperature will be maintained at the selected temperature. Preheat temperature is reached when "P" flashes. The door must remain closed. If oven is not used, preheat automatically switches off after 4 hours. |   | |
3 Open Door.Close DoorPress START Pad. | Place food in oven.Select programme.eg. Convection 220°C 15 mins.Display window will count down time.At end of heating programme, beeps 3 times and "0" flashes in window until door is opened. |  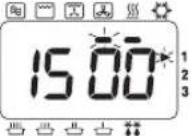 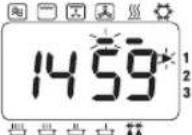 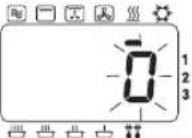 |
| 4 Open Door. | Display window will indicate the previous programme.If START Pad is not pressed within 1 minute, oven reverts to PREHEAT temperature previously selected. | 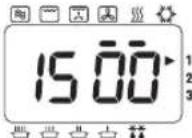 After 1 minute After 1 minute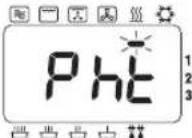 |
Notes on Preheat and Cooling:
- Only PREHEAT and COOLING functions can be selected when the display is blank. All other programmes must have "0" in display.
- You can select PREHEAT function during a COOLING function and vice versa.
• After a heating function has completed, oven will revert to PREHEAT function automatically. - * The oven will memorise the last PREHEAT temperature used should you wish to use the same one again. Press the PREHEAT Pad and the last temperature used will be displayed.
Cooling your Oven quickly
To quickly cool the oven cavity, the Panasonic Combi has a Cooling Pad. The Cooling Pad can be used effectively at the end of a cooking session to cool the oven for cleaning or if it is required for defrosting or heating by MICROWAVE whilst on PREHEAT function.
| ACTION | INFORMATION | DISPLAY |
1 Press COOLING Pad. You can  | select cooling when the display is blank (door closed), or when “0” is in the display (door open). | eg. Display has “0”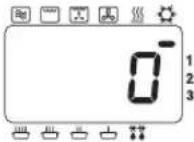 |
2 Press START Pad. | The COOLING fan and CONVECTION fan will turn on.The oven door can be opened or closed.But cools fastest when the door is open.The oven will cool in 3-30 mins. depending on temperature. |  |
| 3 Once the oven has cooled. | The cooling and convection fans switch off. | 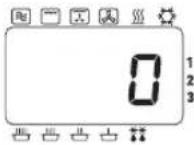 |
How to change the Beep Tone
| ACTION | INFORMATION | DISPLAY |
| 1 Open Door.Keep door open. | The oven lamp will come on. |  |
| 2 Press PROG Pad. Keep pressed Pad for 2 seconds. | 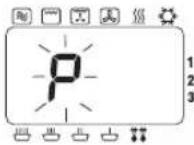 | |
| 3 Press START Pad. Press START Pad to choose sound level required. (eg. twice for Medium)No. Presses Display Sound level1 b-3 Loudest2 b-2 Medium3 b-1 Quietest4 b-0 Silent | 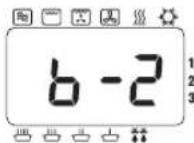 | |
| 4 Press PROG Pad. After 3 seconds, display returns to “0”. | 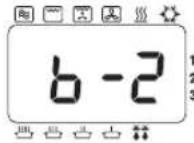 After 3 seconds After 3 seconds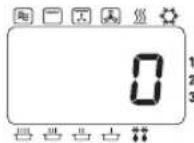 |
How to change Cleaning Interval of the Air Filter
A warning to clean the Air Filter will appear as "FILt" in the Display Window.
The oven is programmed to display the "FILt" warning after 500 hours of use.
When "FILT" appears in the Display Window, remove the Air Filter and clean it with hot soapy water.
Press STOP/RESET Pad to clear the display.
| ACTION | INFORMATION | DISPLAY |
| 1 Open Door. The oven lamp will | come on. | 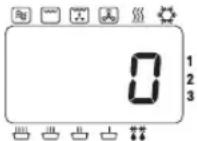 |
| 2 Close a door while pushing START Pad and open a door. | 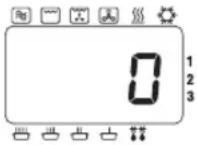 | |
| Keep Door open. | ||
| 3 Press NUMBER Pad 3. | The currently programmed interval will appear. eg. 500 hours. | 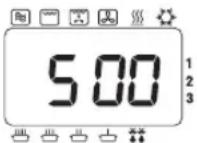 |
| 4 Select press NUMBER Pad. Up | to 9999 hours. eg. 600 hours. Press NUMBER Pads 6, 0 and 0. | 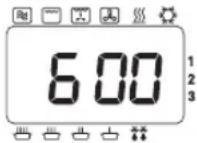 |
| 5 Press PROG Pad. | After 3 seconds, display returns to “0”. |  |
To check the total number of hours used,
1 Open the door. Keep door open.
2 Press Number Pad "3" while pressing START Pad.
3 The total number of hours used will appear in Display Window.
eg. If the oven has been used for 20 hours,
After 3 seconds, display returns to "0".
Care of your Oven and Cleaning
It is essential that you follow these points to get the maximum use from your oven. Microwaves are attracted to moisture and grease: therefore a dirty oven does not cook EFFICIENTLY.
1. Before Cleaning
Switch off at the socket.
Cool the oven before cleaning. Use the COOLING programme.
(See page 22.)
The door may be left open to cool the oven quickly.
2. Door seals
Pay special attention to cleaning the door seals and door seal areas.
Regularly wipe the Drip Ledge to avoid a build up of moisture and grease.
3. Door
Keep the inside glass of the door clean by wiping regularly with a soft damp cloth. Small amounts of oven cleaner can be used - DO NOT SPRAY DIRECTLY onto door - spray onto a cloth and wipe over.
Do not use harsh detergents or abrasives.
4. Oven walls
The walls should be wiped regularly with a soft damp cloth. Small amounts of oven cleaner can be used
- DO NOT SPRAY DIRECTLY onto walls - spray onto a cloth and wipe over.
DO NOT ALLOW OVEN CLEANER NEAR THE HOLES IN THE WALL OF THE OVEN.
If corrosive cleaner gets behind the wall, your oven could be damaged.
Do not allow cleaning liquids to seep into openings.
Keep the shelf runners free from grease and food debris.
The back wall of the oven has a heat resistant coating.
Clean this area oven cleaner applied onto a cloth and wipe over.
Do not use wire wool scourers to clean the oven interior.
Excess grease can be softened for ease of cleaning by placing 1-1 1/2 pints of hot water in a microwave-safe bowl with a chopped, fresh lemon. Heat on HIGH Power for 10-15 minutes. The moisture produced on the walls should then be wiped with a soapy cloth.
5. Floor
The wave guide is situated beneath the ceramic base of the oven. Any spills must be wiped off to ensure even heating. Do not use harsh detergents or abrasives.
6. Roof
The roof contains the 4 Quartz Grill elements. Before cleaning ensure oven has cooled to avoid burns.
Wipe the roof regularly with a damp cloth to minimise build up of grease.
7. Control Panel / SD Card Cover
If the Control Panel and SD Card Cover becomes dirty, clean with a soft, dry or well wrung cloth.
Do not use harsh detergents or abrasive on Control Panel. DO NOT use a saturated cloth as the remaining moisture may damage the panel.
Care of your Oven and Cleaning
8. Accessories
The accessories should be cleaned regularly to maximise efficiency of the oven.
Ceramic/Tray - Clean Ceramic Tray after every use but DO NOT PLACE HOT CERAMIC INSULATING TRAY directly under a COLD tap - the tray may shatter. You can wash the ceramic tray in the dishwasher or by hand in hot, soapy water.
Wire Rack Shelf - This should be cleaned after every session. Take care not to use harsh abrasive.
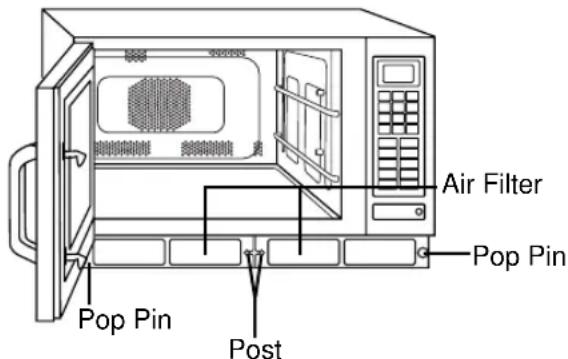
9. Air Filter
Clean the Air Filters occasionally according to the following instructions. Problems may occur with the oven if the filters become clogged with dirt or grease. If the Air Filter becomes blocked this will cause an overheat problem on the oven.
a. Remove the right Air Filter from the front bottom skirt by pulling the Right Pop Pin straight out.
Then slide the filter to the right and lift it off the post at the centre.
Remove the left Air Filter in the same way.
b. Wash the filters in hot, soapy water.
c. To replace, align the filter with the centre post, and holding the front of the Pop Pin forward, locate, the back of the pin into its hole. Press the front of the pin and it will pop into place. Be sure to replace the air filters before using the oven.
Note: When "FILt" sign appears in Display Window, remove Air Filter and clean it with hot soapy water.
Press STOP / RESET Pad to clear the display.
10. Replacing Oven Lamp
If the Oven lamp burns out you can replace it yourself by following these simple directions:
a. Unscrew the Oven Lamp cover, located on the left side of the cabinet.
b. Replace the old lamp with a new 240/220V 25W Max, E-14 lamp.
c. Close the Oven Lamp Cover and replace screw.
CAUTION:
Switch off from electricity supply before replacing the Oven Lamp.
Damage
If the oven becomes damaged in any way, contact a Service Engineer before continuing use.
CAUTION:
Do not clean this appliance with a water jet.
Do not use any non-specified chemical cleaners or spray anything directly into the oven cavity.
When to Call a Service Engineer
If an "F" Appears In The Display
Your Panasonic Combi Oven is equipped with a Self Diagnostic Failure Code System; this means the oven monitors its own operation and will show a failure code in the display window in the unlikely event of a malfunction. If a Failure Code appears in the display window (it will appear as an "F" then a two digit number) follow these steps:
- Close the door and switch off at socket. Ensure all air vents are clear.
- Leave 1 minute and then reconnect the oven at the mains.
- Open the door and place food or a jug of water in the cavity, close the door.
- Try the same function that had been in operation prior to theb appearance of the Failure Code in the display window.
If the Failure Code appears again, then contact the dealer from which you purchased the oven, the manufacturer or a known Approved Service Agent.
If a "U" Appears In The Display
A fault with the SD Memory Card will also show as a Failure Code in the display window (it will appear as a "U" then a two digit number). Follow the steps in the following chart.
| CODE PROBREM | WHAT TO DO | |
| U16 | SD Memory Card is locked. | Take out the SD Memory Card & remove the Lock. (see below).Insert the SD Memory Card.Lock is removed when this part is pushed up wards.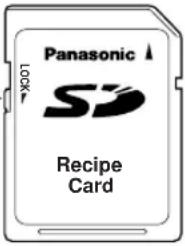 |
| U17 | There is no programme data from this oven on the SD Memory Card. | An SD Memory Card confirms that it is attached to this oven. Please check whether there is programme data from the oven on the SD Memory Card in your personal computer.(See “Storing Programme Data on SD Memory Card”)When programme data is deleted, please contact Service Engineer. |
| Programme data of a SD Memory Card are damaged. | ||
| U19 | SD Memory Card is not inserted. | Remove the SD Card Cover & insert an SD Memory Card. |
Technical Specifications
| Model No. | NE-C1475 |
| Power Source | 230 V / 50 Hz, Single phase |
| Outlet | 16 A |
| Required Power - Max | 14.5A 3.3kW |
| - Microwave | 2350 W |
| - Grill | 1950 W |
| - Convection Heater | 1950 W |
| Output - Microwave | 1350 W (IEC Test Procedure) |
| Grill | 1840 W |
| Convection Heater | 1800 W |
| Frequency | 2450 MHz |
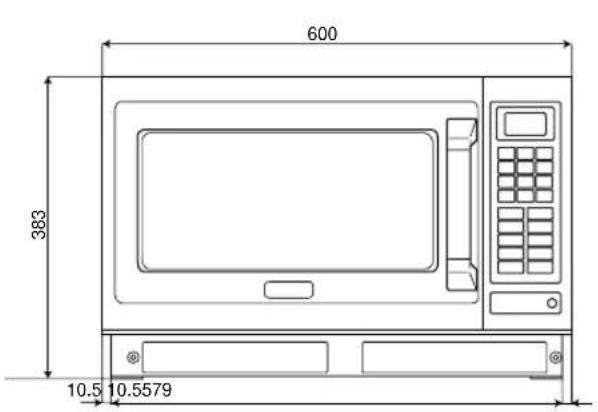
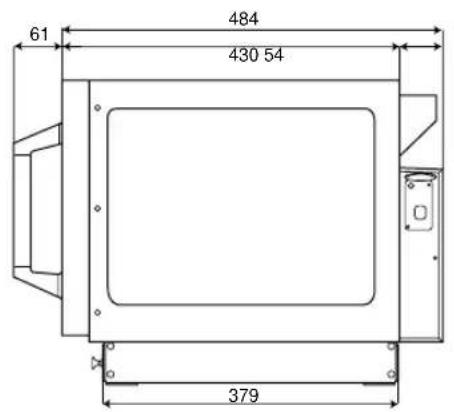
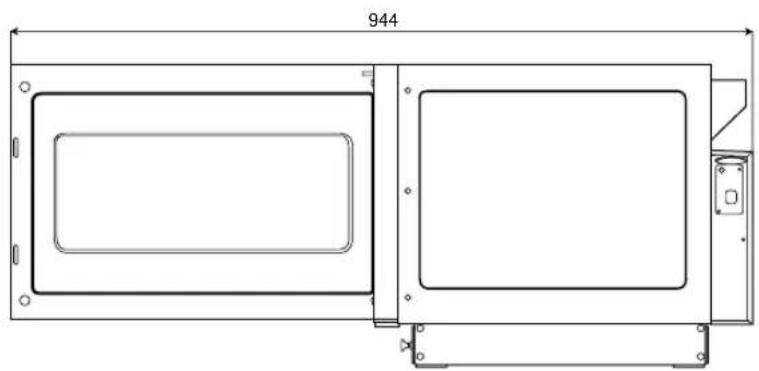
| Outer Dimensions(W x D x H) | 600 mm x 484 mm x 383 mm |
| Cavity Dimensions(W x D x H) | 406 mm x 336 mm x 217 mm |
| Net Weight | 41 kgs (includes accessories) |
Specifications subject to change without notice.
natural_image
Technical line drawing of a rectangular device with a central recessed panel and mounting bracket (no text or symbols)Information on Disposal for Users of Waste Electrical & Electronic Equipment (private households)
natural_image
Symbol of a trash bin crossed out by two diagonal lines, with no text or labels present.This symbol on the products and/or accompanying documents means that used electrical and electronic products should not be mixed with general household waste.
For proper treatment, recovery and recycling, please take these products to designated collection points, where they will be accepted on a free of charge basis. Alternatively, in some countries you may be able to return your products to your local retailer upon the purchase of an equivalent new product.
Disposing of this product correctly will help to save valuable resources and prevent any potential negative effects on human health and the environment which could otherwise arise
from inappropriate waste handling. Please contact your local authority for further details of your nearest designated collection point.
Penalties may be applicable for incorrect disposal of this waste, in accordance with national legislation.
For business users in the European Union
If you wish to discard electrical and electronic equipment, please contact your dealer or supplier for further information.
Information on Disposal in other Countries outside the European Union
This symbol is only valid in the European Union.
If you wish to discard this product, please contact your local authorities or dealer and ask for the correct method of disposal.
natural_image
Line drawing of a hand pressing a button on a mechanical component (no text or symbols)natural_image
Line drawing of a hand inserting a component into a computer drive (no text or symbols visible)Einlegen
natural_image
Line drawing of a mechanical component with a handle and mounting bracket (no text or symbols)natural_image
Line drawing of a hand inserting a component into a device (no text or symbols visible)Vorsicht:
natural_image
Diagram of a vehicle interior with a black X mark symbol (no text or labels)natural_image
Technical line drawing of a mechanical assembly with grid and mounting brackets (no text or symbols)natural_image
Technical line drawing of a mechanical assembly with grid and mounting brackets (no text or symbols)natural_image
Technical line drawing of a vehicle interior with a grid-patterned tray and control panel (no text or symbols)natural_image
Line drawing of a train interior with platform and window (no text or symbols)natural_image
Technical line drawing of a mechanical assembly with grid and mounting brackets (no text or symbols)natural_image
Technical line drawing of a mechanical assembly with grid and mounting brackets (no text or symbols)natural_image
Technical line drawing of a rectangular device with a central recessed panel and mounting bracket (no text or symbols)natural_image
Symbol of a trash bin crossed out by two crossed lines, with a blank rectangular base below (no text or symbols)INSTALLATION DU FOUR
natural_image
Line drawing of a hand inserting a button into a device (no text or symbols)natural_image
Line drawing of a hand inserting a component into a computer drive (no text or symbols visible)Insertion
natural_image
Line drawing of a computer monitor with an inserted port (no text or symbols)natural_image
Line drawing of a vehicle's front panel showing the door and seat (no text or symbols)Attention:
natural_image
Diagram of a double-headed door with a black X mark, no text or symbols presentnatural_image
Technical line drawing of a mechanical assembly with no visible text or symbolsnatural_image
Technical line drawing of a mechanical assembly or enclosure with grid-patterned components and no visible text or symbolsnatural_image
Technical line drawing of a mechanical assembly or enclosure with no visible text or symbolsnatural_image
Technical line drawing of a mechanical assembly with grid and mounting brackets (no text or symbols)natural_image
Technical line drawing of a mechanical assembly with grid and mounting brackets (no text or symbols)natural_image
Technical line drawing of a mechanical assembly with grid and mounting brackets (no text or symbols)natural_image
Technical line drawing of a rectangular device with a central recessed panel and mounting bracket (no text or symbols)natural_image
Symbol of a trash bin crossed out by two crossed lines, with no text or labels present.WAARSCHUWING OVER VOLTAGE EN STROOM
natural_image
Line drawing of a hand inserting a button into a device (no text or symbols)natural_image
Line drawing of a computer monitor with an open port and a hand pointing to the left side (no text or symbols)Hoe in te steken
natural_image
Line drawing of a device's internal components, showing a hand inserting a cable into a socket (no text or symbols)natural_image
Line drawing of a vehicle's front panel showing the door and seat (no text or symbols)Voorzichtig:
natural_image
Diagram of a double door with a black X mark, showing internal compartments and no text or symbolsnatural_image
Technical line drawing of a mechanical assembly or enclosure with grid and support components (no text or symbols)natural_image
Technical line drawing of a mechanical assembly or enclosure with grid-patterned components and no visible text or symbolsnatural_image
Technical line drawing of a mechanical assembly or enclosure with no visible text or symbolsnatural_image
Technical line drawing of a mechanical assembly or enclosure with grid pattern and control panels (no text or symbols)natural_image
Technical line drawing of a mechanical assembly with grid and mounting brackets (no text or symbols)natural_image
Technical line drawing of a mechanical assembly with grid and mounting brackets (no text or symbols)natural_image
Technical line drawing of a rectangular device with a central recessed panel and mounting bracket (no text or symbols)natural_image
Symbol of a trash bin crossed with no text or labels, representing waste sorting or disposal (no text present)natural_image
Line drawing of a hand pressing a button on a mechanical component (no text or symbols)natural_image
Line drawing of a computer monitor with ports and a hand pointing to the left side (no text or symbols present)Insertar
natural_image
Line drawing of a mechanical component with no visible text or symbolsnatural_image
Line drawing of a hand inserting a component into a device panel (no text or symbols visible)Precaución:
natural_image
Diagram of a vehicle interior with a black X mark symbol, no text or labels presentnatural_image
Technical line drawing of a mechanical assembly with no visible text or symbolsnatural_image
Technical line drawing of a mechanical assembly or enclosure with grid-patterned components and no visible text or symbolsnatural_image
Technical line drawing of a mechanical assembly or enclosure with no visible text or symbolsnatural_image
Technical line drawing of a mechanical assembly with no visible text or symbolsnatural_image
Technical line drawing of a mechanical assembly with grid and mounting brackets (no text or symbols)natural_image
Technical line drawing of a mechanical assembly with grid and mounting brackets (no text or symbols)natural_image
Technical line drawing of a rectangular device with a central recessed panel and mounting bracket (no text or symbols)natural_image
Symbol of a trash bin crossed with no visible text or labelsnatural_image
Line drawing of a hand pressing a button on a mechanical component (no text or symbols)natural_image
Line drawing of a computer monitor with a hand pointing to the left panel (no text or symbols present)Come inserirla
natural_image
Line drawing of a mechanical component with a handle and mounting bracket (no text or symbols)natural_image
Line drawing of a device panel with a hand inserting a button (no text or symbols)Attenzione:
natural_image
Diagram of a double-headed door with a black X mark, no text or symbols presentnatural_image
Technical line drawing of a mechanical or electrical component with grid and mounting brackets (no text or symbols)natural_image
Technical line drawing of a mechanical assembly with grid and mounting brackets (no text or symbols)natural_image
Technical line drawing of a mechanical assembly or enclosure with no visible text or symbolsnatural_image
Technical line drawing of a mechanical assembly or enclosure with grid pattern and control panels (no text or symbols)natural_image
Technical line drawing of a mechanical assembly or enclosure with no visible text, numbers, or symbols.natural_image
Technical line drawing of a mechanical assembly with grid and mounting brackets (no text or symbols)natural_image
Symbol of a trash bin crossed with no visible text or labelsnatural_image
Line drawing of a hand pressing a button on a mechanical component (no text or symbols)natural_image
Line drawing of a hand inserting a component into a computer drive (no text or symbols visible)Installera kortet
natural_image
Line drawing of a mechanical component with a handle and mounting bracket (no text or symbols)natural_image
Line drawing of a mechanical component with a knob inserted, showing no text or symbolsSe upp!
natural_image
Diagram of a vehicle interior with a black X mark symbol, no text or labels presentnatural_image
Technical line drawing of a mechanical assembly or enclosure with grid and supports (no text or symbols)natural_image
Technical line drawing of a mechanical assembly with grid and mounting brackets (no text or symbols)natural_image
Technical line drawing of a mechanical assembly or enclosure with no visible text, numbers, or symbols.natural_image
Technical line drawing of a mechanical assembly or enclosure with grid pattern and control panels (no text or symbols)natural_image
Technical line drawing of a mechanical assembly with no visible text or symbolsnatural_image
Technical line drawing of a mechanical assembly with grid base and mounting brackets (no text or symbols)natural_image
Technical line drawing of a rectangular device with a central recessed panel and mounting bracket (no text or symbols)natural_image
Symbol of a waste bin with crossed lines indicating no waste, and a solid black rectangle below (no text or labels)natural_image
Line drawing of a hand inserting a button into a device (no text or symbols)natural_image
Line drawing of a hand inserting a component into a computer drive (no text or symbols visible)natural_image
Line drawing of a mechanical component with a handle and mounting bracket (no text or symbols)natural_image
Line drawing of a vehicle's front panel showing the door and seat (no text or symbols)Forsigtig:
natural_image
Diagram of a refrigerator interior with a black X mark symbol (no text or labels)natural_image
Technical line drawing of a mechanical assembly with grid and mounting brackets (no text or symbols)natural_image
Technical line drawing of a mechanical assembly or enclosure with grid-patterned components and no visible text or symbolsnatural_image
Technical line drawing of a mechanical assembly or enclosure with no visible text, numbers, or symbols.natural_image
Technical line drawing of a mechanical assembly with grid and mounting brackets (no text or symbols)natural_image
Technical line drawing of a mechanical assembly with no visible text or symbolsnatural_image
Technical line drawing of a mechanical assembly with no visible text or symbolsnatural_image
Technical line drawing of a rectangular device with a central recessed panel and mounting bracket (no text or symbols)natural_image
Symbol of a trash bin crossed out by two crossed lines, with no text or numbers present.(15) Tallknappene
(16) Program-knapp
(17) Microwave (Mikrobølger)-knapp
(18) Grill (Grill)-knapp
(19) Fan Grill (Grill/Vifte)-knapp
(20) Convection (Varmluft)-knapp
(21) Stop/Reset-knapp
Før oppvarming: