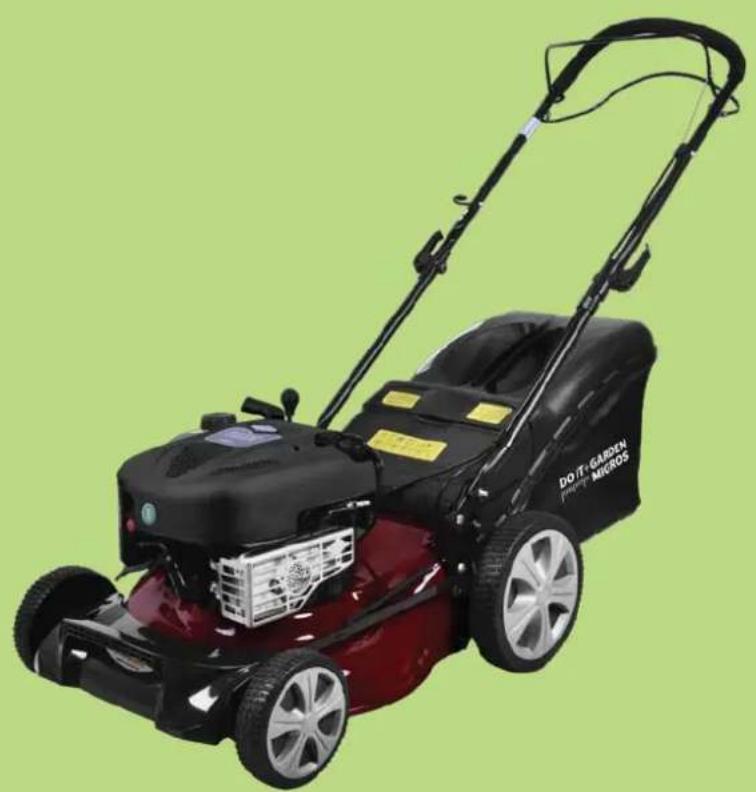
BMR 46 Ranchero - Lawn mower Do It + Garden - Free user manual and instructions
Find the device manual for free BMR 46 Ranchero Do It + Garden in PDF.


| Features | Details |
|---|---|
| Product type | Lawn mower |
| Cutting width | 46 cm |
| Engine type | Gasoline engine |
| Engine power | 140 cc |
| Adjustable cutting height | 5 positions |
| Starting system | Pull cord start |
| Grass collection box capacity | 60 liters |
| Weight | 32 kg |
| Usage | For medium to large gardens |
| Maintenance | Check oil, clean air filter, sharpen blades regularly |
| Safety | Wear safety glasses, do not remove the box while running |
| General information | 2-year warranty, spare parts available |
Frequently Asked Questions - BMR 46 Ranchero Do It + Garden
User questions about BMR 46 Ranchero Do It + Garden
0 question about this device. Answer the ones you know or ask your own.
Ask a new question about this device
Download the instructions for your Lawn mower in PDF format for free! Find your manual BMR 46 Ranchero - Do It + Garden and take your electronic device back in hand. On this page are published all the documents necessary for the use of your device. BMR 46 Ranchero by Do It + Garden.
USER MANUAL BMR 46 Ranchero Do It + Garden
Volume serbatoio: ca. 1,0 I
Olio del motore: ca.0,6/15W40
When using the equipment, a few safety precautions must be observed to avoid injuries and damage. Please read the complete operating instructions and safety regulations with due care. Keep this manual in a safe place, so that the information is available at all times. If you give the equipment to any other person, hand over these operating instructions and safety regulations as well. We cannot accept any liability for damage or accidents which arise due to a failure to follow these instructions and the safety instructions.
1. Safety instructions for handoperated lawn mowers
Note
- Read the directions with due care. Familiarize yourself with the settings and proper operation of the machine.
- Never allow children or other persons who are not familiar with the operating instructions to use the mower. Contact your local governmental agency for information regarding minimum age requirements for operating the mower.
- Never mow in the direct vicinity of persons - especially children - or animals. Always keep in mind that the operator is responsible for accidents involving other persons and/or their property.
- If you give the equipment to any other person, give them these operating instructions as well.
Preliminary measures
- Always wear sturdy, non-slip footwear and long trousers when mowing. Never mow barefoot or in sandals.
- Check the grounds on which the machine will
be used and remove all objects that could be caught up and violently flung out of the chute.
- Warning: Petrol is highly flammable! Therefore: - Only store petrol in containers designed to hold petroleum-based liquids.
- Only refuel out in the open and do not smoke during the refueling process.
- Always refuel the lawn mower before starting the engine. Always ensure that the fuel tank cap is closed when the engine is running and when the mower is hot; also do not refuel.
- If petrol has overflowed, do not under any circumstances attempt to start the engine. Instead, remove the machine from the affected area. Avoid starting the engine until the petrol fumes have completely evaporated.
- For safety reasons, the petrol tank and other tank closures must be replaced if they are damaged.
- Replace defective mufflers.
- Before using the mower, visually inspect it to ensure that the blade, mounting bolts and the entire cutting apparatus are in good working order (i.e. not worn out or damaged). To prevent any imbalance, replace worn out or damaged blades and mounting bolts as a set only (if applicable).
- Please note that where a mower has more than one blade, the rotation of one of the blades can cause the others to rotate as well.
Handling
- Do not let the combustion engine run in enclosed areas, as dangerous carbon monoxide gas can build up.
- Only mow in broad daylight or in well-lit conditions. Avoid using the machine on wet grass as far as possible.
- Always maintain good footing on inclines.
- Only operate the machine at a walking pace.

- For machines with wheels: Always mow across hills i.e. never straight up or straight down.
- Be particularly careful when you change direction on a slope.
- Do not mow on overly steep inclines.
- Always be extra careful when turning the mower around and when pulling it towards you.
- Switch off the lawn mower and ensure that the blade has stopped rotating whenever the mower has to be tilted for transporting over areas other than lawns and whenever it has to be moved from or to the area you want to mow.
- Never use the lawn mower if the blade or safety grilles are damaged, or without the attached guards, e.g. deflectors and/or grass catching devices.
- Do not adjust or overclock the engine speed settings.
- Release the engine brake before you start the engine.
- Start the engine with care, in accordance with the manufacturer's instructions. Make sure that your feet are far enough away from the mower blade!
- Do not tilt the lawn mower when you start the engine unless the mower must raised off of the ground a little in order to start it. In the latter case, tilt the mower as little as absolutely necessary and only raise the side opposite to that of the user.
- Never start the engine while standing in front of the chute.
- Never move your hands or feet toward or under any rotating parts. Keep clear of the chute opening at all times.
- Never lift or carry a lawn mower with the engine running.
- Switch off the engine and pull the spark plug boot:
- before you dislodge any blockages or clogs in
the chute.
- before carrying out any checks, cleaning, maintenance or other work on the lawn mower
-
if the lawn mower strikes a foreign body, examine it for signs of damage and carry out any necessary repairs before restarting and continuing to work with the mower. If the lawn mower begins to experience exceptionally strong vibrations, immediately switch it off and check it.
-
Switch off the engine:
- when you leave the lawn mower.
-
before you refuel.
-
Operation of the machine at higher than normal speed can lead to an increased risk of accidents.
- Take care when carrying out installation work on the machine, and avoid trapping fingers between the moving cutting tool and the fixed parts of the machine.
Maintenance and storage
- Make sure that all nuts, bolts and screws are tightened securely and that the machine is in safe working condition.
- Never store the mower (with petrol in the tank) inside a building in which petrol fumes could come into contact with open flames or sparks.
- Allow the motor to cool before you put the lawn mower in an enclosed area.
- In order to avoid fire hazards, keep the engine, exhaust and the area around the fuel tank free from grass, leaves and leaking grease (oil).
- Routinely check the grass basket for signs of wear and impaired functionality.
- For your own safety, replace worn or damaged parts without delay.
- If the fuel tank should require emptying this should only be done in the open air using a petrol suction pump (available from DIY shops).

CAUTION!
Read all safety regulations and instructions.
Any errors made in following the safety regulations and instructions may result in an electric shock, fire and/or serious injury.
Keep all safety regulations and instructions in a safe place for future use.
Explanation of the symbols on the machine


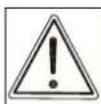
Read the instruction manual carefully before operating the machine.


Be aware of thrown objects. Keep other people at a safe distance whilst working.
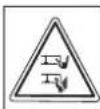
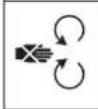
Beware of sharp blades.
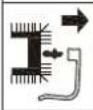
Be aware of cutting. Moving blades. Do not put hands or feet near the blade.
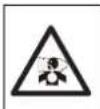
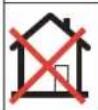
Emission of toxic gas, do not use a mower in a close area or not well ventilated.

Hot surfaces, keep hands away from it.

Warning: Disconnect the spark plug cap before carrying out any repairs or maintenance.
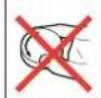
Wear safety goggles.


Never fill up the fuel tank while the engine is running.
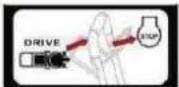
Drive and Stop
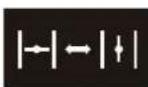
Close position and Open position

Two set positions
- Drive lever (clutch lever)
- Control lever for engine adjustment (throttle lever)
- Petrol tank
- Starter cord
- Air filter
- Spark plug
- Oil dipstick
- Lever for adjusting the cutting height
- Flap for the grass basket
- Grass basket
- Upper push bar
- Mulching
- Screw for cable holder
14.2x cable ties - Lower push bar
- Fastening screws for bottom push bar
- Fastening nuts for bottom push bar
- Fastening screws for top push bar
- Star screws
- Starter cord guide
- Front handle
- Side discharge
3. Proper operation
The petrol lawn mower is intended for private use i.e. for use in home and gardening environments.
Private use of the lawn mower refers an annual operating time generally not exceeding that of 50 hours, during which time the machine is primarily used to maintain small-scale, residential lawns and home/hobby gardens. Public facilities, sporting halls, and agricultural/forestry applications are excluded.
The operating instructions as supplied by the manufacturer must be kept and referred to in order to ensure that the lawn mower is properly used and maintained. The instructions contain valuable information on operating, maintenance and servicing conditions.
Important! Due to the high risk of bodily injury to the user, the lawn mower may not be used to trim bushes, hedges or shrubs, to cut scaling vegetation, planted roofs, or balcony-grown grass, to clean (suck up) dirt and debris off walkways, or to chop up tree or hedge clippings. Moreover, the lawn mower may not be used as a power cultivator to level out high areas such as molehills.
For safety reasons, the lawn mower may not be used as a drive unit for other work tools or toolkits of any kind.
4. Technical data
Engine type:
Single cylinder four-stroke engine, 190 cc
Briggs & Stratton 625 Series
Work
2800 min
Fuel:
standard petrol
Tank capacity:
approx.1.0
Engine oil:
approx.0.61/15W40
Electrode spacing:
0.5-0.6mm
Cutting height adjustment: central, (30-68mm)
Cutting width:
457 mm
L_PA sound pressure level:
83.2 dB(A) (K=3dB(A)
L_W sound power level:
96 dB(A) (K=1,05 dB(A)
Weight:
29,6 kg
5. Before starting the equipment
5.1 Assembling the components
Some parts of the mower come disassembled. For quick and easy assembly, read and follow the instructions below.
Important. You will need the following additional tools (not supplied) for assembly, and also for maintenance work:
An open-ended wrench (10 mm)
A ring wrench (12 mm)
An open-ended wrench (13 mm)
- A flat oil drip tray (for changing the oil)
A 1 liter measuring jug (oil/petrol resistant)
A petrol can (5 liters is sufficient for approx. 6 operating hours)
- A funnel (suitable for the tank's petrol filler neck)
Household wipes (to wipe up oil/petrol residue; dispose of these at a filling station)
- A petrol suction pump (plastic, available from DIY stores)
- An oil can with hand pump (available from DIY stores)
1 liter of engine oil (15W-40)
Assembling the mower
- Take the mower and attachment parts out of the packaging and check that all parts are present (Fig. 2-3).
- Attach the lower push bar (Fig. 1/Item 15) to the mower housing using the screws (Fig. 3/Item 16) and the nuts (Fig. 3/Item 17). Attach the upper push bar (Fig. 1/Item 11) to the lower push bar using the screws (Fig. 3/Item 18) and the star nuts (Fig. 3/Item 19). Do not forget to mount the starter cord guide (Fig. 5/Item 20). Now hook in the Bowden wire for the motor stop and the Bowden wire for the drive unit (Fig. 6/7). Unhook the lever to make it easier to attach the
Bowden wires.
- Then hook the starter cord in the starter cord guide (Fig. 8)
- Fasten the cable holder to the push bar (Fig. 9) with the screw (Fig. 5/Item 13).
- Fasten the cords to the push bar with one of the cable ties (Fig. 3/Item 14), as shown in Fig. 10.
- Lift the ejector flap with one hand and hook the grass basket into the mounts on the housing (Fig.13)
7. Mulching (Fig. 25)
In the mulching mode the cuttings are shredded in the enclosed mower housing and then spread back onto the lawn. It is not necessary to gather and dispose of the grass.
Important: Mulching is only possible if the lawn is relatively short.
To use the mulching function, disconnect the debris bag, slide the mulching adaptor into the ejector opening (Item A) and close the ejector opening.
Side ejector (Fig. 23)
You should fit the mulching adaptor in order to use the side ejector. Connect the side ejector adaptor (Item A) as shown in Figure 23.
5.2 Setting the cutting height
Important! Adjust the cutting height only when the engine is switched off.
- Before you begin to mow, check to ensure that the blade is not blunt and that none of the fasteners are damaged. To prevent any imbalance, replace blunt and/or damaged blades as a set only (if applicable). To carry out this check, first switch off the engine and pull the spark plug boot.
- The cutting height is centrally adjusted with the cutting height adjustor lever (Fig. 1/Item 8). Up to
5 different cutting heights can be selected.
- Pull the adjustor lever out and select the desired cutting height. The lever snaps into the desired position.
6. Operation
Important!
The engine does not come with oil in it. Therefore, ensure that you add 0.6 liters of oil before starting it up. Use normal, multigrade oil (15W40). The oil level in the engine must be checked each time before mowing. (see Checking the oil level).
In order to avoid any unintentional start-ups of the lawn mower, it comes equipped with an engine brake (Fig. 11/Item A) which must be pulled back before the engine can be started. When the engine control lever is released it must return to its initial position, at which point the engine automatically switches off.
Before you start mowing, you should run through this operation several times in order to ensure that the machine is working properly.
Whenever you need to perform any kind of adjustment and/or repair work on your lawn mower, wait until the blade has come to a complete stop.
Always switch off the engine before carrying out any adjustments, maintenance or repairs.
Note:
-
Engine brake (Fig. 11/Item A): Use the lever to stop the engine. When you release the lever the engine and the blade stop automatically (Fig. 11/Pos. A). To mow, hold the lever in the working position. Before you start to mow, check the start/stop lever several times to be sure that it is working properly. Ensure that the tension cable can be smoothly operated (i.e. is not catching or kinking in any way).
-
Drive lever (clutch lever) (Fig. 1/Item 1): If you press this (Fig. 12/Item B) the clutch for the drive will be closed and the lawnmower will start to move with the motor running.
Release the drive lever in good time to stop the moving lawnmower. Practice starting and stopping before you use the mower for the first time until you are familiar with controlling the mower.
- Caution: The blade begins to rotate as soon as the engine is started.
Important:
Before you start the engine, move the motor brake several times to be sure that the stop cable is properly working. Note: The engine is factory set to a speed that is optimal for cutting and blowing grass into the basket and is designed to provide many years of use.
-
Check the oil level.
-
Fill the tank with approx. 1.0 liters of petrol whenever empty, using a funnel and measuring jug to do so. Ensure that the petrol is free of any contaminants.
Note: Use only unleaded petrol as fuel. Warning: Never use more than one safety petrol can. Do not smoke when refueling. Switch off the engine before refueling and allow the engine to cool down for a few minutes.
-
Ensure that the ignition cable is connected to the spark plug.
-
Stand behind the mower. Place one hand on the engine start/stop lever. Place the other hand on the starter handle.
-
Start the engine using the reversing starter (Fig. 1/Item 4). To do this pull the handle approx. 10 - 15cm until you feel a resistance) and then start the engine with a sharp pull. If the engine does not start, pull the handle again.
Important! Never allow the starter cord to snap back.
NOTE: In cold condition, it's necessary to push the prime button on the air filter before pulling the starter coil.(please see below)
you also should put more fuel to mix with air for easy start. When you push the prime button, it will pump the fuel direct from carburetor to burning housing.
Primer only for cool engine use
Temperature Push time
< 0^ C 2 3
0^ 10^ 1 2
10^ C 0 1
Note: In cold weather, it may be necessary to repeat the starting process several times.
6.1 Before mowing
Important information
- Make sure that you are properly dressed when mowing. Wear sturdy, non-slip footwear; do not wear sandals or tennis shoes.
- Inspect the blade. A blade that is bent or damaged in any other way must be immediately exchanged for a genuine Migros replacement blade.
- Do not fill the fuel tank indoors, but rather out in the open. Use a filling funnel and a measuring jug. Wipe off any spilled petrol.
- Read and follow in the instructions in the operating manual as well as the information regarding the engine and accessory equipment. Store the manual in a place where it can be readily accessed by other users of the machine.
- Exhaust gas is dangerous. Only start the engine out in the open.
- Make sure that all the guards are fitted and that they are in good working order.
- The machine should only be operated by persons who are well informed with the way it works, and who are in reasonably good physical
condition.
- It can be dangerous to mow the grass when it is wet. Try to ensure that you only mow the grass when it is dry.
- Advise children and others to keep well away from the lawn mower.
- Never mow the grass in poor visibility.
- Remove all loose objects from the lawn before you start mowing the grass.
6.2 Tips for proper mowing
Important! Never open the chute flap when the catch bag has been detached (to be emptied) and the engine is still running. The rotating blade can cause serious injuries!
Always carefully fasten the chute flap and grass basket. Switch off the engine before emptying the grass basket.
Always ensure that a safe distance (provided by the length of the long handles) is maintained between the user and the mower housing. Be especially careful when mowing and changing direction on slopes and inclines. Maintain a solid footing and wear sturdy, non-slip footwear and long trousers.
Always mow along the incline (not up and down).
For safety reasons, the lawn mower may not be used to mow inclines whose gradient exceeds 15 degrees.
Use special caution when backing up and pulling the lawn mower. Tripping hazard!
6.3 Mowing
Only use a sharp blade that is in good condition. This will prevent the grass blades from fraying and the lawn from turning yellow.
Try to mow in straight lines for a nice, clean look.
Insodoing, the mowing swaths should always overlap each other by a few centimeters in order to avoid bare strips.
Keep the underside of the mower housing clean and remove grass build-up. Deposits not only make it more difficult to start the mower; they decrease the quality of the cut and make it harder for the machine to bag the grass. Always mow along inclines (not up and down). Slightly turning the front wheels up the hill while mowing will prevent the mower from sliding out of the straight line. Select the cutting height according to the length of the grass. If the lawn has grown quite a bit, mow over it several times so that no more than 4cm of grass are cut at one time.
The minimal grass length should be not less than 5cm . Too short grass will die. In the summer time the grass should be 1 to 2cm higher. If the underground is uneven, the height setting must be accordingly higher to avoid damage of the knife. The knife should not touch stones, roots or the underground.
recommended cutting height adjustments are listed below:
stage 1: Mulching function
stage 2/3/4/5: Under cold and humidity weather
stage 5: For dry grass under hot weather
Switch off the engine before doing any checks on the blade. Keep in mind that the blade continues to rotate for a few seconds after the engine has been switched off. Never attempt to manually stop the blade.
Regularly check to see if the blade is securely attached, is in good condition and is sharp. If the contrary is the case, sharpen the blade or replace it.
In the event that the blade strikes an object, immediately switch off the lawn mower and wait for the blade to come to a complete stop. Then inspect the condition of the blade and the blade mount.
Replace any parts that are damaged.
Tips for proper mowing:
- Pay attention to ensure that you do not run into or over anything that could damage the mower.
The lawn mower could be damaged and/or the machine could inflict bodily injury. - A hot engine, exhaust or drive unit can burn the skin if touched. Thus, do not touch these parts unless the mower has been switched off for a while and you know that they have cooled down!
- Use extra caution when mowing on inclines and steep grades.
- Insufficient daylight or even a sufficient level of artificial light is one reason not to mow.
- Check the mower, the blade and other parts if they have struck a foreign object or if the machine vibrates more than usual.
- Do not make any adjustments or repairs until the engine has been switched off. Pull the plug boot.
- Pay special attention if you are mowing directly next to a street or are close by one (traffic).
Always keep the grass chute pointed away from the street.
- Avoid mowing in places where the wheels have trouble gripping or mowing is unsafe in any other way. Before you back up, ensure that nobody is standing behind you (especially little children, who are more difficult to see).
- When mowing over thick, high grass, select the highest cutting level and mow at a slower speed. Before you remove any grass or blockages of any kind, switch off the engine and pull the plug boot.
- Never remove any safety-related parts.
- Never fill the engine with petrol when it is hot or is running.
6.4 Emptying the grass basket
As soon as grass clippings start to trail the lawn mower, it is time to empty the grass basket.
Important! Before taking off the grass basket, switch off the engine and wait until the blade has come to a stop.
To take off the grass basket, use one hand to lift up the chute flap and the other to grab onto the basket handle (Fig. 13). Remove the basket.
For safety reasons, the chute flap automatically falls down after removing the grass basket and closes off the rear chute opening. If any grass remains in the opening, it will be easier to restart the engine if you pull the mower back approx. 1 meter.
Do not use your hands or feet to remove clippings in or on the mower housing, but instead use suitable tools such as a brush or a hand broom.
In order to ensure that the majority of grass clippings are picked up, the inside of both the catch bag and especially the air grill must be cleaned after each use.
Reattach the catch bag only when the engine is switched off and the blade is stopped.
Using one hand, lift up the chute flap, while grabbing onto the basket handle with the other. Hang in the basket from the top.
6.5 After mowing
- Allow the engine to cool before you put the lawn mower in an enclosed area.
- Remove grass, foliage, grease and oil before storing the mower. Do not place any objects on top of the mower.
- Check all the screws and nuts once more before you start to use the lawn mower again. Tighten any loose screws.
- Also be sure to empty the grass basket.
- Pull the spark plug boot to prevent
unauthorized use.
- Ensure that you do not park the mower next to any source of danger. Petrol fumes can lead to explosions.
- Only original parts or parts approved by the manufacturer may be used for repairs (see address on the warranty certificate).
- If the lawn mower is not going to be used for an extended period, empty the petrol tank using a petrol suction pump.
- Tell your children not to use the mower. It is not a toy.
- Never place petrol near an ignition source. Always use a can that is approved to store petrol. Keep petrol away from children.
- Oil and maintain the machine.
- How to switch off the engine:
All you have to do to switch off the engine is release the engine start/stop lever. Close the petrol cock and pull the spark plug boot from the spark plug boot in order to prevent the engine from restarting. Before you start the engine again, check the cord for the engine brake. Check that the cord is correctly fitted. If the cord is kinked or damaged, it should be replaced.
7. Cleaning, maintenance, storage, transport and ordering of spare parts
Important:
Never work on or touch conducting parts on the ignition unit with the engine running. Always pull the spark plug boot from the spark plug before starting any work of care or maintenance. Never perform any work on the machine while it is running. Any work not described in these Operating Instructions must be performed by an authorized service workshop only.
7.1 Cleaning
The lawn mower should be thoroughly cleaned after every use, especially the underneath and
the blade mount. To do so, tip the lawn mower onto its left side (the opposite side to the oil filling socket).
Important: Before you tip the lawn mower onto its side, completely empty the fuel tank using a petrol suction pump. The lawn mower must never be tilted by more than 90 degrees. Dirt and grass is easiest to remove immediately after you have finished mowing the grass. Dried on grass and dirt can result in poorer mowing performance. Check that the grass chute is free of any residual grass. Remove any such residue. Never clean the lawn mower with a water jet or high-pressure cleaner. The engine must remain dry. Do not use aggressive cleaning agents such as cold cleaner or petroleum ether.
7.2 Maintenance
7.2.1 Wheel axles and wheel hubs
These should be lightly greased once a season. To do so, remove the wheel caps with a screwdriver and slacken the fastening screws on the wheels.
7.2.2 Blade
For safety reasons you should only ever have your blade sharpened, balanced and mounted by an authorized service workshop. For optimum results it is recommended that the blade should be inspected once a year.
Changing the blade
Only ever use original spare parts when having the blade replaced. The marking on the blade must be matched with the number given in the list of spare parts. Never have any other model of blade fitted.
Damaged blades
Should the blade, in spite of all precautions, come into contact with an obstruction, shut down the engine immediately and pull the spark plug boot. Tip the lawn mower onto its side and check the blade for damage. Damaged or bent blades must be replaced.
Never attempt to bend a bent blade back to
straight again. Never mow the lawn with a bent or heavily worn blade as this will cause vibrations and can lead to further damage to the lawn mower.
Important: There is a risk of injury if you work with a damaged blade.
Resharpening the blade
The blades can be resharmed with a metal file. In order to avoid imbalance, the blade should be resharmed by an authorized service workshop.
7.2.3 Checking the oil level (Fig. 14/15)
Important: Never run the engine with no or too little oil. This could cause severe damage to the engine.
Use only 15W40 engine oil.
Checking the oil level:
Stand the lawn mower on a flat level surface. Unscrew the oil dip stick (14/Pos. A) by turning anticlockwise, pull out and wipe. Insert the dip stick back in the filling mount as far as the stop, but do not screw back in. Pull out the dip stick again and read off the oil level while holding horizontally. The oil level must be between the maximum (Fig. 15/Item H) and the minimum (Fig. 15/Item L). The moveable orange plastic part on the oil dip stick provides protection against oil foam.
Changing the oil
Change the engine oil every year before the start of the season (in addition to the information in the petrol service manual) when the engine is warm.
- Use only engine oil (15W40).
- Place a flat oil drip tray beneath the mower.
- Open the oil filler screw (Fig. 14/Item A).
- Open the oil drainage screw (Fig. 16). Drain the warm engine oil into a drip tray.
-
Close the drain screw again when all the used oil has been drained.
-
Fill up with engine oil as far as the top mark on the dipstick.
- Important! Do not screw in the oil dipstick to check the oil level – only insert it as far as the thread.
Dispose of the used oil in accordance with applicable regulations.
7.2.4 Care and adjustment of the cables
Oil the cables at regular intervals and check that they move easily.
7.2.4.1 Adjusting the cord for the engine brake
If you notice a drop in the performance of the engine brake, the cord (Fig. 17/Item A) will need readjusting.
7.2.4.2 Drive unit cable adjustment (Fig. 18)
In the drive position of the clutch lever (Fig. 12), the clutch lever (Fig. 1/Item 1) should be pulled up to the top push bar. If the cable is too taut, it must be set to a longer length. To do this, undo the lock nut (Fig. 18/Item A) opposite the main cable (Fig. 18/Item B), extend the screw connection and then tighten the lock nut again. If the power of the drive unit starts to fall, the clutch tension must be increased using the cable. To do this, the screw connection must be reduced (using the method described above). Set the clutch lever (Fig. 1/Item 1) so that it can just touch the top push bar.
7.2.5 Maintenance of the air filter (Fig. 19/20)
A soiled air filter will reduce the performance of the engine because it will prevent enough air getting to the carburetor. It is therefore imperative that regular checks are made. The air filter should be checked every 25 hours and cleaned if required. If the air is very dusty the air filter should be checked more regularly.
Important: Never clean the air filter with petrol or inflammable cleaning agents. Clean the air filter with compressed air or simply by knocking out any soiling.
7.2.6 Maintenance of the spark plug (Fig. 22)
Check the spark plug for dirt and grime after 10 hours of operation and if necessary clean it with a copper wire brush. Thereafter service the spark plug after every 50 hours of operation.
- Pull off the spark plug boot (Fig. 21) with a twist.
- Remove the spark plug with the supplied spark plug wrench.
- Assemble in reverse order.
7.2.7 Repairs
After any repair or maintenance work, check that all safety-related parts are in place and in proper working order.
All parts which may cause injury must be kept where they are inaccessible to children or others.
Important: In accordance with product liability legislation we are not liable for any damages caused by improper repairs or the use of spare parts that are not original spare parts or parts approved by us. In addition, we are also not liable for any damages arising from improper repairs. Such work should be performed by a customer services workshop or authorized specialist. The same applies to accessory parts.
7.2.8 Times of use
Lawn mowers are only permitted to be used on workdays between the hours of 7.00 a.m. and 7.00 p.m. Please comply with statutory regulations, which may vary from location to location.
7.3 Preparing the mower for long-term storage
Caution: Do not empty the petrol tank in enclosed areas, near fire or when smoking. Petrol fumes can cause explosions and fire.
- Empty the petrol tank with a petrol suction pump.
- Start the engine and let it run until any remaining petrol has been used up.
- Change the oil at the end of every season. To
do so, remove the used engine oil from a warm engine and refill with fresh oil.
- Remove the spark plug from the cylinder head. Fill the cylinder with approx. 20ml of oil from an oil can. Slowly pull back the starter handle, which will bathe the cylinder wall with oil. Screw the spark plug back in.
- Clean the cooling fins of the cylinder and the housing.
- Be sure to clean the entire machine to protect the paint.
- Store the machine in a well-ventilated place.
7.4 Preparing the mower for transportation
- Empty the petrol tank (see item 7.3.1).
- Always let the engine run until it has used up the remainder of petrol in the tank.
- Empty the engine oil from the warm engine.
- Remove the spark plug boot from the spark plug.
- Clean the cooling fins of the cylinder and the housing.
- Remove the start tension cable from the hook (Fig. 8). Slacken the wing nuts and fold down the upper push bar.
- Wedge a few layers of corrugated cardboard between the upper and lower push bars and the engine in order to prevent any chafing.
7.5 Ordering replacement parts
Please quote the following data when ordering replacement parts:
- Type of machine
- Article number of the machine
- Identification number of the machine
- Replacement part number of the part required
8. Disposal and recycling
The unit is supplied in packaging to prevent its being damaged in transit. This packaging is raw material and can therefore be reused or can be returned to the raw material system.
The unit and its accessories are made of various types of material, such as metal and plastic.
Defective components must be disposed of as special waste. Ask your dealer or your local council.
9. Faults and remedies for faults
Caution: Always switch off the engine and pull the ignition cable before starting any inspection or adjustment work.
Caution: If, after making an adjustment or repair to the engine, you let it run for a few minutes, remember that the exhaust and other parts will get hot. Thus, do not touch parts that emanate heat, as these may burn you.
| Fault Possible cause | Remedy | |
| Loud while running, machine vibrates heavily | - Screws are loose- Blade fasteners are loose- Blade is unbalanced | - Check screws- Check blade fasteners- Replace blade |
| Engine does not start - Brake lever | not pressed- Spark plug is defective- Fuel tank is empty | - Press brake lever- Replace spark plug- Refill with fuel |
| Engine runs unsteadily - Air filter is | soiled- Spark plug is soiled | - Clean the air filter- Clean the spark plug |
| Uneven mowing results - Blade is | blunt- Cutting height is too low | - Sharpen the blade- Set correct height |
| Unsatisfactory bagging of the grass | - Cutting height is too low- Blade is worn- Basket is clogged | - Set correct height- Replace the blade- Empty the basket |
2006/42/EC 87/404/EEC
2006/95/EC
□98/37/EG
2004/108/EC
□90/396/EC
89/336/EWG
R&TTED1999/5/EC
2000/14/EC_2005/88/EC
□95/54/EC
97/68/EC_2004/26/EC
2002/95/EC
EN 836; EN ISO 14982; Gerauschemission 2000/14/EC, Anhang VI & 2005/88/EC, Garantierter
The technical documentation is kept by our authorized representative.
Matrix GmbH
Postauer Str. 26
D-84109 Worth/Isar
Worth/Isar, den 10.29.2012
M. Bindhammer (Technical Director)