22050 BL - Compressor Creemers - Free user manual and instructions
Find the device manual for free 22050 BL Creemers in PDF.

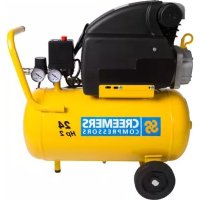
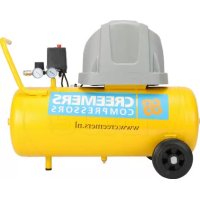
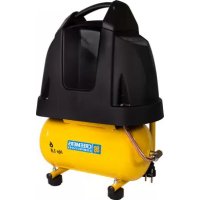
| Technical specifications | Creemers 22050 BL compressor, power of 2.2 kW, maximum pressure of 8 bars, air flow of 220 L/min. |
|---|---|
| Usage | Ideal for DIY tasks, tire inflation, compressed air cleaning, and use with pneumatic tools. |
| Maintenance and repair | Regularly check the oil level, clean the air filter, drain water from the tank after each use. |
| Safety | Use hearing protection, avoid overloading the compressor, do not exceed the recommended maximum pressure. |
| General information | Weight: 30 kg, dimensions: 80 x 40 x 75 cm, 2-year warranty, CE compliant. |
Frequently Asked Questions - 22050 BL Creemers
User questions about 22050 BL Creemers
0 question about this device. Answer the ones you know or ask your own.
Ask a new question about this device
Download the instructions for your Compressor in PDF format for free! Find your manual 22050 BL - Creemers and take your electronic device back in hand. On this page are published all the documents necessary for the use of your device. 22050 BL by Creemers.
USER MANUAL 22050 BL Creemers
natural_image
Technical line drawing of an air compressor unit with mounting flanges and housing (no text or symbols)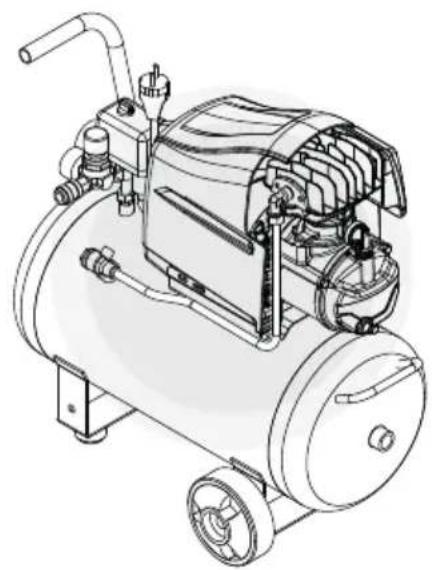
natural_image
Technical line drawing of an air compressor unit (no text or symbols visible)WARNING: Please read and understand this manual before operating the compressor
flowchart
graph TD
    A["Warning"] --> B{Warning?}
    B -->|Yes| C["Warning icon: clock, hand, eye icon"]
    B -->|No| D["Warning icon: warning sign, alert box"]
    C --> E["Action buttons: check, stop, drop, etc."]
    D --> F["Action buttons: check, stop, drop, etc."]
    E --> G["Action icon: warning sign, alert box"]
    F --> H["Action icon: warning sign, alert box"]
| IT | Etichetta spurgo: scaricare la condensa giornalmente. Fare controllare, annualmente, lo spessore del serbatoio da un organismo notificato, annotando la data dell'intervento. |
| EN | Condensate drain label. Periodical service inspection of the air receiver is neede ed. Record the date of intervention on the label. |
| FR | Etiquette de purge. Une révision périodique du réservoir d'air est nécessaire. Inscrivez la date de l'intervention sur l'étiquette. |
| DE | Der Luftbehälter muss im Betrieb regelmäßig geprüft werden,da die Stärke der Stahlwand durch Korrosion. Notieren Sie sich den Zeitpunkt der Intervention auf dem Etikett. |
| ES | Etiqueta de purga. Es necesario realizar inspecciones de servicio periódicas del depósito de aire. Registre la fecha de la intervención en la etiqueta. |
| PT | Etiqueta de purga. É necessária a inspecção periódica em serviço do reservatório. Registar a data de intervenção na etiqueta. |
| NL | Etiket onduchting. Corrosie moet worden voorkomen: periodieke onderhoudsinspecties van de luchtketel zijn nodig. |
| DK | Etiket draening. Periodisk serviceeftersyn af luftbeholderen er nødvendigt, da indvendig korrosion kan reducere stålvæggens tykkelse. |
| SE | Dränering etikett. en periodisk serviceinspektion av luftbehållaren måste göras eftersom den inre korrosionen kan göra att stålväggens tjocklek minskar. |
| FI | kuivatus etiketti Ilmasäiliön säännöllinen käyttötarkastus on välttämätön, koska sisäinen syöpyminen voi pienentää terässeinämän paksuutta, jolloin säiliö voi rikkoutua. |
| 1 | SERBATOIO / TANK / RESERVOIR / KESSEL / TANK / BEHOLDER / DEPÓSITO / DEPÓSITO / SÃILIÕ |
| 2 | GRUPPO COMPRESSORE / COMPRESSOR UNIT / GROUPE COMPRESSEUR / KOMPRESSORAGGREGAT / COMPRESSOR GROEP / KOMPRESSORENHED / GRUPO COMPRESOR / GRUPO COMPRESSOR / KOMPRESSORIYKSIKKŐ / KOM-PRESSORGRUPP |
| 3 | FILTRO ARIA / AIR FILTER / FILTRE A AIR / LUFTFILTER / LUCHTFILTER / LUFT-FILTER / FILTRO DE AIRE / FILTRO AR / ILMASUODATIN / LUFTFILTER A |
| 4 | SCARICO CONDENSA / CONDENSATE DRAIN / EVACUATION CONDENSATION / AUSLASS KONDENSWASSER / AFVOER CONDENSWATER / TÓMNING AF KON-DENSVAND / DESAGÜE DEL CONDENSADO / PURGA DA CONDENSAÇÃO / KON-DENSSIVEDEN TYHJENNYS / KONDENSVATTNETS AVLOPP. |
| 5 | RUOTA / WHEEL / ROUE / RAD / WIEL / HJUL / RUEDA / RODA / PYÖRÄ / HJUL |
| 6 | VALVOLA DI NON RITORNO / CHECK VALVE / VANNE DE NON-RETOUR / RÜCKSCHLAGVENTIL / KLEP VOOR NIET TERUGKEER / KON-TRAVENTIL/ VÁLVULA DE ANTIRRETROCESO / VÁLVULA DE NÃO RETORNO / TAKAI-SKUVENTTIILI / VENTIL UTAN ÁTERGÂNG. |
| 7 | INTERRUTTORE ON-OFF / ON-OFF SWITCH / BOUTON ON-OFF / EIN /AUS SCHALTER /AAN / UIT KNOP / INTERRUPTOR ON-OFF / BOTÃO ON-OFF / AFBRYDEREN / VIRTAKYTKIN |
| 8 | RIDUTTORE DI PRESSIONE / PRESSURE REDUCER / REDUCTEUR DE PRESSION / DRUCKMINDERER / DRUKREDUCTIEMACHINE / TRYKBEGRÆNSER / REDUCTOR DE PRESIÓN / REDUTOR DE PRESSÃO / PAINEENVÂHENTÃJÄ / TYCKREDUCE-RARE |
| 9 | MANOMETRO / PRESSURE GAUCE / MANOMETRE / MANOMETER / MANOMETER /TRYKMÅLER / MANÓMETRO / MANÓMETRO / MA-NOMETRI |
| 10 | USCITA ARIA COMPRESSA RIDOTTA / REDUCED COMPRESSED AIR OUTLET / SORTIE RÉDUITE AIR COMPRIMÉ / REDUZIERTE DRUCKLUFTAU-SGANG / UIT-GANG SAMENGEPERSTE LUCHT VERMINDERD / UDGANG FOR REDUCERET TRYKLUFT / SALIDA DEL AIRE COMPRIMIDO REDU-CIDA / SAÍDA AR COMPRIMIDO REDUZIDA / PAINEILMAN VÄHENNETTY ULOSMENO / REDUCERAD TRYCKLUF-TSUTGÂNG |
Some images could be different from your compressor.
Read and understand all of the operating instructions, safety precautions and warnings in the Instruction Manual before operating or maintaining this compressor. Most accidents that result from compressor operation and maintenance are caused by the failure to observe basic safety rules or precautions. An accident can often be avoided by recognizing a potentially hazardous situation before it occurs, and by observing appropriate safety procedures.
Basic safety precautions are outlined in the "SA-FETY" section of this Instruction Manual and in the sections which contain the operation and maintenance instructions. Hazards that must be avoided to prevent bodily injury or machine damage are identified by WAR-NINGS on the compressor and in this Manual.
Never use this compressor in a manner that has not been specifically recommended by manufacturer, unless you are absolutely sure that the planned use will be safe for you and others.
WARNING: indicates a potentially hazardous situation which, if ignored, could result in personal injury.
NOTE: emphasizes essential information.
1.2 SAFETY
WARNING: DEATH OR SERIOUS BODILY INJURY COULD RESULT FROM IMPROPER OR UNSAFE USE OF THE COMPRESSOR. FOLLOW THESE BASIC SAFETY INSTRUCTIONS.
-
NEVER TOUCH MOVING PARTS: never place your hands, fingers or other body parts near the compressor's moving parts.
-
NEVER OPERATE WITHOUT ALL GUARDS IN PLACE: if maintenance or servicing requires the removal of a guard or safety features, be sure to replace the guards or safety features before resuming operation of the compressor.
-
ALWAYS WEAR EYE PROTECTION: compressed air must never be aimed at anyone or any part of the body.
-
PROTECT YOURSELF AGAINST ELECTRIC SHOCK: prevent body contact with grounded surfaces such as pipes, radiators, ranges and refrigeration enclosures. Never operate the compressor in damp or wet locations.
-
DISCONNECT THE COMPRESSOR from the power source and remove the compressed air from the air tank before servicing, inspecting, maintaining, cleaning, replacing or checking any parts.
-
VOID UNINTENTIONAL STARTING: do not carry the compressor while it is connected to its power source or when the air tank is filled with compressed a Ensure the knob of the pressure switch is in the "OFF" position before connecting the compressor to the power source.
-
STORE COMPRESSOR PROPERLY: when not in use, the compressor should be stored in a dry place.
Keep out of reach of children. Store in a lockable area when not in use.
- KEEP WORK AREA CLEAN: cluttered work areas can cause injuries. Clear all work areas of unnecessary tools, debris, furniture etc.
- KEEP CHILDREN AND OTHER PEOPLE AWAY FROM COMPRESSOR DURING USE: do not let children or other people interfere with the compressor or extension cord. All visitors should be kept safely away from work area.
- DRESS PROPERLY: do not wear loose clothing or jewellery. They can be caught in moving parts. Wear protective hair covering to contain long hair.
- DO NOT ABUSE POWER CORD: never yank or pull the power cord to disconnect it from the plug socket. Keep the cord away from heat, oil and sharp edges.
- MAINTAIN COMPRESSOR WITH CARE: follow instructions for lubricating. Inspect power cords periodically and if damaged, have them repaired by an authorized service facility.
- OUTDOOR USE OF EXTENSION CORDS: when compressor is in use outdoors, use only extension cords suitable for outdoor use.
- STAY ALERT: take care. Use common sense. Do not operate compressor when you are tired or if you are under the influence of alcohol, drugs or medication that makes you drowsy.
- CHECK FOR DAMAGED PARTS AND AIR LEAKS: if a guard or other part is damaged it should be carefully checked to determine that it will operate properly and perform its intended function. A guard or other part that is damaged should be properly repaired or replaced by an authorized service center.
Defective pressure switches should be replaced by authorized service center. Do not use compressor if power switch does not turn it on and off. - OPERATE THE COMPRESSOR ACCORDING TO THE INSTRUCTIONS PROVIDED HEREIN: this compressor has been designed and manufactured exclusively to produce compressed air. Operate the compressor according to the instructions provided.
- HANDLE COMPRESSOR CORRECTLY: operate the compressor according to the instructions provided herein. Never allow the compressor to be operated by children, individuals unfamiliar with its operation or unauthorized personnel.
- KEEP ALL SCREWS, BOLTS AND COVERS TIGHTLY IN PLACE: check their conditions periodically.
- KEEP MOTOR AIR VENT CLEAN: frequently check for dust build-up.
- OPERATE COMPRESSOR AT THE RATED VOLTAGE: if using the compressor at a higher voltage than the rated voltage, it will result in abnormally fast motor revolution and may damage the unit.
- NEVER USE A COMPRESSOR WHICH IS DEFECTIVE OR OPERATING ABNORMALLY: if the compressor appears to be operating unusually,
making strange noises, or otherwise appears defective, stop using it immediately and arrange for repairs by an authorized service center.
- DO NOT WIPE PLASTIC PARTS WITH SOLVENT: solvents such as gasoline, thinner, benzene, carbon tetrachloride, and alcohol may damage and crack plastic parts. Wipe plastic parts with a soft cloth lightly dampened with soapy water and dry thoroughly.
- USE ONLY GENUINE REPLACEMENT PARTS: replacement parts which are not original may void your warranty and can lead to malfunction and resulting injuries.
- DO NOT MODIFY THE COMPRESSOR. Always contact the authorized service center for any repairs. Unauthorized modification may not only impair the compressor performance but may also result in accident or injury to repair personnel.
- TURN OFF THE PRESSURE SWITCH WHEN THE COMPRESSOR IS NOT IN USE: turn the knob of the pressure switch OFF, disconnect it from the power source and open the drain cock to discharge the compressed air from the air tank.
- NEVER TOUCH HOT SURFACES: do not touch tubes, heads, motors and cylinder.
- DO NOT DIRECT AIR STREAM AT BODY
- DRAIN TANK DAILY. Corrosion must be prevented: condensate may accumulate inside the tank and must be drained every day. Periodical service inspection of the air receiver is needed, as internal corrosion can reduce the steel wall thickness with the consequent risk of bursting. Local rules need to be respected, if applicable.
- DO NOT STOP COMPRESSOR BY PULLING OUT THE PLUG: use the "0/OFF" knob of pressure switch.
- USE ONLY RECOMMENDED AIR HANDLING PARTS ACCEPTABLE FOR PRESSURE not less than the maximum rated pressure.
1.3 INTENDED USE
This compressor has been designed for use with intermittent (not continuous) operation.
Please check service factor on the CE label:
Ex. S3 - 70% = 7 minutes run and 3 minutes stop, considering ideal environmental condition (max temp 25°C).
Respect of these tips and regular maintenance will ensure good functioning.
Compressors without the yellow LwA label, are intended to be use indoor.
1.4 ELECTRICAL CONNECTION
The compressor should be grounded while in use to protect the operator from electric shock.
Single-phase compressor is equipped with a three-core cable and three-pin grounding type plug to fit the proper grounding type socket.
Three-phase compressor is supplied with electrical cable without plug. Connection should be conducted only by qualified electrician
The green (or green and yellow) conductor in the cord is the grounding wire. Never connect it to a live terminal.
Never disassemble the compressor or carry out other connections to the pressure switch.
1.5 USE OF EXTENSION CABLE
Use only three-way extension cables that have three-pin connecting plugs and three-pole sockets that accept the compressor plug.
Do not use extension cables that are damaged or squashed. An under-rated cable will cause a drop in line voltage resulting in loss of power and overheating.
Check table A (pag.8) in order to choose cable correct size.
WARNING: Avoid electrical shock hazard.
Never use this compressor with a damaged or frayed electrical cord or extension cord.
Never use in or near water or in any environment where electric shocks are possible.
2. INSTALLATION AND USE
2.1 INSTALLATION
Remove the compressor from its packing (fig.1), makes sure it is in perfect condition, checking if it was damaged during transport, and carry out the following operations:
- If not already fitted, fit the wheels and rubber feet following the instructions in fig.2.
- Transport the compressor correctly, do not overturn it or lift it with hooks or ropes (fig. 5/6).
- Position the compressor in a well aired place, protected against atmospheric agents and not in a place subject to explosion hazard.
- If the surface is inclined (max. 10^ - see fig.3), check if the compressor moves while in operation, if it does, secure the wheels with two wedges. If the surface is a bracket or a shelf top, make sure it cannot fall, securing it in a suitable way.
- To ensure good ventilation and efficient cooling, the compressor's belt guard must be at least 50 cm from any wall (fig. 4).
- Compressors fitted on the tank, with fixed feet, should not be rigidly secured to the ground. In this case, we advise you to fit 4 anti-vibration supports.
- Replace the plastic plug (fig.7) with the oil level stick or with the relevant breather plug, supplied with the instructions booklet. Check oil level, consulting the reference marks on the stick or the oil level inspection window.
2.2 ELECTRICAL CONNECTION
Single-phase compressors are supplied with an electrical cable and a two-pole + earth plug. The compressor must be connected to a grounded power socket (fig.8).
Three-phase compressors must be installed by a specialised technician. Three-phase compressors are
supplied without a plug. Connect a plug, with screw-on grommet and securing collar (fig.8), to the cable, consulting the table B (page 8).
NOTE: any damage caused by incorrect connections of the power line to the mains, automatically excludes warranty of electrical parts.
To avoid connection errors, we suggest you to contact a specialised technician.
2.3 START-UP
Check that the mains power matches that indicated on the electrical data-plate (fig.9), the permissible tolerance range is +/-5%.
When first starting compressors operating on 3-phase voltage, check the rotation direction of the cooling fan by comparing it with the direction of the arrow on the belt guard or on the protective housing.
Fit the plug in the power socket and start the compressor, turning the pressure switch knob into position "I/On" (fig.10).
The compressor is fully automatic, and is controlled by the pressure switch which stops it when tank pressure reaches maximum value and restarts it when it falls to minimum value. The pressure difference between maximum and minimum values is usually about 2 bar (29 psi).
E.g.: the compressor stops when it reaches 8 bar (116 psi) and restarts automatically when the pressure inside the tank drops to 6 bar (87 psi).
After connecting the compressor to the power line, load it to maximum pressure and check correct functioning.
NOTE: some models could be equipped with a discharge valve on the top of the head, useful to facilitate the next start. In this case it is normal a puff of air when compressor stops
2.4 MOTOR PROTECTION DEVICES
Compressors must be connected to a power socket protected by a suitable differential switch (magneto-thermal, see. table C-page.8).
Compressors are equipped with an automatic thermal breaker located inside the winding, this stops the compressor when motor temperature reaches excessively high values.
If the breaker is tripped, compressor restarts automatically after 10-15 minutes. To help restart turn the pressure switch knob to Off/0 and then to On/I (fig.10).
If the protection device trips again, it's highly recommended to stop the compressor, disconnect electric plug and contact the nearest service centre.
2.5 ADJUSTING THE WORKING PRESSURE
You do not have to use the maximum operating pressure at all times. On the contrary, the pneumatic tool being used often requires less pressure. Check correct pressure on tool's manual.
On compressors supplied with a pressure reducer, operating pressure must be correctly adjusted (see fig.11).
Release the pressure reducer knob by pulling it up, adjust pressure to the required value by turning the knob clockwise to increase pressure and anti-clockwise to reduce it.
When you have obtained optimum pressure, lock the knob by pressing it downward.
For pressure reducers equipped without a pressure gauge, the set pressure can be seen on the graduated scale located on the reducer body.
Some pressure regulators do not have "push to lock": just turn the knob to adjust the pressure.
For those models without pressure reducer, a suitable pressure reducer must be fitted on the distribution line by the user.
2.6 CAUTIONS WHILE USING
Do not unscrew any connection while the tank is pressurised, always check if the tank is pressure free.
Do not drill holes, weld or deform the air tank.
Do not perform any jobs on the compressor unless you have disconnected the power plug.
Do not aim jets of water or inflammable liquids on the compressor. Do not place inflammable objects near the compressor.
Do not aim the air jet at people or animals. Keep children and animals away from the operating area.
Do not transport the compressor while the tank is pressurised
Do not touch hot parts (fig.12). Some parts of the compressor such as the head and delivery tubes, as they can reach high temperatures.
Do not insert hands and/or any object inside protection grilles.
Do not use cable plug as switch.
Transport the compressor, lifting or pulling it with the appropriate grips or handles.
Temperature in operating ambient: 0°C +35°C.
If using the compressor for painting:
a) Do not work in closed environments or near to naked flames
b) Make sure there is adequate exchange of air
c) Protect your nose and mouth with a mask.
If the electrical cable or plug are damaged, do not use the compressor and contact an service centre to replace damaged part.
3. MAINTENANCE
Before attempting any maintenance jobs on the compressor, make sure of the following:
Master power switch in position "0/Off".
Compressor power switch in position "0/Off"
No pressure in the air tank
Wait for all parts to cool down, so to avoid any burn.
If necessary, remove shroud in order to access inner parts. Take care to not break or pull any cable or pneumatic connections.
3.1 CLEAN/REPLACE SUCTION FILTER
Every 50 hours of duty: we advise you to dismantle the suction filter and clean the filtering element by blowing compressed air on it (fig.13).
You are recommended to replace the filter element at least once a year if the compressor operates in a clean environment, but more frequently if in a dusty environment.
3.2 CONDENSATE DRAIN
The compressor generates condensate water which accumulates in the tank.
The condensate in the tank must be drained daily by opening the drain tap (fig.14) under the tank.
Periodical service inspection of the air receiver is needed, as internal corrosion can reduce the steel wall thickness with the consequent risk of bursting.
Take care if there is compressed air inside the tank, water could flow out with considerable force. Recommended pressure: 1-2 bar max.
CONDENSATE MUST NOT BE DRAINED INTO THE SEWER OR DISPERSED IN THE ENVIROMENT AS IT CONTAINS OIL.
3.3 OIL CHANGE
We recommend a full change of oil within the first 100 hours of duty. Afterwards replace the oil every 300 hours.
Unscrew the oil drain plug on the housing cover, allow all the oil to flow-out, and re-screw the plug (fig.15).
Pour oil into the upper hole of the housing cover until it reaches the level indicated on the stick or indicator.
Once a week: check oil level and top-up if necessary.
Use mineral oil ALTAIR. Do not mix different oils.
DO NOT DRAIN USED OIL INTO THE SEWER OR DISPOSE OF IT IN THE ENVIRONMENT.
| Maintenance | |||
| hours of duty 50 100 300 | |||
| Condensate drain daily | |||
| Clean the filter x | |||
| Replace the filter once a year | |||
| Replace oll x x | |||
4. TROUBLESHOOTING
Loss of air in valve under pressure switch
It could depend on poor tightness of the check valve.
Take the following action (fig.16):
Discharge all pressure from the tank
Unscrew the hexagon-head of the valve
Carefully clean both the rubber disk (A) and its seat.
Refit all parts accurately.
Air losses
These can be caused by poor tightness of a union, check all unions, wetting them with soapy water.
Reduction of performance. Frequent start-up. Low pressure values.
Excessive performance request.
Check for any leaks from the couplings and/or pipes. Intake filter may be clogged.
Replace the seals, clean or replace the filter.
Compressor turns but does not load
This may be due to failure of the valves or of a damaged/broken head gasket.
Parts must be replaced by service centre.
Compressor no starting
If the compressor has trouble starting, check the following :
Does mains power match that of the data-plate?
Are power cable extensions of adequate diameter or length?
Is the work environment too cold? (under 0°C)
Was the thermal-breaker tripped? (see 2.4)
Is power supplied to the electrical line?
Compressor not stopping
If the compressor does not stop when maximum pressure is reached, the tank safety valve comes into operation.
Stop the compressor and contact service centre.
5 NOTE
5.1 TECHNCIAL DATA
- Check data label applied on compressor (fig.9).
- For the European market, compressors are manufactured in order to meet current directives and standards (see the declaration of conformity).
- The sound pressure level is measured in a free range at a distance of 1 mt. ± 3dB(A) at the maximum working pressure.
- The value of the sound level may increase from 1 to 10 dB(A) depending on the environment in which the compressor is installed.
5.2 STORING THE COMPRESSOR
For the whole time that the compressor is not used before unpacking it, store it in a dry place at a temperature between +5^ C and +45^ C and sheltered away from weather.
For the whole time that the compressor is not used after unpacking it, place sheets over it to protect it.
The oil is to be replaced and the operational efficiency of the compressor is to be checked if it is not used for long periods.
5.3 PNEUMATIC CONNECTIONS
Make sure that pneumatic tubes for compressed air with maximum pressure characteristics that are adequate for the compressor used. Do not attempt to repair faulty tubes.
5.4 DISPOSAL
Compressor and all materials (package, oil and spare parts....) must be correctly disposed according to the local laws.
1. PRÉMISSE
1.1 INFORMATIONS IMPORTANTES
De Compressor is koud.
3.1 OPZUIGFILTER
OBS: understryker viktig information.
1.2 SÄKERHET
WARNING:
EN FELAKTIG ANVÄNDNING OCH ETT DÅLIGT UNDERHÅLL AV DENNA KOMPRESSOR KAN FÖRORSAKA FYSISKA KROPPSSKADOR PÅ ANVÄNDAREN. FÖR ATT UNDVIKA DESSA RISKER, BER VI DIG ATT LÄSA FÖLJANDE INSTRUKTIONER NOGA. LÄS ALLA INSTRUKTIONER
natural_image
Abstract geometric pattern with a zigzag line and arrow shape (no text or symbols)E' CONFORME ALLE SEGUENTI DISPOSIZIONI - WAS BUILT IN COMPLIANE WITH THE FOLLOWING DISPOSITIONS - EST CONFORME AUX DISPOSITIONS SUIVANTES MIT DEN FOLGENDEN VORSCHRIFTEN UBEREINSTIMMT - ES CONFORME CON LAS SIGUIENTES DISPOSICIONES ESTÁ EM CONFORMIDADE COM AS SEGUINTES DISPOSICÕES - IN OVEREENSTEMMING IS MET DE VOLGENDE BEPALINGEN - OPFYLDER FÓLGENDE FORSKRIFTER ÁR I ÖVERENSSTÄMMELÉ MED FÖLJANDE FÖRESKRIFTER - ALLAOLEVIEN SÄÄDÖSTEN MUKAISESTI - ΣΥΜΜΟΡΦΩΝΕΤΑΙ ΜΕ ΤΙΣ ΑΚΟΛΟΥΘΕΣ ΔΙΑΤΑΞΕΙΣ - JEST ZΟΩΝΑ Ζ ΝΙŽΕJ WYMIENIONYΜΙ NORMAMI - U SKLADU SA SLJEDEĆIM PROPISIMA - V SKLADU S SLEDEĆIMI ODREDBAMI - MEGFELEL AZ ALÁBBI RENDELETEKNEK - JE V SOULADU S NÁSLEDUJÍCÍMI SMĚRNICEMI - JE V SÚLADE S NASLEDOVNÝMI SMERNICAMI - OTPREЧАЕТ ТРЕБОВАНИЯМ СЛЕДУЮЩИХ НОРМАТИВОВ - ER I OVERENSSTEMMELSE MED FÓLGENDE BESTEMMELSER: AŞAĞIDAKÍ KUKALLAVA UYGUNLUĞUNU BEYAN EDERÍZ] - A FOST EXECUTAT CONFORM DISPOZITIILOR - E B CЪOTBETCTBIE CЪС СЛЕДНИТЕ РАЗПОРЕДБИ - U SKLADU SA SLEDEĆIM PROPISIMA - PAGAMINTAS, REMIANTIS SEKANČIOMIS DIREKTY-VOMIS - ON VALMISTATUD KOOSKI LAS JARGMISTE DIREKTIIVIDEGA TIKA IZGATAVOTS ATBILSTOŠI SEKOJOŠAJÂM DIREKTĪVÂM
2014/68/EU (97/23/EC) - 2006/42/EC - 2014/30/EU - 2014/35/EU - 2014/29/EU - 2000/14/EC (Annex VI) EN 2012-1:2010 - EN 60204-1:20063/A1:2009 - EN 60335-1:2012+A11:2014
ED AUTORIZZIAMO - AND WE AUTHORIZE - ET NOUS AUTORISONS - UND WIR GENEHMIGEN - Y AUTORIZAMOS - E AUTORIZAMOS - EN WIJ GEVEN TOESTEMMING - HERVED GODKENDER VI - OCH VI GODKÄNNER - JA ANNAMME LUVAN - KAI EEOYΣΙΟΔΟΤΟΥΜΕ - UPOWAŻNIAMY - I OVLAŠĆUJEMO - IN DOVOLJUJE SE, DA SE - ÉS FELHATALMAZZUK, - A POVOLUJEME - A AUTORIZUJEME - И РАЗРЕШАЕМ - OG VI AUTORISE RER - VE YETKILI KAVAKTAYIZ - SIAUTORIZÄM - ДАВА СЕ РАЗРЕШЕНИЕ - I OVLAŠĆUJEMO - IR DUODAME LEIDIMĄ - JA VOLITAME - UN MĘS PILNVAROJAM
XXXXXXXXX
A COSTITUIRE IL FASCICOLO TECNICO PER NOSTRO CONTO - TO DRAW UP THE TECHNICAL FILE ON OUR BEHALF - À RÉALISER LE FASCICULE TECHNIQUE POUR NOTRE COMPTE - DIE TECHNISCHE BROSCHÜRE AUF UNSERE RECHNUNG ZU GRÜNDEN - LA CREACIÓN DEL EXPEDIENTE TÉCNICO A NUESTRO NOMBRE - A FORMAR O FASCÍCULO TÉCNICO POR NOSSA CONTA - HET TECHNISCHE DOSSIER NAMENS ONS OP TE STELLEN - OPRETTELSE AF DET TEKNISKE HÄFTE PÅ VORES VEGNE - ATT SKAPA DEN TEKNISKA DOKUMENTATIONEN Ä VÄRA VÄGNAR - TEKNISEN OPPAAN LAATIMISELLE PUOLESTAMME - NA ΔΗΜΙΟΥΡΓΗΣΕΙ ΤΟ ΤΕΧΝΙΚΟ ΦΑΚΕΛΟ ΓΙΑ ΛΟΓΑΡΙΑΣΜΟ ΜΑΣ - DO WYKONANIA DLA NAS TECZKI TECHNICZNEJ - FORMIRANJE TEHNIČKH UPUTA ZA NAŠ RAČUN - NA NAŠ RAČUN IZDELA POPOLNO TEHNIČNO DOKUMENTACIJO. - HOGY RÉSZÜNKRE ELKÉSZÍTSE A MŰSZAKI DOKUMENTÁCIÓT - VYTVOŘIT TECHNICKOU SLOŽKU NA NÁŠ ÚČET - VYTVORIŤ TECHNICKÚ ZLOŽKU NA NÁŠ ÚČET - COCTABЛЯТЬ ΤΕΧНИЧЕСКУЮ БРОШЮРУ ВМЕСТО НАС - TIL Å UTFORME DEN TEKNISKE DOKUMENTASJONEN FOR OSS - BIZIM HESABIMIZA TEKNIK BIR FASIKÜLÜN OLUSTURULMASINA - SÄ SE REALIZEZE PENTRU NOI BROŞURA TEHNICĂ - ЗА СЪСТАВЯНЕ НА ТЕХНИЧЕСКО РЬКОВОДСТВО ОТ НАШЕ ИМЕ - PRAVLJENJE TEHNIČKH UPUTSTAVA PO NAŠEM NALOGU - MUMS PARENGTI TECHNINÍ APRAŠA – MEIE NIMEL TEHNILISE BROŠÜÜRI KOOSTAMIST - IZSTRÄDÄT MŰSU VÄRDÄ TEHNISKO INFORMÄCIJU
Nooite van Alon
Maarten Van Acker Product engineeringl

Angelo Amore Purchasing Manager
Conforme d.lgs. N. 262/02
V230/50/3
V400/50/3
CElabei - Apply here