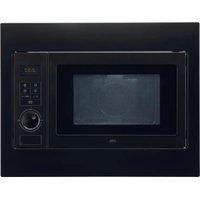
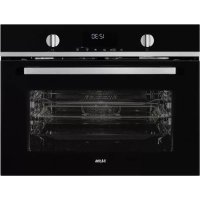
CM125HRVS - Microwave Oven ETNA - Free user manual and instructions
Find the device manual for free CM125HRVS ETNA in PDF.

| Technical Specifications | ETNA CM125HRVS microwave oven, 800 W power, 20 L capacity, 5 power levels, 24.5 cm turntable. |
|---|---|
| Usage Functions | Defrost function, quick cooking, built-in timer, electronic controls. |
| Maintenance and Cleaning | Easy-to-clean stainless steel interior, removable turntable, recommended cleaning with soapy water. |
| Safety | Door locking system, overheat protection, compliant with safety standards. |
| General Information | Dimensions: 44.5 x 34.5 x 25.8 cm, weight: 12 kg, 2-year warranty. |
Frequently Asked Questions - CM125HRVS ETNA
User questions about CM125HRVS ETNA
0 question about this device. Answer the ones you know or ask your own.
Ask a new question about this device
Download the instructions for your Microwave Oven in PDF format for free! Find your manual CM125HRVS - ETNA and take your electronic device back in hand. On this page are published all the documents necessary for the use of your device. CM125HRVS by ETNA.
USER MANUAL CM125HRVS ETNA
| Specifications techniques | 23 |
Environnement
Specifications techniques
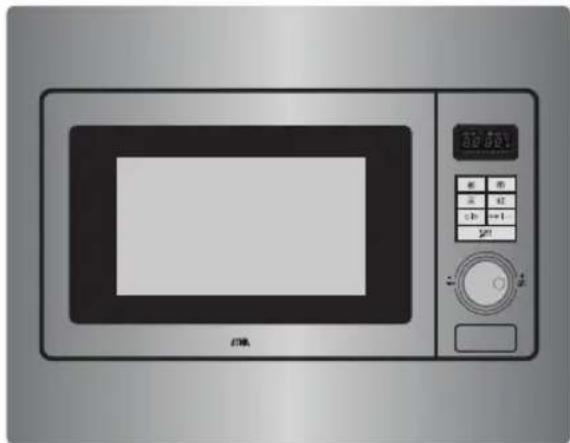
Your combi-microwave
| Introduction | 4 |
| Description | 5 |
| Control panel 6 |
Safety
| Materials | 7 |
Use
| Prior to first use | 8 |
Controls
| Set the time 9 |
| Kitchen timer 9 |
| Microwave function 9 |
| Quick start 10 |
Stop 11
Grill function 11 Combi function 12
Oven function with pre-heat 13
Oven function 14
Defrosting according to weight 14 Defrosting according to time 15 Cooking in phases 15
Auto cook 16
Child lock 17
Cooking tips 18
Maintenance Cleaning 21
Faults 22
Technical data 23
Environmental aspects
| Disposal of the appliance and packaging | 25 |
Introduction
You have opted to purchase an Etna combi-microwave. Optimum user comfort and easy operation were paramount during the development of this product.
The combi-microwave combines the properties of a microwave with those of a traditional oven. The wide range of programming options make it possible to choose your preparation method precisely. However, the controls are still simple, partly because of the automatic cooking and defrosting programmes.
This manual gives insight into the appliance's possible functions. The different functions are listed clearly in the chapter on controls. Tips that may help you are also included.
First read the user instructions carefully and completely before starting to use the appliance, and keep them safely for future reference.
The manual also serves as reference material for service technicians. The appliance identification card contains all the information the service technician will need in order to respond appropriately to your needs and questions.
Enjoy cooking!
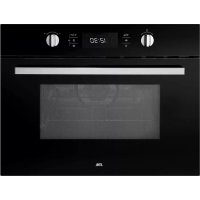
Description
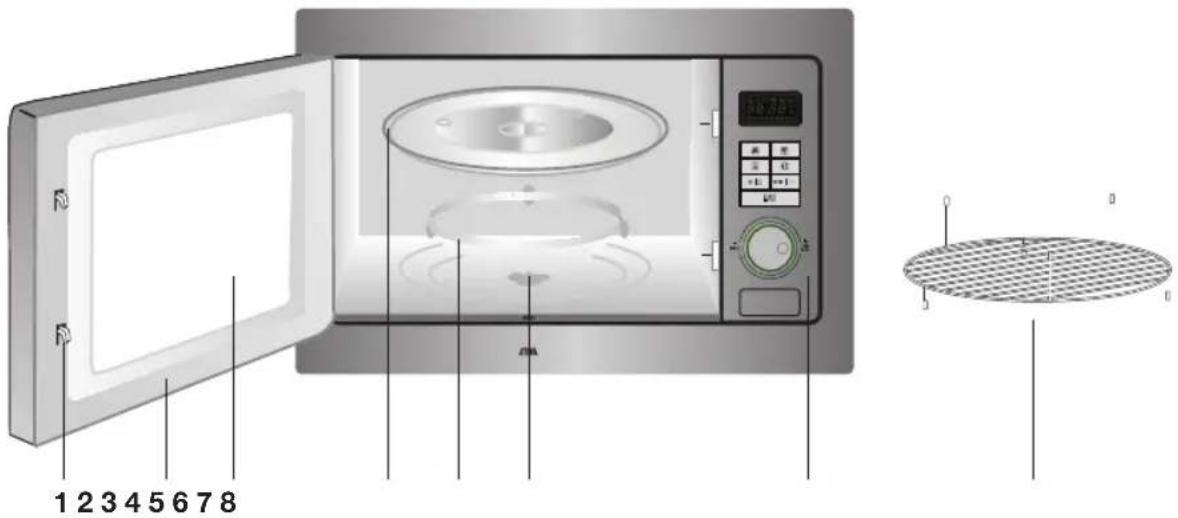
- Door lock
- Door
- Window
- Glass turntable
- Guiding ring
- Drive shaft
- Control panel
- Rack
The microwave may not be used without the guiding ring and turntable. The turntable should be fitted with the opening for the drive shaft facing downwards.
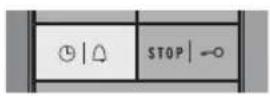
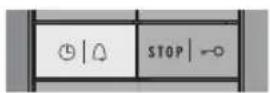
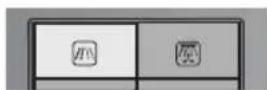
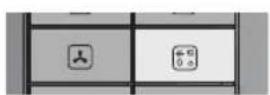
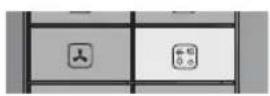
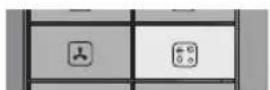
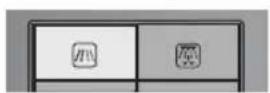
Control panel
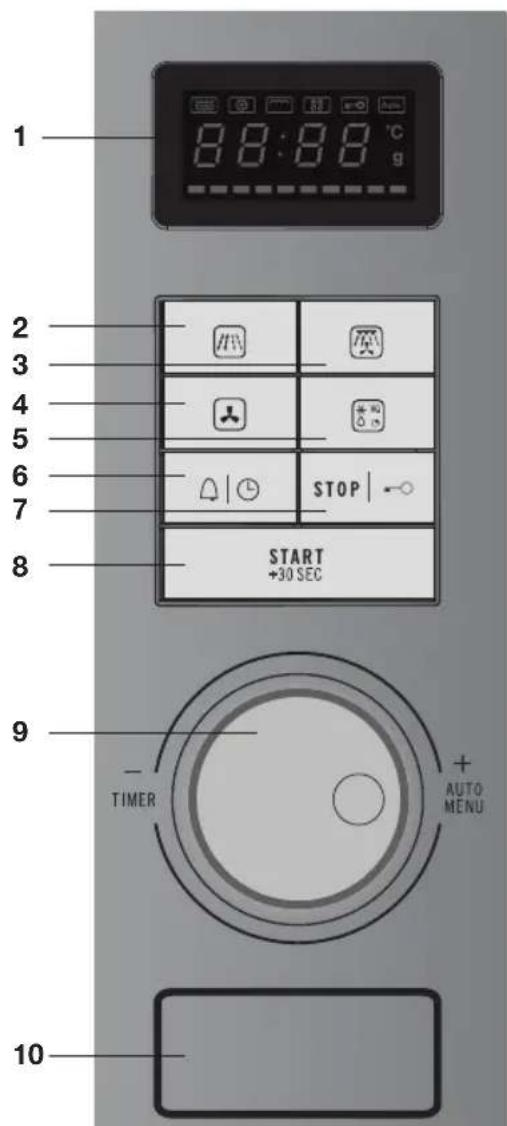
- Display
- Microwave button
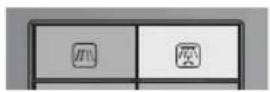
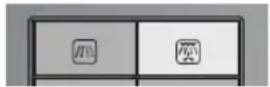
- Combination button (grill, microwave, hot air)
- Oven button (hot air)
- Defrost button
- Kitchen timer button/timer button
- Stop button/Child lock
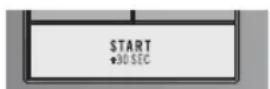
- Start button/Quick start/Confirm
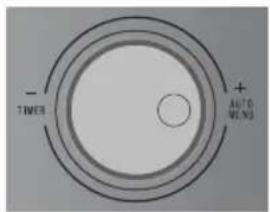
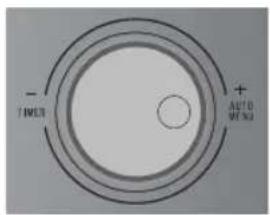
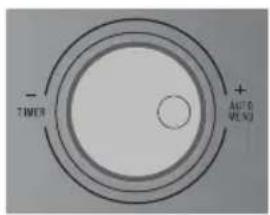
- Setting dial
- Door release
Read the separate safety instructions before using the device!
If the safety functions and warnings are not followed, the manufacturer cannot be held responsible for any resulting damage.

If you decide not to use the appliance because of a fault, we advise you to cut off the cable after removing the plug from the plug socket. Take the appliance to the municipality's waste disposal site.
Materials
Not all materials can be used in the microwave. The table below indicates which materials you can and can't use.
| Material Microwave | |
| Paper yes* | |
| Aluminium foil yes** | |
| cling film yes | |
| Aluminium trays no | |
| Heat-resistant plastic yes | |
| Unglazed pottery no | |
| Metal cooking utensils no | |
| Normal glass yes | |
| Pyrex, other oven-safe glass and ceramics yes | |
| Plates with metallic decorative edging no | |
| Metal closing strips no | |
| Mercury thermometer no | |
| Closed pot no | |
| Bottle with a narrow neck no | |
| Roasting bags | yes |
- Use non-decorated kitchen paper to cover a dish or place under bread during defrosting.
** By covering thinner areas of food (such as chicken legs) you prevent them from cooking too quickly.
Prior to first use
Preferably use the oven grid when preparing meals. Never place cold (frozen) meals directly on the glass turntable. The difference in temperature may cause it to crack!
- Open the door, remove the packaging and check the microwave for damage. Don't install the microwave if it is damaged, contact your supplier.
- Remove the protective film from the casing.
- Clean the oven interior and accessories with a damp cloth. Don't use any abrasive cleaner or strong-smelling cleaning products.
- Place the guiding ring in the middle of the oven interior. Place the turntable on the guiding ring with the opening for the drive shaft facing downwards.

Please note
The microwave may not be used without the guiding ring and turntable.
- Test that the microwave works properly: place a glass of water in the oven interior and turn on the microwave for one minute on the highest setting (press twice on the start button). Afterwards the water should be hot.
CONTROLS
Set the time
When the appliance is connected to the network for the first time, you need to set the time. The display reads '0:00'. The clock runs as long as the combi-microwave is connected to the network.
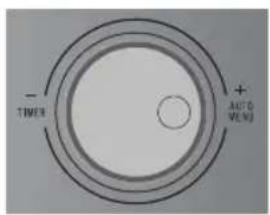
- Press twice on the timer button. The hours flash in the display.
- Turn the control dial to set the hours. The set hours appear in the display.
- Press the timer button again. The minutes flash in the display.
- Turn the control dial to set the minutes. The set minutes appear in the display.
- Press the timer button again. The clock is set: the current time appears in the display with a flashing
Kitchen timer
The kitchen timer gives a signal after reaching the set time.
- Press once on the kitchen timer button. The display reads '00:00'.
- Turn the control dial to set the time. The display indicates the set time.
-
Press the start button. The set time counts down in the display.
-
When the set time has been reached, the current time appears again in the display, and you will hear 5 beeps.
- You cannot adjust the set time during countdown. Press on the stop button to interrupt the kitchen timer and set a new time.
Microwave function
With this function you can set the power and time yourself. If you don't set the power, the microwave will switch on at the highest power. In the following table you can see which power levels can be set.
CONTROLS
| Display Power output Food | |
| P100 100 % - 900 W - Boiling water, warming up - Cooking chicken, fish and vegetables | |
| P 80 80 % - 720 W - Warming up - Cooking mushrooms and seafood - Cooking dishes containing egg and cheese | |
| P 50 50 % - 450 W - Cooking rice and soup | |
| P 30 30 % - 270 W - Defrosting | - Melting chocolate and butter |
| P 10 10 % - 90 W - Defrosting | delicate/fragile dishes - Defrosting irregularly-formed dishes - Making ice-cream softer - Allowing dough to rise |
-
Press the microwave button. 'P100' flashes in the display.
-
Press again (a number of times) on the microwave button if you wish to set another power.
- You can use the control dial to select another power by turning the dial.

- Press the start button.
The selected power is now confirmed.
- Turn the control dial to set the time.
The display indicates the set time.
- Press the start button again.
The microwave switches on and the set time counts down in the display. The microwave symbol flashes in the display.
- When the set time has been reached, the current time appears again in the display, and you will hear 5 beeps.
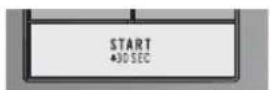
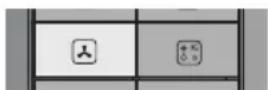
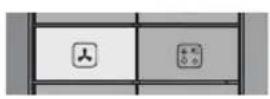
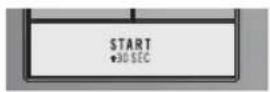
Quick start
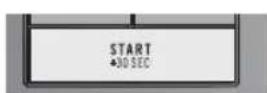
With one press of the start button you can start the microwave on full power for 30 seconds. If you press more times on the start button, the time will increase in steps of 30 seconds to a maximum of 95 minutes.
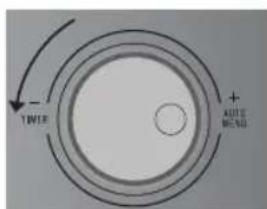
You can also first turn the control dial to the left to set a time. Then press the start button and the microwave will switch on on full power for the set amount of time.
Stop
CONTROLS
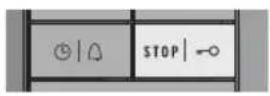
You can stop or cancel a running programme by opening the door or pressing the stop button. In order to start the programme again, press the start button.
- If you want to cancel the programme entirely, press the stop button again.
The current time appears in the display.
Grill function
You can heat dishes with the grill function and brown them without using the microwaves.
- Press once on the combi button.
^ G - 1 flashes in the display.
- Press again (a number of times) on the combi button if you wish to select a different function.
-
You can use the control dial to select another function by turning the dial.
-
Press the start button.
The selected function is now confirmed.
- Turn the control dial to set the time.
The display indicates the set time.
- Press the start button again.
The microwave switches on and the set time counts down in the display. The grill symbol flashes in the display.
- Half-way through the grill time a double-beep signal sounds to indicate that the dish needs to be turned over. Open the door, turn the dish over, close the door and press the start button.
- When the set time has been reached, the current time appears again in the display, and you will hear 5 beeps.
Combi function
There are four different combi functions. In the following table you can see which functions you can select and for what they should be used.
| Display Function Description | |
| C-1 Microwave + hot air Use this | function to bake food quickly. Suitable for fruit cake, bread and gratinated dishes (that normally need a longer preparation time). |
| C-2 Microwave + grill This function | is suitable for larger pieces of meat such as half chickens, whole chickens and for whole fish and gratinated dishes. |
| C-3 Grill + hot air Use this function | to cook food evenly while browning simultaneously. |
| C-4 Microwave + grill + hot air | This function is ideal for cooking food quickly while browning simultaneously. You can also prepare 'au gratin' dishes. The microwave and the grill function simultaneously. The microwave cooks and the grill browns. |
- Press twice on the combi button.
'C-1' appears in the display.
- Press again (a number of times) on the combi button if you wish to select a different function.
- You can use the control dial to select another function by turning the dial.
- Press the start button.
The selected function is now confirmed.
- Turn the control dial to set the time.
The display indicates the set time.
- Press the start button again.
The microwave switches on and the set time counts down in the display. Various symbols flash in the display.
- When the set time has been reached, the current time appears again in the display, and you will hear 5 beeps.

Oven function with pre-heat
You can prepare dishes in the oven in the same way as in a traditional oven. The microwave is not used. You are advised to pre-heat the oven to the required temperature before placing food in the oven.
- Press the oven button.
'130' flashes in the display.
- Press again (a number of times) on the oven button if you wish to set another temperature. You can set a temperature from 130^ to 220^ .
- You can use the control dial to select another temperature by turning the dial.

- Press the start button.
The selected temperature is now confirmed.
-
Press the start button again to start the pre-heat.
-
A double-beep signal indicates when the oven is at temperature. The set temperature appears in the display.
-
Place the dish in the microwave.
-
Turn the control dial to set the time (maximum 95 minutes). The display indicates the set time.
-
The time can only be set once the pre-heat is ready and the door has been opened and closed again.
-
If no time is set within 5 minutes after pre-heating, the preheating stops and 5 beeps sound. The microwave switches off.
-
Press the start button again.
The microwave switches on and the set time counts down in the display. The oven symbol flashes in the display.
- When the set time has been reached, the current time appears again in the display, and you will hear 5 beeps.
Oven function
CONTROLS
- Press the oven button.
'130' flashes in the display.
- Press again (a number of times) on the oven button if you wish to set another temperature. You can set a temperature from 130^ to 220^ .
- You can use the control dial to select another temperature by turning the dial.
- Press the start button.
The selected temperature is now confirmed.
- Turn the control dial to set the time (maximum 95 minutes). The display indicates the set time.
- Press the start button again.
The microwave switches on and the set time counts down in the display. The oven symbol flashes in the display.
- When the set time has been reached, the current time appears again in the display, and you will hear 5 beeps.
Defrosting according to weight
With this function you only need to set the weight of the food. The defrost time appears automatically in the display when the microwave starts.
- Press once on the defrost button. 'd-1' flashes in the display.
- Turn the control dial to set the weight (from 100 to 2000 grams). In the display you will see the set weight.
-
Press the start button. The microwave switches on and the set time counts down in the display. The defrost symbol flashes in the display.
-
In order to obtain a better defrosting performance for the food, turn the dish over during defrosting.
-
Open the door; the microwave switches off.
- Close the door after checking/turning over, press the start button and the microwave continues further with the set programme.
- When the set time has been reached, the current time appears again in the display, and you will hear 5 beeps.
Preferably use the oven grid when preparing meals. Never place cold (frozen) meals directly on the glass turntable.
The difference in temperature may cause it to crack!
CONTROLS
With this function you only need to set the defrost time of the food.
- Press twice on the defrost button. 'd-2' flashes in the display.
- Turn the control dial to set the defrost time (maximum 95 minutes). The display indicates the set time.
- Press the start button.
The microwave switches on and the set time counts down in the display. The defrost symbol flashes in the display. - In order to obtain a better defrosting performance for the food, turn the dish over during defrosting.
- Open the door; the microwave switches off.
- Close the door after checking/turning over, press the start button and the microwave continues further with the set programme.
- When the set time has been reached, the current time appears again in the display, and you will hear 5 beeps.
Cooking in phases
You can set a maximum of two phases in a cooking programme. If defrost is a phase in a cooking programme, you should input this first. A beep will sound when the first phase is ready, the second phase starts automatically after the first phase.

Example
You would like to defrost food for 5 minutes, followed by cooking for 7 minutes on 80% power.
- Press twice on the defrost button. 'd-2' flashes in the display.
- Turn the control dial to set 5 minutes defrost time. The display indicates the set time.
-
Press the microwave button. 'P100' flashes in the display.
-
Press again on the microwave button to set 80% power.
-
You can use the control dial to set 80% power by turning the dial.
-
Press the start button.
The selected power is now confirmed.
- Turn the control dial to set 7 minutes.
The display indicates the set time.
- Press the start button again.
The microwave switches on and the set time for the first phase counts down in the display. The defrost symbol flashes in the display.
- When the set time is reached, the set time of the second phase appears in the display and the microwave symbol flashes.
- When the set time of the second phase has been reached, the current time appears again in the display, and you will hear 5 beeps.
Auto cook
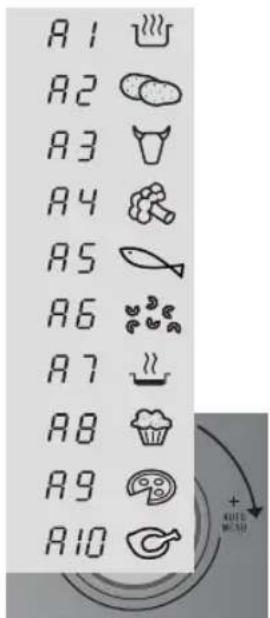
With this function you can prepare popular dishes very simply. You set the weight and the microwave selects the correct time automatically.
| Display Description Weight | |
| A1 Automatic heating 150/250/350/450/600 grams | |
| A2 Potatoes 1/2/3 potatoes | (approximately 230 g/460 g/690 g) |
| A3 Meat 150/300/450/600 g | |
| A4 Vegetables 150/350/500 g | |
| A5 Fish 150/250/350/450/650 g | |
| A6 Pasta | 50/100/150 g |
| A7 Soup | 200/400/600 ml |
| A8 Cake | 475 g |
| A9 Pizza | 200/300/400 g |
| A10 Poultry | 500/750/1000/1200 g |
- Turn the control dial to the right to select an auto cook
programme.
In the display you will see the selected programme.

- Press the start button.
The selected programme is now confirmed.
- Turn the control dial to set the weight.
In the display you will see the set weight.
- Press the start button again.
The microwave switches on and the set time counts down in the display. Various symbols flash in the display.
- When the set time has been reached, the current time appears again in the display, and you will hear 5 beeps.
Child lock
Please note: when you select A8 (Cake), don't immediately place the cake in the microwave. The oven first pre-heats to 180^ .
A double-beep signal indicates when the oven is at temperature.
Place the cake in the microwave and press the start button.
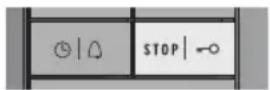
You can 'lock' your combi-microwave so that starting the combi-microwave is no longer possible.
Please note: the child lock can only be switched on if the combi-microwave is not switched on. The current time is visible in the display.
- Press for 3 seconds on the stop button.
A long beep sounds and the child lock symbol appears in the display. The child lock is activated.
- Press again for 3 seconds on the stop button to switch off the child lock again.
A long beep sounds and the child lock symbol disappears from the display.
Warming up and cooking
- The microwave always heats with the same intensity. The more you place in the microwave, the longer the cooking time.
- Flatter dishes heat up more quickly than thin, tall dishes.
- Covering dishes with microwave film or a fitting lid prevents spattering, reduces cooking time and helps retain moisture levels. After cooking remove the foil or cover carefully. Please note! The steam released can be extremely hot!
- Dishes that dry out quickly can be moistened. Place potatoes and vegetables in cold water briefly prior to placing them in the microwave. This prevents a skin forming.
For an even result its best to stir or turn a dish a few times. - For warming up already prepared dishes, always use the highest microwave setting.
- In cooking you don't need much water, salt or herbs. Salt is best added after cooking. This prevents that moisture is withdrawn from the food.
- After the microwave is switched off, the dish continues cooking for a short time. Take this into account and don't heat up the dish for too long.
- Please note! To warm up small quantities of powder-forming products (such as when drying herbs) always place a small cup of water in the microwave. Self-combustion is possible if small quantities are heated.
Defrosting
- Always use the defrost programme to defrost large compact items. Because the dish is defrosted gradually and evenly, you don't run the risk that the outside dries out while the core is still frozen.
- In order to increase the defrosting process, it is advised to separate the item into sections after a certain amount of time.
- Introduce two pauses for large pieces of meat and compact dishes.
- When defrosting an irregularly-formed dish you can cover thin areas halfway through the defrosting process or wrap with aluminium foil.
Factors that influence the cooking process
- The temperature of the ingredients influences the preparation time. A cold meal needs more cooking time than a meal at room temperature.
Lighter dishes cook faster than heavier and solid dishes, such as stews or rolled meats. Take care in preparing light, porous dishes. The edges will quickly become dry and tough. - Smaller dishes are warmed more evenly if you place them in the microwave separate from each other, preferably in a circle.
- Bones and fat conduct heat better than meat. Aluminium foil blocks the microwaves. By covering thinner areas of dishes (such as chicken legs and wings) you prevent them cooking too quickly.
- Grease-proof paper prevents spattering and helps retain the heat.
Basic techniques
- Placing
- Place thicker pieces on the outside of the turntable. Dishes placed on the outside of the turntable receive the most microwaves.
- Stirring
- By stirring dishes regularly you distribute the stored heat. Stir always from outside in, since the outside of the dish always heats up first.
- Turning over
Large, thick dishes should be turned over regularly They then cook more evenly and quickly. - Pricking
- Food with a skin or shell burst open in the microwave, such as egg yolks, seafood and fruit. Prevent this by pricking these prior to cooking a few times with a fork or satay stick.
- Checking
- Dishes cook quickly. That's why you should check them regularly. Take them out of the microwave just before they're ready.
- Continued cooking
- Allow dishes to stand covered for 3 to 10 minutes after removing them from the microwave. The dishes continue to cook. Don't cover dry crust dishes, such as cake.
Freezing
- When freezing you should take defrosting in the microwave into account, by not using aluminium foil or trays and by freezing in flat portions.
Cooking vegetables
- If possible, always use fresh vegetables. If vegetables have become a little limp because they've been left for too long, you can place them in cold water for a while so that they absorb moisture.
- Use a large dish to cook vegetables, so that the dish base is covered with a not too thick layer.
- Don't add any water to vegetables than that remaining after rinsing.
Always cover the dish with a cover or microwave film. - Don't add any salt. The salts present naturally in the vegetables should give sufficient flavour. If you still wish to add salt, you can do this after cooking.
- Cook vegetables for the shortest time possible. Take into account the fact that the vegetables will continue to cook.
- Check with a satay stick or fork whether the vegetables are ready.
Cooking fish
- Fish needs to cook evenly For thin fish, oily fish or small portions set the power to 30% . In other cases you can set the power somewhat higher. Take continued cooking into account. Fish is ready when it becomes opaque.
Cleaning

- DON'T USE any abrasive cleaners or metal scrapers to clean the glass door. This will scratch the surface which can break the glass.
- DON'T USE high pressure or steam cleaners to clean the microwave.
- Clean the interior directly after use. Use a damp cloth to remove condensation, boiled over liquid and food remnants. Remnants of crumbs and moisture absorb microwave energy and increase cooking time.
- Clean the interior and outer casing regularly; use some washing up liquid and water and dry the microwave well with a dry cloth.
- Ensure that the cover of the microwave distributor is clean. Dirt in the cover can lead to spark formation.
- Clean the accessories regularly; use some washing up liquid and water with a brush and dry the accessories well with a dry cloth. The accessories may also be washed in the dishwasher.
- Smells will disappear if you place a glass of vinegar or water with lemon in the microwave area. Switch the microwave on on full power for two minutes. Then rub down with a damp cloth.
- Check the door closure and the door rubber regularly for damage. Don't use the microwave if the door or door closure is damaged.
- If the seal of the microwave is very dirty, the door won't close properly. The front of adjacent furniture can become damaged. Keep the seal clean.
- Salt is extremely aggressive. When this is deposited in the oven interior, rust patches can be created.
- Sharp sauces such as ketchup and mustard or salty dishes such as salted meat, contain ingredients that can erode the surface. After use, you should always clean the oven interior.
FAULTS
If you are uncertain about whether your appliance is working properly, this does not automatically mean there is a defect. Try to deal with the problem yourself first by checking the points mentioned below: If the recommendations below do not solve your problem, telephone our service department.
- Is the plug in the socket?
Is the door closed properly? - Is the fuse in the fuse box faulty?
- Are the power settings and times set properly?
- Are there objects in the microwave that shouldn't be there?
- Did you use the correct kitchen utensils?
- Are the ventilation openings blocked?
- Has the food been defrosted sufficiently?
- Did you turn over or stir the food during preparation?
Is the child lock activated?
Sparks in the microwave
If you see sparks in the microwave, don't turn off the microwave immediately. Sparks can be caused by:
- metal or aluminium foil that touches the interior of the microwave;
- aluminium foil that is not correctly covering the food (points that stick up act as an antenna);
- metal from a closing strip or cutlery with metallic edges;
recycled paper that contains small metal particles.
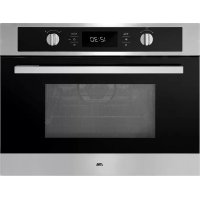
Technical data
The data plate indicates the total nominal load, the required voltage and the frequency.
This appliance meets all relevant CE guidelines.
| CM125HRVS | |
| Connection 230V~50Hz | |
| Microwave power 0.9 kW | |
| Grill power output 1.1 kW | |
| Oven power 2.5 kW | |
| Maximum total power 3 | 6 kW |
| Capacity 25 litres | |
| Diameter of turntable 31 | 5 mm |
| Weight 21 kg |
Electrical connection
For this appliance a mains supply of 230V, 50 Hz AC is needed. The appliance has a mains lead with an earthed plug.

Please note! For safe use it is necessary that the appliance is correctly earthed. Never connect the appliance to DC. Incorrect use can cause electric shocks.
Installation
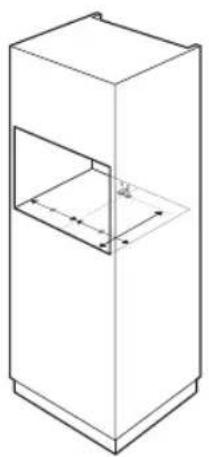
Please note: first fit the support in the cupboard (see drawing). This support prevents the microwave from tilting forwards.
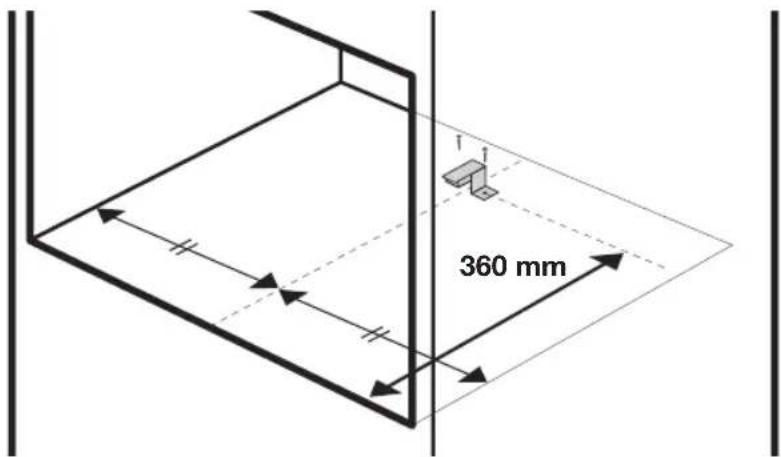
Please note: the microwave needs to be screwed on the front in the cupboard.
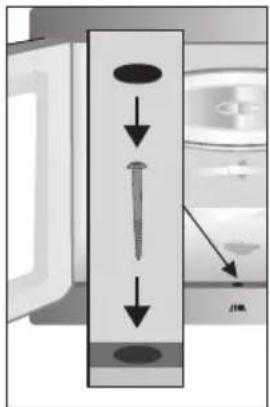
Slide the microwave into the cupboard. Open the door of the microwave. There is a round opening at the front middle for inserting a screw. Screw the microwave and cover the screw with the cap.
- Never cover the ventilation opening.
- Do not place the microwave in the vicinity of heat sources.
- Send and receive equipment such as radios and TVs can influence the working of the microwave.
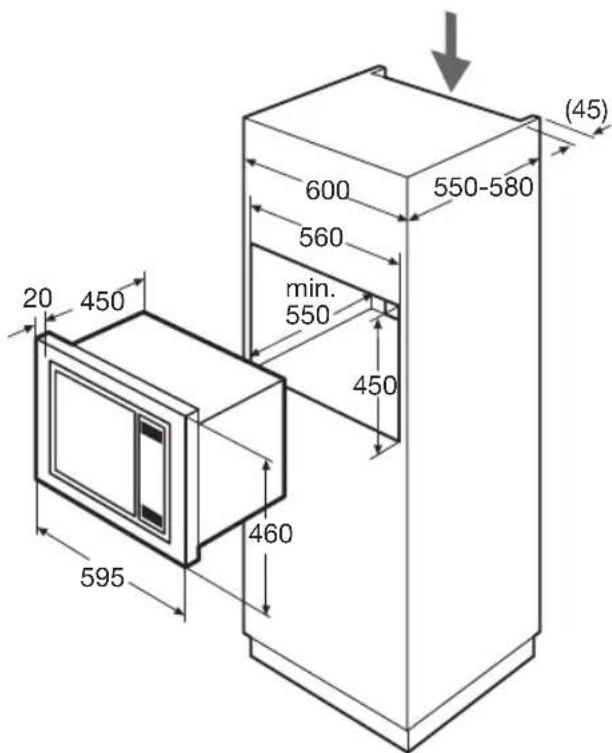
Installation dimensions
Disposal of the appliance and packaging
Sustainable materials have been used during manufacture of this appliance. This appliance must be disposed of responsibly at the end of its service life. The government can provide you with information about this.
The appliance packaging is recyclable. The following may have been used:
cardboard;
polyethylene film (PE);
CFC-free polystyrene (PS hard foam).
You should dispose of these materials responsibly and in accordance with government regulations.
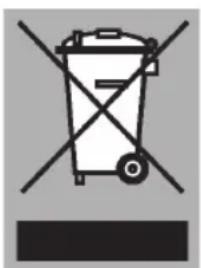
To designate the requirement for separate collection of household electrical appliances, the symbol of a dustbin with a cross through it is applied to the product. This means that the appliance may not be included with normal domestic refuse at the end of its service life. The appliance must be taken to a special municipal centre for separated waste collection or to a dealer providing this service.
Separate collection of household appliances helps to prevent potential negative impact on the environment and on human health caused by improper disposal. It ensures that the materials that make up the unit can be recycled to achieve a significant saving in terms of energy and raw materials.

Declaration of conformity
We hereby declare that our products satisfy the applicable European directives, orders and regulations, as well as the requirements stated in the referenced standards.

The appliance identification card is located on the inside of the appliance.
When contacting the service department,
have the complete type number to hand.
You will find the addresses and phone numbers of the service organisation on the guarantee card.

855608