Yoga Book C930 - Laptop LENOVO - Free user manual and instructions
Find the device manual for free Yoga Book C930 LENOVO in PDF.
| Features | Details |
|---|---|
| Model | LENOVO Yoga Book C930 |
| Device type | 2-in-1 laptop |
| Display | 10.8 inches, 2560 x 1600 resolution, touchscreen |
| Processor | Intel Core i5 or i7 (depending on configuration) |
| RAM | 4 GB or 8 GB LPDDR3 |
| Storage | 64 GB or 256 GB SSD |
| Operating system | Windows 10 |
| Connectivity | Wi-Fi 802.11ac, Bluetooth 4.1 |
| Ports | 2 x USB-C, 1 x 3.5 mm audio jack |
| Camera | HD 720p |
| Weight | 1.1 kg |
| Dimensions | 25.6 x 17.0 x 0.4 cm |
| Battery life | About 10 hours |
| Maintenance | Limited access to internal components, regular cleaning recommended |
| Security | Windows security features, regular software updates |
| General information | Ideal for note-taking, drawing, and browsing |
Frequently Asked Questions - Yoga Book C930 LENOVO
User questions about Yoga Book C930 LENOVO
0 question about this device. Answer the ones you know or ask your own.
Ask a new question about this device
Download the instructions for your Laptop in PDF format for free! Find your manual Yoga Book C930 - LENOVO and take your electronic device back in hand. On this page are published all the documents necessary for the use of your device. Yoga Book C930 by LENOVO.
USER MANUAL Yoga Book C930 LENOVO
Reading first - regulatory information
Device models equipped with wireless communications comply with the radio frequency and safety standards of any country or region in which it has been approved for wireless use. In addition, if your product contains a telecom modem, it complies with the requirements for connection to the telephone network in your country.
Be sure to read the Regulatory Notice for your country or region before using the wireless devices contained in your device. To obtain a PDF version of the Regulatory Notice, refer to the "Downloading publications" section below.
Getting support
To get support on network services and billing, contact your wireless network operator. To learn how to use your device and view its technical specifications, go to http://support.lenovo.com.
Downloading publications
Electronic versions of your publications are available from
http://support.lenovo.com
Your User Guide contains detailed information about your device. To access your User Guide, go to http://support.lenovo.com and follow the instructions on the screen.
Legal notices
Lenovo and the Lenovo logo are trademarks of Lenovo in the United States, other countries, or both.
Other company, product, or service names may be trademarks or service marks of others.
Manufactured under license from Dolby Laboratories. Dolby, Dolby Atmos, and the double-D symbol are trademarks of Dolby Laboratories.
LIMITED AND RESTRICTED RIGHTS NOTICE: If data or software is delivered pursuant to a General Services Administration "GSA" contract, use, reproduction, or disclosure is subject to restrictions set forth in Contract No. GS-35F-05925.
This manual applies to Lenovo YB-J912F (WLAN) / Lenovo YB-J912L (WLAN + LTE).
1 Device overview

- Read this guide carefully before using your device.
- All pictures and illustrations in this document are for reference only and may differ from the final product.
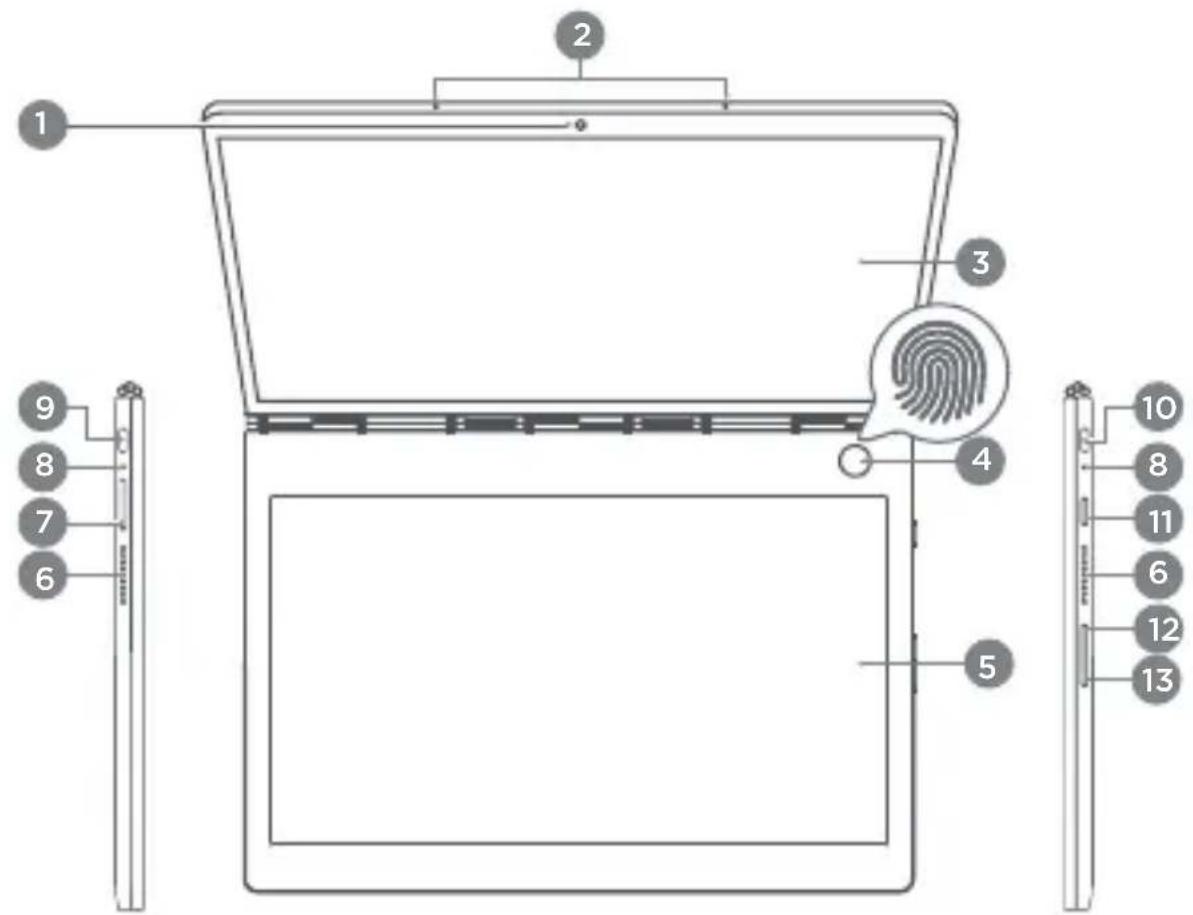
1 Camera
2 Microphone
3 LCD Screen
Fingerprint sensor / indicator
E Ink Screen
6 Speakers
7 Card tray
8 Charging indicator
9 10 Type-C connector: used for charging and connecting to digital headsets, and so on.
Only 10 can be used to connect an analog headset connector adapter.
11 Power button
12 Volume up button
13 Volume down button
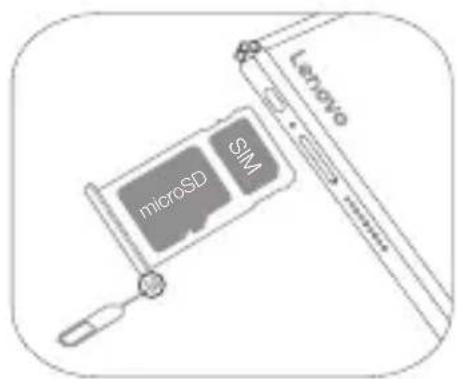
2 Preparing your device Installing cards
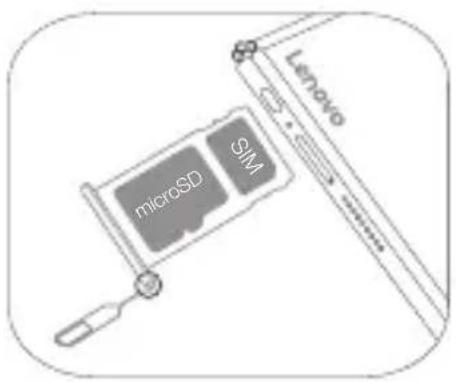
Install the cards as shown in the figure.

- Power off the device before inserting or removing a card.
Note that the WLAN version (Lenovo YB-J912F) does not have a Nano-SIM card slot.
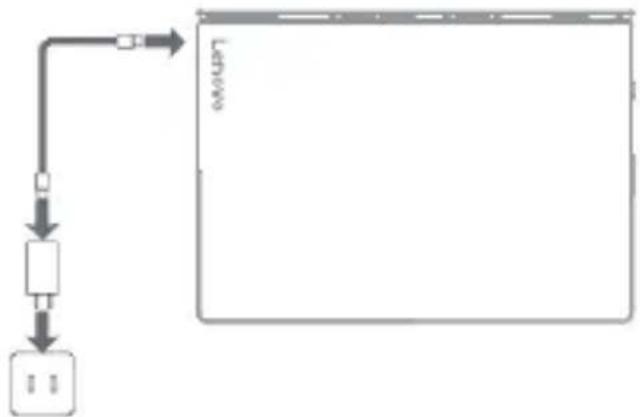
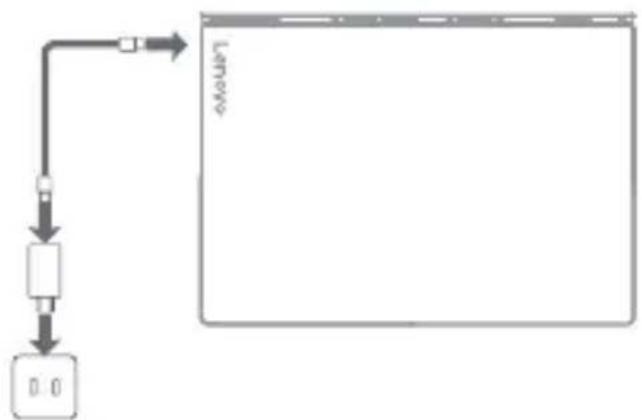
Charging your device

Connect your device to a power outlet using the USB cable and power adapter provided.
Charging indicator status
| Status Position | Description | |
| Blinking fast: (white) | Left side The b | battery percentage is lower than 5%, and the device is powered on while not connected to a charger. |
| Blinking slow: (white) | The side the adapter is connected to | The device is connected to a charger and is charging. |
| Solid white The device is conne | ected to a charger and is fully charged. |
3 Getting started
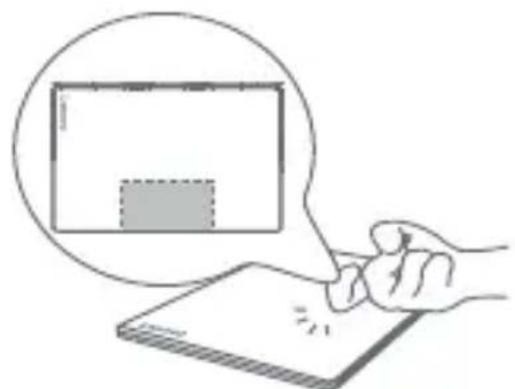
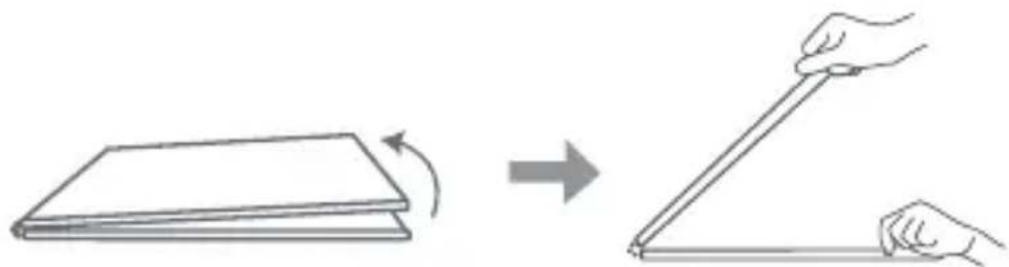
Open the cover using the following two methods:
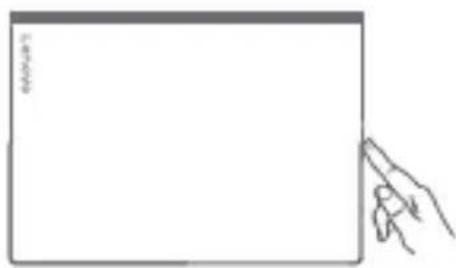
Opening with Knock To Open
Place the device on a flat surface with its cover facing up, double tap the cover, and it will open automatically.
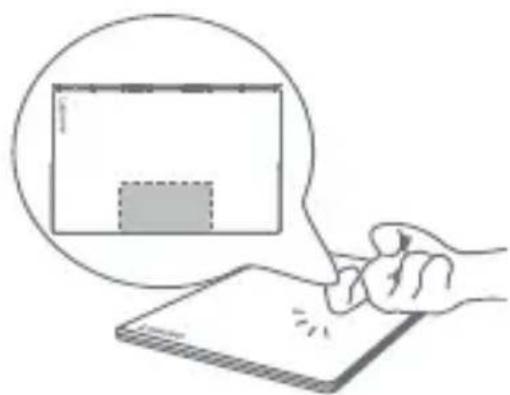
Opening with the volume down button
Press and hold the volume down button until the cover of your device opens automatically.
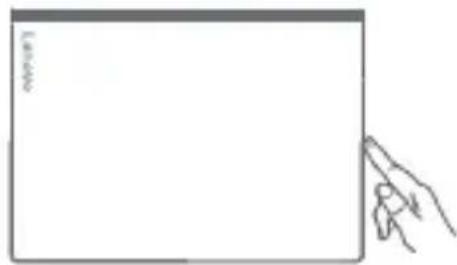
Then manually adjust the display opening to a suitable angle.
!
- Avoid knocking the cover too frequently, and wait at least 15 seconds between attempts.
- To avoid temporary response failure with Knock To Open, avoid pressing on the area around the hinge. In case of failure, fully open the cover to 180 degrees and close it again to restore function.
- The cover may open if it is touched by another object or the table shakes.
- Do not place heavy objects on top of the device.
- The Knock To Open function is unavailable if the device has never been charged before or the battery is lower than 2% .
Powering on for the first time
When powering on your device for the first time, press and hold the power button until the fingerprint indicator lights up. Complete the setup process by following to the onscreen instructions. Setup may include the following steps:
- Accept End User License Agreement
- Set up your Internet connection
- Create your user account

The battery is set to Ship Mode at the factory, meaning it is unactivated and will not provide power to the device. Connect your device to the power adapter before using it for the first time.
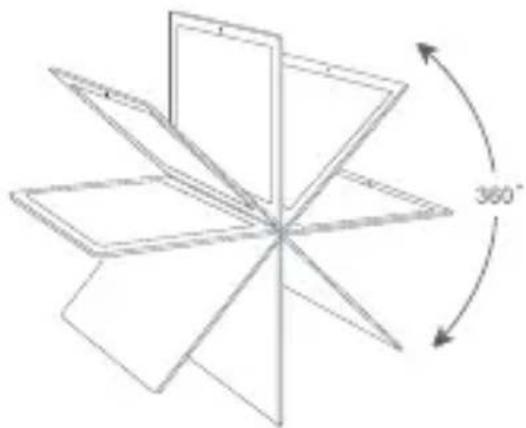
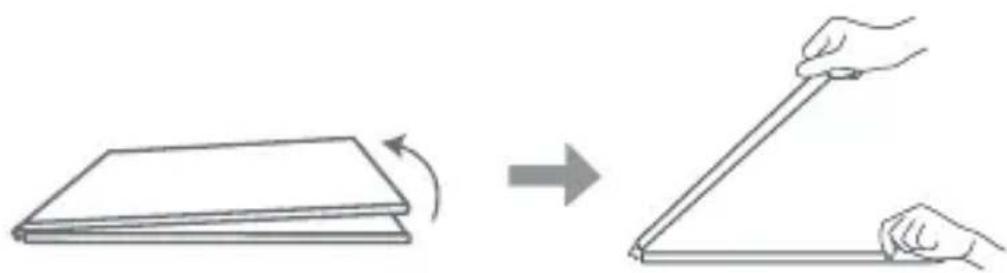
Positioning the display
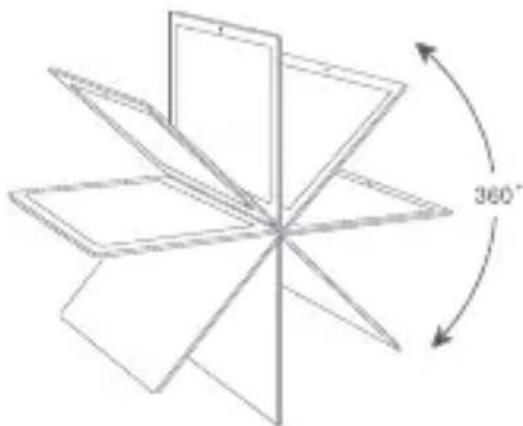
You can rotate the display up to 360 degrees.
When opened beyond approximately 200 degrees, the LCD screen continues displaying while the E Ink Screen locks and displays.
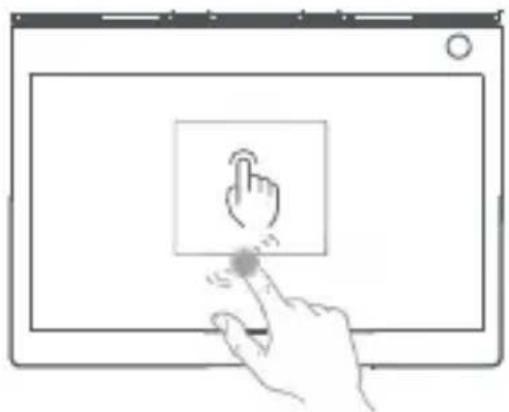
Double tap the E Ink Screen with your finger to switch the display from the LCD screen to the E Ink Screen.
If you want to wake the LCD again, double tap it.
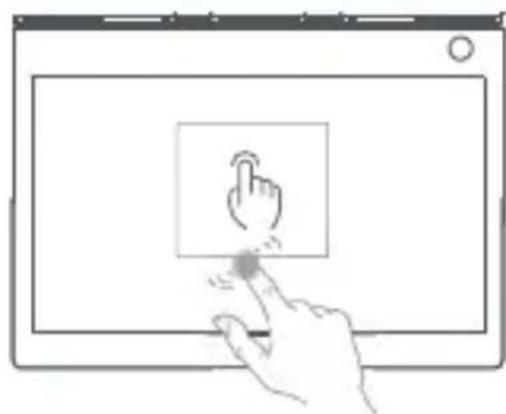
When waking the screen, make sure your other fingers do not touch the screen; otherwise, it may not wake.
4 Logging in with your fingerprint
Touch the fingerprint sensor to quickly unlock the screen.
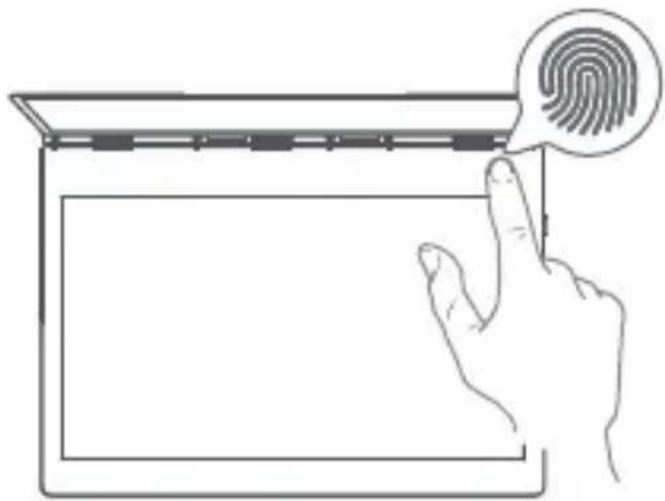
It is recommended to follow the onscreen instructions and register your fingerprint when powering on your device for the first time. You can also go to > Accounts > Sign-in options > Fingerprint to register a fingerprint.

Before using fingerprint functions, you need to set a lock screen password. Go to Account > Login Options > Password to set up.
Registering a fingerprint
Follow the onscreen instructions to register your fingerprint.
- Fully cover the fingerprint sensor with your finger and press gently for 1 second.
- Repeat this operation with different areas of the same finger until the fingerprint is successfully registered.
You can register up to 10 fingerprints.

Please keep your finger and the fingerprint sensor surface clean. Water, sweat, and oil may affect fingerprint registration.
Fingerprint indicator status
| Status Description | |
| Solid white Registering/identifying a fingerprint. The device is turning on/off. | |
| Off The fingerprint sensor is inactive. |
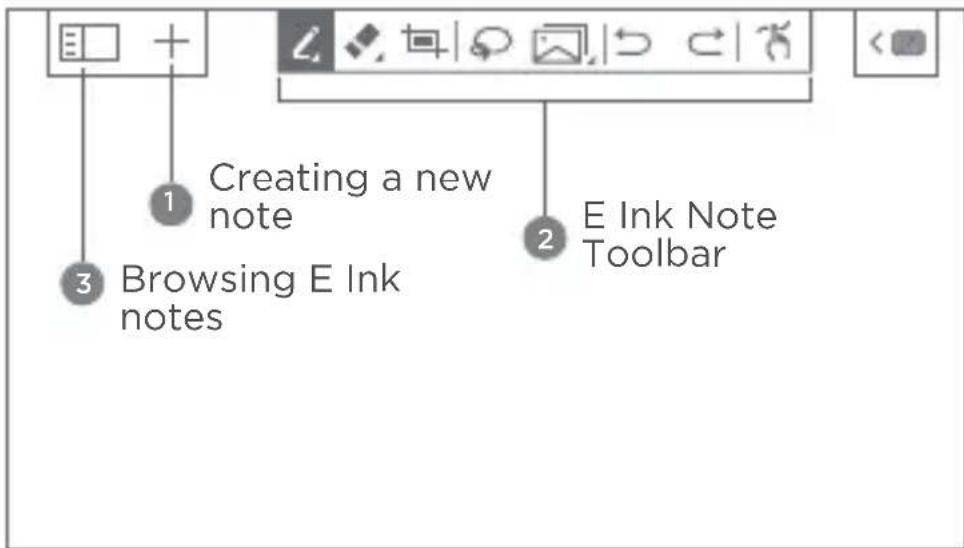
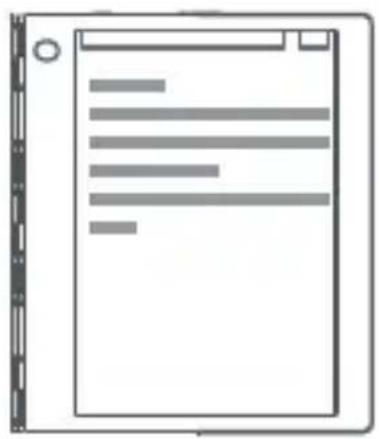
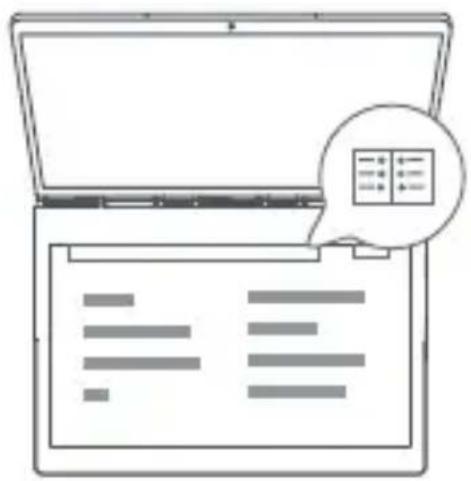
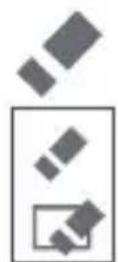
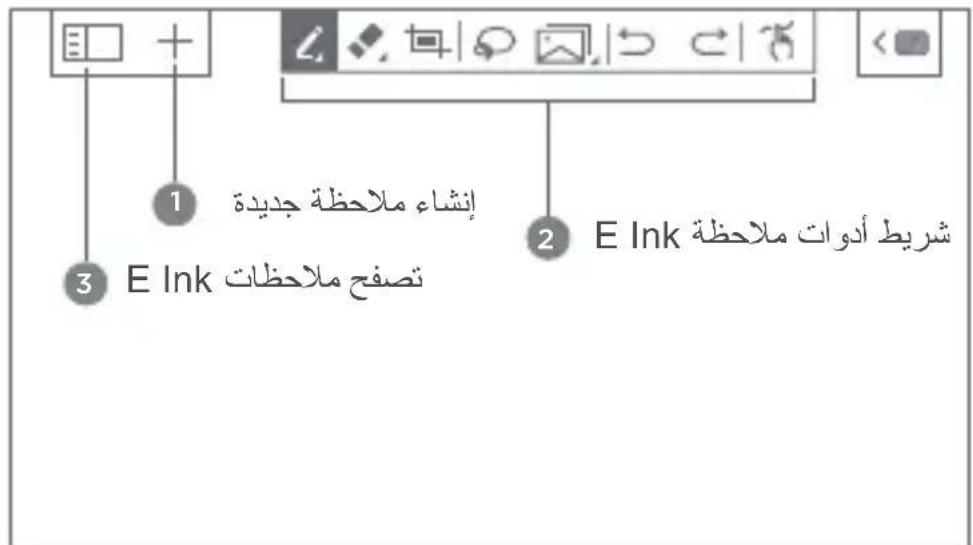
5 Using the E Ink Screen
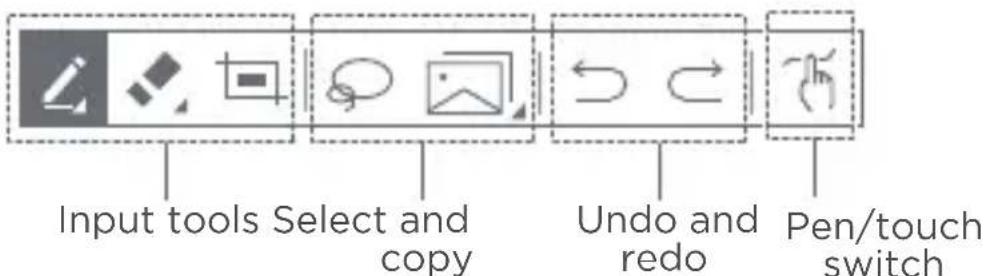
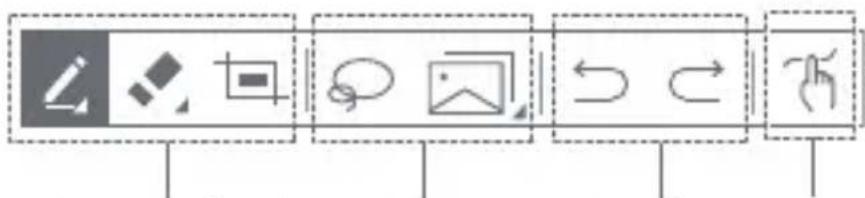
E Ink Toolbar
In the upper right corner of the E Ink Screen is the E Ink Toolbar as shown below.
Tap the icons to quickly enter the corresponding functions.
To learn more about using the E Ink Screen, you can read the instructions. Tap >Help >E Ink Display Operation Guide.
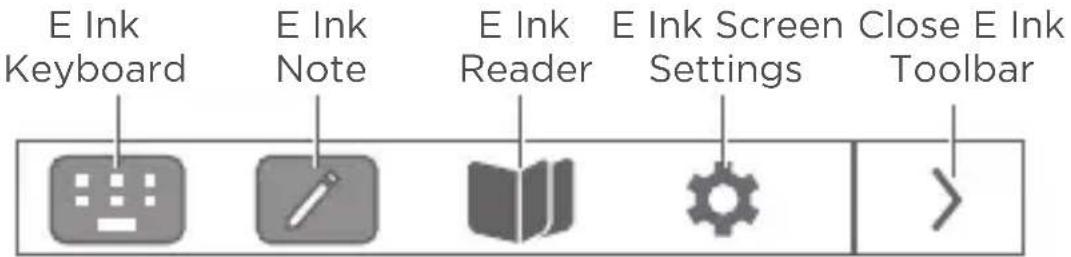
Bring up Current E Ink Toolbar mode
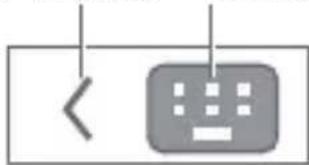
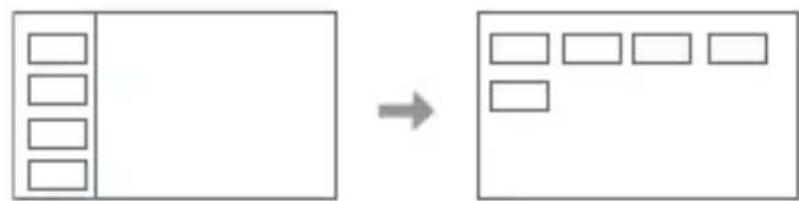
E Ink Keyboard
Your E Ink Keyboard is a revolutionary new keyboard using electronic ink display with a standard keyboard layout. You can set the keyboard style and language you prefer.
Modern (Default)
Larger keys provide a better user experience.
Tap to show the trackpad, and tap any letter or symbol key to switch back to the space bar.
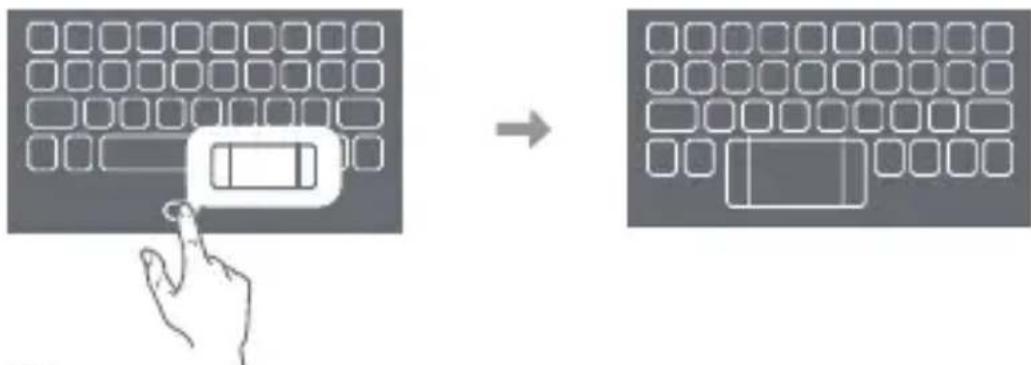

In keyboard mode, you can only tap with your fingers to input content on the E Ink Screen. The Lenovo Precision Pen or other writing instruments are not supported.
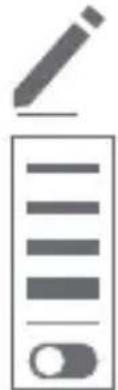
E Ink Note
When E Ink Note is enabled, you can take a note or sketch immediately, even if your LCD screen is locked. The Lenovo Precision Pen* supports pressure and hover functions, and you can use it to write and draw as you would with a regular pen and paper.
Creating a new note
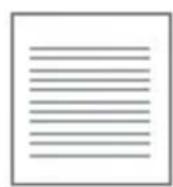
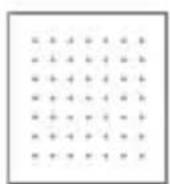
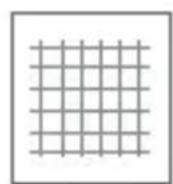
E Ink Note is preset with various note templates. Tap + to create a new note.


Writing in E Ink Note
When writing a new note, the contents will be displayed on the E Ink Screen and saved automatically.
*The Lenovo Precision Pen does not come with all models, and is sold separately. To purchase one, go to http://www.lenovo.com/accessories.
Writing method

Switch between using touch or Lenovo Precision Pen to write or draw.
You can use your finger or the pen, but not both, to write or draw.


E Ink Note Toolbar
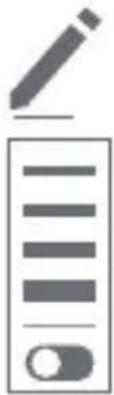
Pen tools
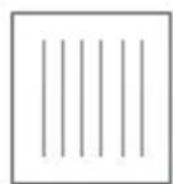
You can write or draw on the E Ink Screen. Press and hold the icon for more options:
: Set the pen thickness.
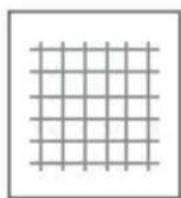
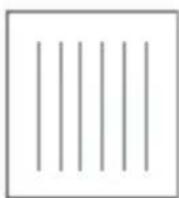
: Turn on the Smart Brush switch. Smart brush automatically turns free hand drawings into regular shapes.

Eraser tools
Move the tip over the area you want to erase to eraser it. Press and hold the icon for more options. Tap to clear a content in this page.

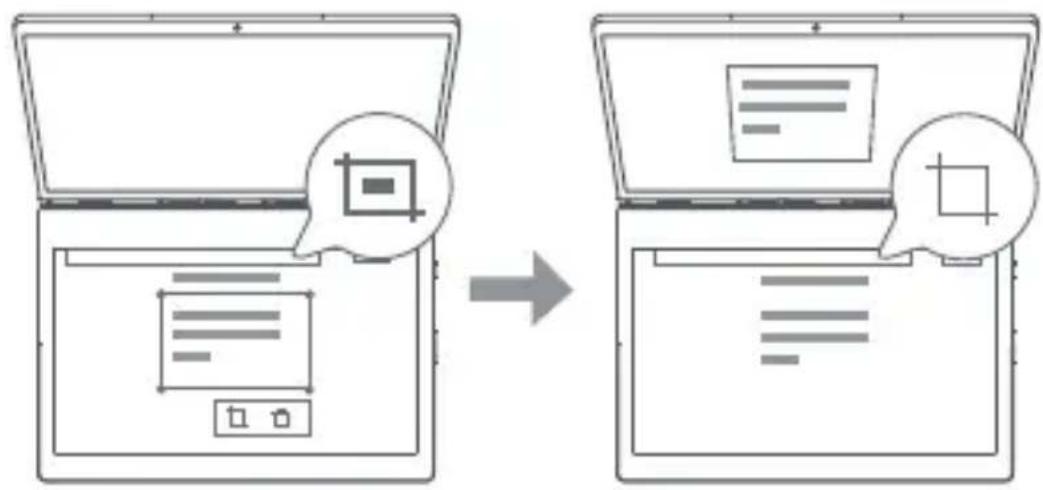
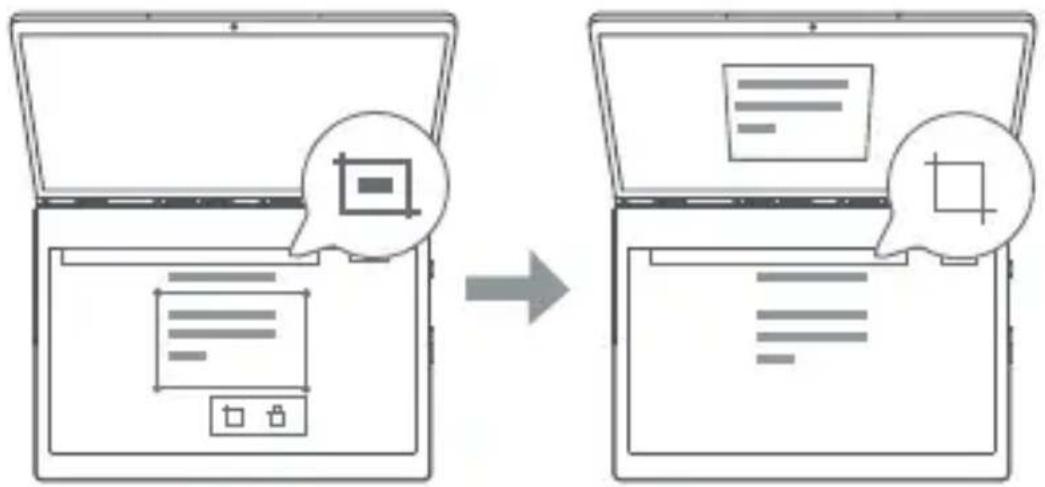
Screenshot tool
Take a screenshot of the LCD screen and paste the picture into E Ink Note. Then you can edit the picture, such as resizing or deleting it. Tap and then the screenshot to edit it again.

E Ink Note supports the handwriting optimization function. To use it, lift your pen 5 mm above the E Ink Screen after writing, and the function renders your handwriting with smoother strokes. You can continue writing again after optimization.
Selecting and copying
- Tap , then draw a line around the content to select this section.
- Tap to copy the content. The page is copied by default if no content is selected.
Press and hold the icon for more options. You can copy the content as Image, Text, Formula, or Graph. You can then paste it into supported applications.

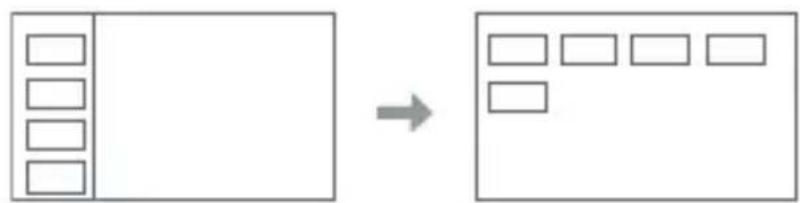
Browsing E Ink notes
Tap , and a list of thumbnails for all of the pages in E Ink Note will be displayed. Tap a page thumbnail to view this page.

Display all page thumbnails in full screen. Tap to view all page thumbnails in list mode.

Delete notes. Select the note you want to delete and tap Delete.

E Ink Note Settings. You can set Text Recognition Language, Note Template, and so on.
To learn how to use E Ink Note, see the instructions. Go to Help.
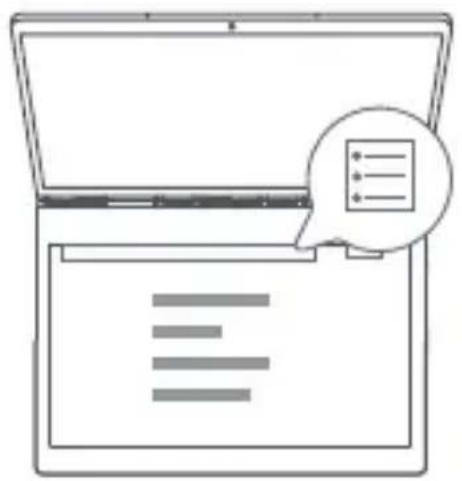
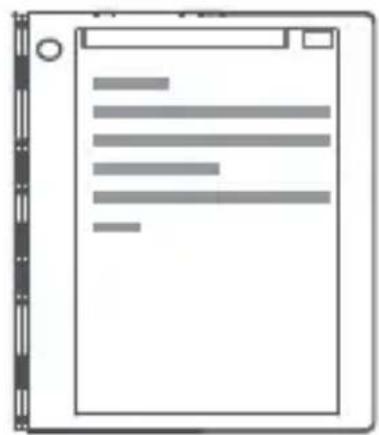
E Ink Reader
When E Ink Reader is enabled, you can browse PDF or other files on the E Ink Screen. E Ink Reader relieves eye strain.
① Depends on the software version.
- Tap to open E Ink Reader.
- Open the file list and find the file you want to read.
- To turn the page, tap on the left/right side of the screen, or swipe left/right with your finger.
E Ink Reader Toolbar
Tap the central area of the E Ink Screen to bring up E Ink Reader Toolbar. Tap the central area again to hide the toolbar.

Select a file from the file list.

Enter a page number to quickly jump to that page.

Zoom in. The page is enlarged to fit the screen size by default. Tap the central area of on the screen to bring up the Zoom View menu.

: Move to see other parts of the page.

Adjust the page to fit the screen size.

: Adjust the magnification.

exit zoomed view.
Selecting and copying
- Tap to select an area of the page.
- Tap to take a screenshot of the currently selected area and save the picture to the clipboard. You can then paste it into Paint or other supported applications.
Tap to cancel the selection.
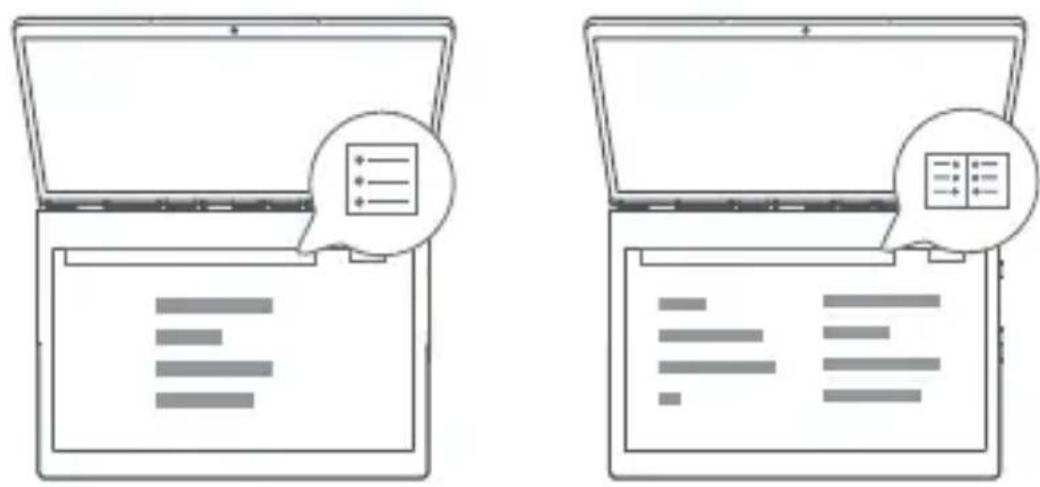
Displaying a full page/showing two pages
In landscape, tap / display a full page/show two pages side by side.
E Ink Screen Settings
You can personalize your E Ink Screen. Tap on the E Ink Screen, and select the corresponding tab.
E Ink Keyboard
Keyboard Sound
You can turn on/off the keyboard sound and adjust its volume.
If your device is muted, Keyboard Sound is also muted, even if the Keyboard Sound setting is on.
Keyboard Vibration
When typing with Keyboard Vibration on, you can feel a slight vibration of the keyboard as if you were pressing physical keys. Keyboard Vibration is enabled by default. You can turn keyboard vibration on/off and adjust the vibration level.
Keyboard style
The E Ink Keyboard uses a standard layout. You can set the keyboard style and color.
Keyboard Language
You can change the keyboard language.
The keyboard language does not change automatically when you change the system language; you must change it manually. You can select a keyboard language from the language list and choose an input method. For details about system language and keyboard language, see the user guide at https://www.support.lenovo.com.
To change the keyboard language to Japanese, do the following:
-
Go to Time & Language > Region & language > Preferred languages > Add a language. Add Japanese to the list of preferred languages.
-
Tap Japanese > Options > Change layout > Japanese Keyboard (106/109 Key), then restart the device.
-
On the E Ink Screen, tap > Keyboard language > Japanese.
If you selected Japanese as your system language during initial setup, the above actions are unnecessary.
E Ink Image Settings
You can choose to replace or close the E Ink Image.
Knock To Open
You can enable/disable the Knock To Open function.
Legal Information
You can view the legal information related to this device.
Help
To learn how to use the E Ink Screen, tap this tab.
6 Lenovo Precision Pen
With 4096 levels of pressure detection and the hover function, you can use Lenovo Precision Pen in place of your fingers for more great experiences such as taking screenshots or working with specific applications to write or draw on both the LCD screen and E Ink Screen.

The Lenovo Precision Pen does not come with all models, and is sold separately. To purchase one, go to http://www.lenovo.com/accessories
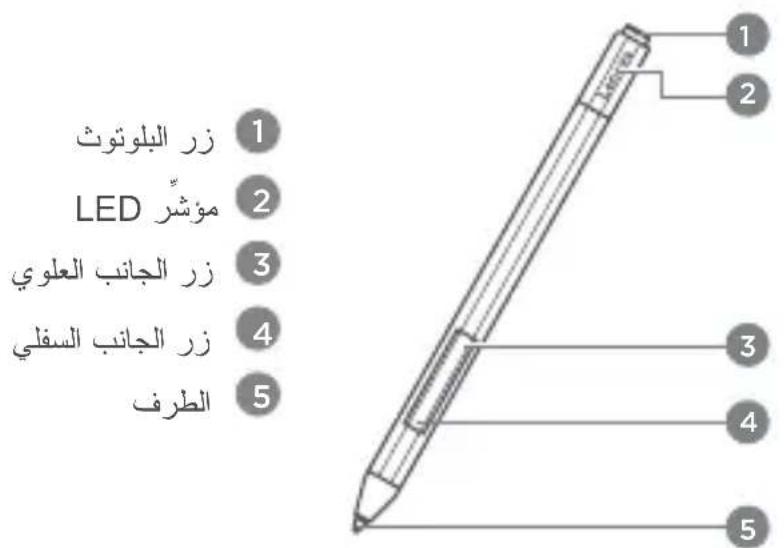
Overview
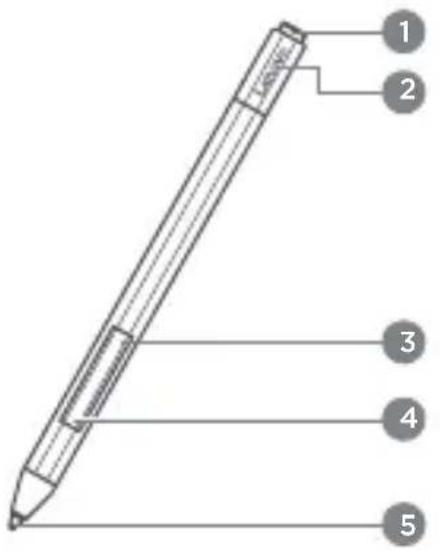
1 Bluetooth button
2 Indicator LED
3 Upper side button
4 Lower side button
Tip
Pen indicator status
| Status Description | |
| Solid White Bluetooth pairing is enabled. | |
| Blinking slow: White Bluetooth is in process of pairing. | |
| Blinking fast: White Bluetooth has been paired. | |
| Blinking slow: Amber The battery is low. |
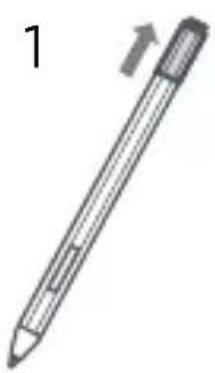
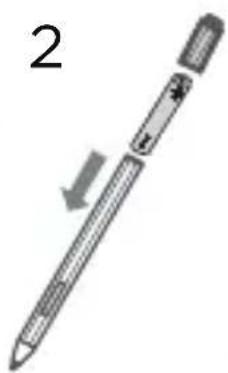
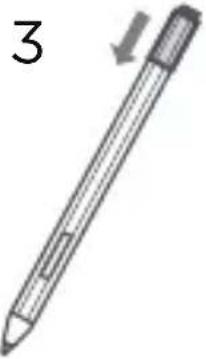
Installing a battery
- Remove the cap in the direction shown in the figure.
- Place an AAAA alkaline battery into the body of the pen with the negative end facing down.
- Replace the cap on the pen. Make sure the flat surface of the pen body is aligned with the flat surface of the cap.

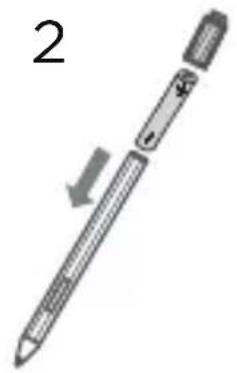
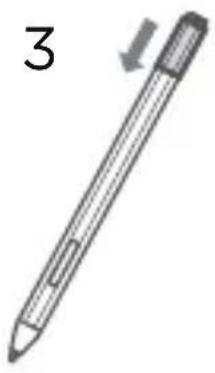
You can start to use Lenovo Precision Pen after installing the battery.

- AAAA alkaline batteries may only be available in some countries and regions.
- Please be cautious when using the Lenovo Precision Pen. The pen contains sensitive electronic components including a battery. Dropping it may cause damage.
Pairing a pen
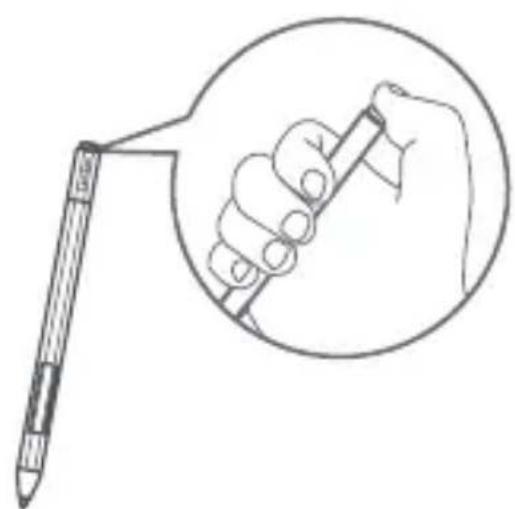
- Go to > Devices > Bluetooth and Other Devices > Add Bluetooth or Other Devices > Bluetooth.
- Press and hold the Bluetooth button on the pen for at least 3 seconds until the LED indicator blinks white, indicating Bluetooth pairing is turned on.
- On your device, select Lenovo Precision Pen and start pairing.
- After pairing, click the Bluetooth button on the pen to access more functions. To access other functions, double click the Bluetooth button.
Using the magnetic pen holder
The Lenovo Precision Pen has a magnet which allows you to attach it to a specific area of your device, making the pen very portable.
See the top view of the product as shown on the right. With the tip of the pen pointed toward the hinge, align the body of the pen with the edge of the device cover.
Important safety and handling information
Plastic bag notice
Danger: Plastic bags can be dangerous. Keep plastic bags away from babies and children to avoid danger of suffocation.
Built-in rechargeable battery notice
Danger: Do not attempt to replace the internal rechargeable lithium ion battery. Risk of explosion if the battery is replaced with an incorrect type. Contact Lenovo Support for factory replacement.
Note: Use a power adapter that comes standard with Lenovo and connect the power adapter to a suitable power outlet. The use of non-standard power adapters will affect the normal charging speed, resulting in abnormal charging and even damage the equipment in severe cases.
Handle your device with care
Your device is an innovative ultra-thin dual-screen computer with an E Ink Screen. Be careful not to leave stylus pens or other objects between the LCD screen and the E Ink Screen, otherwise the display or hinge may be damaged when you close the display.
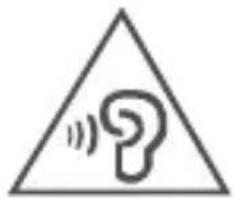
Caution about high volume usage
Warning: Exposure to loud noise from any source for extended periods of time may affect your hearing. The louder the sound, the less time is required before your hearing could be affected. To protect your hearing:
- Limit the amount of time you use headsets or headphones at high volume.
- Avoid turning up the volume to block out noisy surroundings.
- Turn the volume down if you can't hear people speaking near you.
If you experience hearing discomfort, including the sensation of pressure or fullness in your ears, ringing in your ears or muffled speech, you should stop listening to the device through your headset or headphones and have your hearing checked.
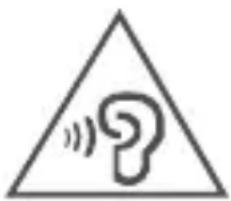
To prevent possible hearing damage, do not listen at high volume levels for long periods.
Safety instructions for parents and adult supervisors
Your mobile device is not a toy. Not recommended for children under 3 years of age to play with it. As with all electrical products, precautions should be observed during handling and using of electrical products to reduce the risk of electric shock. If parents choose to allow children 3 or older to use the device, they should caution his or her child about the potential hazard while using and handling the mobile device.
Parents should inspect the mobile device (including the ac power adapter and the small part, as applicable) periodically for damage. Routinely check this mobile device to ensure that the device is working properly and is safe for children to use.
Service and support information
The following information describes the technical support that is available for your product, during the warranty period or throughout the life of your product. Refer to the Lenovo Limited Warranty (LLW) for a full explanation of Lenovo warranty terms. See "Lenovo Limited Warranty notice" later in this document for details on accessing the full warranty.
Online technical support
Online technical support is available during the lifetime of a product at: https://support.lenovo.com
Telephone technical support
You can get help and information from the Customer Support Center by telephone. Before contacting a Lenovo technical support representative, please have the following information available: model and serial number, the exact wording of any error message, and a description of the problem. Your technical support representative might want to walk you through the problem while you are at your device during the call.
Worldwide Lenovo Support telephone list
Important: Telephone numbers are subject to change without notice. The most up-to-date telephone list for the Customer Support Center is always available at: http://www.lenovo.com/support/phone.
If the telephone number for your country or region is not listed, contact your Lenovo reseller or Lenovo marketing representative.
Warranty information
Lenovo Limited Warranty notice
This product is covered by the terms of the LLW, version L505-0010-02 08/2011. Read the LLW at http://www.lenovo.com/warranty/llw_02. You can read the LLW in a number of languages from this Web site. If you cannot view the LLW from the Web site, contact your local Lenovo office or reseller to obtain a printed version of the LLW.
Warranty period and type of warranty service
| Country or region Warranty period | Type of warranty service | |
| United Kingdom, Israel, Australia, New Zealand | Parts and Labor - 1 year Battery Pack - 1 year Pen - 1 year | 1,3 |
| Guatemala, Costa Rica, Venezuela, Peru, Uruguay, Ecuador, Colombia, Chile, Argentina, Indonesia, Vietnam, India, Malaysia, Thailand, Philippines, Singapore, Hong Kong, El Salvador, Taiwan, South Korea, Mexico | Parts and Labor - 1 year Battery Pack - 1 year Pen - 1 year | 1,4 |
| Russia, Ukraine, Egypt, Lebanon, Morocco, South Africa, Tunisia, Mauritius, Mozambique, United Arab Emirates, Jordan, Kenya, Nigeria, Uganda, Ghana, Oman, Tanzania, Namibia | Parts and Labor - 1 year Battery Pack - 1 year Pen - 1 year | 4 |
| United States of America, Canada, Japan | Parts and Labor - 1 year Battery Pack - 1 year Pen - 1 year | 1,5 |
| Panama | Parts and Labor - 1 year Battery Pack - 1 year Pen - 1 year | 2,4 |
| Brazil | Parts and Labor - 1 year Battery Pack - 1 year Pen - 1 year | 2,5 |
| Spain, Switzerland, Portugal, Netherlands, Belgium, Sweden, Denmark, Norway, Finland, Estonia, Latvia, Lithuania, Iceland, France, Germany, Italy, Austria | Parts and Labor - 2 years Battery Pack - 1 year Pen - 1 year | 1,3 |
| Czech Republic, Hungary, Romania, Bulgaria, Greece, Croatia, Slovenia, Slovakia, Cyprus, Poland | Parts and Labor - 2 years Battery Pack - 1 year Pen - 1 year | 1,5 |
| Turkey | Parts and Labor - 2 years Battery Pack - 2 years Pen - 1 year | 3,4 |
| Saudi Arabia | Parts and Labor - 2 years Battery Pack - 2 years Pen - 1 year | 4 |
| Serbia | Parts and Labor - 2 years Battery Pack - 1 year Pen - 1 year | 1,4 |
- Excludes some components. 90-day limited warranty for power adapters, keyboards, plastics, and hinges.
Type of warranty service
- Customer Replaceable Unit ("CRU") Service
- On-site Service
- Courier or Depot Service
- Customer Carry-In Service
- Mail-in Service
- Customer Two-Way Mail-in Service
- Product Exchange Service
EurAsia compliance mark
EAC
Environmental, recycling, and disposal information
General recycling statement
Lenovo encourages owners of information technology (IT) equipment to responsibly recycle their equipment when it is no longer needed. Lenovo offers a variety of programs and services to assist equipment owners in recycling their IT products. For information on recycling Lenovo products, go to http://www.lenovo.com/recycling.
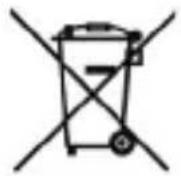
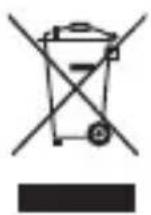
Important battery and WEEE information
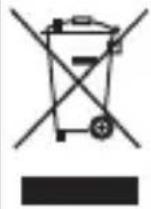
Batteries and electrical and electronic equipment marked with the symbol of a crossed-out wheeled bin may not be disposed as unsorted municipal waste. Batteries and waste of electrical and electronic equipment (WEEE) shall be treated separately using the collection framework available to customers for the return, recycling, and treatment of batteries and WEEE. When possible, remove and isolate batteries from WEEE prior to placing WEEE in the waste collection stream. Batteries are to be collected separately using the framework available for the return, recycling, and treatment of batteries and accumulators. Country-specific information is available at: http://www.lenovo.com/recycling
Recycling information for Japan
Recycling and disposal information for Japan is available at:
http://www.lenovo.com/recycling/japan
Additional recycling statements
Additional information about recycling device components and batteries is in your User Guide. See "Downloading publications" for details.
Battery recycling marks
Battery recycling information for Taiwan

Battery recycling information for the United States and Canada

US & Canada Only
Battery recycling information for the European Union
Energy efficiency mark

Restriction of Hazardous Substances Directive (RoHS)
Turkey
The Lenovo product meets the requirements of the Republic of Turkey Directive on the Restriction of the Use of Certain Hazardous Substances in Waste Electrical and Electronic Equipment (WEEE).
RoHS compliant as per E-waste (Management) Rules.
Vietnam
Lenovo products sold in Vietnam, on or after September 23, 2011, meet the requirements of the Vietnam Circular 30/2011/TT-BCT ("Vietnam RoHS").
European Union
Lenovo products sold in the European Union, on or after 3 January 2013 meet the requirements of Directive 2011/65/EU on the restriction of the use of certain hazardous substances in electrical and electronic equipment ("RoHS recast" or "RoHS 2"). For more information about Lenovo progress on RoHS, go to: http://www.lenovo.com/social_responsibility/us/en/RoHS_Communication.pdf
Singapore
Lenovo products sold in Singapore, on or after June 1, 2017, meet the requirements of Government Gazette order No. S 263/2016 Restriction of Hazardous Substances in Electrical and Electronic Equipment in Singapore ("SG-RoHS").
Alkaline battery warnings
These warnings only apply to products containing alkaline batteries.
When replacing the alkaline batteries, only use a compatible type or an equivalent to the one recommended by the manufacturer. Alkaline batteries can explode when they are used, handled, or disposed of improperly. When disposing of alkaline batteries, comply with all relevant local battery disposal ordinances and regulations. In addition:
- Do not disassemble or short-circuit batteries.
- Insert the batteries correctly according to the + / - symbols for their polarity.
- Remove batteries from the product when not in use.
- Do not recharge alkaline batteries.
- Do not dispose of batteries in fires.
- Do not allow metal objects to come in contact with the battery terminals.
- Do not mix new batteries with used batteries, or mix batteries of different types (such as alkaline with carbon zinc).
For proper battery installation and removal, follow the manufacturer's instructions for this product. Keep batteries away from children. If swallowed, consult a physician immediately. If the batteries are leaking, avoid letting the battery fluid come into contact with your skin and eyes. If battery fluid has already come in contact with your skin, wash your skin with clean water. If battery fluid has already come in contact with your eyes, avoid rubbing your eyes. Consult your physician immediately.
European Union compliance statement
European Union conformity
EU contact: Lenovo, Einsteinova 21, 851 01 Bratislava, Slovakia
C E
Compliance with the RE Directive
Lenovo PC HK Limited declares that the radio equipment type Lenovo YB-J912L, Lenovo YB-J912F is in compliance with Directive 2014/53/EU.
The full text of the EU declaration of conformity is available at the following internet address:
http://www3.lenovo.com/us/en/socialresponsibility/EU_DoC Tablets This radio equipment operates with the following frequency bands and maximum radio-frequency power:
| Model Name Frequency | Bands | Maximum Conducted Power (dBm) |
| Lenovo YB-J912L | UMTS B1/B8 24.5 | |
| LTE B1/3/7/8/28/38/40 24 | ||
| LTE B5/B20 23.5 | ||
| WLAN 2400-2483.5 | Antenna 1: 16.5 Antenna 2: 16.3 | |
| WLAN 5150-5725 17.5 | ||
| WLAN 5725-5850 9.5 | ||
| Bluetooth 2400-2483.5 10.5 | ||
| Lenovo YB-J912F | WLAN 2400-2483.5 | Antenna 1: 16.5 Antenna 2: 16.3 |
| WLAN 5150-5725 17.5 | ||
| WLAN 5725-5850 9.5 | ||
| Bluetooth 2400-2483.5 10 .5 |
The above information is for EU countries only. Please refer to the actual product for supported frequency bands in other countries.
Specific Absorption Rate information
YOUR MOBILE DEVICE MEETS INTERNATIONAL GUIDELINES FOR EXPOSURE TO RADIO WAVES.
Your mobile device is a radio transmitter and receiver. It is designed not to exceed the limits for exposure to radio waves (radio frequency electromagnetic fields) recommended by international guidelines. The guidelines were developed by an independent scientific organization (ICNIRP) and include a substantial safety margin designed to assure the safety of all persons, regardless of age and health.
The radio wave exposure guidelines use a unit of measurement known as the Specific Absorption Rate, or SAR. The SAR limit for mobile devices is 2W/kg . Tests for SAR are conducted using standard operating positions with the device transmitting at its highest certified power level in all tested frequency bands. The highest SAR values under the ICNIRP guidelines for your device model are listed below:
| Maximum SAR for this model and conditions under which it was recorded. | ||||
| Europe 10g SAR Limit (2.0W/kg) | Lenovo YB-J912L | Body-worn LTE Band 3, Wi-Fi, Bluetooth | 1.585W/kg | |
| Lenovo YB-J912F | Body-worn Wi-Fi, Bluetooth 1.536W/kg | |||
During use, the actual SAR values for your device are usually well below the values stated. This is because, for purposes of system efficiency and to minimize interference on the network, the operating power of your mobile device is automatically decreased when full power is not needed for the data connection.
The lower the power output of the device, the lower its SAR value.
If you are interested in further reducing your RF exposure then you can easily do so by limiting your usage or simply using a hands-free kit to keep the device away from the body.
Français
Directive européen RoHS (Restriction of Hazardous Substances)
Turquie
RoHS compliant as per E-waste (Management) Rules.
Vietnam
http://www3.lenovo.com/us/en/socialresponsibility/EU_DoC Tablets
http://www3.lenovo.com/us/en/socialresponsibility/EU_DoC Tablets
: 1
RoHS compliant as per E-waste (Management) Rules.
p
2011 23
(“p”)30/2011/TT-BCT
1
2011/65/EU 4 2013 3 1111111111111111111111111111
http://www.lenovo.com/social Responsibility/us/en/RoHS_Communication.pdf :
S 263/2016 2017 1 1
("SG-RoHS")
(WEEE)
y j 1 y 1 1 1 1 1 1 1 1 1 1 1 1 1 1 1 1 1 1 1 1 1 1 1 1 1 1 1 1 1 1 1 1 1 1 1 1 1 1 1 1 1 1 1 1 1 1
i 1
gall 12
http://www.lenovo.com/recycling/japan
aL 1 yg dlc
Jgall "Cle glll jz" 1. pssssssssssssssssssssssssssssssssssssssssssssssssssssss
i
aIbIgdsIcIcIe
a

15g 0

US & Canada Only
(gbsla ggsjglg jlll jgall
aollll jlll lalil 111 klll Jg bgs
Lenaov0
m = 311
m = 311
( x + 1) ( y - 1) = 0
j jlll 1
g j g j g j g j g j g j g j g j g j g j g j g j g j g j g j g j g j g j g j g j g j g j g j g j g j g j g j g j g j g j g j g j g
a aal
a
sbllll jolal
Pn 1
J
jiee 1iee
Ji 1
aaa 2
Jauuuaa aillwll Jaa
3
s wll 2bll pll pll 2bll
原不等式成立
LenoO Precision Pen
a 1
LenoO Precision Pen 1
aai 1
0g21g 1
<g
gagll jglj 102
LED
1 1
3
Lenovo Precision Pen
4
aIg 1Jggl. gll jn Jgall
.

Lenovo Precision Pen 6
Lenovo Precision Pen 4096
yIglll
. E Ink LCD
J. J. J. J. J. J. J. J. J. J. J. J. J. J. J. J. J. J. J. J. J. J. J. J. J. J. J. J. J. J. J. J. J. J. J. J. J. J. J. J. J. J. J. J. J. J. J. J. J. J. J. . . . . . . . . . . . . . . . . . . . . . . . . . . . . . . . . . . . . . . . . . . . . . . . . . . . . . . . . . . . . . . . . . . . . . . . . . . . . . . . . . . . . . . . http://www.lenovo.com/accessories
aoleo
pall
| العربية | العربية |
| العربية:العربية | العربية:العربية |
| العربية:العربية | العربية:العربية |
| العربية:العربية | العربية:العربية |
| العربية:العربية | العربية:العربية |
E Ink
gall gill aie e E Ink aiee biai. iaiia E Ink aiaa
E Ink
1 1
C
15 15
aalall 1e baiy piai
j 1 j 1 j 1 j 1 j 1 j 1 j 1 j 1 j 1 j 1 j 1 j 1 j 1 j 1 j 1 j 1 j 1 j 1 j 1 j 1 j 1 j 1 j 1 j 1 j 1 j 1 j 1 j
jī 21 sīn wā
e 1
2110 4
E 1
.https://www.support.lenovo.com
y
aI11 aI11 1
aiee
109/106) 100 < b2b2< < c2c2< b2b2.2
jie 11 i
aJbll < 215 aal aai < E lnk aL3
aIiI 1
4
E Ink
.E lnk 8g
eaa
iill jill a b g lbo/ 15
aigila ciaagla
jll lgl aolal gilall clogall
0000 100000000000000000000000000000000000000
1
- 1
- 2.
yill clly
J 1
/
E Ink 4.
E Ink
1
E Ink is
Aicol jyj ylll 100g lalall aai 2
lll jn j g j jilal ll baiiaai all .3
.
E Ink 8
aibial 1c biai E Ink s jw y E Ink a w no sbwll abiaill 1c biai
Lalal aoljoldo

aaii

aiee eae aee ae aee

.
aall jgjcljgld jaii: 0
aaiiie 1
111 1
X
bi
1.
1
2.
g a g a g a g a g a g a g a g a g a g a g a g a g a g a g a g a g a g a g a g a g a g a g a g a g a g a g a g a g a g a g a g a g a g a g a g a g a g a g a g a g a g a
aagdall lalbll glaal 12 jSoy

E Ink
e 10
aall o8 yel aai all o
1 1
aaiall gao 1 aaiall jaiall
gii jii gill laloll 12. llo
.

- iSg, CbDyall g, yll 1e aill 1d 12c) ilk .E Ink abdo

.
LenoO Precision Pen 1 J 1 1 1 1 1 1 1 1 1 1 1 1 1 1 1 1 1 1 1


E Ink 4
pai 1 gai
Jn Jn Jn Jn Jn Jn Jn Jn Jn Jn Jn Jn Jn Jn Jn Jn Jn Jn Jn Jn Jn Jn Jn Jn Jn Jn Jn Jn Jn Jn Jn Jn Jn Jn Jn Jn Jn Jn Jn Jn Jn Jn Jn Jn Jn Jn Jn Jn Jn Jn Jn
:
0 1
A
aaii iiaaa aaii
aaii iaboi
J 1

5 5 5 5 5 5 5 5 5 5 5 5 5 5 5 5 5 5 5 5 5 5 5 5 5 5 5 5 5 5 5 5 5 5 5 5 5

LCD 15 12 10 10 10 10 10 10 10 10 10 10 10 10 10 10 10 10 10 10 10 10 10 10 10 10 10 10 10 10 10 10 10 10 10 10
a 1


E Ink
E Ink 1
J 1
Jr Jn Jn Jn Jn Jn Jn Jn Jn Jn Jn Jn Jn Jn Jn Jn Jn Jn Jn Jn Jn Jn Jn Jn Jn Jn Jn Jn Jn Jn Jn Jn Jn Jn Jn Jn Jn Jn Jn Jn Jn Jn Jn Jn Jn Jn Jn Jn Jn Jn Jn J. http://www.lenovo.com/accessories
E Ink
.
j 1 jaiy y g bai jg jgl l iie
iac Jia Lao Jsi.
Jai jaiy jgi
Jai jaiy jaiy
Jai jaiy jgi
Jai jaiy jgi
Jai jaiy jgi
gill p
s jy jyj yj 12! .
sy jy pjw w w
.
360 1
LCD 200 jg jy jy jll
E Ink J
E Ink L
E Ink L
E Ink L
LCD
Jaa 1234567890
gall jj pliy
i
i
s jss s j 1j 1j 1j 1j 1j 1j 1j
100 100 100 100
aaiia jiey jie yj 1
15 15 15 15 15 15 15 15 15 15 15 15 15 15 15 15 15 15 15 15 15 15 15 15 15 15 15 15 15 15 15 15 15 15 000000000000000000000000000000000000000000000000
:
aIglll 1
.
2% n 1
.
.
Nano-SIM (Lenovo YB-J912F) WLAN
Jgog JgLj
USB

Jen Jn Jn Jn Jn Jn Jn Jn Jn Jn Jn Jn Jn Jn Jn Jn Jn Jn Jn Jn Jn Jn Jn Jn Jn Jn Jn Jn Jn Jn Jn Jn Jn Jn Jn Jn Jn Jn Jn Jn Jn Jn Jn Jn Jn Jn Jn Jn Jn Jn Jn J
. . . . . . . . . . . . . . . . . . . . . . . . . . . . . . . . . . . . . . . . . . . . . . . . . . . . . . . . . . . . . . . . . . . . . . . . . . . . . . . D. Dolby Atmos. Dolby. Dolby Laboratories 1234567890123456789012345678901234567890123456789012345678901234567890123456789012345678901234567890123456789
Yoga Book C930
#
Copyright Lenovo 2018.
.Lenovo 2018
Reduca|Roun|Recycle

V1.0 20180710

SSC8C30285 MC
Printed in China