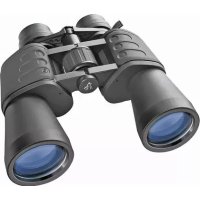
Hunter 824x50 - Binoculars BRESSER - Free user manual and instructions
Find the device manual for free Hunter 824x50 BRESSER in PDF.



| Product type | Binoculars |
| Brand | Bresser |
| Model | Hunter 824x50 |
| Magnification | 8x to 24x (continuous zoom) |
| Objective lens diameter | 50 mm |
| Prism type | Porro |
| Interpupillary distance adjustment | Fold at the central hinge |
| Focus | Central wheel and diopter adjustment |
| Eyecups | Twist-up or rubber depending on version |
| Tripod mount | Yes, with optional adapter (item no. 19-16000 or 19-16500) |
| Connection thread | DIN (standard tripod) |
| Weight (approx.) | 900 g |
| Power supply | None (optical instrument) |
| Maximum operating temperature | 60°C |
| Cleaning | Microfiber cloth, optionally eyeglass cleaning fluid |
| Safety | Never look at the sun – risk of blindness |
| Warranty | 2 years (extension possible at www.bresser.de/warranty_terms) |
| Included accessories | Protective caps, pouch |
Frequently Asked Questions - Hunter 824x50 BRESSER
User questions about Hunter 824x50 BRESSER
0 question about this device. Answer the ones you know or ask your own.
Ask a new question about this device
Download the instructions for your Binoculars in PDF format for free! Find your manual Hunter 824x50 - BRESSER and take your electronic device back in hand. On this page are published all the documents necessary for the use of your device. Hunter 824x50 by BRESSER.
USER MANUAL Hunter 824x50 BRESSER
natural_image
Black binoculars with visible lenses and no text or symbols
BRESSER®
natural_image
Close-up of a mechanical component with no visible text or symbols1 3
P = Porro-Zoomfernglas
C = Kompaktes Zoomfernglas
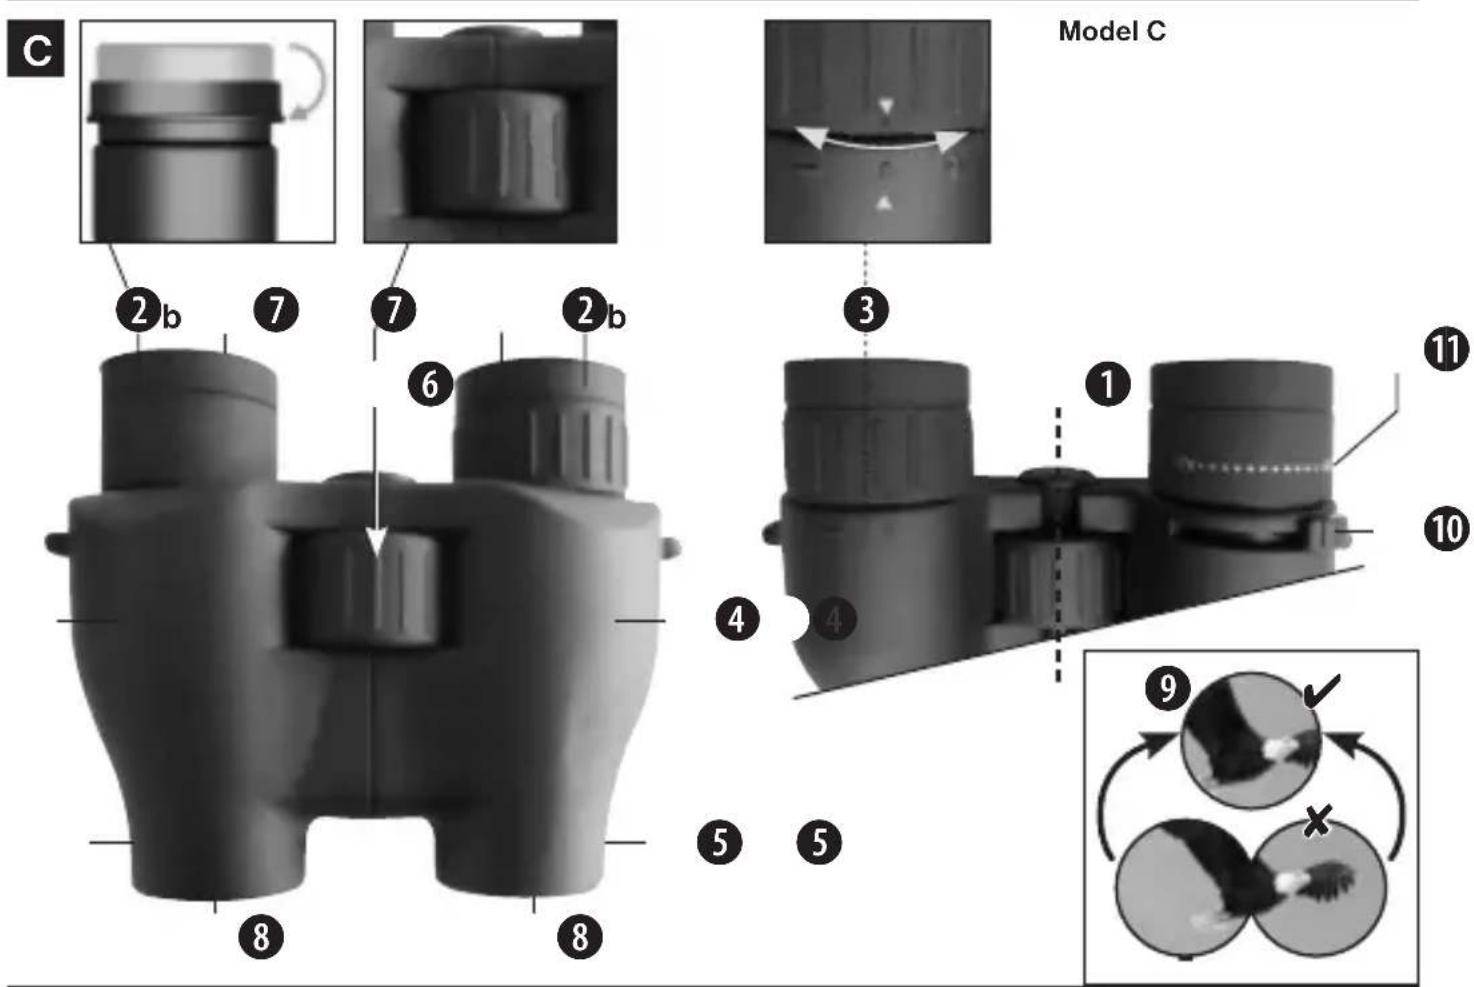
This instruction manual was created for various models in our series of binoculars. Pages 2-4 present the relevant features in pictures. Depending on the model you have purchased, this chapter of the manual covers the binoculars in full or in part. As a result, please pay attention to the letters (P or C) to make sure that a chapter applies to your model.
Please read this manual carefully and completely before using the binoculars.
Your BRESSER Team
P = Porro prism model
c = Compact model
General Safety Informations!

RISK of physical injury!
Never look through this device directly at ornear the sun. There is a risk of BLINDING
YOURSELF!
Children should only use this device under supervision. Keep packaging materials (plastic bags, rubber bands, etc.) away from children. There is a risk of SUFFOCATION.

Fire/Burning RISK!
Never subject the device - especially the lenses - to direct sunlight. Light ray concentration can cause fires and/or burns.

RISK of material damage!
Never take the device apart. Please consult your dealer if there are any defects. The dealer will contact our service centre and send the device in for repair if needed.
BINOCULARS
Do not subject the device to temperatures exceeding 60^ C!
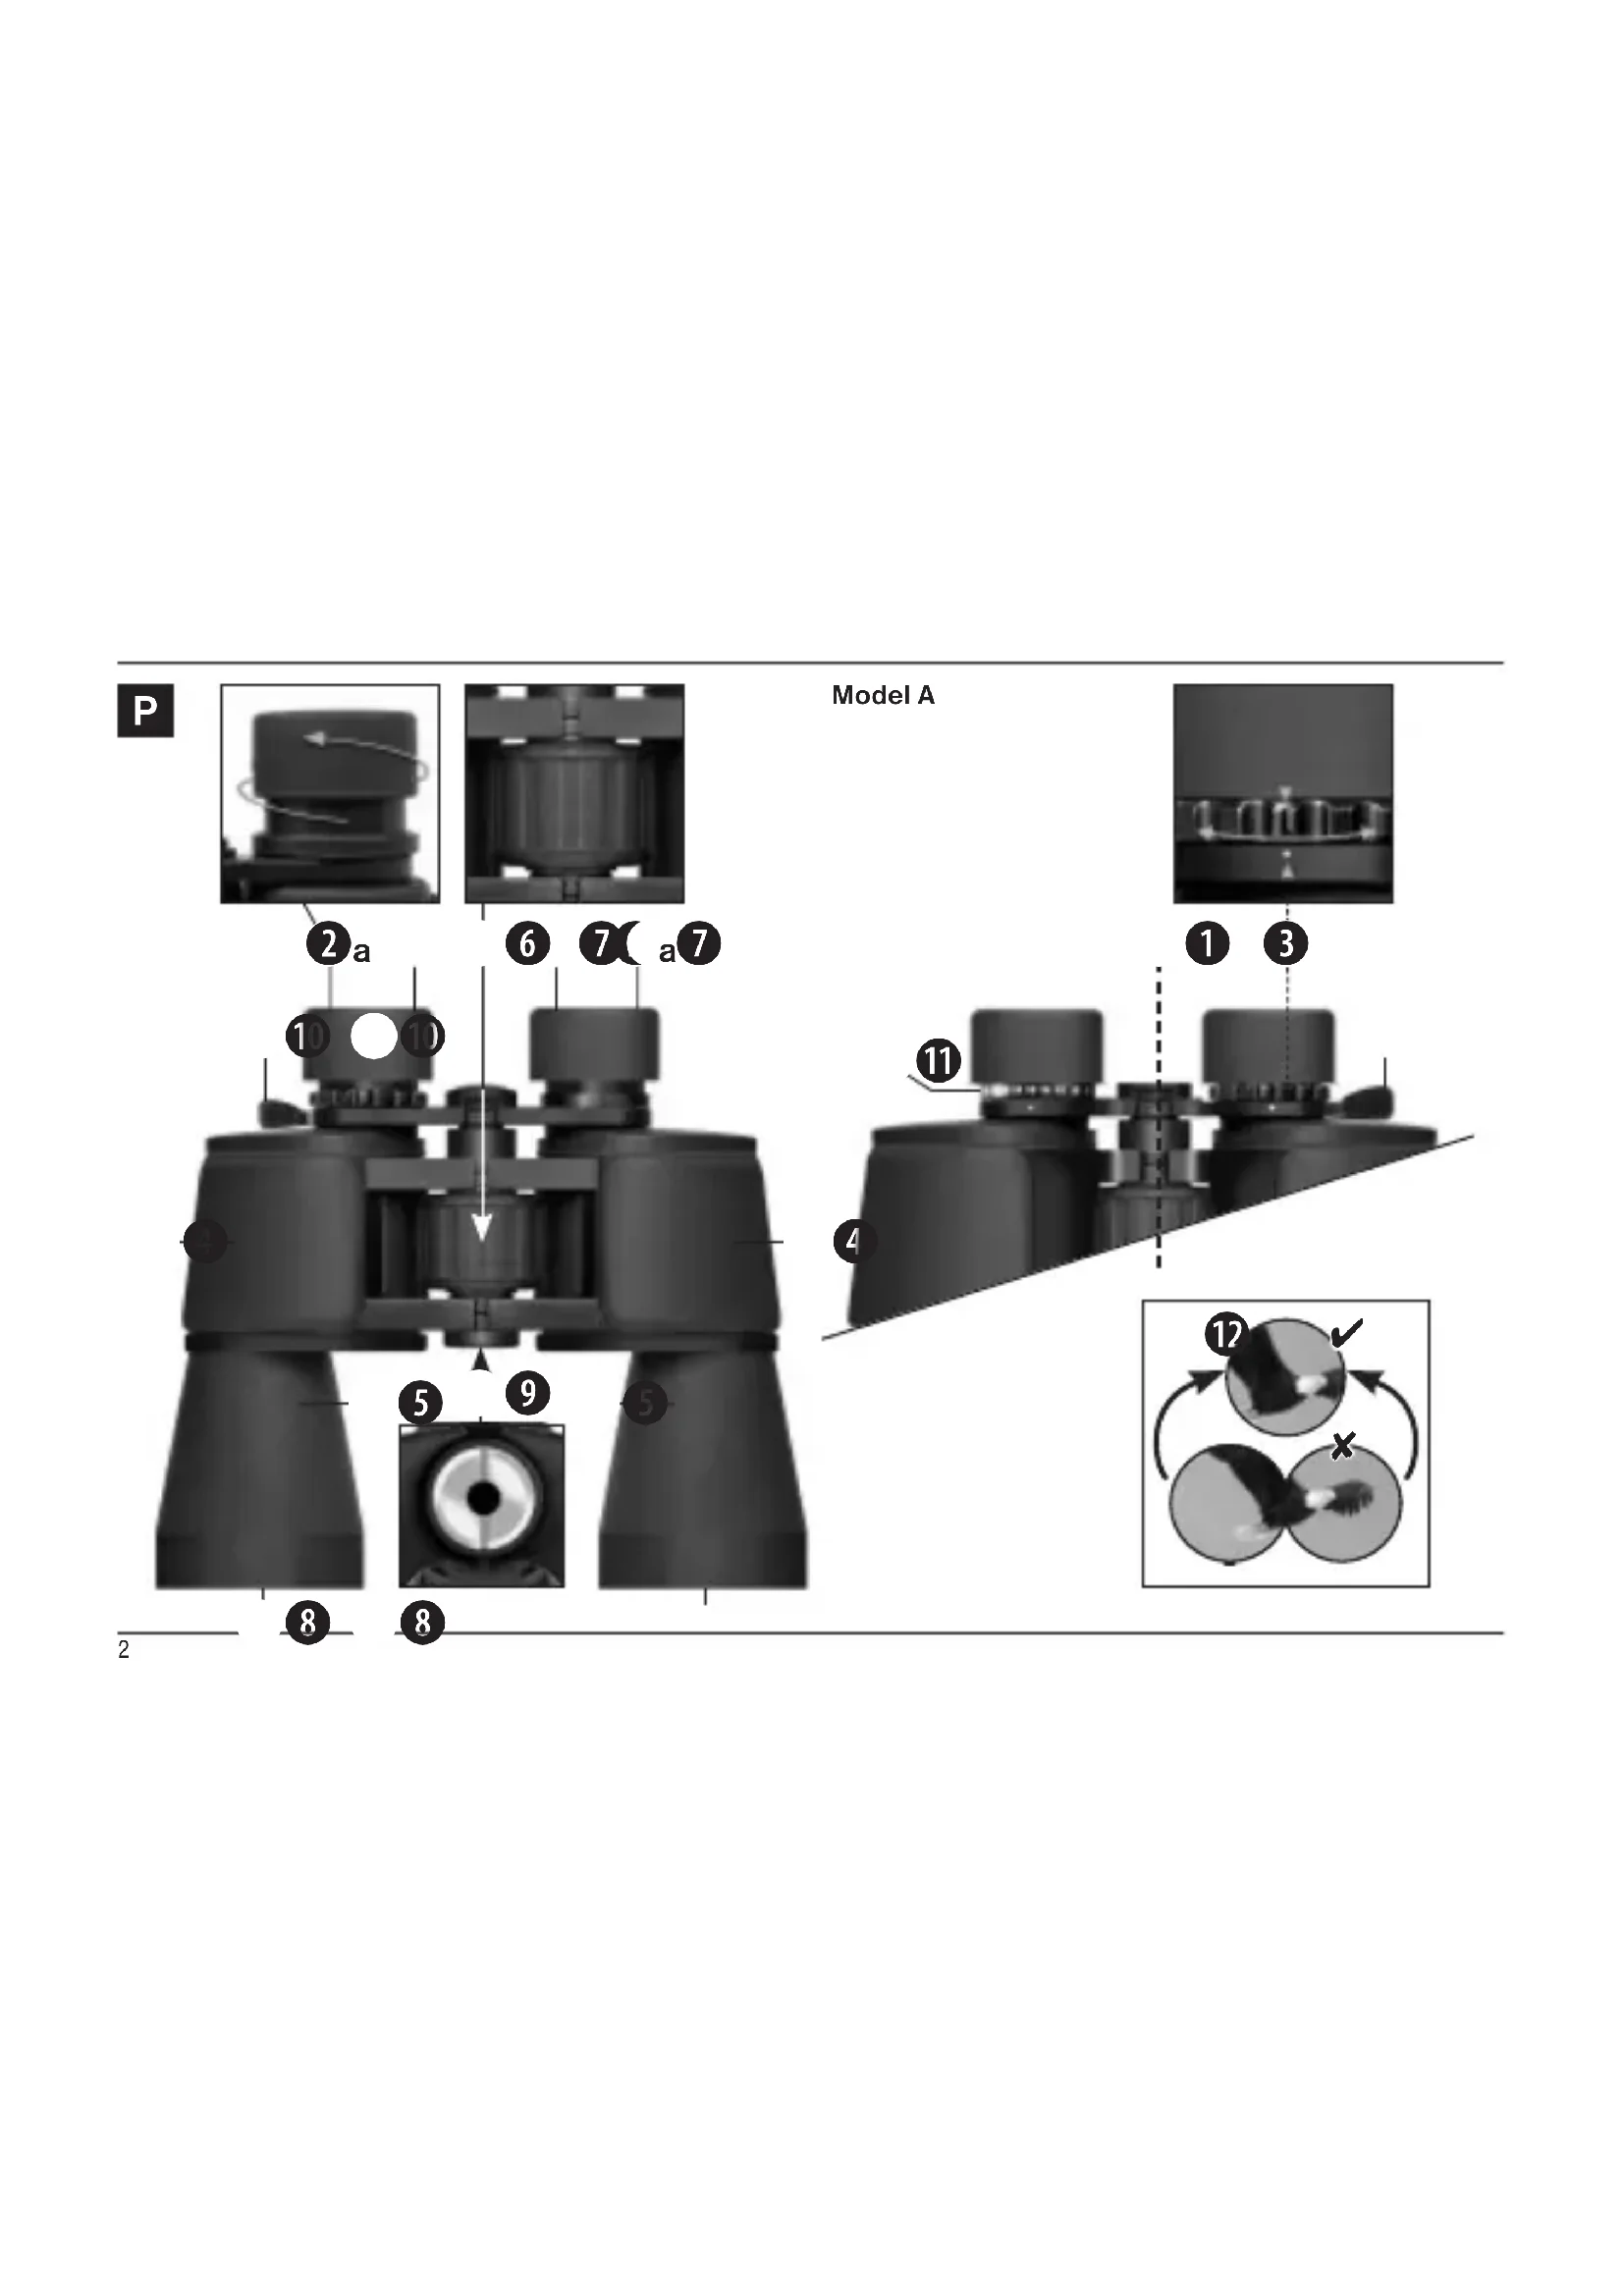
List of Parts
1 Centre axle
②a Twist-up eyecups or
②b Rubber eyecups
3 Dioptre adjustment
4 Body of the binoculars
5 Lens tube
6 Central focussing wheel
7 Eyepiece
8 Objective lens
9 Threaded tripod connection
10 Zoom lever
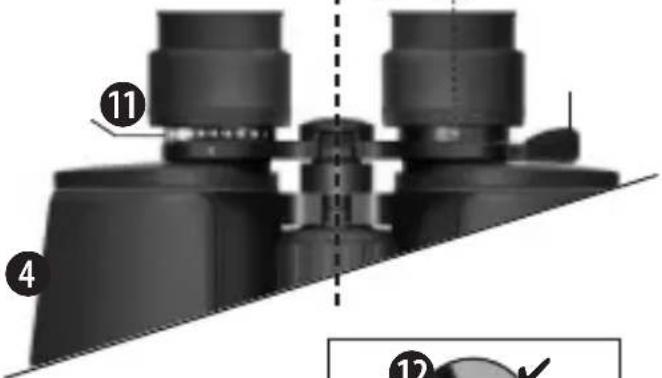
11 Magnification scale
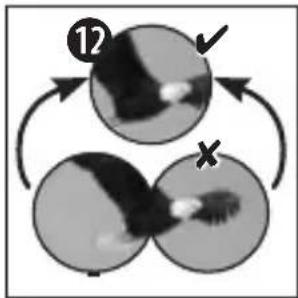
12 Image circle with correctly set eye distance
Eyepieces for spectacle wearers P C
Depending on the model, your binoculars are equipped with either twist-up eyecups (2a) or rubber eyecups (2b). Since there is a larger distance between the binocular eyepiece and the pupil for those wearing glasses, both eyecup varieties can be adjusted individually.
Twist-up Eyecups (2a)
Screw in the twist-up eyecups (2a) to use the binoculars while wearing glasses. If you are not wearing glasses, unscrew the eyecups to achieve the required distance from the pupils. OR
Rubber Eyecups (2b)
To use the binoculars while wearing glasses, turn the rubber eyecups (2b) towards the sides and down. If you are not wearing glasses, leave the eyecups in the upright position to achieve the required distance from the pupils.
Adjusting the eyepiece distance P C
The distance between the eyes differs between individuals. To achieve perfect interaction between your eyes and the eyepieces of your binoculars set the angle at the centre of the binoculars (1) so that you see a circular image (12). Note this setting for later use.
Adjusting the focus P C
Look through your binoculars with your right eye closed. Now adjust the image for your left eye using the centre wheel (6) until it is sharp and clear. Close your left eye and adjust the image for your right eye using the dioptre ring (3) until it too is sharp and clear.
Using the Zoom Function PC
You can use the zoom lever (10) to select various levels of magnification (11); in general, the zoom is continuous. Simply move the lever back or forth to zoom.
Please note: When changing the magnification setting, it is necessary to re-adjust the image sharpness using the centre focussing wheel (6).
Mounting the binoculars on a tripod P
Your binoculars have a threaded tripod connection (9) built in. The required tripod adapter is available as an optional accessory (Art. No. 19-16000 or 19-16500). With this accessory, you are able to mount your binoculars on a tri-
pod with a DIN mounting thread (e.g. Art. No. 49-22100).
TIPS on cleaning
Lenses (eyepieces and object lenses) should be cleaned with a soft, lint-free cloth (e.g. microfibre) only. Do not use excessive pressure - this may scratch the lens.
Dampen the cleaning cloth with a spectacle cleaning fluid and use it on very dirty lenses.
Protect the device against dirt and dust. Leave it to dry properly after use at room temperature. Then put the dust caps on and store the device in the case provided.
Chère cliente, cher client,
The regular guarantee period is 2 years and begins on the day of purchase. To benefit from an extended voluntary guarantee period as stated on the gift box, registration on our website is required.
You can consult the full guarantee terms as well as information on extending the guarantee period and details of our services at www.bresser.de/warranty_terms.
FR
Garantie et Service

- BRESSER®
- General Safety Informations!
- RISK of physical injury!
- YOURSELF!
- Fire/Burning RISK!
- RISK of material damage!
- BINOCULARS
- List of Parts
- Eyepieces for spectacle wearers P C
- Twist-up Eyecups (2a)
- Rubber Eyecups (2b)
- Adjusting the eyepiece distance P C
- Adjusting the focus P C
- Using the Zoom Function PC
- Mounting the binoculars on a tripod P
- TIPS on cleaning
- Chère cliente, cher client,
- FR
- Garantie et Service
Brand : BRESSER
Model : Hunter 824x50
Category : Binoculars