
4Safety Precision DB6150 - Iron AEG - Free user manual and instructions
Find the device manual for free 4Safety Precision DB6150 AEG in PDF.

| Product type | Iron |
| Brand | AEG |
| Model | 4Safety Precision DB6150 |
| Soleplate | RESILIUM™ 500 |
| Water tank capacity | Approximately 300 ml |
| Power supply | 220-240 V, 50-60 Hz |
| Power | 2400 W |
| Functions | Spray, steam shot, vertical steam shot, self-cleaning |
| Auto shut-off | 30 s on soleplate/side, 8 min on heel |
| Power indicator | Green (ready) |
| Auto shut-off indicator | Flashing yellow + 6 beeps before shut-off |
| Safety | Auto shut-off, grounding |
| Maintenance | Self-cleaning, clean soleplate with soft damp cloth |
| Recommended water type | Tap water or distilled water (50/50 mix) |
| Usage | Household |
| Ironing chart | Included for different fabrics |
| Weight | Approximately 1.5 kg |
Frequently Asked Questions - 4Safety Precision DB6150 AEG
User questions about 4Safety Precision DB6150 AEG
0 question about this device. Answer the ones you know or ask your own.
Ask a new question about this device
Download the instructions for your Iron in PDF format for free! Find your manual 4Safety Precision DB6150 - AEG and take your electronic device back in hand. On this page are published all the documents necessary for the use of your device. 4Safety Precision DB6150 by AEG.
USER MANUAL 4Safety Precision DB6150 AEG
4Safety™ PRECISION STEAM IRON DB61XX
D·GR·NL·F·GB
D Anleitung 3-15
GB Instruction book.17-23
Before using the appliance for the first time, please read the safety advice on page 18 carefully.
D
Teile
This page is left blank intentionally

GB
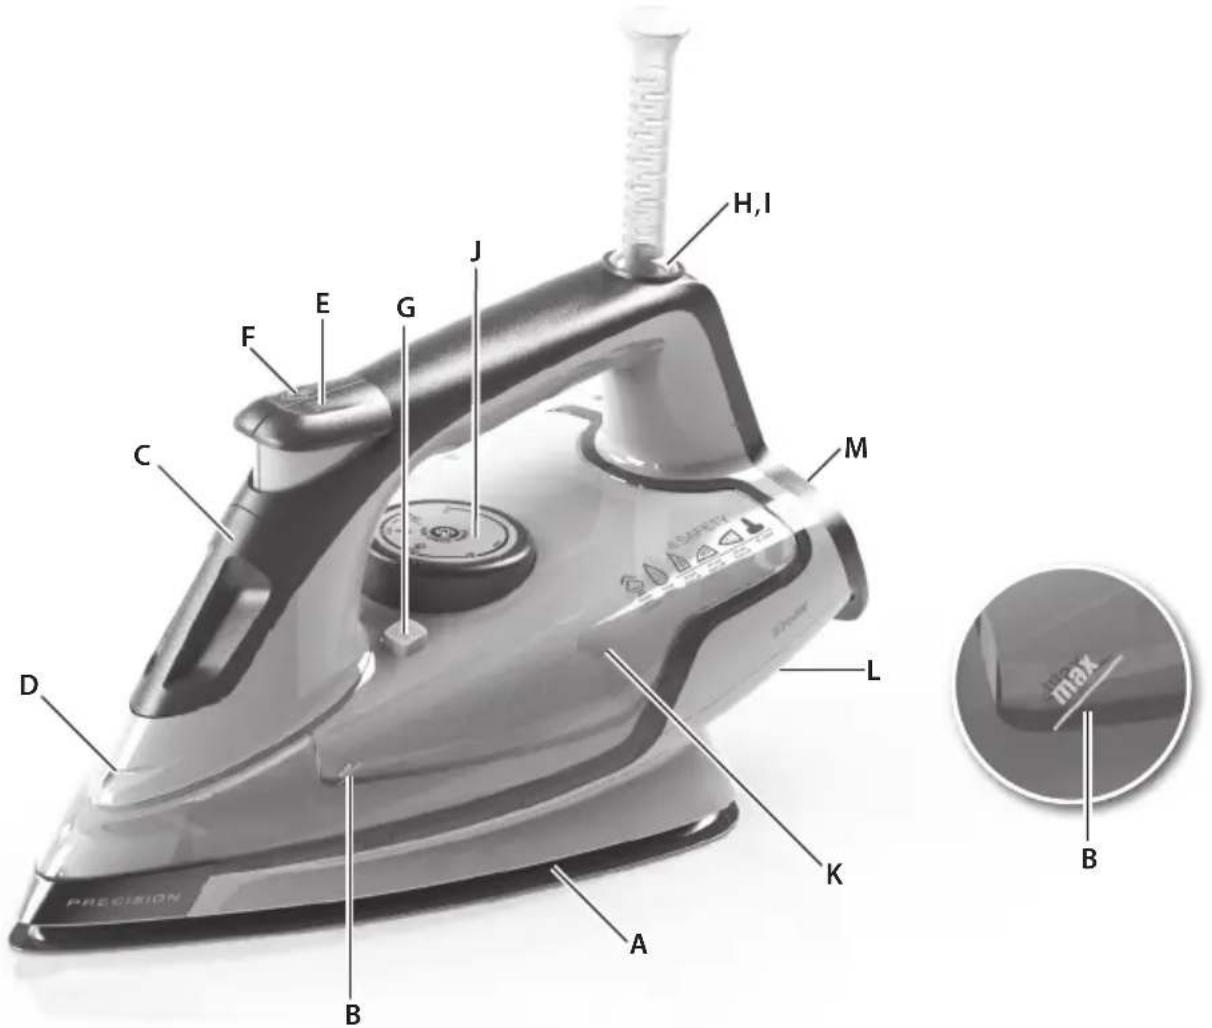
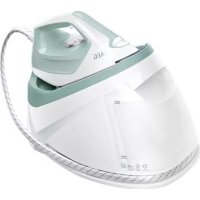
Components
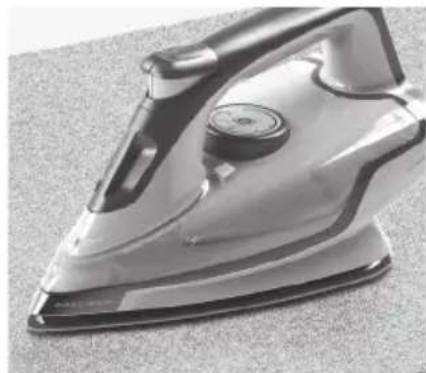
A. RESILIUM™ 500 soleplate
B. Maximum water level indicator
C. Filling aperture with cover
D. Spray nozzle
E. Spray button
F. Steam jet button
G. Self-cleaning button
H. Power indicator light
I. Safety auto-off light
J. Temperature selector
K. Water tank
L. Cable wrap facility
M. Rubber-napped heel
Read the following instruction carefully before using machine for the first time.
- This appliance can be used by children aged from 8 years and above and persons with reduced physical, sensory or mental capabilities or lack of experience and knowledge if they have been given supervision or instruction concerning use of the appliance in a safe way and understand the hazards involved.
Children shall not play with the appliance. - Cleaning and user maintenance shall not be made by children without supervision.
- Keep the iron and its cord out of reach of children less than 8 years of age when it is energized or cooling down.
- The surfaces are liable to get hot during use.
- The appliance may only be connected to a power supply whose voltage and frequency comply with the specifications on the rating plate!
- The iron is not to be used if it has been dropped, if there are visible signs of damage on the iron or its cord or if it is leaking.
- The appliance must only be connected to an earthed socket.
- If the appliance or the supply cord is damaged, it must be replaced by the manufacturer, its service agent or similarly qualified person, in order to avoid hazard.
- The iron must be used and rested on a stable surface. When placing the iron on its stand, ensure that the surface on which the stand is placed is stable.
- Never leave the appliance unattended while connected to the supply mains.
- The appliance must be switched off and the mains plug withdrawn each time after use, before cleaning and maintenance.
- The plug must be removed from the socket outlet before the water reservoir is filled with water.
- The mains cable must not come into contact with any hot parts of the appliance.
- Do not immerse the appliance in water or any other liquid.
- Do not exceed the maximum filling volume as indicated on the appliances.
- If there are limitations please define water quality / type of water that can be used with appliance.
- This appliance is intended for domestic use only. The manufacturer cannot accept any liability for possible damage caused by improper or incorrect use.
- This product is appropriate for use with tap water. It is recommended to use distilled water or a mix of 50% distilled, 50% tap water.
- Do not connect the appliance to a wall socket intended for shavers.
| Fabric Temperature setting Ironing recommendation | ||
| Acrylic | ● | Dry iron on wrong side. |
| Acetate | ● | Dry iron on wrong side while still damp or use spray to dampen. |
| Nylon & Polyester | ● | Iron on wrong side while still damp or use spray to dampen. |
| Rayon | ● | Iron on wrong side of fabric. |
| Viscose | ● | Mainly dry iron. Steam can be used under manufacturer's instructions. |
| Silk | ●● | Iron on wrong side. Use an ironing cloth to prevent shine marks. |
| Cotton blends | ●● | Check label and follow manufacturer's instructions. Use setting fo the fibre requiring lowest setting. |
| Wool & wool blends | ●● | Steam iron on wrong side or use ironing cloth. |
| Cotton | ●● | Use steam medium to high. |
| Corduroy | ●●● | Steam iron on wrong side or use ironing cloth. |
| Linen | ●●to "max" | Iron on wrong side or use ironing cloth to prevent shine marks, especially with dark colours. Use steam medium to high. |
| Denim | ●●to "max" Use maximum | steam. |
| Varied ironing speed and fabric dampness might cause optimal setting to differ from that recommended in the table! | ||
Getting started
1. Before first use. Remove all adhesive remains and gently rub with a dampened cloth. Rinse water tank to remove foreign particles. When turned on for the first time, temporary vapours/odours may occur.
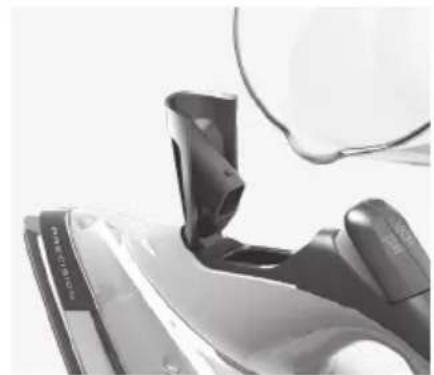
2. Filling steam iron with water. Make sure plug is removed from power outlet. Turn the temperature selector to 0^ and open the filling aperture cover. Let the iron rest on the heel. Fill water up to maximum level. Close cover. Caution: Do not exceed the maximum water level.
3. Plug power cable into a power outlet. Power indicator light turns on. Set temperature by turning temperature selector to adequate choice. When the light turns green, the iron is ready to use.

4. Using the spray mist and steam jet function. Ensure that water tank is at least 1/4 full. Use spray mist to pre-dampen fabrics by pressing spray button several times to release a fine mist (A). To use the steam jet function, ensure that tank is at least 1/2 full. Press steam jet button several times to prime pump (B).
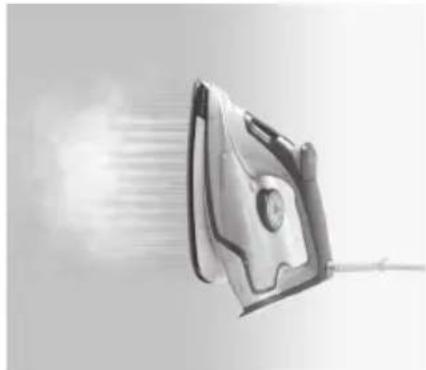
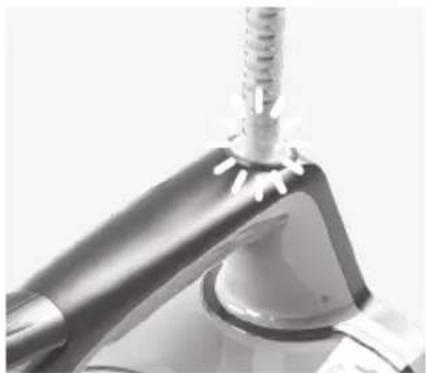
5. Steaming hanging items. Vertical steam jet function is ideal for steaming curtains, suits and delicate fabrics. Hang item on a hanger, hold iron at a distance of 10 - 20cm and press steam jet button.
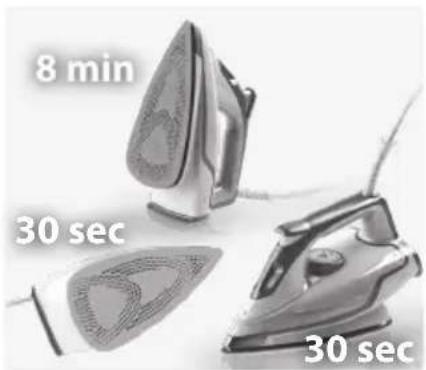
6. 3-way Auto-OFF. If iron is left unattended on soleplate or on the side, it turns off after 30 seconds. If left unattended on the heel, it turns off after 8 minutes. To turn on, just begin to iron again. The indicator light will flash yellow and the sound alert will beep 6 times before Auto-OFF.
Cleaning and care
1. Always store iron on its heel rest. To clean exterior surfaces, use a damp soft cloth and wipe dry. Do not use any chemical solvents, as these will damage the surface. Do not store the iron with water in the tank. Wind the mains cord around the cord storage facility.
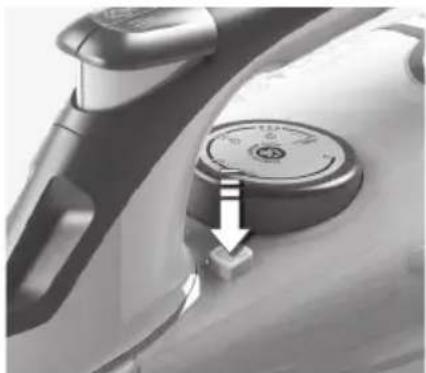
2. Self-cleaning function. Fill the iron with water and heat up the iron. When the indicator light turns green, unplug the iron. Hold the iron over a sink, press and hold the cleaning button. Use a full tank of water. Release button to stop self-cleaning function. Repeat the procedure if necessary.
NOTE! Do not use any descending fluid or vinegar.
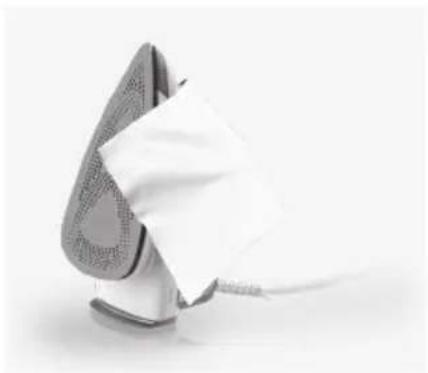
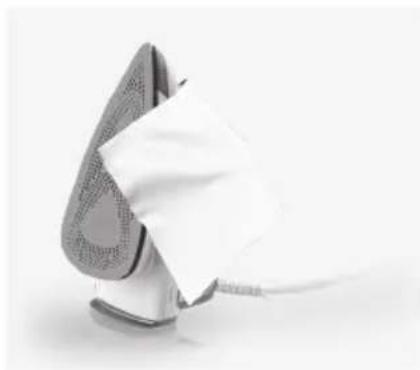
3. Cleaning the soleplate. Do not use scouring pads or harsh cleaners on the soleplate as these will damage the surface. To remove burnt residue, iron over a damp cloth while iron is still hot. To clean the soleplate, simply wipe with soft damp cloth and wipe dry.

| Problem Possible cause Solution | ||
| Soleplate is not heating even though iron is turned on. | Connection problem Check main power supply cable, plug and outlet. | |
| Temperature control is in MIN position. Select adequate temperature. | ||
| Iron does not produce steam. Not enough water | in tank. Fill water tank (see "Getting started", no 2). | |
| Steam control is selected in non-steam position. Set steam control between positions of minimum steam and maximum steam (see "Ironing chart"). | ||
| Selected temperature is lower than that specified to use with steam. | Increase temperature to at least ● ● | |
| Spray function does not work. Not enough water | in tank. Fill water tank (see "Getting started", no 2). | |
| Steam jet and vertical steam jet function does not work. | Steam jet function was used very frequently within a short period. | Put iron on horizontal position and wait before using steam jet function. |
| Iron is not hot enough. Adjust the proper temperature to steam ironing (up to ● ●. Put iron in vertical position and wait until temperature indicator light turns off. | ||
Disposal
GB
Recycle the materials with the symbol

- Put the packaging in applicable
containers to recycle it.
Help protect the environment and human health and to recycle waste of electrical and electronic appliances.
Do not dispose appliances marked with

with the household
waste. Return the product to your local recycling facility or contact your municipal office.
D
GR
NL
F
GB
www.aeg-home.com

Brand : AEG
Model : 4Safety Precision DB6150
Category : Iron