
FP 1977 - Food Processor FRITEL - Free user manual and instructions
Find the device manual for free FP 1977 FRITEL in PDF.
| Product type | Food processor |
| Brand | Fritel |
| Model | FP 1977 |
| Dimensions (approx.) | 30 x 20 x 30 cm |
| Weight (approx.) | 4 kg |
| Power supply | 230 V ~ 50 Hz |
| Power (approx.) | 700 W |
| Bowl capacity | 2.5 L (max) |
| Main functions | Chop, mix, knead, beat, grate, slice, juice citrus fruits, make puree |
| Number of speeds | Variable with progressive speed control |
| Pulse function | Yes, by impulse |
| Safety | Safety switch, correct assembly required for operation |
| Materials | Plastic motor block, plastic bowl, stainless steel blades |
| Included accessories | Beater disc, stainless steel knife, kneaders (large and small), grating/slicing discs (fine, coarse), julienne disc, puree disc, citrus press (cone and sieve), spatula |
| Cleaning | Dishwasher-safe accessories; wipe motor block with a damp cloth |
| Warranty | 2 years, covers the motor block |
| Repairability | Contact an approved repairer |
| Usage | Household use only |
Frequently Asked Questions - FP 1977 FRITEL
User questions about FP 1977 FRITEL
0 question about this device. Answer the ones you know or ask your own.
Ask a new question about this device
Download the instructions for your Food Processor in PDF format for free! Find your manual FP 1977 - FRITEL and take your electronic device back in hand. On this page are published all the documents necessary for the use of your device. FP 1977 by FRITEL.
USER MANUAL FP 1977 FRITEL
text_image
fritel qualityFood Processor FP 1977
natural_image
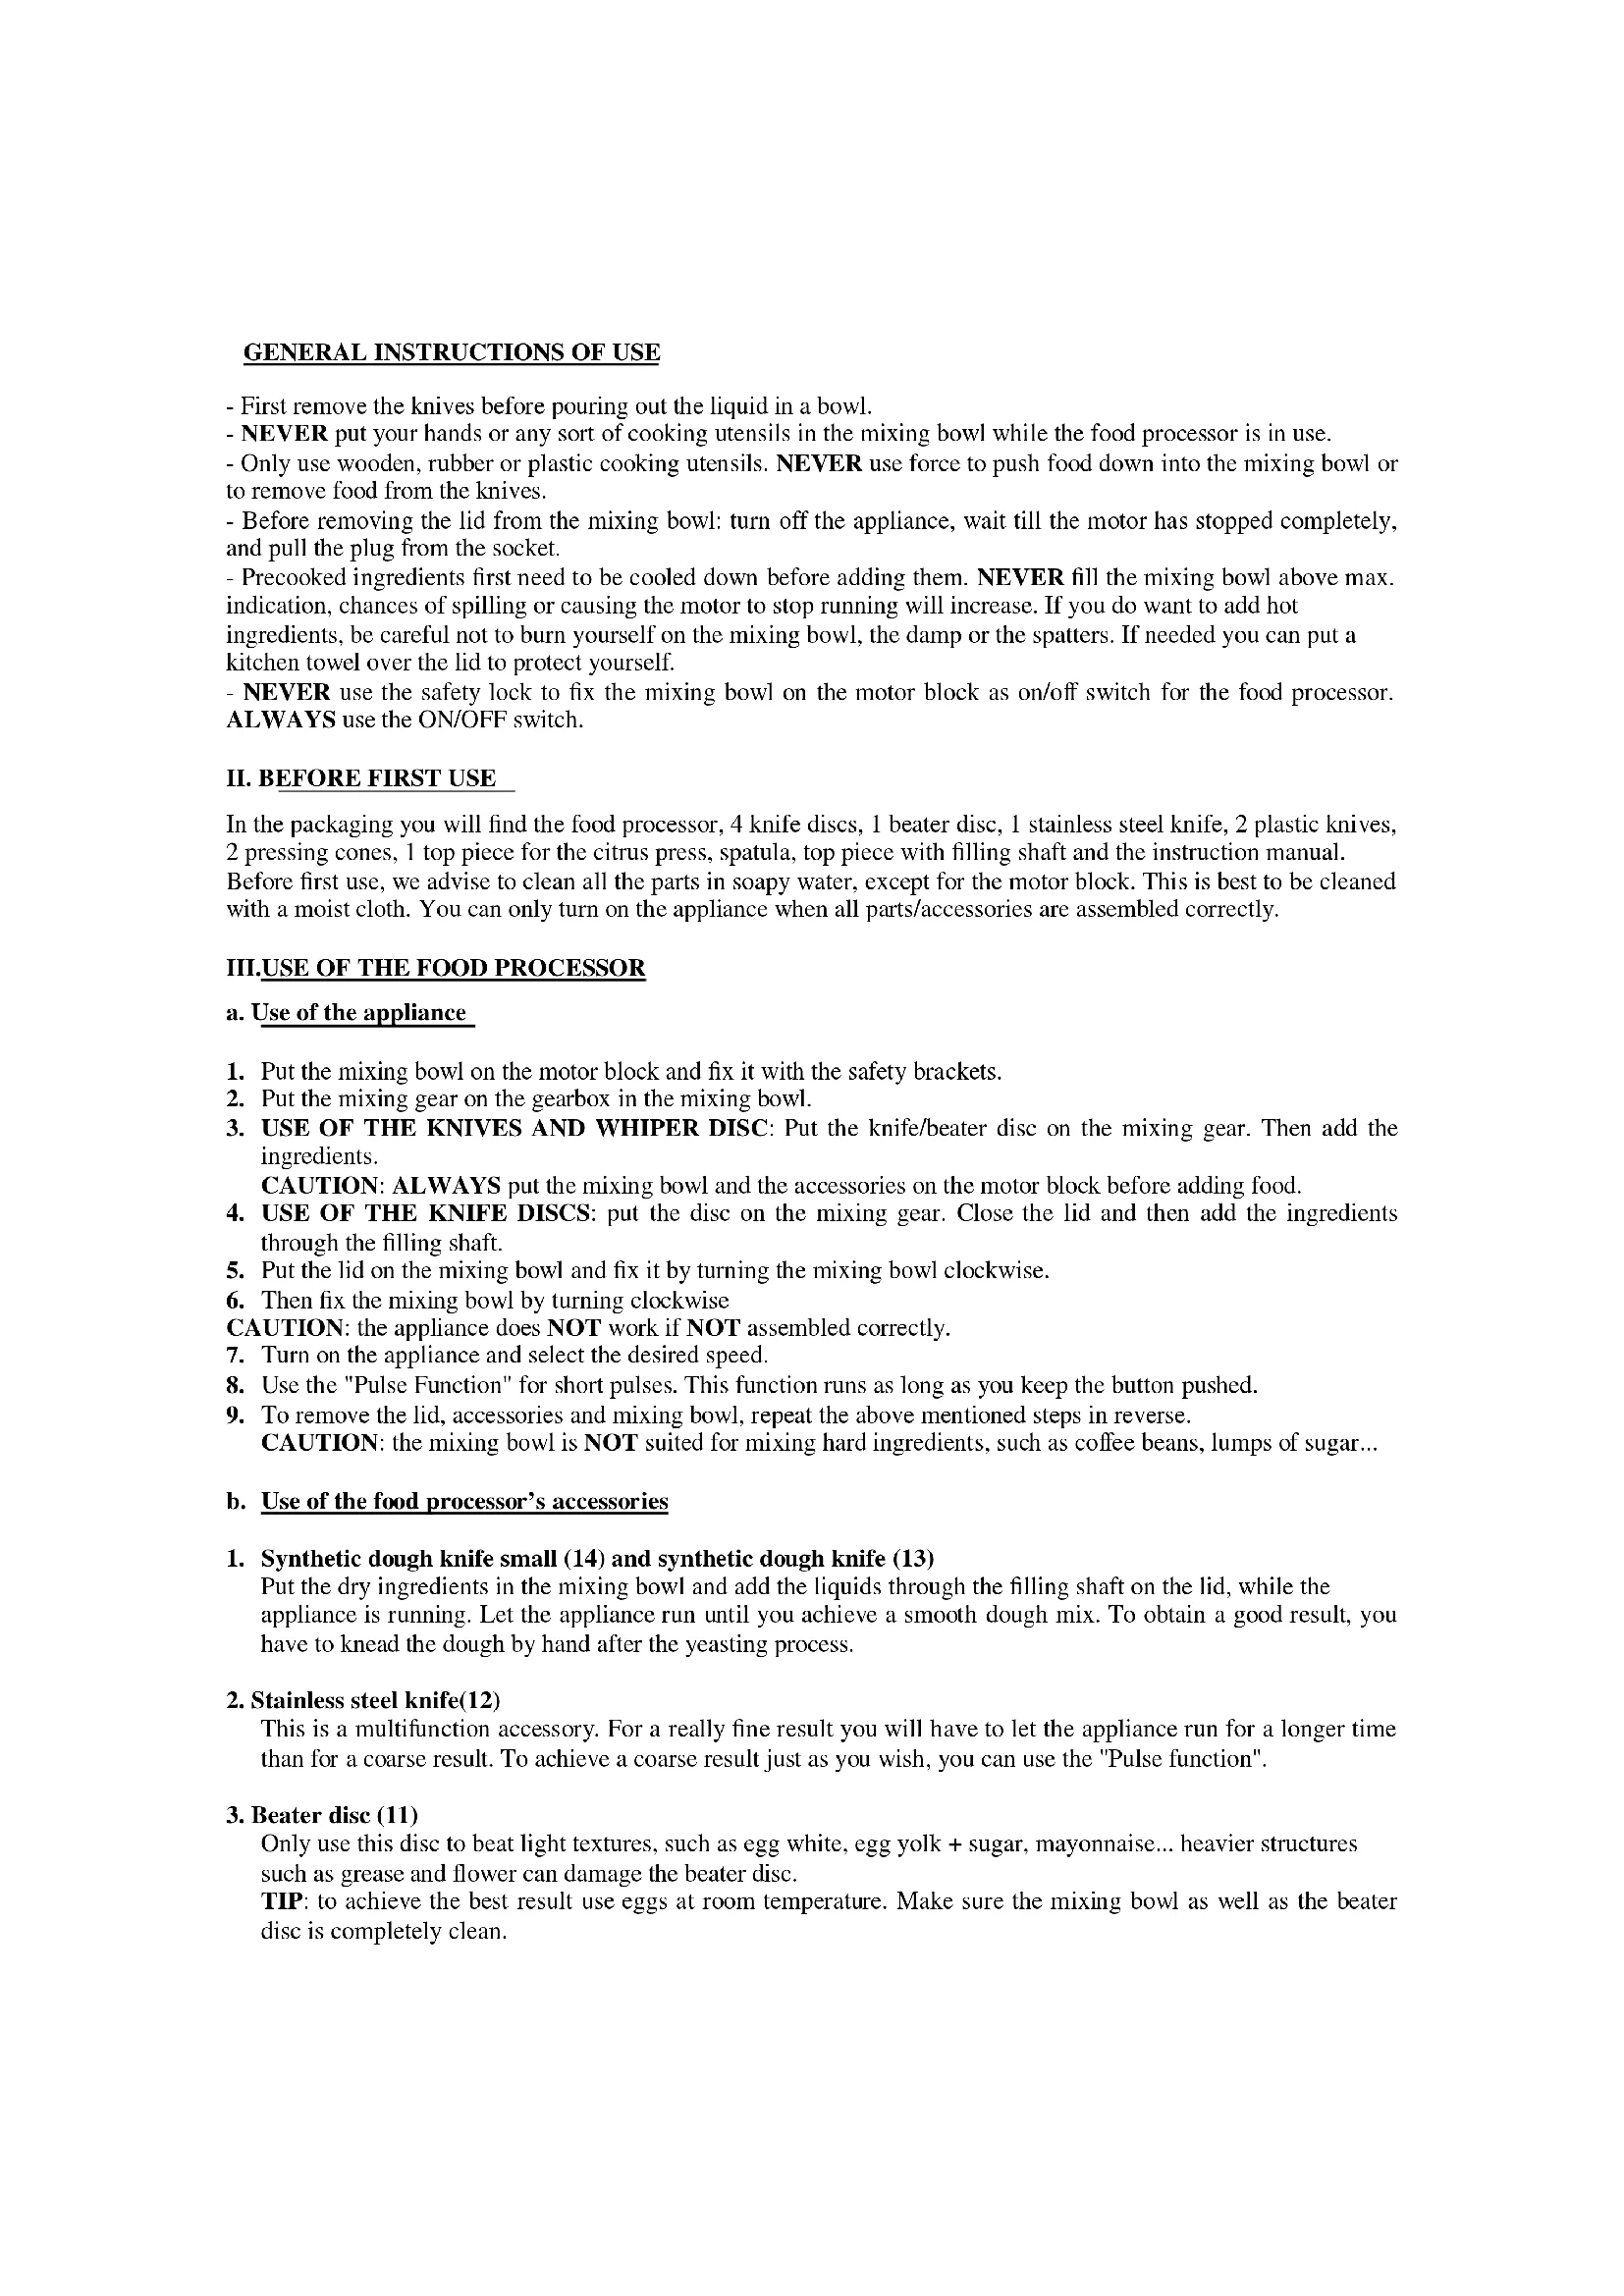
Fritel kitchen blender with food items on a green gradient background (no text or symbols visible)Congratulations, you have just bought a fantastic food processor, a reliable and high-quality product from our FRITEL Quality range.
Read this instruction manual before you put the food processor into use and save it well!
***
I. PRODUCTOMSCHRIJVING
text_image
Technical diagram of a mechanical component with numbered parts labeled 4, 5, and 6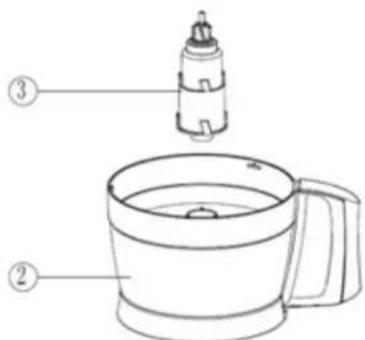
text_image
Diagram of a kitchen appliance with labeled parts, showing a container and a top component.
text_image
Labeled diagram of a kitchen appliance with numbered parts for identification
text_image
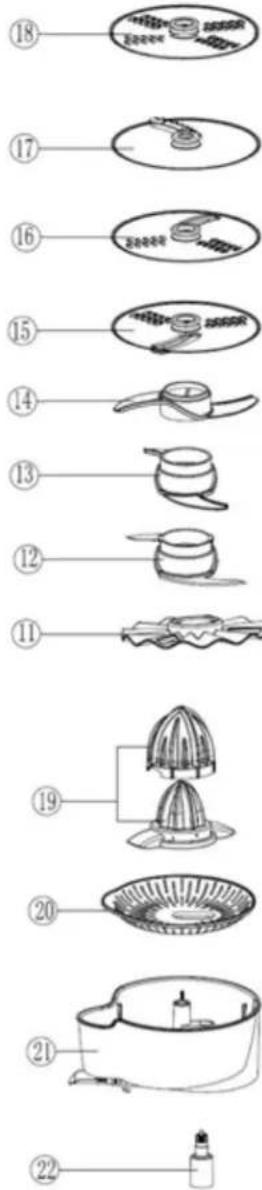
Diagram showing 22 labeled plant parts with corresponding illustrations, likely for a manual labor or processing task.I. PRODUCT DESCRIPTION
- Motor Block
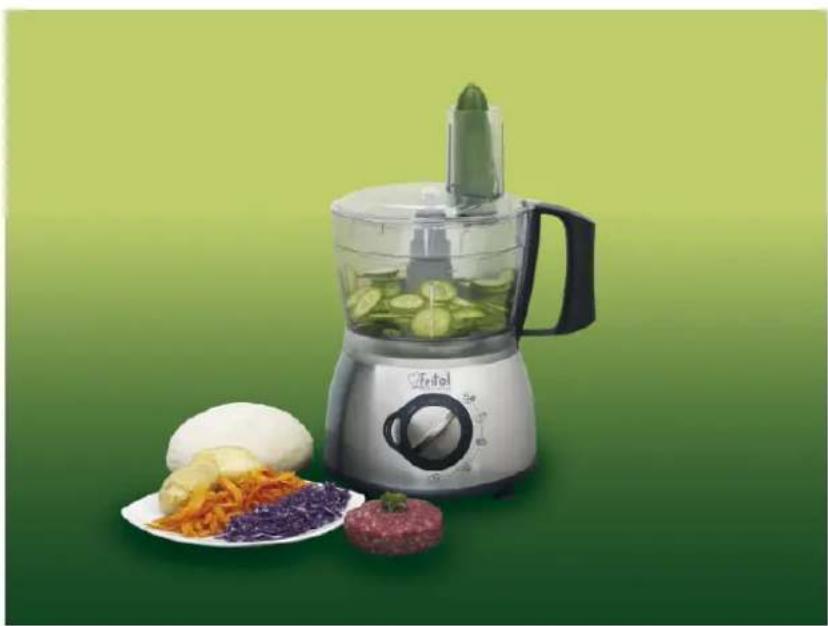
- Mixing bowl
- Gearbox
- Lid
- Filling shaft
- Pusher
- Safety brackets
- Cord storage
- Pulse button
- Speed control
- Beater disc
- Stainless steel knife.
- Synthetic kneading hook large
- Synthetic kneading hook small
- Disc for grating/cutting (fine)
- Disc for grating/cutting (coarse)
- Disc for Julienne
- Mashing disk
- Cone for citrus press
- Sieve for citrus press
- Juice collector
- Gearbox citrus press
- Spatula
The manufacturer maintains the right to introduce technical and or other changes at any time.
GB This appliances is in accordance to the European safety prescriptions, carries the CE label and is only suited for domestic use.
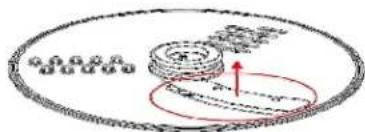
text_image
Diagram illustrating mechanical components with labeled parts and directional arrows, likely from a technical or engineering context.text_image
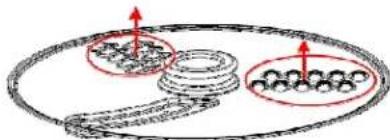
Diagram showing a mechanical or electrical component with labeled parts and directional arrows, likely illustrating a system or process.text_image
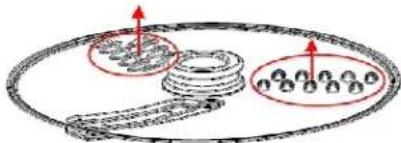
Diagram illustrating a mechanical or electrical system with labeled components and directional arrows indicating movement or force.text_image
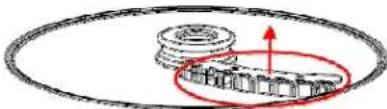
Diagram illustrating a mechanical or electrical system with labeled components and directional arrows indicating motion or force.natural_image
Diagram of a circular object with internal patterns and central features, no text or symbols presentPureerschijf (18)
text_image
Technical diagram showing a mechanical assembly with labeled components and an upward arrow indicating motion or force.natural_image
Simple line drawing of a dome-shaped object with concentric rings (no text or symbols)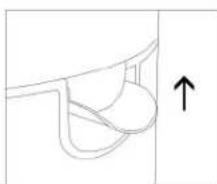
natural_image
Simple line drawing of a curved mechanical component with an upward arrow, no text or symbols present.Fig. 1
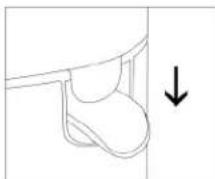
Fig. 2
text_image
Diagram illustrating mechanical assembly with labeled components and motion arrowstext_image
Diagram showing a mechanical or electrical component with labeled parts and directional arrows indicating motion or force.text_image
Diagram illustrating mechanical assembly or gear mechanism with labeled components and directional arrowstext_image
Diagram illustrating a mechanical or electrical system with labeled components and directional arrows indicating motion or force.natural_image
Simple line drawing of a circular object with internal patterns and dots, resembling a lid or cover (no text or symbols)natural_image
Mechanical assembly diagram showing a gear and shaft assembly with a red circular annotation (no text or symbols)I.SAFETY REGULATIONS
- The Food processor can only be used with 230V AC
- ALWAYS put the appliance on a heat resistant, dry and stable base, such as a kitchen tablet or table, so that the appliance cannot swift over or slide.
- For your own safety the appliance will not work if not assembled correctly. ALWAYS check if the mixing bowl, the citrus press is assembled correctly.
- NEVER touch the knives because they are extremely sharp. Remove the lid and dismount the accessories only when the motor has stopped completely and after the plug is pulled from the socket
-This appliance is intended for mixing, kneading: kneading of food, pressing citrus fruit and mash potatoes/vegetables
- NEVER put your fingers in the filling shaft.
- NEVER use the appliance outdoors, near heating sources or in rooms with a high degree of humidity.
- NEVER plunge the motor block, the cord or the plug into water or any other liquid. Only clean the appliance with a moist cloth. If it should get wet anyway, immediately pull the plug from the socket.
- NEVER use accessories or parts from other brands/appliances.
-ATTENTION: ALWAYS be very careful when using the appliance in the presence of children. NEVER leave the appliance unattended in the presence of children. Children should be supervised to ensure that they do not play with the appliance. NEVER let children, disabled persons, persons with reduced physical or mental capabilities or persons with lack of experience and knowledge use the appliance.
- NEVER leave the appliance unattended when in use.
- NEVER pull the cord itself to pull the plug from the socket. NEVER use extension cords and ALWAYS unroll the cord completely. NEVER use the cord in the proximity of sources of heat, such as ovens, stoves or heating.
NEVER turn the cord around the appliance when in use. NEVER fold or pinch the cord. NEVER let the cord hang over the edge of the table or kitchen counter.
- NEVER use the appliance when the cord is damaged. In that case, immediately bring the appliance to a recognized repair expert.
- The appliance is intended for household use and cannot be used for more than 1 minute at a time.
- Repairs can only be executed by a recognized expert or a recognized repair shop.
- Persons who haven't read this instruction manual cannot use this appliance.
- ALWAYS switch off the appliance and pull out the plug
* After use or when the appliance is not in use
* If the food processor
* When cleaning the appliance
GENERAL INSTRUCTIONS OF USE
- First remove the knives before pouring out the liquid in a bowl.
- NEVER put your hands or any sort of cooking utensils in the mixing bowl while the food processor is in use.
- Only use wooden, rubber or plastic cooking utensils. NEVER use force to push food down into the mixing bowl or to remove food from the knives.
- Before removing the lid from the mixing bowl: turn off the appliance, wait till the motor has stopped completely, and pull the plug from the socket.
- Precooked ingredients first need to be cooled down before adding them. NEVER fill the mixing bowl above max. indication, chances of spilling or causing the motor to stop running will increase. If you do want to add hot ingredients, be careful not to burn yourself on the mixing bowl, the damp or the spatters. If needed you can put a kitchen towel over the lid to protect yourself.
- NEVER use the safety lock to fix the mixing bowl on the motor block as on/off switch for the food processor. ALWAYS use the ON/OFF switch.
In the packaging you will find the food processor, 4 knife discs, 1 beater disc, 1 stainless steel knife, 2 plastic knives, 2 pressing cones, 1 top piece for the citrus press, spatula, top piece with filling shaft and the instruction manual.
Before first use, we advise to clean all the parts in soapy water, except for the motor block. This is best to be cleaned with a moist cloth. You can only turn on the appliance when all parts/accessories are assembled correctly.
III. USE OF THE FOOD PROCESSOR
a. Use of the appliance
-
Put the mixing bowl on the motor block and fix it with the safety brackets.
-
Put the mixing gear on the gearbox in the mixing bowl.
-
USE OF THE KNIVES AND WHIPER DISC: Put the knife/beater disc on the mixing gear. Then add the ingredients.
CAUTION: ALWAYS put the mixing bowl and the accessories on the motor block before adding food.
-
USE OF THE KNIFE DISCS: put the disc on the mixing gear. Close the lid and then add the ingredients through the filling shaft.
-
Put the lid on the mixing bowl and fix it by turning the mixing bowl clockwise.
-
Then fix the mixing bowl by turning clockwise
CAUTION: the appliance does NOT work if NOT assembled correctly.
-
Turn on the appliance and select the desired speed.
-
Use the "Pulse Function" for short pulses. This function runs as long as you keep the button pushed.
-
To remove the lid, accessories and mixing bowl, repeat the above mentioned steps in reverse.
CAUTION: the mixing bowl is NOT suited for mixing hard ingredients, such as coffee beans, lumps of sugar...
b. Use of the food processor's accessories
1. Synthetic dough knife small (14) and synthetic dough knife (13)
Put the dry ingredients in the mixing bowl and add the liquids through the filling shaft on the lid, while the appliance is running. Let the appliance run until you achieve a smooth dough mix. To obtain a good result, you have to knead the dough by hand after the yeasting process.
2. Stainless steel knife(12)
This is a multifunction accessory. For a really fine result you will have to let the appliance run for a longer time than for a coarse result. To achieve a coarse result just as you wish, you can use the "Pulse function".
3. Beater disc (11)
Only use this disc to beat light textures, such as egg white, egg yolk + sugar, mayonnaise... heavier structures such as grease and flower can damage the beater disc.
TIP: to achieve the best result use eggs at room temperature. Make sure the mixing bowl as well as the beater disc is completely clean.
- Stainless steel knives for coarse cutting, grating and for fine cutting, grating (15,16)
Use the disc with the cutting side upwards to cut cheese packs, carrots, cucumbers, potatoes, cabbage, onion...
text_image
Diagram illustrating mechanical assembly with labeled components and motion arrowsDisc for coarse cutting (16)
text_image
Diagram showing a mechanical or electrical component with labeled parts and directional arrows, likely illustrating a cycle or motion path.Disc for fine cutting (15)
Use the disc with the grating side upwards to grate cheese, carrots, potatoes, cucumber...
natural_image
Diagram of a mechanical assembly with rollers and housing, no text or symbols presentDisc for coarse grating (16)
text_image
Diagram illustrating mechanical assembly with labeled components and directional arrows indicating motion or forceDisc for coarse grating (15)
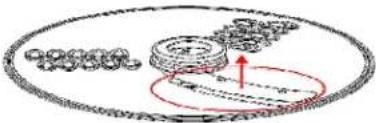
- Stainless steel mashing disc (18)
Use the mashing disc to mash cooked potatoes, carrots... and other cooked vegetables.

natural_image
Diagram of a circular mechanical component with internal holes and a central hub (no text or symbols)Mashing Disc (18)
- Stainless steel disc for julienne (17)
Use this disc with the cutting side upwards to cut vegetables in julienne.
natural_image
Mechanical assembly diagram showing a gear and shaft assembly with a red circular arrow indicating motion (no text or labels)Disc for Julienne (17)
| Accessories | Function | Speed |
| Beater Disc | Beat egg whites, make mayonnaise (max. 6 egg whites)Beat egg yolk + sugarCream (1L) | 111 |
| Stainless steel knife | Yeast dough (max. 500gr flour + 300ml water), crumb dough (max. 800gr + 600gr crème), cake dough (max. 1,5kg) | 2 |
| Discs for fine/coarse cutting, French fries/julienne | Solid food such as potatoes, carrots, cabbage...Softer ingredients, such as tomatoes, cucumber... | 21 |
| Citrus press | Citrus fruit | 1 |
IV. USE OF THE CITRUS PRESS
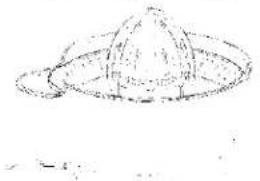
natural_image
Simple line drawing of a dome-shaped object with concentric rings (no text or symbols)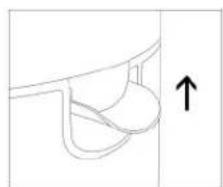
natural_image
Simple line drawing of a curved mechanical component with an upward arrow, no text or symbols present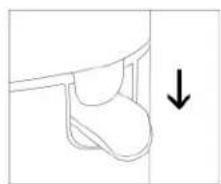
natural_image
Simple line drawing of a shoe seat with a downward arrow indicating direction (no text or symbols)Fig. 1 Fig. 2
- Put the gearbox of the citrus press and the juice receptor with the sieve on the motor block.
- Turn the juice collector clockwise to fix the motor block.
- The put the selected pressing cone (big or small) on the juice receptor with sieve.
- Cut the citrus fruit in two. Put the fruit half on the pressing cone and push gently in order for the motor to start running.
- The juice collector is equipped with an ant drip spout. Before pressing, place a glass under the spout and put the spout down (fig.2). After pressing put the spout in upward position to avoid spatters. (fig. 1.)
V. CLEANING
- Turn the appliance off, pull the plug and wait until the motor has stopped completely.
- Remove the accessories. Be careful with the sharp knives.
- NEVER plunge the motor block into water or any other liquid. Only clean this part with a moist cloth and dry carefully. ALWAYS make sure no water runs in the appliance.
You can clean the accessories and the removable parts in soapy water. Then rinse carefully with cold water.
These accessories are dishwasher proof.
CAUTION: NEVER use abrasive sponges, aggressive or biting cleansing materials, liquids such as alcohol, petrol, acetone... to clean the appliance.
TIP: Clean the appliance immediately after use, this is easier.
VI. PRACTICAL TIPS IN CASE OF MALFUNCTIONS
Do not use the appliance in case of a malfunction of when the power cord is damaged. Please address your sales point immediately.
THE APPLIANCE HAS BEEN DESIGNED FOR DOMESTIC USE. THE GUARANTEE CONDITIONS EXPIRE UPON PROFESSIONAL USE;
DEFECT AND/OR DAMAGES FOLLOWING TO THE NON OBSERVANCE OF THE USER MANUAL ARE NOT COVERED BY THE GUARANTEE.
VII. GUARANTEE CONDITIONS
Your guarantee starts on the day of purchase.
Valid for 2 years
- The guarantee covers every repair and / or replacement free of charge of the parts recognized defective by our technical department. The accessories: bowl, knife and lids are not covered by the guarantee.
• The guarantee is only valid for the original user. - Carriage both ways is for the purchaser's account.
The guarantee only applies after submitting the purchasing invoice.
• Incorrect connection, e.g. electric voltages.
• Abnormal use or misuse handling.
- Lack of care.
- Modifications or repairs made to the appliance by persons not authorized by us as manufacturer.
- When reference numbers are altered or removed.
Do not throw the appliance away with the normal household waste at the end of its life, but hand it in at an official collection point for recycling. By doing this you will help to preserve the environment.
IX.LIABILITIES
All liabilities, towards both consumer(s) and third parties, which could result from not observing all the safety regulations prescribed in this user manual, can under no circumstances be charged to the manufacturer. In case of non observation of these safety regulations, the user of the appliance, or any other person not having observed these safety regulations, protects the manufacturer from all responsibilities that he could be charged with.
D
GEBRAUCHSANWEISUNG
text_image
Technical diagram showing mechanical assembly with gears and a red directional arrow indicating motion or forcetext_image
Diagram illustrating a mechanical or electrical component with labeled parts and directional arrows, likely from an engineering or physics context.text_image
Diagram illustrating a mechanical or electrical component with labeled parts and directional arrows indicating movement or force.text_image
Diagram illustrating mechanical assembly with labeled components and directional arrows indicating motion or forcenatural_image
Diagram of a circular mechanical component with internal components and mounting holes (no text or labels)Purierscheibe (18)
natural_image
Mechanical assembly diagram showing a gear and shaft assembly with a red circular arrow indicating motion (no text or labels)natural_image
Line drawing of a small steamer with a dome-shaped lid and handle (no text or symbols)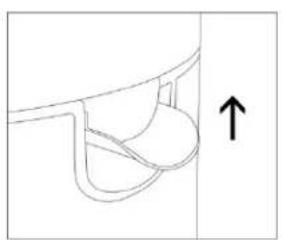
natural_image
Simple line drawing of a mechanical component with an upward arrow, no text or symbols present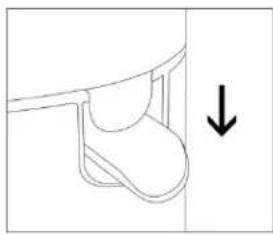
natural_image
Simple line drawing of a shoe seat with a downward arrow indicating direction (no text or symbols)Fig. 1 Fig. 2