Worktube - Radio PerfectPro - Free user manual and instructions
Find the device manual for free Worktube PerfectPro in PDF.
Frequently Asked Questions - Worktube PerfectPro
User questions about Worktube PerfectPro
0 question about this device. Answer the ones you know or ask your own.
Ask a new question about this device
Download the instructions for your Radio in PDF format for free! Find your manual Worktube - PerfectPro and take your electronic device back in hand. On this page are published all the documents necessary for the use of your device. Worktube by PerfectPro.
USER MANUAL Worktube PerfectPro
To get started with the most common functions of the Perfectpro Rockpro please use this „getting started“ user manual. For full explanation of all functions, please download the extended user manual at www.perfectpro.eu
The Bluetooth® word mark and logos are registered trademarks owned by Bluetooth SIG, Inc. and any use of such marks is under license.

WARNING!
WARRANTY BECOMES VOID ONCE THE DEVICE CABINET HAS BEEN OPENED OR ANY MODIFICATIONS OR ALTERATIONS TO THE ORIGINAL DEVICE HAVE BEEN MADE.
NEVER OPEN THE DEVICE CASING. THE MANUFACTURER WILL NOT ACCEPT ANY LIABILITY FOR DAMAGE RESULTING FROM IMPROPER HANDLING. THE TYPE PLATE IS LOCATED ON THE BOTTOM OF THE DEVICE.
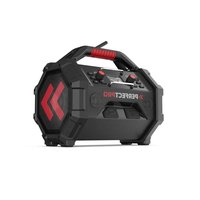
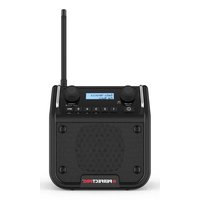
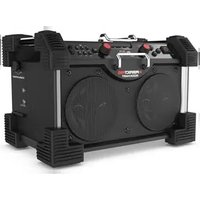
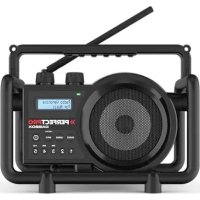
CONTROLS
Button overview
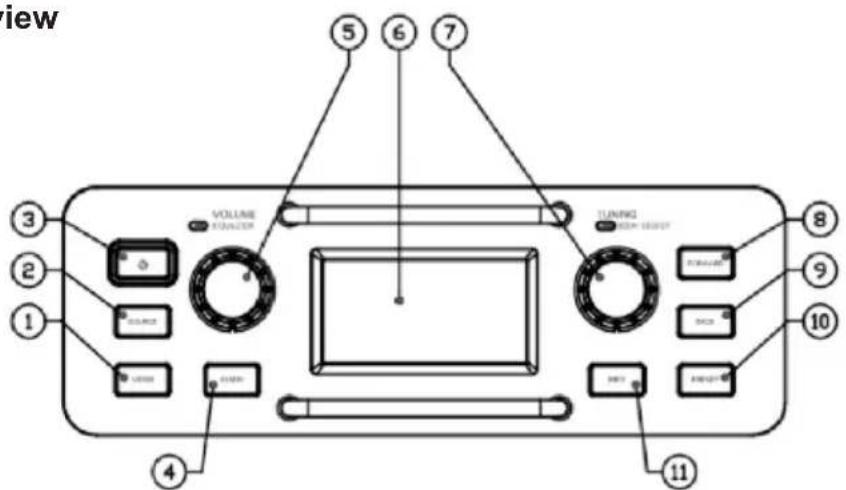
- Menu 7. Tuning / Seek / Select / Phone control
- Source 8. Preset + / Skip forward
- Power 9. Preset - / Skip backward
- Back 10. Preset / Play / Pause
- Volume / EQ control 11. Info
- LCD Display
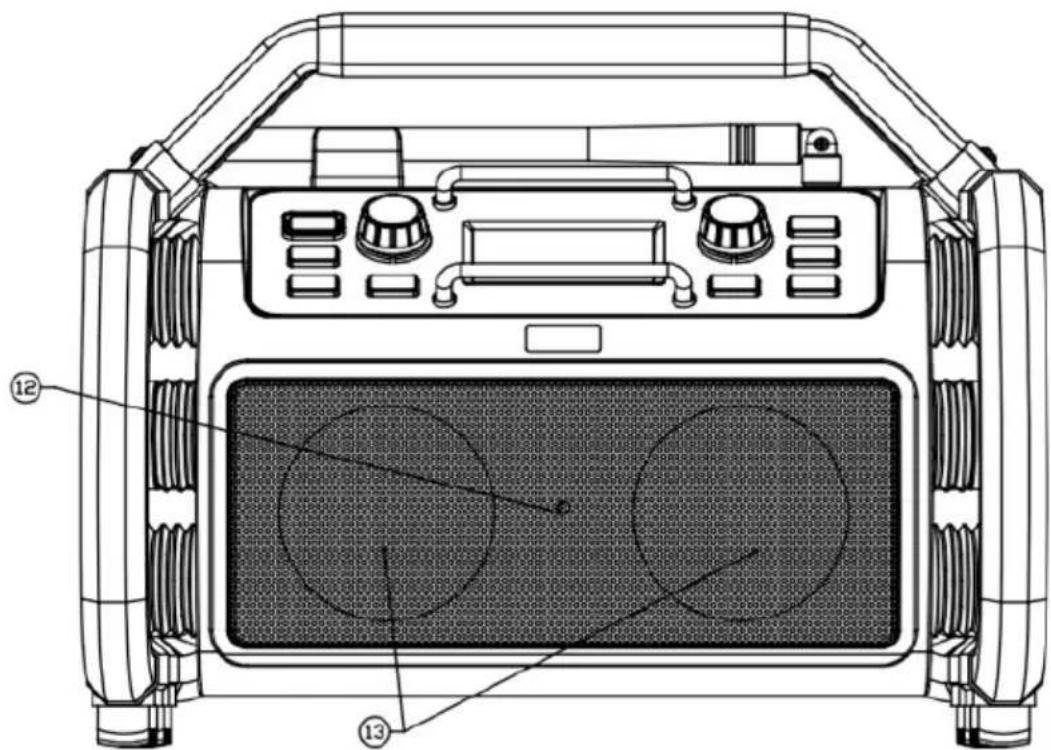
- Bluetooth LED 13. Stereo speakers
CONTROLS
Top view
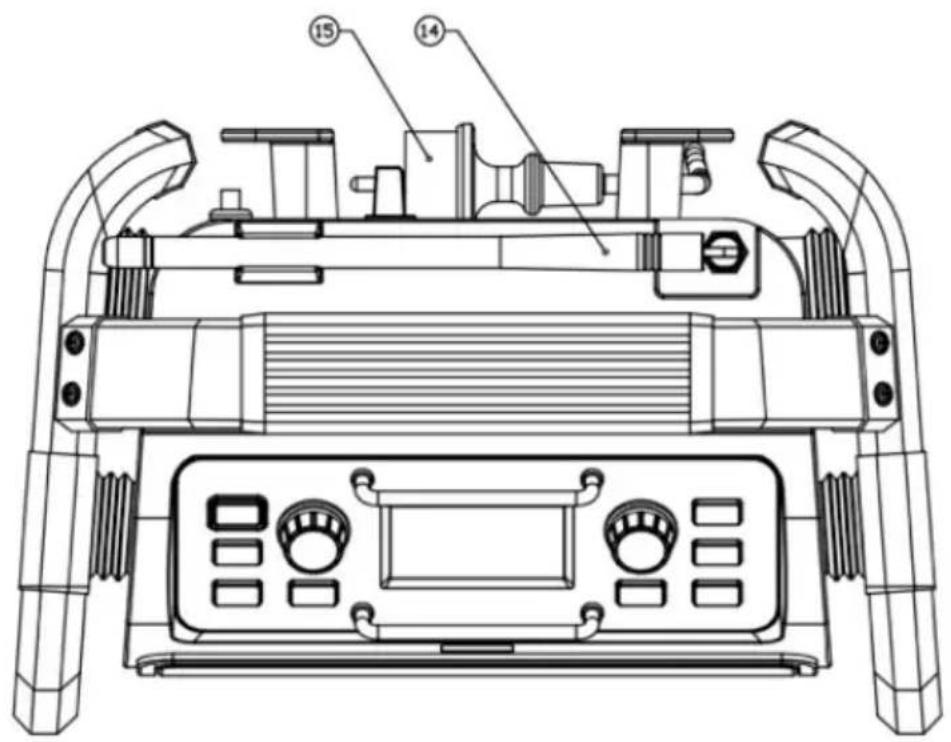
14. Rod antenna 15. Power cord (only required for DAB and FM band)
Bottom view
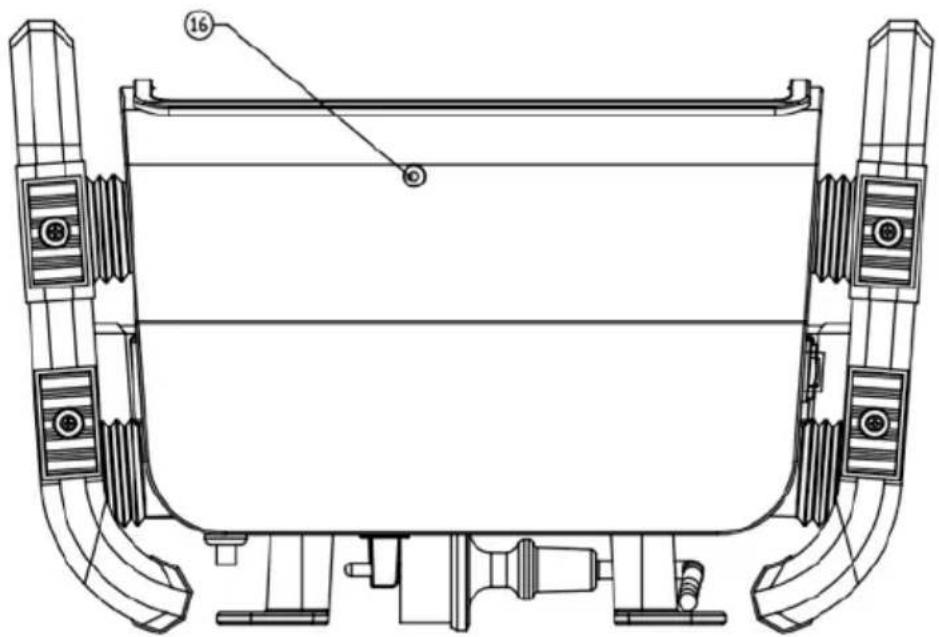
16. Microphone
CONTROLS
Rear view
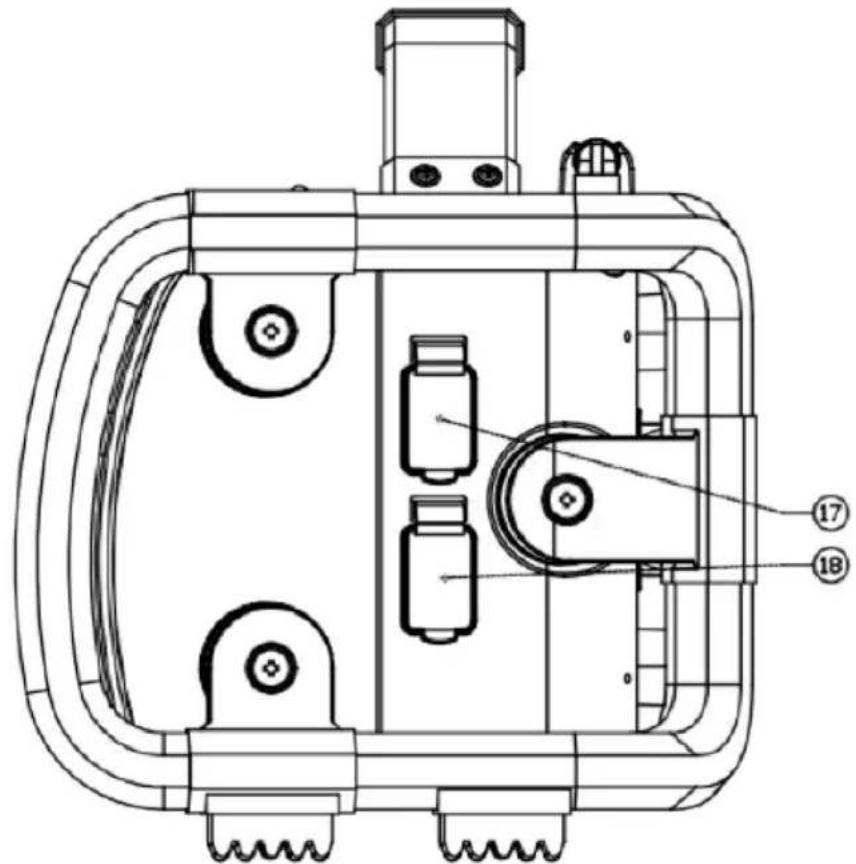
17. AUX-IN socket 18. USB Charge / USB host socket
GB
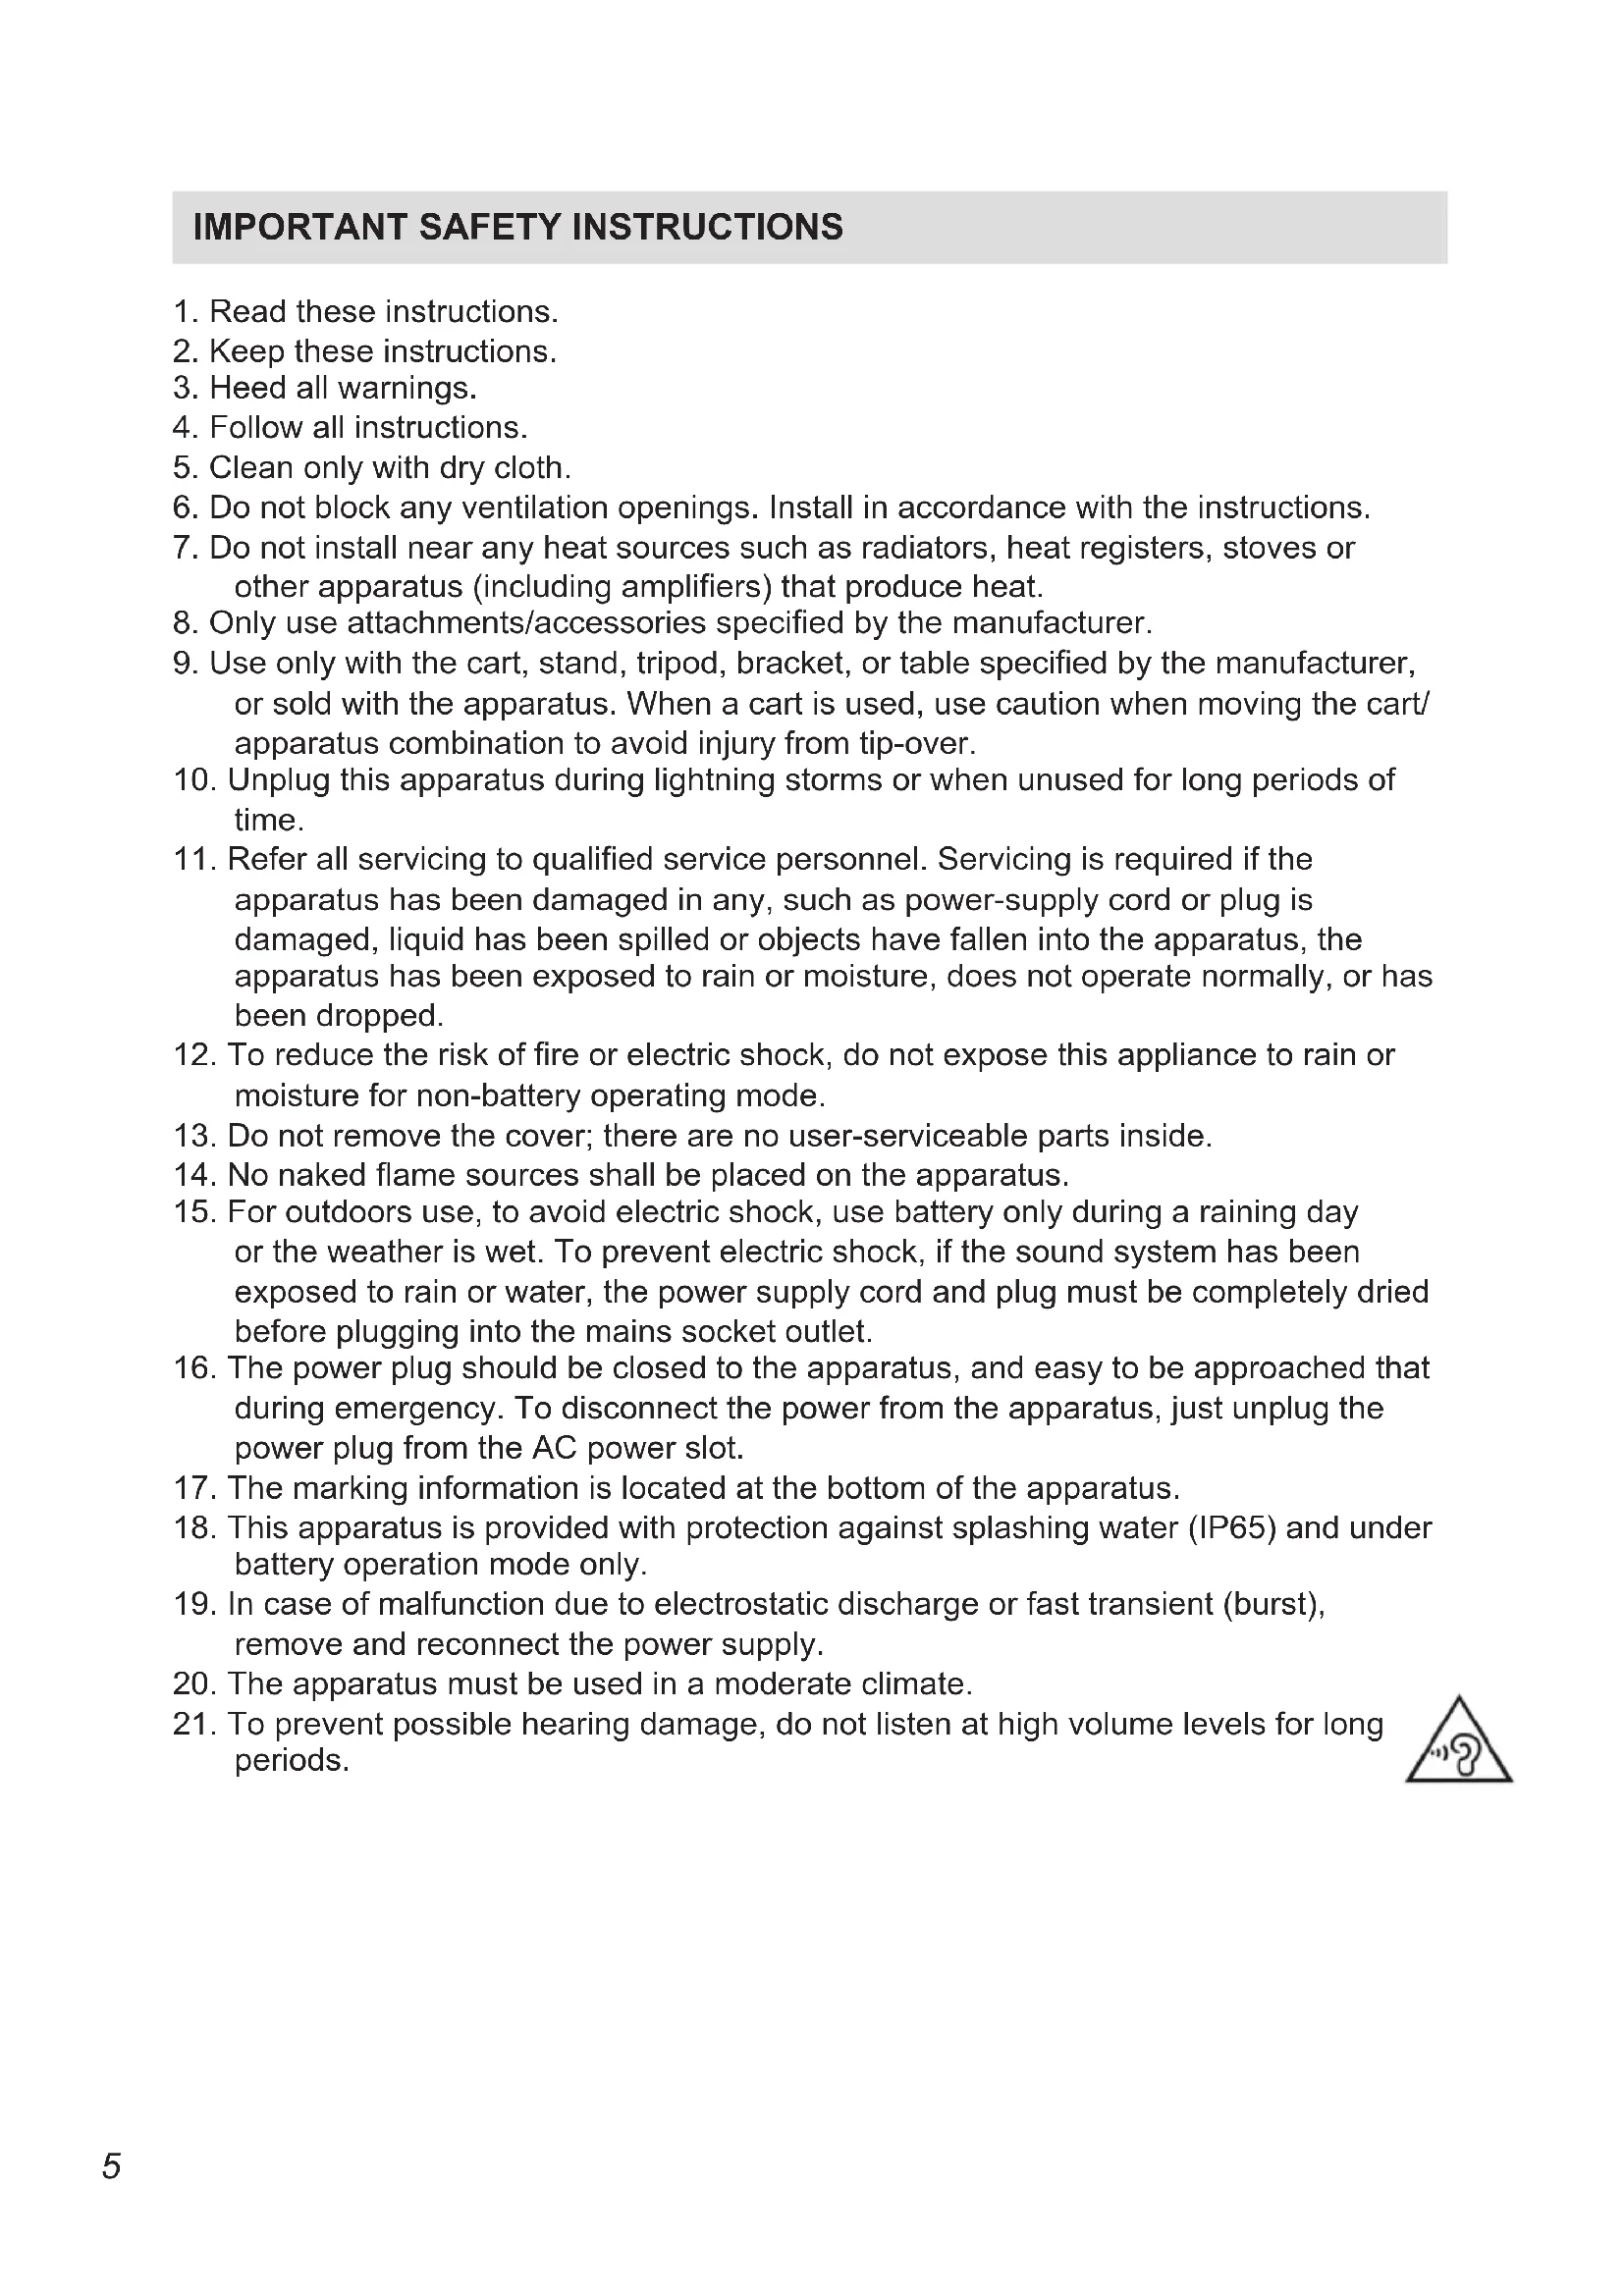
IMPORTANT SAFETY INSTRUCTIONS
- Read these instructions.
- Keep these instructions.
- Heed all warnings.
- Follow all instructions.
- Clean only with dry cloth.
- Do not block any ventilation openings. Install in accordance with the instructions.
- Do not install near any heat sources such as radiators, heat registers, stoves or other apparatus (including amplifiers) that produce heat.
- Only use attachments/accessories specified by the manufacturer.
- Use only with the cart, stand, tripod, bracket, or table specified by the manufacturer, or sold with the apparatus. When a cart is used, use caution when moving the cart/ apparatus combination to avoid injury from tip-over.
- Unplug this apparatus during lightning storms or when unused for long periods of time.
- Refer all servicing to qualified service personnel. Servicing is required if the apparatus has been damaged in any, such as power-supply cord or plug is damaged, liquid has been spilled or objects have fallen into the apparatus, the apparatus has been exposed to rain or moisture, does not operate normally, or has been dropped.
- To reduce the risk of fire or electric shock, do not expose this appliance to rain or moisture for non-battery operating mode.
- Do not remove the cover; there are no user-serviceable parts inside.
- No naked flame sources shall be placed on the apparatus.
- For outdoors use, to avoid electric shock, use battery only during a raining day or the weather is wet. To prevent electric shock, if the sound system has been exposed to rain or water, the power supply cord and plug must be completely dried before plugging into the mains socket outlet.
- The power plug should be closed to the apparatus, and easy to be approached that during emergency. To disconnect the power from the apparatus, just unplug the power plug from the AC power slot.
- The marking information is located at the bottom of the apparatus.
- This apparatus is provided with protection against splashing water (IP65) and under battery operation mode only.
- In case of malfunction due to electrostatic discharge or fast transient (burst), remove and reconnect the power supply.
- The apparatus must be used in a moderate climate.
- To prevent possible hearing damage, do not listen at high volume levels for long periods.
POWER SUPPLY
AC OPERATION
- Before plugging the AC power cord into the AC mains power socket, be sure the voltage is correct.
- Never use the AC power cord in rainy or moist conditions to prevent short circuit or moist from entering the radio. Under those conditions only use battery power and keep all rubber covers well closed.
NOTE:
In order to disconnect the radio from the AC mains power completely, the AC power cord should be removed from the AC mains power socket completely and it shall remain readily operable and should not be obstructed during intended use.
In case of malfunction due to electrostatic discharge or fast transient (burst), remove the AC power cord from AC mains power socket and reconnect the power supply after approximately one minute.
LITHIUM BATTERY OPERATION AND CHARGING
NOTE ON FIRST USE : BEFORE OPERATING THE Perfectpro Rockpro FOR THE FIRST TIME ALWAYS FIRST FULLY CHARGE THE LITHIUM BATTERY.
GB
The Perfectpro Rockpro can be operated by the built-in Lithium battery. During operation on battery power the approximate power level of the battery is displayed by the 4 segments battery icon in the top right corner of the LCD display. When the battery power level is very low, the "empty" icon will start flashing. Under this condition, the battery should be recharged as soon as possible to continue normal operation of the Perfectpro Rockpro.
Charging time from empty to full battery is approximately 6-7 hours (at room temperature with the radio in Standby mode). The Perfectpro Rockpro can be charged in Standby mode as well as in On mode while playing music. While playing music the charging time will be longer than in Standby mode. When charging is in process the battery icon segments will animate.
The Perfectpro Rockpro, for additional safety, will not start the charging process when the battery is already full or nearly full.
BATTERY SAVE MODE
When the Perfectpro Rockpro is operated on battery power and put into Standby mode, after 30 seconds the Perfectpro Rockpro will be turned off completely. This is normal in order to prevent the battery from draining fully in Standby mode.
When the radio is powered on again by pushing the power button it will have to start up fully again as well as reconnect to the WiFi network. It will first try to reconnect with the last used WiFi network. This may take up to one minute.
When the Perfectpro Rockpro is operated on AC power and put into Standby mode it will remain in Standby mode (date and clock display) and can remain connected to the WiFi network.
Note: In Standby mode the alarm function can only be used when the radio is operated on AC power. In Standby mode on battery power the radio will not be turned On by the alarm function/settings.
NOTE ON PLAYING TIME ON BATTERY POWER: The achieved playing time on battery power depends on many factors such as: selected volume level, music type (bass heavy music consumes more energy), selected music source, selected EQ setting, ambient temperature and age of the battery. Depending on these variables a playing time of approximately 12-16 hours on a medium set volume level can be achieved.
NOTE: When playing on battery power and the energy level of the battery is very low, the sound may distort on higher volume and the WiFi-connection may become unstable.
NOTE ON LITHIUM BATTERY LIFE: If the Perfectpro Rockpro is not used for any extended period of time, always first charge the built-in battery until it is full. The optimum working life from the built-in battery will be obtained if it is kept topped up by recharging after each use of the Perfectpro Rockpro, even if it is only partially discharged. The battery's working life will be reduced if the product is left in a discharged condition for a long period of time.
WARNING:
Do not attempt to replace or repair the built-in lithium battery. If you have any doubts about the built-in lithium battery, please contact the service department for further assistance.
WARNING:
Danger of explosion if the battery is incorrectly replaced.
Do not expose the battery to excessive heat such as sunshine, fire or the like.
Batteries should not be disposed of by incineration and with household waste.
Disposable batteries should be taken to a suitable recycling centre if possible.

Safety information for internal rechargeable Lithium-polymer battery
The internal rechargeable lithium-polymer battery used in this device is able to supply power for a long period of time. However, even lithium-polymer batteries reach a point where they cannot be recharged. If the battery does not recharge after several attempts, it may be drained (have a too low charge), please contact service@prefectpro.eu for repair information.
However, if you do not want us to replace the battery, you will need to dispose of used batteries/ device in accordance to the laws and regulations in your area. In addition, you can contact your local electronics retailers or recycling centre for disposal.
User Safety Precautions
Check the room temperature range is 0^ - 35^ ( 32^ - 95^ Fahrenheit) before charging the battery.
Do not attempt to disassemble the plastic covering or any parts of the device, as the materials inside may be toxic and may damage skin and clothes.
Do not puncture, crush, modify, throw or cause any unnecessary shock to your battery, as the battery used in this device may present a risk of fire, explosion, or chemical burn if mistreated.
Do not leave, charge or use the battery in a car under direct sunlight, near fire or any heated source.
Do not immerse, throw, wet the battery in water/ seawater.
Do not use or charge the battery if it appears to be abnormally hot, discoloration, deformation or abnormal conditions is detected during use, charge or storage.
Do not leave a charging battery unattended. Keep the battery away from babies and children.
Instructions to prevent reasonably foreseeable misuse
A battery incorporated in the equipment and a battery together with its associated components (including cells and electric power generators) shall be so constructed that an electric shock or fire safeguard failure (for example, flammable chemical leakage causing fire or insulation damage) is unlikely, taking all reasonably foreseeable conditions into account. If applicable, this shall include extreme conditions as specified by the manufacturer, such as:
- high or low extreme temperatures that a battery can be subjected to during use, storage or transportation; and
- low air pressure at high altitude.
Where providing safety devices or design in a battery or equipment is not reasonably practical considering the functional nature of the battery or equipment containing a battery, instructional safeguards in accordance with Clause F.5 shall be provided to protect the battery from extreme conditions or user's abuse. Examples that shall be considered include: - replacement of a battery with an incorrect type that can defeat a safeguard (for example, in the case of some lithium battery types):
- disposal of a battery into fire or a hot oven, or mechanically crushing or cutting of a battery, that can result in an explosion;
- leaving a battery in an extremely high temperature surrounding environment that can result in an explosion or the leakage of flammable liquid o
gas;
- a battery subjected to extremely low air pressure that may result in an explosion on the leakage of flammable liquid or gas.
GETTING STARTED
Installation using THE "SET-UP WIZARD"
Place Perfectpro Rockpro on a flat surface and plug the AC power plug into the AC mains power socket, be sure the voltage is correct.
IMPORTANT: In order to disconnect the Perfectpro Rockpro from the AC mains power completely, the AC power plug should be removed from the AC mains power socket completely and it shall remain readily operable and should not be obstructed during intended use.
When you apply power, the display on the sound system will light up.

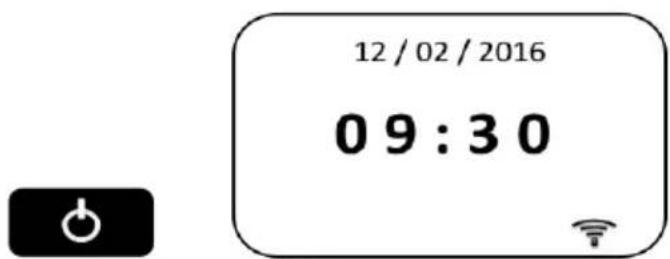
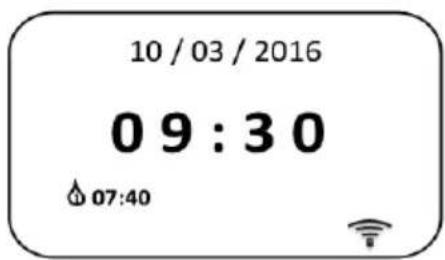
After a few seconds the radio will then enter Standby and the clock will display '00:00' as shown.

To continue to setup Perfectpro Rockpro press the Power button. If this is the first time that you use Perfectpro Rockpro (or after a Factory Reset) the display will show 'Setup wizard' and 'YES' will be highlighted on the screen.

Press the Tuning/Seek/Select control to select 'YES' and to begin setting up Perfectpro Rockpro.

TUNING SEEK/SELECT

The Language menu will be shown on the screen for you to select your preferred language. By default Perfectpro Rockpro will display all menus and messages in English. Rotate the Tuning/Seek/Select control until the desired language is highlighted on the screen. Press the Tuning/Seek/Select control to select the chosen language option. The set up procedure will be continued with Date/Time menu shown up with your desired language.

GB
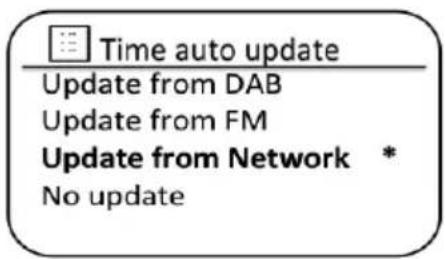
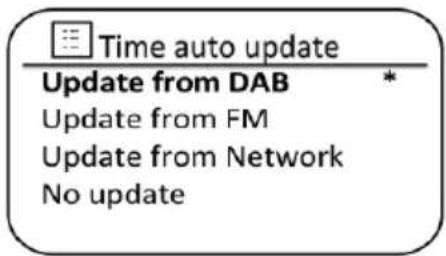
Next, the way in which the radio updates its clock is set. A menu allowing you to specify the auto-update option for the clock will be shown. The 'Update from Network' or "Update from DAB" option will be good for most users.
Rotate the Tuning/Seek/Select control to highlight the time zone for your current location. Press the Tuning/Seek/Select control to enter the setting.
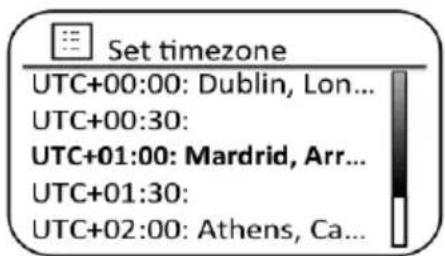
You will then need to set the Daylight Savings option according to your location (Daylight Savings is also known as Summer/Winter time or CEST/ECT adjustment). Rotate the Tuning/Seek/Select control to highlight 'ON' or 'OFF' as required. The asterisk shows the current setting. For example, in the Germany, 'ON' is equivalent to Central European Summer Time (CEST) and 'OFF' is equivalent to Central European Time (CET).

Rotate the Tuning/Seek/Select control to highlight the required option and then press the control to make the selection.


After setting the Keep Connected option, the display will show a list of supported WiFi regional options.
Rotate the Tuning/Seek/Select control to highlight the required region (for the European countries, choose ' Europe'), and then press the control to make the selection. Perfectpro Rockpro will then scan for available WiFi networks.

If you plan to use a WiFi connection, you will first need to identify your network in the list of network names presented by the Network Wizard. If no networks are found then you may have to get your wireless router working (please see the instructions supplied with the wireless router) or you may be too far from the router.
When the sound system finds your wireless network, it displays the Network Name (SSID) for the wireless access point on the screen. This is a name that is allocated to the access point in your router by the person who set up the network - for example: 'Wilson' or 'Jame's group'. If the router supports WiFi Protected Setup, then '[WPS]' will be shown in front of theSSID.

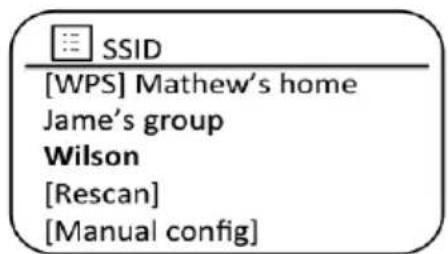
It is possible, and in some locations highly likely, that Perfectpro Rockpro will find more than one wireless network, in which case you should choose which one you need to connect to.
Rotate the Tuning/Seek/Select control to see the SSID for each wireless network that has been found. If your network is shown proceed to step 6. If it is not shown then proceed to step 5.
If you make a mistake at any point, use the Back button to go back to the previous screen.
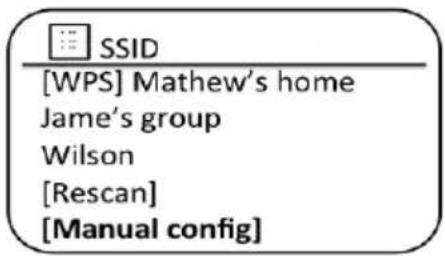
If your network is not found, it may be because the router is configured not to broadcast the SSID. You should then use the Tuning/Seek/Select control to highlight and select the 'Manual config' option in order to enter the network details manually. This is described in 'Manual Network Configuration'.

If your network name is being broadcast, and it was not found, then try re-scanning (press the Back button), and if necessary try moving Perfectpro Rockpro to a location closer to your access point / router.
When the SSID for the wireless network you wish to connect to is highlighted on the screen, press the Tuning/Seek/Select control. If WiFi Protected Setup (WPS) was indicated, you will see an additional menu at this point, otherwise proceed to step 7.
Choose one of the WPS menu options as required for your router (WPS may be via push button, or using an identification number).

'WPS Button': the display prompts you to press the WPS button on your router and then the Select control on the sound system. The two devices should then connect with the encryption key sent automatically to the sound system.
'WPS PIN': the display shows an identification number which you must enter into your router using a web browser (refer to your router's user documentation). You should then press the Select control on the sound system.
The two devices should then connect with the encryption key sent automatically to the sound system. 'Skip WPS' - if you wish to enter the encryption key yourself (or if it was previously entered).
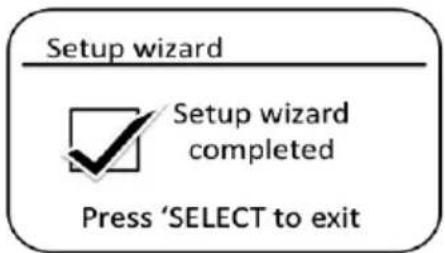
If you choose 'WPS Button' or 'WPS PIN' the screen will then show 'Connecting...' and then 'Setup wizard completed'. Press the Tuning/Seek/Select control to exit the setup wizard.

If your network is configured without an encryption key, the screen should say 'Connecting...', and then 'Setup wizard completed'. Press the Tuning/Seek/Select control to exit the setup wizard and show the Main menu. If this is the case then you have successfully connected Perfectpro Rockpro to your network.
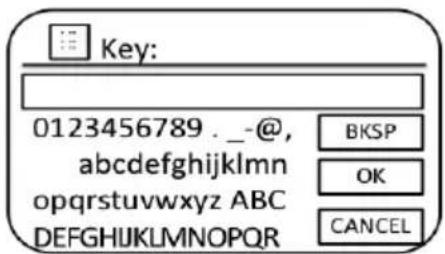
If the screen displays 'Key:', it is because the network is using one of the encryption systems: Wired Equivalent Privacy (WEP) or WiFi Protected Access (WPA). You will need to enter the correct WEP or WPA key into the sound system to allow it to communicate with your wireless network. If you do not have the WEP or WPA key, then you should obtain it from the person who set up your network. Some wireless routers may come with an encryption key already set up by the supplier, in which case you should refer to the documentation provided with it. WPA is used here to also include WPA2.
WEP keys are 10 or 26 characters long (using 0 - 9, and A - F). Some wireless routers can also use pass-phrases for WEP but these are not supported by the sound system. WPA keys are usually set up using a pass-phrase of between 8 and 63 characters. Perfectpro Rockpro accepts pass-phrases for WPA keys.
To enter the WEP or WPA key, characters are selected and entered using the Tuning/Seek/Select control. As you rotate the control, the highlight scrolls through the available characters as well as the three controls on the right. The character currently highlighted will be entered when you press the Tuning/Seek/Select control.

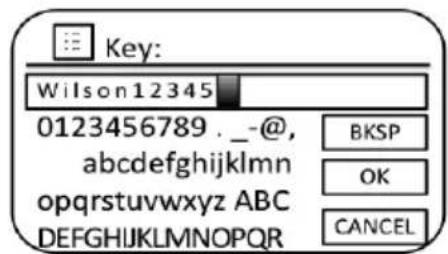
Do this as needed until the complete key has been entered. Remember, WEP keys only use the numbers 0-9 and letters A-F. WPA keys are sensitive to upper and lower case characters. You must enter the key exactly or the sound system will not connect to the network.
The three controls on the right-hand side of the screen have special functions. You can quickly access these by pressing the Info button and then using the Tuning/Seek/Select control as needed:
select 'BKSP' to erase a character just entered (long press to clear);
select 'OK' when the complete key has been entered
select 'CANCEL' to cancel and re-run the Network Wizard
INFO
If a WEP or WPA key has previously been entered for the selected SSID then the display will show 'Key: [Set]'. If you have previously entered a different key, you must clear this by selecting the 'BKSP' symbol.

After the final character of the WEP or WPA key has been entered, highlight the 'OK' symbol and press the Tuning/Seek/Select control. The screen will show 'Connecting...' and then 'Setup wizard completed'. Press the Tuning/Seek/Select control to the exit setup wizard. The sound system should now be able to connect to the network.
Once you have connected Perfectpro Rockpro to the network (and therefore also to the Internet) it will display the Main menu. Press the Power button to put the sound system into Standby/Off mode. It should then display the time as obtained from the Internet. If the time display is not correct for any reason, it can easily be adjusted later, 'Manually setting the clock'.
INTERNET RADIO
Selecting a radio station by location
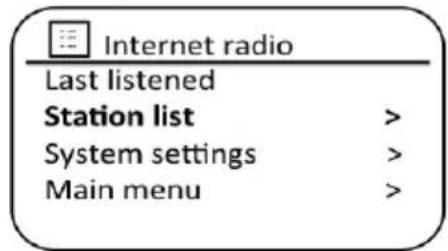
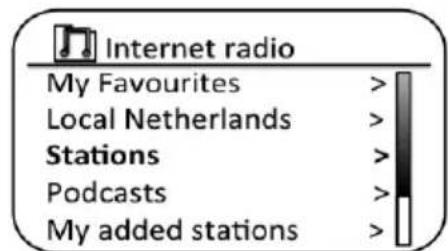
Press the Power button to switch the sound system on. Then press the Source button to select the Internet radio mode display.
SOURCE
Press the Menu button to enter the main Internet radio menu. Rotate the Tuning/Seek/Select control until 'Station list' is highlighted on the display and then press the control to select the option.
MENU
GB
Rotate the Tuning/Seek/Select control until 'Stations' is highlighted on the display and the press the control to select. Note that the menu may offer one or more local selections based upon the country in which the unit is being used, according to your internet IP address ('United Kingdom' and 'BBC' stations, for example).

TUNING SEEK/SELECT
Rotate the Tuning/Seek/Select control until 'Location' is highlighted on the display and then press the control to select.
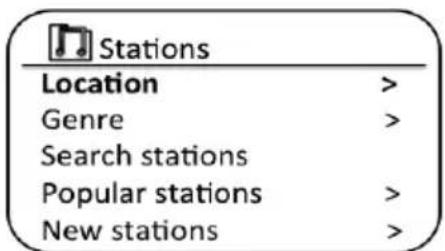
Rotate the Tuning/Seek/Select control to scroll through the list of continents. When the desired continent is highlighted press the control to enter your selection.

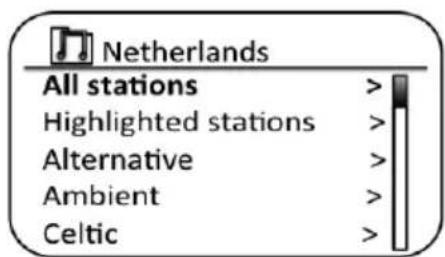
The display will show a list of countries within the chosen continent. If there are many countries shown you can scroll through the list continually in either direction. For example, if the chosen continent was Europe, then to find the Netherlands scroll up from the top of the list to the bottom by turning the Tuning/Seek/Select control anticlockwise. Press the Tuning/Seek/Select control to choose the desired country.

You will typically find that you then have the option to select either 'All Stations' or one of a number of categories. The lists are always sorted alphabetically, and long lists will wrap around from top to bottom or bottom to top.
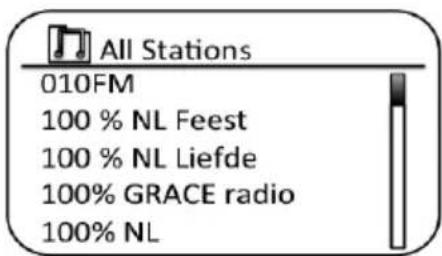
Rotate the Tuning/Seek/Select control to highlight your chosen radio station and then press the control to enter your selection. The display will show 'Connecting...' while the sound system connects to the new station. The station should then start playing. Adjust the volume as needed.
SPOTIFY CONNECT
Spotify Connect - the basics
Spotify is all the music you'll ever need. Millions of songs available instantly. Just search for the music you love, or let Spotify play you something great. Spotify works on your phone, tablet, computer and home speakers. So you'll always have the perfect soundtrack for whatever you're doing.
Spotify Connect allows your Spotify selections to be played through the radio, remotely controlled from your iPhone, iPad, Android device or any Desktop.
Connect also allows you to transfer the playing of the sound to other Spotify Connect enabled devices under the control of your smart-phone, tablet or any Desktop.
Once your Spotify account has been connected to your radio, you may start Spotify playing from the radio without needing to use the Spotify app.
Spotify Connect compatibility is shown with the following identifier:

GB
NOTE: Spotify Connect requires a Spotify Premium subscription.
Setting up Spotify Connect
For more details about setting up Spotify Connect, please go to Spotify.com/connect
To use Spotify with your Perfectpro Rockpro radio you will need to download the Spotify app and you will need a Spotify Premium account.
The Spotify software is subject to third party licenses found here: www.spotify.com/ connect/third-party-licenses
Playing music by Spotify Connect
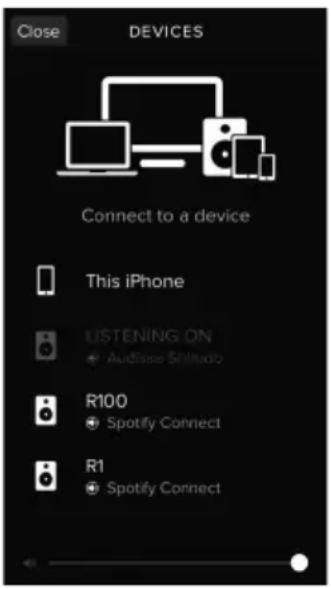
Simply open Spotify on your Apple iOS / Android device and tap the Spotify Connect icon on the play screen. When the Spotify app has identified other devices that are compatible with Connect, the Connect icon will be shown with a circle. When another device is playing, the Spotify Connect icon will be become green. Tapping the Connect icon will show a list of Connect enabled devices and allow remote control of the volume. To select your radio choose Perfectpro Rockpro on the Spotify Connect devices screen. You are now ready to play music through your radio using Spotify Connect.
Controlling Spotify on your radio
The music can be controlled using the controls on your radio as well as by any Spotify enabled device.
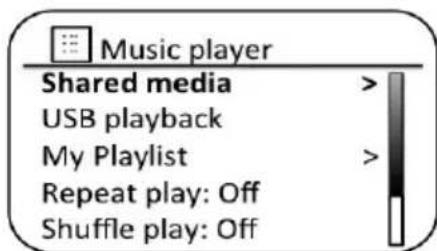
MUSIC PLAYER
Accessing your audio files via a UPnP server
If your computer is running Windows (XP or Vista), then Windows Media Player version 11 includes a UPnP server which will make your files available to Perfectpro Rockpro. There are other UPnP server solutions available for non-Windows users and for Windows users who may wish to use an alternative (see the preceding page). It is beyond the scope of this instruction book to cover all possible options for UPnP. We explain the use of Microsoft's Windows Media Player here since that will be the first choice for the majority of users.
Rotate the Tuning/Seek/Select control until 'Shared media' is highlighted and press the control to select. The sound system will scan for all available UPnP servers. It may take a few seconds for the radio to complete its scan. The radio will display <Empty> if no UPnP servers are found.

After scanning, select your UPnP server using the Tuning/Seek/Select control. If you are using WMP 11 as the server, Perfectpro Rockpro will then normally display 'Unauthorized - Select to retry' at this stage.


USB PLAYER
Using USB memory devices
This section describes how to use your radio to access and playback your audio files via USB memory devices.
USB memory devices plug into the rectangular slot on the right hand side of your radio. Important: Your radio is only designed to work with USB flash memory devices. It is not intended to be connected to hard disk drives or any other type of USB device.
The Prefectpro Rockpro radio has been tested with a range of USB memory devices of up to 128GB capacity. USB memory must use the FAT or FAT 32 filing system in order to operate with your radio. Your radio is unable to play from media formatted using the exFAT or NTFS formats.
It is possible to use SD or SDHC cards for media storage and playback when held in a suitable USB adaptor. However, due to the wide variation of such adaptors, it is not possible to guarantee that all adaptor / card combinations will work in the radio.
Audio formats supported are MP3, WMA, AAC, FLAC and WAV. USB playback does not support files encoded using WMA Lossless, WMA Voice, WMA 10 Professional, nor files of any format, which have DRM protection.
DAB+ DIGITAL RADIO
DAB Radio
Using DAB mode for the first time
Carefully extend the rod antenna.
Press the Power button to switch on the sound system. If the sound system has been used before the last used mode will be selected.

Press the Source button as needed so that DAB radio mode is selected on the display.
SOURCE

If this is the first time, the display will show 'Scanning'. (If the sound system has been used before the last used station will be selected instead.)
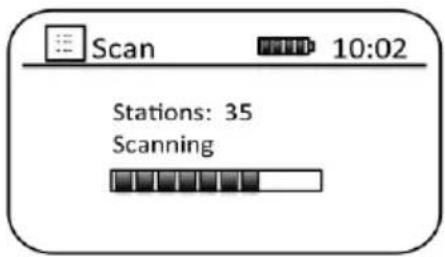
During the scanning process, as new stations are detected the station counter will increase and the stations will be added to the list which is stored in the sound system. The bar graph indicates the progress of the scan.
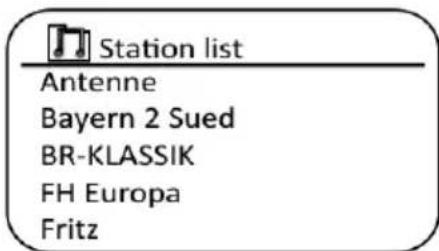
When scanning is completed the radio will list the stations found (in numeric-alpha order 0....9...A..Z), unless it has previously been tuned to a DAB station.
Rotate the Tuning/Seek/Select control to scroll through the list of available DAB radio stations.
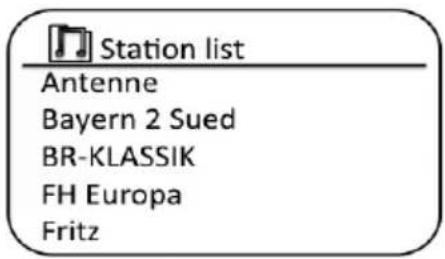

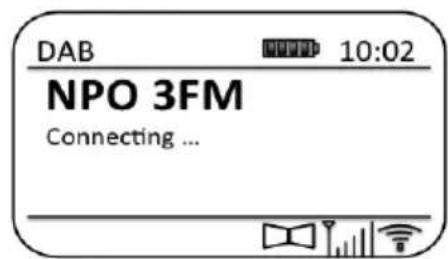
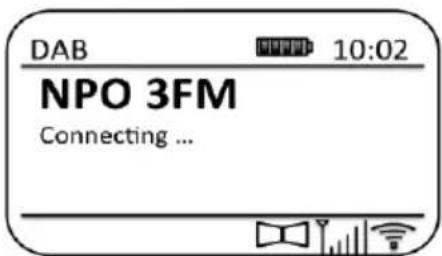
Press the Tuning/Seek/Select control to select the highlighted station. The display may show 'Connecting...' while the radio re-tunes.

Use the Volume control to set the sound level as needed. If the station list is still empty after the scan the display will show 'Service not available'. If no stations are found it may be necessary to relocate Perfectpro Rockpro to a position giving better reception.
Selecting a DAB radio station
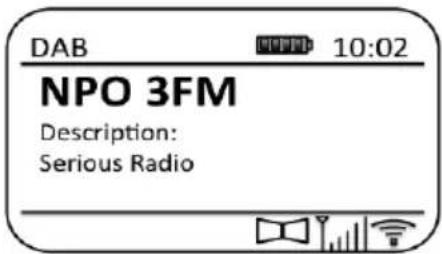
When playing a DAB radio station, the display normally shows the name of the current station with other related information.
Rotate the Tuning/Seek/Select control to access the radio station list and to scroll through the available stations.

Press the Tuning/Seek/Select control to select the highlighted station. The display may show 'Connecting...' while the radio re-tunes.
Use the Volume control to set the sound level as needed.

Note: If the display shows 'Station Not Available' it may be necessary to relocate Perfectpro Rockpro to a position giving better reception. A question mark in front of the station name merely indicates that the station has not recently been detected by the sound system. It may still be available.
FM RADIO
Operating in FM mode
Carefully adjust the rod antenna and press the Power button to switch on Perfectpro Rockpro.

Press the Source button as needed to select FM radio mode.

Rotate the Tuning/Seek/Select control in a clockwise direction. The displayed frequency will increase. Press the Tuning/Seek/Select control to carry out an autotune. Your radio will scan up the FM band from the currently displayed frequency and will stop scanning when it finds a station of sufficient strength.


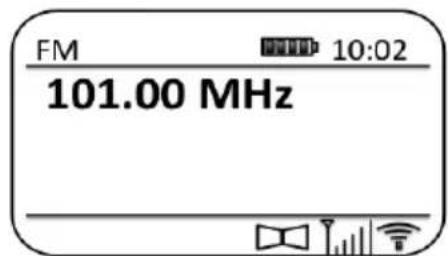
The display will show the frequency of the signal which has been found. If RDS information is available, after a few seconds the display will show the radio station name. If you only hear hiss or interference, simply press the Tuning/Seek/Select control to scan further. Perfectpro Rockpro may have found a spurious interference signal.

To find more FM stations press the Tuning/Seek/Select control to repeat the scan operation. To scan down in frequency, rotate the Tuning/Seek/Select control in a anticlockwise direction first and then press the control. Your radio will scan down the FM band from the currently displayed frequency and will stop scanning when it finds a signal of sufficient strength.
When the end of the waveband is reached Perfectpro Rockpro will recommence tuning from the opposite end of the waveband.
Use the Volume control to adjust the sound level as needed.
PRESETTING RADIOSTATIONS
There are 40 memorypresets. They are used in the same way for each operating mode.
The Perfectpro Rockpro has the unique function of Preset + and Preset -
This enables you to quickly zap through your whole preset list.
When performing a Factory Reset the whole Preset memory of the radio will be emptied.
To store radio stations into 40 memory presets by using Preset button.
Press the Power button to switch on Perfectpro Rockpro.
Tune to the required radio station as previously described.
To store the station as a preset station, press and hold the Preset button until the display shows a preset menu 'Save to Preset'.

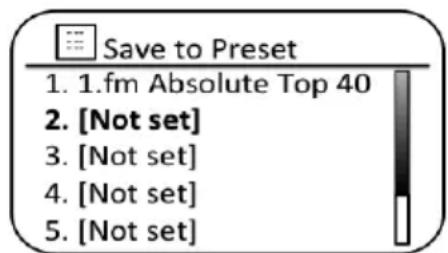
Rotate the Tuning/Seek/Select control to the desired preset number until it is highlighted. Press the Tuning/Seek/Select control to confirm and the display shows 'Preset Stored'. The station will be stored under the chosen preset button. Repeat this procedure as needed for the remaining presets.


Stations which are already stored in the presets may be over written by following the above procedure.
Note: The radio station presets are retained in memory when the sound system is switched off and disconnected from the mains supply.
Recalling a preset radiostation
Press the Power button to switch on Perfectpro Rockpro

Select the required operating mode using the Source button.
SOURCE
You can briefly press the Preset -/Skip Backward button to recall the previous one preset station. For example, if you are playing P2, the Preset -/Skip Backward button will recall the P1 station if it exists.

Note: If the P1 station is not existing in the preset menu, the sound system will directly search for the previous available station in the list, then play.
Note: If there is no available station in the preset list, the sound system will display a pop-up screen with an announcement "Preset empty".
or you can briefly press the Preset +/Skip Forward button to recall the next one preset station in the list. For example, if you are playing
P2, the Preset +/Skip Forward button will recall the P3 station if it exists.

Note: If the P3 station is not existing in the preset menu, the sound system will directly search for the next available station in the list, then play.
Note: If there is no available station in the preset list, the sound system will display a pop-up screen with an announcement "Preset empty".
Or press and release the Preset button until the display shows the "Recall from Preset" screen.
Use the Tuning/Seek/Select control to scroll through the preset list until you reach the preset you want to select. Press and release the Tuning/Seek/Select control to select the preset.
BLUETOOTH
The Bluetooth mode on your sound system allows you to play audio, play sound from video files and stream music from Bluetooth capable devices such as your mobile phone, computer, tablet etc. through your Perfectpro Rockpro's loudspeakers.
Connecting Bluetooth devices
The sound system allows to be connected to one Bluetooth device via Bluetooth connection.
Ensure that the Bluetooth capability on your phone, tablet or PC is enabled. You may need to refer to the user documentation for your device, since the method will vary with each device.
Press the Power button to switch on the Prefectpro Rockpro sound system.

Press the Source button on your sound system until the Bluetooth is selected.
SOURCE
Press the Menu button to enter Bluetooth menu;
MENU
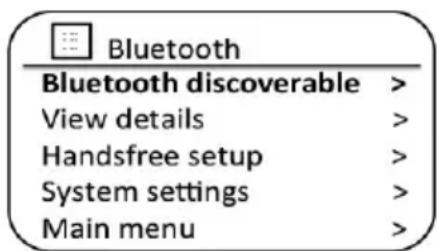
Press the Tuning/Seek/Select control to select "Discoverable" and press the control to start enter Bluetooth discovery mode.
The Perfectpro Rockpro sound system will immediately enter discovery mode by flashing its Bluetooth icon, and showing "Bluetooth Discoverable", "Please connect with a device to: Perfectpro Rockpro" on the display.
Using the Bluetooth settings of your phone, tablet or PC direct it to search for 'discoverable' devices. After a few seconds, you should see a device named 'Perfectpro Rockpro'. Just occasionally it may take longer for the sound system to be found by your device.

Select 'Perfectpro Rockpro' to cause your phone, tablet or PC to pair with your sound system and to establish a connection.
Once the connection is established, the Bluetooth icon on the LCD will stop flashing and will remain on. A message will be displayed briefly confirming and followed by a display with the name of the connected device.

GB
You can now begin playing music from your smart-phone, tablet, etc.

Some Bluetooth devices may require a 'Passkey' (an authentication key) in order to establish a link between devices. A passkey is similar to a password, although you only need to use the passkey once to establish a link. If your device asks for a passkey to be able to pair with your radio then enter a code of 0000 (four zeroes).
ANSWERING INCOMING PHONE CALL
The Hands Free Calling feature allows you to answer an incoming phone call when the sound system has been connecting to a Bluetooth mobile phone.
Press the Tuning/Seek/Select control (Phone icon) on the right to pick up an incoming call.

TUNING
SEEK/SELECT
Speak towards the microphone (MIC) located bottom side of the radio.
Adjust the conversation volume by rotating the Volume control. A lower volume setting can reduce a possible echo in the phone conversation.

VOLUME
EQUALIZER
Press the Tuning/Seek/Select control again to hang up the phone call.
Note: The volume of ring tone will be increased to maximum after the phone rings for about 10 seconds.
Note: The ringtone of iPhone will be streamed to the radio via Bluetooth. But because of Android system, the ringtone of Android phone or other phones will only be sounded on the mobile.
AUX INPUT
WARNING: Never use the AUX-IN socket in rainy or moist conditions to prevent moist from entering the radio. Keep the rubber cover well closed under these conditions.
A 3.5mm Auxiliary Input socket located on the right hand side of Perfectpro Rockpro is provided for connecting the audio signal from an external audio source such as an MP3 or CD player.
Connect a stereo lead from the headphone output of your MP3 or CD player to the Aux In socket located at the rear of the sound system. Typically this lead will have a 3.5mm stereo plug at both ends.
Switch on Perfectpro Rockpro by pressing the Power button briefly.

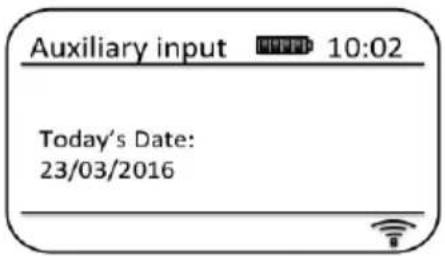
Press the Source button until AUX in mode is shown on the display.
SOURCE
Press the 'play' on the connected audio device. If you are using its headphone output for the connection, set its volume control to a level of somewhere between two-thirds and maximum (the objective is to get a strong audio signal but without too much distortion). Then adjust the volume on the sound system as required. Note, if using an iPod as the sound source, you may need to set its output to maximum to get an adequate audio signal level.
After use, disconnect your player in order to listen to Perfectpro Rockpro conventionally.
EQUALIZER FUNCTION
The sound on Perfectpro Rockpro can be adjusted to suit your personal taste for the material that you are listening to. The Perfectpro Rockpro has a range of equaliser modes. Alternatively you may set the treble and bass levels to your own preferences which can be accessed from the My EQ menu item.
Press the Power button to switch on your radio. Access the menu for the current mode by pressing the Menu button.
MENU
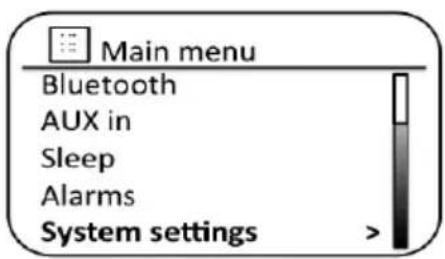
Rotate the Tuning/Seek/Select control until 'System settings' is highlighted on the display. Press the control to enter the system settings menu.
Rotate the Tuning/Seek/Select control until 'Equaliser' is highlighted on the display. Press the control.
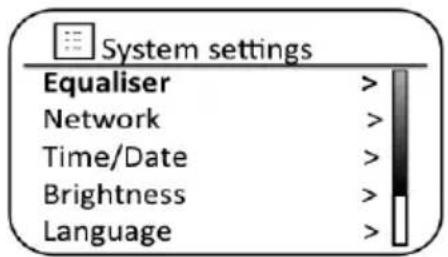
Rotate the Tuning/Seek/Select control to cycle through and highlight the various modes. Press the control to confirm your selection.
a - 'Normal (Flat)' d - 'Movie' g - 'News'
b - 'Jazz' e - 'Classic' h - 'My EQ'
c - 'Rock' f - 'Pop'
SETTING THE ALARM CLOCK
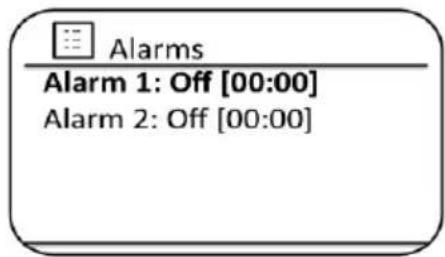
Prefectpro Rockpro has two separate alarms which can be set to wake you to either the radio or a buzzer alarm. In the event of a power interruption Perfectpro Rockpro has built in memory that will retain your alarm settings.
Important note: In Standby mode the alarm function can only be used when the radio is operated on AC power. In Standby mode on battery power the radio will turn off fully after 30 seconds (battery power save mode) and will not be turned on by the alarm function/settings.
Ensure that the time is set correctly before setting the alarms.
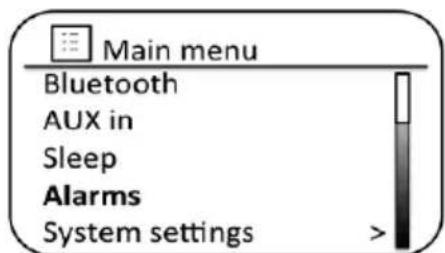
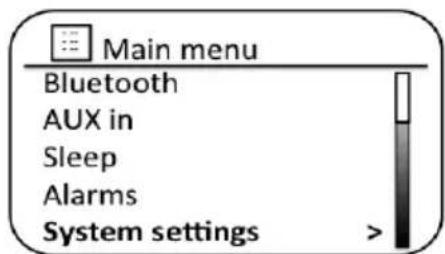
With Perfectpro Rockpro switched on, press the Menu button to access the menu for the current mode. Rotate the Tuning/Seek/Select control until 'Main menu' is highlighted on the display. Press the control to enter the 'Main menu'.
Rotate the Tuning/Seek/Select control until 'Alarms' is selected on the display. Press the control to see the current alarm settings. If no change is required, press the Menu or Back buttons to exit.

Rotate the Tuning/Seek/Select control until the desired alarm (1 or 2) is highlighted on the display. Press the control to enter alarm setup.
Rotate the Tuning/Seek/Select control until 'Time' is highlighted on the display. Press the control to adjust the alarm time.
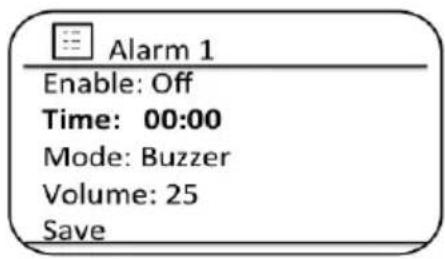
Rotate the Tuning/Seek/Select control to choose the alarm hour. Press the control to confirm the setting.

Rotate the Tuning/Seek/Select control to choose the alarm minute. Press the control to confirm the setting. The display will then return to the alarm setting menu. If the sound system has been set to use a 12 hour clock format, there will also be an option here for setting AM or PM for the alarm time.

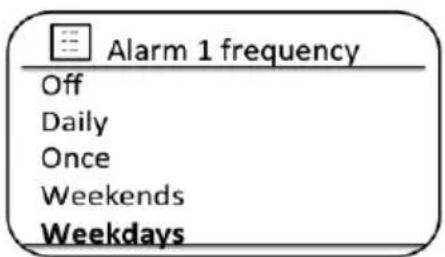
Rotate the Tuning/Seek/Select control to highlight 'Enable' and press the control. The display will show the Frequency options for the alarm. The alarm frequency options are as follows: 'Off' - the alarm will be disabled 'Daily' - the alarm will sound everyday 'Once' - the alarm will sound once 'Weekends' - the alarm will sound only at weekends 'Weekdays' - the alarm will sound on weekdays only. Rotate the Tuning/Seek/Select control to choose the required alarm frequency option. Choosing Off will disable the alarm. Press the control to confirm the selection. If you choose to set the alarm to Once you will also need to set the date using the Tuning/Seek/Select control.

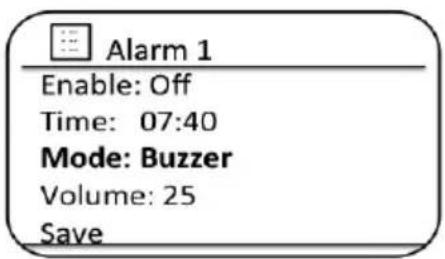
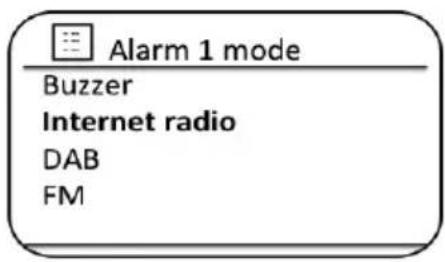
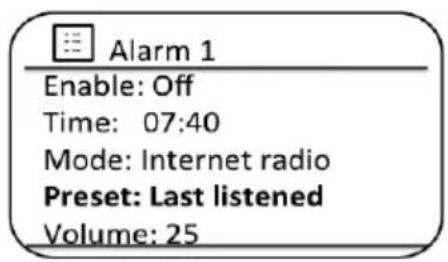
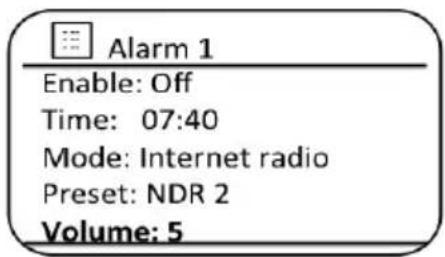
The alarm can be set to buzzer, Internet radio, DAB radio or FM radio. For whichever radio mode is selected, the radio alarm may be set to any of the stations, which have been stored as presets or to the station most recently listened to. Rotate the Tuning/Seek/Select control to highlight the current 'Mode' option for the alarm, then press the control if you wish to change it. Rotate the Tuning/Seek/Select control to highlight either 'Buzzer' or the required radio mode. Press the control to confirm the selection.
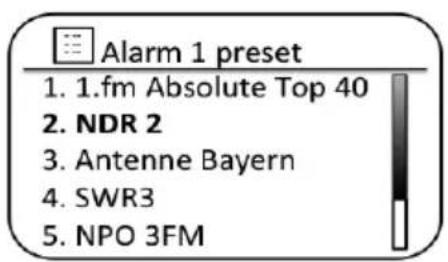
If setting the alarm to a radio option, rotate the Tuning/Seek/Select control to highlight the 'Preset:' option then press the control if you wish to change it. Choose from either the radio station 'Last listened' to, or from the presets 1 - 40. Scroll to the chosen option and press the control to confirm the selection. Note that you can only set the alarm to use a preset which has already been stored.
Rotate the Tuning/Seek/Select control until the 'Volume:' option is highlighted on the display and press the control if you wish to change it. The sound system uses the saved volume setting for each alarm when it sounds. Rotate the control to set the required volume and then press the control to confirm the setting.
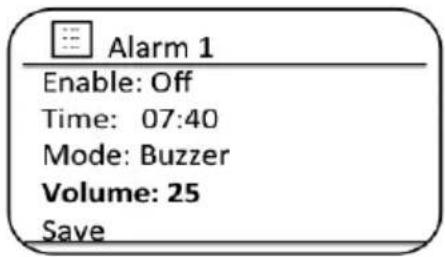

In order to store the alarm settings rotate the Tuning/Seek/Select control until 'Save' is highlighted. Press the control to store the alarm settings. Your radio will show 'Alarm saved' and will then go back to the list of alarms with the new alarm setting shown in the display. If you decide not to save the settings, press the Back button. The display will show 'Save changes' with a 'YES' or 'NO' option. Rotate the Tuning/Seek/Select control to choose 'NO' and then press the control. 'Alarm not saved' will show on the display. Active alarms are shown using small alarm indicators at the bottom of the playing displays and on the clock display when in standby.

Note: If you make a mistake at any point while setting the alarms, use the Back button to go back to the previous screen.
FACTORY RESET
If you wish to completely reset Perfectpro Rockpro to its initial state this may be performed by following this procedure. By performing a factory reset, all user entered settings will be erased.
Access the menu for the current mode by pressing the Menu button. Rotate the Tuning/Seek/Select control to highlight the 'Main menu' option, then press the control to select.

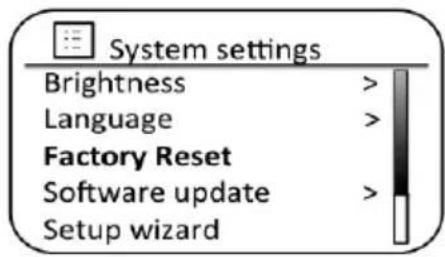
Rotate the Tuning/Seek/Select control until 'System settings' is highlighted and then press the control to select.

Rotate the Tuning/Seek/Select control until 'Factory Reset' is highlighted and then press the control. Rotate the Tuning/Seek/Select control and highlight 'YES' to proceed. If you do not wish to carry out a system reset, highlight 'NO' and then press the control. The display will revert to the previous menu.
With 'YES' highlighted, press the Tuning/Seek/Select control. A full reset will be performed and the sound system will restart as if first plugged in. The DAB stations list together with any preset stations will be erased and your wireless network connection details will be lost. All configuration settings will be restored to their defaults, the clock and alarms will be reset.

In case of malfunction for any reason, reset the product as described above to resume normal operation. It may be necessary in some cases to disconnect the mains power, then reconnect power after 10 seconds.

In case of malfunction due to electrical fast transient (burst), reset the product as above (reconnection of the power source may be required) to resume normal operation.
Under the environment with Conducted Immunity disturbance / Radiated Immunity, the sample may malfunction. It will automatically recover to normal when the Conducted Immunity disturbance / Radiated Immunity stopped.
CHARGING A MOBILE PHONE
The USB socket on the right hand side can provide DC power of 5V/0.5A for charging a mobile phone. Connect the mobile phone to the USB socket with an appropriate cable (not included with Perfectpro Rockpro). The USB power is available in all the operating modes and including standby mode. Refer to the user manual or the manufacturer of the mobile phone to verify if it supports charging from an USB power.
Warning: Never use the USB socket in rainy or moist conditions to prevent moist from entering the radio and so to prevent potential short circuit. Always keep the rubber cover well closed under these conditions.
It is recommended to use AC power while charging a mobile phone via USB socket. On battery power it is also possible to charge a mobile phone from the USB socket, however using battery power to charge a mobile phone will consume much energy from the battery and so drain the battery fast.
UNDOK APP
The Perfectpro Rockpro supports remote control from Apple iPhone, iPad and Android using the UNDOK app. The apps are available in Apple's app store and Google's android play.
The UNDOK app allows you to:
Control all the modes of the Perfectpro Rockpro, including internet radio, Spotify, Media Player, USB playback, DAB, FM, Bluetooth and AUX-In;
Adjust the volume level of current playback;
Setting EQ for various audio presets;
Setting Sleep timer;
Editing the displayed name of the Prefectpro Rockpro.
ADDITIONAL METAL TELESCOPIC ANTENNA
You can use this as an alternative antenna for your radio in areas or locations where the radio signal (FM/DAB/DAB+) is weak to very weak.
ATTENTION: The standard antenna on the radio is flexible. The metal antenna is not flexible or bendable and should be used with care. Breaking or bending antennas is not covered by warranty.
Installing: Carefully screw off the standard exible antenna. First carefully loosen the antenna with an open-end-wrench (size 14) - turn counter clockwise.
Carefully screw on the metal telescopic antenna and softly tighten it with an open-end wrench key (size 14) – turn clockwise.
ATTENTION: do not use too much force when fixing the antennas as this can damage the screw threat of the antennas or make it break off.
WARRANTY
This radio has a 2 year limited warranty.
WARNING! Warranty becomes void once the radio cabinet has been opened or any modifications or alterations to the radio have been made!
The terms of the warranty of this radio do not cover the following:
- Damage caused by misuse, abuse, neglect, alterations, accidents or unauthorized repair.
- Normal wear and tear.
- Breaking or bending of the metal telescopic antenna.
- Product with removed or defaced serial numbers.
Never open the device casing. The manufacturer will not accept any liability for damage resulting from improper handling. The type plate is located on the bottom of the device.
SPECIFICATIONS
Power Requirements
AC: 230 volts AC, 50Hz only
Built-in Lithium Polymer Battery: 11.1V, 4000mAh
Frequency Coverage
FM 87.5-108MHz
DAB 174.928 - 239.200 MHz
Connectivity
WiFi Dual modes to support 2.4GHz and 5GHz WiFi system 802.11b and 802.11g supported with WEP and WPA/WPA2 encryption compatible with 802.11n routers which offer mixed mode support for 802.11b/g. 2400-2483.5MHz, 5150MHz-5350MHz, 5470MHz-5725MHz
Bluetooth Version 4.1 supports Bluetooth pro iles A2DP and AVRCP 2400-2483.5MHz, MAX power < 20dBm
Circuit feature
Loudspeaker 2 × 76 ~mm
Output Power 2 × 15 Watts
Aux In socket 3.5mm, stereo
Aerial System WiFi Built-in antenna
DAB aerial
FM aerial
The company reserves the right to amend the specifications without notice.


If at any time in the future you should need to dispose of this product please note that : Waste electrical products should not be disposed of with household waste. Please recycle where facilities exist. Check with your Local Authority or retailer for recycling advice. (Waste Electrical and Electronic Equipment Directive)
Restriction in the 5GHz band:
According to Article 10 (10) of Directive 2014/53/EU, the packaging shows that this radio equipment will be subject to some restrictions when placed on the market in Belgium (BE), Bulgaria (BG), the Czech Republic (CZ), Denmark (DK), Germany (DE), Estonia (EE), Ireland (IE), Greece (EL), Spain (ES), France (FR), Croatia (HR), Italy (IT), Cyprus (CY), Latvia (LV), Lithuania (LT), Luxembourg (LU), Hungary (HU), Malta (MT), Netherlands (NL), Austria (AT), Poland (PL), Portugal (PT), Romania (RO), Slovenia (SI), Slovakia (SK), Finland (FI), Sweden (SE), the United Kingdom (UK), Turkey (TR), Norway (NO), Switzerland (CH), Iceland (IS), and Liechtenstein (LI). The WLAN function for this device is restricted to indoor use only when operating in the 5150 to 5350 MHz frequency range.
GB

Bluetooth
SOURCE D'ALIMENTATION
UTILISATION SUR SECTEUR
Bluetooth discoverable >
View details
Handsfree setup
System settings
Main menu
Prise Aux In 3.5mm, stereo
KONFIGURATIONEN “SET-UP WIZARD”
Please wait Connecting ..
Setup wizard completed
Press SELECT to exit
Bluetooth discoverable >
View details
Handsfree setup
System settings
Main menu
Product name: Rockpro
Art.nr.: RP1
ENG Declaration of Conformity
Prime Europe B.V. hereby declares that this model RP1 is in compliance with the essential requirements and other relevant provisions of Directive 2014/53/EU and also fulfills all the relevant provisions of EC/EU Directives: 2011/65/EU.
The EU declaration of conformity is available at the following internet address:
http://www.perfectpro.nl/support/ce-docs/