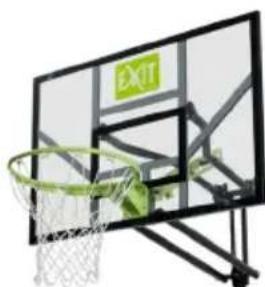
Galaxy WallMount System - Wall basketball hoop EXIT - Free user manual and instructions
Find the device manual for free Galaxy WallMount System EXIT in PDF.
| Product type | Wall-mounted basketball hoop |
| Brand | EXIT |
| Model | Galaxy WallMount System |
| Minimum usage height | 1.98 m (to the bottom of the backboard) |
| Maximum adjustable height | 3.05 m (standard height) |
| Main material | Steel |
| Backboard type | Black backboard with reinforced or flexible rim |
| Rim type | Standard rim (20) or flexible rim with spring (48) |
| Net included | Yes |
| Height adjustment system | Telescopic adjustment pole mechanism |
| Wall mounting | Wall frame with bolts and anchors |
| Number of people for assembly | 2 adults |
| Recommended use | Recreational family use outdoors or indoors (sufficient ceiling height) |
| Steel frame warranty | 2 years |
| Backboard and net warranty | 1 year |
| Maintenance | Cleaning with clean or soapy water; regular inspection of fixings and corrosion; anti-rust paint if necessary |
| Safety | Do not hang on the rim; adult supervision recommended; check condition before each use; do not use in strong wind |
| Spare parts available | Yes, complete list in the manual (pages 44-46) |
| Tools required for assembly | Drill, adjustable wrenches, hammer, screwdriver, level, stepladder |
Frequently Asked Questions - Galaxy WallMount System EXIT
User questions about Galaxy WallMount System EXIT
0 question about this device. Answer the ones you know or ask your own.
Ask a new question about this device
Download the instructions for your Wall basketball hoop in PDF format for free! Find your manual Galaxy WallMount System - EXIT and take your electronic device back in hand. On this page are published all the documents necessary for the use of your device. Galaxy WallMount System by EXIT.
USER MANUAL Galaxy WallMount System EXIT
Galaxy Wall Mount Basketball System Owners Manual
English4

Deutsch14
Nederlands24
François34


44
1.0 Introduction
Congratulations on choosing a EXIT Galaxy basketball system!
Have fun, be active and play outdoors.....
That's what keeps driving us to develop innovative, quality toys for cool kids.
We do everything possible to develop safe products for children. As our products are classed as toys, we comply with the toughest consumer safety regulations. Before launching our products onto the market, we have independent tests carried out for certification. We also continuously test our production runs and periodically have independent tests performed again as a further check. Only products which live up to the highest EXIT Toys standard are marked with and recognized by the EXIT-brand.
"We want to thank you for your custom and your confidence in this product. We're sure your kids will have as much fun as we did during development. Being open-minded, we really appreciate all comments and ideas which will help us improve our products or develop new ones. You are invited to send your ideas to us at info@exittoys.com"
Please visit www.exittoys.com and discover more cool new products.
The EXIT Toys team

SAFETY INSTRUCTIONS

FAILURE TO FOLLOW THESE SAFETY INSTRUCTIONS MAY RESULT IN SERIOUS INJURY OR PROPERTY DAMAGE AND WILL VOID WARRANTY.
Owner must ensure that all players know and follow these rules for safe operation of the system.
To ensure safety, do not attempt to assemble this system without following the instructions carefully. check entire box and inside all packing material for parts and/or additional instruction material. Before beginning assembly, read the instructions and identify parts using the hardware identifier and parts list in this document. proper and complete assembly, use, and supervision are essential for proper operation and to reduce the risk of accident or injury. A high probability of serious injury exists if this system is not installed, maintained, and operated properly.
- If using a ladder during assembly, use extreme caution.
- Two (2) capable adults are recommended for this operation.
- Seat the pole sections properly (if applicable). Failure to do so could allow the pole sections to separate during play and/or transport of the system.
- Climate, corrosion, or misuse could result in system failure.
- Minimum operational height is 6^ 6^ (1.98 m) to the bottom of backboard.
- This equipment is intended for home recreational use only and NOT excessive competitive play.
- Read and understand the warning label affixed to pole.
- The life of your basketball pole depends on many conditions. The climate, placement of the pole, location of the pole, exposure to corrosives such as pesticides, herbicides, or salts are all important.
- If technical assistance is required, contact customer Service.
- Adult supervision is recommended when adjusting height.
DO NOT HANG ON RIM
Most injuries are caused by misuse and/or not following instructions. Use caution when using this system.
TOOLS REQUIRED

- Two (2) Capable Adults
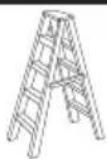
- Step Ladder 8ft. (2.4 m)
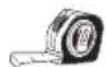
- Tape Measure
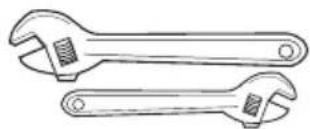
Large and Small Adjustable Wrenches
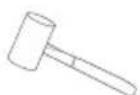
- Hammer
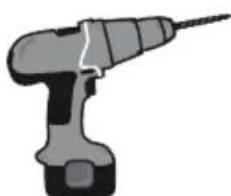
- Drilling machine
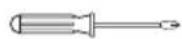
-
2 or #3 Phillips Screwdriver

- Spirit level
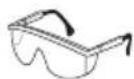
- Safety Glasses

- Pencil
General instructions for use
- Read the instructions before use and keep them throughout the lifetime of the product.
- Warning! Not suitable for children under 3 years due to small parts. Choking hazard.
Please note
- Regularly check the important parts of the product (backboard, rim, frame, fastenings, etc) to make sure it is in a good state of repair. Without these regular checks, the product might topple over or present other risks to the user.
We advise you to mount your backboard on the ground. - This piece of equipment must not be misused.
- Not adhering to the safety instructions below may lead to seriously physical injury.
- For domestic use only.
- Product designed exclusively for novice basketball use.
When assembling
- It should be fitted by two adults only.
- Adhere to the assembly instructions (diagrams and text supplied)
- Before mounting the product, check with a professional builder that the screws are suitable for the support you intend to mount it on.
- When you adjust the height or move the system, keep you hands and fingers away from moving parts.
Storage
- If the product is stored outside, it must be placed far away from personal belongings and hanging cables and/or in a place protected from wind.
Instructions for use in play
- Read the instructions below before using this product. Not adhering to these safety instructions may lead to serious physical injury and/or material damage.
Children using this product should be under the constant supervision of an adult. - Outdoor or indoor use (allow sufficient ceiling height to be able to play at a maximum height of 3.05m ).
- When adjusting the height, keep you hands and fingers away from moving parts.
- It is essential that you check the state of repair of the system before every use. Never play using faulty equipment.
- Check the system (loose screws, excessive wear and signs of corrosion) and that parts which fit together are firmly fastened (backboard, rim, frame, net, stability of the whole system) before each use. If necessary, repair before use.
- DO NOT HANG ON THE RIM, the net or any other part of the system, including the backboard and the frame.
- Do not climb, jump, slide or play on the system.
- Do not shake the frame.
- Risk of strangulation with the net.
- During play, especially when dunking, keep your face away from the backboard, rim and net. You risk serious injury if your theeth or face come into contact with the backboard, rim or net.
-
Do not allow a child to adjust the system alone. It must be adjusted or moved by an adult only.
-
Before play, remove your jewellery (rings, watches, necklaces, etc). These objects may get caught in the net.
- The ground surface under the system must be smooth, with no gravel or other sharp objects.
- Check the state of repair of the system (signs of corrosion like rust, holes, flaking) and repaint with outdoor enamel paint. If rust has worn through the steel at any point, replace the part immediately.
- Do not use the system when there are high winds and/or storms.
Safety Instructions:
NOT COMPLYING WITH THESE SAFETY INSTRUCTIONS MAY CAUSE SERIOUS PHYSICAL INJURY, MATERIAL DAMAGE AND/OR THE CANCELLATION OF THE WARRANTY.
- The owner must ensure that all players know and adhere to the instructions for using and assembling the system.
- Correctly and full assembly, use and supervision are essential for the system to work properly and to reduce the risks of accident or injury. Serious injuries are very likely if the system is not fitted, maintained and used correctly.
- If you use a ladder for assembly (solution not recommended for assembling this system), make sure you are extremely careful.
- Weather conditions, corrosion or misuse may damage the system.
- All EXIT Galaxy basketball systems, including those used for display, must be assembled, as per the instructions. If you do not adhere to these instructions you risk SERIOUS INJURIES.
- Most injuries are caused by misuse and/or not adhering to the instructions. Be careful when you use this system.
Care and Warranty
To ensure that your product lasts, we advise you to:
- Adhere to the usage and assembly procedures.
- Check the system before each use, loose screws, excessive wear and signs of corrosion) and if necessary make repairs.
- Regularly inspect and tighten screws and small parts to prevent slack and risks of injury.
- Do not use detergent products to care for the system. Wash with clear or soapy water.
Use the accompanying parts list drawings as from page 44
Parts list #1
| Part.Nr. | Description # | |
| 7 Upper Arm 2 | ||
| 42 Short Arm 2 | ||
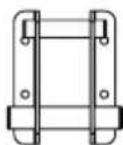
| 38 Wall-mount frame 1 | ||
| 70 Bolt sleeve 1 | ||
| 39 Adjustment bracket 1 | ||
| 10 Backboard bracket 1 | ||
| 11 Arm Bracket 4 | ||
| 44 Upper adjustment pole 1 | ||
| 45 Middle adjustment pole 1 | ||
| 46 Bottom adjustment pole 1 | ||
Parts list #2
| Part.Nr. | Description # | |
| D2 M8 Washer | 4 | |
| 15 M10 Plastic Washer | 4 | |
| 16 M12 Washer | 6 | |
| D8 M12 Plastic Washer 4 | ||
| C4 | M12 Locknut | 5 |
| C3 | M10 Locknut | 3 |
| C2 | M8 Locknut | 8 |
| G1 M8 Spring Washer | 4 | |
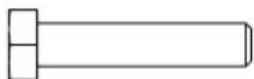
| A22 | M12X225 Bolt | 2 |
| A26 | M12X225 Button head Bolt | 1 |
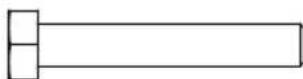
| A4 | M8X40 Bolt | 4 |
| A5 | M8X50 Bolt | 4 |
| A11 | M10X60 Bolt 2 | |
| A16 | M10X115 Bolt | 1 |
| A19 | M12X65 Bolt 2 | |
Enclosed are the current specifications and product features available at time of printing, however, changes may be made in equipment, availability, specifications and features without notice.
Parts list #3
| Part.Nr. | Description # | |
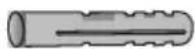
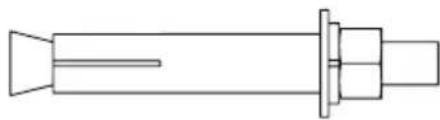
| H1 M8X46 | Plastic expansion pipe 4 | |
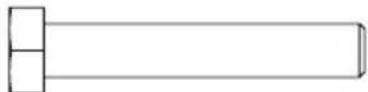
| A24 M8X60 | Lag Screw 4 | |
| A25 M8X80 | Steel Bolt 2 | |
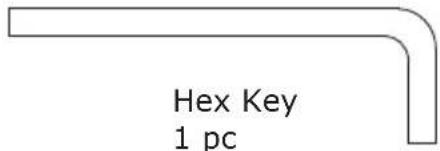
| Hex Key 1 | ||
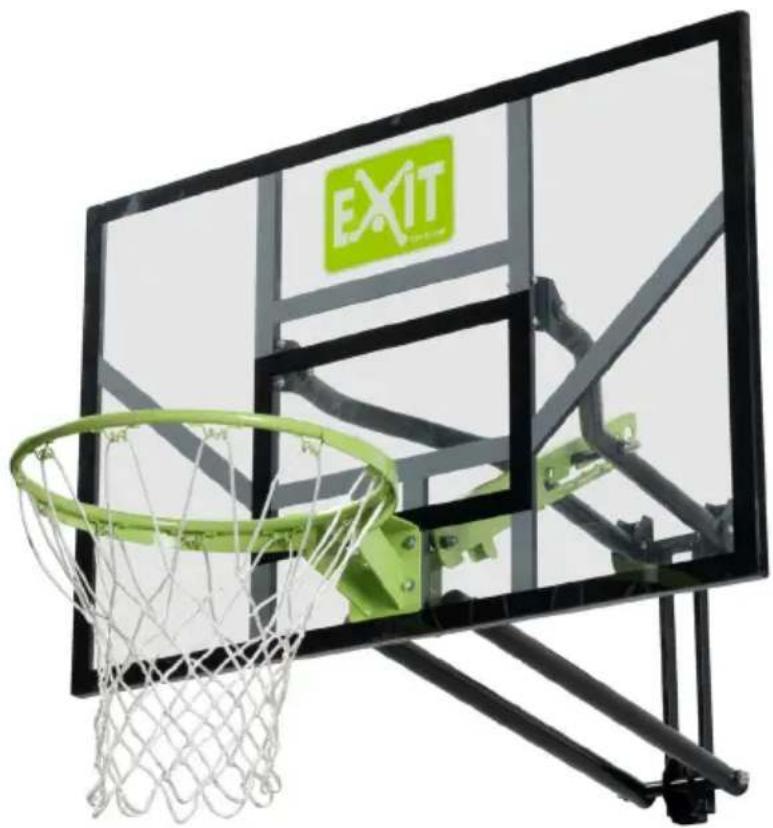
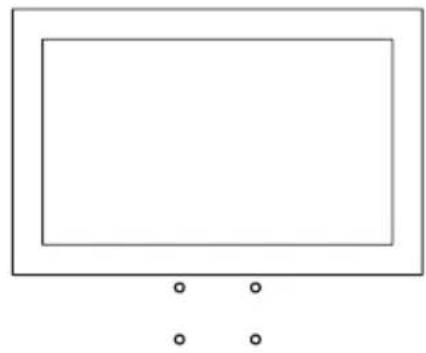
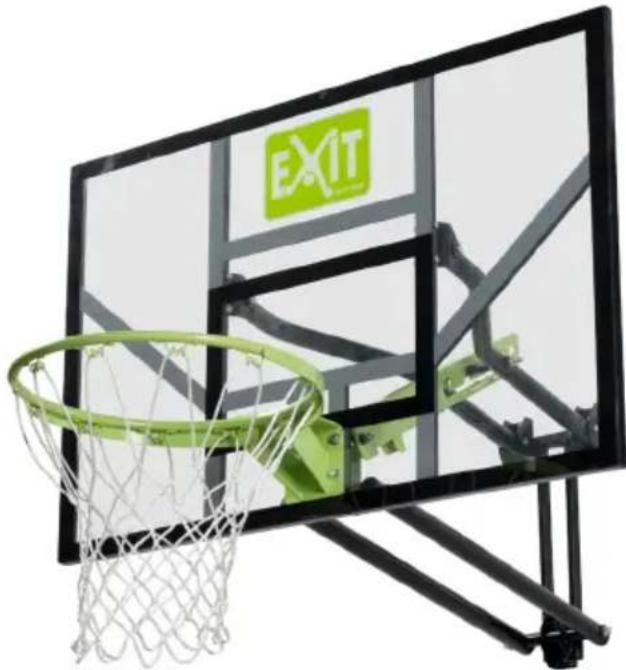
| 19 Blackboard 1 | ||
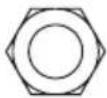
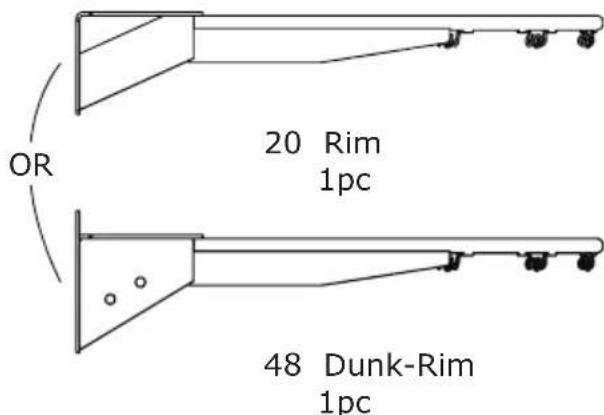
| 20 Rim | 1 | |
| 48 Dunk Rim (flexible) | ||
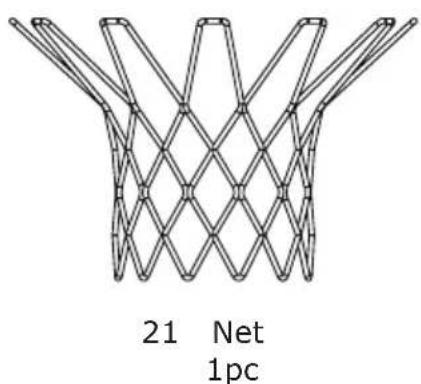
| 21 Net 1 | ||
Enclosed are the current specifications and product features available at time of printing, however, changes may be made in equipment, availability, specifications and features without notice.
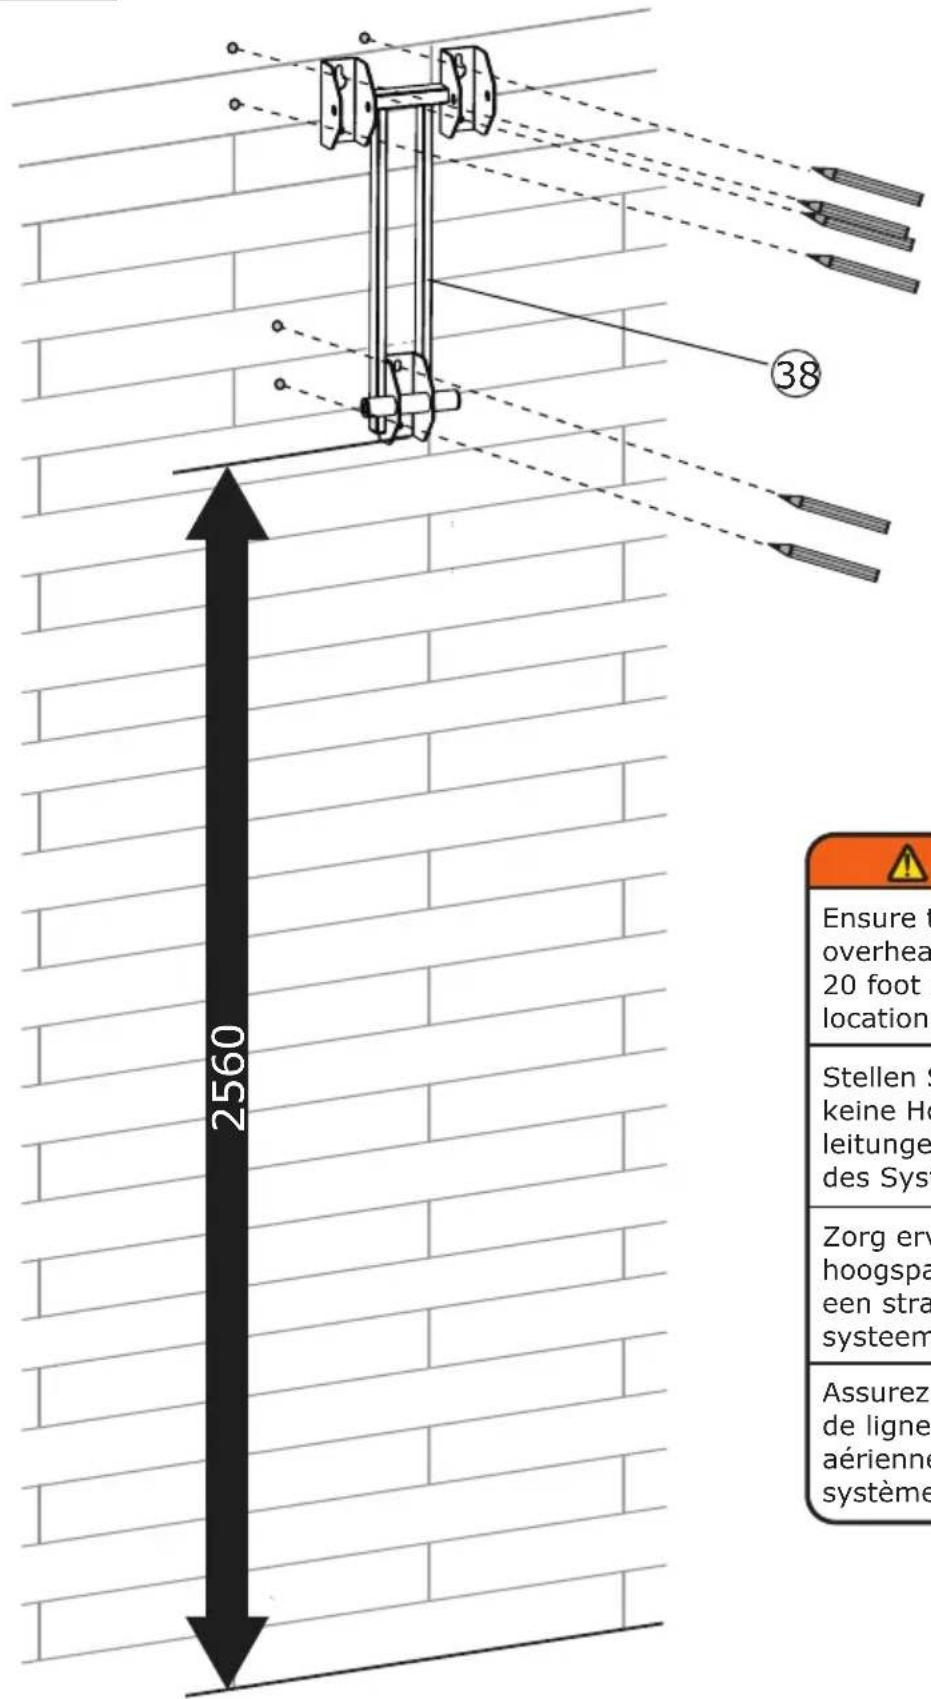
1
Use the accompanying assembly drawings starting on page 47
- First, the distance from the wall-mount frame (38) to the ground is 2,560mm .
- Then, mark where the holes should be made according to the position of wallmount frame
- Drill the holes according to the markings on the wall.
2
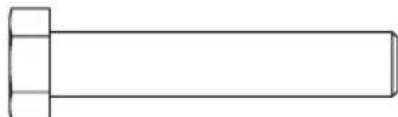
- Install two M8X80mm steel bolts (A25) in the top two holes.
- Install the four M8X46 plastic expansion pipe (H1) into the wall.
3
Attach the arm bracket (11) using two M8X40mm Bolts (A4) and two M8 locknuts (C2) into the blackboard (19).
Repeat this step on the other side of the weight system.
4
RIM (20): Attach the backboard bracket (10) to the Rim (20) using four M8X50mm bolts (A5), four M8 spring washers (G1), four M8 washers (D2), four M8 locknuts (C2) assembly to blackboard (19).
DUNK RIM (48): Attach the Backboard Bracket(10) and Dunk Rim (48) with four M8X50mm Bolts (A5), four M8 Spring Washers (G1), four M8 Washers (D2), to Blackboard (19).
5
Attach the adjustment bracket (39) using an M10X115mm bolt (A16) and M10 locknut (C3) into the backboard bracket (10).
6
- Attach the upper arm (7) to the arm bracket (11) using the M10X60mm bolt (A11), two M10 plastic washers (15), and an M10 locknut (C3).
Repeat this step on the other side of the weight system.
Do not tighten the bolt yet.
- Attach the bolt sleeve (70) to upper arm (40) using an M12X225mm button head bolt (A26), two M12 washers (16) and an M12 locknut (C4).
Do not tighten the bolt yet.
7
Attach the short arm (42) to the backboard bracket (10) using an M12X225mm Bolt (A22), two M12 washers (16), and an M12 locknut (C4).
8
Install the wall-mount frame (38) to the upper arm (7) using two M12X65mm bolts (A19), four M12 plastic washers (D8), and two M12 locknuts (C4).
Do not tighten the bolt yet.
9
Install the wall-mount frame (38) to the short arm (42) using an M12X225mm bolt (A22), two M12 washers (16), and an M12 locknut (C4).
Make sure all the bolts in the steps above are tighten. Do not over tighten the locknuts on the pivot parts.
10
-
Assemble the upper adjustment pole (44) with middle adjustment pole (45).
-
Then, attach the bottom adjustment pole (46) to the middle adjustment pole (45).
11
- First, the wall-mount frame (38) should be affixed using M8X80mm steel bolts (A25).
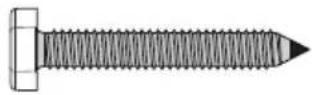
- Then, assemble washers, spring washers and nuts. Install the wall-mount frame (38) with four M8 washers (D2) and four M8X60mm wooden screws (A24) into the wall.
Note: Make sure all the bolts in the steps above are tighten.
12
Instructions
A. Elevating the backboard height.
Push the rim upwards using the adjustment pole to increase the backboard height.
B. Lowering the backboard height:
1. First, push the adjustment bracket using the adjustment pole so that the backboard will descend to the lowest point.
2. Then, push rim upwards using the adjustment pole to increase the backboard height to a spot you prefer.
Congratulations! Your EXIT Galaxy Basketball hoop is now fully assembled (put together).
Warranty
-
After the date of the purchase invoice, the owner of the EXIT Toys Galaxy System has a:
-
2-year warranty on the steel frame.
- 1 year warranty on the backboard and rim.
Parts subject to wear and tear (such as the net): no warranty.
- The warranty applies only to the material and construction defects with respect to this product or its components.
-
The warranty becomes defunct if:
-
This product is used incorrectly and/or carelessly and is used in such a way that it does not comply with its purpose.
- This product is not assembled and maintained according to the instruction booklet.
- Technical repairs to this product are not carried out professionally.
- Parts, which are mounted afterwards, do not comply with the technical specifications of the product concerned or are mounted incorrectly.
- Defects are a result of climatic influences such as corrosion, UV rays or normal disintegration.
-
The product is rented out or was made available to various unspecified persons in any other manner.
-
EXIT Toys will repair or replace according to its choice all material and construction defects that have been ascertained by EXIT Toys during the warranty period.
- The owner of the EXIT Toys Galaxy System is only entitled to the warranty by presenting the product for inspection at a EXIT Toys dealer. It should be handed to the EXIT Toys dealer, accompanied by the original purchase invoice.
- In case of material and construction defects that have been ascertained by EXIT Toys, the product or its components will be repaired or replaced - according to its choice - free of charge during the warranty period mentioned in Article 1.
- If the claim for warranty is not justifiable, all the costs are at the expense of the owner.
- This warranty cannot be transferred to third parties.
- The EXIT Toys Galaxy System is designed for personal use. It is not permitted to rent out or use the EXIT Toys Galaxy System in non-residential areas like schools, clubs or day-care centres. The guarantee and any other liabilities shall expire if the EXIT Toys Galaxy System is rented out or used in public areas.
- Warranties shall cover damage or failure that occurs during the course of NORMAL or INTENDED USE of the product. Normal or intended use shall be described as activity that is necessary for the participation in the sport for which the equipment is designed. NOT COVERED is damage caused by deliberate hanging, multiple player hanging, vandalism, non-basketball activities or any other activity that could be regarded as abusive.
Notes / Notizen / Notities / Notes
1.0 Einführung
Glickwunsch zur Wahl des EXIT Toys Galaxy Basketball Systems!
- Adjustment bracket 1pc

- Bolt sleeve 1pc
- Backboard Bracket 1pc

- Arm Bracket 4pcs

-
Upper adjustment pole 1pc
-
Middle adjustment pole 1pc
-
Bottom adjustment pole 1pc
D2 M8 Washer 4 pcs
15 M10 Plastic Washer 4 pcs
16 M12 Washer 6 pcs
D8 M12 Plastic Washer 4 pcs
C4 M12 Locknut 5 pcs
C3 M10 Locknut 3 pcs

C2 M8 Locknut 8 pcs


G1 M8 Spring Washer 4 pcs
A22 M12X225 Bolt 2 pcs

A26 M12X225 Button head Bolt 1 pc
A4 M8X40 Bolt 4 pcs
A5 M8X50 Bolt 4 pcs
A11 M10X60 Bolt 2 pcs

A16 M10X115 Bolt 1 pc
A19 M12X65 Bolt 2 pcs
H1 M8X46 Plastic expansion pipe 4 pcs
A25 M8X80 Steel Bolt 2 pcs
A24 M8X60 Lag Screw 4 pcs

19 Backboard 1pc
1
WARNING!
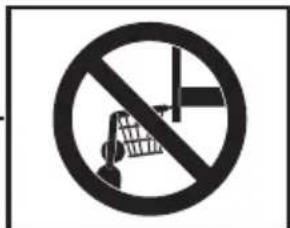
Ensure that there are no overhead power lines within 20 foot (7m) radius of system location.
Congratulations! Your EXIT Galaxy Basketball hoop is now fully assembled (put together).
DE:
Galaxy Wall Mount Basketball System Owners Manual
Contact:
Dutch Toys Group
Fabriekstraat 17^e
P.O.Box 369,7000 AJ Doetinchem
info@exittoys.com
www.exittoys.com
EXIT is a registered trade mark of Dutch Toys Group