
MATV1RC - Dongle Sunstech - Free user manual and instructions
Find the device manual for free MATV1RC Sunstech in PDF.
| Product type | Android multimedia dongle |
| Brand | Sunstech |
| Model | MATV1RC |
| Operating system | Android 4.0 |
| Processor | Amlogic ARM Cortex A9 |
| Graphics processor | Mali 400 (OpenGL ES1.1/2.0) |
| RAM memory | 1 GB DDR3 |
| Wireless network | Wi-Fi 802.11 b/g/n |
| Interfaces | USB 2.0, Micro SD (up to 32 GB), HDMI 1.3 |
| Power supply | 5V/1.5A via mini USB (mains adapter included) |
| Dimensions (approx.) | 10 x 3 x 1 cm |
| Weight (approx.) | 50 g |
| Main functions | Internet browsing, video/music/photo playback, Android app installation, compatibility with Air Mouse remote control |
| Cleaning | Use a soft, slightly damp cloth. Do not use abrasive products. |
| Safety | Do not expose to moisture, heat sources or direct sunlight. Disconnect during storms. Maintain adequate ventilation. |
| Warranty | 2 years from date of purchase (excluding misuse) |
| Box contents | Dongle, mains adapter, USB cable, Air Mouse remote control, user manual |
Frequently Asked Questions - MATV1RC Sunstech
User questions about MATV1RC Sunstech
0 question about this device. Answer the ones you know or ask your own.
Ask a new question about this device
Download the instructions for your Dongle in PDF format for free! Find your manual MATV1RC - Sunstech and take your electronic device back in hand. On this page are published all the documents necessary for the use of your device. MATV1RC by Sunstech.
USER MANUAL MATV1RC Sunstech
Before using the product, please read this manual thoroughly.
The manual contains important security information and tutorials about the product.
! As a switching equipment, power adaptor should be convenient for operating. the device should be far away from water dropping and splashing.

SAFETYWARNING
PLACEMENT
Do not place the unit on an unstable cart, stand, tripod, bracket, table, or shelf.
- Do not expose the unit to direct sun- light and other sources of heat.
-Do not handle liquids near or on the unit.
- Never spill liquid of any kind into the unit
- Do not put the unit near appliances that create magnetic fields.
- Do not put heavy objects on top of the unit.
POWER SUPPLY
-Make sure the USB power supply can offer 5V/1.5A.If not, please use a 5V/1.5A output AC adapter instead.
- Please unplug power supply and aerial plug when the weather is thunder-storm or lightning.
- Please unplug power supply, when there is nobody at home or didn't use over a long period of time.
- Please keep power cord from physical or mechanical damage.
- Please use exclusive power cord, don't modify or lengthen it.
- Please check and ensure AC source is connected with the ground.

SAFETYWARNING
TEMPERATURE
- Do not place the unit near or over a radiator or a heater
- If your unit is suddenly moved from a cold to a warm place, unplug the power cord for at least two hours until moisture removed.
HUMDITY
- Do not expose machine in rain, damp or place near water.
- Ensure the indoor is dry and cool
VENTILATION
- Keep the ventilation openings clear
- Ensure that the unit has enough space for ventilation around.
BATTERY
- Please dispose used battery correctly.
- Please don't let kid touch battery, don't throw battery into fire.
FEATURES
Android Dongle is based on Android OS
You can use it:
- Surf the Internet via Wi-Fi
- Communicate with your friends via SNS applications
-Enjoy movies, music and photos via media player
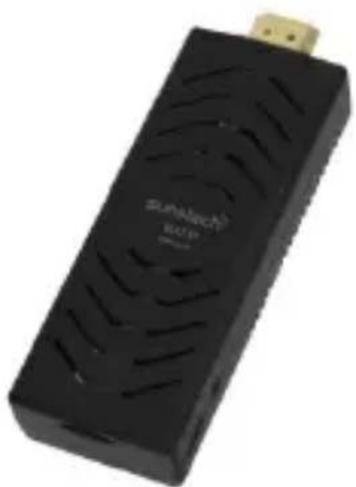
PRODUCT&ACCESSORIES

Android Dongle
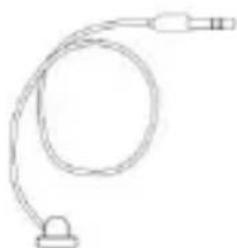
Remote Signal Receiver
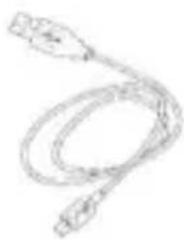
USB Power Supply Wire
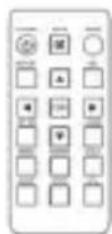
Mini Remote Controller
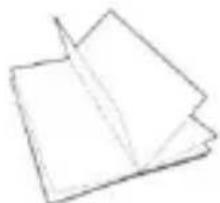
User Manual
adaptor
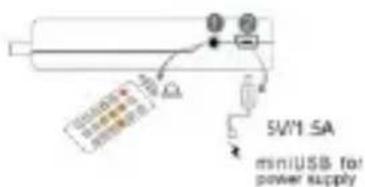
QUICK INSTALL GUBE
Normal Condition:
First: Connect the supplied adaptor AC/DC 5V to
Unit dongle.(Slot Micro USB)
If your TV has a USB slot, you can connect it to power the Dongle.
Important: USB slot must meet these Characteristics. " 5V - 1,5Amp "
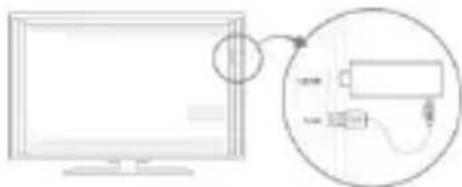
Insert Dongle into TV's HDMI input interface.
Connect Dongle's miniUSB port to TV's USB port via USB supply line for power supply.
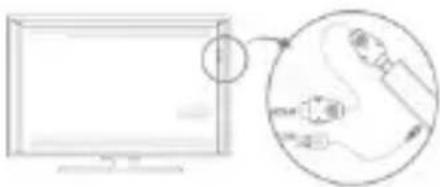
HDMI extended wire
- Connected Condition(NO ENOUGH SPACE FOR DONGLE AROUND THE TV'S HDMI INPUT NTERFACE):
Connect Dongle to TV's input interface needs to add another HDMI extended wire
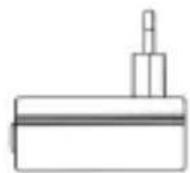
INTERFACE
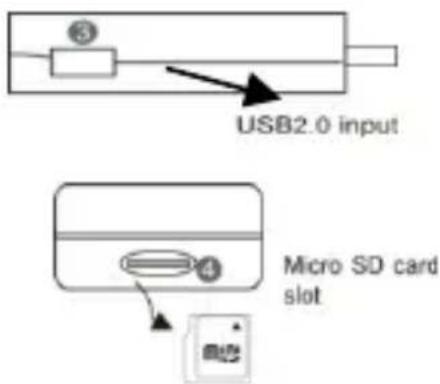
Remote signal receiver
Features
- Remote signal receiver
- Power supply(Must be 5V/1.5A)
- USB Host 2.0 input
- Micro SD card slot(up to 32GB)
REMOTE OPERATING

INSTALLING WIZARD
WELCOME PAGE
When the Android Dongle first powered on Welcome Page will appear. It helps you to configure the device.
-INSTALLING WIZARD
You can set your Dongle as below
- Choose your language
- TV output Mode.
- Choose your Wi-Fi network access point
- Configuration Result;
Adjust screen size. using the arrow buttons
on remote control: (It needs to reboot the product after adjusting screen size)
MAIN LAUNCHER
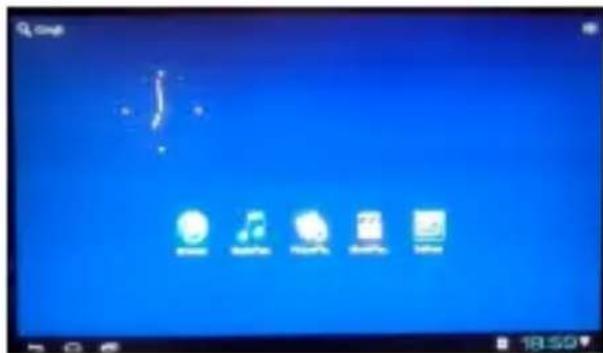
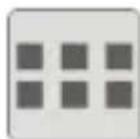
The AppManager lets you view and launch selected application,

The Browser tab contains bookmark and search bar. It allows you enjoy your time on surfing Internet. You can search for information and watch online TV etc.
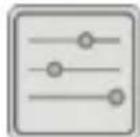
The Settings screen contains most of the customizing and configuration options, such as language, aspect ratio and network settings.

The Media Player tabs contain :Video/music/pic

Video tab& music tab lists information as: media type-preview, file name, time.
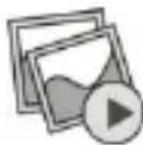
PIC tab shows different pictures in a screen

To select on the top left of the screen and go to Google Search
To select on the top right of the screen icon, then you can see the screen as follow
Main launcher contains:
Time information; Function status
Often used Apps; Widgets
SETTINGS
Wi-Fi settings
Check to turn on Wi-Fi so you can connect to
Wi-Fi networks
Check to receive an alert when an open Wi-Fi
network becomes available
Opens a dialog where you can add a Wi-Fi
network by entering its SSID (the name it
broadcasts) and security type
Display
Output mode:480i,480p,576i,576p,720i,720p,1080i, 1080p;
Set your display overscan ratio
Font size
-Date & time
Automatic date & time(Need network)
Set date
Set time
Select time zone
Use 24-hourformat
Select date format
Applications
Downloaded
On SD/TF card
Running
All
-Factory data reset
Erases all data on MediaBox
SETTINGS
-Storage
Total space
Available space
Erase USB storage
Available space of internal storage
- Language & input
Select language
Android keyboard
Remote controller input method
- About device
Status
Model number
Android version
Kernel version
Build number
MEDIA PLAYER
Video

You can play the video on the USB. flash drive, TF card etc. Use to control Play/Pause; Use to change Next Prev video; Use to control menu.
Picture
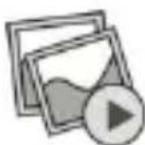
You can play the picture on the USB flash drive, TF card etc. Use control. Play/Pause; Use to change Next Prev picture, Use to control Menu,

Music

You can play the music on the USB lash drive, TF card etc. Use control Play/Pause, Use to change Next/Prev music: Use to control menu.

Attention: When you need to play media files from your USB flash drive or mobile HDD, please confirm that your power supply is over 5V/1.5A. If still you have problems playing medias, please use mobile HDD with extra power supply
BROWSER
-Menu Key:Call out the menu of browser
Back key Back to the last page
Search Key. Call out the search bar to search or input web address
Menu of Browser
-Set a new window (At most 4)
- Bookmarks
-Refresh the Current Sheet
-Forward
-More:Add bookmark; Find on page:Select
text; Page info; Downloads; Settings: Close
APPLICATIONS
Install from USB Flash Drive/TF card
- Open the "File manager"
- Choose your USB flash drive or any other mass storage's folder
- Find you application, and press it
- Press the install button
- You can find the application in tab
"Apps" after installation
APPLICATIONS
Download & install from Browser
1.Open the Browser.
2. Press search key and input your website address
3. Download the APK file which you like if there is a link for download (If you have problems with downloading, please try to put your TF card in the card slot)
4.You will find the file in your SD card folder
Install from APPinstaller
- Open the APPinstaller
- Find the icon of the application, and enter it
- Press the install button
4.You can find the application in tab "Apps" after installation
Remove Applications
- Enter SETTINGS
- Enter "Applications--Manage applications"
- Find the application you want to remove in tab "All"
- Enter the icon and press "Uninstall"
- Press "OK" to confirm uninstall
Restore System:
1-Select settings
2-Select "Backup and Reset"
3-Select "Factory data reset"
SPECIFICHE TECNICHE
| CPU Amlogic, ARM Cortex A9 | |
| GPU Mali 400,OpenGL ES1.1/2.0 | |
| OPERATIVE SYSTEM | Android 4.0 |
| RAM | 1GB DDRIII |
| WIRELESS NETWORK | Wi-Fi (802.11 b/g/n) |
| INTERFACE USB2.0, Micro Slot SD, HDMI 1.3 | |
| POWER DC 5V,1.5A Mini USB | |
Warranty conditions:
The warranty of this product is for 2 years since the purchase date. The warranty will exclude breakdowns caused by bad use of the product, wrong installation or installation in not desirable places for a proper maintenance of the product, rips, updates of the products that are not the supplied by the brand, pieces wore away for its use or for not domestic or inappropriate use. Also are excluded breakdowns caused for manipulations of the products by people or companies alien to our company. For any request regarding the warranty terms, the purchase receipt must be attached.
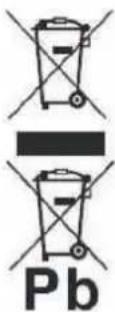
Correct disposal of this Product
(Waste Electrical & Electronic Equipment(WEEE)
Your product is designed and manufactured with high quality materials and components which can be recycled and reused.
This symbol means that electrical and electronic equipment, at their end-of-life should be disposed of separately from your household waste.
Please dispose of this equipment at your local community waste collection/recycling centre.
In the European Union there are separate collection systems for used electrical and electronic products. Please help us to conserve the environment we live in!
sunstech
The specification and software version involved in this manual is for reference only.
Design and specifications are subject to change without prior notice.

sunstech
MATV 1
Manual de Nombre
PRODUIT & ACCESSORIES
Mode de sortie : 480i,480p,576i,576p,720i,720p,1080i, 1080p;
Modo de saía: 480i,480p,576i,576p,720i,720p,1080i, 1080p;
To use these symbols "@#~$%&" etc, placed in the numerical keyboard of this remote control, it is possible that change configuration of your android unit is needed.
Please, follow the next steps:
1- Go to Settings
2- Select Language & input
3- Select Spanish Android keyboard
Then please go out from configuration menu and check correct functions.
1、Brief Introduction:
1.1 This is a 2.4 GHz wireless air mouse product, which can fully give play to the function of the traditional keyboard and mouse. Its using in air function can make you thoroughly free from the computer. The computer cursor can be moved easily and precisely as soon as you make the corresponding movement to it in the air. Many tests approve its perfect display. It gives you comfortable and convenient handle operation. There is absolutely no need to take static desktop as reference, when it's used. It will be different from the traditional mouse. At the same time, here we keep a infrared window to meet the needs of operating television.
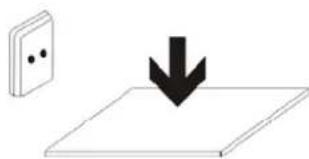
1.2 Adopt port USB2.0 mini receiver: achieve perfect connection with computer by USB receiver
1.3 Advanced technology for saving power: the electric current will be
9uA, when it's in the sleep mode condition, improve the battery usage by a large margin
1.4 Provided with function of low voltage indicating: when the voltage of the battery in the air mouse is under 3.1V, the LED light will be on all the time, each key button can awake.
1.5 Compatibility: be compatible with windows98/Me/NT/
2000/XP/VISTA/Android
2、Front-panel instruction:
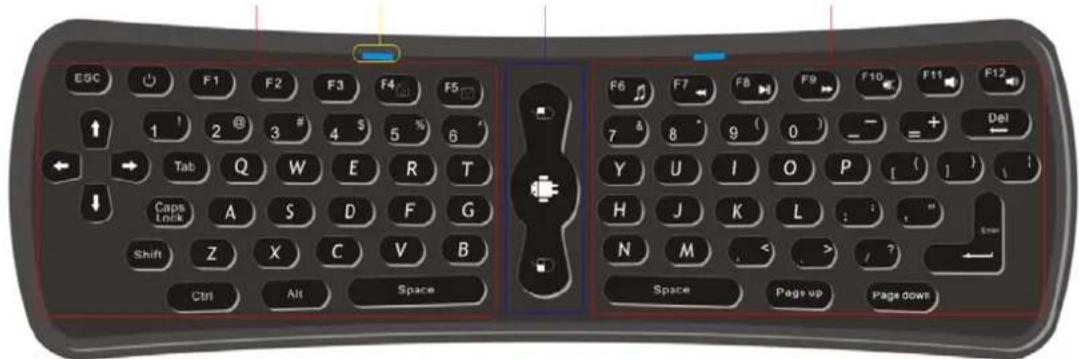
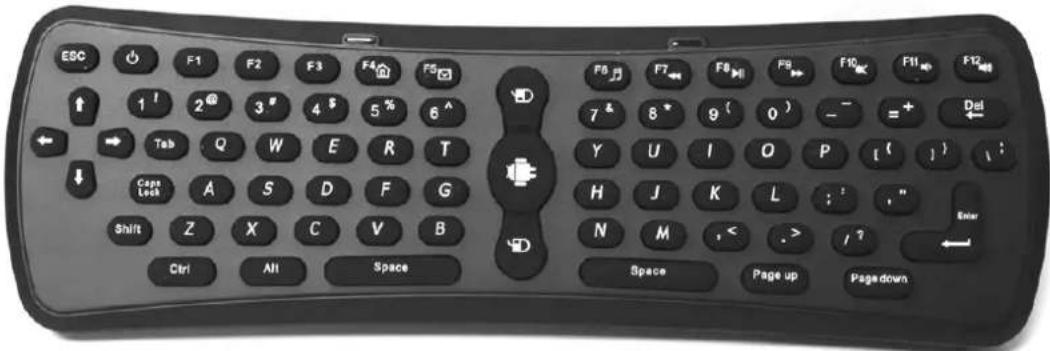
2.1 Keyboard area: it's the key component of the keyboard, which ranking of key mapping is the same as the one on normal computer keyboard. This area includes number keys, letter keys, common operational character and punctuation mark keys, the function of this area is the same as standard keyboard except some necessary control keys.
Power: dormancy key, press this key can make computer be dormant state.
Shift+F4: Open web browser home page.
Shift+F5: Open Outlook Express.
Shift+F6: Open the media player.
Shift+F7:Skip backward
Shift+F8: Play and pause
Shift+F9:Skipforward
Shift+F10:Mute
Shift+F11:Volume decrease
Shift+F12:Volume increase
2.2 Mouse area:

Positioning key:
Press the button without loose, the cursor can be moved very much in the moves the air mouse location. Release it, the cursor will keep still. OR
Click the button, then you can get the cursor moved by changing shifting the air mouse. Click it again, the cursor will keep still.

Mouse left key

Mouse right key
2.3 Work indicator light(LED):
Press any key in the mouse area, the LED will shine once;
When it is in the condition of correcting code, the LED will shine again and again rapidly;
When it is active, the LED will shine all the time;
When the power of the battery in it is low, the LED will shine again and again, but slowly!
3、Operating instructions:
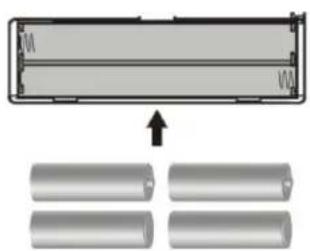
3.1 Preparing: Open the back cover of the battery warehouse, put 3 pcs "AAA" batteries, close the cover, then put the MINI receiver into USB port of computer, keyboard, displayer, MID or internet TV set
3.2 Correcting code: press key "UP"、"DOWN"、"ENTER"、in sequence, and then release all 3 keys at the same time, the LED will shine, after insert the mini USB receiver into computer, LED shines, which shows that correcting code has been accomplished. Then, it can work regularly.
Press any key can cancel correcting code when it processes.
It is the state of correcting code when the LED shines, if there is no USB receiver inserting into the computer, this state will be over after 27 seconds by itself.
Only use when the receiver and the air mouse don't match each other.
3.3 Usage: No need to point it to screen or keep it horizontal, whatever angle and direction you can hold the air mouse to use. You should use it as same as remote control, if you want to get its sensitivity maximum.
(front-end up and down)
Pls don't keep the air mouse horizontal when you shift it, otherwise there will be no response, the only thing you need to do is just swinging your wrist.
4、Parameter table of electric
| Parameter | Minimum | Typical | value | Maximum | Units |
| Voltage | 3.4 | 4.5 | 6 | V | |
| Current | 8 | 10 | 12 | mA | |
| Quiescent current | 9 |
5、Specification:
| Distance | 15-20 M |
| Maximum refresh rate of USB | 125/second |
Warranty conditions
- The warranty of this product is for 2 years since the purchase date.
- The warranty will exclude breakdowns caused by bad use of the product, wrong installation or installation in not desirable places for a proper maintenance of the product, rips, updates of the products that are not the supplied by the brand, pieces wore away for its use or for not domestic or inappropriate use. Also are excluded breakdowns caused for manipulations of the products by people or companies alien to our company.
- For any request regarding the warranty terms, the purchase receipt must be attached.
Correct disposal of this Product
(Waste Electrical & Electronic Equipment(WEEE)
Your product is designed and manufactured with high quality materials and components which can be recycled and reused.
This symbol means that electrical and electronic equipment, at their end-of-life should be disposed of separately from your household waste.
Please dispose of this equipment at your local community waste collection/recycling centre.
In the European Union there are separate collection systems for used electrical and electronic products. Please help us to conserve the environment we live in!
- DO NOT place objects on top of the device, as objects may scratch the device.

-
DO NOT expose the device to dirty or dusty environments.
-
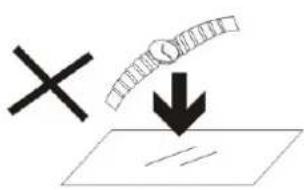
DO NOT place the device on an uneven or unstable surface.
- DO NOT insert any foreign objects into the device.

- DO NOT expose the device to strong magnetic or electrical field.


- DO NOT expose the device to direct sunlight as it can damage the device.
Keep it away from heat sources.
60^(140^)
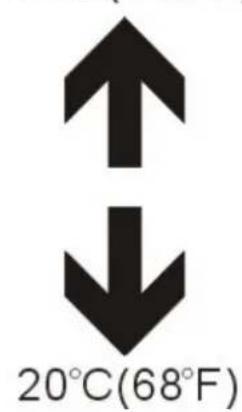
- DO NOT store your device in temperatures higher than 40^ C(104^ F) . The internal operating temperature for this device is from 20^ C(68^ F) to 60^ C(140^ F) .

- DO NOT use the device in the rain.

- Please check with your Local Authority or retailer for proper disposal of electronic products.
- The device and adaptor may product some heat during normal operation of charging. To prevent discomfort or injury from heat
exposure, DO NOT leave the device on your lap.
- POWER INPUT RATING: Refer to the rating label on the device and be sure that the
power adaptor complies with the rating. Only use accessories specified by the manufacturer.

- Clean the device with a soft cloth. If needed, dampen the cloth slightly
before cleaning. Never use abrasives or cleaning solutions.
- Always power off the device to install or remove external devices that do not support hot-plug.
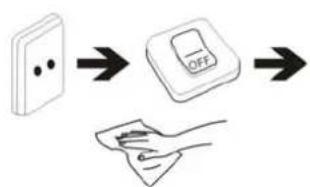
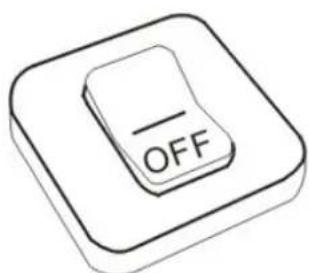
- Disconnect the device from an electrical outlet and power off before cleaning the device.
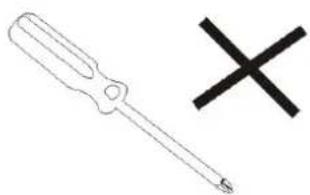
- DO NOT disassemble the device. Only a certified service technician should perform repair.

- The device has apertures to disperse heat. DO NOT block the device ventilation, the device may become hot and malfunction as a result.
- Risk of explosion if battery replaced by an incorrect type. Dispose of used batteries according to the instruction.
- PLUGGABLE EQUIPMENT: the socket-outlet shall be installed near the equipment and shall be easily accessible.
sunstech
RC100
Manual de usuario
Air Mouse
INFORMATION IMPORTANTE PARA EL USUARIO
Shift+F5: Abre Outlook Express.
Shift+F5: Abre o Outlook Express.
Shift+F6:Abre o leitor multimédia.
- SAFETYWARNING
- PLACEMENT
- POWER SUPPLY
- TEMPERATURE
- HUMDITY
- VENTILATION
- BATTERY
- FEATURES
- PRODUCT&ACCESSORIES
- QUICK INSTALL GUBE
- INTERFACE
- REMOTE OPERATING
- INSTALLING WIZARD
- WELCOME PAGE
- -INSTALLING WIZARD
- MAIN LAUNCHER
- SETTINGS
- Wi-Fi settings
- Display
- -Date & time
- Applications
- -Factory data reset
- -Storage
- - Language & input
- - About device
- MEDIA PLAYER
- Video
- Picture
- Music
- BROWSER
- Menu of Browser
- Install from USB Flash Drive/TF card
- Download & install from Browser
- Install from APPinstaller
- Remove Applications
- Restore System:
- Warranty conditions:
- Correct disposal of this Product
- sunstech
- MATV 1
- PRODUIT & ACCESSORIES
- 1、Brief Introduction:
- 2、Front-panel instruction:
- Mouse area:
- Positioning key:
- Mouse left key
- Mouse right key
- Work indicator light(LED):
- 3、Operating instructions:
- 4、Parameter table of electric
- 5、Specification:
- Warranty conditions
- Air Mouse
- INFORMATION IMPORTANTE PARA EL USUARIO
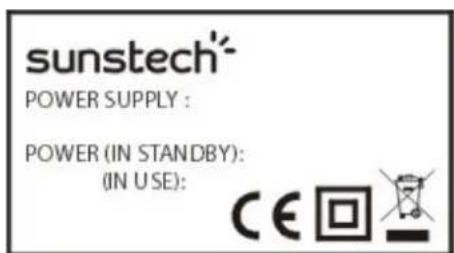
Brand : Sunstech
Model : MATV1RC
Category : Dongle