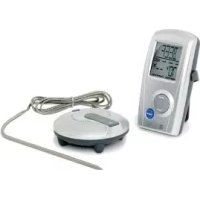
AW129 - Electronic thermometer OREGON SCIENTIFIC - Free user manual and instructions
Find the device manual for free AW129 OREGON SCIENTIFIC in PDF.


| Product type | Wireless barbecue thermometer |
| Brand | Oregon Scientific |
| Model | AW129 |
| Control unit power supply | 2 AA 1.5V batteries |
| Thermometer probe power supply | 2 AAA 1.5V batteries |
| LCD display range | 0 °C/°F to 199 °C/°F |
| Operating temperature range (control unit) | 0 °C to 50 °C (32 °F to 122 °F) |
| Storage temperature range (control unit) | -30 °C to 70 °C (-22 °F to 158 °F) |
| Operating temperature range (probe with sensor) | -20 °C to 250 °C (4 °F to 482 °F) |
| Temperature accuracy | ±1 °C (± 2 °F) |
| Maximum transmission distance | 30.5 m (100 feet) |
| Stainless steel probe length | 1 m (3.28 feet) |
| Preset meat types | Beef, lamb, veal, hamburger, pork, turkey, chicken, fish |
| Doneness levels | Rare, medium, well done (for beef/lamb/veal) |
| Alarm functions | Signal loss, target approaching, target reached, overcook |
| Display | Target temperature, current temperature, meat type, doneness level, battery and signal indicators |
| Settings | °C/°F, volume (high/low), meat selection, doneness level |
| Care and cleaning | Wipe with a damp cloth; hand wash the probe with mild dish soap; do not immerse or put in dishwasher |
| Safety precautions | Do not expose to direct heat, flames, excessive moisture; remove batteries during prolonged non-use |
Frequently Asked Questions - AW129 OREGON SCIENTIFIC
User questions about AW129 OREGON SCIENTIFIC
0 question about this device. Answer the ones you know or ask your own.
Ask a new question about this device
Download the instructions for your Electronic thermometer in PDF format for free! Find your manual AW129 - OREGON SCIENTIFIC and take your electronic device back in hand. On this page are published all the documents necessary for the use of your device. AW129 by OREGON SCIENTIFIC.
USER MANUAL AW129 OREGON SCIENTIFIC
WIRELESS BBQ THERMOMETER
USER MANUAL
****
MANUEL D'UTILISATION
****
MANUEL DE USO
WIRELESS BBQ THERMOMETER
MODEL: AW129
USER MANUAL
CONTENTS
Key features .... 1
Setup 3
Installing the batteries 3
°C / °F 4
Volume 4
LED indicator ....4
Sensor location....4
Connecting the probe 4
Operation 4
Check signals and alarm 5
Signal 5
Alarm 5
Battery 5
Precautions 6
Specifications 6
EU-Declaration Of Conformity 7
KEY FEATURES

Figure 1. Monitor
- Indicates monitor / thermometer sensor communication
- Low battery indicator
- Target temperature
- Select / Cook button
- Type of meat
- Level of doneness
- Current temperature
- Power button

Figure 2. Thermometer Sensor
- Power button
- Thermometer sensor LED
- Probe socket
- Probe socket cover
- Probe

natural_image
Line drawing of a handheld electronic device with a grid and control panel (no text or symbols)Figure 3. Insert Batteries (Monitor)

natural_image
Technical line drawing of a mechanical device with a circular top and base plate (no text or symbols)Figure 4. Insert Batteries (Thermometer Sensor)

Figure 5. reset (Thermometer Sensor)

Figure 6. Battery Compartment (Monitor)
- Hi / Lo button
- °C / °F button
- reset button

natural_image
Line drawing of a mechanical device with a magnified inset showing a tool (no text or symbols)Figure 7. Belt Clip and Stand Position
SETUP
INSTALLING THE BATTERIES
Follow these steps to install the batteries.
In the Monitor (Figures 3,5 and 7)
- Slide down and lift the belt clip off the back of the monitor. Slide then lift up to remove the battery compartment cover.
- Place two AA batteries in the compartment as indicated by the polarity symbols (+ and -).
- Press reset in the battery compartment using a pointed object such as a paper clip (Figure 5).
NOTE Reset both the monitor and the thermometer seen within 60 seconds to synchronize signal transmission.
- Replace the cover and the belt clip.
In the Thermometer Sensor (Figure 4)
- Slide the battery compartment cover open.
- Insert two AAA size batteries into the compartment matching the polarities (as shown). Press reset using a pointed object such as a paper clip.
- Replace the battery compartment cover.
NOTE When 📋 appears on the monitor, replace the batteries.
°C / °F
(Figure 6)
To select Fahrenheit of Celsius, slide the °C / °F switch.
VOLUME
(Figure 6)
To adjust the monitor's volume, slide the Hi/Lo switch, located in the thermometer battery compartment.
LED INDICATOR
(Figure 2)
The red LED in the middle of the thermometer sensor flashes to indicate that it is on and transmitting.
SENSOR LOCATION
(Figure 7)
You can wear the monitor on your belt or stand it up on a flat surface. To stand it up, remove the belt clip from the back of the monitor. Insert the left or right side of the clip into the lower part of the slot, then snap the other side into the other lower slot.
CONNECTING THE PROBE
(Figure 2)
Locate the probe socket cover on the top right side of the thermometer sensor and carefully pull it out. Plug the wire end of the meat probe into the socket.
OPERATION
The doneness level selections, Rare, Med Rare, Medium, and Well Done only apply to beef, lamb and veal. For chicken, turkey, pork, fish, and hamburger the monitor defaults to Well Done.
- Press and hold power until the thermometer sensor's red LED flashes. Then press and hold power until the monitor's green LCD lights and all display segments appear.
- Press select (twice) until the desired meat appears. You can choose between BEEF, LAMB, (hamburger), PORK, (turkey), (chicken) or .
- Press cook repeatedly to select the level of doneness.
TIP: This product gauges internal temperature only and is not meant to substitute recipe instructions. The ranges for meat types and doneness levels are guidelines only. Some recipes may call for the meat (such as turkey or chicken) to be removed from the heat source 15-30 minutes earlier, so that the internal temperature can continue to rise before the meat is carved. Always follow the recipe instructions to ensure that the meat is fully and properly cooked.
- Place the thermometer near the cooking area and insert the tip of the probe into the center of the meat. Use the monitor's stand for easy viewing or use the belt clip.
NOTE
- For a clear signal, place the monitor within 100 feet (30.5m) of the thermometer sensor
-
Place the thermometer sensor away from direct heat or flame. Do not rest the probe on the cooking surface as doing so can damage the thermistor inside the probe.
-
When the meat is done, remove the probe from the meat and let it cool before touching it. Press power on the monitor and thermometer sensor to turn them off.
- Disconnect the probe from the thermometer sensor and replace the socket cover. After you finish cooking, wipe the monitor and the thermometer sensor with a damp cloth. Gently wash the steel probe only with mild dish detergent and warm water.
NOTE Do not use a dishwasher to clean the probe and do not immerse the monitor or thermometer sensor in water or liquid.
CHECK SIGNALS AND ALARM
SIGNAL
▲ Indicates no signal.
Indicates the thermometer is receiving a signal from the sensor.
ALARM
- Three beeps - indicates that the monitor is not receiving a signal from sensor.
- Four beeps - indicates that the current temperature is within five degrees of the target temperature.
- A continuous beep - indicates that the sensor has reached the target temperature.
- A fast and continuous beep - indicates that the meat is overcooked.
BATTERY
Appears on the monitor to indicate the condition of the batteries. Please observe the following information for an indication of when the batteries need to be replaced.
- ham - indicates that the monitor's battery is low.
-
Remote - indicates that the thermometer sensor battery is low.
-
Main remote - indicates that the batteries are low in both the monitor and thermometer sensor.
- Use only fresh batteries of the specified size.
- Do not mix old and new batteries, different types of batteries (standard, alkaline, or rechargeable), or rechargeable batteries of different capacities.
- If you do not plan to use the thermometer for a month or longer, please remove the batteries to prevent leakage and damage.
PRECAUTIONS
This product is engineered to give you years of satisfactory service if you handle it carefully. Here are a few precautions:
- Do not subject the unit to excessive force, shock, dust, temperature or humidity
- Do not cover the ventilation holes with any items such as newspapers, curtains etc.
- Do not immerse the unit in water. If you spill liquid over it, dry it immediately with a soft, lint-free cloth.
- Do not clean the unit with abrasive or corrosive materials.
- Do not tamper with the unit's internal components. This invalidates the warranty.
-
Only use fresh batteries. Do not mix new and old batteries.
-
Images shown in this manual may differ from the actual display.
- When disposing of this product, ensure it is collected separately for special treatment.
- Placement of this product on certain types of wood may result in damage to its finish for which Oregon Scientific will not be responsible. Consult the furniture manufacturer's care instructions for information.
- The contents of this manual may not be reproduced without the permission of the manufacturer.
NOTE The technical specifications for this product and the contents of the user manual are subject to change without notice.
SPECIFICATIONS
Specifications are typical and individual units may vary. Specifications are subject to change without notice.
MONITOR
Batteries 2 x AA 1.5V
Operating temperature range 0°C to 50°C (32°F to 122°F)
Storage temperature range -30°C to 70°C (-22°F to 158°F)
LCD display range
0^ / ^ to 199^ / ^
THERMOMETER SENSOR PROBE
Batteries 2 x AAA 1.5V
Operating temperature range -20^ to 250^ ( -4^ to 482^ )
GENERAL
Stainless steel probe (length) 3.28 feet (1 meter)
Temperature resolution ±1°C (± 2°F)
Heat resistance 70°C (158°F)
Stainless steel probe
operating temperature 250°C (482°F) Maximum
NOTE The operation temperature range of the sensor probe is -20^ to 250^ ( 4^ to 482^ ). The LCD display range is 0^/^ to 199^/^ . When the display temperature is out of range, the display digits flash.
EU-DECLARATION OF CONFORMITY
Hereby, IDT Technology Limited, declares that the Wireless BBQ Thermometer (Model AW129) is in compliance with the essential requirements and other relevant provisions of Directive 1999/5/EC.
A copy of the signed and dated Declaration of Conformity is available on request via our Customer Service.
natural_image
Line drawing of a mechanical device with a magnified inset showing a tool (no text or symbols)EU-DECLARATION DE CONFORMITE
natural_image
Line drawing of a handheld electronic device with a grid screen and control panel (no text or symbols)natural_image
Technical line drawing of a mechanical component with no visible text or symbols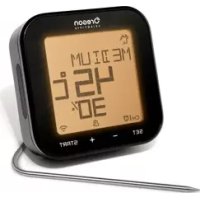

- WIRELESS BBQ THERMOMETER
- CONTENTS
- KEY FEATURES
- SETUP
- INSTALLING THE BATTERIES
- In the Monitor (Figures 3,5 and 7)
- In the Thermometer Sensor (Figure 4)
- °C / °F
- (Figure 6)
- VOLUME
- LED INDICATOR
- (Figure 2)
- SENSOR LOCATION
- (Figure 7)
- CONNECTING THE PROBE
- OPERATION
- NOTE
- CHECK SIGNALS AND ALARM
- SIGNAL
- ALARM
- BATTERY
- PRECAUTIONS
- SPECIFICATIONS
- MONITOR
- THERMOMETER SENSOR PROBE
- GENERAL
- EU-DECLARATION OF CONFORMITY
- EU-DECLARATION DE CONFORMITE
Brand : OREGON SCIENTIFIC
Model : AW129
Category : Electronic thermometer