CX7 Classic - Cordless vacuum AEG - Free user manual and instructions
Find the device manual for free CX7 Classic AEG in PDF.

| Product type | Cordless stick vacuum |
| Brand | AEG |
| Model | CX7 Classic |
| Voltage | 14.4 V |
| Runtime | Up to 30 min (long duration mode) |
| Charging time | Approximately 4 hours (first charge: 24 hours recommended) |
| Dust container capacity | 0.5 L (estimated) |
| Filters | Washable inner fine filter and outer pre-filter |
| Rotating brush | Yes, with automatic stop if blocked |
| Suction modes | Max power (default) and quiet mode (power reduction) |
| Included accessories | Crevice tool, small brush, wall mount, charger |
| Weight (approx.) | 2.5 kg |
| Total height (assembled) | Approximately 104 cm (including wall mount) |
| Noise level | Not specified |
| Container material | Recyclable plastic |
| Filter maintenance | Quick cleaning with shake rod; rinse with warm water monthly |
| Brush cleaning | Remove rotating brush; cut threads with scissors |
| Battery | Integrated lithium-ion; removal only by authorized center for recycling |
| Warranty | Standard AEG (excluding runtime loss due to usage) |
| Recommended use | Household, indoor, hard floors and carpets |
| Indicator lights | Charging light and battery level (LED) |
Frequently Asked Questions - CX7 Classic AEG
User questions about CX7 Classic AEG
0 question about this device. Answer the ones you know or ask your own.
Ask a new question about this device
Download the instructions for your Cordless vacuum in PDF format for free! Find your manual CX7 Classic - AEG and take your electronic device back in hand. On this page are published all the documents necessary for the use of your device. CX7 Classic by AEG.
USER MANUAL CX7 Classic AEG
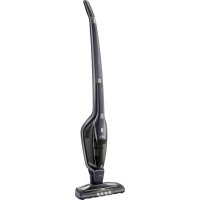
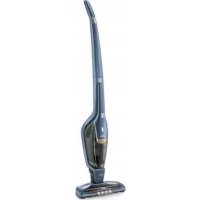
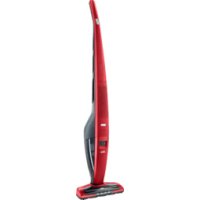
Cordless vacuum cleaner
Li-30 (14,4V)
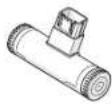
natural_image
Black AEG vacuum cleaner with extended arm and base (no visible text or symbols)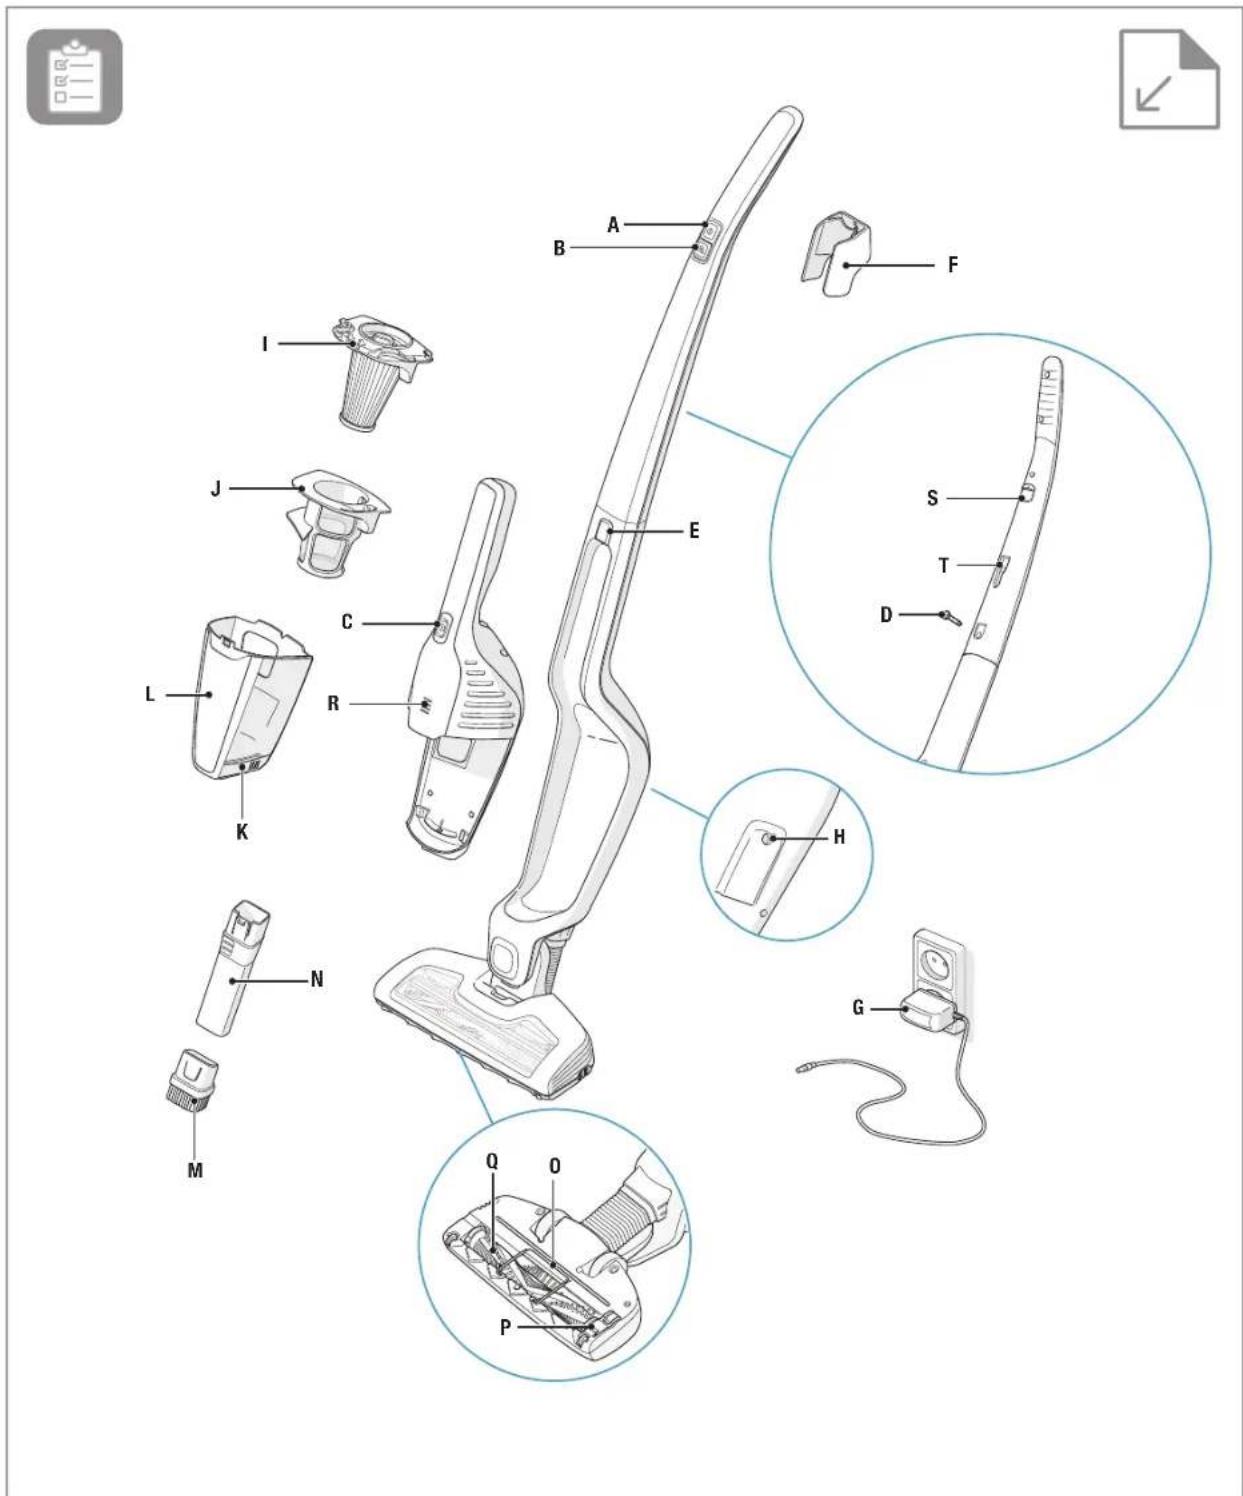
text_image
Technical diagram of a vacuum cleaner with labeled parts and exploded view, including internal components and part numbers.
natural_image
Diagram showing a medical or surgical tool interacting with a device, with an inset close-up highlighting the tool (no text or symbols present)
text_image
2 104 cm 104 cm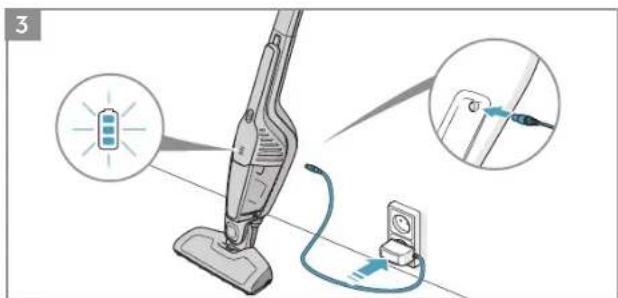
text_image
Diagram illustrating a vacuum cleaner's electrical connection with labeled parts and magnified views
text_image
4h = 100%
natural_image
Diagram of a smartphone with a close-up inset showing the screen and key button (no text or symbols present)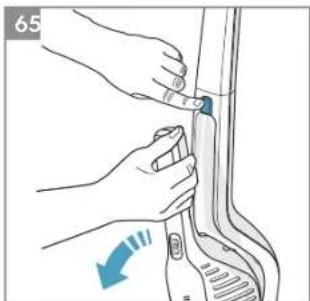
natural_image
Illustration of hands adjusting a component with a blue arrow indicating motion (no text or symbols)
natural_image
Illustration of a hand using a handheld device to clean or store items, with a magnified inset showing the same setup (no text or symbols present)
text_image
8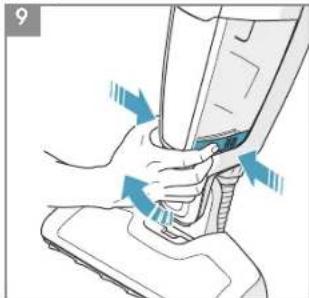
natural_image
Illustration of a hand pressing down on a mechanical component with blue arrows indicating motion (no text or symbols)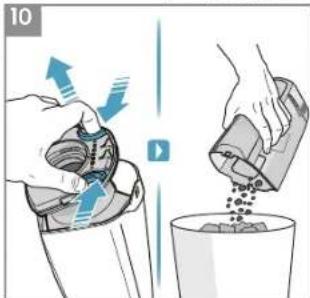
text_image
10
text_image
Diagram showing a hand using a tool to lift a bottle, with labeled parts and directional arrows indicating motion or movement.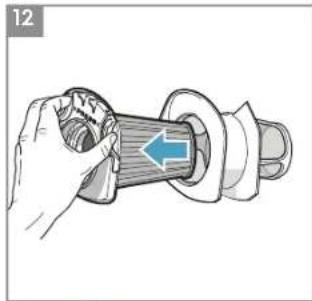
natural_image
Hand holding a cylindrical mechanical component with a blue arrow indicating direction (no text or symbols)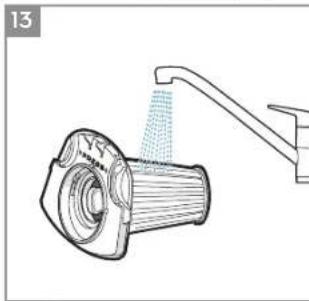
natural_image
Line drawing of a showerhead spraying water from a drain (no text or symbols)
natural_image
Illustration of a sun, clock, and mechanical device with no visible text or symbols
natural_image
Illustration of a medical device with an eye symbol and arrow indicating light (no text or labels)
text_image
15
natural_image
Illustration of a mechanical device with blue arrows indicating motion or force, no text or symbols present
natural_image
Illustration of a hand using scissors to cut a cylindrical mechanical component (no text or symbols)
text_image
18 Warning Recycle RecycleDE
GB
EL
ES
FR
IT
NL
PT
AR
FA
DEUTSCH
I. Feinfilter (Innenfilter)
text_image
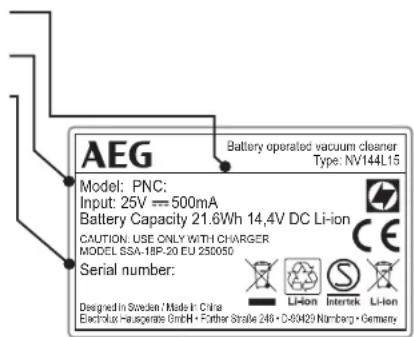
AEG Battery operated vacuum cleaner Type: NV144L15 Model: PNC; Input: 25V ≈ 500mA Battery Capacity 21.6Wh 14,4V DC Li-ion CAUTION USE ONLY WITH CHARGER MODEL SSA-18P-20 EU 250050 Serial number: Designed in Sweden / Made in China Electrolux Hauserdale GmbH • Farther Shale 246 • D30420 Numburg • Germany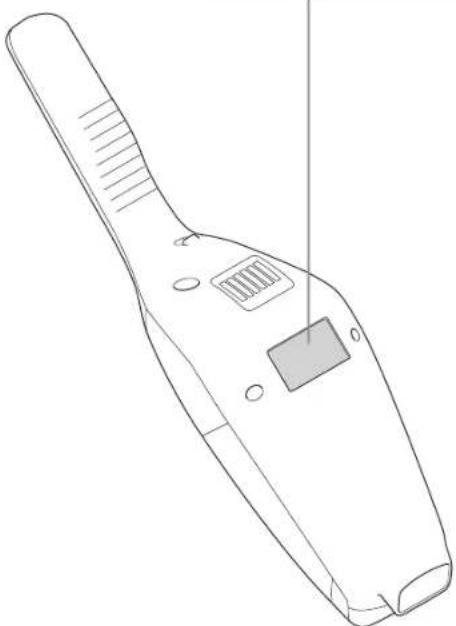
natural_image
Line drawing of a handheld electronic device with a screen and handle (no text or symbols)VERBRAUCHSGÜTER UND ZUBEHÖR

www.aeg.com/shop
Filter
Bez.: AEF144
natural_image
Technical line drawing of mechanical components including a coiled spring, plastic clip, and connector (no text or symbols)BedPro™ MINI
Bez.: AZE125
Thank you for choosing an AEG CX7 Classic vacuum cleaner. In order to ensure the best results, always use original AEG accessories and spare parts. They have been designed especially for your vacuum cleaner. This product is designed with the environment in mind. All plastic parts are marked for recycling purposes.
DESCRIPTION OF CX7 CLASSIC
A. ON/OFF button
B. Power regulation button
C. ON/OFF button, hand unit
D. Locking screw
E. Release button, hand unit
F. Wallholder
G. Charging cable (with adapter)
H. Charging plug
I. Fine filter (inner filter)
J. Pre filter (outer filter)
K. Release button, dust container
L. Dust container
M. Dusting brush
N. Crevice nozzle
O. Cable protector grill
P. Hatch cover for brush roll
Q. Brush roll
R. Charging indicator
S. Cliff hanger
T. Slot for accessory storage
BEFORE STARTING
Check that the package includes all parts described in this instruction manual and read this manual carefully. Pay special attention to the safety precautions chapter. Save these instructions.
1 Assemble the handle.
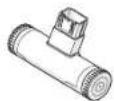
2 A) Make sure that CX7 Classic is on a stable and horizontal surface away from heat sources, direct sunlight or wet places. Attach the wall holder to the wall 104 cm above the floor with a suitable screw and wall plug. Make sure to use a correct wall plug for the wall. B) Attach the handle to the wall holder. C) Connect the charging cable to the back side of the vacuum cleaner.
3 Insert the adaptor into the mains and charge CX7 Classic. The charging indicator will be lit when CX7 Classic is on charge.
CHARGING CX7 CLASSIC
4 When fully charged, the charging indicator will blink slowly. The numbers of LED lamps will indicate the level of charge. Full charging time is around 4 hours. For better battery performance, charge CX7 Classic for 24 hours before first use and always keep it on charge when not used.
VACUUMING WITH CX7 CLASSIC
Before vacuuming, check that the nozzle wheels and the brush roll are clean from sharp objects in order to avoid scratching sensitive floors and to ensure full cleaning performance.
5 Start and stop CX7 Classic by pushing the ON/OFF button.
CX7 Classic will start on the high power mode.
For more silent cleaning and longer runtime, press the power regulation button.
VACUUMING FURNITURE, CAR SEATS ETC.
6 Press the button to release the hand unit from the main body.
7 Attach the crevice nozzle to facilitate cleaning of areas difficult to reach. Attach the brush on the crevice nozzle for dusting.
8 The crevice nozzle and small brush can be stored in the slot on the back side of the handle.
EMPTYING OF THE DUST CONTAINER
9 Remove the dust container by pressing the buttons.
10 Take out the filters from the dust container by pressing the release buttons. Empty the contents into a dustbin. Never wash the dust container or filters in a dishwasher.
IMPORTANT - FILTER CLEANING!
11 Pull the filter cleaning rod (B) to its end position and release it to remove dust from the inner filter. Repeat 5 times.
12 The filters must be cleaned at regular intervals to ensure a high cleaning performance. Take out the filters by pressing the release buttons. Separate the inner filter from the outer filter.
13 Rinse the filter parts carefully under lukewarm water without using any detergents. (Never use the dishwasher or washing machine.) Shake to remove excess water and leave to dry minimum 12h before putting them back into the cleaner.
www.aeg.com
CLEANING THE HOSE AND NOZZLE WHEELS
14 Loosen the hose behind the nozzle from its upper connection. Remove any object or debris that can be blocking the airflow in the hose or in the air channel to the dust cup, and put the hose back.
15 If the wheels need to be cleaned or get jammed, remove them carefully by using a flat screwdriver.
REMOVING AND CLEANING THE BRUSH ROLL
16 If the brushroll gets blocked CX7 Classic will stop. Open the cable protector grill and the brush roll hatch cover and remove the brush roll.
17 Use a pair of scissors to remove threads etc. Reassemble the brush roll, making sure it can spin freely.
REMOVING THE BATTERIES FOR RECYCLING
Warning; Battery removal must only be done by an AEG service center or official collection point!
18 Only remove batteries if the product is to be scrapped. Improper handling of the batteries may be hazardous. Batteries should always be completely discharged before removal. Take your product to an AEG service center or official collection point for recycling. They can remove and recycle the battery and electric parts in a safe and professional way. Follow your country's rules for collection of rechargeable batteries and electrical products.
Enjoy a great cleaning experience with CX7 Classic!
SAFETY PRECAUTIONS
This appliance can be used by children aged from 8 years and above and persons with reduced physical, sensory or mental capabilities or lack of experience and knowledge if they have been given supervision or instruction concerning use of the appliance in a safe way and understand the hazards involved.
Children shall not play with the appliance.
Cleaning and maintenance shall not be made by children without supervision.
Batteries must be removed from the appliance before it is scrapped.
The battery is to be disposed of safely.
Only use the charging adapter that was provided with the product.
CX7 Classic should only be used for normal vacuuming indoors and in a domestic environment. Make sure it is stored in a dry place. Packaging material, e.g. plastic bags should not be accessible to children to avoid suffocation.
Never use the vacuum cleaner:
- In wet areas.
- Close to flammable gases, etc.
- When the product shows visible signs of damage.
- On sharp objects or liquids.
- On hot or cold cinders, lighted cigarette butts, etc.
- On fine dust, for instance from plaster, concrete, flour, hot or cold ashes.
Caution:
- Do not leave the vacuum cleaner in direct sunlight.
- Avoid exposing the vacuum cleaner to strong heat.
- The battery cells within must not be dismantled, short circuited or placed against a metal surface.
- Never use the vacuum cleaner without its filters.
- Do not try to touch the brush roll while the cleaner is switched on and the brush roll is turning.
- Mind your fingers if cleaning the inside of the floor nozzle.
Using the vacuum cleaner in the above circumstances may cause serious personal injury or damage to the product. Such injury or damage is not covered by the warranty or by AEG.
SERVICING AND WARRANTY
All service or repairs must be carried out by an authorized AEG service centre.
This warranty does not cover reduction in battery runtime due to battery age or use, as the life of the battery depends upon the amount and nature of use.
INDICATION LAMPS
| CHARGING | WHAT DOES IT MEAN? | DURING USAGE | WHAT DOES IT MEAN? | |
| 14.4 V | Blink slowly = 100 % fully charged 75 - 100 % capacity | |||
| 50 - 95 % charged 50- 75 % capacity remaining | ||||
| 0 - 50 % charged 25 - 50 % capacity remaining | ||||
| CX7 Classic needs to be recharged. | ||||
Get usage advice, brochures, trouble shooter, service information: www.aeg.com

Register your product for better service: www.aeg.com/productregistration

Buy Accessories and Consumables for your appliance: www.aeg.com/shop
CUSTOMER CARE AND SERVICE
When contacting the AEG service center, ensure that you have following data available:
- Model number,
- PNC number
- Serial number
The information can be found on the rating plate.
PNC number
Model number
Serial number
text_image
AEG Battery operated vacuum cleaner Type: NV144L15 Model: PNC: Input: 25V ≈ 500mA Battery Capacity 21.6Wh 14.4V DC Li-ion CAUTION: USE ONLY WITH CHARGER MODEL SSA-18P-20 EU 250050 Serial number: Designed in Sweden / Made in China Electrolux Hausopera GmbH • Further Straße 246 • D-80429 Numburg • Germany
natural_image
Line drawing of a handheld electronic device with a screen and handle (no text or symbols)CONSUMABLES & ACCESSORIES

www.aeg.com/shop
Filter
Ref: AEF144
PNC: 900 167 1537

Car Kit
Ref: AKIT360+
PNC: 900 168 3375

natural_image
Technical line drawing of a flexible hose and plastic clip components (no text or symbols)BedPro™ MINI
Ref: AZE125
PNC: 900 168 3797
RUNNING TIMES FOR CX7 CLASSIC
Model Volt Long runtime mode
CX7-1-30XX 14,4V 30 min
The battery should be removed from The product before disposal. Dispose of or recycle The battery in accordance with local regulations. The symbol

on the product or on its packaging indicates that this product may not be treated as household waste. Instead it shall be handed over to the applicable collection point for the recycling of electrical and electronic equipment. By ensuring this product is disposed of correctly, you will help prevent potential negative consequences for the environment and human health, which could otherwise be caused by inappropriate waste handling of this product. For more detailed information about recycling of this product, please contact your local city office, your household waste disposal service or the shop where you purchased the product.
www.aeg.com
ΕΛΛΗΝΙΚΑ
text_image
AEG Battery operated vacuum cleaner Type: NV144L15 Model: PNC: Input: 25V ≈ 500mA Battery Capacity 21.6Wh 14.4V DC Li-ion CAUTION USE ONLY WITH CHARGER MODEL 5SA-18P-20 EU 250050 Serial number: Designed in Sweden / Wace in China Elektrola Haugette GmbH • Further Straße 246 • D-90/29 Nomberg • Germany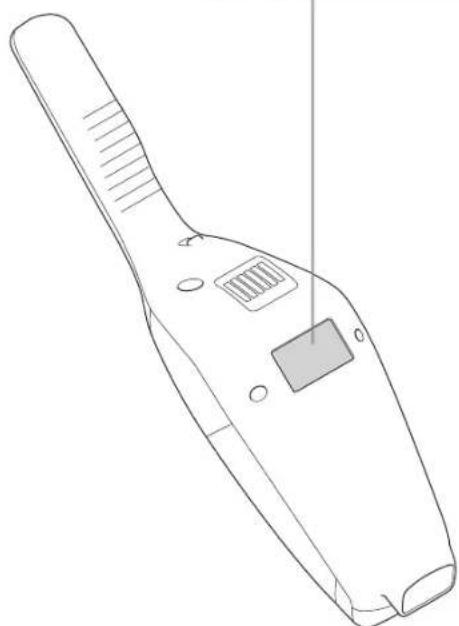
natural_image
Line drawing of a handheld electronic device with a small square button and ventilation slots (no text or symbols)natural_image
Technical line drawing of a flexible hose assembly with attached clip and connector (no text or symbols)BedPro™ MINI
Avap: AZE125
PNC: 900 168 3797

natural_image
Technical line drawing of a flexible hose and connector (no text or symbols)BedPro™ MINI
Ref: AZE125
Número de producto (PNC): 900 168 3797
Battery operated vacuum cleaner Type: NV144L15
Model: PNC:
Input: 25V = 500mA
Battery Capacity 21.6Wh 14.4V DC Li-ion
CAUTION: USE ONLY WITH CHARGER
MODEL SSA-18P-20 EU 250050
Serial number:


Designed in Sweden/Made in China
Electrical Healthcare GmbH • Former State 240 • D-9,425 N.M.berg • Germany

natural_image
Line drawing of a handheld electronic device with a screen and handle (no text or symbols)CONSOMMABLES ET ACCESSOIRES

www.aeg.com/shop
Filtre
Réf: AEF144
PNC: 900 167 1537

Kit Auto
Réf: AKIT360+
PNC: 900 168 3375

natural_image
Technical line drawing of a flexible hose and connector (no text or symbols)BedPro™ MINI
Réf: AZE125
PNC: 900 168 3797

AUTONOMIES POUR CX7 CLASSIC
Battery operated vacuum cleaner Type: NV144L15
Model: PNC:
Input: 25V = 500mA
Battery Capacity 21.6Wh 14.4V DC Li-ion
CAUTION: USE ONLY WITH CHARGER
MODEL SSA-18P-20 EU 250050
Serial number:


Designed in Sweden Made in China
r Straße 245 • D-90429 Nürnberg • Germany

natural_image
Line drawing of a handheld electronic device with a screen and handle (no text or symbols)MATERIALI DI CONSUMO E ACCESSORI

www.aeg.com/shop
Filtro
Rif: AEF144
PNC: 900 167 1537

Kit per auto
Rif: AKIT360+
PNC: 900 168 3375

natural_image
Technical line drawing of a flexible hose assembly with a clip, bracket, and connector (no text or symbols)BedPro™ MINI
Rif: AZE125
PNC: 900 168 3797
TEMPI DI UTILIZZO PER CX7 CLASSIC
VOOR U VAN START GAAT
natural_image
Line drawing of a handheld electronic device with a screen and handle (no text or symbols)VERBRUIKSARTIKELEN & ACCESSOIRES

natural_image
Technical line drawing of a flexible hose assembly with plastic components (no text or symbols)BedPro™ MINI Ref: AZE125 PNC: 900 168 3797

BEDRIJFSTIJDEN VOOR CX7 CLASSIC
ASSISTÊNCIA E GARANTIA
Battery operated vacuum cleaner Type: NV144L15
Model: PNC:
Input: 25V = 500mA
Battery Capacity 21.6Wh 14.4V DC Li-ion
CAUTION: USE ONLY WITH CHARGER
MODEL SSA-18P-20 EU 250050
Serial number:


Designed in Sweden: Made in China
natural_image
Line drawing of a handheld electronic device with a screen and handle (no text or symbols)CONSUMÍVEIS E ACESSÓRIOS

www.aeg.com/shop
Filtros
Ref.Ş: AEF144
PNC: 900 167 1537

natural_image
Line drawing of various cable and connector components (no text or symbols)BedPro™ MINI
Ref.Ş: AZE125
PNC: 900 168 3797
natural_image
Technical line drawing of a flexible hose and connector (no text or symbols)text_image
AEG Battery operated vacuum cleaner Type: NV144L15 Model: PNC: Input: 25V = 500mA Battery Capacity 21.6Wh 14,4V DC Li-ion CAUTION: USE ONLY WITH CHARGER MODEL SSA-18P-20 EU 250050 Serial number: Designed in Sweden / Made in China Extrusive Haugaralla GmbH • Further Smls 246 • D-3042B Numborg • Germany
natural_image
Line drawing of a handheld electronic device with a small square button and textured handle (no text or symbols)www.aeg.com
natural_image
Technical line drawing of a flexible hose and plastic component (no text or symbols)جعبه ابزار ماشین
AKIT360+ : مرجع
PNC: 900 168 3375

BedPro™ MINI
AZE125: مرجع
PNC: 900 168 3797