AR141B - Cooker JennAir - Free user manual and instructions
Find the device manual for free AR141B JennAir in PDF.
Frequently Asked Questions - AR141B JennAir
Download the instructions for your Cooker in PDF format for free! Find your manual AR141B - JennAir and take your electronic device back in hand. On this page are published all the documents necessary for the use of your device. AR141B by JennAir.
USER MANUAL AR141B JennAir
GENERAL PRECAUTIONS NEVER use your appliance for warming orheating the room.Wear proper apparel. Loose-fitting or hang-ing garments should never be worn whileusing the appliance.Do not repair or replace any part of theappliance unless specifically recommendedin this manual. All other servicing shouldbe referred to an authorized Jenn-AirServicer.Flammable materials should not be storednear surface units.Use only dry potholders. Moist or damppotholders on hot surfaces may result inburns from steam. Do not let potholdertouch hot heating elements. Do not use atowel or other bulky cloth.NEVER leave surface units unattended athigh heat settings. Boil over causes smok-ing and greasy spillovers that may ignite.Keep all switches "OFF" when unit is not in use.
Turn off appliance and ventilating hood toavoid spreading the flame. Extinguish flamethen turn on hood to remove smoke andodor.• Smother fire or flame in a pan with a lidor cookie sheet.NEVER pick up or move a flaming pan.Do not use water on grease fires. Use bak-ing soda, a dry chemical or foam-type ex-tinguisher to smother fire or flame.Installer: Please leave this manualwith this appliance.Consumer: Please read and keep thismanual for future reference. Keepsales receipt and/or cancelled checkas proof of purchase.Model Number Serial Number Date of Purchase_______________________________If you have questions, call:Jenn-Air Customer Assistance1-800-688-11001-800-688-2080 ( U.S. TTY for hear-ing or speech impaired)(Mon.-Fri., 8 am-8 pm Eastern Time)Internet: http://www.jennair.comFor service information, see page In our continuing effort toimprove the quality and per-formance of our cookingproducts, it may be necessaryto make changes to the ap-pliance without revising thisguide.All appliances - regardless of themanufacturer - have the potentialthrough improper or careless use tocreate safety problems. Therefore thefollowing safety precautions should beobserved when operating your Jenn-Air accessories and cartridges: READ BEFORE OPERATING YOUR COOKTOP OR RANGE CHILD SAFETY NEVER leave children alone or unsuper-vised near the appliance when it is in useor is still hot.NEVER allow children to sit or stand onany part of the appliance as they could beinjured or burned.NEVER store items of interest to childrenin cabinets above an appliance. Childrenclimbing on the appliance to reach itemscould be seriously injured. COIL ELEMENTS On conventional element cooktops, makesure that drip pans are in place. Absenceof these pans during cooking may subjectwiring or components underneath to dam- age. NEVER use aluminum foil to line surfaceunit drip pans or grill basin. Installation ofthese liners may result in an electric shockor fire hazard.Glazed cookware - only certain types ofglass, glass-ceramic, ceramic, earthenware,or other glazed cookware are suitable forcooktop surface without breaking due tothe sudden change in temperature. Followutensil manufacturer’s instructions whenusing glass.Cookware handles should be turned inwardand not extend over adjacent surface heat-ing elements to avoid burns, ignition of flam-mable materials and spillage due to unin-tentional contact with the cookware.Do not soak or immerse removable heat-ing elements in water.
IMPORTANT SAFETY INSTRUCTIONS2
RADIANT AND HALOGEN ELEMENTS NEVER cook on glass-ceramic cookingsurface if the cooktop is broken. Cleaningsolutions and spillovers may penetrate thebroken cooktop and create a shock haz-ard. Contact a qualified technician imme-diately.Clean glass-ceramic cooktops with caution.If wet sponge or cloth is used to wipe spillson a hot cooking area, be careful to avoidsteam burns. Some cleansers can producenoxious fumes if applied to a hot surface. UTENSIL SAFETY Use proper pan size. Many appliances areequipped with one or more surface unitsof different size. Select cookware havingflat bottoms large enough to cover the sur-face unit heating element. The use of un-dersized cookware will expose a portionof the heating element to direct contactand may result in ignition of clothing. Properrelationship of cookware to heating ele-ment will also improve efficiency and per-formance. GAS BURNERS Have the installer show you the location ofthe gas shut off valve and how to shut it offin an emergency.A faint gas odor may indicate a gas leak. If agas odor is detected, shut off gas supply tothe appliance. Call your installer or localgas company to have the possible leakchecked. Never use a match or otherflame to locate a gas leak.
If theinformation in this manual isnot followed exactly, a fire orexplosion may result causingproperty damage, personalinjury or death.– Do not store or use gasoline orother flammable vapors and liq-uids in the vicinity of this or anyappliance.– IF YOU SMELL GAS:• Do not try to light any appli-ance.• Do not touch any electricalswitch.• Do not use any phone in yourbuilding.• Immediately call your gassupplier from a neighbor’sphone. Follow the gas sup-plier’s instructions.• If you cannot reach your gassupplier, call the fire depart-ment.– Installation and service must beperformed by a qualified in-staller, service agency or the gassupplier.Always adjust surface burner flame so thatit does not extend beyond the bottom edgeof the pan. An excessive flame is hazard-ous, wastes energy and may damage the ap-pliance, pan or cabinets above the appliance. IMPORTANT SAFETY NOTICE AND WARNING The California Safe Drinking Water andToxic Enforcement Act of 1986 (Proposi-tion 65) requires the Governor of Califor-nia to publish a list of substances known tothe State of California to cause cancer orreproductive harm, and requires businessesto warn customers of potential exposuresto such substances.Users of this appliance are hereby warnedthat the burning of gas can result in low-level exposure to some of the listed sub-stances, including benzene, formaldehydeand soot, due primarily to the incompletecombustion of natural gas or liquid petro-leum (LP) fuels. Properly adjusted burnerswill minimize incomplete combustion. Ex-posure to these substances can also beminimized by properly venting the burnersto the outdoors.IMPORTANT NOTICE REGARDINGPET BIRDS: Never keep pet birds in thekitchen or in rooms where the fumes fromthe kitchen could reach. Birds have a verysensitive respiratory system. Fumes re-leased during an oven self-cleaning cyclemay be harmful or fatal to birds. Fumes re-leased due to overheated cooking oil, fat,margarine and overheated non-stick cook-ware may be equally harmful. SAVE THESE
INSTRUCTIONS FOR FUTURE REFERENCE
COOKING SAFETY Always place a pan on a surface burnerbefore turning it on. Be sure you knowwhich knob controls which surface burner.Make sure the correct burner is turned onand that the burner has ignited. When cook-ing is completed, turn burner off beforeremoving pan to prevent exposure toburner flame.COOKTOP CARTRIDGES
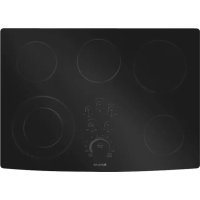
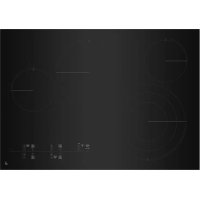
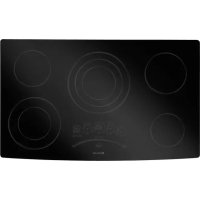
ALOGEN ADIANT JEA7000ADB (black) JEA8130ADB (black) JEA8120ADB (black)JEA7000ADW (white) JEA8130ADW (white) JEA8120ADW (white)JEA7000ADS (stainless) Expressions® Collection: Expressions® Collection:Expressions® Collection: AH151B/W AR141B/WAC110B/WCAUTIONS:• DO NOT use wire trivets, fire rings,pads or any such items between thecookware and the element.• DO NOT cook foods directly oncooktop.• DO NOT allow pan to boil dry asthis could damage the cooktop andthe pan.• DO NOT slide heavy metal or glasscookware across glass-ceramic sur-face since these may scratch the sur-face.• DO NOT use or place plastic itemsanywhere on cooktop.• DO NOT use cartridge in the eventa break has occurred.• DO NOT drop heavy cookware onthe cooktop surface. CONVENTIONAL COIL ELEMENTS The conventional coil cartridge is the mostversatile of the cartridges. When an ele-ment is on, it will cycle on and off to main-tain the heat setting. RADIANT AND HALOGEN ELEMENTS The two cooking areas are identified bycircles on the glass-ceramic cooktop. Whenan element is turned on, the cooktop willheat up and the red glow of the heatingelement can be seen through the glass-ce-ramic top. (NOTE: On halogen model, acircular halogen bulb will glow instantly.) Itis normal to see the red glow of the ele-ment whenever it cycles on. The elementwill cycle on and off for all control settingsexcept Hi. However, it may also cycle onHi if improper cookware is used.
- Select heavy gauge cookware. Gen-erally, heavy gauge cookware will notchange shape when heated.• Use cookware with flat, smoothbottoms. To determine if the cookwareis flat, place the edge of a ruler on thebottom. Hold up to the light. No lightshould be visible between the edge ofthe ruler and the pan. Reject any pansthat do not fit flush against ruler's edge.• Match the size of the cookware tothe size of the element. Cookwareshould be the same size or slightly larger.IMPROPER COOKWARE• DO NOT use cookware that extendsmore than one inch beyond the cookingarea.• Cookware that is smaller in diameterthan the cooking area should not be used.Not only can this cause the element torequire more energy and time, but canalso result in spillovers burning onto thecooking area resulting in a cleaning chore.• DO NOT use specialty items that arenonflat, oversized, uneven or do not meetproper cookware specifications such asround bottom woks with rings, griddles,rippled bottom canners, lobster pots,large pressure canners, etc. Large uten-sils, such as pressure canners or over-sized skillets, should be used only onconventional coil cartridges.• Glass-ceramic, earthenware, heat proofglass or glazed cookware may scratch theglass-ceramic cooktop and therefore arenot recommended.• NOTE: On halogen cartridge only, alu-minum pans may cause the element tocycle even when the control setting is Hi. SELECTING PROPER COOKWARE4
TO AVOID DAMAGE TO THE
GLASS-CERAMIC COOKTOP – Radiant and Halogen Cartridges Only:• Do not use glass pans. They may scratchthe surface.• Do not allow plastic, sugar or foods withhigh sugar content to melt onto the hotcooktop. Should this happen, clean im-mediately. (See Cleaning, pages 6 & 7.)• Never let a pan boil dry as this will dam-age the surface and pan.• Never use cooktop as a work surface orcutting board. Never cook food directlyon the surface.• Do not slide aluminum pans across a hotsurface. The pans may leave marks whichneed to be removed promptly. (SeeCleaning, pages 6 & 7.)• Make sure the surface and the pan bot-tom are clean before turning on to pre-vent scratches.• To prevent scratching or damage to theglass-ceramic top, do not leave sugar, saltor fats on the cooking area. Wipe thecooktop surface with a clean cloth orpaper towel before using.• Do not slide heavy metal pans across thesurface since these may scratch.• Do not use foil or foil-type containers.Foil may melt onto the glass. If metal meltson the cooktop, do not use. Call an au-thorized Jenn-Air Servicer.• If a spillover occurs while cooking, im-mediately clean the spill from the cook-ing area while it is hot to prevent a toughcleaning chore later. Using extreme care,wipe spill with a clean dry towel.• Do not use abrasive cleansing powdersor scouring pads which will scratch thecooktop.• Do not use chlorine bleach, ammonia orother cleansers not specifically recom-mended for use on glass-ceramic.All Cartridges:• Before first use clean cooktop cartridge.(See detailed instructions, pg. 6.)• For best results, always use recom-mended cookware.• Different cooktops and different amountsof food being prepared will influence thecontrol settings needed for best results.(See cooktop or range use and caremanual for typical control settings.) Forfastest cooking, start with the surfacecontrol on Hi for one minute; then turnthe control to the desired setting. Cov-ering pans, whenever possible, speedscooking and is more energy efficient.Radiant and Halogen Cartridges:• The glass-ceramic cooking area retainsheat for a period of time after the ele-ments have been turned off. Put this re-tained heat to good use. Turn elementsoff a few minutes before food is com-pletely cooked and use the retained heatto complete the cooking. Because of thisheat retention characteristic, the ele-ments will not respond to changes in heatsettings as quickly as coil elements. Inthe event of a potential boilover, removethe pan from the cooking area.• When preparing foods which can be eas-ily scorched or over-cooked, start cook-ing at a lower temperature setting andgradually increase temperature asneeded.• A higher setting than normal may be nec-essary when using cookware made withmaterial that is slow to conduct heat.• A lower setting can be used when cook-ing small quantities of foods or whenusing a pan that conducts heat quickly. COOKING PROCEDURES GLASS-CERAMIC COOKTOP SEALED GAS CARTRIDGE Sealed Burner Cartridge –Model JGA8100ADB (black)Model JGA8100ADW (white)The sealed burners of your cartridge aresecured to the cartridge and are not de-signed to be removed. Since the burnersare sealed into the cartridge, boilovers orspills will not seep underneath the cooktop.However, the burner heads should becleaned after each use. (See page 7 for clean-ing directions.)TO PREVENT THE COOKTOPFROM DISCOLORING ORSTAINING: Clean cooktop after each use. Wipe acidic or sugary spills as soon asthe cooktop has cooled as these spillsmay discolor the porcelain. BURNER GRATES The grates must be properly positioned be-fore cooking. Improper installation of thegrates may result in chipping of the cooktop.Do not operate the burners withouta pan on the grate. The grate’s por-5 NOTES:
A properly adjusted burner with cleanports will light within a few seconds.If using natural gas, the flame will beblue with a deeper blue inner cone.If the burner flame is yellow or isnoisy, the air/gas mixture may be in-correct. Contact a service technicianto adjust. (Adjustments are not cov-ered by the warranty.)With LP gas, some yellow tips on theflames are acceptable. This is normaland adjustment is not necessary. With some types of gas, you may heara “popping” sound when the surfaceburner is turned off. This is a normaloperating sound of the burner. If the control knob is turned veryquickly from hi to lo, the flame maygo out, particularly if the burner iscold. If this occurs, turn the knob tothe OFF position, wait several sec-onds and relight the burner. To improve cooking efficiency and toprevent possible damage to thecooktop or pan, the flame must beadjusted so it does not extend be-yond the edge of the pan. INSTALLATION TO INSTALL SEALED BURNERCARTRIDGE:
1. Be sure control knobs are turned OFF.
2. Clean basin of any grease accumulation.(See appliance User’s Guide for clean-ing recommendations.)3. With the back raised, position theburner cartridge with the mixer tubeopenings and ignitor rods toward theorifices and terminal receptacle. Slide thecartridge until the tubes and ignitorsstart to engage, then lower the cartridgeso that it rests on the cooktop surface.Gently slide forward to fully engage.celain finish may chip without a panto absorb the heat from the burnerflame.Although the burner grates are durable,they will gradually lose their shine and/ordiscolor, due to the high temperatures ofthe gas flame.TO REMOVE SEALED BURNERCARTRIDGE:1. Control knobs should be in the OFFposition and the cooktop should becool.2. Lift up the edge of the cartridge untilthe bottom of the cartridge clears thebasin. (Lifting the cartridge too highwhile still engaged could damage theignitor rods and mixer tubes.)3. To disengage the cartridge, hold by thesides and pull away from the terminalreceptacle and orifices. Lift out whenfully unplugged.4. Do not stack cartridges where they mayfall or be damaged.
COOKTOP CARTRIDGES, CONT.6
- Be sure appliance is off and allparts are cool before handling orcleaning. This is to avoid damageand possible burns.• The cooktop cartridge DOES NOTneed to be removed for normal clean- ing.
- NEVER immerse cartridge in water toclean. This can damage wiring. A drainhole within the cartridge permits drain-age of normal spills into the porcelainbasin pan where they will drain into thegrease container. The bottom of thecartridge may be wiped clean with de-tergent solution if necessary. CONVENTIONAL COIL CARTRIDGE – HEATING ELEMENTS
- Under normal conditions, most soil willburn off elements. The heating elementsunplug for your convenience in cleaningthe drip pans. Lift slightly and pull awayfrom receptacle. DO NOT IMMERSE INWATER. To replace elements, push com-pletely into the receptacle. Make surethe elements fit flat. DRIP PANS
- To keep the like-new appearance, cleanfrequently and never allow anything to burnon twice. When cool, wash after each use,rinse and dry to prevent staining and dis-coloration.• To clean heavy soil, soak in hot, sudsywater, then use a mild abrasive cleanersuch as Soft Scrub* and a plastic scour-ing pad. Do not use abrasive cleaningagents.• Do not use abrasive cleansers, steel woolor cleansers not recommended for useon chrome. Blue/gold staining of the drippans indicates improper cookware selec-tion and/or using excessively high heatand cannot be removed. PORCELAIN COOKTOP
- The porcelain enamel used on yourcooktop is acid resistant, not acid proof.Therefore, acidic foods (such as vinegar,tomato, milk, etc.) spilled on the cooktopshould be wiped up immediately with adry cloth.• Wash cool cooktop with warm soapywater and rinse. Polish with a dry cloth.• Do not use abrasive or caustic cleaningagents which may permanently damagethe finish.• NEVER wipe off a warm or hot porce-lain enamel surface with a damp cloth.
STAINLESS STEEL COOKTOP
- Before using the cooktop, remove allpieces of plastic covering the top. Use aglass cleaner to remove any film residuefrom the top and inside the rim area sup-porting the drip pan. If residue is left oncooktop, it can be burned onto cooktopand be difficult to remove.• DO NOT USE ANY CLEANINGPRODUCT CONTAINING CHLO-RINE BLEACH.• ALWAYS WIPE WITH THE GRAINWHEN CLEANING.• Daily Cleaning/Light Soil –– Wipewith one of the following - soapy water,white vinegar/water solution, Formula409 Glass and Surface Cleaner* or a simi-lar glass cleaner - using a sponge or softcloth. Rinse and dry. To polish and helpprevent fingerprints, follow with StainlessSteel Magic Spray (Jenn-Air Model A912,Part No. 20000008)**.* Brand names for cleaning products are registered trademarks of the respective manufacturers.**To order direct, call 1-800-688-8408.• Moderate/Heavy Soil –– Wipe withone of the following - Bon Ami*, SmartCleanser*, or Soft Scrub* - using a dampsponge or soft cloth. Rinse and dry. Stub-born soils may be removed with a dampScotch-Brite* pad; rub evenly with thegrain. Rinse and dry. To restore lusterand remove streaks, follow with Stain-less Steel Magic Spray.• Discoloration –– Using a damp spongeor soft cloth, wipe with Cameo StainlessSteel Cleaner*. Rinse immediately anddry. To remove streaks and restore lus-ter, follow with Stainless Steel MagicSpray.
CARTRIDGE – GLASS-CERAMIC SURFACE Never use oven cleaners, chlorine bleach, am-monia or glass cleaners with ammonia. NOTE:Call an authorized servicer if the glass-ceramictop should crack, break or if metal or alumi-num foil should melt on the cooktop.• Allow the cooktop to cool before cleaning.• General – Clean cooktop after eachuse, or when needed, with a damp papertowel and Cooktop Cleaning Creme*(Part No. 20000001)**. Then, buff with aclean dry cloth.NOTE: Permanent stains will develop if soilis allowed to cook on by repeatedly usingthe cooktop when soiled.• Heavy Soils or Metal Marks –Dampen a “scratchless” or “neverscratch” scrubber sponge. ApplyCooktop Cleaning Creme* (Part No.20000001)** and scrub to remove asmuch soil as possible. Apply a thin layerof the creme over the soil, cover with adamp paper towel and let stand 30 to45 minutes (2-3 hours for very heavysoil). Keep moist by covering the paper CLEANING7 CLEANING, CONT.
- Brand names for cleaning products are registered trademarks of the respective manufacturers.**To order direct, call 1-800-688-8408.RIGHT WRONG WRONG BIG POT CANNING ELEMENT Model A145AThe canning ele-ment accessorymakes it possibleto use large or oversized flanged or rippledbottom canners with the conventional coilcartridge.Follow these procedures whencanning:• Bring water to boil at Hi setting; afterboiling has begun, reduce heat to lowestsetting that will maintain boiling.• Make certain canner fits over center ofsurface unit.• Flat-bottomed canners give the best can-ning results.• Use canning recipes from a reputablesource such as the manufacturer of yourcanner and manufacturers of canning jars.• Canning is a process that creates largeamounts of steam. Follow equipment in-structions to avoid burns from steam orhot canners.• If your area has low voltage at times, can-ning may take longer than indicated bythe directions. WOK Model AO142Use Jenn-Air’s flatbottom wok accessory for optimum results.It has a nonstick finish, wood handles, cover,steaming rack, rice paddles, cooking tips andrecipes. GRILL COVER Model A341 (electric)Model AG341 (gas)The grill cover protectsthe grill when not in use.It is available in texturedsteel in black or whitewith molded handles. ACCESSORIES ELECTRIC GRILL ACCESSORY Model JEA8000ADBIncludes grill element, two grill grates andbasin liner pan.
SEALED GAS BURNERS/GRATES
- Allow burner and grates to cool. Wash withsoapy water and a plastic scouring pad. Forstubborn soils, clean with a soap-filled, non-abrasive pad or a sponge and a commercialCooktop Cleaning Creme (Part#20000001)**.• Clean gas ports with a soft bristle brush or astraight pin especially the port below the ig-nitor. Do not enlarge or distort holes.• Be careful not to get water into burner ports.• When cleaning, use care to prevent damageto the ignitor. If the ignitor is soiled, wet ordamaged the surface burner will not light.towel with plastic wrap. Scrub again, thenbuff with a clean dry cloth.NOTE: Only use a CLEAN, DAMP“scratchless” pad that is safe for non-stickcookware. The pattern and glass will be dam-aged if the pad is not damp, if the pad issoiled, or if another type of pad is used.• Burned-on or Crusty Soils – Scrubwith a “scratchless” or “never scratch”scouring pad and Cooktop CleaningCreme*.NOTE: Hold a razor blade scraper at30° angle and scrape any remaining soil.Then, clean as describedabove. Do not use the ra-zor blade for daily clean-ing as it may wearthe pattern on theglass.• Melted Sugar or Plastic – Immediatelyturn element to LOW and scrape sugaror plastic from hot surface to a cool area.Then turn element OFF and allow to cool.Clean residue with razor blade scraperand Cooktop Cleaning Creme*.MODEL JEA8200ADX
1. Make sure controls are in the OFF posi-
holes are in front. This will permit ex- cess grease to drain into the grease con- tainer.
1. Make sure controls are in the OFF posi-
tion. The basin should be empty and clean.
2. Slide the griddle towards the receptacle
until the terminal plug is completely en- gaged. The griddle should rest on the basin. NOTE: The liner pan may remain in place but is not necessary. GRIDDLE ACCESSORY MODEL JGA8200ADX (GAS)
1. Make sure controls are in the OFF posi-
3. Place griddle over burner so that the
drain holes are in front. This will permit excess grease to drain into the grease container.
USING THE GRIDDLE CLEANING
10IF YOU NEED SERVICE
Full One Year Warranty - Parts and LaborFor one (1) year from the original retail pur-chase date, any part which fails in normal homeuse will be repaired or replaced free of charge.Limited Warranties - Parts OnlySecond Year - After the first year from the origi-nal purchase date, parts which fail in normal homeuse will be repaired or replaced free of chargefor the part itself, with the owner paying all othercosts, including labor, mileage and transportation.Third Through Fifth Year - From the originalpurchase date, parts listed below which fail in nor-mal home use will be repaired or replaced free ofcharge for the part itself, with the owner payingall other costs, including labor, mileage and trans-portation.• Glass-ceramic Cooktop: Due to thermalbreakage.• Electric Heating Elements: Elements oncoil, radiant and halogen cartridges.• Sealed Gas BurnersCanadian ResidentsThe above warranties only cover an appliance in-stalled in Canada that has been certified or listedby appropriate test agencies for compliance to aNational Standard of Canada unless the appliancewas brought into Canada due to transfer of resi-dence from the United States to Canada.Limited Warranty Outside the UnitedStates and Canada - Parts OnlyFor two (2) years from the date of original retailpurchase, any part which fails in normal home usewill be repaired or replaced free of charge for thepart itself, with the owner paying all other costs,including labor, mileage and transportation.The specific warranties expressed above are theONLY warranties provided by the manufacturer. Thesewarranties give you specific legal rights, and you mayalso have other rights which vary from state to state.
WHAT IS NOT COVERED BY THESE
WARRANTIES: 1. Conditions and damages resulting from any of the following:a.Improper installation, delivery, or maintenance.b.Any repair, modification, alteration, or adjustment not authorized by themanufacturer or an authorized servicer.c.Misuse, abuse, accidents, or unreasonable use.d.Incorrect electric current, voltage, or supply.e.Improper setting of any control.2 Warranties are void if the original serial numbers have been removed,altered, or cannot be readily determined.3. Products purchased for commercial or industrial use.4. The cost of service or service call to:a. Correct installation errors.b.Instruct the user on the proper use of the product.c.Transport the appliance to the servicer.5. Consequential or incidental damages sustained by any person as a resultof any breach of these warranties. Some states do not allow the exclusionor limitation of consequential or incidental damages, so the above exclu-sion may not apply.• Call the dealer from whom your appliance was purchased or call MaytagAppliances Sales Company, Jenn-Air Customer Assistance at 1-800-688-1100 to locate an authorized servicer.• Be sure to retain proof of purchase to verify warranty status. Refer toWARRANTY for further information on owner’s responsibilities for war-ranty service.• If the dealer or service company cannot resolve the problem, write toMaytag Appliances Sales Company, Attn: CAIR Center, P.O. Box 2370,Cleveland, TN 37320-2370, or call 1-800-688-1100.U.S. customers using TTY for deaf, hearing impaired or speech impaired,call 1-800-688-2080.NOTE: When writing or calling about a service problem, please includethe following information:a. Your name, address and telephone number;b. Model number and serial number;c. Name and address of your dealer or servicer;d. A clear description of the problem you are having;e. Proof of purchase (sales receipt).• User’s guides, service manuals and parts information are available fromMaytag Appliances Sales Company, Jenn-Air Customer Assistance. JENN-AIR WARRANTY