
Slim Spaces - High chair GRACO - Free user manual and instructions
Find the device manual for free Slim Spaces GRACO in PDF.
Frequently Asked Questions - Slim Spaces GRACO
User questions about Slim Spaces GRACO
0 question about this device. Answer the ones you know or ask your own.
Ask a new question about this device
Download the instructions for your High chair in PDF format for free! Find your manual Slim Spaces - GRACO and take your electronic device back in hand. On this page are published all the documents necessary for the use of your device. Slim Spaces by GRACO.
USER MANUAL Slim Spaces GRACO
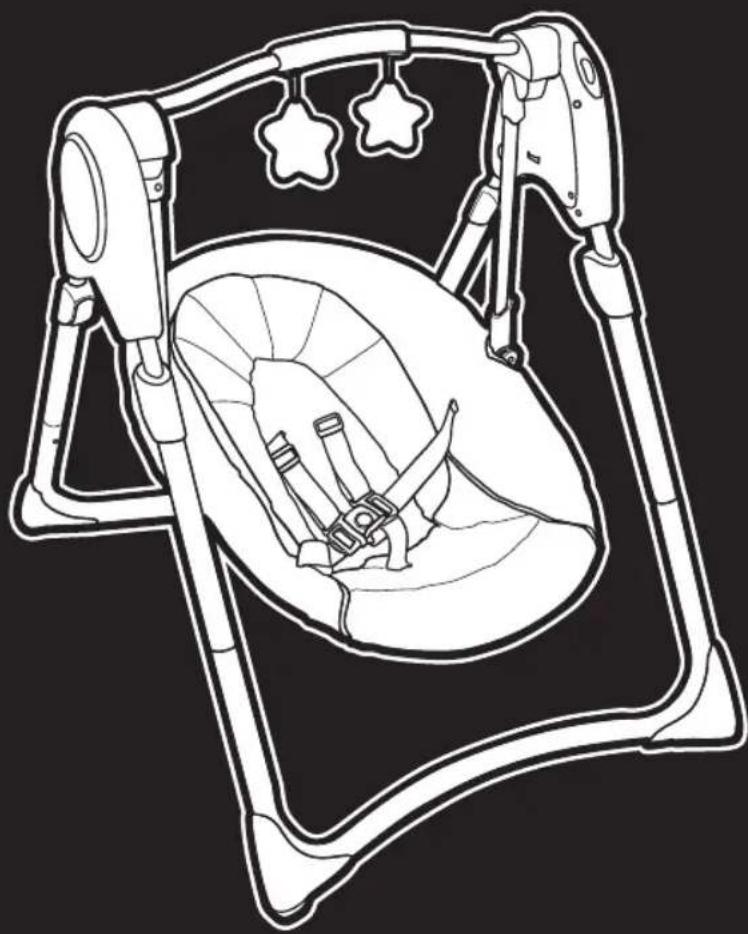
Slim Spaces™ Compact Swing
Owner's Manual · Mode d'Emploi · Manual del propietario
www.gracobaby.com
www.gracobaby.ca
©2017 Graco PD349399E 3/17
1 WARNING·MISE EN GARDE · ADVERTENCIA
4-C To Lower Leg Height (Position 2 to Position 1)
- Pour réduire la hauteur des pattes (de la position 2 à la position 1)
- Como bajo la.altura de la pata (posicion 2 a posicion 1)
Failure to follow these warnings and the assembly instructions could result in serious injury or death.
- PLEASE SAVE OWNER'S MANUAL FOR FUTURE USE.
TO PREVENT SERIOUS INJURY OR DEATH FROM INFANTS FALLING OR BEING STRANGLED IN STRAPS:
Always secure infant in the restraint system provided. After fastening buckles, adjust belts to get a snug fit around your infant.
- Never leave infant unattended in swing.
- Never carry swing with infant in it.
- Discontinue use of swing when infant attempts to climb out (approximately 9 months) or reaches 25 lb (11 kg).
- ALWAYS place swing on floor. Never use on any elevated surface.
STRANGULATION HAZARD:
DO NOT place swing in any location where there are cords, such as window blind cords, drapes, phone cords, etc.
- Strings can cause strangulation. DO NOT place items with a string around your child's neck, such as hood strings or pacifier cords.
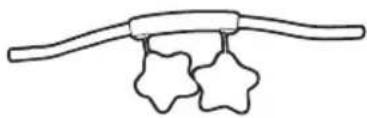
- DO NOT suspend strings over the swing or attach strings to toys.
DO NOT USE SWING without the seat cover.
- DISCONTINUE USING YOUR SWING should it become damaged or broken.
- THIS PRODUCT REQUIRES ADULT ASSEMBLY. Follow assembly instructions carefully. If you experience any difficulties, please contact the Customer Service Department.
WARNING
FOR SAFE BATTERY USE:
Keep the batteries out of children's reach.
Any battery may leak battery acid if mixed with a different battery type, if inserted incorrectly (put in backwards) or if all batteries are not replaced or recharged at the same time. Do not mix old and new batteries. Do not mix alkaline, standard (carbon-zinc) or rechargeable (nickel-metal hydride, nickel-cadmium) batteries.
Any battery may leak battery acid or explode if disposed of in fire or an attempt is made to charge a battery not intended to be recharged. Never recharge a cell of one type in a recharger made for a cell of another type.
Discard leaky batteries immediately. Leaky batteries can cause skin burns or other personal injury. When discarding batteries, be sure to dispose of them in the proper manner, according to your state and local regulations.
Remove batteries before storing product for a prolonged period of time. Batteries left in the unit may leak and cause damage.
Recommended type batteries—alkaline disposables, size 4-D (LR20-1.5V). NEVER mix battery types. Change batteries when product ceases to operate satisfactorily.
WARNING
Changes or modifications to this unit not expressly approved by the party responsible for compliance could void the user authority to operate the equipment.
NOTE: This equipment has been tested and found to comply with the limits for a Class B digital device, pursuant to Part 15 of the FCC Rules. These limits are designed to provide reasonable protection against harmful interference in a residential installation. This equipment generates, uses and can radiate radio frequency energy and, if not installed and used in accordance with the instructions, may cause harmful interference to radio communications.
However, there is no guarantee that interference will not occur in a particular installation. If this equipment does cause harmful interference to radio or television reception, which can be determined by turning the equipment off and on, the user is encouraged to try to correct the interference by one or more of the following measures:
- Reorient or relocate the receiving antenna.
- Increase the separation between the equipment and receiver.
- Connect the equipment into an outlet on a circuit different from that to which the receiver is needed.
- Consult the dealer or an experienced radio/TV technician for help.
This Class B digital apparatus meets all requirements of the Canadian Interference-Causing Equipment Regulations. CAN ICES-3 (B) /NMB-3 (B).
AMISE EN GARDE
Check that you have all the parts for this model BEFORE assembling your product. If any parts are missing, call Customer Service.
No tools required.
DO NOT use any other accessories with this product.
Only use this head support on this swing. Never use this head support on any other product.
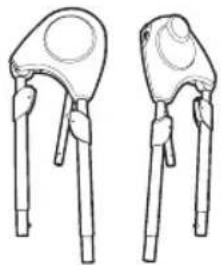
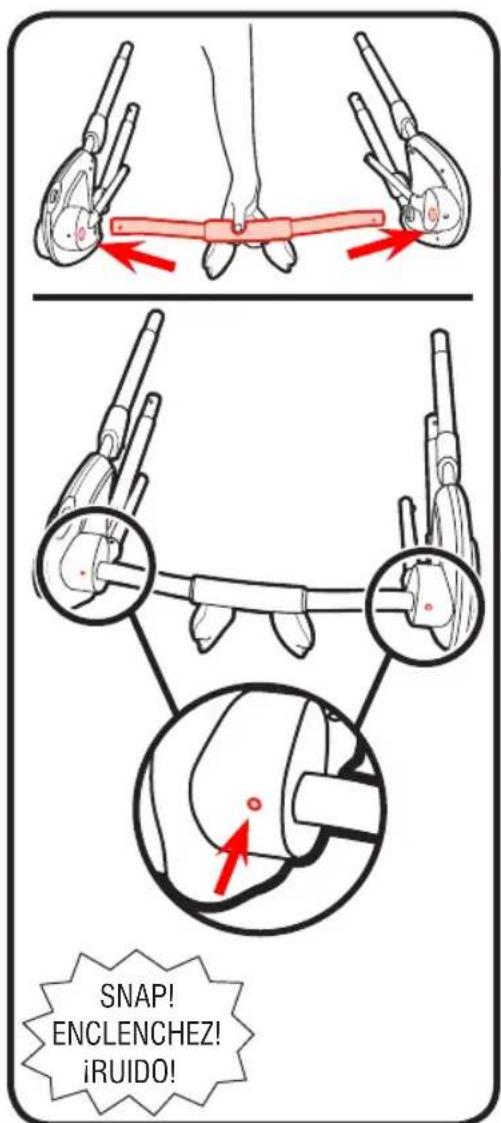
3-B Assembling Swing Frame
Montage du cadre de la balançoné
- Ensamblaje del armazón del columpio
3-C Attaching Seat to Swing Frame
4-B To Adjust Leg Height (Position 1 to Position 2)
To avoid sliding or falling out, always make sure all 4 legs are set to the same leg height.
NEVER adjust the leg height while infant is in seat.
MISE EN GARDE
4-C To Lower Leg Height (Position 2 to Position 1)
Pour réduire la hauteur des pattes (de la position 2 à la position 1)
- Como bajo la.altura de la pata (posicion 2 a posicion 1)
WARNING
To avoid sliding or falling out, always make sure all 4 legs are set to the same leg height.
NEVER adjust the leg height while infant is in seat.
MISE EN GARDE
Falling Hazard: Always use the seat belt.

MISE EN GARDE
4-E Installing Batteries (not included)
To avoid injury: Remove child from swing before changing batteries.
AMISE EN GARDE
avoid serious injury from falling or sliding
out. Always use seat belt. After fastening buckles, adjust belts to get a snug fit around your infant.
TO TURN SWING ON:
Rotate the speed dial up, and lightly push the swing to get it started. Observe the swinging motion for a minute. It takes time for the swing to adjust to a setting. Change setting if needed by moving the dial up for faster speeds or down for slower.
TO TURN SWING OFF: Turn dial down until it Clicks into the "OFF" position.
Your seat may be stopped at any time the motor is running without damaging the motor. Push swing to restart.
AMISE EN GARDE
- No batteries in swing.
- Batteries dead.
- Speed setting too low.
- Batteries in backwards — check “+” and “-”.
- Corrosion on battery terminals. Rotate batteries in place against terminals, or clean with sandpaper or steel wool if corrosion is severe.
- Baby leaning too far forward.
- Baby grabbing swing legs. (Discontinue use.)
- Seat not pushed high enough for a good start.
SEAT DOESN'T SWING VERY HIGH:
- Control setting too low.
- Blanket hanging down, causing increased wind resistance.
- Batteries too weak.
- Baby leaning too far forward.
- Baby too heavy or too active. (Discontinue use.)
- Soft carpet (swings higher on hard floors).
LA BALANCOIRE NE DEMARRE PAS:
Reverse steps to re-attach.
To purchase parts or accessories or for warranty information, please contact us at the following:
To register your Graco product from within the U.S.A. visit us online at www.gracobaby.com/productregistration or return registration card provided with your product. We currently do not accept product registrations from those living outside the United States of America.