IEO28LCR30 - Oven Ices - Free user manual and instructions
Find the device manual for free IEO28LCR30 Ices in PDF.

| Product Type | Electric Oven |
| Brand | Ices |
| Model | IEO28LCR30 (IEO-28LCR30) |
| Estimated Capacity | 28 liters |
| Maximum Temperature | 250 °C (according to cooking guide) |
| Cooking Modes | Top and bottom heating, Convection, Rotisserie, Combinations |
| Timer | Adjustable mechanical timer (minutes) |
| Automatic Shut-off | Yes, at end of timer |
| Thermostat | Rotary temperature control |
| Door Material | Glass |
| Included Accessories | Baking tray, grill rack, rotisserie, rotisserie handle |
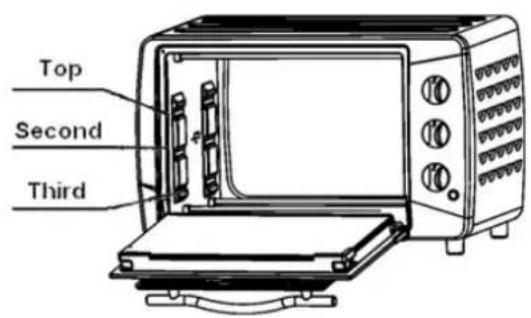
| Tray Positions | 3 positions (heights) |
| Safety Distances | 30 cm above, 10 cm at rear and sides |
| Power Supply | AC cord, grounded plug |
| Maintenance | Clean with soft cloth and mild detergent after cooling |
| Repairability | Do not disassemble yourself, contact a qualified professional |
| Safety Instructions | Do not touch hot surfaces, do not block ventilation openings, keep out of reach of children |
| Rotisserie Function | Yes, with forks and rotisserie handle |
| Convection Function | Yes, air flow for even cooking |
Frequently Asked Questions - IEO28LCR30 Ices
User questions about IEO28LCR30 Ices
0 question about this device. Answer the ones you know or ask your own.
Ask a new question about this device
Download the instructions for your Oven in PDF format for free! Find your manual IEO28LCR30 - Ices and take your electronic device back in hand. On this page are published all the documents necessary for the use of your device. IEO28LCR30 by Ices.
USER MANUAL IEO28LCR30 Ices
Précautions ET INDICATIONS
SPECIAL WAIARSCHUWINGEN
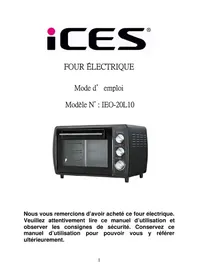
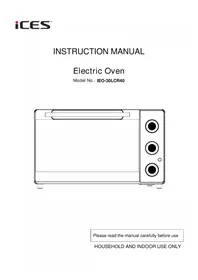
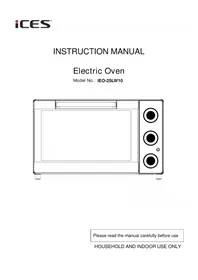
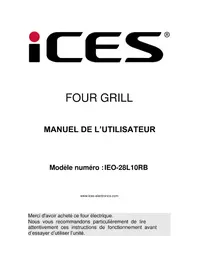
Thank you purchasing this electric oven. Please read this instruction manual carefully and follow the instructions. Please keep this instruction manual for future reference.
ATTENTION AND INDICATION
※ Before using, please read and follow the indication carefully
| WARNING |
| This is a domestic electrical product, which must only be used for its intended purpose, in accordance with these instructions. This product should never be used in a commercial environment. |
| Domestic electrical products are not designed for use by children! Any child using a domestic electrical product should be closely supervised by a responsible adult to ensure all instructions and safety precautions are adhered to. |
| Before use, please check that whether the utensils and foods are suitable for use in ovens, |
| The oven must be placed on a flat, stable surface. The oven must have sufficient air flow. Allow 30cm of space on the top of oven, 10cm at back and on both sides. |
| If the oven is positioned too close to a wall, the wall will be burned or stained. Be sure the curtain, etc., are not in contact with the appliance. |
| Do not put anything between the bottom of the body and the surface on which it is placed. An object so placed could be burned |
| REMARKS | |
| If the power cord is damaged, it must be replaced by the manufacturer or its service agent or a similarly qualified person in order to avoid power hazard | |
| WARNING | |
| AC power must be connected to a properly-wired outlet. Insert the plug completely into the socket; if it is not, it could become abnormally hot. Do not use an electric light outlet. Never connect multiple plugs to the same outlet. Do not immerse cord or plug in water. | |
| Do not wet the power cord nor handle the unit with wet hands. Always unplug the cord after use, or whenever the unit is to be left unattended. A malfunction could cause a fire while the plug is inserted into the outlet. | |
| When unplugging the cord, always take hold of the plug itself. Never pull on the cord. Doing so could break the wires inside the cord. | |
| Do not put anything on the oven while using it. The heat could cause deformation, cracking, etc. | |
| Do not place anything heavy on the open door. It may cause the falling of the appliance. | |
| Be careful! Not to burn yourself during use or immediately after use. The metal parts and glass window of the door become extremely hot during use. Be careful not to touch them when opening and closing the door. | |
| Always use the Tray Handle when inserting or removing the tray. Touching directly will cause severe burns. | |
| Do not apply water to the Glass Door during hot. It may cause the breakage of the glass. | |
| When cooking oil-splashing dishes such as roast chicken, it is recommended to put 2 sheets of aluminum foils on a tray in order to diminish oil splashing. Put one sheet on a tray. Then oil will drip to a gap between foils. | |
| Do not put anything on top / close to the heating elements (Upper and Lower), the food will scorch. Always put the Bake Tray to the Fourth Rack support to avoid the juice or crumb dropping to the heating element. | |
| Do not use any inflammable substance near an operating electrical appliance. Put the pressurized container and any other Flammable gases far away from the operating appliance. It may cause fire and explosion. | |
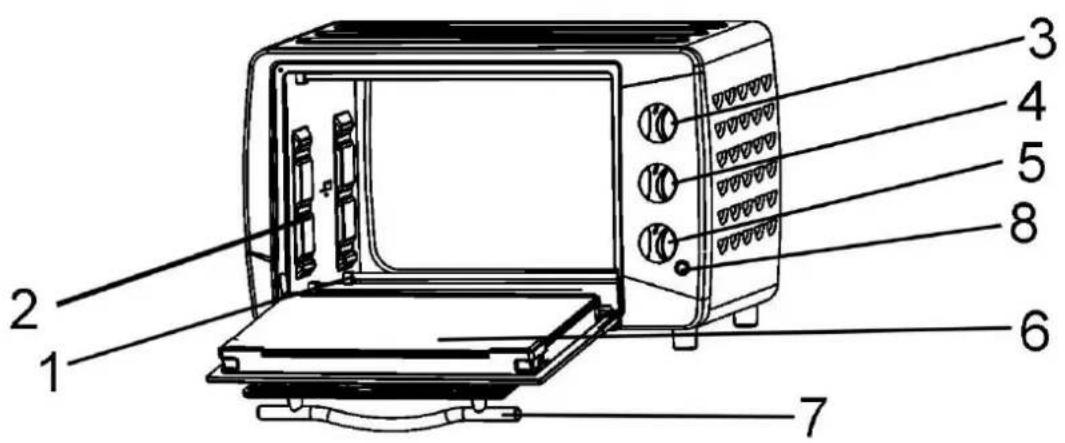
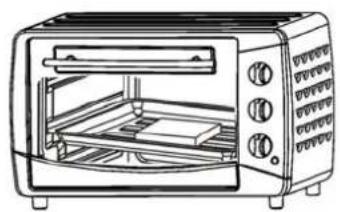
| 1.Heating Element 4. Function Selector 7.Door Handle | ||
| 2.Shelf Position 5.Timer 8.Indicator Light | ||
| 3.Temperature Control | 6.Glass Door | |
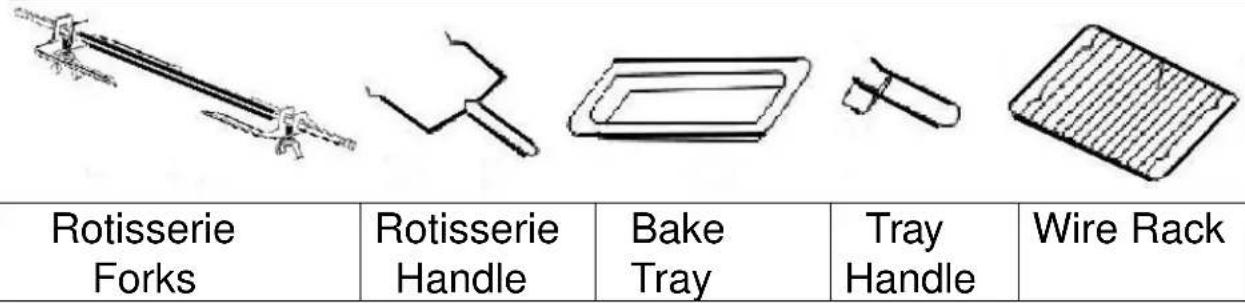
ACCESSIONS
BRIEF INSTRUCTION
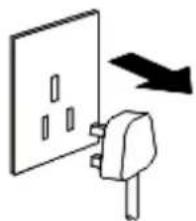
1 Well inserted the plug to the correct Socket.

2 Put the food on the Wire Rack or Bake Tray or Rotisserie Forks, and then close the glass door.
3 Set the "Temperature Control" by turning clockwise to select the suitable temperature according to the dishes you are going to cook.
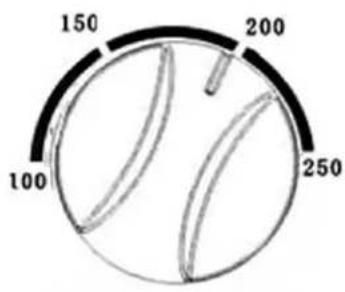
Temperature Control
5 Set the "Timer" to the number which indicates the cooking time (minutes). Now, the oven is working, beware of the HOT surface, and DO NOT open the glass door during cooking!

Timer
6 The oven will turn off automatically at the end of the selected time and a bell will ring. Please take out the food carefully and enjoy your food.
4 Set the "Function Selector" by turning clockwise to select the suitable heating function. "OFF" indicated no function.
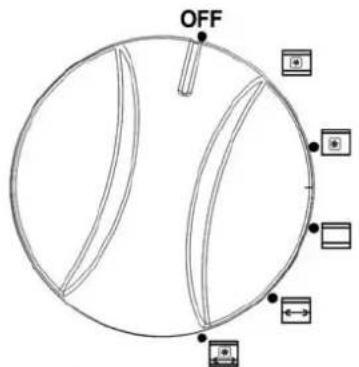
Function Selector

Upper & Lower Heating + Convection Function

Upper Heating + Convection Function

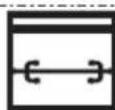
Upper & Lower Heating
Upper Heating + Rotisserie Function

Upper & Lower Heating + Convection & Rotisserie Function
7 Take off the plug after use, or whenever the unit is to be left unattended. Cool down before cleaning.
| Bake Tray and Wire Rack | ||
| Food(For Ref. only) How to use Tray Handle | ||
| Bake Tray *Recommended to use it as crumb tray. | Roast Chicken Wings, Hamburg steak, Gratin, Cake, almost all other oven-cooked foods | |
| Wire Rack | Baked potatoes, Dry food | |
| Bake Tray and Wire Rack | For food which will drip, e.g. boiled fish, etc. | |
| WARNING |
| Be careful when removing the hot liquids. |
| Rotisserie Function | |
| Use with Rotisserie Forks | Install Rotisserie Forks |
| With this function, even baking will be provided. | Left Right |
Rack Support
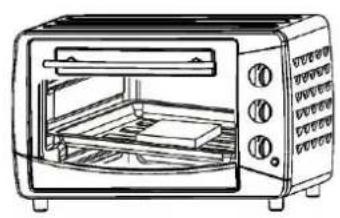
You can adjust the Tray at 3 different positions according to the dishes you want to cook. For instance, when making macaroni gratin and you want to have the top part cooked the most, use the second or the second rack support.
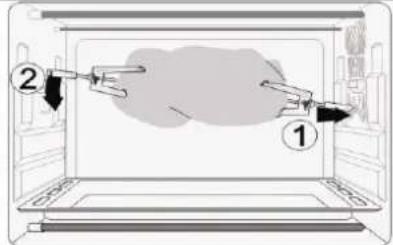
Install Rotisserie Forks
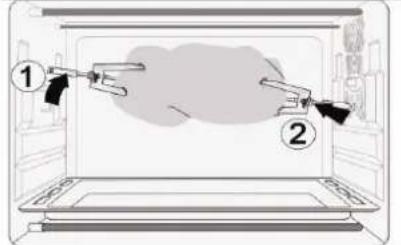
Remove Rotisserie Forks
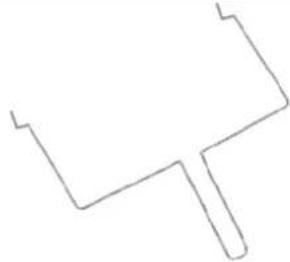
Rotisserie Handle
Install the Rotisserie Forks to the rotisserie hole, and then put it to the rotisserie tray.
Use Rotisserie Handle to take out the Rotisserie Forks from the rotisserie tray, and then remove it from the rotisserie hole.
CAUTION: Beware of HOT dripping oil!
Please always use Rotisserie Handle to take out the Rotisserie Forks.
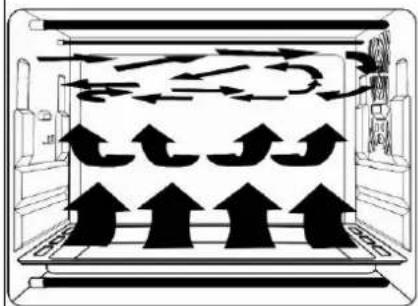
Convection Function
Featured with a special convection function, strong and absolute cycling airflow by making the heating more complete. Original flavor can be kept.
WARNING
Be careful when removing the hot liquids.
There may be some smoke and burning smell at the first time, but this is not malfunction.
NOTE
If the inner cabinet is dirty, cooking may take slightly longer than usual.
BAKING REFERENCE OF COMMON FOOD (Reference Only)
| Type Of Food | Temperature(℃) | Rack Support Time (MIN) |
| Bread | 180 | Third |
| Cake | 180 | Second |
| Fish | 250 | Second |
| Chicken/Duck | 220-250 | Second |
| Pancake | 160 | |
| Beef | 250 | Second |
| Egg/Peanut | 125-150 | Second |
| Hot Dog | 200 | Second |
| Hamburger | 240 | Second |
METHOD OF CLEANING
| Take off the plug and all parts are totally cool down before cleaning. | |
| Wash the interior and exterior surface, tray, grid, and food fork with soft cotton (or sponge) with neutral cleaner when cleaning. Then wash with clean water. Do not use hard brush or any others to wash, so as not to scrape the interior surface of the oven, and to protect the tray, the net and the food fork. | |
| Do not use the toxic and abrasive cleaners such as gasoline, polishing powder, solvent. | |
| Take out the wire rack, put the mild cleaner or kitchen lotion to water, soak the wire rack into water, and then use the soft sponge for cleaning. Lastly, rinse thoroughly with clean water and dry it before storage. | |
| Take out the baking tray, put the mild cleaner or kitchen lotion to water, soak the baking tray into water, and then use the soft sponge for cleaning. Lastly, rinse thoroughly with clean water and dry it before storage. | |
| Put the cleaning cloth into the clean water, take out and dry the cloth, then begin to use it to clean the outer and inner (including the window and heating element) of the unit. Lastly, dry the unit with a clean cloth. |
| WARNING |
| ·Use only recommended attachments. |
| ·If this product stops working unexpectedly, switch off and unplug the product immediately. Seek professional advice before attempting to re-use the product. |
| ·To avoid the risk of electrical shocks, DO NOT disassemble or attempt to repair appliance, but return it to your retailer or to one of our authorized service centres for examination and or repair. |
SPECIAL WARNING
Caution: The temperature of the accessible surface may be high when the appliance is operation.
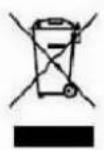
If at any time in the future you should need to dispose of this product please note that: Waste electrical products should not be disposed of with household waste. Please recycle where facilities exist. Check with your Local Authority or retailer for recycling advice. (Waste Electrical and Electronic Equipment Directive)