
Arrow - Tablet i-Joy - Free user manual and instructions
Find the device manual for free Arrow i-Joy in PDF.
| Product type | Tactile tablet |
| Brand | i-Joy |
| Model | Arrow |
| Operating system | Android (unspecified version) |
| Processor | High-performance processor (unspecified) |
| RAM memory | 512 MB (estimated) |
| Internal storage | 4 GB (estimated) |
| Screen | 7-inch touchscreen (estimated) |
| Screen resolution | 800 x 480 pixels (estimated) |
| Wi-Fi connectivity | Wi-Fi 802.11 b/g/n (estimated) |
| Camera | Integrated camera (unspecified) |
| Power supply | DC 5V power adapter included, rechargeable battery |
| Battery life | Several hours (estimated) |
| Maintenance | Clean with a soft, dry cloth. Avoid moisture and dust. |
| Security | Screen lock by pattern, password, or swipe. |
| Main functions | Web browsing, messaging, video/music playback, camera, games, Android apps. |
| Included accessories | Power adapter, USB cable, user manual. |
| Warranty | Warranty against manufacturing defects (conditions in manual). |
| Country of manufacture | China |
Frequently Asked Questions - Arrow i-Joy
User questions about Arrow i-Joy
0 question about this device. Answer the ones you know or ask your own.
Ask a new question about this device
Download the instructions for your Tablet in PDF format for free! Find your manual Arrow - i-Joy and take your electronic device back in hand. On this page are published all the documents necessary for the use of your device. Arrow by i-Joy.
USER MANUAL Arrow i-Joy
This manual contains important safety precautions and information of correct use. Please be sure to read this manual carefully before use so as to avoid any accidents.
Do not place the product in hot, wet or dusty environment, especially in summer, do not leave the product inside a car with all windows closed.
Avoid dropping, impacting or shaking the product violently, otherwise it may cause damages or malfunctions. Select a proper volume to avoid ear problem when using earphones.
Do not cross the road or drive vehicles, using headphones to avoid traffic accidents.
Be sure to use the provided chargers and accessories in the package.
Be sure to charge the product when the following situations take place,
- The battery icon shows lower or empty.
- System automatically shut down and it turns off soon after restart.
- Operation keys do not respond properly.
- The device shows in down right corner.
Important Notice
- If the device is freezing or stuck, press the reset button(a small hole) or long press power button for 7 seconds.
- When the performance is slow after using some applications, it is recommended to close running application in setting menu.
Caution
- For charging, be sure to use the power adapter(DC5V) that is provided in the package, otherwise, the device may be damaged and does not work.
- The device is equipped with high performance processor. It may heat in case of using long or while charging.
1. Power On/Off
Long press power button to turn on/off the device. It may take a minute to boot the device. Short press power button to turn on/off the screen.(Standby mode. refer to 3. below)
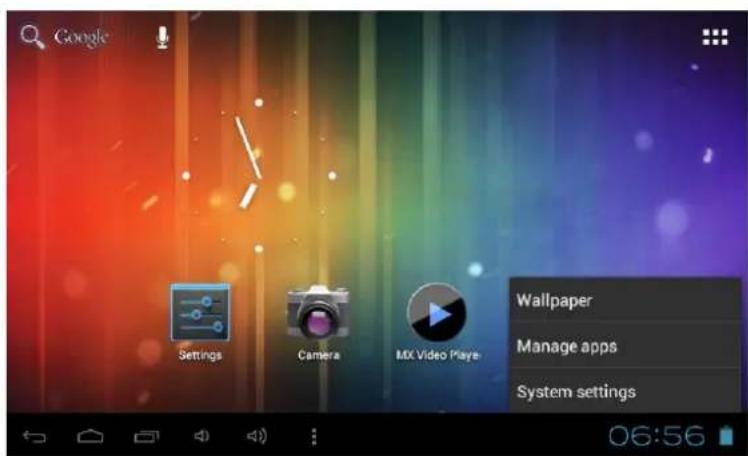
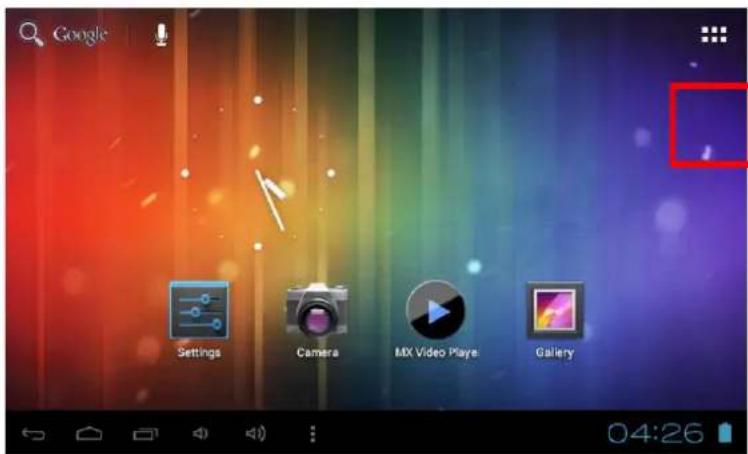
2. Desktop
After turning on the device, desktop displays with shortcut icons and arrow panel at the right side

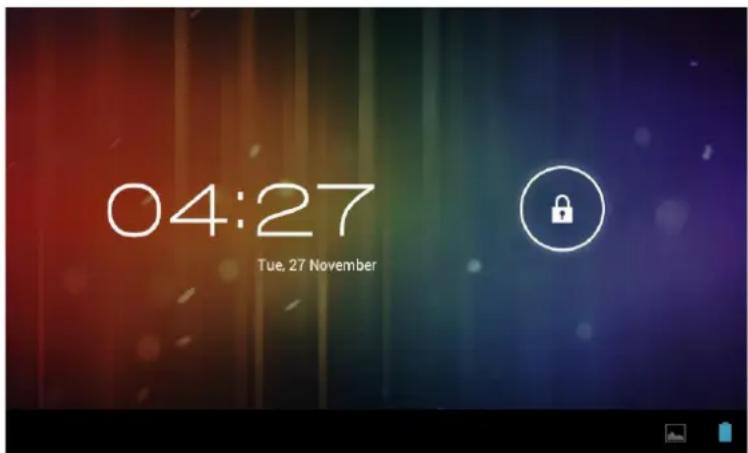
3. Standby mode (Screen off mode) / Unlock the screen
Short press the power button to turn on/off the screen (Standby mode on/off). After standby mode, slide the lock icon in order to unlock the screen.
4. System settings
On the desktop, press menu button and select system settings.
Press System Settings
1. Wireless & networks 2. Sound
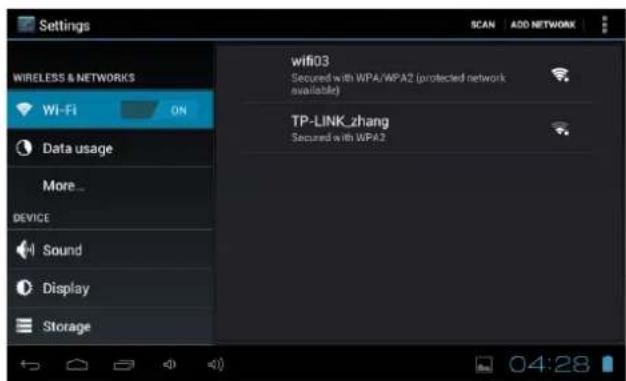
Wi-Fi - Press Wi-Fi to turn on/off like.
Wi-Fi settings - Press Wi-Fi settings, then the device will automatically search the available Wi-Fi signals. Select the network you want to connect with.
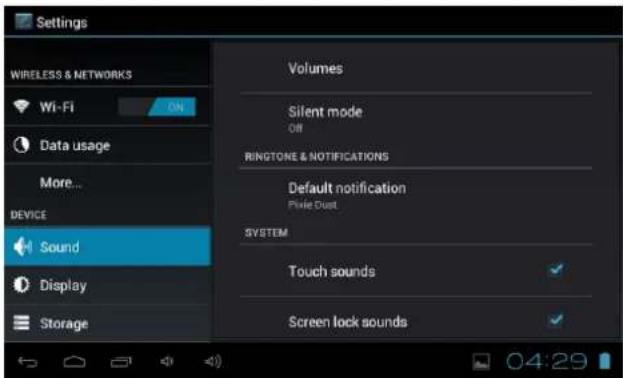
Set up each setting as you
3. Display 4. Storage
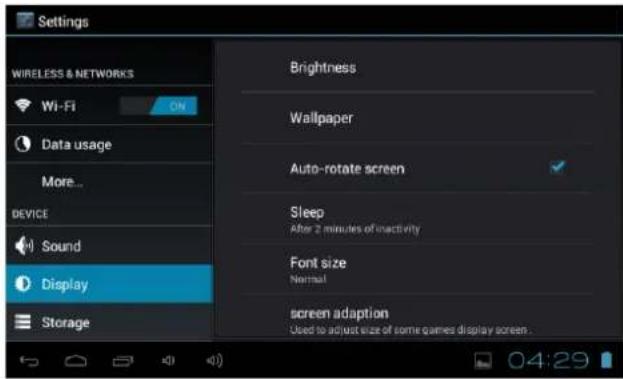
Set up each setting as you like.
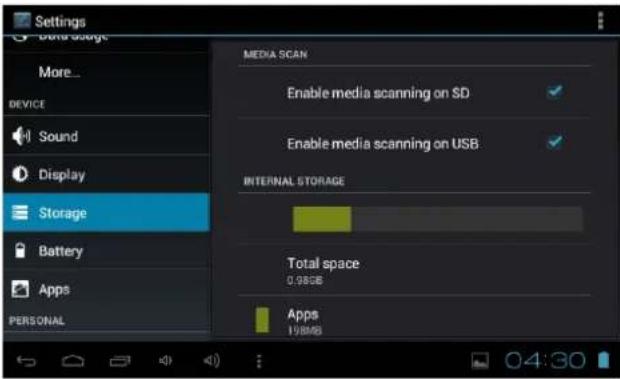
Check device memory and microSD card status. Unmount SD card – Unmount the SD card for safe removal.
5. Battery 6. Apps
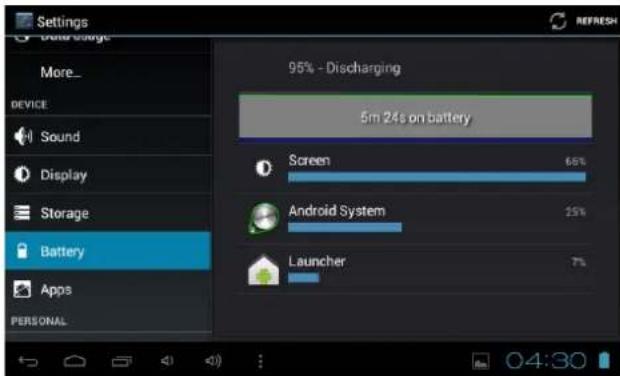
Check battery usage status.
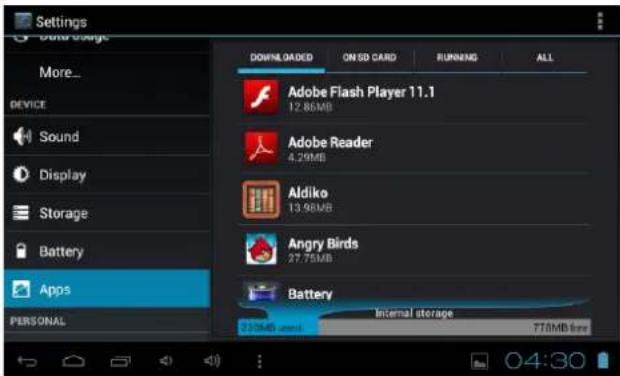
Manage downloaded or running applications.
All installed application downloaded are listing.
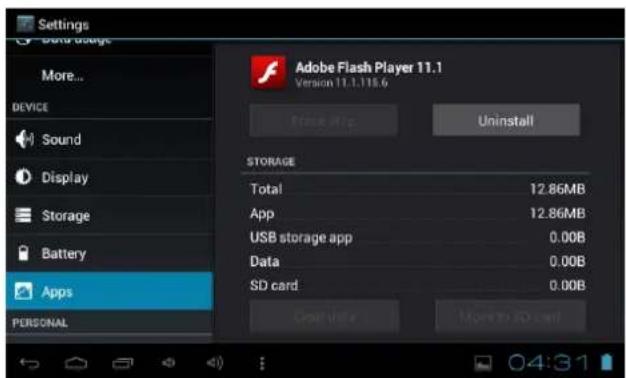
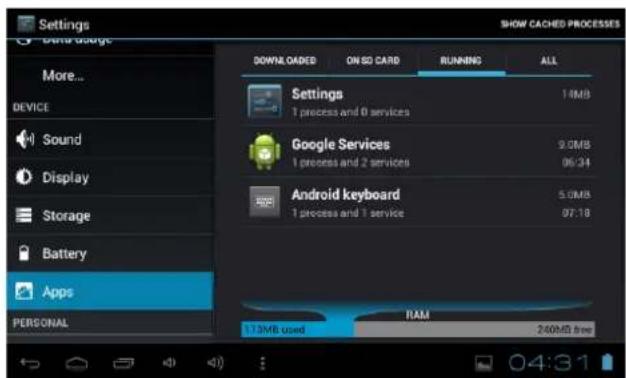
Keep pressing an application to manage. Running services
Press Uninstall to uninstall the selected application. View and control currently running services.
7. Account & sync
Create your account. After connecting Wi-Fi network, the e-mailing system synchronizes your account with the device. Emails are automatically downloaded into the device.
8. Location services
Google's location service - Let apps use data from sources such as WiFi and mobile networks to determine your approximate location
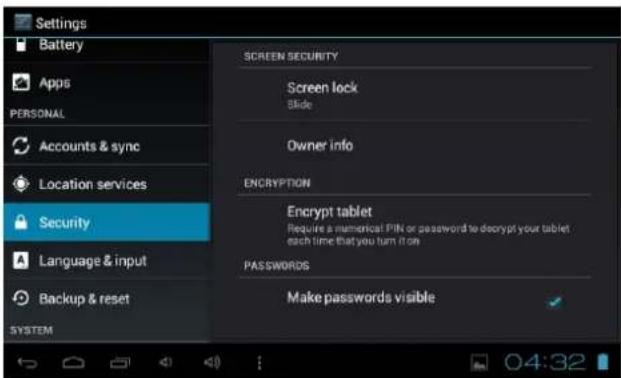
9. Security
Screen lock – Protect your device from unauthorized use by creating a personal screen unlock pattern. Make passwords visible – Show password as you type.
Unknown sources - If you want to allow installation of non-Market
Applications, Press Unknown sources and presses OK.
Install from SD card – Install encrypted certificates from SD card.
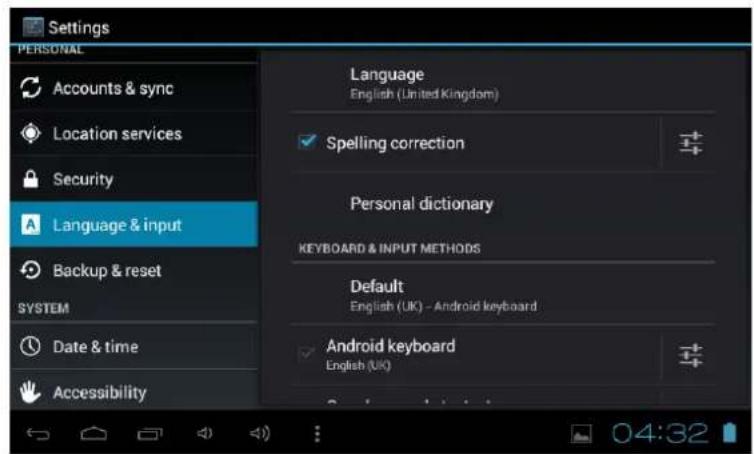
10. Language & input
Language – Choose your preferable language.
Keyboard & input method – Change keyboard & keyboard settings.
On Language & input settings, if you need other languages besides English on keyboard, press the relevant keyboard and enter the chosen Keyboard settings, select Keyboards, press the language you need.
11. Date & time
Set date & time and format
12. Developer options
Set options for application development
13. About tablet
See status, legal information, ETC
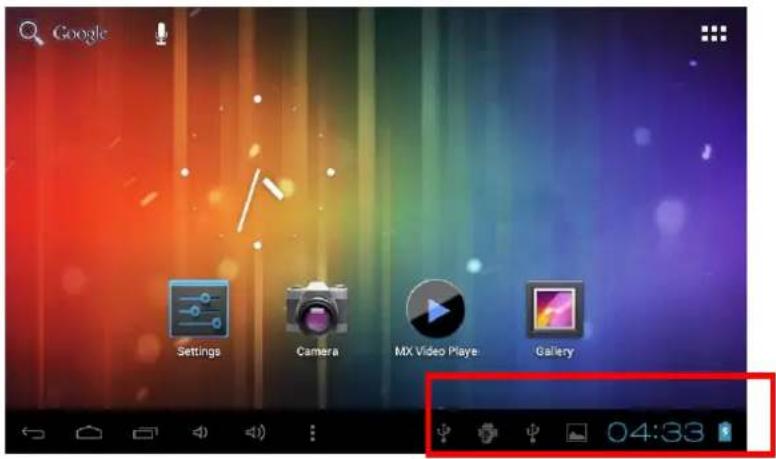
How to connect/disconnect the device with/from the computer
On main desktop, connect the device with the PC, touch right side of the status bar on the bottom of desktop
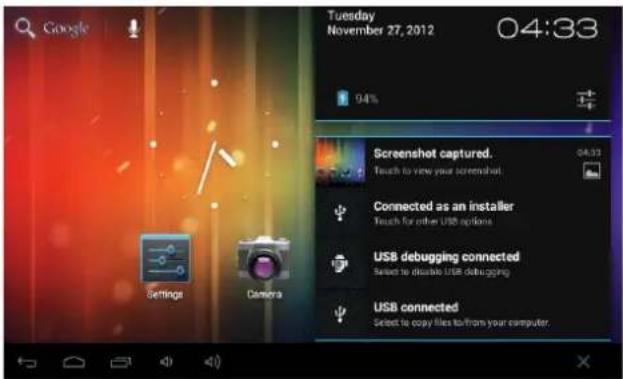
Press "USB connected", select "Turn on USB storage". The device is recognized at Explorer of the computer. Now you can use it as an external storage.
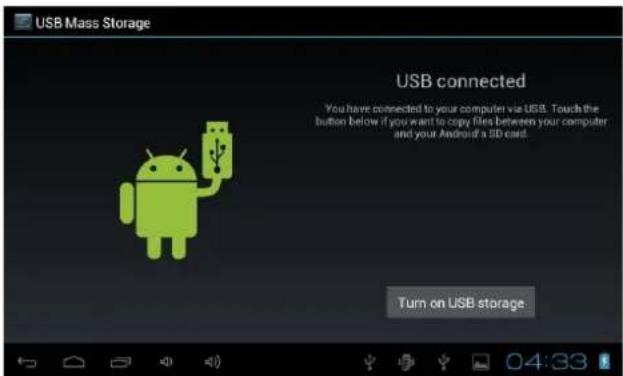
After finishing your work, Press "Turn off USB storage" to unmount it.
How to install Applications(.apk file) into the device
Method 1.
- Connect the device with internet. See above [1.Wireless & networks] in order to connect internet.
- Run "Play Store" and search the applications you want to install.
- Follow the instruction on the screen for installation.
Method 2.
- With your computer, search application file(.apk) that you want to install into the device.
- Download the file(.apk) into your computer.
- Connect the device with your computer. See above [How to connect/disconnect the device with/from the computer.]
- Copy and paste .apk file into the device and disconnect it from your computer.
- Run "File browser" and .apk file that was copied into the device.
- Press the file to install and follow the instruction on the screen.
Note
You may only download adult applications if you are at least 18 years of age, or at least the age of majority in the jurisdiction where you reside or from which you download adult applications. If you do not meet these requirements, then you do not have permission to download adult applications.
In case of any problems including legal issues from the breach by end-user's own decision, the manufacturer shall not be responsible
How to make desktop icons
Press the upper right side icon of desktop, the pop-up displays.
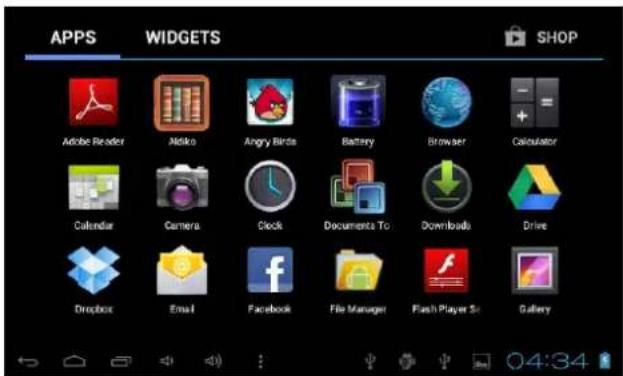
Shortcuts
Long press your desired APK icon and put it on the desktop.
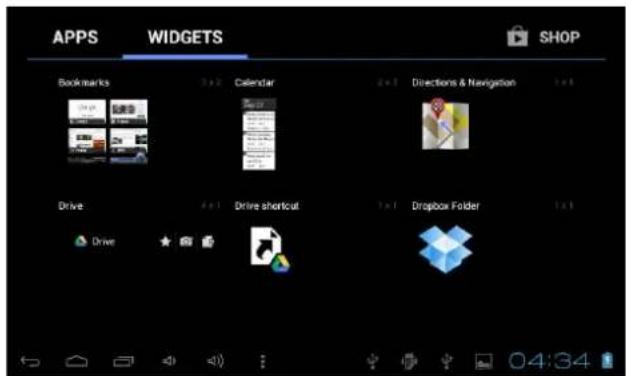
Widgets
Press Widgets and press your desired icon to put it on the desktop.
Wallpaper
Long press the desktop, press Wallpapers and select one of categories of wallpaper.
Select one you desire and press Set wallpaper.
Change Input Method
If your device was installed with other more input method, long press setting icon of keyboard, and the pop-up displays.
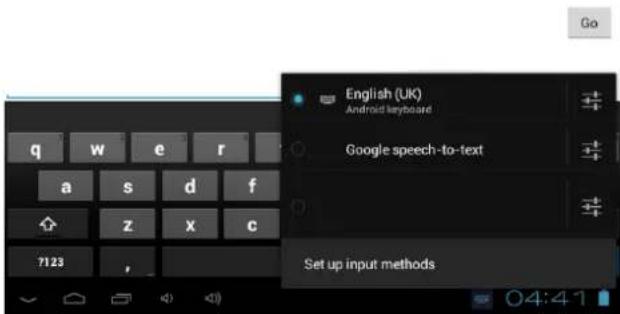
Select the installed keyboard, then the keyboard will appear with your desired language you installed.
Conditions of Guarantee
- For the guarantee to be carried out, all products must be delivered to IJOY perfectly packed, preferably in its own original packing, with all accessories, user manuals and drivers that the packaging would originally contain. Otherwise, IJOY will not be held responsible for damages that might occur during transportation.
- To be able to carry out the guarantee it will necessary to have a copy of the proof of purchase, preferably with a copy of the original bill.
- The repair of the products will be carried out according to the problem reported by the client; therefore it is essential that the client indicates in a clear form and in the most specific way possible where the problem lies, to be able to solve it in the correct manner. In the case that there is not problem with the product a diagnosis and transportation charge can be applied.
- The client must have carried out a security copy of the data as during the reparation process there exists the possibility that such data may be lost and/or erased. In any case IJOY will not be held responsible for the loss of data contained in hard drives, as well as any other non -original accessory, might there be batteries, memory cards, CD's DVD's, etc.
- In the case that there is no possibility of repair of the product, it can be replaced by another one of similar or superior characteristics, taking into consideration the state in which the product is received, such as usage marks, scratches, etc. In any case the product returned to the customer will have been tested to be functioning correctly.
- The Guarantee will only cover errors caused by deficiencies in manufacturing, and does not therefore cover damage caused by mis-use, modifications or damages caused by accidents of any nature of caused by the client. The guarantee does not cover: Accessories, pieces exposed to normal wear and tea. The Guarantee will not be valid when the product is not used for the purpose for which it was originally conceived.
- In the case of TFT, there exists what are known as dead pixels or bright dots (due to the complexity of the manufacturing process), in such cases, there exists a maximum limit permitted by law (ISO 13406/02) that allows this not to be considered defective.
- The power supplies or chargers and batteries will have a guarantee limited to six months as long as they used within the established operating conditions for the correct usage have not been exposed to power surges.
- It will be necessary that the equipment has a legible serial number, that the guarantee seal has not been manipulated and in perfect state; that the equipment has all original seals in all components so that the guarantee is valid.
- The guarantee period starts in the moment of first purchase of the product. The reparation or substitution of the product will not imply an extension of the guarantee period.
- In the case that the product is not covered by the guarantee, a budget will be drawn up which has to be approved by the client. In the case that the budget is not approved by the client, the client must pay for the cost incurred in the transportation, manipulation and diagnosis of the product.
- Once the product is repaired after notifying the client, the client will have a period of ten working days to pick up the product. After this period of time, a daily storage charge will be applicable depending on the volume of the product.
i-Joy
C/ Mario Roso de Luna, 31 · P.I. Fin de Semana · 28022-Madrid (Spain)
Tel. +34 902 55 55 60
E-mail: rma@i-joy.es (Under warranty) | postventa@i-joy.es (Technical doubts)

CONDITIONS DE GARANTIES

- Important Notice
- Caution
- Power On/Off
- Desktop
- Standby mode (Screen off mode) / Unlock the screen
- System settings
- Press System Settings
- Wireless & networks 2. Sound
- Display 4. Storage
- Battery 6. Apps
- Account & sync
- Location services
- Security
- Language & input
- Date & time
- Developer options
- About tablet
- How to connect/disconnect the device with/from the computer
- How to install Applications(.apk file) into the device
- Method 1.
- Method 2.
- Note
- How to make desktop icons
- Shortcuts
- Widgets
- Wallpaper
- Change Input Method
- Conditions of Guarantee
- i-Joy
- CONDITIONS DE GARANTIES
Brand : i-Joy
Model : Arrow
Category : Tablet