
Optix MAG24C - Monitor MSI - Free user manual and instructions
Find the device manual for free Optix MAG24C MSI in PDF.
| Product Type | LCD Monitor |
| Brand | MSI |
| Model | Optix MAG24C |
| Diagonal Size | 60 cm (23.6 inches) |
| Optimal Resolution | 1920 x 1080 |
| Aspect Ratio | 16:9 |
| Pixel Pitch | 0.272 x 0.272 mm |
| Image Dimensions | 521.4 x 293.28 mm |
| Maximum Refresh Rate | 144 Hz |
| Tilt Angle | From -5° (forward) to +20° (backward) |
| Rotation (Pivot) | From -30° to +30° |
| Height Adjustment | 65 mm |
| Connectivity | DP, DVI, HDMI, audio output |
| Power Supply | External power adapter |
| Operating Temperature | 5°C to 40°C |
| Storage Temperature | -20°C to 60°C |
| Operating Relative Humidity | 20% to 80% |
| Main Functions | Game Modes (Standard, Cinema, FPS, RTS, Eye Care), FreeSync, DCR, adjustable response time, crosshair |
| Maintenance and Cleaning | Unplug before cleaning, use a soft cloth, avoid chemicals |
| Safety | Do not disassemble, use on stable surface, avoid wet outlets |
| Supplied Accessories | Power adapter, base, signal cable, warranty card, user manual |
Frequently Asked Questions - Optix MAG24C MSI
User questions about Optix MAG24C MSI
0 question about this device. Answer the ones you know or ask your own.
Ask a new question about this device
Download the instructions for your Monitor in PDF format for free! Find your manual Optix MAG24C - MSI and take your electronic device back in hand. On this page are published all the documents necessary for the use of your device. Optix MAG24C by MSI.
USER MANUAL Optix MAG24C MSI
MSI GAMING MONITOR User's Manual

natural_image
Stylized red dragon head illustration against black background (no text or symbols)Catalog
English 1
Française 8
Español 15
I. Safety Prevention Measures
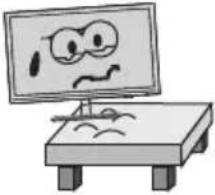 | 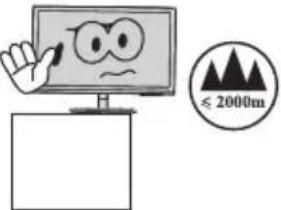 |  |  |
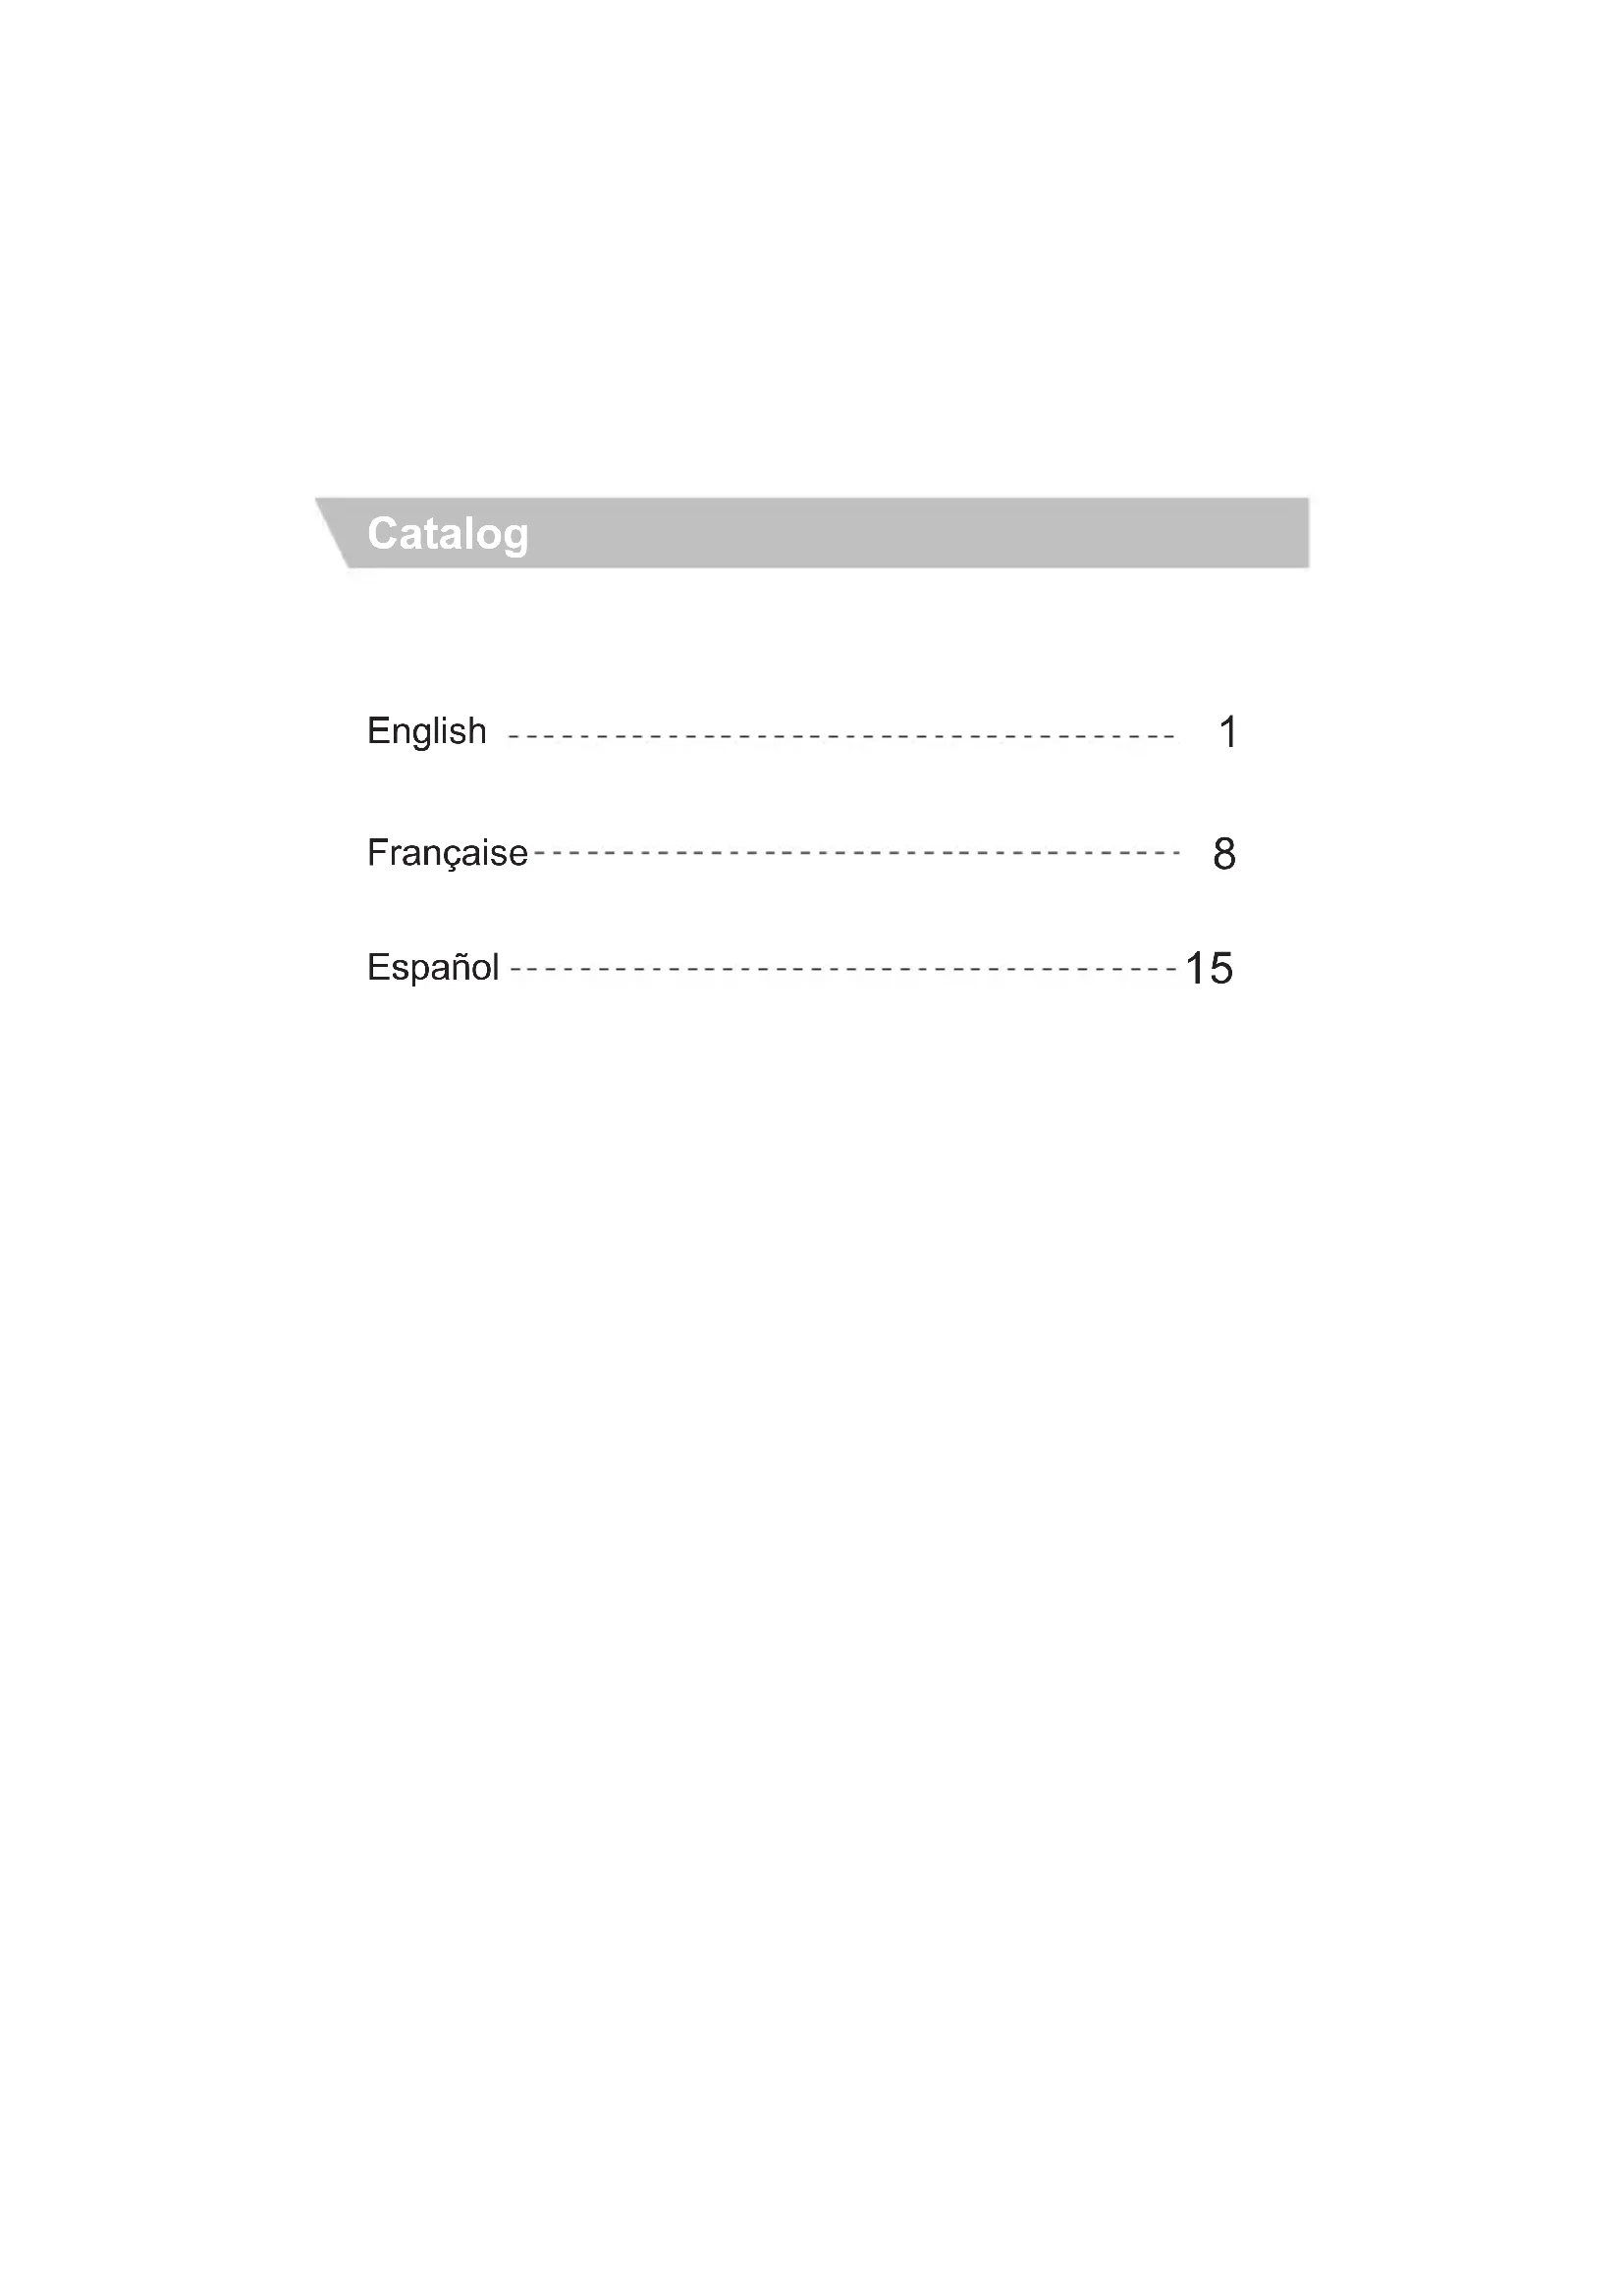
| Please always place this device on a stable surface; otherwise, it may fall and be damaged. | The altitude and the tropical environment the adapter fits depend on which adapter is used for the device. The rating plate on the back of the device with the above warning sign indicates that this product is applicable for the safe use of the region with altitude of 2,000m and below. | Do not hold the plug with wet hand; otherwise, electric shock may occur. Make sure the plug has a good touch because poor touch may cause fire. | Do not use a broken power plug nor keep a power cord near heat source; otherwise, el e ctri c sh ock or fire may occur. |
| When cleaning the device, be sure to remove the power plug, use a piece of soft cloth rather than industrial chemical to clean the device, be sure not to let water enter the device. | Do not disassemble this device without permission. In case of failure, be sure to contact a professional servicing person to fix it. The unauthorized disassembly of this device may result in electric shock or fire. | In case of rare smell or noise out of this device, be sure to immediately cut off the power supply and ask a professional servicing person to fix the problem. | When this device is idle for long time, be sure to power it off; otherwise, electric shock or fire may occur. |
Note:
The device with AC switch may use such AC switch as cut-off component. The device without AC switch may use power plug or coupler as cut-off component. In case of the normal use of the equipment, make sure the cut-off component can be accessed easily.
II. Installation Instructions
1.Accessories
Power adapter
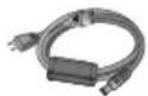
Base/Stand
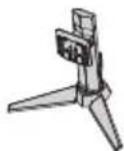
Signal cable
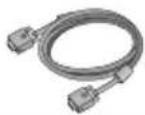
Warranty card
User manual
(The above pictures are for illustration only and the physical accessories shall govern.)
2. Adjustment of Rotation Angle
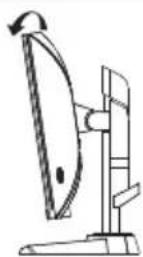
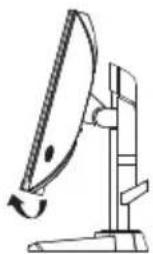
- The screen may be inclined 5° forward and 20° backward.
natural_image
Simple line drawing of a tool with a curved blade and handle, no text or symbols present
natural_image
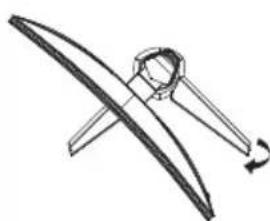
Simple line drawing of a curved blade with a circular head and a rotating arrow (no text or symbols)- The angle may be adjusted left and right within -30^-30^ .
natural_image
Simple line drawing of a computer monitor with an upward arrow, no text or symbols present.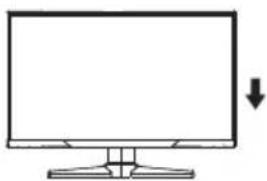
natural_image
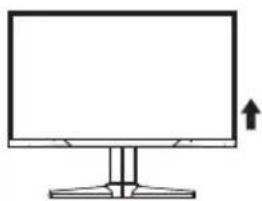
Simple line drawing of a computer monitor with a downward arrow indicating compression or download (no text or symbols)- Vertical direction can be adjusted up and down within 65mm.
natural_image
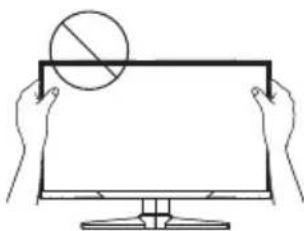
Line drawing of two hands holding a blank computer monitor with a prohibition symbol above (no text or labels)- When adjusting the angle of the display, be sure not to touch or press the screen area.
(The above pictures are for illustration only and the physical accessories shall govern.)
3. Project Assembly
See the assembly sketch on the cover of the packaging case.
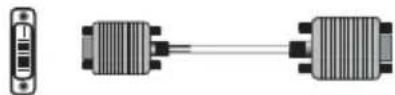
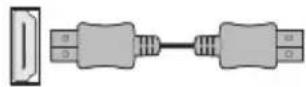
III. Connect the Monitor to PC

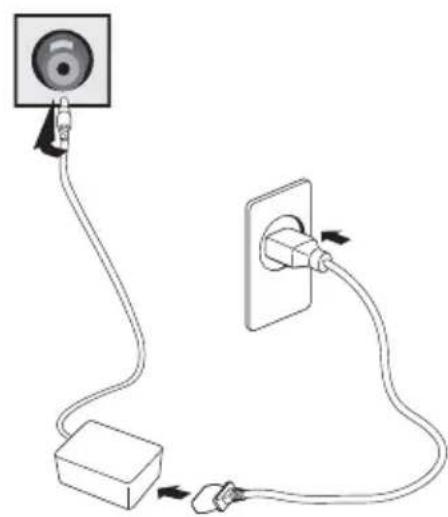
Before connecting the LCD monitor to the PC, please power down the PC and the monitor.
natural_image
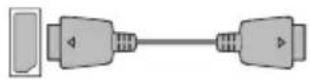
Simple line drawing of a cable and plug connection (no text or symbols)Power adapter
* Warning: Always use the power cord of standard configuration.
1 DP Port Connect the DP cable into the DP IN port of the monitor (this needs the support of the monitor).
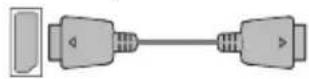
2 DVI Port Connect the DVI cable into the DVI IN port in the back of the monitor (this needs the support of the monitor).
③ HDMI Port HDMI™
Connect the HDMI cable into the HDMI IN port into the back of the monitor (this needs the support of the monitor).
4 Audio Interface Connect the AUDIO cable to the AUDIO OUT port in the back of the display (this needs the support of the monitor).

5 Power Plug Connect the power cord of the monitor into the POWER port in the back of the monitor.
(The above pictures are for illustration only and the physical accessories shall govern.)
IV. User Setup
1. Schematic Diagram of Keys
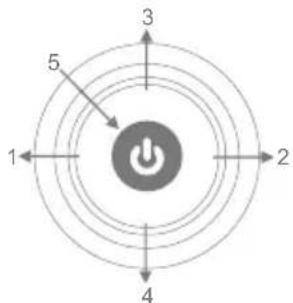
2. Description of Keys' Functions
| 1. |  | MENU key: Press this key to pop up the main menu/back to the previous menu (in case of main menu, exit). |
| 2. |  | When a menu is open, press this key as the RIGHT key to enter the submenu;When no menu is open, press this key to switch to the desired signal input source. |
| 3. |  | When a menu is open, press this key as the UP key to increase the progress bar value;When no menu is open, press this key to switch to the desired mode. |
| 4. |  | When a menu is open, press this key as the DOWN key to decrease the progress bar value;When no menu is open, press this key to switch to the desired sight bead (with sight bead switch activated). |
| 5. |  | POWER/MENU Key: Press this key shortly to pop up Main Menu/Confirm; hold this key to power off. |
| 6. | LED Indica t or | Blue: Normal power-on state; Blinking blue: Power saver state. |
Note: The physical keys of the specific model shall govern.
V. Operation Menu (OSD) Function Descriptions
| First level menu item | Second level menu item | Third level menu item | Instructions | |
| Game[GxXT] | Mode | Standard | Normal use mode | |
| Movie | Application mode of seeing film | |||
| FPS | First person shooting game mode | |||
| RTS | Strategic game mode | |||
| Eye Saver | Eye-protecting blue light filtered application mode | |||
| DCR | Off | Inactivate dynamic contrast | ||
| On | Activate dynamic contrast | |||
| FreeSync | Off | Inactivate FreeSync function | ||
| On | Activate FreeSync function, only AMD display card supported (the support from the display is needed) | |||
| Aspect ratio | Auto | Automatic image scale adjustment | ||
| 16:9 | Adjust image to be wind screen | |||
| 4:3 | Adjust image to be 4:3 | |||
| Crosshair | None | Inactivate sight bead function | ||
 | Switch to the red round sight bead | |||
| [50X6] | Switch to the green round sight bead | |||
| [27H3] | Switch to the red cross sight bead | |||
| [CS7S] | Switch to the green cross sight bead | |||
| Response time | Off | OD off mode (the support from the display is needed) | ||
| Normal | OD general mode, reducing motion vague (the support from the display is needed) | |||
| Extreme | OD top speed mode, reducing motion vague (the support from the display is needed) | |||
| Image | Brightness | [50WD] | Adjust display bright | |
| [20DW] | ||||
| [28W] | ||||
| Contrast | [5H3] | Adjust display contrast | ||
| [8ADH] | ||||
 | ||||
| Color Temp. | Warm | Set as cold color temperature | ||
| Cool | Set as warm color temperature | |||
| User | 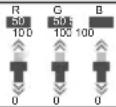 | Slightly adjust red color temperature | ||
| Slightly adjust green color temperature | ||||
| Slightly adjust blue color temperature | ||||
| Gamma | 1.8 | Adjust color tone brightness grey 1.8 | ||
| 2.2 | Adjust color tone brightness grey 2.2 | |||
| Input | DVI | DVI (digital) signal input | ||
| HDMI | HDMI (digital) signal input | |||
| DisplayPort | DisplayPort (digital) signal input | |||
| Setup | Language | 繁中 | 繁體中文 | |
| English | English | |||
| French | French | |||
| German | German | |||
| Italian | Italian | |||
| Spanish | Spanish | |||
| Korean | Korean | |||
| Japanese | Japanese | |||
| Russian | Russian | |||
| Portuguese | Portuguese | |||
| Power Off | Off | Inactivate the timed power-off function | ||
| On | In no-signal state, automatically power off after 1min standby | |||
| LED | Off | LED off | ||
| On | LED on | |||
| Reset | Off | Exit from this function | ||
| On | Restore to factory settings | |||
Note: The functions may be adjusted due to specific model or the upgrade of software version. The physical model shall govern.
VI. FAQ
| Faults occurring | Possible solutions |
| The power indicator light is not on | ◆ Check if the power is on.◆ Check if the power cord is connected. |
| Impossible plug-and-play | ◆ Check if the function of plug-and-play of the device is compatible with PC.◆ Check if the display card is compatible with the plug-and-play function. |
| Dimming picture | ◆ Adjust brightness and contrast. |
| Flickering picture or picture with ripples | ◆ There may be electrical appliances or equipment with electronic disturbance. |
| The power indicator light is on (flickering), but the monitor has no pictures. | ◆ Check if the PC power is on.◆ Check if the PC display card is inserted properly.◆ Check if the signal cable of the monitor is correctly connected with the PC.◆ Check the signal cable plug of the monitor and make sure every pin has no bending.◆ Observe the indicator light by pressing the Caps Lock key on the PC keyboard and check if the PC is working. |
| Color shortage(red, green and blue) | ◆ Check the signal cable of the monitor and make sure every pin has no bending. |
| Picture with color difference(white looks not white) | ◆ Adjust RGB color or reselect color temperature. |
| Please confirm the default values of the output dynamic range and the pixel format in the graphics Settings is "all". when the brightness of the screen is higher than usual. | |
VII. Product Specifications
| Diagonal dimensions | Picture aspect ratio | Picture dimensions (mm) | Dot distance (mm) | Optimal resolution |
| 60cm(23.6") | 16:9 | 521.4*293.28 | 0.272*0.272 | 1920*1080 |
| Ambient temperature | Storage temperature | -20°C to 60°C | ||
| Working temperature | 5°C to 40°C | |||
| Humidity | RH for operation | 20% 80% to | ||
Remark: When the resolution are 2560*1440@60Hz/3440*1440@60Hz/1920*1080@144Hz/2560*1440@144Hz/3840*2160@30Hz connection via DVI port, pls choose 24+1 pin double - channel DVI cables.
Note: The actual application of the above parameters shall be subject to the specific model.
VIII. Table of Product Preset Modes
In DVI/DP connection mode
| Display dimensions | Aspect ratio | Preset resolution/Refresh rate | |||||||
| 23.6" | 16:9 | 720x400(70Hz) | 640x480(60/75/72.8Hz) | 800x600(56/60/70/75Hz) | 1024x768(60/70/75/120Hz) | 1280x1024(60/75/120Hz) | 1440x900(60/120HZ) | 1680x1050(60Hz/DVI)(60/120HZ/DP) | 1920x1080(60/120/144Hz) |
In HDMI connection mode
| Display dimensions | Aspect ratio | Preset resolution/Refresh rate | |||||||
| 23.6" | 16:9 | 720x400(70Hz) | 640x480(60/75/72.8Hz) | 800x600(56/60/70/75Hz/) | 1024x768(60/70/75/120Hz) | 1280x1024(60/75/120Hz) | 1440x900(60/120Hz) | 1680x1050(60/120Hz) | 1920x1080(60 Hz)/120 |
Note: The actual application of the above parameters shall be subject to the specific model.
natural_image
Simple line drawing of a curved blade with a circular head and a rotating arrow (no text or symbols)
natural_image
Simple line drawing of a curved blade with a circular head and a rotating arrow (no text or symbols)natural_image
Simple line drawing of a computer monitor with an upward arrow, no text or symbols present.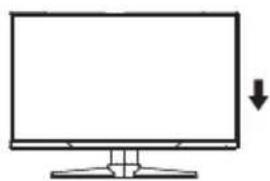
natural_image
Line drawing of a computer monitor with an arrow indicating direction (no text or symbols)natural_image
Line drawing of two hands holding a blank computer monitor with a prohibition symbol on top (no text or labels)natural_image
Simple line drawing of a cable and plug connection (no text or symbols)natural_image
Simple line drawing of a curved blade with a circular head and a rotating arrow (no text or symbols)
natural_image
Simple line drawing of a curved mechanical component with a circular head and angular base, no text or symbols present.natural_image
Line drawing of a computer monitor with an upward arrow, no text or symbols present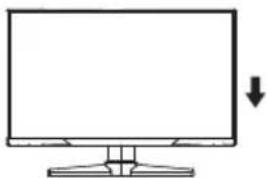
natural_image
Simple line drawing of a computer monitor with a downward arrow indicating left-side motion (no text or symbols)natural_image
Line drawing of two hands holding a blank computer monitor with a prohibition symbol above (no text or labels)natural_image
Simple line drawing of a cable and plug connection (no text or symbols)Connect the DP cable into the DP IN port of the monitor (this needs the support of the monitor).
2 Puerto DVI
natural_image
Red shield emblem featuring a white dragon design (no text or symbols)msi®

Brand : MSI
Model : Optix MAG24C
Category : Monitor